
When you create a new document in Microsoft Word, it looks decent right off the bat. But sometimes you want to make your page look much better than the default.
Use Microsoft Word’s page layout design tools to make easy-to-read documents that reflect positively on you and your business—even if you’re new to Word.


You can make page layout designs in Microsoft Word from scratch. Or, skip the grunt work by using Microsoft Word templates.
Envato Elements and GraphicRiver are both great sources of print templates for Word. Each template is made by professional designers. Elements makes a compelling offer. Download unlimited templates, fonts, photos, and other creative assets for one fixed subscription price.
But, if you only need the occasional template for MS Word and prefer to pay for each single use, then look to GraphicRiver.
How to Make Awesome Page Layout Designs in Microsoft Word (Video)
If you create or modify documents in Word, you may want to change the standard Microsoft Word layout. There are a number of changes you can make.
Watch this quick screencast to find out what you need to know about Word page layout options:
To learn more about changing page layouts in Microsoft Word, study the complete written tutorial below:
Why Learn About Page Layouts In Word?
Page layout settings in Word determine how your document looks when you print it out. It includes the page orientation, margins, and columns, for example.
It’s important to pay attention to the page layout of your document for several reasons:
- It ensures consistency. This gives your readers a good experience while consuming your document.
- A good page layout makes your document more readable. When your document is aesthetically pleasing and has a consistent look, your audience is more likely to read, comprehend, and remember your content.
- A well-designed document reflects well on you. It reinforces your credibility and authority in your field.
Microsoft Word has robust page settings that allow you to control your page layout design. Everything is designed to be as simple and intuitive as possible. Yet, doing page layout in Word can be daunting if you’re new to the software.
This article breaks things down for you. So, you can follow along, step-by-step, and take control of how your document looks.
Types of Documents You Can Create in MS Word
You can create all kinds of printed documents in Microsoft Word.
Make business documents like:
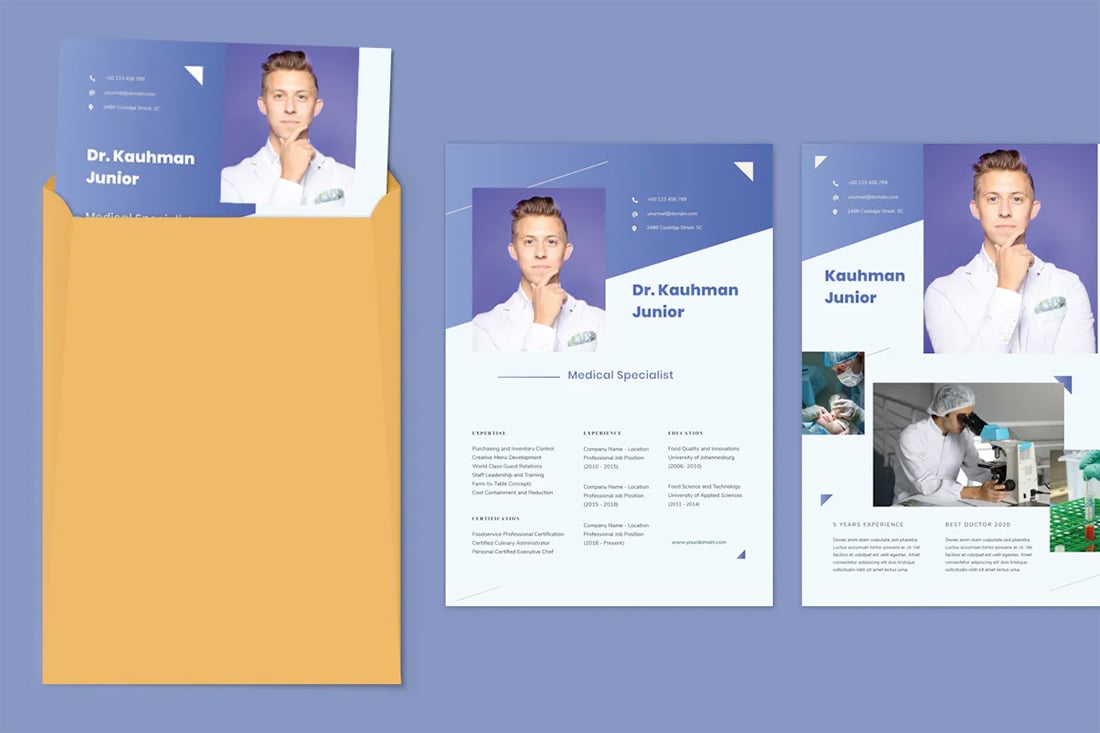
- resumes
- cover letters
- business letters
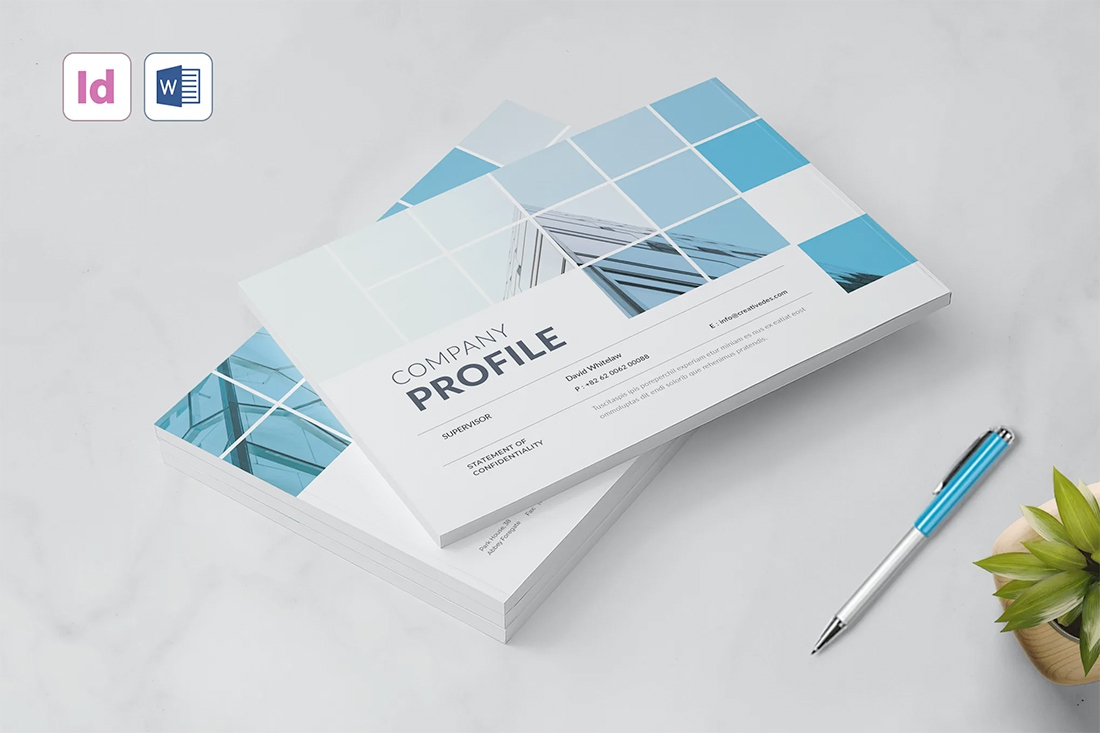
- reports
- proposals
- invoices
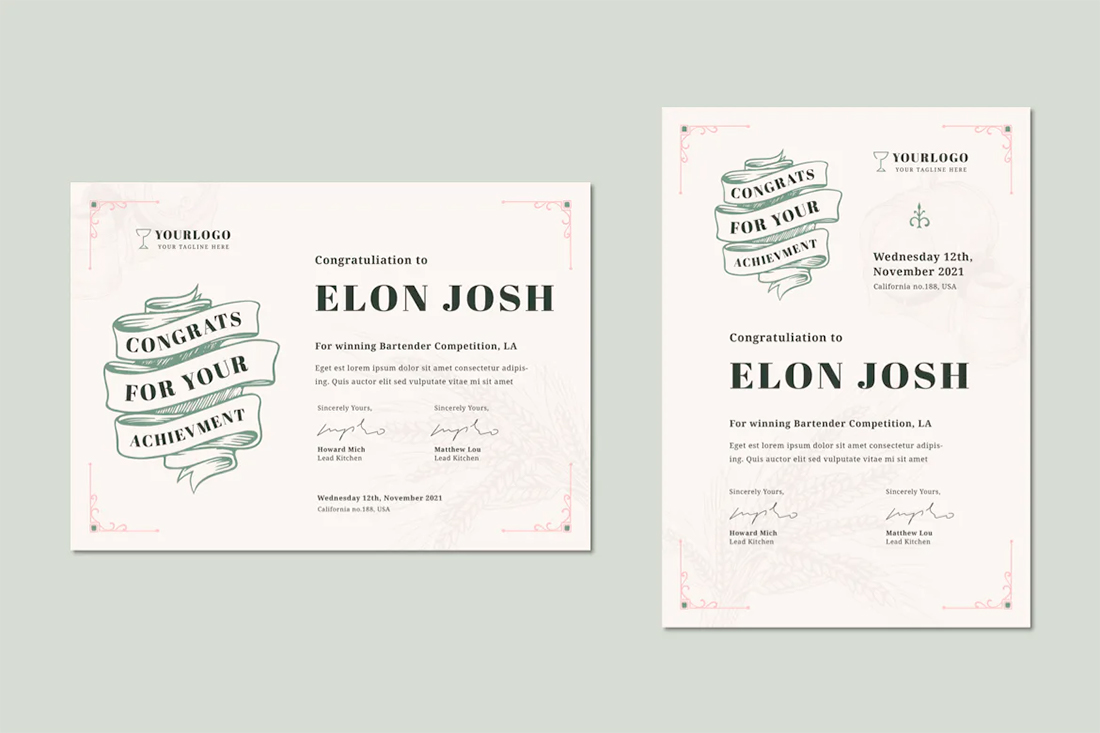
- certificates
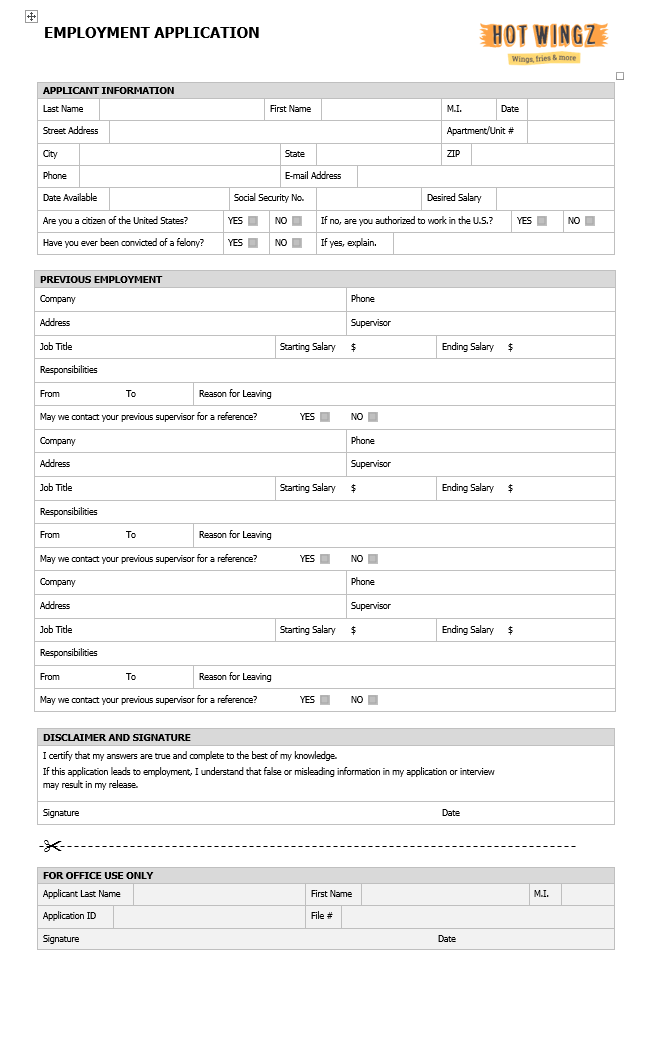
- forms
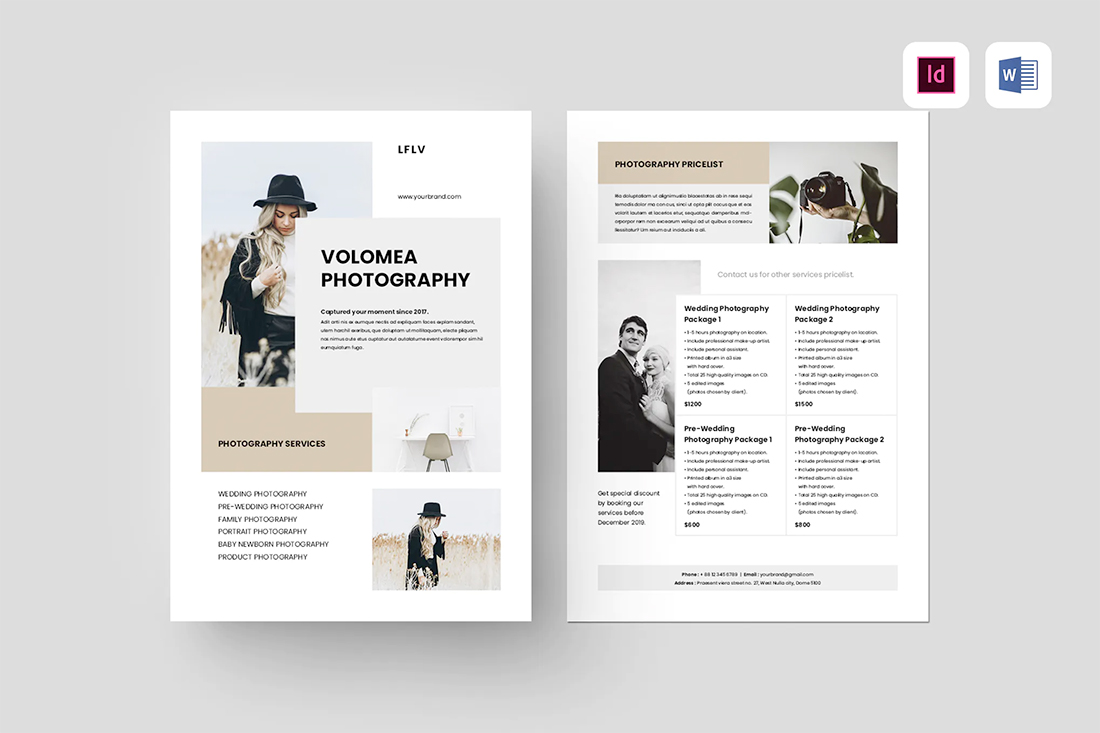
MS Word is also very handy for creating marketing documents. Create everything from:
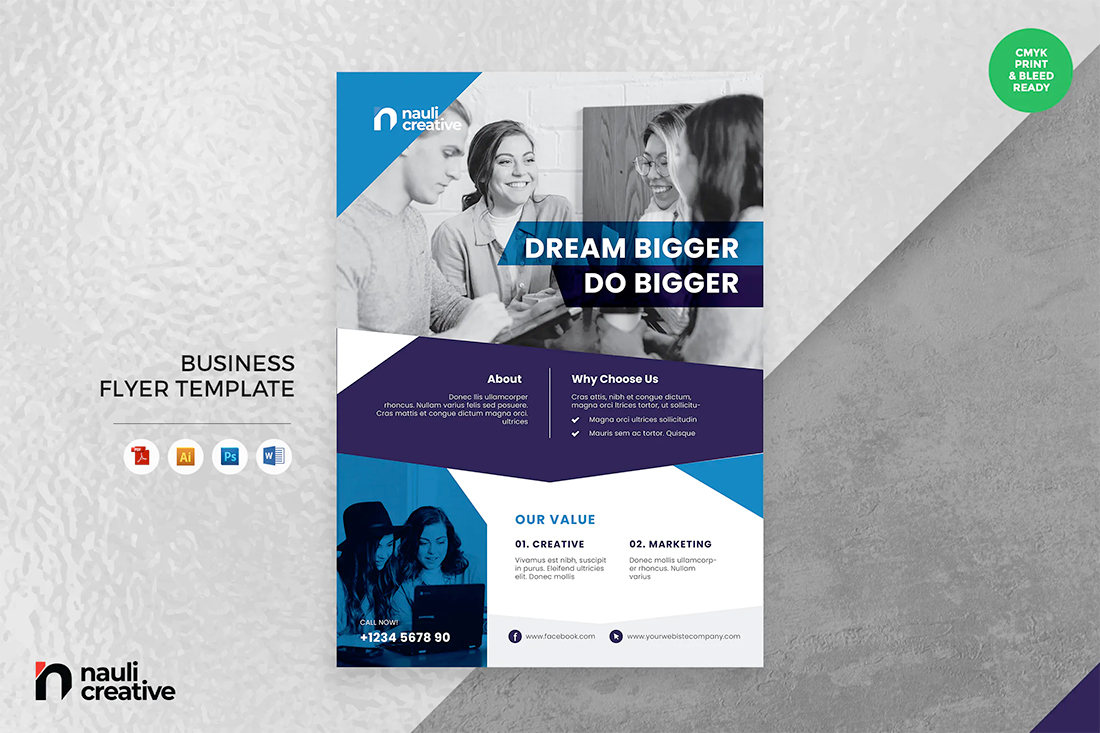
- flyers
- brochures
- advertising inserts
- and more
For education or training use Word to prepare:
- handouts
- workbooks
- manuals
- certificates
You can also produce postcards, invitations, newsletters, and signs. If you can print it, then you can whip it up in Word.
In this tutorial, you’ll learn how to use Microsoft Word’s page layout tools to produce the print materials you need.
How to Work With Templates to Quickly Change Your Design
The quickest way to change or apply a page layout is by using a print template for Word. For the examples below, we’ll be using the SEO Proposal template from Envato Elements.


When looking for a print template for Word, it’s a good idea to choose one that uses paragraph and character styles. The styles feature will allow you to quickly format text even in a long document.
Below are some roundups of Microsoft Word templates you can choose from:
Now that you’ve chosen a template with a good page layout in Word, it’s time to learn how to use it.
1. Download the Template
Download the template of your choice to your computer’s hard drive. Unzip the file, then copy the template. This way, you’ve got the original template file intact, if you want to revert to it.


2. Customize the Template With Your Own Content
Replace the text with your own information.


If you want to change the text formatting, change the settings for fonts and paragraphs.
To add your own image, click on an image placeholder. The Format Picture dialog box opens. Under Fill, select Picture or texture fill. Under Picture source, click Insert….


Find and select the image you want to use. Click Insert.


Now, the image is inserted.


To replace an existing logo on the template, click on the logo, then click on the Picture Format tab.


Click the Change Picture button on the ribbon. Find and select the logo file, then click Insert.
![]()
![]()
![]()
If necessary, click-and-drag one of the handles of the logo to resize it.
Next, I’d like to change the color of the rectangle on the cover page. To do that, select the shape, then click the Shape Format tab.


The Shape Format ribbon is displayed. Click on the drop-down arrow beside the Shape Fill button. Select from the color options shown or click More Fill Colors… to specify the color you want to apply.


This is what the customized proposal cover looks like now:


Repeat these steps to customize the other pages of the template.
As you can see, when you start with a template for Word most of the design and page formatting decisions are already made for you by the template creator.
But, if you prefer to start your document from scratch, follow the steps below to change the default page format settings.
Type or paste your text into the document. Apply text and paragraph formatting to modify settings for fonts, spacing, alignment, and more. Then, you can move on to the page layout.
3. How to Set the Microsoft Word Page Orientation as Portrait or Landscape
To set the Microsoft Word page orientation of your document, go to File > Page Setup….


The Page Setup dialog opens. Click on the button for either Word portrait or landscape layout orientation.


4. How to Set the Print Size of the Paper
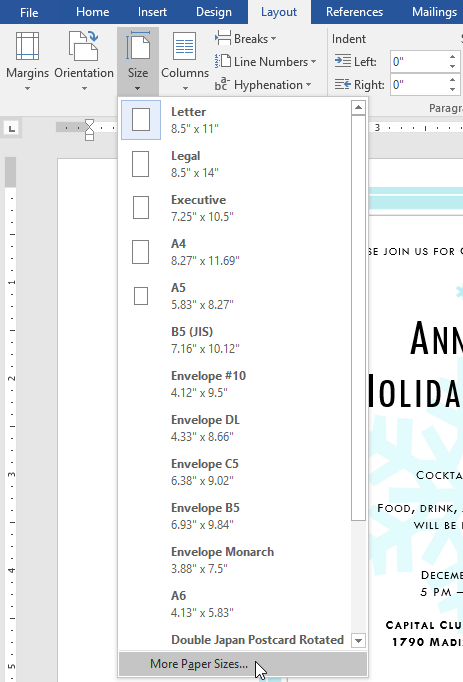
From the Microsoft Word Page Setup dialog, you can also change the paper size when you print the document. Click on the Paper Size field to show the different paper size choices available.


Select the size you wish to use. You can also click Manage Custom Sizes… to specify your own size.


5. How to Split Your Text into Multiple Columns
Sometimes you may want to divide your text into columns. This can make the document more readable and adds variety to an otherwise monotonous layout. Columns are popular in magazines, newsletters, and similar types of materials.
Arrange the Entire Document into Columns
To change the MS Word layout to columns, follow these steps:
1. Go to Layout > Columns.


The Columns dialog box opens.


2. Select one of the Presets or manually set the:
- number of columns
- width and spacing
- apply to the whole document or from that point forward
3. When you’re happy with the settings, click OK.
Apply Columns to a Part of the Document
You can also apply columns to only a specific part of the document.
1. Select the text you wish to display in columns.


2. Go to Layout > Columns.
3. In the Columns dialog box, choose the settings you want to apply.
Notice that you now have the option to apply the column settings to Selected text. Click OK.


Now, only the selected text has been broken into two columns. The rest remains in one column.


6. How to Add Page and Section Breaks
Sections in Microsoft Word enable you to apply different layouts to different parts of your document. This is useful for making creative layouts, especially to long documents.
Insert a Page Break in Word
A page break separates text, so that anything after the break is moved to a succeeding page. It’s useful for dividing up a document into chapters and sections.
To insert a page break, place the cursor at the point where you want the break to be, then go to Insert > Break > Page Break.


In our sample document, the title page is now on a separate page from the rest of the text.


Insert a Section Break in Word
If you wish to apply varying formatting on different parts of the document, then you’ll want to break it into sections. This includes varying the columns, headers and footers, pagination, borders, and other settings.
To create a section break, place the cursor where you would like the section break to be. Go to Insert > Break > Section Break.


Select the type of section break you want to insert:
- Section Break (Next Page) creates a section break and moves the next section into a new page.
- Section Break (Continuous) keeps the two sections on the same page while allowing you to apply different formatting settings for each.
- Section Break (Odd Page) starts a new section on the next odd-numbered page.
- Section Break (Even Page) starts a new section on the next even-numbered page.
Take Control of Your Page Layouts with Microsoft Word
Use Microsoft Word’s page layout tools to give your documents a consistent, readable, and professional look. You don’t have to be an expert in Word to take better control of your document’s page layouts. With Microsoft Word’s page layout tools, you can make any document look the way you want it to.
You don’t have to start from scratch, either. You can have professional designers make most of the design and layout decisions for you by using print templates for MS Word. If you want unlimited downloads of templates as well as photos, fonts, icons, and other creative assets—all for one small, fixed fee—then Envato Elements is the best source for you.
For one-off Word templates and other desktop publishing tools, look to GraphicRiver. Here, you can access everything you need to create impressive print materials on a pay-per-use basis.
And when you use a template, the skills you learned in this post will help you customize and adapt it to your needs.
Editorial Note: Video added by Alexis (Lexi) Rodrigo.
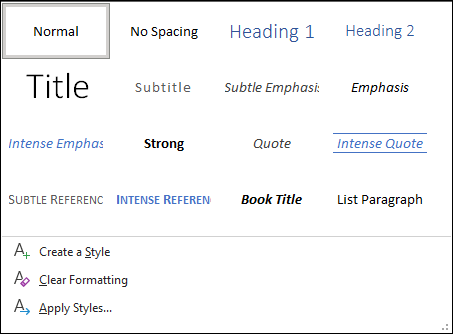
Select the words, paragraph, list or table to edit. On the Home tab, select a style. to expand the gallery.
Themes add a professional look to your document.
- Select Design > Themes.
- Point to a theme to preview how it will look.
- Select the theme you want.
Contents
- 1 Can I apply a design template to an existing Word document?
- 2 How do I create a design layout in Word?
- 3 How do I convert a template to a Word document?
- 4 How do I create a fillable field template in Word?
- 5 Why is there no Design tab in Word?
- 6 Where is the Design tab in Microsoft Word?
- 7 How do you Design a document?
- 8 How does a template help in creating a document?
- 9 How do you design a template?
- 10 Can you make a Word document fillable?
- 11 How do I make a Word document fillable and not editable?
- 12 How do I turn on design mode in Word?
- 13 Where is the Design tab in Word 2010?
- 14 How do you add the Design tab in Word 2007?
- 15 What is Layout tab?
- 16 How do I make a Word document creative?
- 17 How do I design a page layout?
- 18 What is meant by document design?
- 19 How do I create a template in Word 2019?
- 20 What are the steps in creating a new template?
Can I apply a design template to an existing Word document?
Apply a Word Template to an existing Word document
- Open the Word document you will apply template to, and click File > Options to open the Word Options dialog box.
- In the Word Options dialog box, please (1) click Add-ins in the left bar, (2) select Templates from the Manage drop down list, and (3) click the Go button.
How do I create a design layout in Word?
Click the File tab, and then click New. Under Available templates, click New from existing. Click a template or a document that is similar to the one that you want to create, and then click Create New. Make the changes you want to the margin settings, page size and orientation, styles, and other formats.
How do I convert a template to a Word document?
Click the top folder in the library and launch Template Manager. (See Open and Close Template Manager.) The Template Manager window appears. In the file list, select the templates you want to convert and click the Convert button.
How do I create a fillable field template in Word?
Go to File > New. In Search online templates, type Forms or the type of form you want and press ENTER. Choose a form template, and then select Create or Download.
Why is there no Design tab in Word?
If the Design tab is missing from your current installation, choose the “Main Tabs” option from the pulldown on the right, then turn on the checkbox for the “Design” main tab. Use the up or down buttons on the far right to move position of the selected tab within the main ribbon area.
Where is the Design tab in Microsoft Word?
Word online currently does not natively have a ‘Design’ tab. If you have an Add-in installed that creates buttons in the ‘Design’ tab, you will see the design tab appear.
How do you Design a document?
Document Design
- Use at least 12 point.
- Use a clear, easy to read font.
- Make important points stand out.
- Use bold or bigger sized font to emphasise text.
- Text should be set horizontally.
- Avoid splitting a word between two lines.
- Templates with accessible formatting.
- Use accessible formatting.
How does a template help in creating a document?
A template is a document type that creates a copy of itself when you open it. For example, a business plan is a common document that is written in Word. Instead of creating the structure of the business plan from scratch, you can use a template with predefined page layout, fonts, margins, and styles.
How do you design a template?
Edit your template
- Click File > Open.
- Double-click Computer or This PC.
- Browse to the Custom Office Templates folder that’s under My Documents.
- Click your template, and click Open.
- Make the changes you want, then save and close the template.
Can you make a Word document fillable?
To do this, click on “File” tab > “Options” > “Customize Ribbon“. Then under the “Customize Ribbon”, select the “Developer” checkbox and click “OK”. Step 2: Open a Word document and you will be able to make the Word document fillable.
How do I make a Word document fillable and not editable?
Head on to the “Protect” section on the ribbon and click the button labeled “Protect Document.” You should then click the button named “Restrict Formatting and Editing.” On the options that appear, select the one that says “Allow only this type of editing in the document” and pick “Filling in forms.” Once you’re done,
How do I turn on design mode in Word?
Turn on “Design Mode”. Highlight the placeholder text and make formatting adjustments as desired.
In the Word Options window,
- Click on “Customize Ribbon” in the left-hand sidebar.
- In the Tabs area on the right, check the box beside “Developer”.
- Click OK.
Where is the Design tab in Word 2010?
The main tabs in Word 2010 are the same as Word 2007 except the Office Menu has been replace with a “File” tab in Office 2010 and there is no “Design” tab.
How do you add the Design tab in Word 2007?
Customize Developer tab in Microsoft Word 2007
- Launch Word 2007.
- Click the Microsoft Office Button.
- Choose the Word Option button, and then the Word Option dialog box pops up.
- Click Popular, select the box at Show Develop Tab in the Ribbon and check it.
- Click OK, and then the Develop Tab will appear on the Ribbon.
What is Layout tab?
The Layout tab provides access to page display and layout options. These include page orientation and AutoFit, which is a feature that limits the width of columns in a report to be no wider than the largest value in each column. These options allow you to change the size or orientation of your report.
How do I make a Word document creative?
10 Simple Design Rules for Professional Microsoft Word Documents
- Keep It Simple, Less Is More.
- Choose a Context-Appropriate Typeface.
- Use Standard Font Size and Color.
- Use Standard Page Size and Margins.
- Align Paragraphs to the Left.
- Indent the First Lines of Paragraphs.
- Place Images Between Paragraphs.
How do I design a page layout?
Seven Ways to Create a Better Page Layout
- Align all elements with each other or a grid.
- Select a single visual or make strong visual connections.
- Keep odd or even elements in balance.
- Divide the page into thirds.
- Add white space in the right place.
- Use two or more of the same design element.
What is meant by document design?
Document design is the process of choosing how to present all of the basic document elements so your document’s message is clear and effective. When a document is well designed, readers understand the information more quickly and easily.Regardless of the form, the document development process remains the same.
How do I create a template in Word 2019?
Creating a new template in Word 2019
- Create a new document or open a document with styles that you can recycle.
- On the File tab, choose Save As. The Save As window opens.
- Click This PC.
- Click the Browse button.
- Open the Save As Type menu and choose Word Template.
- Enter a name for your template.
- Click the Save button.
What are the steps in creating a new template?
Answer
- Click File > Open.
- Double-click This PC. (In Word 2013, double-click Computer).
- Browse to the Custom Office Templates folder that’s under My Documents.
- Click your template, and click Open.
- Make the changes you want, then save and close the template.
Design and edit in Word
Use Styles
Styles templates apply a consistent font, font size, font color, and spacing to headings, paragraphs, and titling throughout your document.
-
Select the words, paragraph, list or table to edit.
-
On the Home tab, select a style.
If you don’t see the style you want, click the More button
 to expand the gallery.
 to expand the gallery.

Apply Themes
Themes add a professional look to your document.
-
Select Design > Themes.
-
Point to a theme to preview how it will look.
-
Select the theme you want.

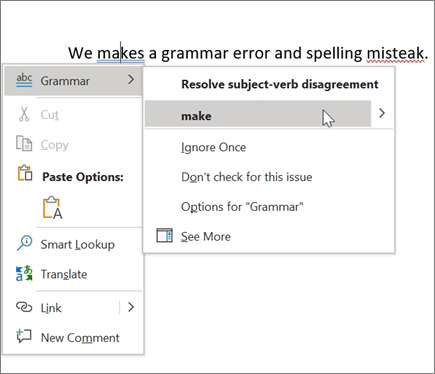
Check spelling and grammar
Word marks misspelled words with a red squiggly underline and grammar mistakes with a blue double underline.
-
Right-click the word.
-
Select a correction, or select Ignore.
Note: Spelling and grammar check work a little differently in newer versions of Word and Microsoft 365. For more, see Editor — your writing assistant.
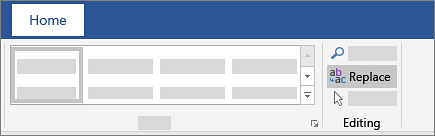
Find and replace text
-
Select Home > Replace.
-
For Find what, enter a word or phrase to search. For Replace with, enter the new text.
-
Select Find next, and then select:
-
Replace to replace the first instance, or
-
Replace all to replace all instances.
-
Next:
Collaborate in Word
Need more help?
Lesson 12: Page Layout
/en/word/links/content/
Introduction
Word offers a variety of page layout and formatting options that affect how content appears on the page. You can customize the page orientation, paper size, and page margins depending on how you want your document to appear.
Optional: Download our practice document.
Watch the video below to learn more about page layout in Word.
Page orientation
Word offers two page orientation options: landscape and portrait. Compare our example below to see how orientation can affect the appearance and spacing of text and images.
- Landscape means the page is oriented horizontally.
- Portrait means the page is oriented vertically.
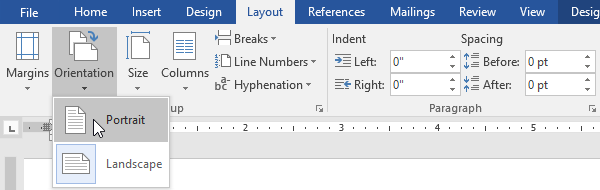
To change page orientation:
- Select the Layout tab.
- Click the Orientation command in the Page Setup group.
- A drop-down menu will appear. Click either Portrait or Landscape to change the page orientation.
- The page orientation of the document will be changed.

Page size
By default, the page size of a new document is 8.5 inches by 11 inches. Depending on your project, you may need to adjust your document’s page size. It’s important to note that before modifying the default page size, you should check to see which page sizes your printer can accommodate.
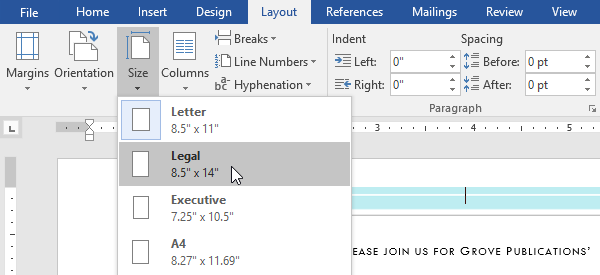
To change the page size:
Word has a variety of predefined page sizes to choose from.
- Select the Layout tab, then click the Size command.
- A drop-down menu will appear. The current page size is highlighted. Click the desired predefined page size.
- The page size of the document will be changed.

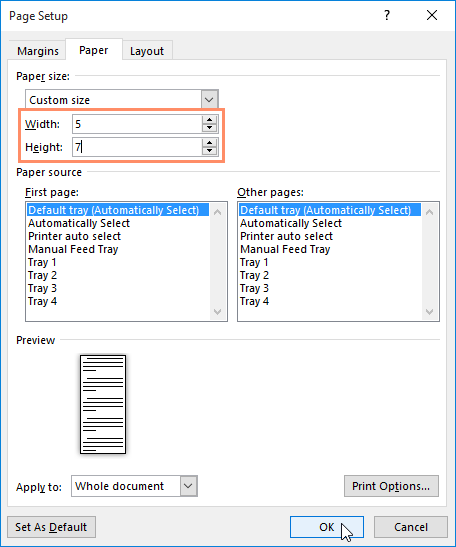
To use a custom page size:
Word also allows you to customize the page size in the Page Setup dialog box.
- From the Layout tab, click Size. Select More Paper Sizes from the drop-down menu.
- The Page Setup dialog box will appear.
- Adjust the values for Width and Height, then click OK.
- The page size of the document will be changed.
Page margins
A margin is the space between the text and the edge of your document. By default, a new document’s margins are set to Normal, which means it has a one-inch space between the text and each edge. Depending on your needs, Word allows you to change your document’s margin size.
To format page margins:
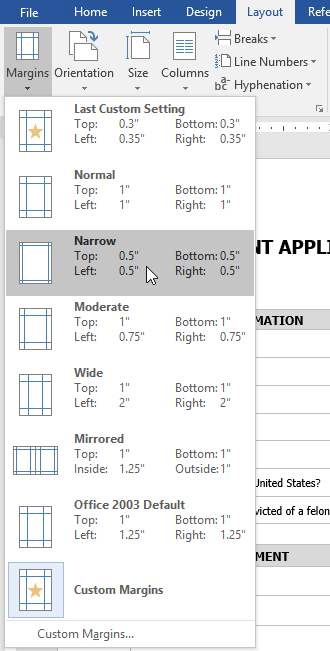
Word has a variety of predefined margin sizes to choose from.
- Select the Layout tab, then click the Margins command.
- A drop-down menu will appear. Click the predefined margin size you want.
- The margins of the document will be changed.

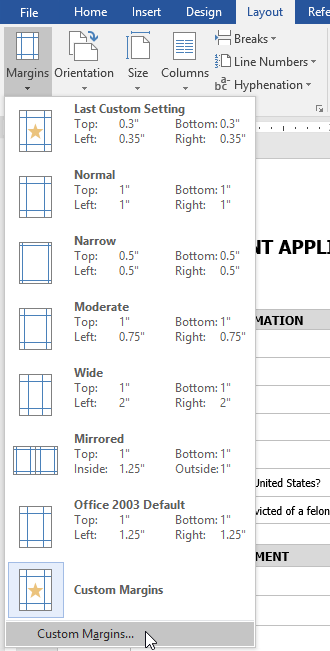
To use custom margins:
Word also allows you to customize the size of your margins in the Page Setup dialog box.
- From the Layout tab, click Margins. Select Custom Margins from the drop-down menu.
- The Page Setup dialog box will appear.
- Adjust the values for each margin, then click OK.
- The margins of the document will be changed.
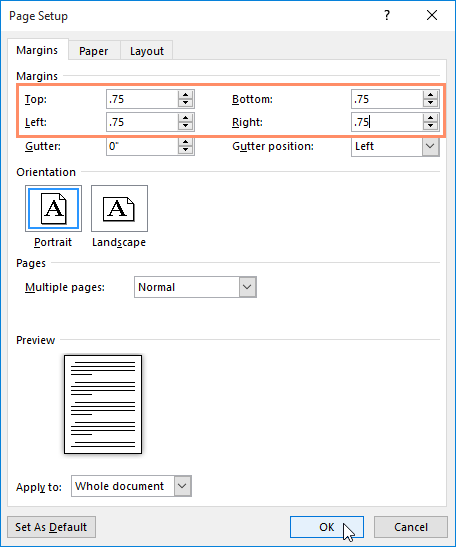
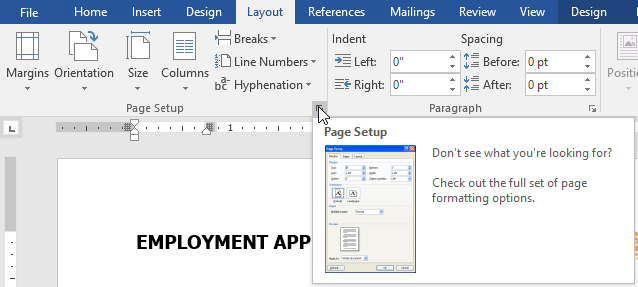
You can also open the Page Setup dialog box by navigating to the Layout tab and clicking the small arrow in the bottom-right corner of the Page Setup group.
You can use Word’s convenient Set as Default feature to save all of the formatting changes you’ve made and automatically apply them to new documents. To learn how to do this, read our lesson on Changing Your Default Settings in Word.
Challenge!
- Open our practice document.
- Change the page orientation to Portrait.
- Change the page size to Legal. If Legal size is not available, you can choose another size such as A5.
- Change the margins to the Narrow setting.
- When you’re finished, your document should be one page if using Legal size. It should look something like this:
/en/word/printing-documents/content/
If you are ready to amp up your designs in Microsoft Word, this is the right place. Here – with templates as examples – we are going to look at a variety of ways you can create more modern, professional-looking page layout designs using this common tool.
Microsoft Word is capable of so much more than you might expect with page layout. You can build modern, on-trend documents, and push the software further than ever before.
Forget the old days of Word Art and choosing between six fonts. Let’s take Microsoft Word into a new world of improved design and typography!
1. Asymmetrical Grids
Get out of the default template and try an asymmetrical grid for a look that will create a fresh look for design projects in Microsoft Word.
When it comes to creating a grid, consider smaller columns as the foundation so that elements will still have a sense of organization and place, without having that split-down-the-middle look.
Another thing to think about with grids is creating both horizontal and vertical grids. These imaginary lines are the secret to organizing content in a visually meaningful way.
2. Infographics

A common theme in design is “show, don’t tell,”
Infographics are the way to do that, and you can design and include them in Word documents, from one-page brochures to multi-page booklets.
Think carefully about infographics in the planning process to keep information easy to digest and understand. Use maps, numbers, charts, and icons to help show the information your document is designed to convey.
3. Gradients
Gradients are the color trend that we can’t get enough of. You can use them in designs for Word documents for a truly modern feel.
From bright monotone gradients that move from light to dark hue to multi-color options, you can find an application for almost any color variable.
Gradients can be used for borders, big text elements, backgrounds, or other visual elements as you see fit.
Take particular care with gradients if you plan to print the Word document to ensure that your color choices will look as intended on paper.
4. Monotone Color Palettes
Monotone color palettes have a beautiful simplicity that just works. Using dark and light variations of a single color feels classic and inviting.
A monotone feel can also solidify brand elements and images and avoid that “plain Word doc” look.
Even with a monotone palette, don’t feel like you have to have a wide range of hues. Pick a color and a handful of variations to use in the design. For most projects, that’s enough.
5. Layers

Layering is a fun and practical effect that brings design elements in the two-dimensional space to life. This design trend has been popular in website design for some time and can work just as well with Word documents and printed layouts.
The trick to using layers is to overlap elements without making the design feel cluttered. Continue to use space and your underlying grid to ensure that everything has a place and it doesn’t look like a smattering of parts were just thrown on the canvas.
Layers can also begin to look and feel heavy if you aren’t careful, so take care with placement and visual weight of colors, typefaces, and images so that everything maintains clear readability.
6. Minimal Aesthetic

White space never goes out of style.
A minimal approach with well-planned space establishes a design that’s easy to understand and follow. It’s something that doesn’t often happen with Word documents, where we have almost been “trained” to fill all the space in a document.
Break out of that mold with open space around elements and in the page gutters so that everything has a seamless flow and light style.
Don’t forget to use a typography style that matches the minimal feel as well. (A simple sans serif can be a nice option.)
7. Color Overlays
Color overlays can be paired with color or black and white images or against other colors with an overprint look.
Putting together blocks of color adds visual interest – particularly with fun shapes such as in the example above – when you don’t have a lot of other artwork to finish out the design.
If you plan to use color overlays, stick to one or two colors from your brand palette. Using too many colors with this style can get overwhelming because color takes on all kinds of tints and tones when used as an overlay.
A tight palette will likely serve you better than a more expansive one here.
8. Bold Color Palettes

Bold, high-contrast color palettes are an immediate attention-getter. (And something that’s not generally expected when it comes to designing Word documents.)
Boldness isn’t always defined by color alone. Boldness can also be the combination of color choices or the display contrast from the pairing.
The black and white resume template, above, with a simple yellow line, is bold and striking. But there’s not a lot of color. A small accent adds an amazing level of boldness without being over the top.
9. Clean Typography
For most designers working in Word, the end goal of the document is to create something that people will read. That starts with clean, simple typography that’s highly readable and understandable.
Often, that’s not just one font, size, or style. It’s using different levels and layers of typography to create an architecture that helps people move through the document in the right order with an understanding of the content.
One of the best ways to accomplish this is with type size. A trend in typography is to use oversized typefaces for key information. That also works well in Word documents of almost any type. Go big with the main headline or key point to draw attention to the overall design.
10. Beautiful Images
Depending on how your Microsoft Word document will be used, amazing photos can take it to the next level. Great images almost always look good with digital transmission. (Consider printing if you are working on a document that will be physically handed out.)
Don’t be afraid to go big with one or two images that make your design sizzle. Avoid clusters of tiny photos. The key to making beautiful images work is the ability to see them at a glance and be drawn into the detail therein.
Here’s another thing that makes a beautiful image work and feels fresh and modern: It needs to match and mesh with other design elements. The image and text should “say the same thing” and support each other.