

Способ 1: Контекстное меню
Проще и быстрее всего удалить более ненужный столбец из созданной в Word таблицы, независимо от его содержимого, можно с помощью предусмотренных в контекстном меню инструментов. Доступно два варианта.
Читайте также: Как создать таблицу в Ворде
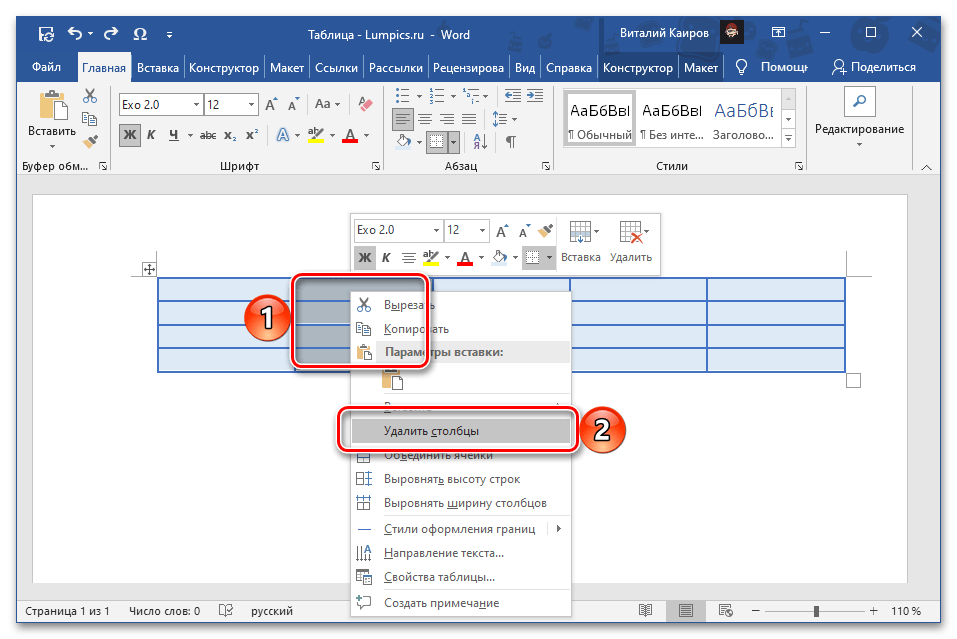
- Выделите с помощью мышки столбец, от которого требуется избавиться. Нажатием на нем правой кнопки мышки (ПКМ) вызовите контекстное меню и выберите пункт «Удалить столбцы».
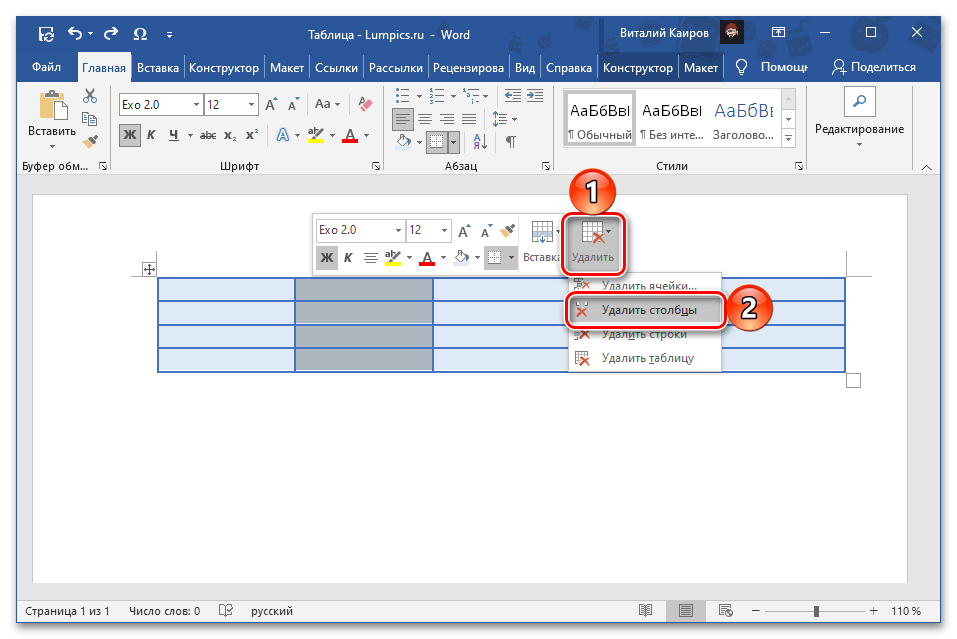
- Установите указатель курсора (каретку) в любой из ячеек более ненужного столбца или выделите его, и нажмите ПКМ для вызова контекстного меню. Кликните по расположенной в верхней области кнопке «Удалить», чтобы развернуть список предусмотренных в ней опций, и выберите «Удалить столбцы».
Каким бы из предложенных выше методов вы не воспользовались, озвученная в заголовке статьи задача будет решена.

Читайте также: Как объединить ячейки таблицы в Word
Способ 2: Инструменты «Строки и столбцы»
Альтернативный метод удаления столбца заключается в использовании одного из инструментов группы вкладок «Работа с таблицами», многие из которых также представлены и в контекстном меню.
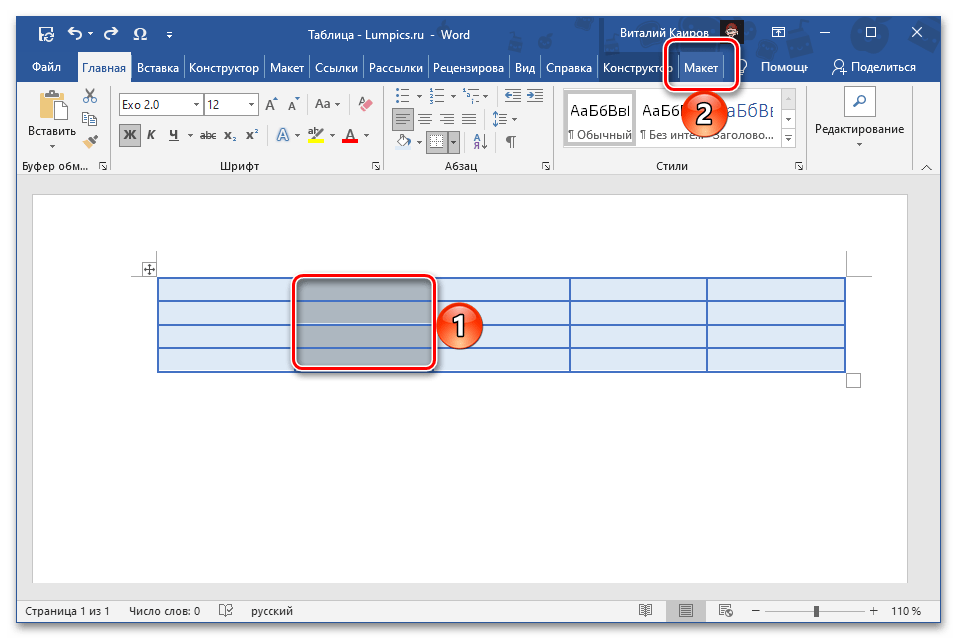
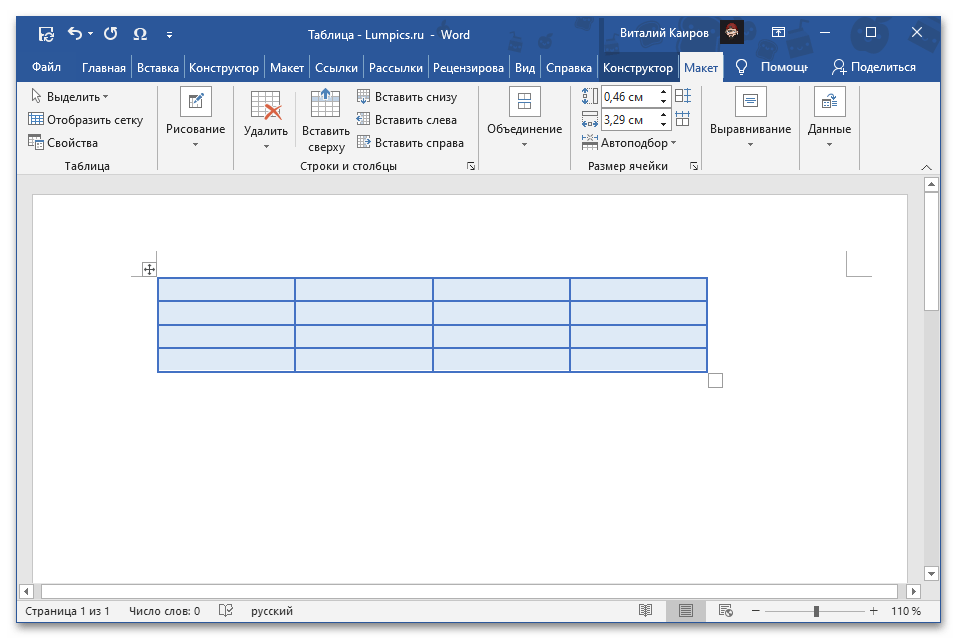
- Кликните по любой из ячеек в том столбце, от которого требуется избавиться, либо выделите его, и перейдите во вкладку «Макет» (не первую одноименную, а вторую на ленте, расположенную в группе вкладок «Работа с таблицами»).
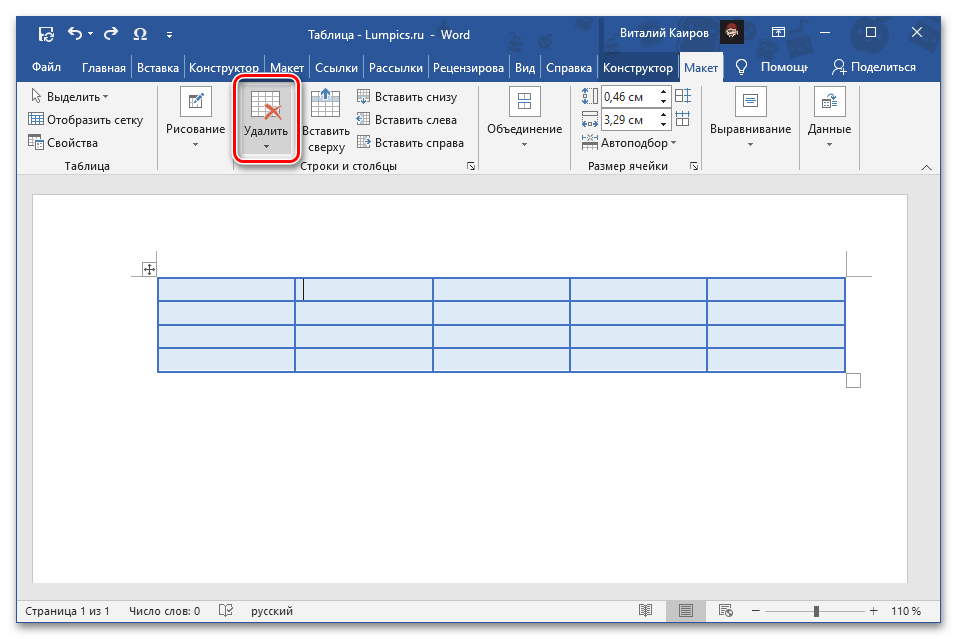
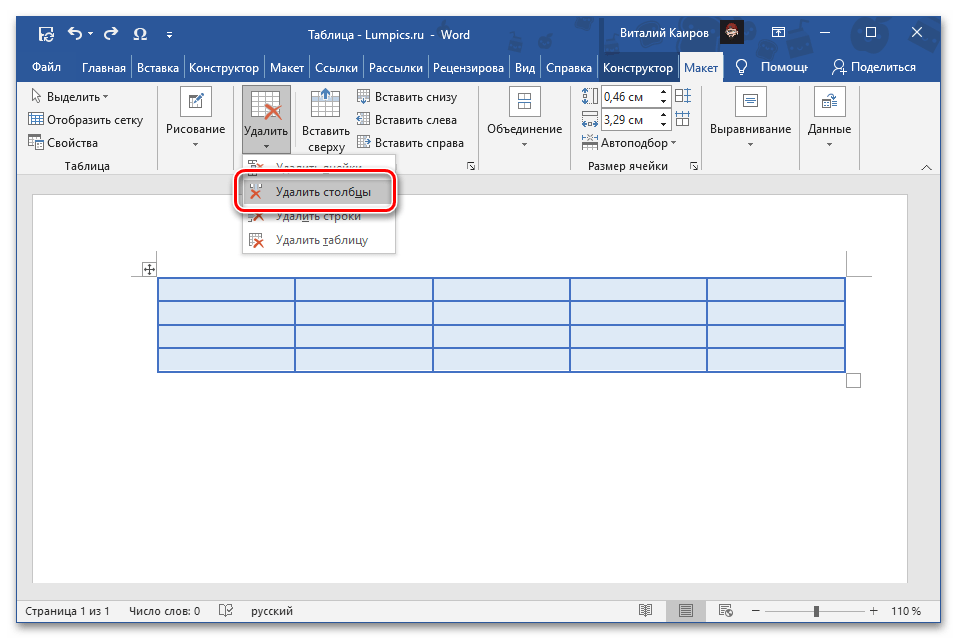
- В блоке инструментов, обозначенных «Строки и столбцы», разверните меню кнопки «Удалить».
- В появившемся списке выберите пункт «Удалить столбцы».
Такой подход практически не отличается от рассмотренного выше, с той лишь разницей, что вкладка «Макет» предоставляет быстрый доступ и к ряду других инструментов для работы с таблицами.
Читайте также:
Как добавить столбец в таблицу в Ворде
Как удалить строку из таблицы в Ворде

Еще статьи по данной теме:
Помогла ли Вам статья?
How to add columns and delete columns in Word When writing documents in Word, sometimes you have to use a table to show all the content you need to write. From the beginning, you can estimate how many rows of columns you need a table to insert into the text. But tr

When editing text in Word, there are times when you’ll need to use tables to cover everything you need to write. From the beginning, you can estimate how many rows of columns you need a table to insert into the text. But during the editing process, it may not be possible to avoid adding or deleting columns or rows.
In this article, TipsMake.vn will guide you how to add columns and rows, delete columns and rows in Word.
1.1. Method 1
You can immediately use the add tool right on the table you are editing. Just hover over the top edge of the table, where you need to add the column, then click the blue plus sign that appears.
Similarly, you can add rows by moving the mouse to the side of the table where you need to add the column and click the green plus.

The result will be a column (or row) at the position you just clicked.

1.2. Method 2
Right-click the cell next to the position where you want to add the column or row. Then select Insert .
In Insert there will be 4 options you need:
– Insert Columns to Left (Insert Columns to the left)
– Insert Columns to Right (Insert Columns to the right)
– Insert Rows Above ( Insert Rows Above )
– Insert Rows Below ( Insert Rows Below )
Click on the option you need to insert the column or row into the edit panel.

1.3. Method 3
Highlight the column or row next to the position where you want to insert the column or row.
Open the Layout ribbon tab , under Rows & Columns there are 4 options you need:
– Insert Above : to insert more rows on top
– Insert Below : to insert more rows below
– Insert Left : to insert more columns to the left
– Insert Right : to insert more columns to the right

1.4. Add more columns
In the above way, you can only use to add a column. But if you want to add two or more columns, you need to do the following:
Step 1: Highlight the number of columns corresponding to the number of columns you want to add. For example, if you want to add 4 columns, you must highlight all 4 columns.

Step 2: Move the mouse to the top right corner of the text editor and click the green plus sign that appears. As a result, you will add columns that are equal to the number of columns you have highlighted.

2. How to delete columns and rows in Word
2.1. Method 1
Step 1: Highlight the columns and rows you need to delete
Step 2: Right-click the area you have highlighted. A quick selection panel appears, click the Delete icon at the outermost.
Select Delete Columns if you want to delete the column.
Select Delete Rows if you want to delete the row.

2.2. Method 2
Step 1: Highlight the columns and rows you need to delete
Step 2: Open the ribbon Layout tab , click the triangle icon for Delete in the Rows & Columns section .
Select Delete Columns if you want to delete the column.
Select Delete Rows if you want to delete the row.

Do you know how to add or delete rows and columns now?
Thank you for following the article of TipsMake.vn on how to add delete columns and rows in Word. I wish you successful implementation!
In Word you can easily edit a table that you have made. This article will explain what the various modifications you can make are, and how to delete a certain part of a table: columns, rows, or other cells.
How to delete part of a table in Word?
In the Table Tools tab, you can, by clicking on the Delete button (Rows & Columns), you get three very explicit commands:
- Delete Columns: removes the column of the active cell or selected columns.
- Delete Rows: deletes the row of the active cell or selected lines.
- Delete table: deletes the table.

The Delete cells options, displays a dialog box in which you specify how Word must reorganize the rest of the table:
- Shift cells left: the cells to the right of the deleted cells will shift to the left to «fill» the empty space.
- Shift cells up: cells located below the deleted cells will shift up to «fill» the empty space.
- Delete the entire row or column: the deletion extends to all cells in the same column or the same row.
Do you need more help with Microsoft Office? Check out our forum!