
Debug.Print is one of the useful tools presented in the VBA editorThe Visual Basic for Applications Editor is a scripting interface. These scripts are primarily responsible for the creation and execution of macros in Microsoft software.read more to figure out how a program works. It helps to analyze the changes in the values of variables created in the VBA program. It shows the output of the prompt window when we run the program without any bugs.
Debug.Print offers the two main benefits over using Msgbox to display the output of the code. It eliminates the need for clicking the “OK” button every time and shows the log of returned output values to the immediate windows. It saves a lot of time for users. The present article explains the use of excelIn today’s corporate working and data management process, Microsoft Excel is a powerful tool.» Every employee is required to have this expertise. The primary uses of Excel are as follows: Data Analysis and Interpretation, Data Organizing and Restructuring, Data Filtering, Goal Seek Analysis, Interactive Charts and Graphs.
read more VBA Debug.Print with many examples and explains how to use it, covering the following things.
Table of contents
- Excel VBA Debug.Print
- What is VBA Debug Print?
- How to Use Excel VBA Debug Print?
- Examples of Excel VBA Debug.Print
- Example #1 – Displaying the Values of the Variables
- Example #2 – Debug print to File
- Example #3 – Displaying the Factorial of a Number in the Immediate Window
- Example #4 – Printing the Full name of the Active Workbook
- Recommended Articles
What is VBA Debug Print?
Debug is an object in VBA used with the two methods called “Assert” and “Print.” The “Print” is helpful for in-display messages, and “Asserts” is useful in evaluating the conditions. In VBA, debug. In addition, one can use the print statement in any place of the coding program to show the values of a variable or messages in the immediate window. These do not need any acknowledgment or confirmation and do not display any effect on the code developed. It is safe and best to use the code to facilitate access to many users. These are just helpful in testing or evaluating the code to confirm that it is working correctly or not. It prints the variables, strings, numbers, arrays, and values in Excel and empty and active sheets.
How to Use Excel VBA Debug.Print?
VBA Debug.Print is the statement helpful in displaying more variables at a time in the immediate window. It is the best and alternative approach to show the output.
For example,
Debug.print count, sum, average, standard deviation
As shown in the example, all the variables are separated by commas. This statement can transfer the output to the immediate window even if a window is not opened. It does not stop running the code as in msgbox. This flexibility supports continuous monitoring of the changes in the output concerning changes in the code.
The variables count, sum, average, and standard deviation are displayed in the same line with equal space. If the immediate window is not opened, follow the following steps to see the output.
Steps to Open Immediate Window and See the Output
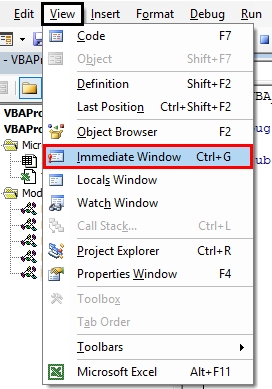
- Press Ctrl + G or click on the ‘View’ menu in the VBA Editor.
- Choose the option ‘Immediate Window.’
- Place the cursor in the Window and again run the code.
- Observe the output in the window.
Examples of Excel VBA Debug.Print
The following examples demonstrate the use of Debug.Print in Excel VBA.
You can download this VBA Debug Print Excel Template here – VBA Debug Print Excel Template
Example #1 – Displaying the Values of the Variables
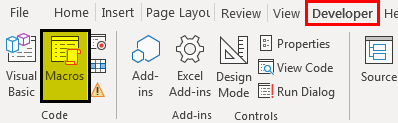
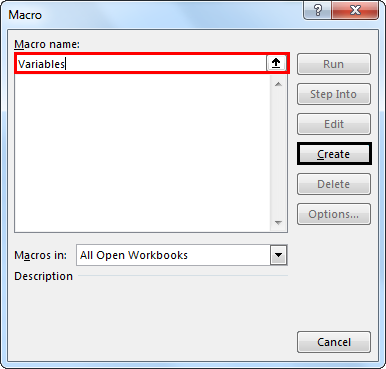
First, go to the Developer tabEnabling the developer tab in excel can help the user perform various functions for VBA, Macros and Add-ins like importing and exporting XML, designing forms, etc. This tab is disabled by default on excel; thus, the user needs to enable it first from the options menu.read more, click on “Macros,” and create a macro to write the code in the VBA and add a name to it.
After adding a name, click on “Create.” It opens the VBA Editor.
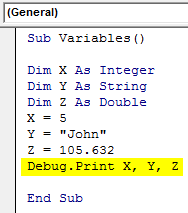
Develop a small program, as shown in the figure.
Code:
Sub Variables()

Dim X As Integer
Dim Y As String
Dim Z As Double
X = 5
Y = "John"
Z = 105.632
Debug.Print X
Debug.Print Y
Debug.Print Z

End Sub
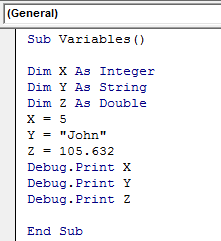
The screenshot shows three dimensions or variables decreasing X, Y, and Z as an integer, string, and double. One can use the Debug.Print these values. It will display the output in the prompt window. Press CTRL+G to see the result, as shown in the screenshot.
Run this code using the F5 key and press CTRL+G to see the output in the immediate window.
One can simplify this program by separating the Debug.Print statements by a comma.
Code:
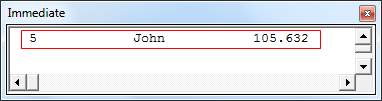
Sub Variables()

Dim X As Integer
Dim Y As String
Dim Z As Double
X = 5
Y = "John"
Z = 105.632
Debug.Print X, Y, Z

End Sub
The debug statement prints the output in the same line, as shown in the screenshot.
Example #2 – Debug print to File
This example illustrates the use of the VBA Debug.Print to display output to a file when the length of the text is too high.
The program is developed to print the output on a file, as shown in the figure.
Code:
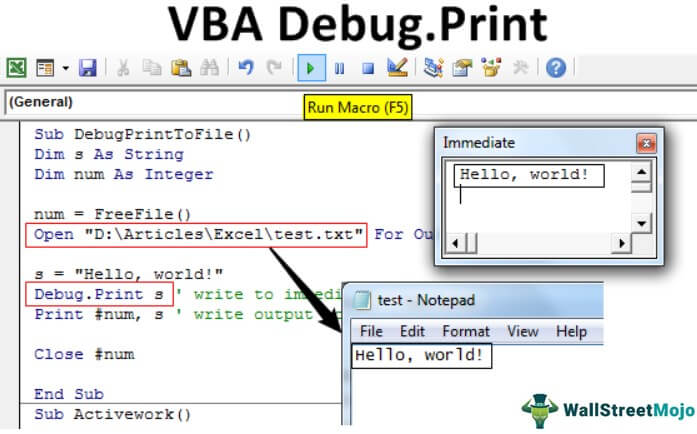
Sub DebugPrintToFile()

Dim s As String
Dim num As Integer

num = FreeFile()
Open "D:ArticlesExceltest.txt" For Output As #num

s = "Hello, world!"
Debug.Print s ' write to the immediate window
Print #num, s ' write output to file

Close #num

End Sub
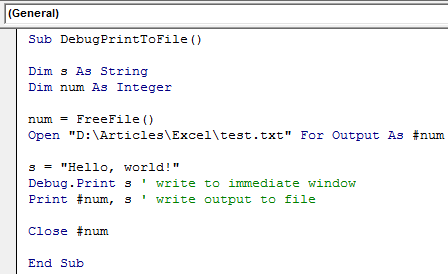
In this program, two variables, S and Num, are considered string and integer. The open statement creates a text file with the name test. A column called “Hello World” is declared into the variable S.
When you run the VBA codeVBA code refers to a set of instructions written by the user in the Visual Basic Applications programming language on a Visual Basic Editor (VBE) to perform a specific task.read more manually or using the F5 key, one can write the output into the immediate window, and the file displays in the folder at a time.
The output of the file shows in the below-mentioned figure.

Printing output to file is beneficial when presenting long text.
Example #3 – Displaying the Factorial of a Number in the Immediate Window
This example illustrates the use of the debug—a print statement to show the factorial of a number.
Code:
Public Sub Fact()

Dim Count As Integer
Dim number As Integer
Dim Fact As Integer
number = 5
Fact = 1
For Count = 1 To number
Fact = Fact * Count
Next Count
Debug.Print Fact

End Sub
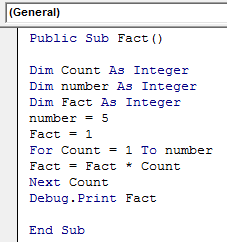
One must consider three variables for determining the factorial, including the count, number, and fact. For loop is taken to repeat the multiplication of fact-value with count to determine factorial of the number.
Here, debug. The print statement uses outside the “for” loop to display the value after completing the circle. The output is determined.
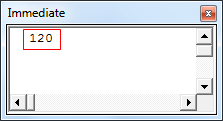
If we use the Debug.Print statement inside the “for” loop; the fact-value is displayed for every recurring time, as shown in the figure.
Code:
Public Sub Fact()

Dim Count As Integer
Dim number As Integer
Dim Fact As Integer
number = 5
Fact = 1
For Count = 1 To number
Fact = Fact * Count
Debug.Print Fact
Next Count

End Sub
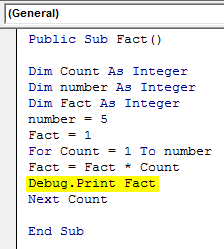
Run the code by pressing the F5 key and see the output in the immediate window. In this situation, we should consider the last value as the factorial of the given number.
Example #4 – Printing the Full name of the Active Workbook
This example explains how to print the current workbook name into the prompt window.
Then, the program develops, as shown in the figure.
Code:
Sub Activework()

Dim count As Long
For count = 1 To Workbooks.count
    Debug.Print Workbooks(count).FullName
Next count
Debug.Print count

End Sub
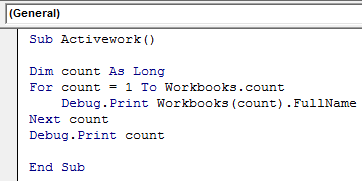
Here ‘count’ is the variable taken to count the number of active workbooks and to display the full name of the active workbook. The full name and number of active workbooks are displayed, as shown in the figure.
The workbook’s path in the drives displays accurately using the VBA Debug.Print statement.
Things to Remember
- The main issue with the debug .print is no text wrapping option for long strings in the immediate window.
- We should bring the immediate window to the top to see the output in the user interface.
- It is impossible to wrap the long text displayed in the immediate window. In this situation, we must show the result to a file stored in the drive.
Recommended Articles
This article has been a guide to VBA Debug.Print. Here, we learn how to use the VBA Debug.Print statement to analyze VBA code output along with examples and explanations. Below are some useful Excel articles related to VBA: –
- Switch Case in VBA
- VBA Break For Loop
- VBA DatePart
- VBA Print
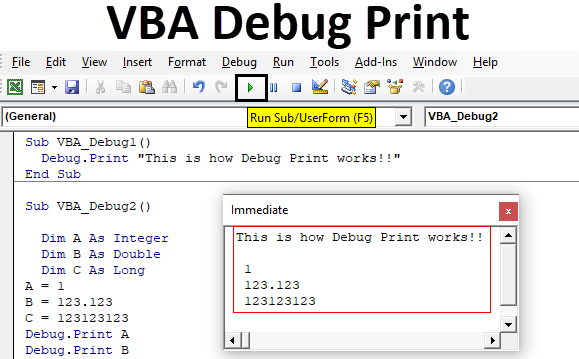
Excel VBA Debug Print
Debug Print is one of the most useful but underrated tools VBA has. Debug Print can be used in place of MsgBox. It helps in analyzing the process and output in the immediate window. Debug Print and MsgBox in VBA works on the same principles.
They both show the values like a message. But there are some major difference and benefits of using Debug Print over MsgBox. Debug Print, shows us the value stored in any variable or in itself in Debug Print like MsgBox. It also helps in debugging the error after executing the complete code. There is no need of clicking on the Ok button after we get the message, by which we can save a small amount of time and extra step to perform.
There is no proper syntax of Debug Print. We can add anything and whatever we want to see as output in the immediate window.
How to Use Debug Print in Excel VBA?
Below are the different examples to use Debug Print in excel by using VBA code.
You can download this VBA Debug Print Excel Template here – VBA Debug Print Excel Template
Excel VBA Debug Print – Example #1
For applying Debug Print in Excel VBA, we need to follow the below steps.
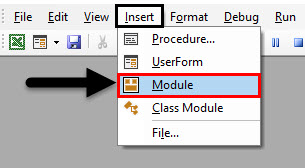
Step 1: Go to the VBA window, under the Insert menu tab select Module as shown below.
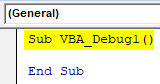
Step 2: In the newly opened Module, write the subcategory VBA Debug Print or you can choose any other name for that.
Code:
Sub VBA_Debug1()

End Sub
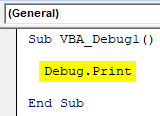
Step 3: Now directly use Debug Print as shown below. As we discussed, Debug Print doesn’t have any syntax. We can choose anything we want to print.
Code:
Sub VBA_Debug1()

  Debug.Print

End Sub
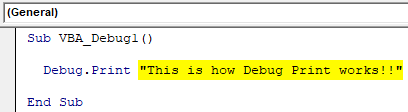
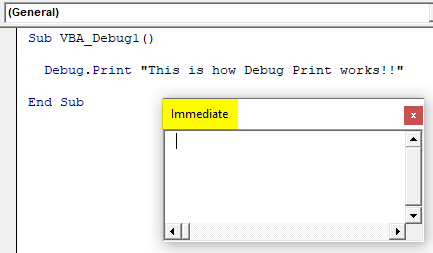
Step 4: Let’s print any random text which we want to see and quote that text in inverted commas to see the output.
Code:
Sub VBA_Debug1()

  Debug.Print "This is how Debug Print works!!"

End Sub
Step 5: As we know, the output of Debug Print will only be seen in Immediate Window. So, we will be opening the Immediate Window from the View menu bar as shown below.
After that, we will be getting a blank Immediate Window as shown below. This is a place where we will be seeing all the output from Debug Print.
Step 6: Now compile the code and run it by clicking on the Play button located below the menu bar. We will see, the Debug print has omitted the output in Immediate window as shown below.
Excel VBA Debug Print – Example #2
In this example, we will see, how to print any value using Debug print in excel VBA. For this, follow the below steps:
Step 1: In a module, write the subcategory in any name as shown below.
Code:
Sub VBA_Debug2()

End Sub

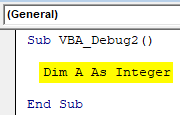
Step 2: We will need a variable as an Integer.
Code:
Sub VBA_Debug2()

  Dim A As Integer

End Sub
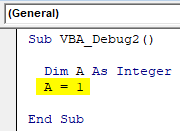
Step 3: Assign any value to that integer.
Code:
Sub VBA_Debug2()

  Dim A As Integer
  A = 1

End Sub
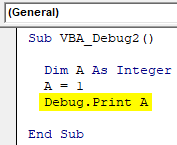
Step 4: Now we will use Debug print and assign the variable which we have just defined directly.
Code:
Sub VBA_Debug2()

  Dim A As Integer
  A = 1
  Debug.Print A

End Sub
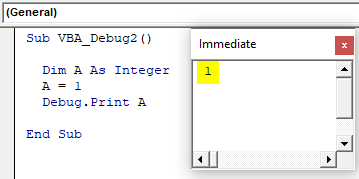
Step 5: Now we will run the code by pressing F5 key. We will see, the value stored in variable A is now printed in the Immediate window.
In a similar way, let’s define different types of variables in the same code and see, what changes happen.
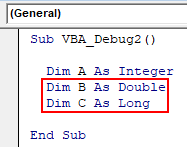
Step 6: Declare the 2 more variables as Double and Long where we will try to store decimal value and large values in 6 digits.
Code:
Sub VBA_Debug2()

  Dim A As Integer
  Dim B As Double
  Dim C As Long

End Sub
Step 7: Now assign some values to each defined variable as per their character of data types. Assign the whole number to variable A, decimal value to variable B and any 6 digits or larger number to variable C.
Code:
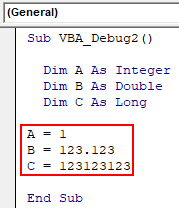
Sub VBA_Debug2()

  Dim A As Integer
  Dim B As Double
  Dim C As Long

A = 1
B = 123.123
C = 123123123

End Sub
Step 8: Now give individual Debug Prints to each of the variables so that, we will be seeing the separate values but in the same immediate window.
Code:
Sub VBA_Debug2()

  Dim A As Integer
  Dim B As Double
  Dim C As Long

A = 1
B = 123.123
C = 123123123

Debug.Print A
Debug.Print B
Debug.Print C

End Sub

Step 9: Now run the complete code by pressing the F5 key or by clicking on the Play Button. We will see, in one shot all the values are stored in variables A, B, and C which can be seen in the immediate window.
Excel VBA Debug Print – Example #3
In this example, we will see how any mathematical expression would run if we use an immediate window to see the output. For this, follow the below steps to use Debug Print in Excel VBA.
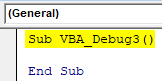
Step 1: Write the subcategory of VBA Debug Print as shown below.
Code:
Sub VBA_Debug3()

End Sub
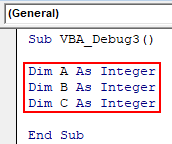
Step 2: Here, we will need to try to perform an addition of 2 variables. For this define 2 variables in which we will be submitting the input numbers and 3rd variable where we will store the output coming from addition of the first two variables. Let’s consider those variables as A, B, and C respectively.
Code:
Sub VBA_Debug3()

Dim A As Integer
Dim B As Integer
Dim C As Integer

End Sub
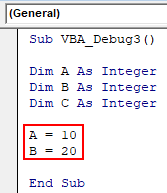
Step 3: Now allot any numerical values to variable A and B. Here, we have considered those as 10 and 20 respectively.
Code:
Sub VBA_Debug3()

Dim A As Integer
Dim B As Integer
Dim C As Integer

A = 10
B = 20

End Sub
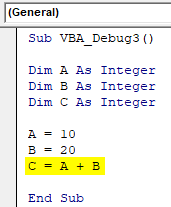
Step 4: For the purpose of adding, we will perform a mathematical function where we will add first and second variable A and B and get the output in variable C.
Code:
Sub VBA_Debug3()

Dim A As Integer
Dim B As Integer
Dim C As Integer

A = 10
B = 20
C = A + B

End Sub
Step 5: Now we will use Debug print to print the output of addition of variable A and B under variable C. So, only variable C will be assigned in Debug Print to see the output of addition.
Code:
Sub VBA_Debug3()

Dim A As Integer
Dim B As Integer
Dim C As Integer

A = 10
B = 20
C = A + B
Debug.Print C

End Sub

Step 6: Now run the code by pressing F5 key or by clicking on Play Button. We will get the output of addition of values stored in variable A and B under C in the immediate window.
By this, we can perform any type of mathematical process and get the output in an immediate window instead of using MsgBox which is also easy but not as good as Debug Print.
Pros of Excel VBA Debug Print
- It is easy to apply.
- No need to change the window to see the output. That we easily can see in the immediate window.
- We can even delete the output data from an immediate window once the purpose is incomplete.
- Compiling the code is optional.
- If we get any error then we can easily rectify that just from seeing the output in the immediate window.
Things to Remember
- If there is an error in the code, then the immediate window will give us the output as 0.
- If the text is long, then we can adjust the size of the immediate window as per our need.
- We can also adjust the location of an immediate window.
Recommended Articles
This is a guide to VBA Debug Print. Here we discuss how to use Debug Print in Excel using VBA code along with practical examples and downloadable excel template. You can also go through our other suggested articles –
- VBA RGB
- VBA XML
- VBA Block Comment
- VBA IsError
Return to VBA Code Examples
In this Article
- Displaying the Immediate Window
- Executing Lines of Code
- Questions and the Immediate Window
- Run a Macro from the Immediate Window
- Using Debug.Print
- Using the Immediate Window When Running Code
The VBA Immediate Window is used to quickly run lines of VBA code, as well as fetch information about your code or Excel file. This tool allows you to test individual lines of code, which is useful when you are writing and debugging code. The output is displayed in the Immediate Window.
Displaying the Immediate Window
You need to display the Immediate Window first. In order to do this, you would press Alt + F11 to enter the Visual Basic Editor. Once you have inserted a module. Press Ctrl + G to view the Immediate Window.
You should see the following:
Executing Lines of Code
One of the things that the Immediate Window allows you to do is test a line of code. The following code will show you how to use the Immediate Window to fill Cell A1 of the Active Sheet with a light orange fill color. Type in the following line and then press Enter on your keyboard:
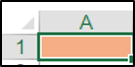
Range("A1").Interior.Color = RGB(246, 174, 134)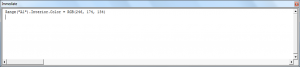
The result is:
Questions and the Immediate Window
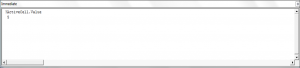
You can use the Immediate Window to get information about your workbook. You can do this by using the question mark. If you enter a statement preceded by a question mark then the Immediate Window will deliver the appropriate answer. Let’s say you have the number 5, in cell A1 which is selected. The following code will allow you to use the Immediate Window to get this value:
?ActiveCell.ValueThe result is:
Run a Macro from the Immediate Window
You can run a macro from the Immediate Window by typing in the name of the macro and pressing Enter. If your macro contains arguments then you can use the Immediate Window and pass the arguments to the macro through the Immediate Window. The following code shows you how to call a macro named CountWorksheets from the Immediate Window:
CountWorksheets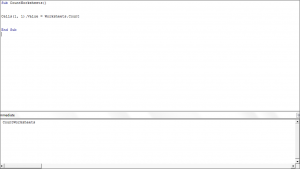
After pressing Enter, the result is shown on the worksheet in Cell A1.
Using Debug.Print
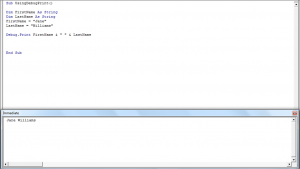
You can use Debug.Print as part of your sub procedures and this tells the Immediate Window to display certain information. This is used when you don’t want to display values or results in a cell in the workbook itself or in a message box. The following code uses the Debug.Print statement as part of a sub procedure and displays the results in the Immediate Window.
Sub UsingDebugPrint()

Dim FirstName As String
Dim LastName As String
FirstName = "Jane"
LastName = "Williams"

Debug.Print FirstName & " " & LastName

End Sub
The result when you press F5 to run the macro is shown in the Immediate Window:
Using the Immediate Window When Running Code
You can also use the Immediate Window to set or get a variable’s value while you are stepping through your code:
Sub GettingAndSettingVariableValues()

Dim LName As String
Dim SName As String
Dim Age As Integer

LName = "John"
SName = "Smith"
Age = 31

End Sub
The following code has a breakpoint that is inserted as shown below:
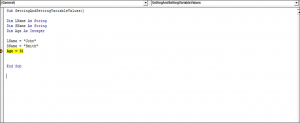
If you enter ?SName in the Immediate Window while stepping into your code using F8, at the break point you will get the following result:

VBA Coding Made Easy
Stop searching for VBA code online. Learn more about AutoMacro — A VBA Code Builder that allows beginners to code procedures from scratch with minimal coding knowledge and with many time-saving features for all users!

Learn More!
The VBA Immediate Window is a great tool that can help any Excel user, even if you are not writing macros. Learn how to get answers about your Excel file, quickly run macros, debug your code, and more. Free file to download contains VBA code samples.
The VBA Immediate Window is an awesome tool that allows you to get immediate answers about your Excel files, and quickly execute code. It is built into the Visual Basic Editor, and has many different uses that can be very helpful when writing macros, debugging code, and displaying the results of your code.
Every Excel user can benefit from the Immediate Window, even if you’re not writing macros. This post will explain 5 different uses for the Immediate Window. Once you understand the capabilities of this tool, you will find yourself using it all the time.
Where is the Immediate Window?
The Immediate window is located in the Visual Basic Editor window.
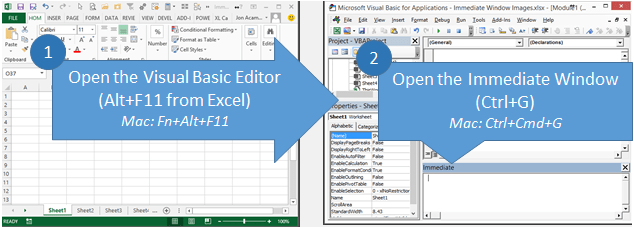
The fastest way to get to the Immediate Window is to:
- Press Alt+F11 (hold Alt key, then press F11 key) from anywhere in Excel. The Visual Basic Editor window will open. (Mac version is Fn+Alt+F11)
- Pressing Ctrl+G opens the Immediate Window and places the text cursor in it. Begin typing your code. (Mac version is Ctrl+Cmd+G)
When you open the VB Editor (Alt+F11) you might see the Immediate Window automatically appear in the bottom right corner. This is its default location. If it’s not there you can press Ctrl+G or View menu > Immediate Window.
This Blank Box is Magical!
When you click inside the Immediate Window you will just see a blank box with the text cursor flashing. At first glance this doesn’t look too exciting, but the Immediate window can be a very powerful and useful tool.
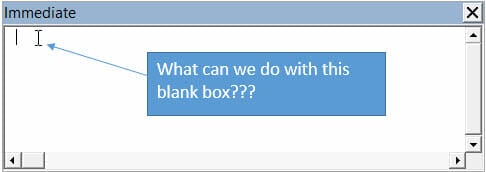
Think of it like a blank cell in a worksheet. It’s pretty boring until you add a formula to it, right? Well the Immediate Window is very similar, so let’s look at 5 examples that will help you get the most out of this magical box.
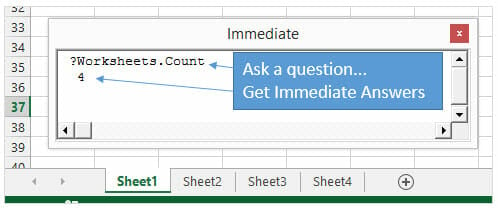
#1 – Get Info About The Active Workbook
The simplest use for the Immediate window is to quickly get information about the workbook that you currently have open and active in the background. You can evaluate any line of VBA code in the Immediate Window, and it will immediately give you the result.
For example, to find out how many sheets are in the active workbook, type the following line of code in the Immediate window and then press the Enter key.
?Activeworkbook.Worksheets.Count
The answer will be displayed on the next line of the Immediate window, directly under the code.
Ask a question, any question…
Putting the question mark (?) at the beginning of the statement tells the Immediate window that we are asking it a question, and expecting a result.
The following screencast shows a few examples of how we can use the Immediate window to get the value, number format, and fill color of the active cell.
Notice that the Immediate Window displays the intellisense as I type. Intellisense is the drop-down menu that displays the properties, methods, and members of the object I’m referencing. This makes it very fast and easy to type code in the Immediate Window.
You can download the free sample workbook that contains a few more useful examples.
#2 – Execute a Line of VBA Code
You don’t have to write a whole macro if you just need to perform one line of code to your workbook.
Remove the question mark at the front of the statement and the Immediate Window will execute or perform that line of code.
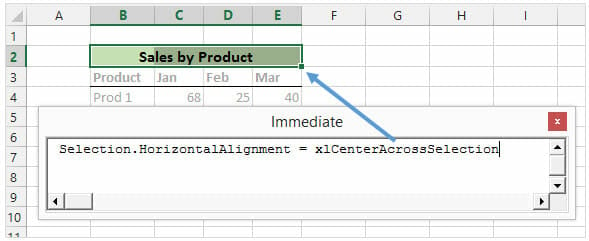
Selection.HorizontalAlignment = xlCenterAcrossSelection
The image above shows how to format the selected cells with the Center Across Selection alignment.
You can also use the following line of code to make a worksheet “very hidden”.
Worksheets(“Sheet1”).Visible = xlVeryHidden
Another example is to hide the contents of a cell by making its font color the same as its fill (background) color.
Range(“A1”).Font.Color = Range(“A1”).Interior.Color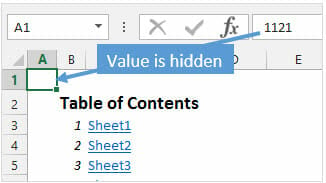
I use this line of code in Tab Hound’s Table of Contents tool to hide some settings stored in cell A1. Even if the user changes the fill color of the sheet, the contents in cell A1 will still be hidden after the code is run.
#3 – Run a Macro
You can run a macro from the Immediate Window by typing the name of the macro (procedure), and pressing Enter.
Of course you can also do this by pressing the F5 key or the Run Macro button in the VB Editor, but what if your macro contains arguments?
A macro cannot be run from within the procedure if it contains arguments. However, you can call the macro from the Immediate Window.
The example below is a simple macro that enters the current date (Now) in the cell , and changes the font color to blue (Color = vbBlue). This macro requires two arguments to be passed to it to run, the worksheet name and cell address where the date stamp will be entered.
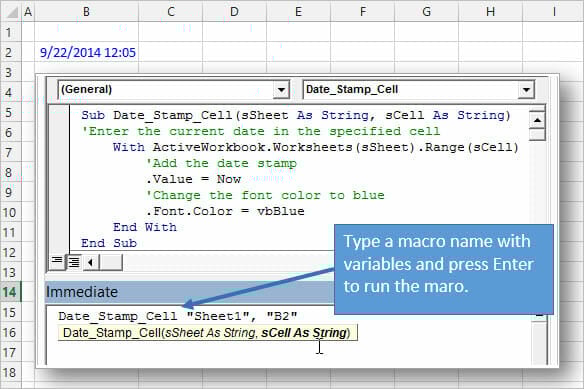
For a macro like this you will typically be calling it from another macro and specifying the arguments in the macro that is calling it. But if you just want to test the macro that contains arguments, you can use the Immediate Window to call it.
This is great for writing and debugging code. You might not want to run the entire stack of procedures (macros) in the code, but you can use the Immediate Window to only call that specific macro you’re working on.
The example above shows how you can specify the arguments after the macro name. For arguments that are string variables (text), you will need to wrap the variable in quotation marks.
As you can see in the image, the intellisense is available in the Immediate Window, which makes it easy to specify the arguments for the macro.
The code in the image above is included in the free sample file you can download below.
#4 – View Debug.Print Info
Have you ever seen VBA code on the internet that contains a line similar to the following?
Debug.Print xxxxx
With that “xxxxx” being some variable that the code is calculating or producing.
Debug.Print is telling VBA to print that information in the Immediate Window. This can be useful when you want to see the value of a variable in a certain line of your code, without having to store the variable somewhere in the workbook or show it in a message box. It is especially useful when you are writing or debugging code.
The example below is a macro that loops through all the sheets in the workbook and checks to see if each sheet is empty (not used). If the sheet is empty then it is listed in the Immediate Window using Debug.Print.
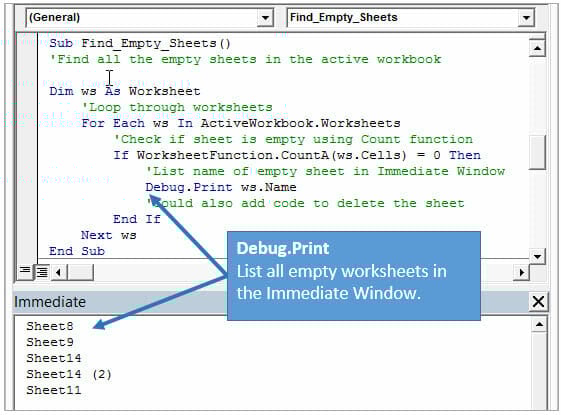
The ultimate goal of this macro may be to delete all empty (blank) sheets in the workbook, but we might want to test the code first before actually deleting any sheets. The Debug.Print line creates a list of empty sheets in the Immediate Window, and we can then manually check each of those sheets to make sure they are really blank.
#5 – Get or Set a Variable’s Value
The Immediate Window can also be used to get answers about the procedure (macro) that is currently running. If you are stepping through your code (F8) or add a break point (F9) or add a STOP line in your code, then the code will pause. When the code is paused you can use the Immediate Window to get information about any variables or objects that are referenced in the code.
The following example is a macro that creates a list of all the sheets in the active workbook. There are plenty of different ways to write this code, but in this example I use the “lSht” variable in a For Next loop to loop through the worksheets and then add the sheet name to the active sheet.
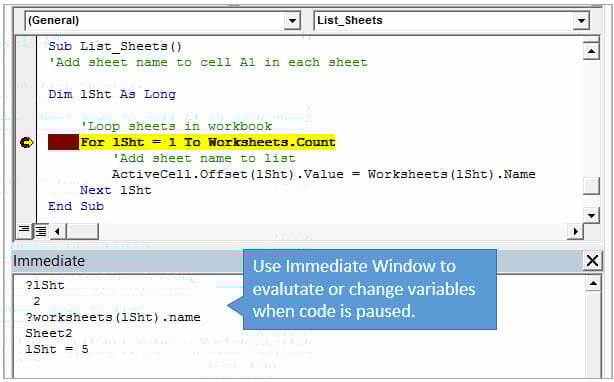
I added a break point (F9) in the code to pause the code when that line is executed. With the code paused, the Immediate Window can be used to evaluate or change variables. In the image above I used the question mark to check the value of the lSht variable. Then I used the variable to get the sheet name of the sheet that is currently being processed in the loop.
Finally I changed the lSht variable to 5 by using the equals sign (lSht = 5). This will effectively skip some of the sheets in the loop because I changed the variable from 2 to 5.
This is a simple example, but the Immediate Window can come in handy when stepping through code.
Pete asked a great question in the comments below. He wanted to know how I made the Immediate Window float on top of the Excel application in some of the screenshots.
This screencast shows you how you can undock the Immediate Window.
Here are the step-by-step instructions:
- Left-click and hold on the top bar of the immediate window.
- Drag it out of the VB Editor window. The immediate window becomes a free floating window that you can put on top of Excel.
- To re-dock it, double-click on the top bar of the immediate window.
You can do this with any of the windows in the VB Editor including the Project, Properties, Locals, and Watch windows. Many developers will setup their VB Editor differently than the default layout. Some prefer to have the project and properties windows on the right side instead of the left. The VB Editor window gives you a lot of flexibility to customize your view.
Download
You can download the workbook that contains the code for all these examples in the link below.
Conclusion
The Immediate Window is a very versatile tool that can really help when writing and debugging macros. It’s a great way to get some quick answers about your file or application. If you are new to VBA, the Immediate Window will be very useful as you start learning and writing code.
What do you use the Immediate Window for? Please leave a comment below with your suggestions, or any questions.
Home / VBA / VBA Immediate Window (Debug.Print)
What is Immediate Window
Immediate Window is a small box in the Visual Basic Editor that you can use to execute a single line of code and get an instant result of that. In simple words, instead of executing your code directly in Excel, you can run a macro line to what it returns. It’s quite useful when you are debugging a code.
When you open the visual basic editor (Alt+ F11), you can see the immediate window at the bottom.

But, if it’s not there then you need to activate it from the edit menu, or you can also use the keyboard shortcut key Control + G.

And if you want to unlock it, click and hold the title bar and drop it and outside of the VB editor.

What is Debug.Print
Debug.Print is a command that you can use to execute a single line of code and get the result of that line in the Immediate Window. In simple words, when you use debug.print command at the starting of the line of code and then execute it, VBA shows the result of that line in the immediate window.
Imagine, you want to know which font color is applied A1. In that case, you can use the following line of code it starts with Debug.Print and then code to get the font color.
Debug.Print Range("A1").Font.ColorNow when you run this code, you get the result in the immediate window, like below:

Executing a Line of Code
Apart from using the debug.print you can directly execute a line of code from the immediate window. Let’s say if you want to enter a value in cell A1 you can directly type the following code in the immediate window, and after that, hit ENTER.

Immediate Window executes a single line of code at a time. So, you need to hit enter each line of code that you want to run.
Run a Macro Directly from the Immediate Window
You can also run a macro directly from the immediate window using the macro name. All you need to do is type the name of the macro and then hit enter.

Make sure to define the arguments within the immediate window if you have any.

Asking Quick Questions
You can also ask questions directly into the immediate window. What I’m trying to say is you can directly write a line of code in the immediate window and use a question mark to get the result.
Let’s say if you want to know the value that you have in cell A1, in that case, you can type the following line of code into the immediate window and hit enter.
?Range("A1").Value