
This post is the first of a few where we look at how easy the Office 365 stack integrates. In this series, we will:
- Create a Form and have the data save directly in Excel (this post)
- Add the Form to Microsoft Teams
- Notify the Team a submission was made
- How does this look like on the phone
I came across this neat little feature and instantly fell in love. We know about Microsoft Forms, the Office 365 quiz and polls tool. We know this can be easily exported to Excel. However, if you have an existing Excel file, you can use Forms to import directly into your existing Excel file!
Yes. Import. Directly. Into. Your. Existing. Excel. File.
I find this as a big deal. There have been numerous use cases for this over my last 20 years of consulting. People just want to collect data, in a clean manner, and then analyze it in Excel. This also comes in handy when you want to use the form for more than just a survey tool. I’ve set up a Form as a request tool for the intranet. Users submit intranet requests it in Forms, it writes to my Excel file, then I can triage the request, manage that data in my Excel file, without having to download it, or writing a Flow to write the data to the Excel file.
If Excel isn’t enough, check out this other post and you can save your Forms into anything else, like Planner, Trello, Slack, etc.
Start with Excel in SharePoint Online
Create your Excel file, if you don’t have one already. Any Excel file will do, make sure it’s the xslx file extension (if you created it in O365 or Office 2016, you should be fine). Now throw that file up in SharePoint or Teams.
Here I have a basic Excel file, with the goal of managing a booth at a trade show. I need 3 people at the booth, and I want to collect who wants to man it when.

Alternatively, you can create a fresh new Excel file, with a Forms front end, from your SharePoint library!

press the New menu and select Forms for Excel. Name your Excel file and you’ll be sent to the Forms designer.
Will this work with OneDrive?
Great question! Thanks for asking. I don’t know. Use SharePoint. I have normally used a shared Excel file in Teams/SharePoint, but for my first round through this post I decided to use OneDrive. I got through creating the form, but no results would save in the Excel file. Really weird. I’m guessing there’s a connection missing somewhere. If you try it in OneDrive, let me know how it goes!!
Open Excel file in Office Online and create the Form
Go open up your file in a browser. A fast way to do this is to click File menu, then click the path and click Copy path to clipboard.

Now paste that in a browser. Any modern browser will work, I’m using Chrome.
Edit your file, click Edit Workbook, then Edit in Browser.

Create your Form
Up in the HOME ribbon, in the Tables section, click Forms then New Form. This only appears in Excel Online, maybe it’ll be in Office 2019?

Did you know that was there? I found it one day and clicked it. Awesomeness
And now you’re in FORMS!! It’s awfully nice of Microsoft to assume the same name of the form to the Excel file. Yes you can change that.

Click Add Question and start creating your form! Add your first question and navigate back to the Excel file in the browser and see what’s happening.

This might take a few moments to catch up, sometimes it’s immediate, sometimes I had to refresh the browser to effectively see the columns.
First off, a new worksheet has been added, called Form1.
Each question gets added automatically, and you’ll see a bunch of additional columns get added like Start Time, Completion Time, Email, and Name. These auto-generate, which is awesome.
Finish throwing your questions in, here’s my impressive form:

Yes, XXLT is a size, and my perfect size. No one ever offers it.
You can test it real quick, press the Preview button at the top and fill it out and watch Excel load!

Once this data is in Excel, you can then treat it like any other data table. Use vlookups, functions, etc. to continue your analysis.
In my example, I used a vlookup to populate the Mobile Number of each person. Now we have a single page view of who’s working the booth, when and how to reach them.


Couple of things…
If you want to change the form, you’re best bet is to access it via the Forms button. You’ll probably get assaulted with something like this to remind you:

If you go to Forms, depending on where you stored the Excel file, you may see it either under My forms or Recent group forms. Since I accessed this via a Team (a Group) it’s a group form

I’ve noticed that the data is pushed into Excel, if you delete rows in Excel, it still exist in Forms, BUT not sure how to get it out after the fact. I deleted a bunch of rows from Excel, and they still exist in the Forms app. I think that’s great, but there doesn’t appear a way to refresh, download, or otherwise get that data from Forms. If this is a need, we can use a Flow to write the data to another datasource.
When Forms writes to Excel, the Last Modified By is SharePoint App. It’s nice something uses a service account in Office 365 (which Flow doesn’t support yet).
Do you have an existing Form you’d like to hook up to Excel? Check out my other post Saving data from Microsoft Forms into Excel using Power Automate (flow)
Done!
This was relatively painless right? Stay tuned to my next post on how to add this form to Teams!
This article describes the options available for importing form designs and form data from other programs into Microsoft Office InfoPath. It also describes options for exporting InfoPath form templates and form data to other formats.
In this article
-
Options for importing form designs from other programs
-
Options for importing data from other programs
-
Options for exporting form templates to other programs
-
Options for exporting data to other programs
Options for importing form designs from other programs
InfoPath offers the following options for importing form designs from other programs into design mode.
Import Word documents and Excel workbooks If you use an existing form, such as a form that you created in Microsoft Office Word, you can use the InfoPath Import Wizard to convert that form into an InfoPath form template. InfoPath includes two form template importers, which help you convert an existing Microsoft Office Excel workbook or Microsoft Office Word document into an InfoPath form template. In the following example, the designer is customizing the import options for a Word document.
Develop a custom form template importer If you are a designer or developer of advanced form templates, you can develop your own solution for importing form templates from other kinds of electronic forms and documents. This work occurs outside of InfoPath.
You can also develop your own solution for importing paper forms and documents that are electronically scanned by using optical character recognition (OCR) software. By default, the InfoPath Import Wizard imports one form at a time. If your organization has a large library of existing forms, you can automate the form template importer to make it easier to import multiple forms at once. For example, if you work for a large organization that has hundreds of existing Word forms, you might decide that it is worth the time and resources to automate the built-in InfoPath importer for Word forms.
For more information about developing custom form template importers, click the MSDN: What’s new for InfoPath developers link in the See Also section.
Use a third-party form template importer On the Microsoft Office Web site, you may be able to find form template importers that are created by third-party providers. The functionality of a resulting form template depends on the particular importer. In some cases, after a form template has been imported, you may need to manually create the data source for the new form template, and then bind the controls on the form template to fields or groups in the data source.
Top of Page
Options for importing data from other programs
Form data importers make it possible for users to fill out InfoPath forms by using data from files in other formats. InfoPath doesn’t include any data importers. However, a third-party service provider or someone within your own organization can create form data importers that users can install and use. After a data importer is installed on users’ computers, users can open a form, and then use the Import Form Data command (on the File menu) to import data from other sources into the form.
You can use the following options for importing data into InfoPath forms.
Develop a custom data importer Depending on the business requirements in your organization, your company’s designers or developers of advanced form templates may decide to write a custom importer for transferring existing data from other programs to InfoPath forms. This work occurs outside of InfoPath. For example, suppose that your organization plans to import existing data from paper insurance claim forms into InfoPath insurance claim forms. To automate the process, the developers in your information technology (IT) department might design a data importer that scans the paper forms and uses optical character recognition (OCR) to translate the scanned forms into actual text characters. You can then install this data importer and use it to efficiently transfer data from the existing paper forms into corresponding fields in your InfoPath form.
For more information about developing custom data importers, click the MSDN: What’s new for InfoPath developers link in the See Also section.
Use a third-party data importer On the Office Web site, you may be able to find form data importers that are created by third-party providers. The functionality of the resulting form depends on the particular importer.
Top of Page
Options for exporting form templates to other programs
You can use a form template exporter to export the design of an InfoPath form template into another format. If a custom form template exporter is installed, you can open a form template in design mode, and then click the Export Form Template command on the File menu. This exports the form template’s design to another type of electronic form. InfoPath doesn’t come with any built-in form template exporters. If you want to export the design of a form template, you must do one of the following:
Develop a custom form template exporter Depending on the particular business requirements of your organization, your company’s designers or developers of advanced form templates may decide to develop a custom solution for exporting form template designs from InfoPath into other programs. This work occurs outside of InfoPath.
For more information about developing custom form template exporters, click the MSDN: What’s new for InfoPath developers link in the See Also section.
Use a third-party form template exporter On the Office Web site, you may be able to find form template exporters that are created by third-party providers.
Top of Page
Options for exporting data to other programs
If you want to export data from an InfoPath form to another format, you can do one of the following:
Export form data to Excel You can export the data in an InfoPath form to a new workbook in Microsoft Office Excel 2007. This allows you to quickly filter, sort, analyze, or create charts from the form data. You can export data from one form at a time or from several forms at once. You can export all of the data from one or more forms or select the exact data that you want to export. It is also possible to export data from InfoPath e-mail forms that are stored in an InfoPath Forms folder in Microsoft Office Outlook 2007 or stored in a document library on a site that is running Microsoft Windows SharePoint Services.
Export InfoPath e-mail forms as XML files In addition to exporting form data from one or more InfoPath e-mail forms to a Microsoft Office Excel 2007 workbook, you can export InfoPath e-mail forms as individual XML files that can be saved and opened later by using InfoPath or a data storage or data analysis tool that supports XML, such as Microsoft Office Access or Excel.
Export data to a fixed-layout format To save a snapshot of a completed form in a fixed-layout format, you can export a form into the following formats.
-
Portable Document Format (PDF) PDF is a fixed-layout, electronic file format that preserves document formatting and enables file sharing. The PDF format helps ensure that when the file is viewed online or printed, it retains exactly the format that you intended, and that the data in the file cannot be easily changed. The PDF format is also useful for documents that will be reproduced by using commercial printing methods.
-
XML Paper Specification (XPS) XPS is a fixed-layout, electronic file format that preserves document formatting and enables file sharing. The XPS format helps ensure that when the file is viewed online or printed, it retains exactly the format that you intended, and that the data in the file cannot be easily changed.
Export data as a read-only Web page When users fill out an InfoPath form, they can use the Export to Web feature to save their form as a Single File Web Page (MHTML). This format allows users who do not have InfoPath installed on their computers to view the completed form in a Web browser, but it does not allow them to fill out or modify the form.
Top of Page
Need more help?
Want more options?
Explore subscription benefits, browse training courses, learn how to secure your device, and more.
Communities help you ask and answer questions, give feedback, and hear from experts with rich knowledge.
Actually — there IS a way to get the data from your HTML form exported into an Excel spreadsheet.
In your HTML form you’ll have to create a separate table (it can be hidden).
And the BIG SECRET IS:
In the put id tags and then use a JavaScript to replace the innerHTML with the value of the fields on your form which collect the data you want.
Check out the JSFiddle here: http://jsfiddle.net/MitchinThailand/589C4/
<!DOCTYPE html>
<html>
<head>
<script type="text/javascript">
function fillHidTable(){
    var htqf; //-- hidden field
    var rf; //-- retrieved field
    for ( var i = 1; i < 5; i++ ) {
        rf = "htqf"+i;
        document.getElementById(rf).innerHTML = document.getElementById("Q"+i+"CALC").value;
    }
    tableToExcel('hidTable', 'Analysis Results');
}

var tableToExcel = (function() {
    var uri = 'data:application/vnd.ms-excel;base64,'
            , template = '<html xmlns:o="urn:schemas-microsoft-com:office:office" xmlns:x="urn:schemas-microsoft-com:office:excel" xmlns="http://www.w3.org/TR/REC-html40"><head><!--[if gte mso 9]><xml><x:ExcelWorkbook><x:ExcelWorksheets><x:ExcelWorksheet><x:Name>{worksheet}</x:Name><x:WorksheetOptions><x:DisplayGridlines/></x:WorksheetOptions></x:ExcelWorksheet></x:ExcelWorksheets></x:ExcelWorkbook></xml><![endif]--></head><body><table>{table}</table></body></html>'
            , base64 = function(s) { return window.btoa(unescape(encodeURIComponent(s))) }
            , format = function(s, c) { return s.replace(/{(w+)}/g, function(m, p) { return c[p]; }) }
    return function(table, name) {
        if (!table.nodeType) table = document.getElementById(table)
        var ctx = {worksheet: name || 'Worksheet', table: table.innerHTML}
        window.location.href = uri + base64(format(template, ctx))
    }
})()
</script>

<title>HTML Form Data to Excel</title>

<style type="text/css" media="screen">
    .divCenMid{font-family:Arial,sans-serif;font-size:14pt;font-style:normal;font-weight:700;text-align:center;vertical-align:middle;margin:0;}
    .allbdrCenMid{border:.75pt solid windowtext;color:#000;font-family:Arial,sans-serif;font-size:10pt;font-style:normal;font-weight:400;text-align:center;vertical-align:middle;margin:0;}
    .allbdrCenTop{border:.75pt solid windowtext;color:#000;font-family:Arial,sans-serif;font-size:10pt;font-style:normal;font-weight:400;text-align:center;vertical-align:top;margin:0;}
    .allbdrLtMid{border:.75pt solid windowtext;color:#000;font-family:Arial,sans-serif;font-size:10pt;font-style:normal;font-weight:400;text-align:left;vertical-align:middle;margin:0;}
    .allbdrLtTop{border:.75pt solid windowtext;color:#000;font-family:Arial,sans-serif;font-size:10pt;font-style:normal;font-weight:400;text-align:left;vertical-align:top;margin:0;}

</style>

</head>

<body>

<table width= "565px" cellspacing="0" cellpadding="0" style="border-spacing:0;" id="QMSTable">
    <col width="25px"/>
    <col width="120px"/>
    <col width="360px"/>
    <col width="60px"/>
    <tr>
        <td class="divCenMid" colspan = "4"> QMS Assessment</td>
    </tr>
    <tr>
        <td class="allbdrCenMid"> No</td>
        <td class="allbdrCenMid"> Criteria</td>
        <td class="allbdrLtMid"> Question</td>
        <td class="allbdrCenMid"> Score</td>
    </tr>
    <tr>
        <td class="allbdrCenTop"> Q1</td>
        <td class="allbdrLtTop"> Quality Unit Independency</td>
        <td class="allbdrLtTop"> Do you have the Quality Unit?</td>
        <td class="allbdrCenMid">
            <input id="Q1CALC" type="text" value="" class="nobdrCenMid" style="overflow:hidden; width:93% " name="Q1CALC"/>
        </td>
    </tr>
    <tr>
        <td class="allbdrCenTop"> Q2</td>
        <td class="allbdrLtTop"> Apply PICS GMP</td>
        <td class="allbdrLtTop"> Which GMP regulation do you use?</td>
        <td class="allbdrCenMid">
            <input id="Q2CALC" type="text" value="" class="nobdrCenMid" style="overflow:hidden; width:93% " name="Q2CALC"/>
        </td>
    </tr>
    <tr>
        <td class="allbdrCenTop"> Q3</td>
        <td class="allbdrLtTop"> Deviation or Non-conformance</td>
        <td class="allbdrLtTop"> Do you have a deviation or non-conformance procedure?</td>
        <td class="allbdrCenMid">
            <input id="Q3CALC" type="text" value="" class="nobdrCenMid" style="overflow:hidden; width:93% " name="Q3CALC"/>
        </td>
    </tr>
    <tr>
        <td class="allbdrCenTop"> Q4</td>
        <td class="allbdrLtTop"> Complaint</td>
        <td class="allbdrLtTop"> Do you have a customer complaint procedure?</td>
        <td class="allbdrCenMid">
            <input id="Q4CALC" type="text" value="" class="nobdrCenMid" style="overflow:hidden; width:93% " name="Q4CALC"/>
        </td>
    </tr>
</table>

<div id="hidTable" style="display: none">
    <table id="testTable">
        <caption>Supplier Risk Analysis</caption>
        <colgroup></colgroup>
        <colgroup></colgroup>
        <colgroup></colgroup>
        <thead>
        <tr>
            <th>No.</th>
            <th>Question</th>
            <th>Score</th>
        </tr>
        </thead>
        <tbody>
        <tr>
            <td>Q1</td>
            <td>Do you have the Quality Unit?</td>
            <td id="htqf1">-</td>
        </tr>
        <tr>
            <td>Q2</td>
            <td>Apply PICS GMP?</td>
            <td id="htqf2">-</td>
        </tr>
        <tr>
            <td>Q3</td>
            <td>Do you have a deviation or non-conformance procedure?</td>
            <td id="htqf3">-</td>
        </tr>
        <tr>
            <td>Q4</td>
            <td>Do you have a customer complaint procedure?</td>
            <td id="htqf4">-</td>
        </tr>
        </tbody>
    </table>
</div>

<input type="button" onclick="fillHidTable()" value="Export Data to Excel">
</body>
</html>
If you can’t figure out the details of how to apply it contact me.
Importing a Word form into an Excel spreadsheet is something that you can do with a particular built-in tool. Here’s how!

Using forms in Microsoft Word to gather information is pretty simple and convenient. The major challenge lies in transferring the collected data to your Excel spreadsheet.
It can be overwhelming to manually enter all the data you have collected. Fortunately, there are several ways to automatically fill in data from your Microsoft Word forms into your Excel spreadsheet.
Understanding Forms in Microsoft Word
Before we begin, let’s discuss forms in Microsoft Word documents. You may be wondering how Word forms work, but it is pretty straightforward.
With Word, you can create standardized documents that can be used to collect data. It does this by providing you with a template of your choice.
The template includes all the relevant fields that you may want your users to fill in. Once you specify the questions, users will have the option of filling out these templates. These responses are then stored in Word forms, which can be accessed at any time.
Creating an Excel Spreadsheet From a Microsoft Word Form
You can use any of these methods depending on the number of forms you have or the kind of data you want to export from your Word forms.
Method 1: Single Cell Import
It’s best to use this method if you want to import data from an individual cell to an Excel spreadsheet. Here are the steps you need to follow to use this method.
- On your computer, open a new Excel spreadsheet.
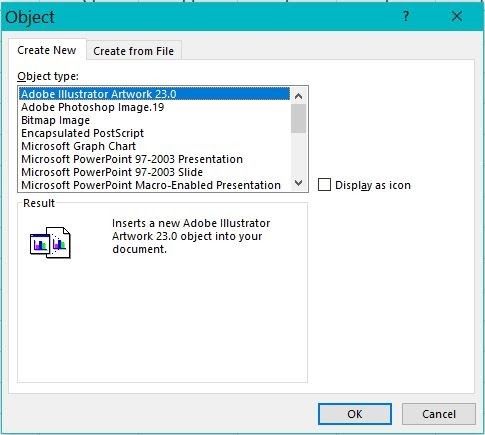
- Click on the Insert tab and select the Object option.
- Upon clicking it, the Object option will lead you to a window, as seen in the screenshot.

- There, select the Create From File option.
- Search through Microsoft Word documents to import your desired file.
- Select it by double-clicking the file name, then close the window by clicking on the OK button. This process will merge the Word file to your Excel spreadsheet.

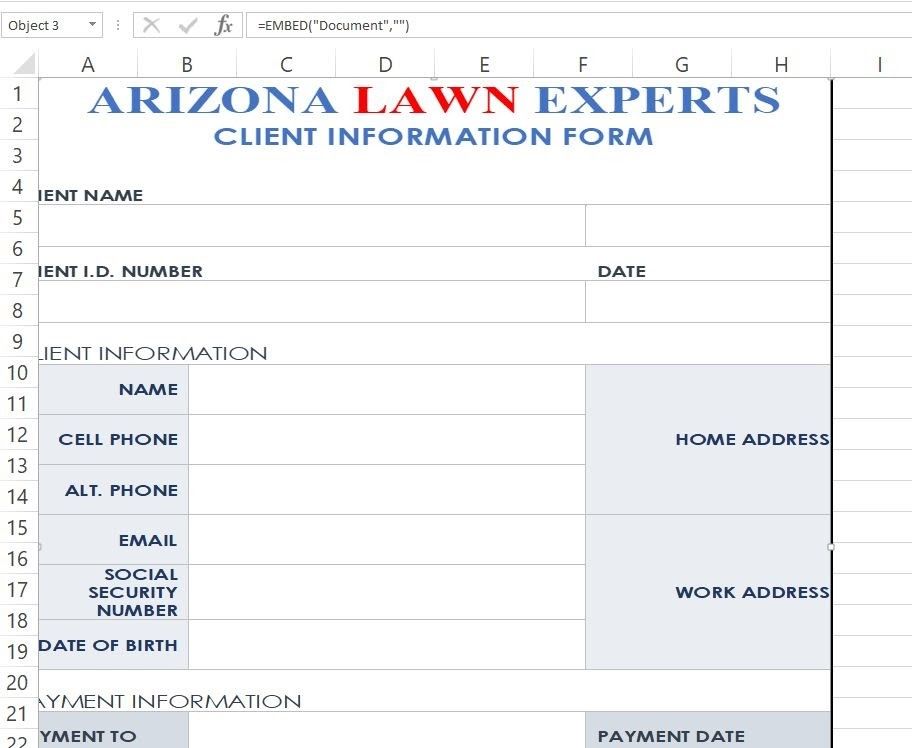
- Your cell text box should now display =EMBED («Document») under it, as shown in the picture. This can only be performed if the source Word document editing permissions are enabled.

- Click on the File tab > Save As, and rename your Excel file instead of overwriting your previous unmerged document.
- Click on Save again to finish the process.
Method 2: Cell by Cell Data Import
This second method allows you to import your data cell by cell. Here are some steps to guide you through.
- Open the Word document with the intended data for transfer.
- Click on the hatch marks that are on the table.

- Copy the table by pressing Ctrl+C.
- You can then close your word document.
- Open an Excel spreadsheet and click on the first cell grid.
- Paste the data you copied by pressing Ctrl+V. Your data will be pasted as seen in this picture.


If you choose to use this method, please ensure that the Excel table has the same layout as the Word table that has the details.
This means that if your word table has ten columns, your Excel table should have the same.
Method 3: Convert Word to Excel Using CSV Files
Another simple method of converting information from your Word form into your Excel spreadsheet is using a comma-separated values (CSV) file. A CSV file is a delimited text file that uses commas to separate values in a file.
Using this method is simple. Word distinguishes relevant data from other text within your form. This means that your client’s responses can not get mixed up with additional details from the template.
Converting Word to CSV
Before using CSV to transfer data into your Excel spreadsheets, you may need to convert your Word form into the CSV format. To convert your files, you can use either of the following methods.
Option 1: Using Options to Convert Your Word to CSV
You can use the Options tab to convert your form into CSV by following these steps.
- Open your Word form. Make sure it contains all the information you need.
- Select File > Options.
- On the Options panel, select Advanced. You will find this on the left side of the dialogue box, as shown in the picture below.
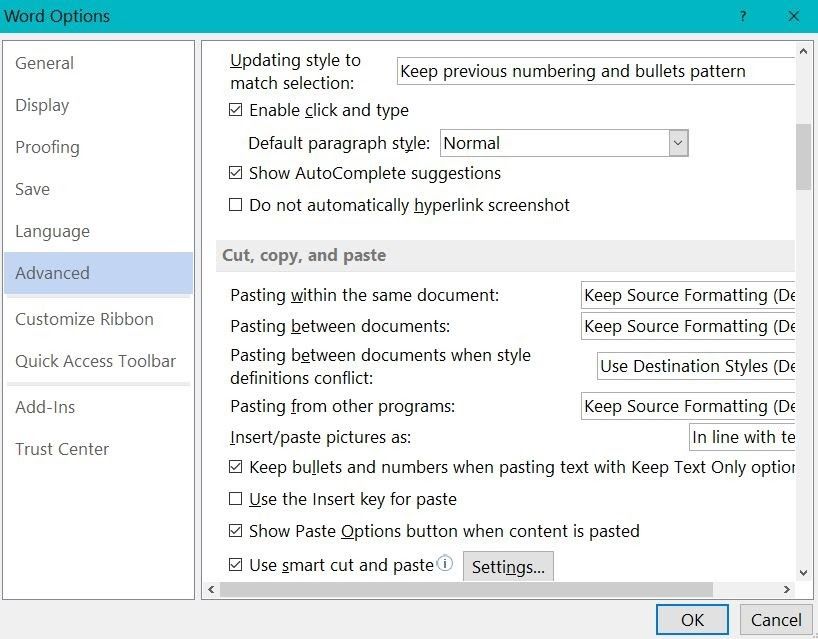
4. Check Save form data as delimited text file.
5. Finally, close the dialogue box by clicking on OK.
You can now either export your data to Excel or save the document as you like.
Option 2: Using «Save As» to Export Your Data to CSV
Alternatively, you can use the Save As option to save your document in CSV format. If this is your ideal method, then here are some steps to guide you through.
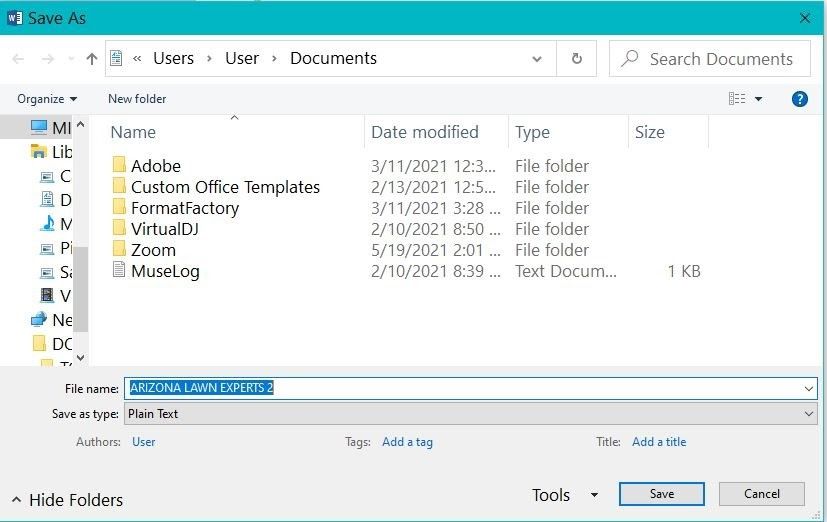
- While still on your Word form, click on the File menu > Save As option.
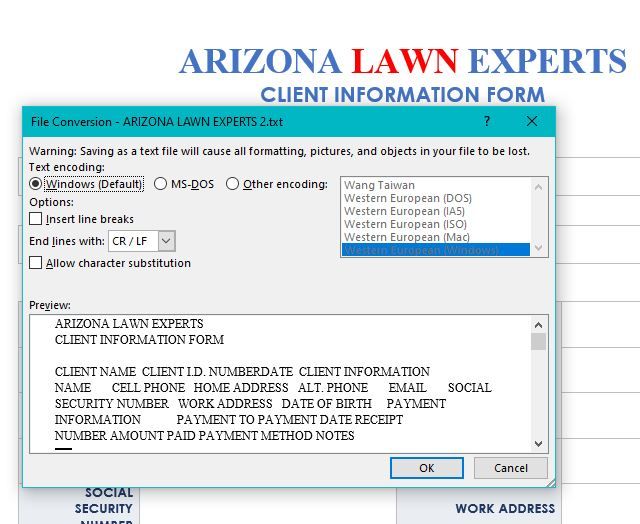
- You will see a dialogue box containing Plain text selected by default, as shown in the picture.

- If you made any changes, you need to rename your file and click Save.
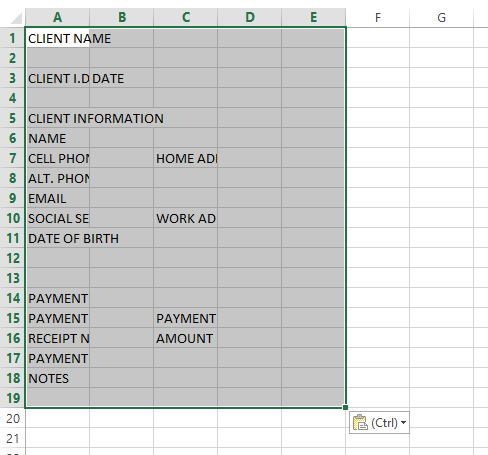
- A preview dialogue box like the one in the screenshot will pop up, displaying the data you intend to export into your CSV format. To export the data, click OK.

By following these steps, Word will extract the data within the form into a .csv file. CSV files are compatible with Excel. They give you the freedom to access them on any version of Excel.
To separate the different fields within the document, Word inserts commas. Excel uses these commas to separate data belonging to various cells.
Option 3: Using Export to Save Data to CSV
If you do not want to use the Save As option, you may want to consider the Export option. Here is how to export data to a CSV file.
- While still on your form, click on File.
- Select the Export option.
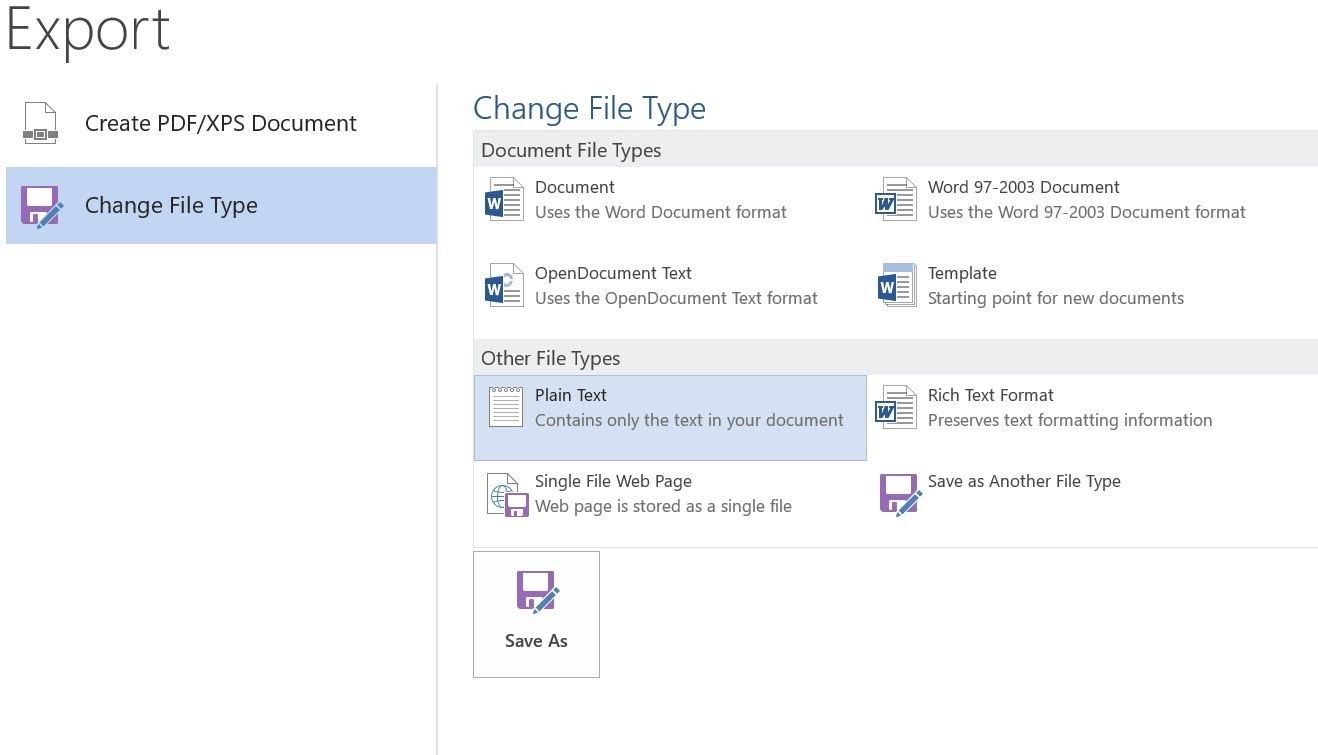
- Click on Change the File Type, then on the File Types, and choose Plain Text (*.txt). It is as simple as it looks in the screenshot.

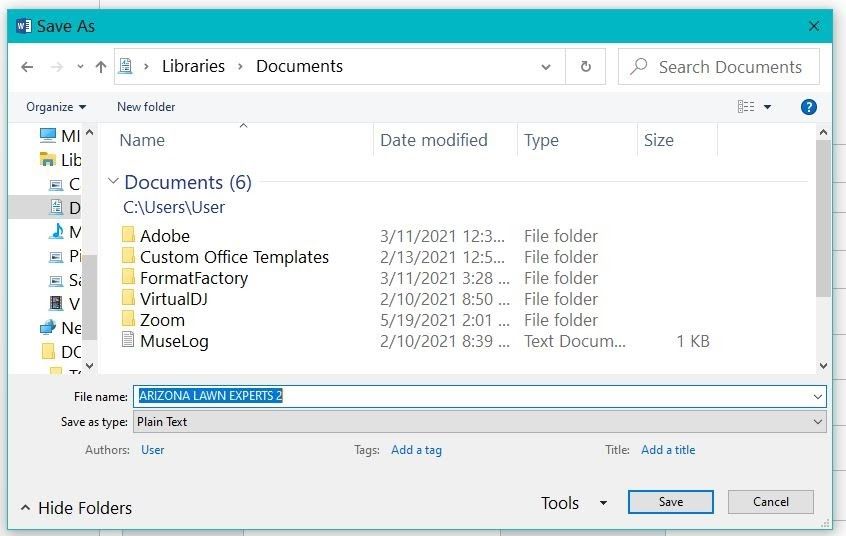
- Click on Save As. By doing this, you will open the Save As dialog box, which will allow you to edit the file’s properties.

- Select the preferred location for your file.
- Name your file as desired and click on Save. This will then export the data.
Importing Form Data Into Excel
Now that you have converted your Word form data to its CSV format, the next step is to import it into your Excel spreadsheet.
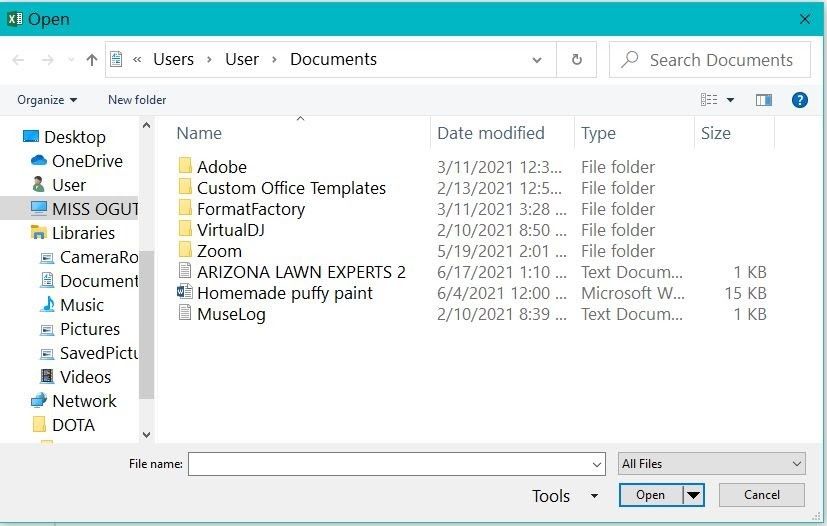
Your file may not be visible on Excel because Excel only displays Excel files by default. To access your CSV file, follow these steps.
- Open up a new Excel spreadsheet.
- Click on File > Open.
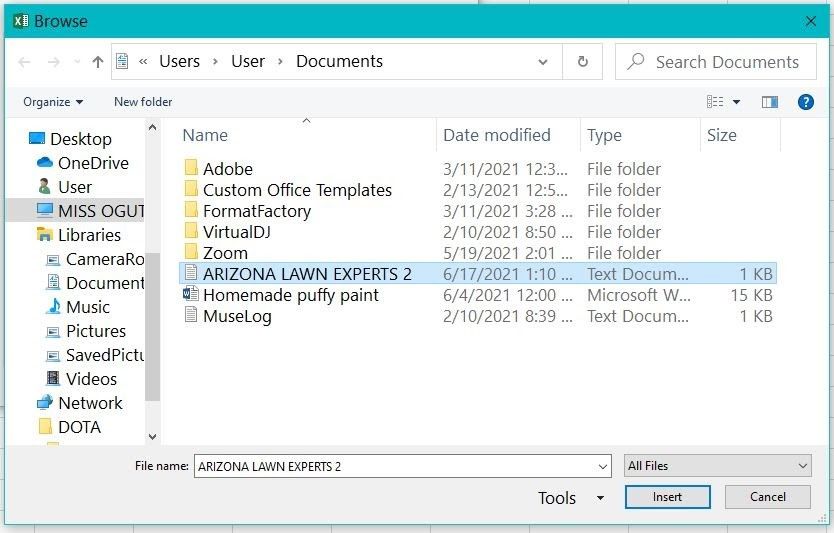
- Choose the Browse icon and select All Files in the types drop-down list.

- Find the location of the file and select it.
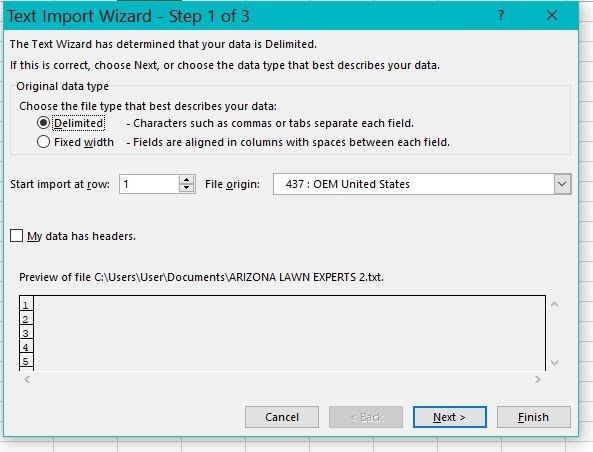
- Click on Open. This will prompt Excel to open the Text Import Wizard, as shown below. Click on Delimited > Next.
Dealing With Many Forms
Sometimes you may need to convert plenty of forms in a single day. Going through this entire process may be strenuous in this case.
The best option is to create code connections to the spreadsheet using ADO when dealing with many forms. ADO (ActiveX Data Object) will automate the transfer process. This way, it becomes easier to transfer data.
Why Use These Methods
Even though learning these new techniques can be intimidating, they will pay off in the long run. You can save a lot of time by using these methods.
They also increase your accuracy when it comes to data entry. This way, the risk of errors becomes slightly lower since data is lifted from one software to another rather than keying it manually.
How to Export Data From a Word Form to Excel
You can easily export Word form data to Excel in just a few simple steps
Updated on August 20, 2021
Microsoft Word doesn’t have an option to directly save form data as an Excel worksheet. However, by going through just a few extra steps, it’s very easy to export data from a Word form into Excel.
Instructions in this article apply to Excel 2019, 2016, 2013, 2010; Excel for Mac, and Excel Online.
Understand Word Forms
A Word form contains fill-in blanks that make it easy for people to fill in important information. Usually, these forms are distributed so that many people can fill them out and return them. Collecting all of the information from those forms and transferring them to an Excel spreadsheet is a tedious manual process. Thankfully, it’s very easy to export Word form data to Excel using comma-delimited files.
Use Options to Select Comma-Delimited Format
It only takes a few adjustments in your Word form document to save the form data as a comma-delimited (CSV) file. This file format separates each form record with commas. Use CSV files to import data into Excel.
Microsoft Word is smart enough to only save the data from the form into the CSV file. The extra text in the document is not added to the CSV file.
With the form document open and filled in with data, select File > Options.
-
Select Advanced in the panel to the left of the Options dialog box.
-
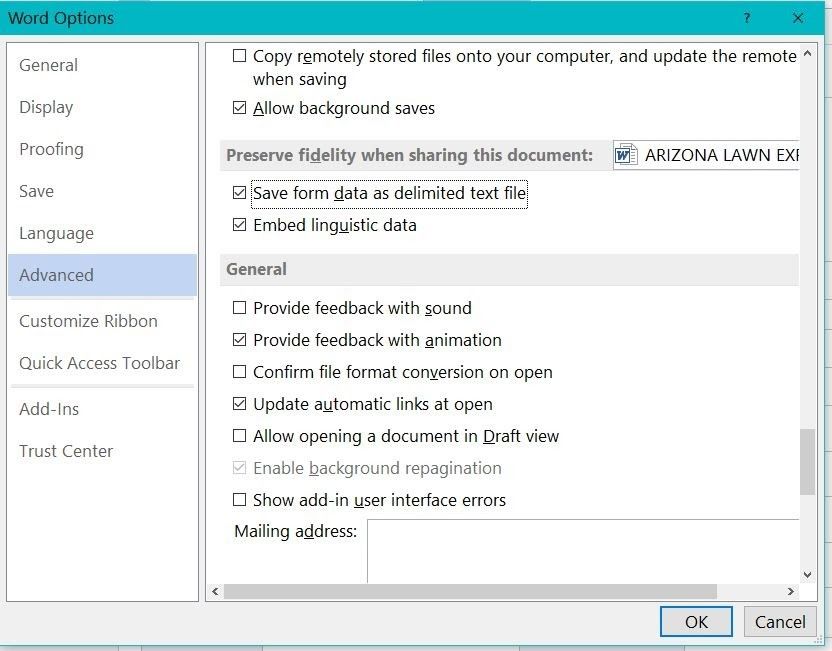
In the Preserve fidelity when sharing this document section, place a check in the box next to Save form data as delimited text file.
-
Press OK to close the Word Options dialog box.
At this point, there are two ways to export the data to Excel. Either save the document or export the data.
Use Save As to Export to CSV
To save the document to CSV format:
-
From the File menu, select Save As. The Save As dialog box opens with the TXT file format already selected.
-
Name the file, and select OK.
-
A dialog box appears with a preview of the data you’re exporting from the form into CSV format.
-
Press OK to export the data.
Word extracts the form data that was typed into the form as a .csv file, which can be opened with Excel. Word inserts commas between the fields. Excel uses the commas to separate the data into specific cells.
Use Export to Save to CSV
To export the data to a CSV file:
-
Select File > Export.
-
Select Change File Type.
-
Under Document File Types, select Plain Text (*.txt).
-
Select Save As to open the Save As dialog box.
-
Choose the location where you want to save the file, enter a filename, and select Save to export the data.
Import Form Data Into Excel
After the Word form data is exported to CSV format, the data is ready to import into Microsoft Excel.
If you open the file using Excel, you won’t see the file in the folder where you saved it because Excel defaults to showing you only Excel files.
Open the CSV file following these steps:
-
Open a blank Excel document.
-
Select File > Open.
-
Select Browse.
-
In the file type drop-down list, choose All Files (*.*).
-
Browse to the folder where the exported Word form data is located, and select the CSV text file.
-
Select Open.
-
Excel opens the Text Import Wizard. Choose Delimited, and select Next.
-
Deselect the Tab checkbox, and select the Comma check box. Then, select Next.
-
Select Finish.
The data from your Word form appears in your Excel sheet.
Import Form Data Into Existing Spreadsheet With Excel 2019 and 2016
If you want to bring data from new Microsoft forms into the same spreadsheet, follow these steps:
-
Open your saved Excel file.
-
Create a new sheet by pressing the + symbol at the bottom of the existing sheet.
-
Select cell A1.
-
In the Data menu, select Get Data > From File, > From Text/CSV (In Microsoft 2010 or 2013, select From Text).
-
Select the new text file with the form data, and select Import.
-
In the Wizard, select Load > Load To.
-
Under Where do you want to put the data, select Existing worksheet, and make sure A1 is selected.
-
Press OK.
Once the form data is imported, add the new Word form data to your primary worksheet:
-
In Word, highlight the entire row with just the data.
-
Right-click, and select Copy.
-
In Excel, select your main worksheet.
-
Highlight the cell just below the last record in the sheet.
-
Right-click, and select Paste.
Import Form Data Into Existing Spreadsheet With Excel 2013 and 2010
To bring data from new Microsoft forms into Excel 2013 or 2010, follow these steps:
-
Open your saved Excel file.
-
Select the cell in the first column just below your existing data.
-
Select Data > From Text.
-
Select the new text file with the form data, and select Import.
-
In the Wizard, choose Delimited, and press Next.
-
Deselect the Tab checkbox, select the Comma check box, and select Next.
-
Press Finish.
-
Under Where do you want to put the data, select Existing worksheet. Make sure the cell where you want the new row to go is selected.
-
Press OK.
This adds the new Word form data to the very next row in your primary worksheet.
Thanks for letting us know!
Get the Latest Tech News Delivered Every Day
Subscribe