
If you want to change the outline of a photo to make it a shape (like a circle or rounded rectangle), use the cropping tool on the ribbon  with the Crop to Shape option.
You can crop to a shape in Word, PowerPoint, Outlook, or Excel.
Crop an image to a shape, such as a circle
You can quickly change the shape of a picture by cropping it to a specific shape. The picture is automatically trimmed to fill the geometry of the selected shape while maintaining its proportions.
(If you want to crop the same picture to more than one shape, make copies of the picture and crop each to the desired shape individually.)

-
Use Insert > Picture to add the image to a Microsoft 365 file (such as a Word document, PowerPoint presentation, or an Outlook email message).
-
Click the picture.
You may crop multiple pictures at once, but you must crop them to the same shape. (But in Word, this is difficult, because you can’t multi-select pictures that have the default In Line with Text layout option.)
-
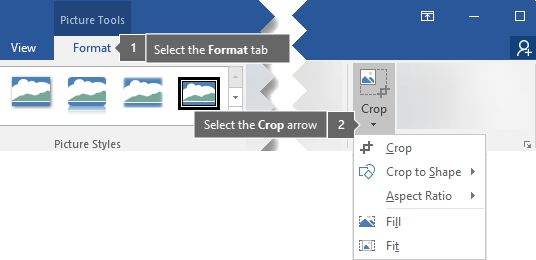
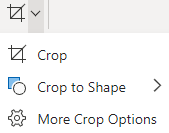
Click Picture Tools > Format, and in the Size group, click the arrow under Crop.

-
From the menu that appears, select Crop to Shape, and then click the shape you want to crop to.
The shape is immediately applied to the image.
-
Next, use Crop > Fit or Crop > Fill to change how much of the picture fits within the shape you’ve applied:
-
Fill Fills the entire shape with the picture. Some outer edges of the picture may be cropped away. There won’t be any empty space at the margins of the shape.
-
Fit Makes the entire picture fit within the shape while maintaining the picture’s original aspect ratio. There may be empty space at the margins of the shape.
(Black crop handles appear on the edges and corners of the picture when you select the Fit or Fill option.)
-
-
You can adjust the position of the picture within the frame by selecting the picture and dragging it where you want. For example, this can help you center the most important part of the picture within the shape you’ve applied to the picture.
-
Crop the margins of the image by dragging a black crop handle as follows:
Description
Action
Crop one side
Drag inward on the side cropping handle
Crop two adjacent sides at the same time
Drag inward on the corner cropping handle
Crop equally on two parallel sides at once
Press and hold Ctrl while dragging inward on the side cropping handle
-
Click the Crop button again when you are done.
Start with a shape and add an image to it
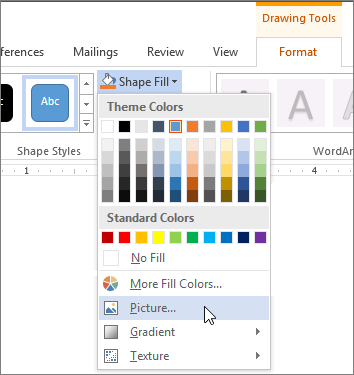
You can add a picture as fill for a shape and then edit or crop the shape.
Add a picture to a shape
-
Add a shape to your document (see Add shapes for instructions) and click the shape to select it.
-
Click Drawing Tools > Format, and in the Shape Styles group, click Shape Fill > Picture.
-
Select the type of picture you want (such as From a File or Online Pictures) and then navigate to the picture you want and insert it.
Resize the shape
To change the filled shape’s dimensions while maintaining its basic format, select it and drag any of the sizing handles.
Choose how the picture fits in the shape
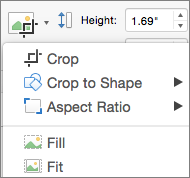
If your picture is skewed, cut off, or doesn’t fill the shape the way you want, use the Fit and Fill tools on the Crop menu for fine tuning:
-
Click a shape created using Shape Fill > Picture.
-
Click Picture Tools > Format, and in the Size group, click the arrow under Crop. A menu appears showing cropping options.
-
Choose Fit if you want as much of the picture as possible to fit within the shape; the original picture aspect ratio will be maintained, but you may have empty space inside your shape.
-
Choose Fill to have the shape fit within the bounds of the picture, cropping away everything outside the shape. You can drag the picture to change what part of it shows within the shape.
-
-
If you want, you can adjust the crop area by using the cropping handles, as described under Crop a picture.
-
When you’re finished, press Esc or click anywhere outside the picture within the document.
Use edit points to edit or crop the shape
Although cropping tools are not available for shapes, you can use the Edit Points tool to customize a shape.
-
Select the shape that you want to edit.
-
Click Shape Format, and in the Insert Shapes group, select Edit Shape
> Edit Points. -
Drag the shape’s vertex points (which appear as black dots around the shape’s perimeter) until the shape looks the way you want.
-
To delete a vertex point, hold Ctrl and click it. To add a vertex point, hold Ctrl while clicking anywhere on the perimeter of the shape that does not already have a vertex point.
 > Edit Points.
See Also
Crop a picture in Microsoft 365
Cut out or cover part of a picture
If you want to change the outline of a photo to make it a shape (like a circle or rounded rectangle), use the cropping tool on the ribbon .
You can crop to a shape in Word, PowerPoint, or Excel.
Crop to a specific shape
Quickly change the shape of a picture by cropping it to a specific shape. The picture is automatically trimmed to fill the geometry of the selected shape while maintaining its proportions.
If you want to crop the same picture to more than one shape, make copies of the picture and crop each to the desired shape individually.
-
Use Insert > Picture to add the image to an Office file (such as a Word document, PowerPoint presentation, or an Excel workbook).
-
In your file, select the picture that you want to crop.
-
On the Picture Format tab, click the arrow next to Crop.
(If you don’t see the Picture Format tab, make sure that you’ve selected a picture (not a shape).)
-
Point to Crop to Shape and then click the shape you want to crop to.
The shape is immediately applied to the image.
-
If you want to adjust the shape, click the Crop button again on the ribbon.
Black crop handles appear on the edges and corners of the picture.
-
Crop the image by dragging any crop handle inward. If you drag one of the corner handles, it crops two adjacent sides at the same time.

Crop to fit or fill a shape
After you have added a picture to a shape, you can choose how the picture fits in the shape by using the Fit and Fill tools for fine tuning.
-
In your file, select the picture that you want within the shape.
-
On the Picture Format tab, click the arrow next to Crop.
If you don’t see the Picture Format tab, make sure that you’ve selected a picture (and not a shape).
-
Click Fill or Fit, and then click outside the picture.
Option
Description
Fill
Removes (or «crops») part of the picture, but still fills the entire shape.
Fit
Makes the entire picture fit within the shape. The original picture aspect ratio is maintained, but you may have empty space inside your shape.
Which app are you using?
Word | PowerPoint
Word: Fit a picture inside a shape
Word for the web doesn’t have the «crop-to-shape» feature that the desktop app has, but you can still use quick picture-styles to apply some basic shapes to a picture, as described here:
-
Insert the image in your document. (Select Insert > Picture and then navigate to the picture you want to use.)
-
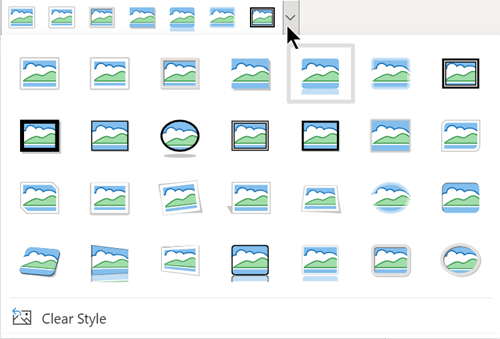
With the image selected on the canvas, select the Picture tab on the ribbon, and then open the Picture Styles gallery:
-
Select a shape to apply it to your picture.
-
Once the shape is applied, you can resize it as needed.
PowerPoint: Crop a picture to a shape
-
Select a picture on a slide to crop to a shape.
-
On the Picture tab, on the right end, select the arrow next to Crop.
Tip: If you don’t see the Picture tab, be sure to select a picture.
-
Select Crop to Shape, then choose a shape to apply to the border of the picture.
-
If you want to trim the margins of the picture, select Crop again, then drag a handle
inward as needed. Drag other handles as needed. -
To save your changes, select the Crop button again, or press Esc.
 inward as needed. Drag other handles as needed.
Crop a picture
- Select the picture you want to crop.
- On the Ribbon, select the Picture tab.
- Select the downward pointing arrow next to the Crop option.
- With your mouse, point at a crop handle, then click and drag inward to trim the margin of the image.
Contents
- 1 How do you freehand crop an image in Word?
- 2 How do I cut a picture on my computer?
- 3 How do I crop a custom image?
- 4 Can you cut a picture in half on word?
- 5 How do you crop an irregular shape?
- 6 How do you crop a picture in Windows 10?
- 7 How do I crop a picture in Word 2010?
- 8 Which allows a user to edit a picture in Word?
- 9 How do you crop an object out of a picture?
- 10 Can you freehand crop in PowerPoint?
- 11 How do I split a picture into prints?
- 12 How do you split a picture in Word?
- 13 How do I split a JPEG in half?
- 14 How do I freehand crop an image in Windows?
- 15 How do I edit around a picture?
- 16 How do you crop a screenshot in Word?
- 17 How do I crop a picture in Word 2016?
- 18 How do I edit a picture in Word 2010?
- 19 Can you edit a picture on Word?
- 20 How do I edit a JPEG in Word?
How do you freehand crop an image in Word?
This is one way to do it:
- Draw the shape.
- Right-click (or Control-click) on it and select Format Shape.
- Choose Fill > Picture or Text and click on Picture.
- Insert a picture, then select Format Picture in the Ribbon.
- Choose Crop > Crop to Fit.
How do I cut a picture on my computer?
Try it!
- Select a picture.
- Select the Picture Tools > Format tab and select Crop.
- There are different ways to crop your picture: Drag a cropping handle to crop it from the side, top, or bottom. Press Shift to crop the entire photo down to the size you want.
- Press Esc to finish.
How do I crop a custom image?
If you want to change the outline of a picture and make it a shape (like a circle or a star), use the cropping tools on the PICTURE TOOLS FORMAT tab. Select the picture (or pictures) that you want to crop. On the PICTURE TOOLS FORMAT tab, click Crop > Crop to Shape, and then pick the shape you want.
Can you cut a picture in half on word?
Right click the image on the first page and select “Crop.” Watching the ruler, drag the top right corner to the halfway mark on the page so only the left half is visible.You’ll notice there’s a round handle at the top of the image’s midpoint, which you can use to crop the image by exactly half.
How do you crop an irregular shape?
How to Crop an Image to an Irregular Shape
- Open the image file in your image editor.
- Double-click on the background layer in the Layers Palette and rename the layer.
- Use the Lasso Tool to outline the irregular shape that you wish to crop.
- Open the Image menu and select the “Crop” option.
How do you crop a picture in Windows 10?
How to crop image using Photos on Windows 10
- Open Start.
- Search for Photos and click the top result to open the app.
- Click on the picture.
- Click the Crop button from the top-center toolbar.
- Use the pins in corners to select the area you want to crop.
- Click and drag the image to center it in the cropping area.
How do I crop a picture in Word 2010?
To crop an image:
- Select an image. The Format tab will appear.
- Select the Format tab.
- Click the Crop command. Black cropping handles appear. The black cropping handles.
- Click and drag a handle to crop an image.
- Click the Crop command to deselect the crop tool.
Which allows a user to edit a picture in Word?
Follow the steps as under to make corrections to the picture. Click the picture to reveal the “Format” tab. Press the “Corrections” option to reveal the dropdown. This will reveal to you how to edit image text in word.
How do you crop an object out of a picture?
Click the Select tool in the toolbar at the top of the program window.
- Select the portion of the image you want to crop using the Select tool.
- Once selected, right-click with the mouse anywhere in the image selection and select Crop.
Can you freehand crop in PowerPoint?
How to crop an image in PowerPoint 2010 or earlier: Custom shape. 1. Head to the Autoshapes menu and select Freeform. Draw a freeform shape over your image, tracing out the part of the image you want to keep.
How do I split a picture into prints?
Right click on the slice icon in the top left corner of the image. Choose Divide Slice and define into how many slices do you want to divide your image, or set the size of each sub-slice. Hit ok. File > Save for web > Save: Make sure “Save all slices” is selected in the dialog.
How do you split a picture in Word?
Follow these steps:
- First and foremost, press Ctrl+C to copy the image (we will need to paste the image again and again)
- Always select the image first.
- Next, press Ctrl and select one parallelogram.
- Go the Format tab under Drawing Tools.
- Locate the Merge Shapes command.
- Click the Intersect option from the drop-down menu.
How do I split a JPEG in half?
How to split JPG
- Open your browser in JPG free application web site and go to Splitter tool app.
- Click inside the file drop area to upload a JPG file or drag & drop a JPG file.
- Click on “SPLIT” button, file will be automatically uploaded to split.
How do I freehand crop an image in Windows?
Step 1: Right-click on the image and select Open With on the pop-up menu, followed by Paint. Step 2: Click the Select button and drag the tool to encompass the portion of the image you wish to crop. Step 3: Click the Crop button directly right of Select.
How do I edit around a picture?
- Open the photo you want to edit.
- Tap Edit. Crop. To crop the photo to different aspect ratios, like a square, tap Aspect ratio . To change the photo’s perspective, tap Transform . Drag the dots to the edges of your desired photo or tap Auto.
- To save a copy of the photo with your edits, at the bottom right, tap Save.
How do you crop a screenshot in Word?
Click the picture, then click the Picture Format tab on the toolbar ribbon. On the Picture Format tab, select Crop. Black crop handles appear on the edges and corners of the picture. Crop the image by dragging any crop handle inward.
How do I crop a picture in Word 2016?
To crop an image:
- Select the image you want to crop. The Format tab will appear.
- From the Format tab, click the Crop command.
- Cropping handles will appear on the sides and corners of the image. Click and drag any handle to crop the image.
- To confirm, click the Crop command again. The image will be cropped.
How do I edit a picture in Word 2010?
How to Edit an Image in a Word 2010 Document
- Click to select the image. The image grows handles.
- Hold down the Shift key.
- Use the mouse to drag one of the image’s four corner handles inward or outward to make the image proportionally smaller or larger.
- Release the Shift key.
Can you edit a picture on Word?
Microsoft Office Picture Manager isn’t included in the new Office but you can use Word to edit photos. Word has many built-in photo editing features, so you might not need a separate program.In Word, you can choose color variations, crop, compress at different levels, and apply some special effects.
How do I edit a JPEG in Word?
While there is no way to turn a JPEG image directly into a Word document that you can edit, you can use a free Optical Character Recognition (OCR) service to scan the JPEG into a Word document file, or you can convert the JPEG file into a PDF and then use Word to convert the PDF into an editable Word document.
Things You Should Know
- In your Word document, select your picture and click Crop.
- Choose Crop for a standard crop, Crop to Shape for an irregular crop, and Aspect Ratio to choose a predetermined size.
- Select the portion of the image you want to keep. Click the «Crop» icon and save.
-
1
Open your Microsoft Word document. Double-click the document that contains the picture you want to crop. This will open the document in Microsoft Word.
-
2
Select a picture. Scroll through your document until you find the picture you want to crop, then click once the picture to select it.
Advertisement
-
3
Click Crop. It’s in the «Size» section on the right side of the Format toolbar. A drop-down menu will appear.
- On Mac, it’s in the toolbar at the top of the «Picture Format» tab.
-
4
Click Crop. This is in the drop-down menu. Clicking it prompts a set of black bars to appear on the edges and in the corners of the selected picture.
-
5
Adjust the picture’s crop. Click and drag inward any of the black bars on the edges or in the corners of the picture to do so.
-
6
Click the «Crop» icon. It’s the box with a line through it above the Crop drop-down icon. This will remove any section of the picture that falls outside of the black bars’ limits.
-
7
Save your changes. Press Ctrl+S (Windows) or ⌘ Command+S (Mac) to do so.


Advertisement
-
1
Open your Microsoft Word document. Double-click the document that contains the picture you want to crop. This will open the document in Microsoft Word.
-
2
Select a picture. Scroll through your document until you find the picture you want to crop, then click once the picture to select it.
-
3
Click the down arrow next to the «Crop» button. It’s in the «Size» section on the right side of the Format toolbar. A drop-down menu will appear.
- On Mac, it’s in the toolbar at the top of the «Picture Format» tab.
-
4
Select Crop to Shape. This is in the drop-down menu. Doing so prompts a pop-out menu with shapes.
-
5
Select a shape. Click the shape in which you want your picture to appear. This will immediately apply the shape to the picture.
-
6
Adjust the shape’s size. Click and drag inward or outward any of the circular points around the picture’s outline to decrease or increase the picture’s size.
-
7
Save your changes. Press Ctrl+S (Windows) or ⌘ Command+S (Mac) to do so.


Advertisement
-
1
Open your Microsoft Word document. Double-click the document that contains the picture you want to crop. This will open the document in Microsoft Word.
-
2
Select a picture. Scroll through your document until you find the picture you want to crop, then click once the picture to select it.
-
3
Click the down arrow next to the «Crop» button. It’s in the «Size» section on the right side of the Format toolbar. A drop-down menu will appear.
- On Mac, it’s in the toolbar at the top of the «Picture Format» tab.
-
4
Select Aspect Ratio. This option is in the drop-down menu. Doing so prompts a pop-out menu to appear.
-
5
Select a ratio. In the pop-out menu, click one of the aspect ratios you’d like to use to crop your picture.
-
6
Adjust the crop selection. Click and drag your picture around until you’ve centered the section you want to keep in the aspect ratio’s square or rectangle.
-
7
Click the «Crop» icon. It’s the box with a line through it above the Crop drop-down icon. Doing so will crop your picture according to your selected aspect ratio.
-
8
Save your changes. Press Ctrl+S (Windows) or ⌘ Command+S (Mac) to do so.


Advertisement
Add New Question
-
Question
How do I make a cropped picture to fit it into another?

Double click or right click the image (depending on what computer/mouse you have), and click on the little icon that looks like a bold triangle. You can also go to the «help» tab and type in «crop» for more hands-on help.
-
Question
What’s the advanced way of cropping a picture in Word?
If you have a Windows configuration on your laptop, just press the Windows button and then the shift button and then the S button. Do this while on the screen you want to screenshot and then drag your cursor to screenshot the section you want. Then simply press CTRL + V (PASTE). But make sure to set the pasted picture to an image format.
Ask a Question
200 characters left
Include your email address to get a message when this question is answered.
Submit
Advertisement
-
Once you crop the photo, it is possible to recover it through various apps and programs.
Thanks for submitting a tip for review!
Advertisement
About This Article
Thanks to all authors for creating a page that has been read 208,053 times.
Is this article up to date?
Содержание
- Обрезаем изображение
- Обрезаем изображение для заполнения или размещения в фигуре
- Удаляем обрезанные области изображения
- Изменяем размер изображения без его обрезки
- Вопросы и ответы

Как вам наверняка известно, работа в программе MS Word не ограничивается одним только набором и редактированием текста. Используя встроенные средства этого офисного продукта, можно создавать таблицы, диаграммы, блок-схемы и многое другое.
Урок: Как создать схему в Ворде
Помимо этого, в Word также можно добавлять графические файлы, изменять их и редактировать, внедрять в документ, совмещать с текстом и делать многое другое. О многом мы уже рассказывали, а непосредственно в данной статье мы рассмотрим еще одну довольно актуальную тему: как обрезать рисунок в Ворде 2007 — 2016, но, забегая вперед, скажем, что и в MS Word 2003 делается практически так же, за исключением названий некоторых пунктов. Визуально же все будет понятно.
Урок: Как сгруппировать фигуры в Ворде
Обрезаем изображение
Мы уже писали о том, как добавить графический файл в текстовый редактор от Microsoft, подробную инструкцию вы можете найти по ссылке ниже. Поэтому логично будет сразу перейти к рассмотрению ключевого вопроса.
Урок: Как вставить изображение в Word
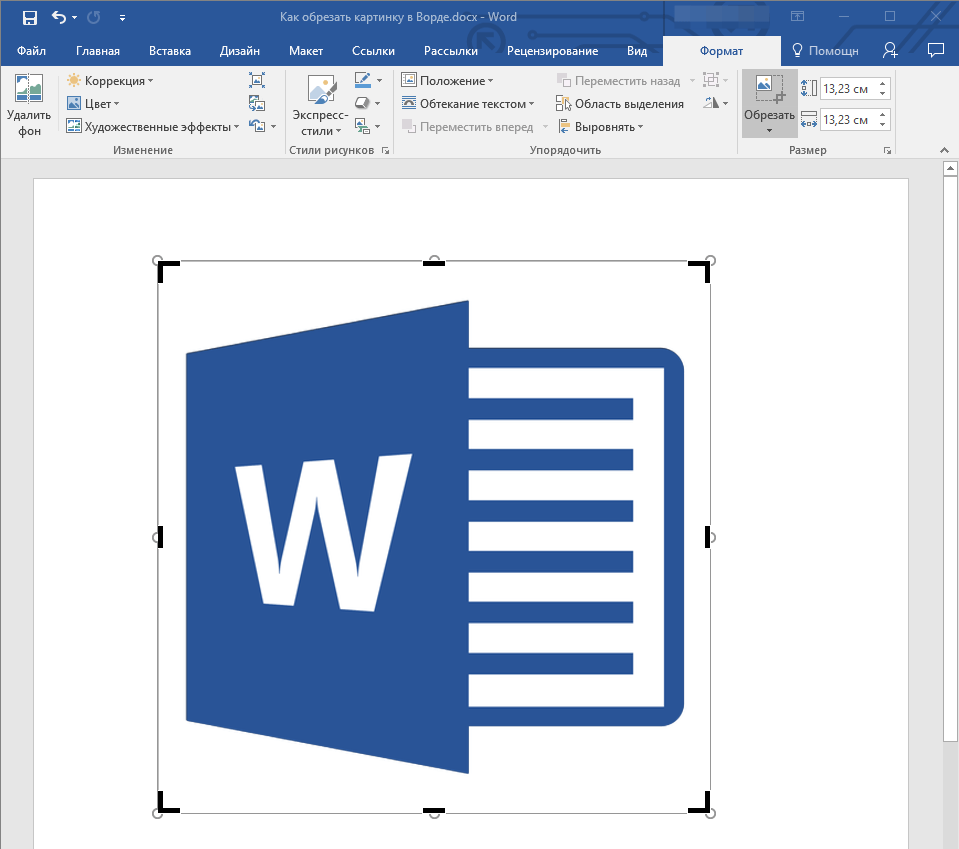
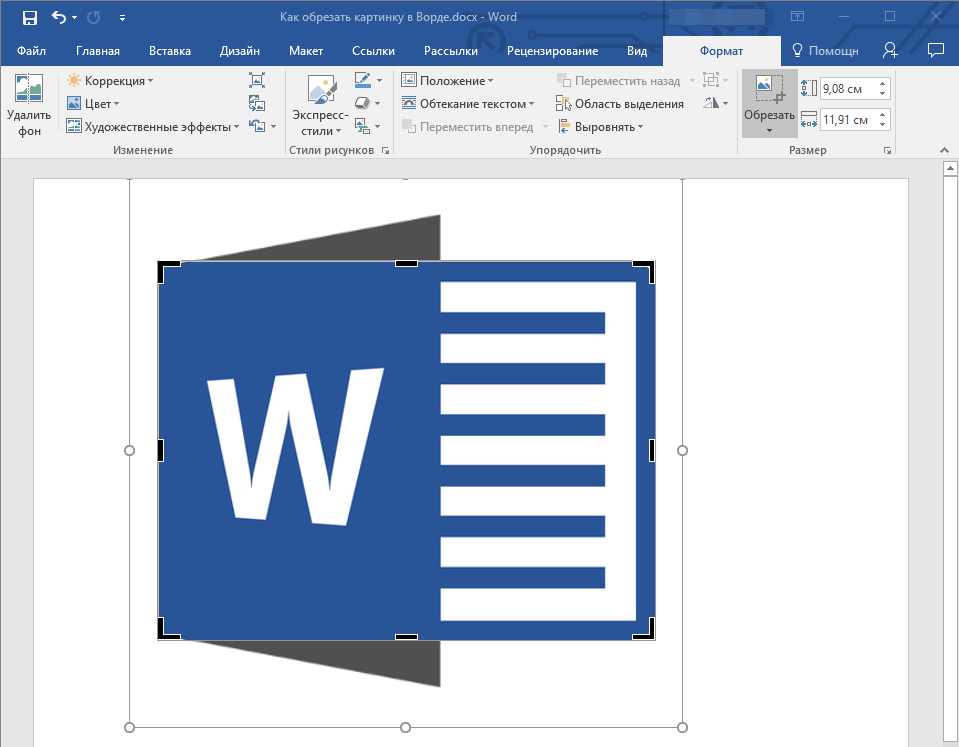
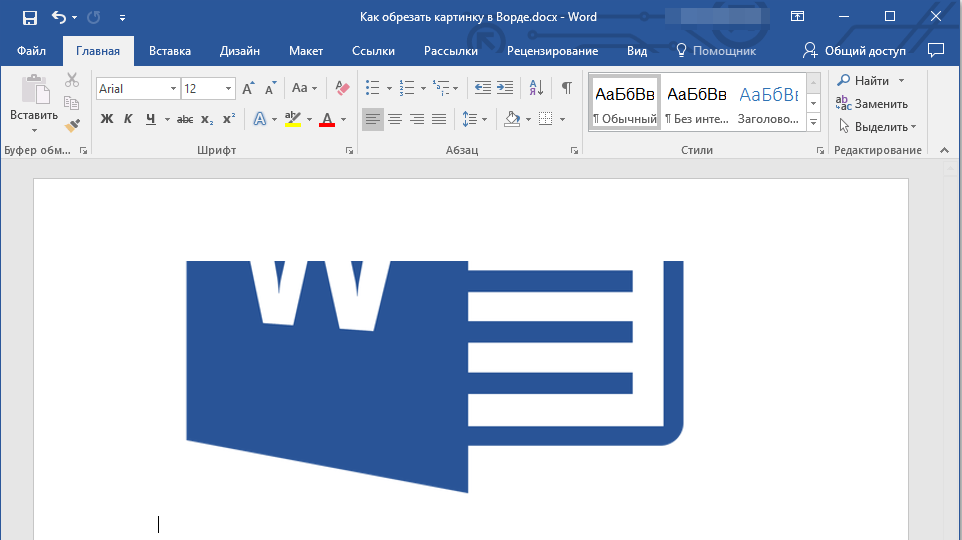
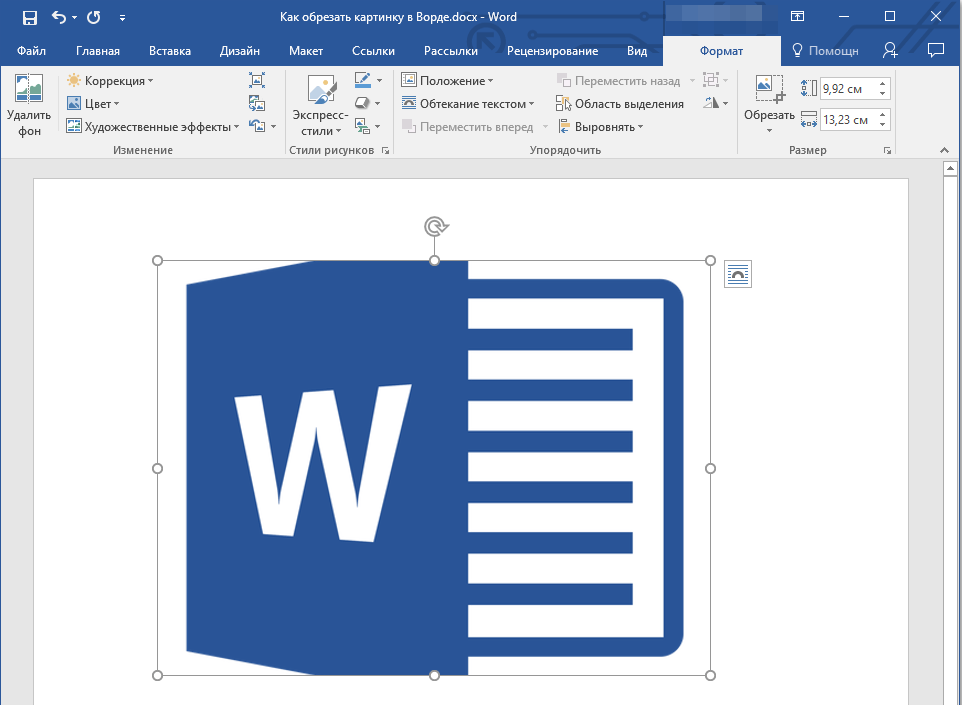
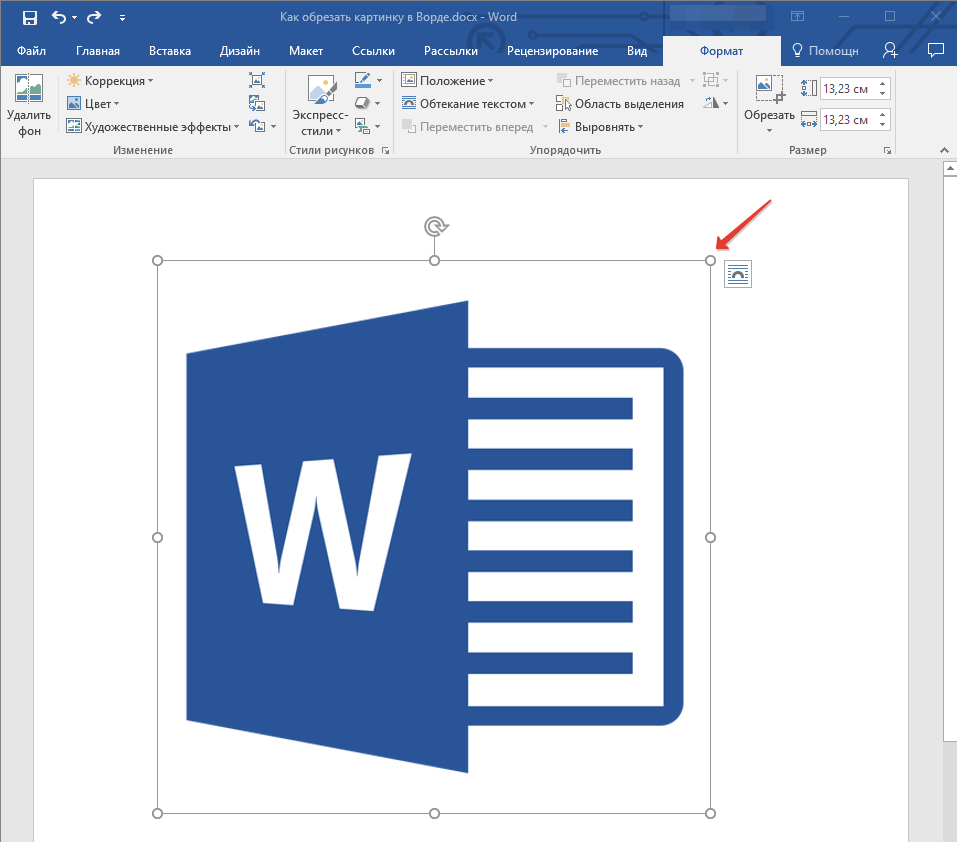
1. Выделите рисунок, который необходимо обрезать — для этого дважды кликните по нему левой кнопкой мышки, чтобы открылась основная вкладка “Работа с рисунками”.
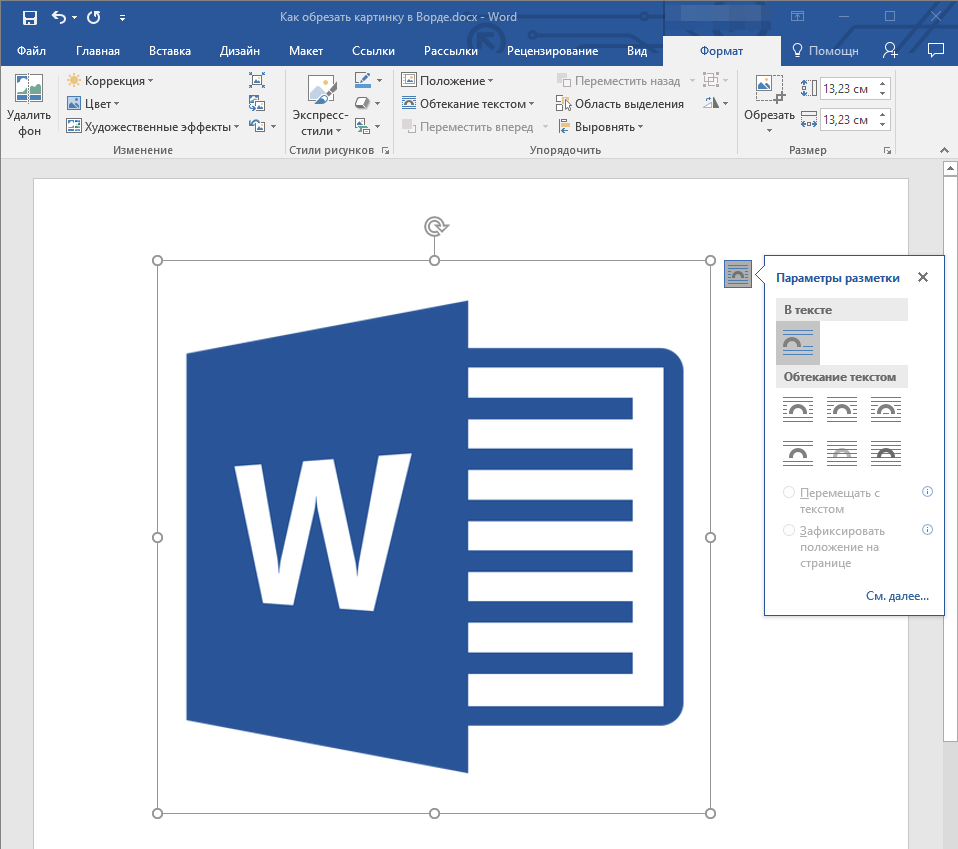
2. В появившейся вкладке “Формат” кликните по элементу “Обрезка” (расположен он в группе “Размер”).
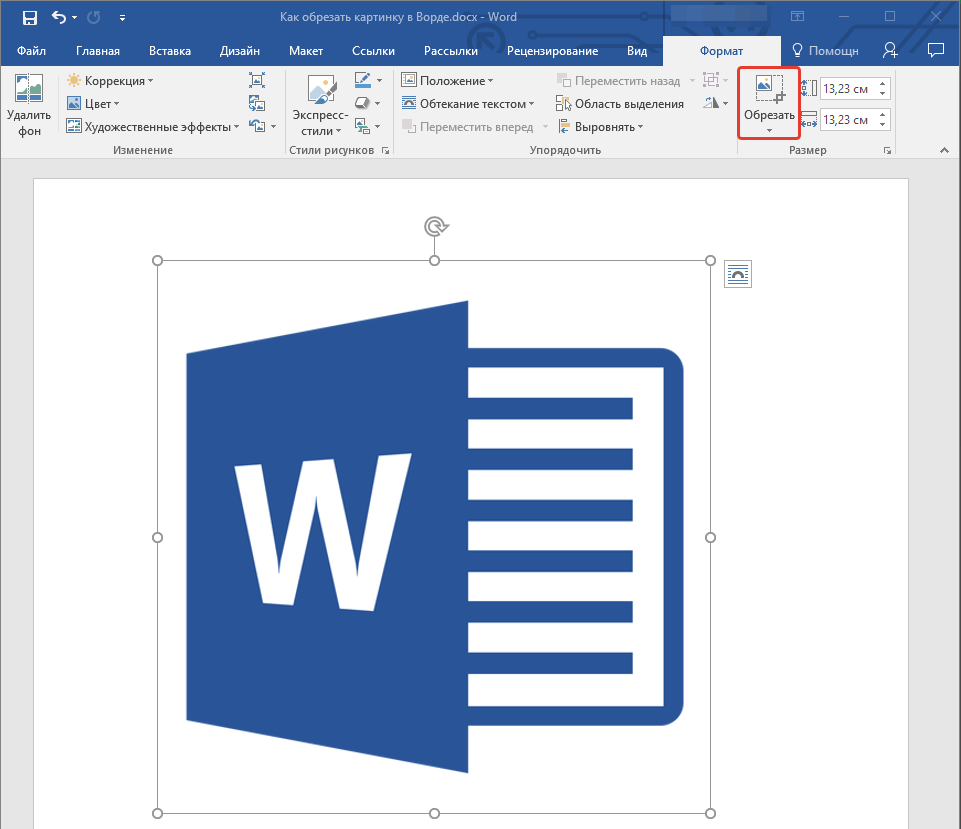
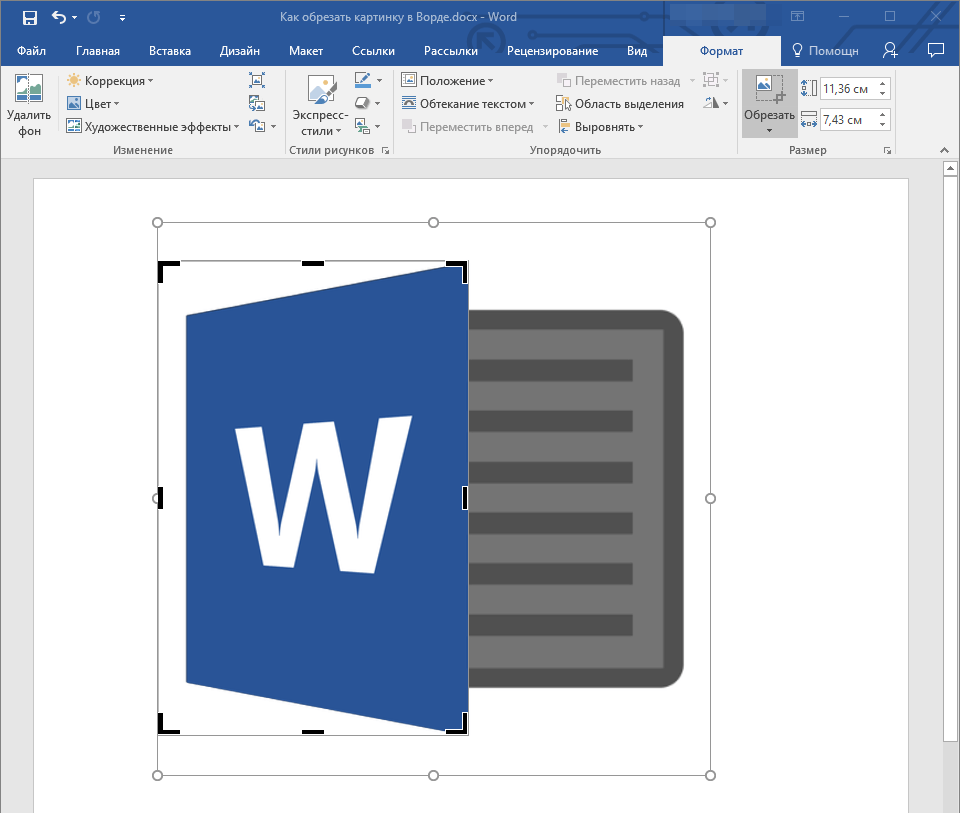
3. Выберите подходящее действие для обрезки:
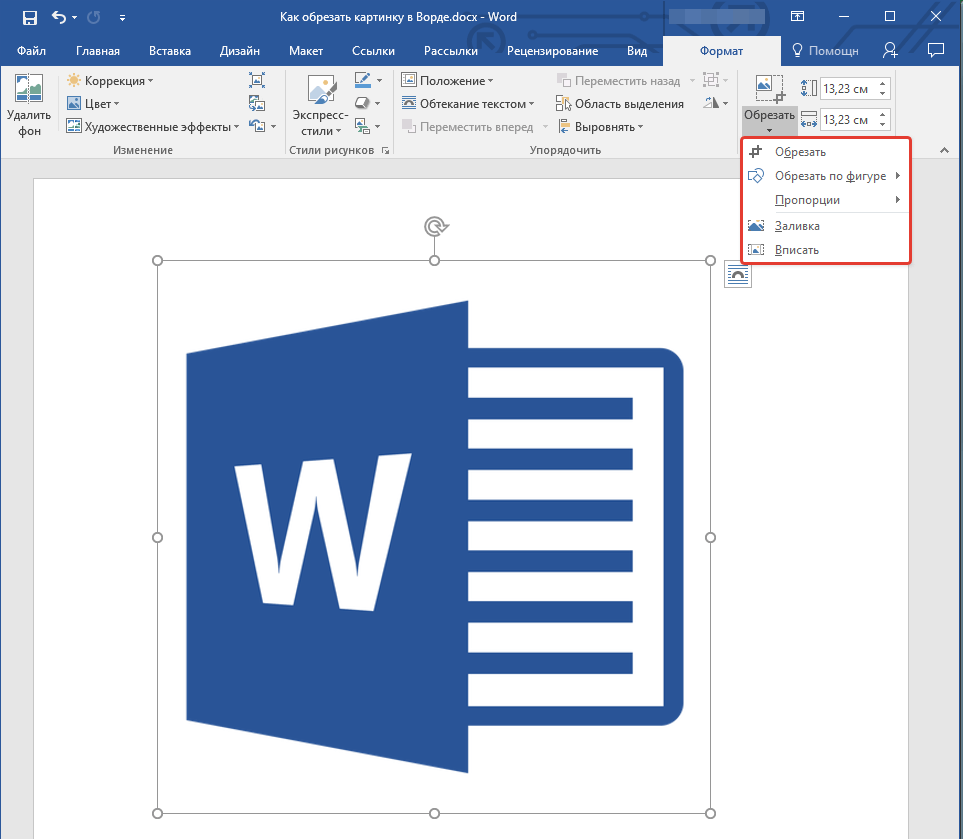
- Совет: Для одинаковой (симметричной) обрезки двух сторон рисунка, перетаскивая центральный маркер обрезки на одной их этих сторон, удерживайте клавишу “CTRL”. Если же вы хотите симметрично обрезать четыре стороны, удерживайте “CTRL” перетаскивая один из угловых маркеров.

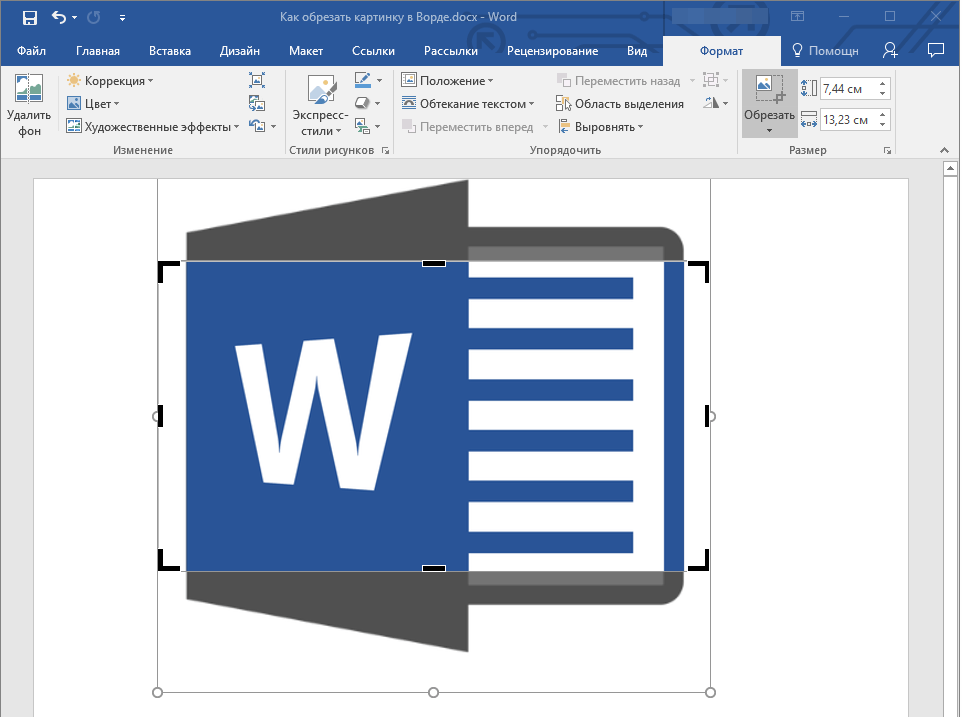
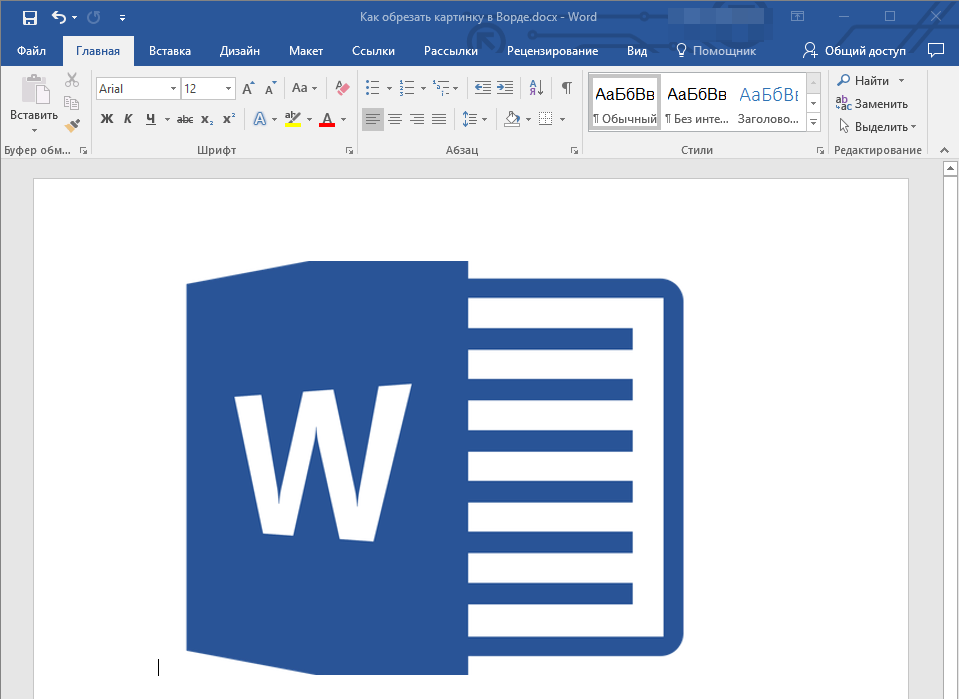
4. Завершив обрезку изображения, нажмите клавишу “ESC”.
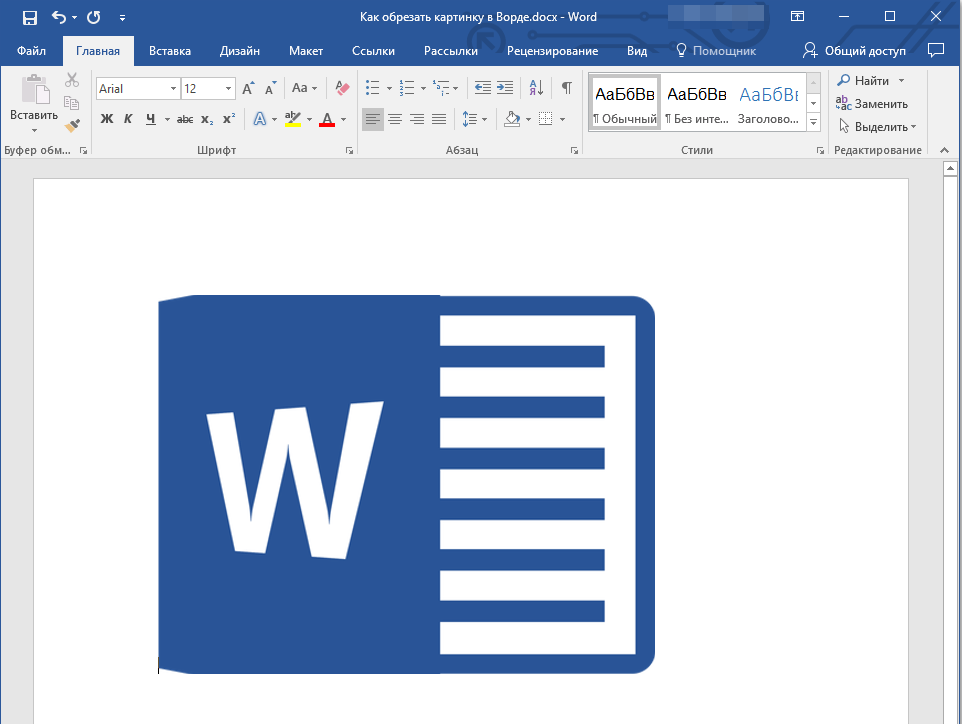
Обрезаем изображение для заполнения или размещения в фигуре
Выполняя обрезку рисунка, вы, что вполне логично, уменьшаете его физический размер (не только объем), а вместе с тем и область рисунка (фигура, внутри которой находится изображение).
Если же вам необходимо оставить размер этой фигуры неизменным, но обрезать само изображение, используйте инструмент “Заливка”, расположенный в меню кнопки “Обрезать” (вкладка “Формат”).
1. Выделите изображение двойным кликом левой кнопки мышки.
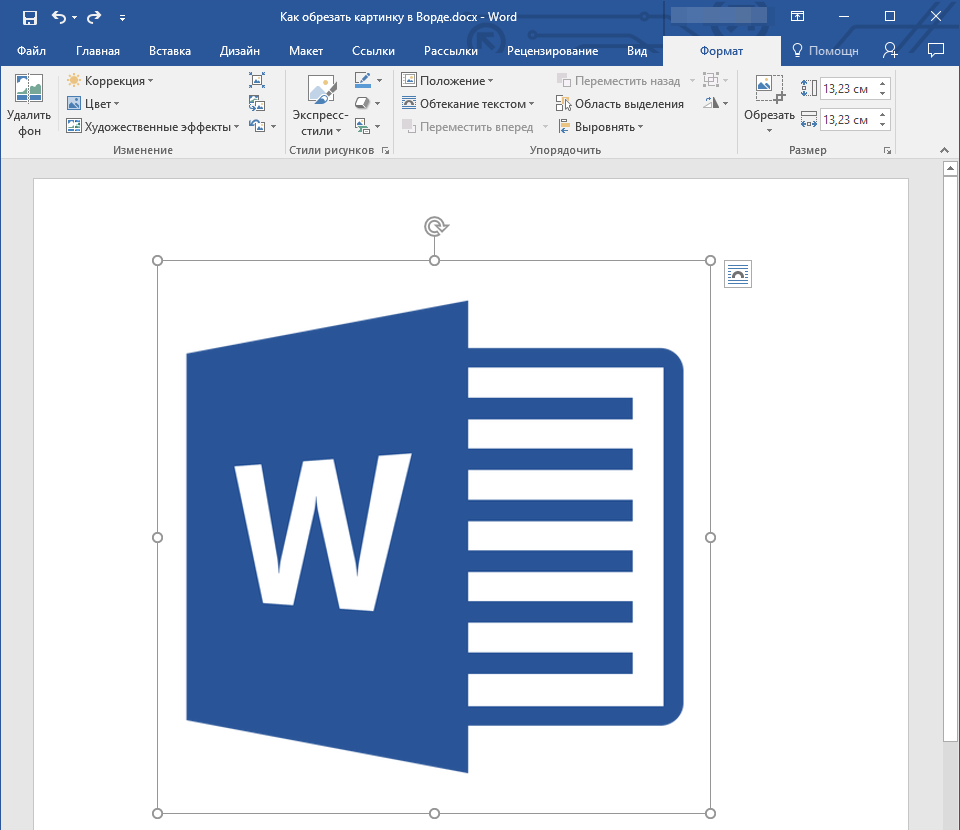
2. Во вкладке “Формат” нажмите на кнопку “Обрезка” и выберите пункт “Заливка”.
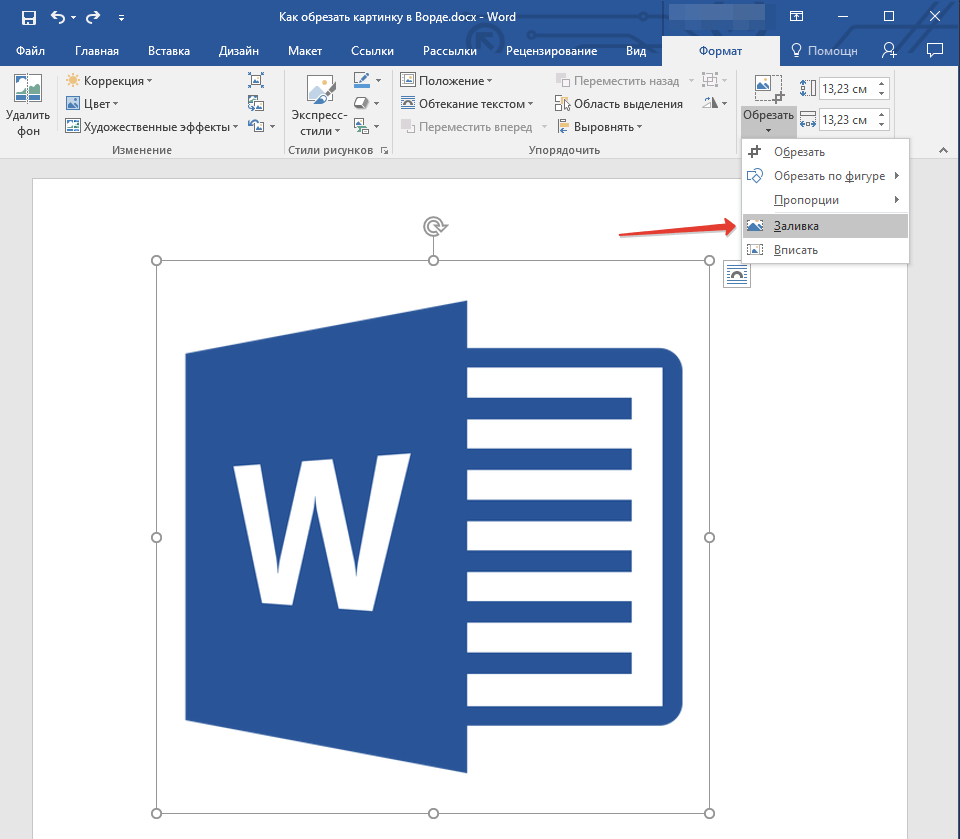
3. Перемещая маркеры, расположенные по краям фигуры, внутри которой находится изображение, измените его размер.
4. Область, в которой находилась фигура (рисунок) останется неизменной, теперь вы можете продолжить работать с ней, например, залить каким-нибудь цветом.
Если же вам необходимо разместить рисунок или его обрезанную часть внутри фигуры, используйте инструмент “Вписать”.
1. Выделите рисунок, дважды кликнув по нему.
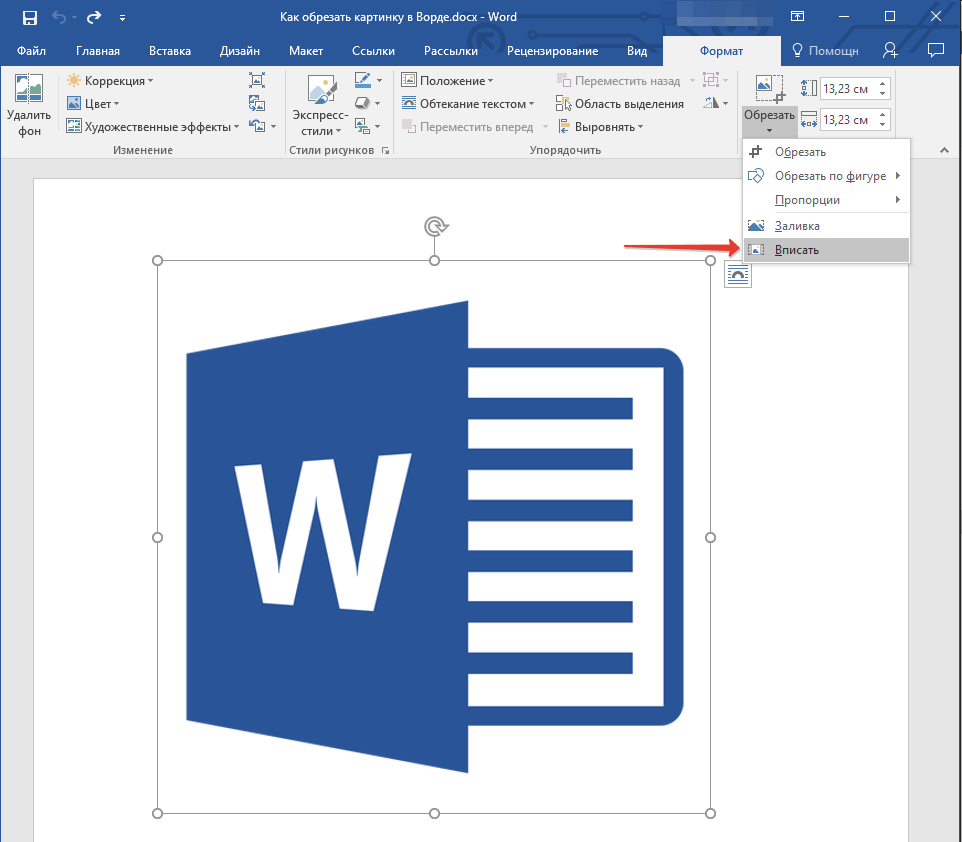
2. Во вкладке “Формат” в меню кнопки “Обрезка” выберите пункт “Вписать”.
3. Перемещая маркер, задайте необходимый размер для изображения, точнее, его части.
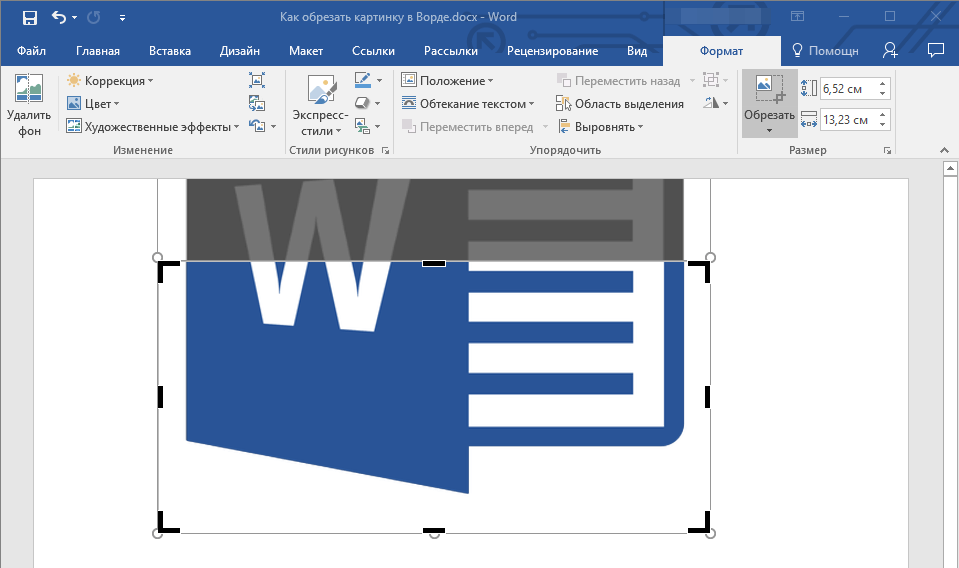
4. Нажмите кнопку “ESC”, чтобы выйти из режима работы с рисунками.
Удаляем обрезанные области изображения
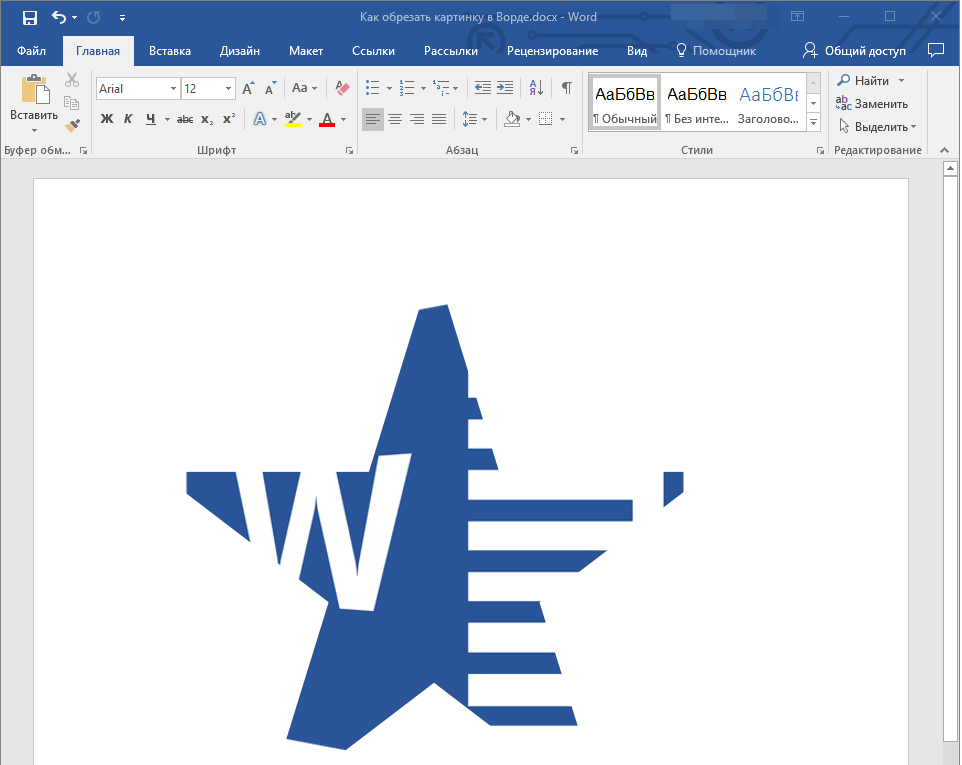
В зависимости от того, какой из методов вы использовали для обрезки изображения, обрезанные фрагменты могут остаться пустыми. То есть, они не исчезнут, а останутся частью графического файла и по-прежнему будут находится в области фигуры.
Обрезанную область рекомендовано удалить из рисунка в случае, если вы хотите уменьшить занимаемый им объем или же сделать так, чтобы никто другой не увидел области, которые вы обрезали.
1. Дважды кликните по изображению, в которм необходимо удалить пустые фрагменты.
2. В открывшейся вкладке “Формат” нажмите на кнопку “Сжать рисунки”, расположенную в группе “Изменение”.

3. Выберите необходимые параметры в появившемся диалоговом окне:
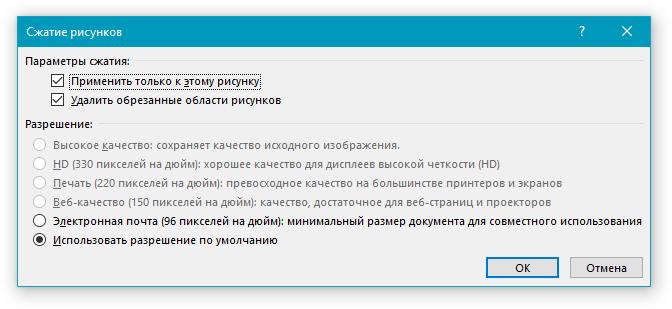
- Применить только к этому рисунку;
- Удалить обрезанные области рисунков.
4. Нажмите “ESC”. Объем графческого файла будет изменен, другие пользователи не смогут увидеть фрагменты, которые вы удалили.
Изменяем размер изображения без его обрезки
Выше мы рассказали обо всех возможных методах, с помощью которых можно обрезать рисунок в Ворде. Кроме того, возможности программы также позволяют пропорционально уменьшить размер изображения или же задать точные размеры, ничего при этом не обрезая. Для этого выполните одно из следующих действий:
Для произвольного изменения размеров рисунка с сохранением пропорциональности кликните по области, в которой он находится и потяните в нужном направлении (внутрь рисунка для уменьшения, наружу — для увеличения его размера) за один из угловых маркеров.
Если вы хотите изменить рисунок не пропорционально, тяните не за угловые маркеры, а за те, что расположены посредине граней фигуры, в которой находится рисунок.
Чтобы задать точные размеры области, в которой будет находиться рисунок, а вместе с тем и задать точные значения размера для самого графического файла, выполните следующее:
1. Выделите изображение двойным кликом.
2. Во вкладке “Формат” в группе “Размер” задайте точные параметры для горизонтального и вертикального полей. Также, вы можете изменить их постепенно, нажимая на стрелочки вниз или вверх, делая рисунок меньше или больше, соответственно.
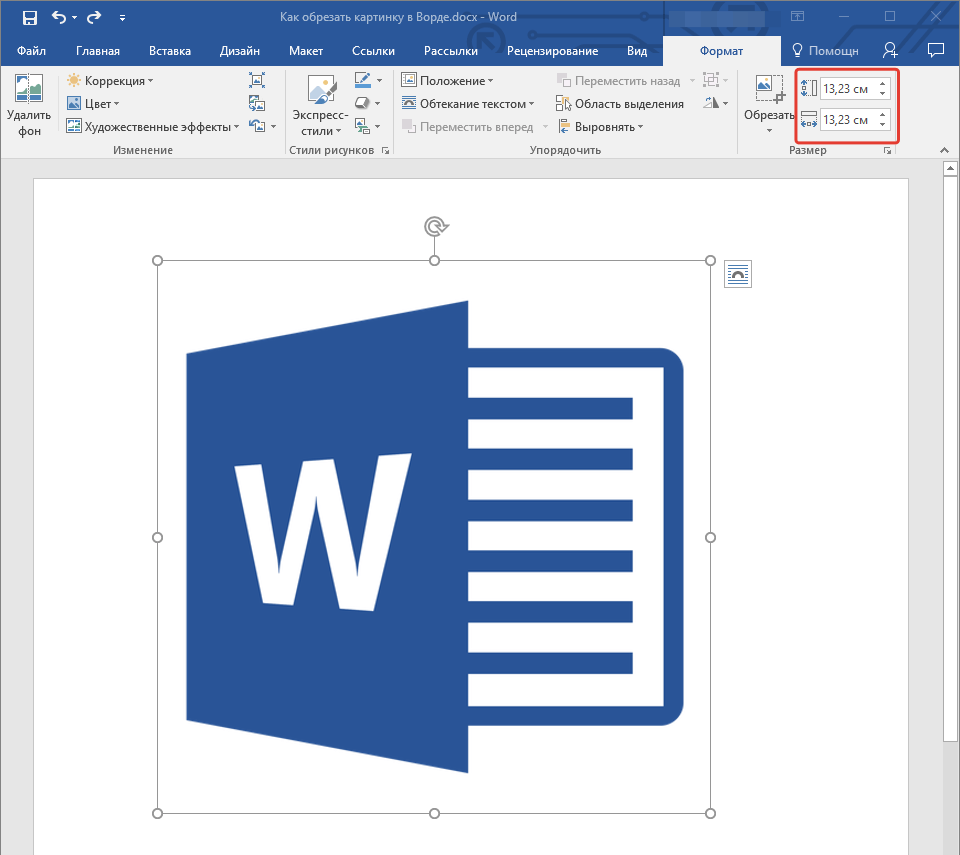
3. Размеры рисунка будут изменены, сам же рисунок при этом обрезан не будет.
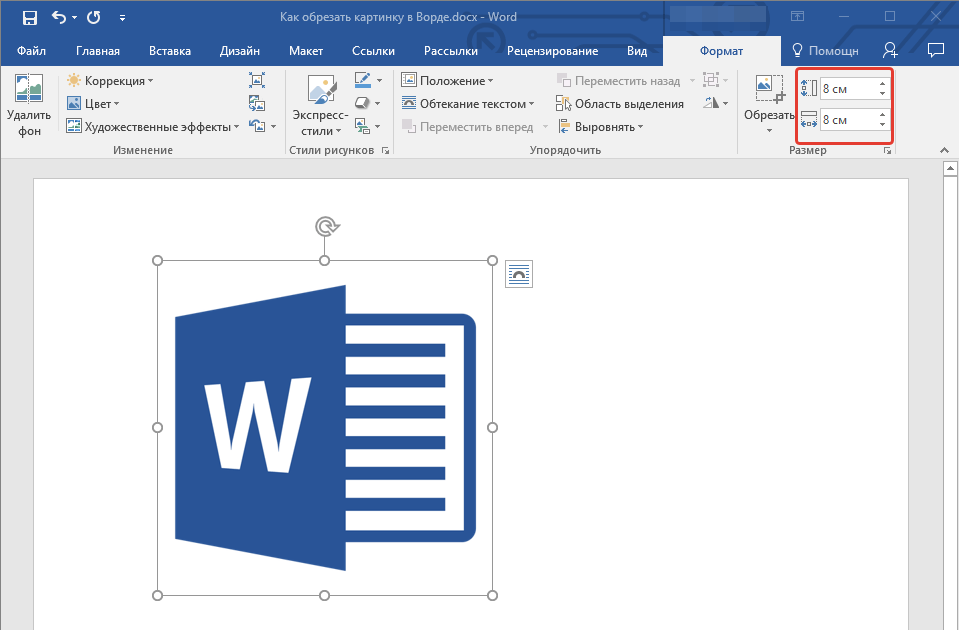
4. Нажмите клавишу “ESC”, чтобы выйти из режима работы с графическими файлами.
Урок: Как добавить текст поверх картинки в Word
На этом все, из этой статьи вы узнали о том, как обрезать рисунок или фото в Ворде, изменить его размер, объем, а также подготовить для последующей работы и изменений. Осваивайте MS Word и будьте продуктивны.

You can remove unnecessary pixels from an image directly in Microsoft Word using the built-in cropping tool. You can also crop a photo to fit a specific shape. Here’s how to crop a picture in Microsoft Word.
To crop a picture in Microsoft Word, open the Word document, add an image (Insert > Pictures), and then select the photo by clicking it.

Next, go to the “Picture Format” tab, which appears after you select the image. Then, in the “Size” group, click “Crop.”
In the drop-down menu that appears, select “Crop.”
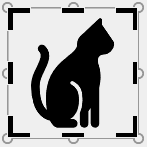
Cropping handles will now appear around the frame of the image. To crop out certain areas, click and drag the handles to capture only the content that you want to keep.
After setting the cropping frame, click the icon in the upper half of the “Crop” option in the “Size” group of the “Picture Format” tab.
The unwanted areas of your image are now removed.
How to Crop a Picture as a Shape in Word
To crop an image as a shape, open the Microsoft Word application, insert an image (Insert > Pictures), and then select the image by clicking it.
In the “Picture Format” tab, which appears after selecting the image, click the “Crop” button found in the “Size” group. In the drop-down menu that appears, select “Crop To Shape.”
A sub-menu displaying a large library of shapes will appear. Select the shape that you’d like to crop the image as by clicking it. We’ll use the teardrop shape in this example.
Your image will now be cropped as the selected shape automatically.
This is just one of many photo editing tools available in Microsoft Word. You can also do things such as removing the background from an image, annotating an image, and more.
RELATED: How to Remove the Background from a Picture in Microsoft Word
READ NEXT
- › How to Crop a Picture in Microsoft OneNote
- › 7 Awesome Microsoft Word Features You Should Be Using
- › 4 Ways to Insert a Command or Code Block in Microsoft Word
- › This New Google TV Streaming Device Costs Just $20
- › The New NVIDIA GeForce RTX 4070 Is Like an RTX 3080 for $599
- › How to Adjust and Change Discord Fonts
- › BLUETTI Slashed Hundreds off Its Best Power Stations for Easter Sale
- › HoloLens Now Has Windows 11 and Incredible 3D Ink Features
How-To Geek is where you turn when you want experts to explain technology. Since we launched in 2006, our articles have been read billions of times. Want to know more?