
You can use WordArt with a Transform text effect to curve or bend text around a shape. If you want the text to circle the shape, you can also do this, but it’s a little bit more work. You can also insert WordArt multiple times to wrap text around shapes with straight edges.

-
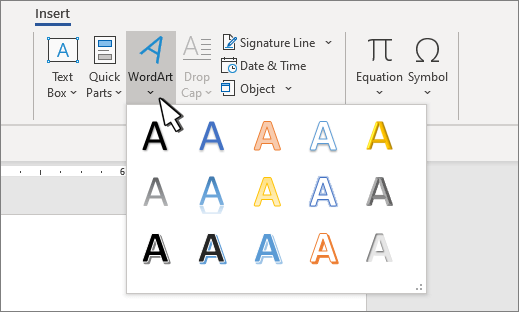
Go to Insert > WordArt, and pick the WordArt style you want.

Note: The WordArt icon is located in the Text group, and it may appear different depending on the version you’re using and the size of your screen. The icon may also look like this
or . -
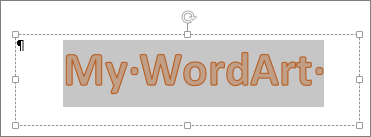
Replace the WordArt placeholder text with your own text.
-
Select your WordArt text.
-
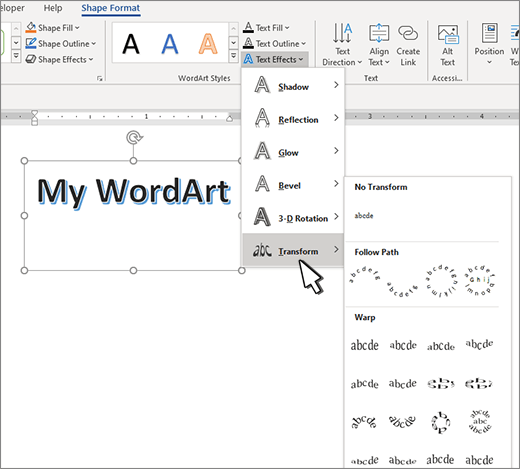
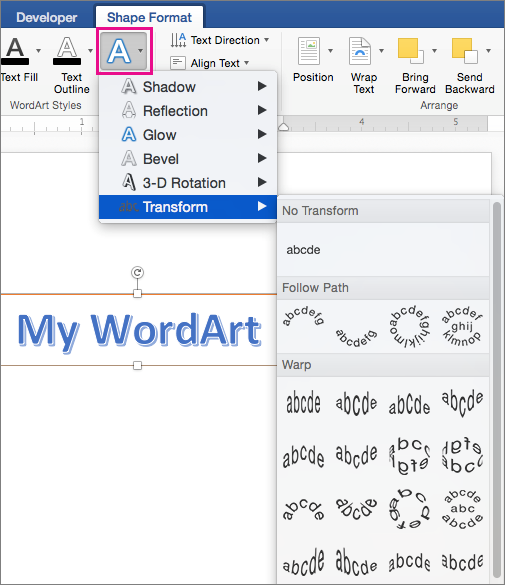
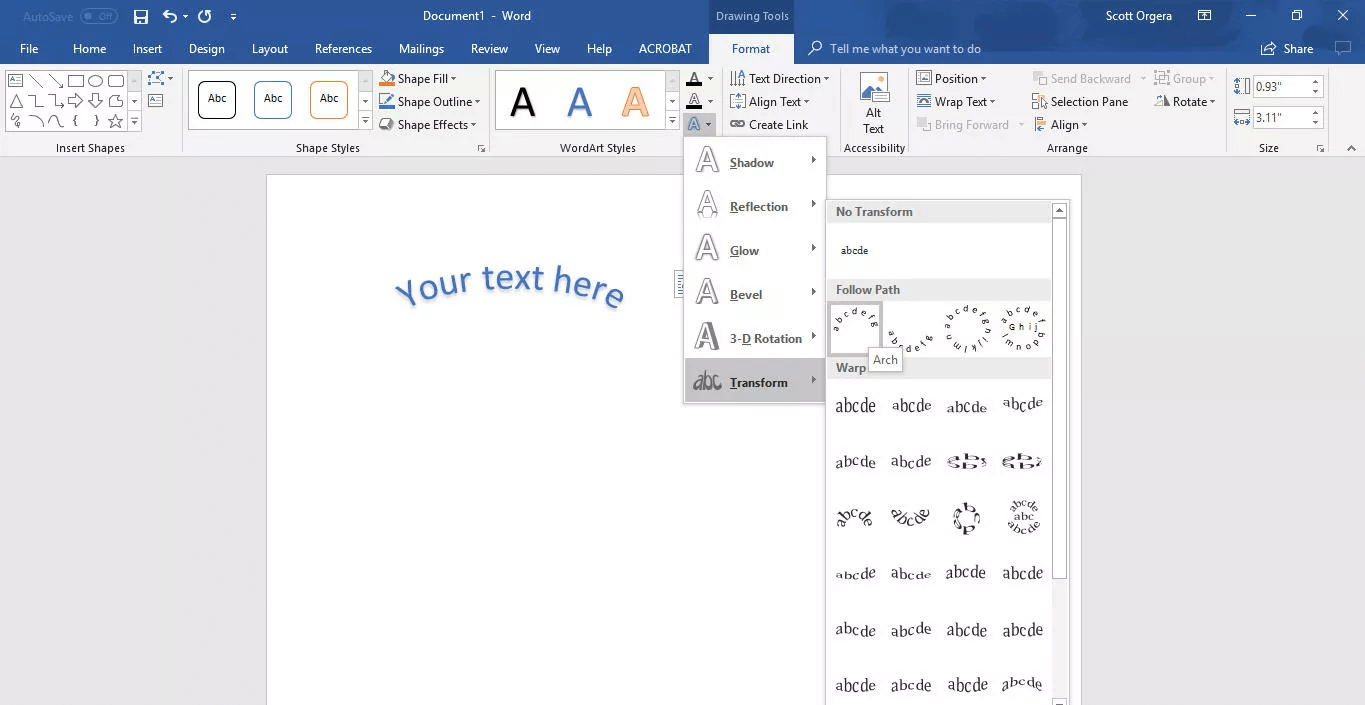
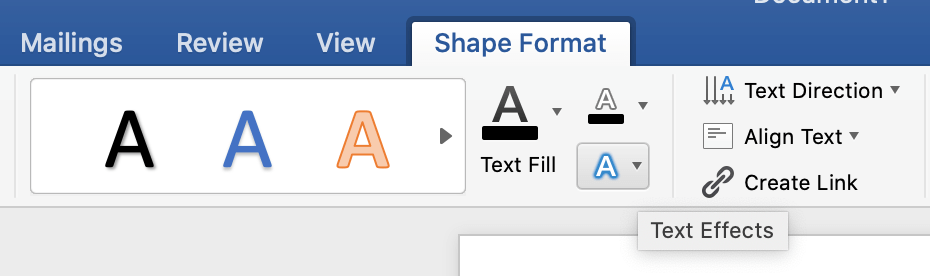
Go to Shape Format or Drawing Tools Format, select Text Effects >Transform and pick the look you want.
 or
or  .
.
Note: Depending on your screen size, you might only see the icons for WordArt Styles.

Advanced techniques
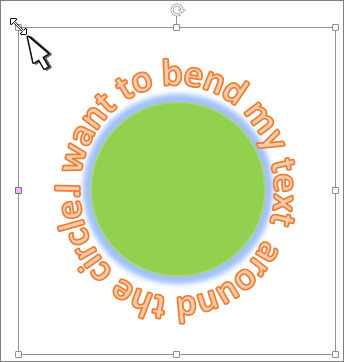
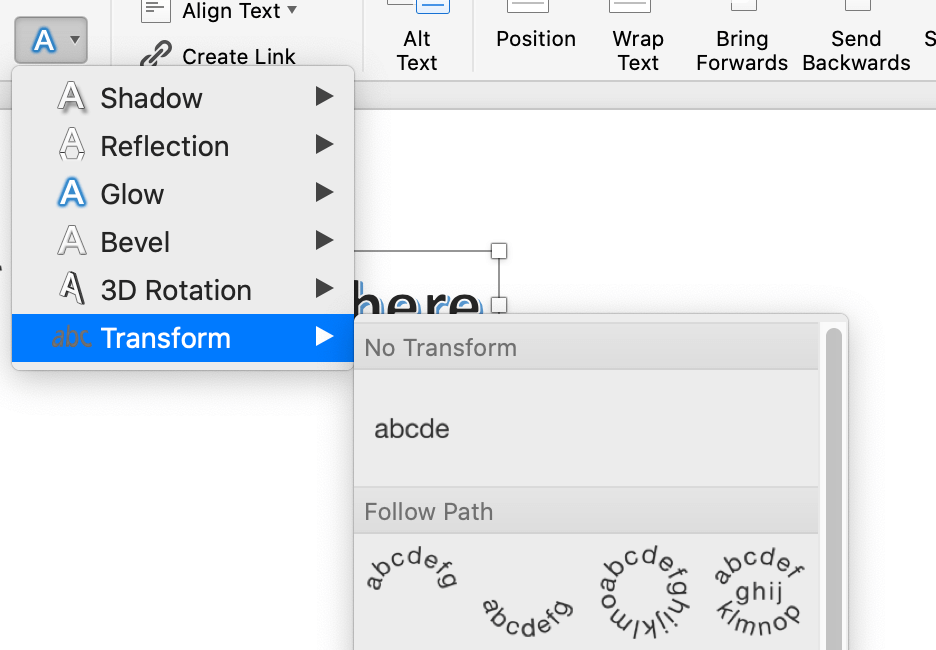
Wrap around a circle To create text that completely circles your shape, choose Circle under Follow Path, and then drag any of the sizing handles until your WordArt is the size and shape you want.
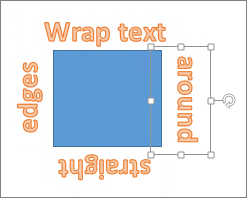
Wrap around straight edges To wrap text around a shape that has straight edges, such as a rectangle, insert WordArt objects for each edge. In this example, WordArt is inserted four times, one for each side of the shape.
Group moves and copy To move or copy multiple WordArt objects as a single shape, see Group or ungroup shapes, pictures, or other objects .
Precise angle control You can control the angle of your WordArt text in relation to your shape with precision by using the Rotate tool.
If you need very precise control or are creating a complex combination of shapes and text, you’ll want to use a third-party drawing or graphics program to create the text around your shape and then copy and paste it into your Office document.
See Also
Add shapes
Insert WordArt
Create curved or circular WordArt
-
Go to Insert > WordArt.
-
Pick the WordArt style you want.
-
Type your text.
-
Select the WordArt.
-
Go to Shape Format > Text Effects > Transform and pick the effect you want.


Advanced techniques
Wrap around a circle To create text that completely circles your shape, choose Circle under Follow Path, and then drag any of the sizing handles until your WordArt is the size and shape you want.
Wrap around straight edges To wrap text around a shape that has straight edges, such as a rectangle, insert WordArt objects for each edge. In this example, WordArt is inserted four times, one for each side of the shape.
Group moves and copy To move or copy multiple WordArt objects as a single shape, see Group or ungroup shapes, pictures, or other objects .
Precise angle control You can control the angle of your WordArt text in relation to your shape with precision by using the Rotate tool.
If you need very precise control or are creating a complex combination of shapes and text, you’ll want to use a third-party drawing or graphics program to create the text around your shape and then copy and paste it into your Office document.
In Word for the web you can see WordArt that’s already in your document, but to add more WordArt you need to open or edit the doc in the desktop version of Word.
You can use the Font features on the Home tab to change the font color and size, and apply bolding, italics, or underlines to your text.
-
1
Open your Word document. Double-click the document in which you want to bend a word or phrase.
-
2
Select a word or phrase. Click and drag your mouse cursor across the word or phrase that you want to bend.
Advertisement
-
3
Click the Insert tab. It’s at the top of the Word window. The Insert toolbar will appear at the top of the window.
-
4
Click WordArt. This option is in the «Text» section of the toolbar. Clicking it prompts a drop-down menu.
-
5
Select a WordArt appearance. Click one of the icons in the WordArt drop-down menu to set it as your selected text’s appearance.
-
6
Click Text Effects. It’s in the «WordArt Styles» section of the Format tab that opens. A drop-down menu will appear.
- If this tab doesn’t automatically open after applying a WordArt appearance to your selected text, click the Format tab before proceeding.
-
7
Select Transform. This option is in the drop-down menu. Selecting it prompts a pop-out menu.
-
8
Click a curved option. You should see four curved options in the «Follow Path» section of the drop-down menu. Click the one you want to use to apply it to your selected text.[1]
- If you want to bend your text around a circular object, click the Rotate option (e.g., the circular text with no word in the middle) in this drop-down menu.
-
9
Adjust your WordArt’s appearance. If you want to change the size and/or curvature of your WordArt word or phrase, do the following:
- Click and drag in or out any of the white dots to shrink or enlarge the word or phrase.
- Click and drag the yellow dot to adjust the curvature of the word or phrase.
-
10
Save your changes. When you’re done adjusting the text, click File and then click Save to save your changes to the document.


Advertisement
Add New Question
-
Question
How do I start a title in MS Word with small letters, gradually increasing the size of the letters to the end of the title?

You have to individually increase the size of the writing by using the «Larger Word» pull-down bar. This is in the Home section of the app.
-
Question
How do I bend heading text in MS Word?
It’s done the same way, just follow the article’s methods.
-
Question
How do I curve a word more/less in MS Word?
Use the yellow dot. The yellow dot is used for adjusting shapes in Word and PowerPoint.
Ask a Question
200 characters left
Include your email address to get a message when this question is answered.
Submit
Advertisement
Video
-
You can also bend words in other Microsoft Office products such as PowerPoint.
Thanks for submitting a tip for review!
Advertisement
-
Applying WordArt to a word or phrase will affect nearby text. For this reason, it’s best to use WordArt on things like titles and headings rather than on a word or phrase in the middle of a paragraph.
Advertisement
About This Article
Thanks to all authors for creating a page that has been read 367,253 times.
Is this article up to date?
This article is a step-by-step guide on how to curve text in word. Whether you’re using a Word for Mac user or PC, Word in Office 365, click here to learn more.
Want to curve text in your Word document? It’s easy:
Choose the Word Art option, then click the text icon that looks the way you want your curved text to look. Click the Drawing Tools Format tab at the top of the window. Choose the Text Effects option, click Transform, then click a curve type from the options on the menu. Adjust the layout options for your curved text.
Essays and long research documents aren’t the only things you can create in Microsoft Word. Many people use the application to work on more lighthearted projects, such as party invitations, flyers, and posters. However, simple headers just don’t make the cut when you’re trying to get the attention of future viewers.
Adding extra touches to your Word documents can increase the visual impact of your projects, which leads to more attention to what you’re trying to convey with your page. One popular technique is using curves when working with text, which is especially useful for large headers or wrapping text around shapes and images.
Our article focuses on how you can warp and curve text in Microsoft Word to create unique, interesting designs to feature in your projects.
Curve words or text in Word
There are tons of different ways you can warp text to form a curve in Word, which can all be accessed by following the directions below. We recommend you play around with the various options to find the perfect setting that suits your vision.
Please note that the functionality described below is not available in Word Online, or desktop versions older than Word 2013.
- Open the Word document which you want to use for this project, or create a new blank document.
- Switch over to the Insert tab in your ribbon, which is the header-Esque interface located on the top section of the Word window.

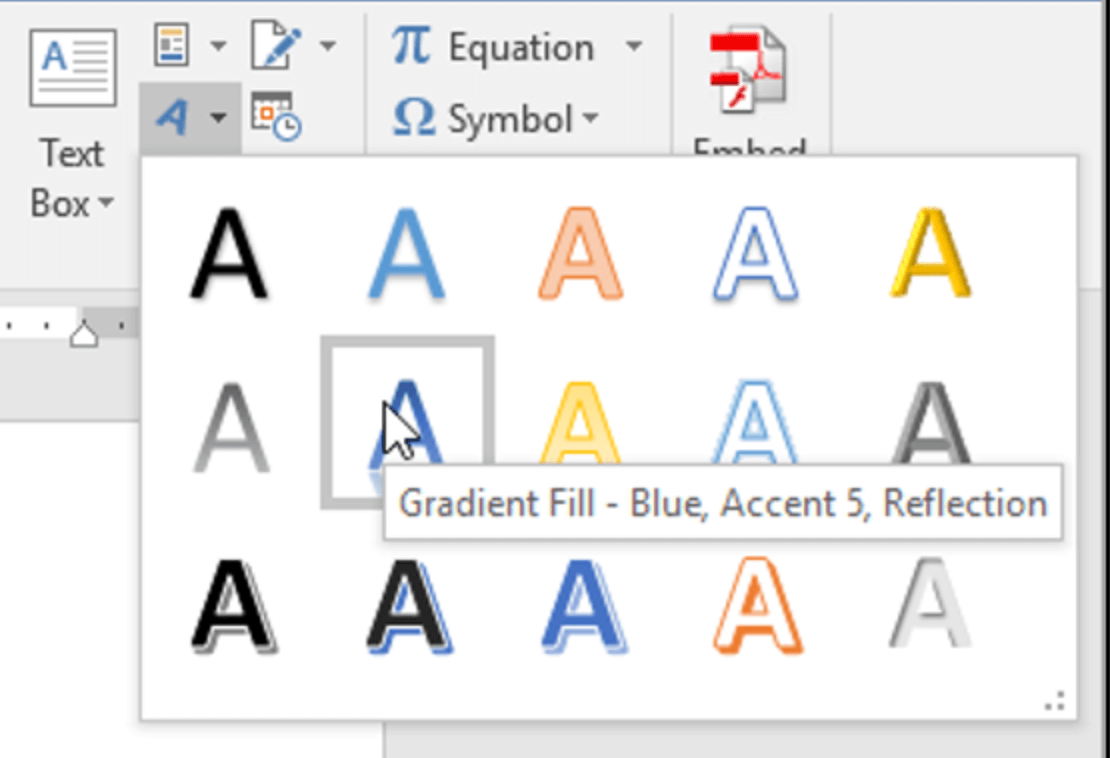
- Click on the Insert WordArt icon, found in the Text section of Word 2016 and above. The icon is a slanted, blue colored letter A.

- A pop-up menu will open up with various different styles of text. Select any of these styles and colors to insert a placeholder into your document with words such as “Your text here.”
- Edit the text to say whatever you’d like, then select it by clicking on it once.
- The Drawing Tools: Format tab will open up. Click on the Text Effect icon, depicted by a white letter A with a light-blue glow around it.

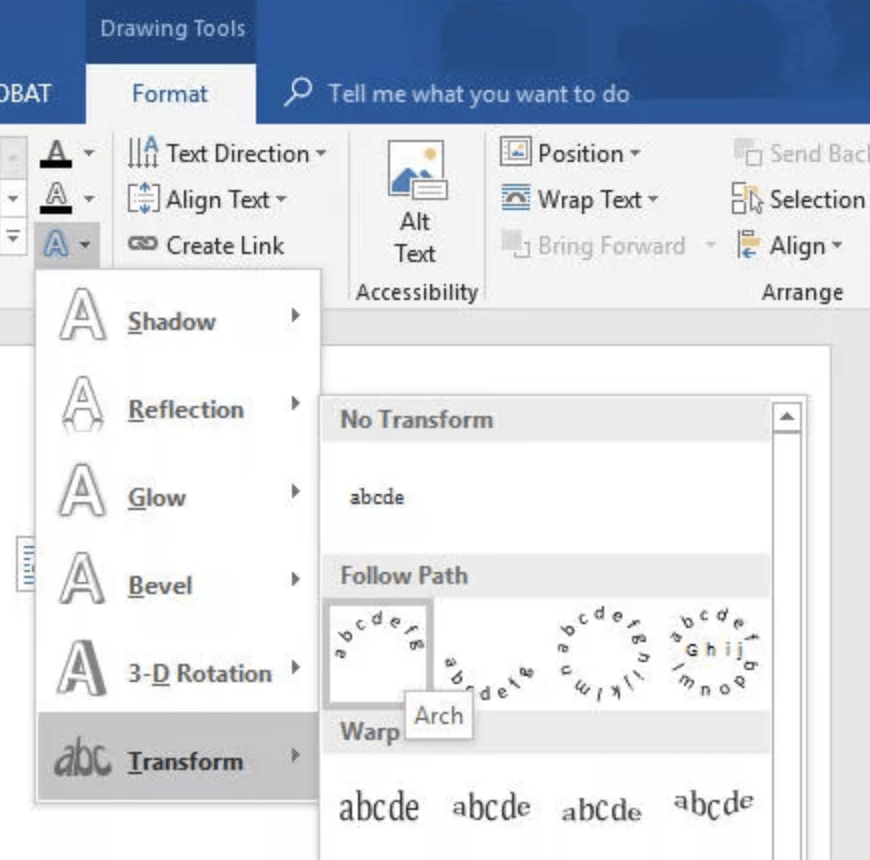
- Hover over the Transform option from the drop-down menu to expand it and see all of the available warp styles for your text.
- Click on a curve or bend that you like. You can preview any options by simply hovering your mouse over them. If you choose from the “Follow path” section, you have the option to edit the curve your text follows by dragging the yellow rectangle until you’re satisfied with the result.
Curve words or text in Word for Mac
Mac users are able to use the same warping techniques as Windows users by following the directions below.
- Open the Word document which you want to use for this project, or create a new blank document.
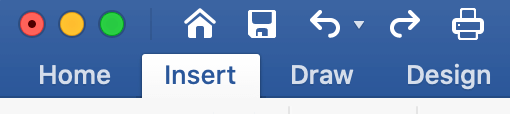
- Switch over to the Insert tab in your ribbon, which is the header-esque interface located on the top section of the Word window.

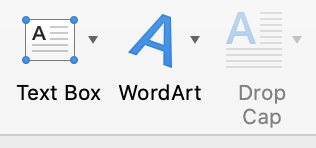
- Click on the Insert WordArt icon, shown as a slanted, blue colored letter A with the WordArt text underneath it. (See picture below.)

- A pop-up menu will open up with various different styles of text. Select any of these styles and colors to insert a placeholder into your document with words such as “Your text here.”

- Edit the text to say whatever you’d like, then select it by clicking on it once.
- The Shape Format tab will open up. Click on the Text Effect icon, depicted by a white letter A with a light-blue glow around it. (See picture below.)

- Hover over the Transform option from the drop-down menu to expand it and see all of the available warp styles for your text.

- Click on a curve or bend that you like. You can preview any options by simply hovering your mouse over them. If you choose from the “Follow path” section, you have the option to edit the curve your text follows by dragging the yellow rectangle until you’re satisfied with the result.

You don’t have to delete your entire text and retype it to remove the curves you (or someone else) previously applied. If you want to remove the curves from a Word text, follow the instructions below.
- Perform the steps 2. to 7. to reach the Transform section while having your curved text selected.
- Select the No Transform option to remove any curves previously applied to the text.
Final thoughts
Now that you know how to curve text in Word, what Next? Download these Microsoft Word Templates to make your next Report Quicker.
Further Reading
> How to Insert a Signature in Microsoft Word
> How to Sort by Date in Excel
> How to Wrap Text in PowerPoint
> How to Insert a Horizontal Line in Word
> Insights into the Windows 10 Start Menu
Additional FAQs Go to the “Insert” tab on the Ribbon. In the “Illustrations” section, click the “Shapes” button. Under the “Line” tab, click on “Curve.” Left-click where you want the curve to start. Move your cursor to draw the line. Left-click to add a curve. Double-click where you want the curve to end.
How do I make text curve without changing in Word?
Select the curved or bent text you want to modify. Select Text Effects. Select Transform > No Transform. The curved or bent text transformation effect is removed.
How do I curve text in Word for Mac?
Hit the “Format” button, right next to “Home”. One of your new selections under “Text Styles” should be “Effects”. Click on Effects and select the last selection, “Transform”. You should have a whole selection of options including curving text up or down, and making circles.
How do I make an image curve in Word?
Draw a curve On the Insert tab, in the Illustrations group, click Shapes. Under Lines, click Curve . Click where you want the curve to start, drag to draw, and then click wherever you want to add a curve. To end a shape, do one of the following: To leave the shape open, double-click at any time.
How do I add text effects in Word?
Add an effect to text Select the text that you want to add an effect to. On the Home tab, in the Font group, click Text Effect. Click the effect that you want. For more choices, point to Outline, Shadow, Reflection, or Glow, and then click the effect that you want to add.
How do I make a curved text box?
Create curved or circular WordArt Go to Insert > WordArt. Pick the WordArt style you want. Type your text. Select the WordArt. Go to Shape Format > Text Effects > Transform and pick the effect you want.
How do I make an image oval in Word?
Select the photo in the document to make the Format menu beneath Picture Tools appear. Click the “Format” menu, then “Crop” and select the “Crop to Shape” option that appears in the drop-down menu. Clicking the “Oval” in the list of shapes crops the photo into an oval.
What is text effects in Microsoft Word?
Change the look of your text or WordArt by changing its fill or outline, or by adding an effect, such as a shadow, reflection, or glow. Select your text or WordArt. Click Home > Text Effects.
How do I create a shadow in Word?
Select the text or WordArt that you want to format. On the Format tab, under Text Styles, click Effects , point to Shadow, and then click the shadow style that you want.
Can you curve a text box in PowerPoint?
Curve text in PowerPoint Select your text and go to Insert > WordArt. Select the style you want from the menu. Now go to Shape Format/Drawing Tools Format and select Text Effects >Transform. Here you will see a whole range options to change the shape of your text.
How do you make an oval function one object in Word?
To select one object, click or tap the object. To select multiple shapes in a group, press and hold Shift or Ctrl while you click or tap the shapes.
How do you crop a picture into an oval shape?
Step 1: Crop the image into an oval Select the image. Click the Picture Tools Format or Picture Format tab in the Ribbon. In the Size group, click the arrow below Crop. From the drop-down menu, choose Crop to Shape and then click the oval.
What is font effect?
Font psychology is the deliberate use of particular styles and sizes of characters in content to produce a desired effect in the viewer.
How do I use small caps font effect in Word?
To do Small Caps in your Word document: Open a black document and go to the top menu ribbon. Go to the Home tab and Font section, you will see a small downward arrow(font button) Click on that arrow and go to Effects. Check the box saying, Small Caps’ Click OK and you are done.
What font is good for making text stand out?
Serif or Sans-Serif Sans-serif fonts are easier to read when there just a few words, so are great for making statements.
How do you shade text in Word?
Apply shading to words or paragraphs Select the word or paragraph that you want to apply shading to. On the Home tab, in the Paragraph group, click the arrow next to Shading. Under Theme Colors, click the color that you want to use to shade your selection.
What is shadow in MS Word?
Adding shadows to the objects you insert into your Word document can give those objects a 3D look. You can add shadows to virtually any object you can insert: pictures, Clip Art, shapes, SmartArt and charts. To remove a shadow previously applied, select the picture and click Picture Effects > Shadow > No Shadow.
How do you draw on Microsoft Word?
How to draw in Word Click the ‘Shapes’ button and select ‘Scribble’ Open up your Microsoft Word document. Hold down your mouse to draw. Click and hold down your mouse to draw. Release the mouse. As soon as you release your mouse, the drawing will be finished. Edit your drawing. Double-click your drawing.
Why is there no circle shape in PowerPoint?
One such scenario is when you need to draw a circle, you’ll find that PowerPoint’s Shape gallery has no Circle shape! Don’t worry, all is not lost because there is an Oval shape and that can be used to draw a perfect circle. Most of the time, PowerPoint will open with a new slide in a presentation.
How do you format shapes in Word?
Under Text Box Tools, on the Format tab, in the Text Box Styles group, click Change Shape, and then click the shape that you want.
How do I fit text into a shape in PowerPoint?
Resize a shape to fit text Right-click the border of the shape or text box. On the shortcut menu, click Format Shape . , click Text Box , and then select Resize shape to fit text .
How do you make an arrow straight in Word?
Hold Shift while drawing What DOES work is drawing a line/arrow while holding down the Shift key. Holding Shift while drawing forces the line to horizontal, vertical or 45° angles.