
Для изгиба текста вокруг фигуры можно использовать текст WordArt с эффектом Transform (Преобразование). Если нужно, чтобы текст полностью окружал фигуру, потребуется немного больше усилий. Объект WordArt также можно вставить несколько раз, чтобы задать обтекание текста вокруг фигур с прямыми границами.

-
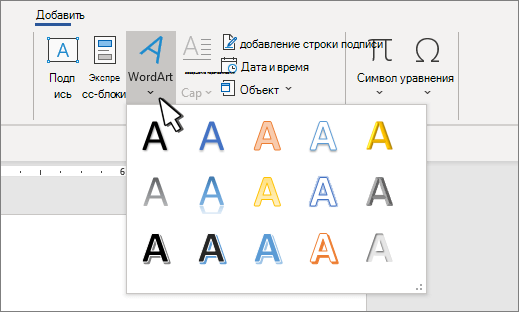
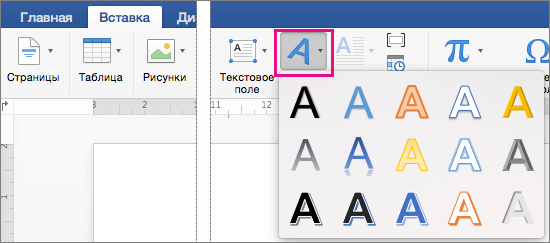
Перейдите в > WordArtи выберите нужный стиль WordArt.

Примечание: Значок WordArt находится в группе Текст и может отображаться по-разному в зависимости от используемой версии и размера экрана. Значок также может выглядеть так, как
или . -
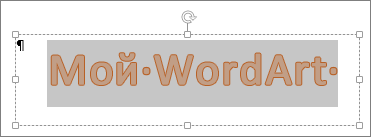
Замените замещатель WordArt собственным текстом.
-
Выделите свой текст WordArt.
-
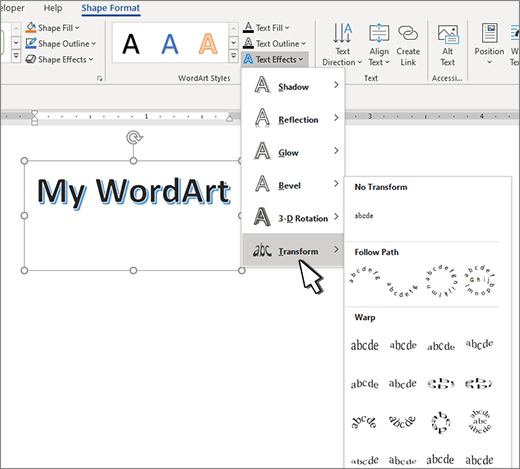
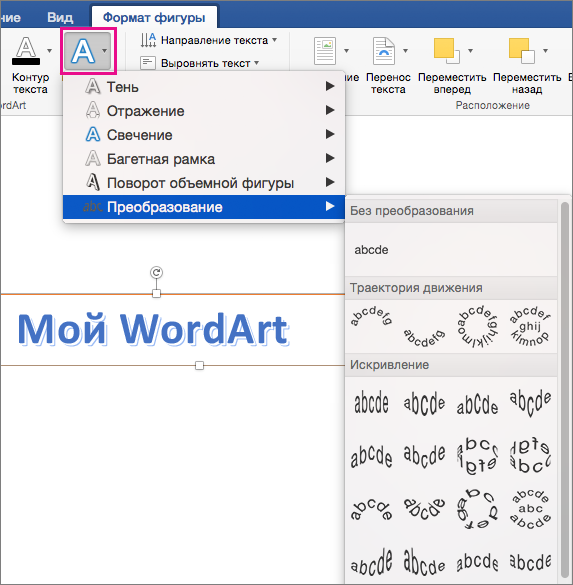
Перейдите в формат фигуры или Средства рисования, выберите Текстовые эффекты >Преобразовать и выберите нужный вид.
 или
или  .
.
Примечание: В зависимости от размера экрана могут отображаться только значки стилей WordArt.
Дополнительные методы
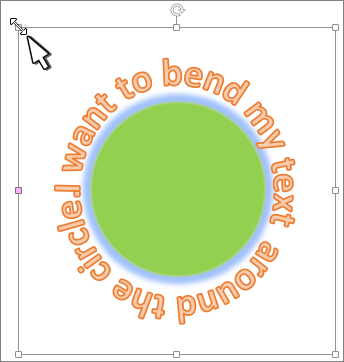
Обтекать круг Чтобы создать текст, который полностью обкругит фигуру, выберите Круг в области По пути ,а затем перетащите любой из хронологий размера, чтобы получить нужный размер и фигуру.
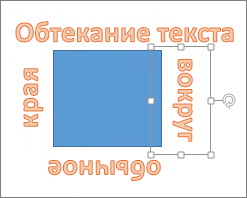
Обтекать прямые края Чтобы обтекать текст вокруг фигуры с прямыми краями, например прямоугольника, вставьте объекты WordArt для каждого края. В этом примере объект WordArt вставлен четыре раза, по одному для каждой стороны фигуры.
Перемещение и копирование групп Чтобы переместить или скопировать несколько объектов WordArt в виде одной фигуры, см. группу и разгруппировку фигур, рисунков и других объектов.
Точный угол управления Угол наклона текста WordArt по отношению к фигуре можно точно настроить с помощью инструмента вращения.
Если вам требуется очень точное управление фигурами и текстом или вы создаете сложное сочетание фигур и текста, создайте текст вокруг фигуры с помощью стороннее графического редактора, а затем скопируйте его и Office документ.
См. также
Добавление фигур
Вставка объекта WordArt
Создание изогнутого или кругового текста WordArt
-
Перейдите в >WordArt.
-
Выберите нужный стиль WordArt.
-
Введите текст.
-
Выделите текст WordArt.
-
Перейдите в формат фигуры > текстовые эффекты > Transform (Преобразовать) и выберите нужный эффект.

Дополнительные методы
Обтекать круг Чтобы создать текст, который полностью обкругит фигуру, выберите Круг в области По пути ,а затем перетащите любой из хронологий размера, чтобы получить нужный размер и фигуру.
Обтекать прямые края Чтобы обтекать текст вокруг фигуры с прямыми краями, например прямоугольника, вставьте объекты WordArt для каждого края. В этом примере объект WordArt вставлен четыре раза, по одному для каждой стороны фигуры.
Перемещение и копирование групп Чтобы переместить или скопировать несколько объектов WordArt в виде одной фигуры, см. группу и разгруппировку фигур, рисунков и других объектов.
Точный угол управления Угол наклона текста WordArt по отношению к фигуре можно точно настроить с помощью инструмента вращения.
Если вам требуется очень точное управление фигурами и текстом или вы создаете сложное сочетание фигур и текста, создайте текст вокруг фигуры с помощью стороннее графического редактора, а затем скопируйте его и Office документ.
В Word в Интернете вы можете увидеть wordArt, который уже есть в вашем документе, но чтобы добавить другие, необходимо открыть или изменить документ в версии Word.
С помощью функций шрифта на вкладке Главная можно изменить цвет и размер шрифта, а также применить к тексту полужирное наличность, наличность или подчеркивается.
Use the WordArt feature to bend and shape words
Updated on February 6, 2021
What to Know
- Use Transform in Text Effects to curve text as you wish.
- Text Effects is part of Microsoft Word’s Word Art Feature.
This article demonstrates how to bend words into an arch or around a shape or image in Word for Microsoft 365, Word 2019, Word 2016, Word 2013, and Word for Mac 2016 and 2011.
How to Curve Text With WordArt
Microsoft Word uses the WordArt feature to curve text:
-
Open a Word document and select Insert > WordArt.
You can also select the WordArt icon from the toolbar. It looks like a capital letter A. However, the icon’s appearance and location vary depending on the version and platform.
-
In the WordArt menu, choose the WordArt style you want. Placeholder text appears in the document. Type your text over the placeholder text.
-
Select the text to display the Drawing Tools tab.
-
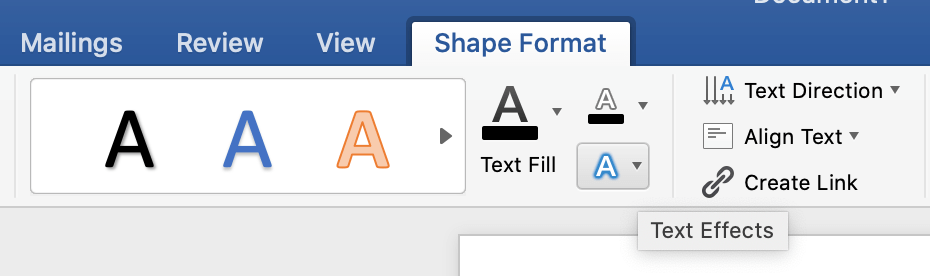
Go to either the WordArt Styles or Text Styles group, then select Text Effects, which is represented by a blue and white letter A.
In Word 2016, Text Effects displays when you hover the mouse cursor over it. In earlier versions, it’s clearly labeled.
-
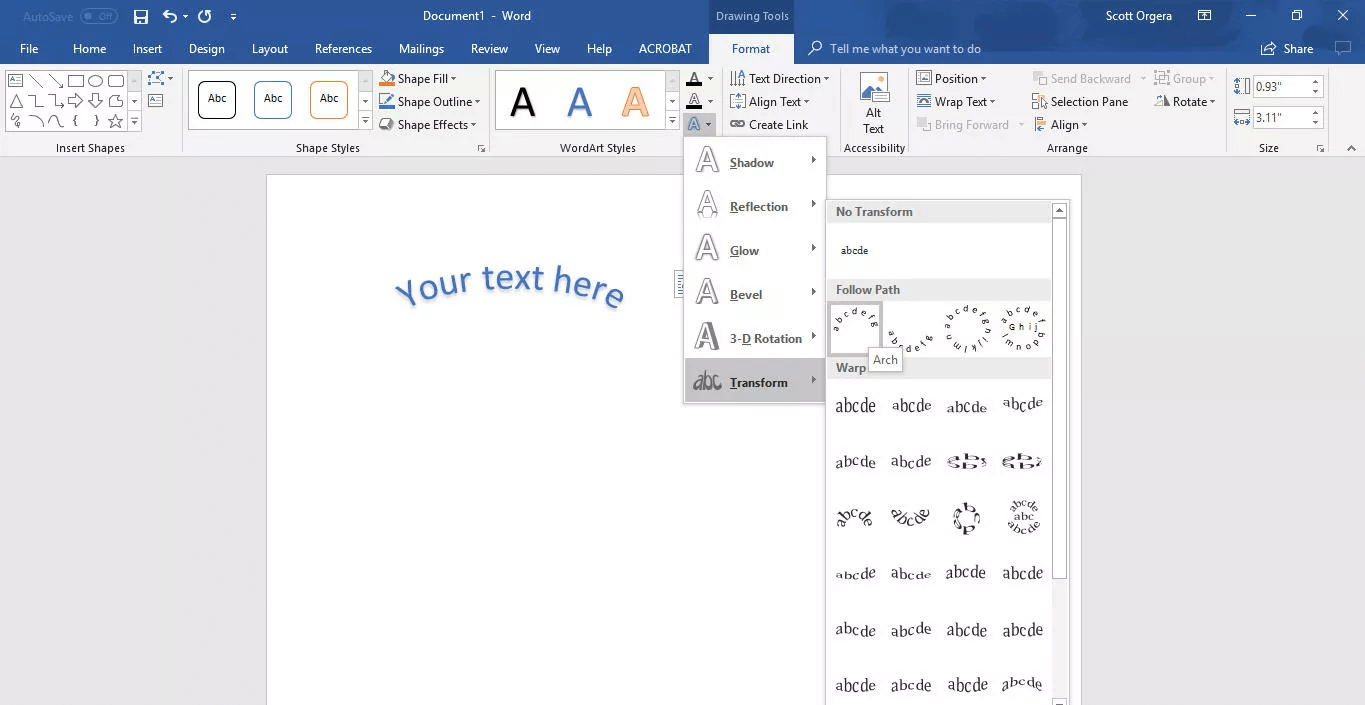
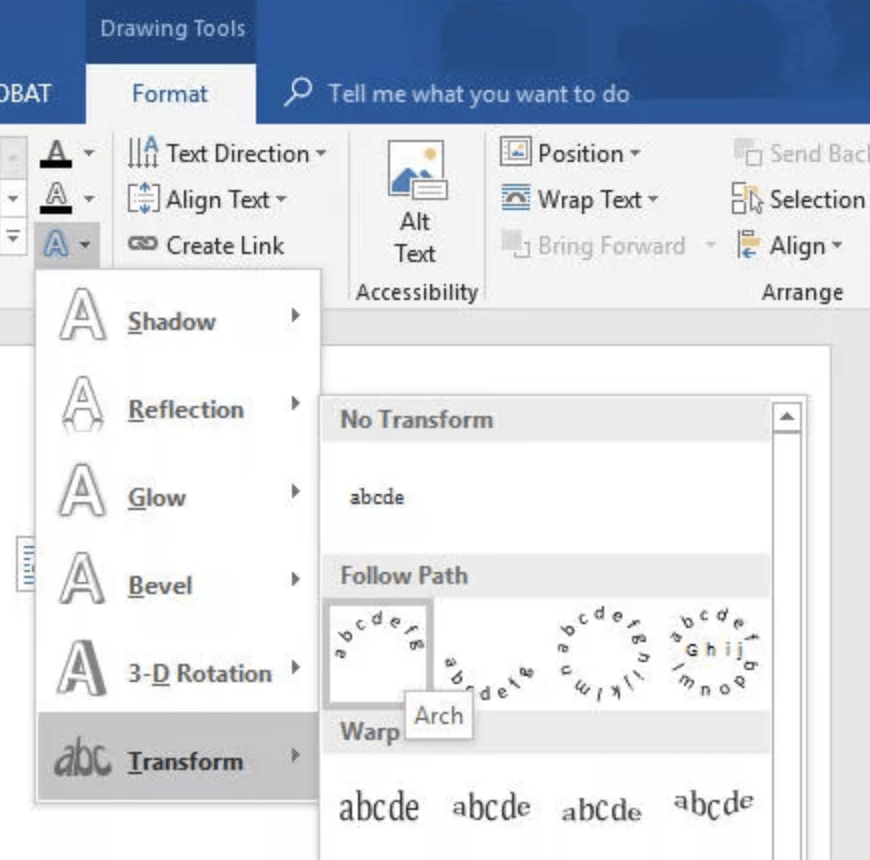
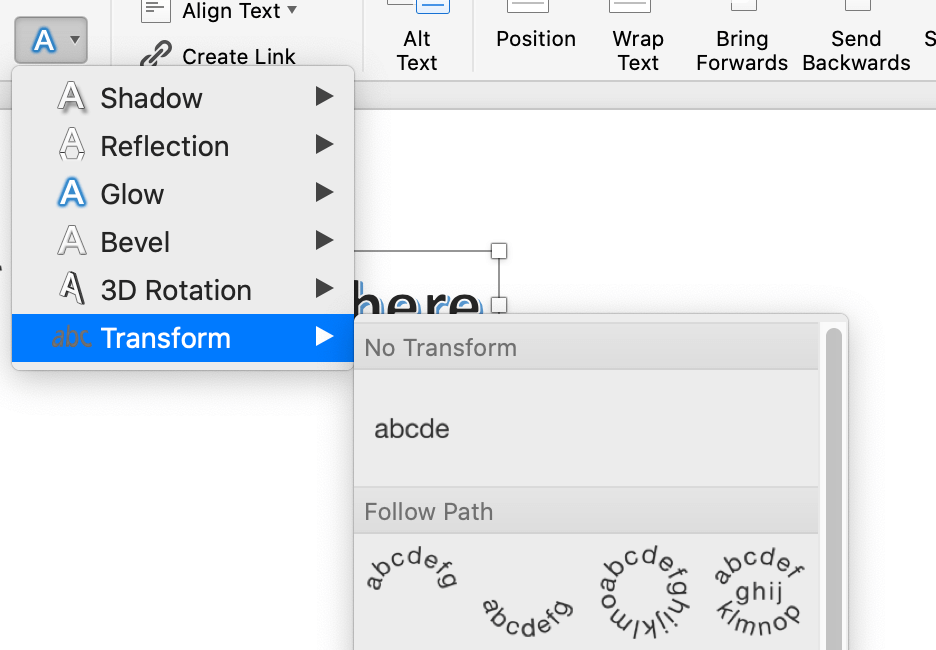
Select Transform.
-
From the submenu, choose from a variety of effects, including curved and bent text. Select an option to apply it to the text.
How to Undo Curved Text
To remove a curved or bent text effect without deleting your text:
-
Select the curved or bent text you want to modify.
-
Select Text Effects.
-
Select Transform > No Transform. The curved or bent text transformation effect is removed.
Thanks for letting us know!
Get the Latest Tech News Delivered Every Day
Subscribe

Whether you want to add a little flair, or you want some text to flow along with the curve of another element (like clip art or a logo), making your letters curve along a path in Word is pretty easy.
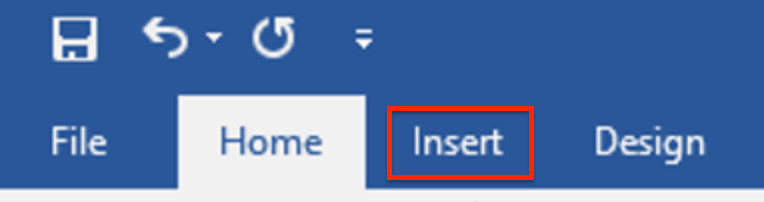
First, click “Insert” on the main Word ribbon.

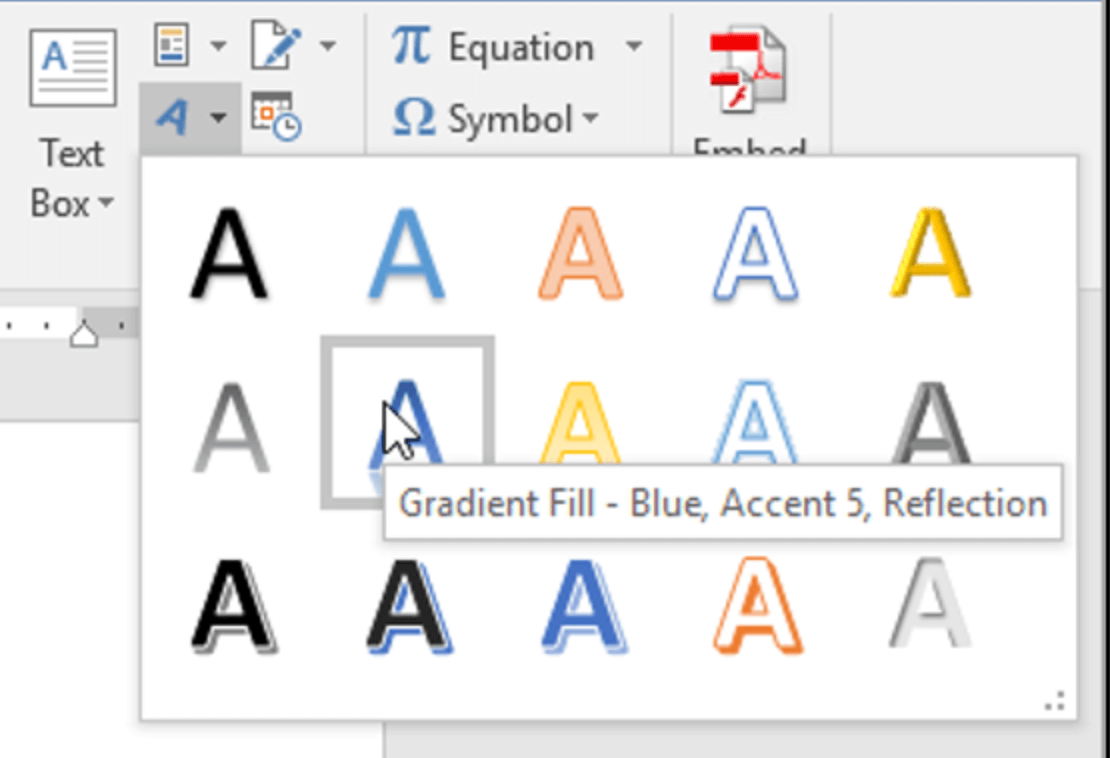
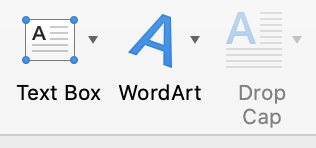
Click “WordArt” from the text options.
Select the style you want your WordArt to be. You can go for anything from plain-looking text to something super-fancy.
Type your text in your newly selected WordArt box.
With your new WordArt still selected, click “Format” on the main Word ribbon.
Click the “Text Effects” button.
Click “Transform” on the drop-down menu.
To get your text to follow a curved path, you’ll want to select one of the options from the “Follow path” section of the menu. You can choose whether you want your text to curve up, down, or all around.
Click to make your selection, and you’ll see your text automatically warped in the direction of your choosing.
If you want to play with the degree of your curve, drag the orange dot.
By moving the orientation of the orange dot, you’ll adjust the curve of your text. You can even use it to turn your text upside down. You’ll have to play with the format and adjustments a bit to get your text to curve just the way you want, especially if you’re trying to match it up with another object.
If you want your text to go back to normal with no curves, head back over to the Text Effects menu and hit “No transform.”
Just like that, your text is back to normal.
READ NEXT
- › How to Curve Text in PowerPoint
- › How to Curve Text in Adobe Photoshop
- › This New Google TV Streaming Device Costs Just $20
- › How to Adjust and Change Discord Fonts
- › The New NVIDIA GeForce RTX 4070 Is Like an RTX 3080 for $599
- › BLUETTI Slashed Hundreds off Its Best Power Stations for Easter Sale
- › HoloLens Now Has Windows 11 and Incredible 3D Ink Features
- › Google Chrome Is Getting Faster
How-To Geek is where you turn when you want experts to explain technology. Since we launched in 2006, our articles have been read billions of times. Want to know more?
This article is a step-by-step guide on how to curve text in word. Whether you’re using a Word for Mac user or PC, Word in Office 365, click here to learn more.
Want to curve text in your Word document? It’s easy:
Choose the Word Art option, then click the text icon that looks the way you want your curved text to look. Click the Drawing Tools Format tab at the top of the window. Choose the Text Effects option, click Transform, then click a curve type from the options on the menu. Adjust the layout options for your curved text.
Essays and long research documents aren’t the only things you can create in Microsoft Word. Many people use the application to work on more lighthearted projects, such as party invitations, flyers, and posters. However, simple headers just don’t make the cut when you’re trying to get the attention of future viewers.
Adding extra touches to your Word documents can increase the visual impact of your projects, which leads to more attention to what you’re trying to convey with your page. One popular technique is using curves when working with text, which is especially useful for large headers or wrapping text around shapes and images.
Our article focuses on how you can warp and curve text in Microsoft Word to create unique, interesting designs to feature in your projects.
Curve words or text in Word
There are tons of different ways you can warp text to form a curve in Word, which can all be accessed by following the directions below. We recommend you play around with the various options to find the perfect setting that suits your vision.
Please note that the functionality described below is not available in Word Online, or desktop versions older than Word 2013.
- Open the Word document which you want to use for this project, or create a new blank document.
- Switch over to the Insert tab in your ribbon, which is the header-Esque interface located on the top section of the Word window.

- Click on the Insert WordArt icon, found in the Text section of Word 2016 and above. The icon is a slanted, blue colored letter A.

- A pop-up menu will open up with various different styles of text. Select any of these styles and colors to insert a placeholder into your document with words such as “Your text here.”
- Edit the text to say whatever you’d like, then select it by clicking on it once.
- The Drawing Tools: Format tab will open up. Click on the Text Effect icon, depicted by a white letter A with a light-blue glow around it.

- Hover over the Transform option from the drop-down menu to expand it and see all of the available warp styles for your text.
- Click on a curve or bend that you like. You can preview any options by simply hovering your mouse over them. If you choose from the “Follow path” section, you have the option to edit the curve your text follows by dragging the yellow rectangle until you’re satisfied with the result.
Curve words or text in Word for Mac
Mac users are able to use the same warping techniques as Windows users by following the directions below.
- Open the Word document which you want to use for this project, or create a new blank document.
- Switch over to the Insert tab in your ribbon, which is the header-esque interface located on the top section of the Word window.

- Click on the Insert WordArt icon, shown as a slanted, blue colored letter A with the WordArt text underneath it. (See picture below.)

- A pop-up menu will open up with various different styles of text. Select any of these styles and colors to insert a placeholder into your document with words such as “Your text here.”

- Edit the text to say whatever you’d like, then select it by clicking on it once.
- The Shape Format tab will open up. Click on the Text Effect icon, depicted by a white letter A with a light-blue glow around it. (See picture below.)

- Hover over the Transform option from the drop-down menu to expand it and see all of the available warp styles for your text.

- Click on a curve or bend that you like. You can preview any options by simply hovering your mouse over them. If you choose from the “Follow path” section, you have the option to edit the curve your text follows by dragging the yellow rectangle until you’re satisfied with the result.

You don’t have to delete your entire text and retype it to remove the curves you (or someone else) previously applied. If you want to remove the curves from a Word text, follow the instructions below.
- Perform the steps 2. to 7. to reach the Transform section while having your curved text selected.
- Select the No Transform option to remove any curves previously applied to the text.
Final thoughts
Now that you know how to curve text in Word, what Next? Download these Microsoft Word Templates to make your next Report Quicker.
Further Reading
> How to Insert a Signature in Microsoft Word
> How to Sort by Date in Excel
> How to Wrap Text in PowerPoint
> How to Insert a Horizontal Line in Word
> Insights into the Windows 10 Start Menu