
Improve Article
Save Article
Like Article
Improve Article
Save Article
Like Article
NodeJS has become one of the famous backend frameworks for development. So in this article, we’ll see one of its use to convert CSV into Excel
We will use CSVtoExcel npm package to do the conversion of files. It provides convertCsvToXlsx function to implement the conversion.
convertCsvToXlsx(source, destination);
Steps to Implement:
- Import path and csv-to-xlsx module.
- Specify the source and destination directory and the file name with path module function.
- Use try catch block for error detection.
- Call the convert function to convert csv to excel function.
- Check the destination directory, you’ll see excel file.
Modules Required:
- path: This module is used to join the path.
- csv-to-xlsx: This module provides functionality to convert csv to excel file.
Creating Nodejs Application And Installing Module:
-
Step 1: Run NPM init in cli and Enter the basic information
npm init
-
Step 2:Now, create app.js or index.js or anything in which we’ll implement our function
touch app.js
-
Step 3: After creating the Nodejs application, Install the required modules using the following command:
npm i path @aternur/csv-to-xlsx
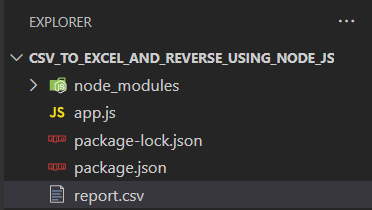
Project Structure: It will look like the following.
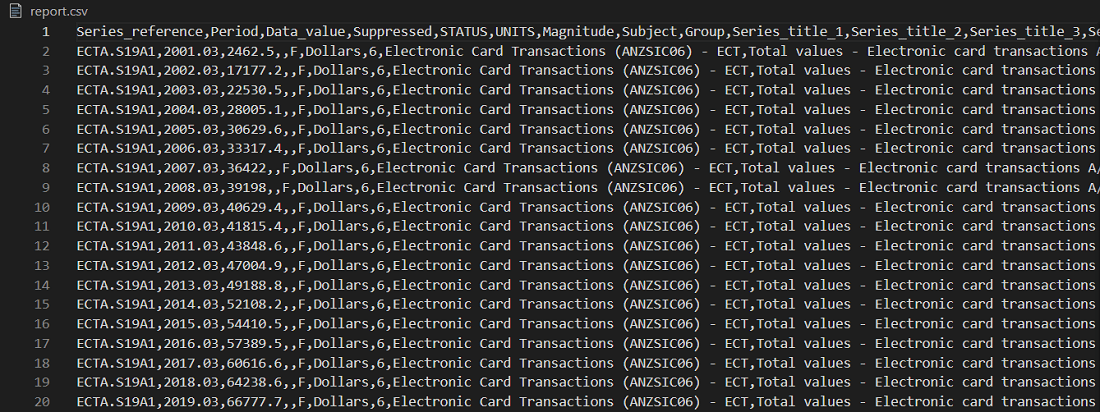
Report.csv File
Code:
Javascript
const path = require('path');
const convertCsvToXlsx = require('@aternus/csv-to-xlsx');
let source = path.join(__dirname, 'report.csv');
let destination = path.join(__dirname, 'converted_report.xlsx');
try {
convertCsvToXlsx(source, destination);
} catch (e) {
console.error(e.toString());
}
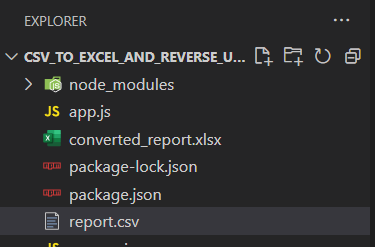
Output:
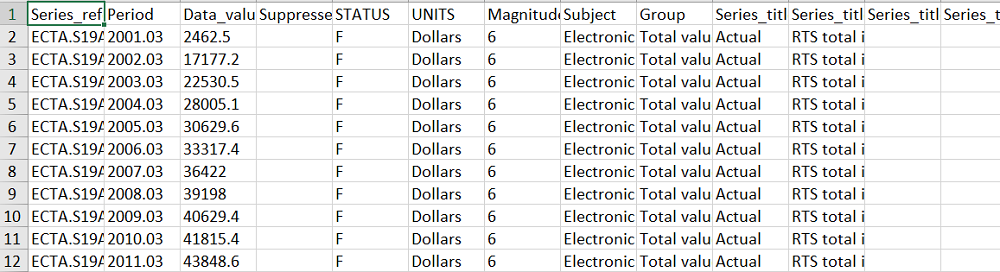
Excel File:
Like Article
Save Article
@aternus/csv-to-xlsx
Convert CSV files to XLSX (Excel 2007+ XML Format) files.
Written in JavaScript. Available for Node.js CLI and API.
Binaries are available for:
- Windows x64
- Linux x64
- MacOS x64
Features
- Binaries — download and run via your OS’s command-line utility
- Fast and Reliable
- Full UTF-8 support
- CSV Column detection
- Batch mode — convert a CSV folder to an XLSX folder
- Node.js CLI and API
Installation
npm install @aternus/csv-to-xlsx
Usage
Binaries
Download the executables from the bin folder.
./csv-to-xlsx-linux -i "input-directory" -o "output-directory"
Node.js CLI
Type --help for a full list of options.
npx @aternus/csv-to-xlsx -i "input-directory" -o "output-directory"
Node.js API
const path = require('path');
const { convertCsvToXlsx } = require('@aternus/csv-to-xlsx');

let source = path.join(__dirname, 'report.csv');
let destination = path.join(__dirname, 'converted_report.xlsx');

try {
  convertCsvToXlsx(source, destination);
} catch (e) {
  console.error(e.toString());
}
License
Released under the MIT License — see LICENSE.md for details.
As the title says, I currently have a CSV file created from SharePoint list data and in order to display this information as a spreadsheet, I want to convert it to an Excel XLSX file. I prefer to do this without relying on a third-party library. At first, I started to use ActiveX objects to try to recreate and/or save the CSV as XLSX, but there’s a limitation with that since I can’t really use it in other browsers besides IE. I was thinking using Blob to somehow convert it? That’s where I’m stuck.
function createCsv(data) {
    var result = "";

    if (data == null || data.length == 0) {
        return;
    }

    var columnDelimiter = ',';
    var lineDelimiter = 'n';

    var keys = Object.keys(data[0]);

    // spreadsheet header

    result += keys.join(columnDelimiter);
    result += lineDelimiter;

    // spreadsheet data

    data.forEach(function (obj) {
        var count = 0;

        keys.forEach(function (key) {
            if (count > 0) {
                result += columnDelimiter;
            }

            result += obj[key];
            count++;
        });

        result += lineDelimiter;
    });

    return result;
}

function downloadCsv(csv) {
    if (csv == null) {
        return;
    }

    var filename = "test.csv";

    csv = "data:text/csv;charset=utf-8," + csv;

    var data = encodeURI(csv);

    console.log(data);

    var link = document.getElementById('csv');
    link.setAttribute('href', data);
    link.setAttribute('download', filename);

    console.log(link);

    //displayCsv(csv);
}

function displayCsv() {
    // using test csv here
    var message = "data:text/csv;charset=utf-8, yo, hey, lol";
    //var fileType = "application/vnd.openxmlformats-officedocument.spreadsheetml.sheet";
    var fileType = "application/msexcel";

    var csvFile = new Blob([message], {type: fileType});
    var csvUrl = URL.createObjectURL(csvFile);

    console.log(csvFile);
    console.log(csvUrl);

}
CSV works fine with using the spreadsheet (by downloading and opening it in Excel), but I really need a way to display it as a spreadsheet on a webpage and not as text, so that’s why I’m looking to convert it over. Since I’m using this within SharePoint then I can use a Excel web part to display the XLSX — it won’t open CSV files like this though. Thanks in advance.
Содержание
- Convert CSV to Excel or Excel to CSV in Node.js
- Node.js CSV to Excel or Excel to CSV Converter
- Convert CSV to XLSX or XLS in Node.js
- Sample CSV
- CSV to Excel
- Convert XLSX or XLS to CSV in Node.js
- Get a Free API License
- Lyumih/csv_to_excel
- Sign In Required
- Launching GitHub Desktop
- Launching GitHub Desktop
- Launching Xcode
- Launching Visual Studio Code
- Latest commit
- Git stats
- Files
- README.md
- About
- Resources
- License
- Stars
- Watchers
- Forks
- Releases
- Packages 0
- Footer
- Aternus/csv-to-xlsx
- Sign In Required
- Launching GitHub Desktop
- Launching GitHub Desktop
- Launching Xcode
- Launching Visual Studio Code
- Latest commit
- Git stats
- Files
- README.md
- About
- Topics
- Resources
- License
- Stars
- Watchers
- Forks
- Releases
- Packages 0
- Used by 163
- Languages
- Footer
- ExcelJS tutorial
- Advertisements ExcelJS
- Excel xlsx
- Advertisements ExcelJS cells
- ExcelJS write to file
- ExcelJS read file
- ExcelJS columns
- ExcelJS rows
- ExcelJS load CSV
- ExcelJS cell alignment
- Advertisements ExcelJS hyperlink
- ExcelJS merge cells
- Advertisements ExcelJS formula
- Русские Блоги
- Как использовать JavaScript для чтения и экспорта файлов Excel в чистом виде
- js-xlsx введение
- 1.1. Совместимость
- 1.2. Как пользоваться
- Читать в Excel
- 2.1. Получить объект книги
- 2.1.1. Чтение локальных файлов
- 2.1.2. Чтение сетевых файлов
- 2.2. Подробная рабочая тетрадь
- 2.2.1. Workbook Object
- 2.2.2. Sheet Object
- 2.2.3. Объект Cell
- 2.2.4. Читать книгу
- Экспорт в Excel
- 3.1. Создайте собственный рукописный код
- 3.2. Используйте официальные инструменты для создания
- 3.3. Решение проблемы слияния ячеек
- 3.4. Пользовательский стиль
Convert CSV to Excel or Excel to CSV in Node.js

CSV format is widely used to import or export large datasets from one application to another. However, in some cases, you may need to convert CSV files to Excel XLSX or XLS. Likewise, vice versa can also be required in certain scenarios. In accordance with that, this article covers how to convert CSV to Excel and Excel to CSV format programmatically in Node.js.
Node.js CSV to Excel or Excel to CSV Converter
For back and forth conversion of CSV and Excel formats, we’ll use Aspose.Cells for Node.js via Java. It is a powerful and feature-rich API for the manipulation of spreadsheet formats from within the Node.js applications. You can either download the API’s package or install it using the following NPM command.
Convert CSV to XLSX or XLS in Node.js
The following are the steps to convert a CSV file to Excel XLSX or XLS.
- Create an object of LoadOptions class and initialize it with FileFormatType.CSV.
- Create an object of the Workbook class to load the CSV file.
- Convert CSV to XLSX using Workbook.save(String , SaveFormat.XLSX) method.
The following code sample shows how to convert CSV to Excel XLSX in Node.js.
View the code on Gist.
Sample CSV
CSV to Excel

Convert XLSX or XLS to CSV in Node.js
The following are the steps to convert XLSX or XLS file to CSV in Node.js.
- Create an object of the Workbook class to load the XLSX file.
- Convert XLSX file to CSV using Workbook.save(String , SaveFormat.CSV) method.
The following code sample shows how to convert Excel XLSX or XLS to CSV.
View the code on Gist.
Get a Free API License
In order to use the API without evaluation limitations, you can request a free temporary license.
Источник
Lyumih/csv_to_excel
Use Git or checkout with SVN using the web URL.
Work fast with our official CLI. Learn more.
Sign In Required
Please sign in to use Codespaces.
Launching GitHub Desktop
If nothing happens, download GitHub Desktop and try again.
Launching GitHub Desktop
If nothing happens, download GitHub Desktop and try again.
Launching Xcode
If nothing happens, download Xcode and try again.
Launching Visual Studio Code
Your codespace will open once ready.
There was a problem preparing your codespace, please try again.
Latest commit
Git stats
Files
Failed to load latest commit information.
README.md
CSV to EXCEL on JS. Переводит формат csv в Excel на JS
- Из файла csv сохранить в подготовленный формат для формирования excel.
- Из объекта, где указаны поля (row, column, cell) или двумерного массива (адресс ячейки, содержимое) сохранить в стандартную excel.
- Подготовленный файл сохранить в стандартную excel.
- Провалидировать входные данные на возможность создания excel
About
CSV to EXCEL on JS. Переводит формат csv в Excel на JS
Resources
License
Stars
Watchers
Forks
Releases
Packages 0
© 2023 GitHub, Inc.
You can’t perform that action at this time.
You signed in with another tab or window. Reload to refresh your session. You signed out in another tab or window. Reload to refresh your session.
Источник
Aternus/csv-to-xlsx
Use Git or checkout with SVN using the web URL.
Work fast with our official CLI. Learn more.
Sign In Required
Please sign in to use Codespaces.
Launching GitHub Desktop
If nothing happens, download GitHub Desktop and try again.
Launching GitHub Desktop
If nothing happens, download GitHub Desktop and try again.
Launching Xcode
If nothing happens, download Xcode and try again.
Launching Visual Studio Code
Your codespace will open once ready.
There was a problem preparing your codespace, please try again.
Latest commit
Git stats
Files
Failed to load latest commit information.
README.md
Convert CSV files to XLSX (Excel 2007+ XML Format) files.
Written in JavaScript. Available for Node.js CLI and API.
Binaries are available for:
- Binaries — download and run via your OS’s command-line utility
- Fast and Reliable
- Full UTF-8 support
- CSV Column detection
- Batch mode — convert a CSV folder to an XLSX folder
- Node.js CLI and API
Download the executables from the bin folder.
Type —help for a full list of options.
Released under the MIT License — see LICENSE.md for details.
About
Convert CSV files to XLSX (Excel 2007+ XML Format) files.
Topics
Resources
License
Stars
Watchers
Forks
Releases
Packages 0
Used by 163
Languages
© 2023 GitHub, Inc.
You can’t perform that action at this time.
You signed in with another tab or window. Reload to refresh your session. You signed out in another tab or window. Reload to refresh your session.
Источник
ExcelJS tutorial
last modified January 10, 2023
ExcelJS tutorial shows how to work with Excel files in JavaScript with ExcelJS library.
Advertisements ExcelJS
is a JavaScript library for reading, manipulating and writing spreadsheet data in XLSX format.
We install ExcelJS with npm i exceljs command.
Excel xlsx
In this article we work with xlsx files. The xlsx is a file extension for an open XML spreadsheet file format used by Microsoft Excel. The xlsm files support macros. The xltm are macro-enabled template files. The xls format is a proprietary binary format while xlsx is based on Office Open XML format.
Advertisements ExcelJS cells
In the first example, we work with cells. We get the reference to a cell with the getCell function.
In the example, we add data to a worksheet and later read them.
The ExcelJS library is imported.
A new workbook is generated.
The addWorksheet adds a new worksheet to the workbook.
The addRows function adds rows of data to the worksheet.
We refer to the top-left cell via the ‘A1’ address; the typical Excel notation. We get the value of the cell with the value property.
Another way is to pass a row and a column number to the getCell function.
The third way is to chain the getRow and getCell calls.
ExcelJS write to file
We write the data to a file with writeFile method.
The example adds some data to a worksheet and writes it into the simple.xslx file.
We write data to three cells.
In adddition, we add an array of values to the third row.
The worksheet is written to the file with writeFile function.
ExcelJS read file
In the following example, we read from an existing xlsx file. We assume some data in the first two columns.
The example reads data from two columns of the sheet.
To read the worksheet data, we use the readFile function.
We get the worksheet with the getWorksheet function.
We get the first column with getColumn .
We iterate over the current cells using the eachCell function.
ExcelJS columns
In the next example, we work with columns.
We define column headers and iterate over column cells.
Via the columns property, we add column headers and define column keys and widths.
We add some row data with addRow .
We refer to the first column via the key name. The eachCell is used to iterate over data.
Here, we get the column by the assigned letter.
Finally, we refer to the third column via the index value.
We get the number of columns with data with the actualColumnCount property.
ExcelJS rows
In the first example, we work with rows.
We add data with addRow and addRows functions and retrieve the rows of data with getRows .
We add an array of values with addRow .
Here, we add the data using key/value pairs, where each key is the column key name.
Multiple rows can be added with addRows .
The actualRowCount property returns the number of rows that have values.
We get values from rows 1..4.
We iterate over the rows and their cells.
ExcelJS load CSV
ExcelJS allows to read data from a CSV file.
We have some simple CSV data.
In the example, we read data from the cars.csv file, print it to the console and write it to the xlsx file.
We read the CSV data with the readFile function of the csv property.
We iterate over the data with two for loops.
When the reading is finished, we call the writeData function.
Inside the writeData function, we write the worksheet data into a xlsx file.
ExcelJS cell alignment
In the next example, we show how to align data in cells. We can align content horizontally and vertically.
To align content, we utilize the style and alignment properties.
Advertisements ExcelJS hyperlink
In the next example, we create a hyperlink.
To create a hyperlink, we use the hyperlink property of the cell value property. We make the text underlined with the font property.
ExcelJS merge cells
We can use the mergeCells function to merge cells.
The example merges cells A1 through C4.
Advertisements ExcelJS formula
To add formulas to cells, we can use the formula property.
The example inserts the SUM formula into the A7 cell.
In this article, we have worked with Excel files using the ExcelJS library.
Источник
Русские Блоги
Как использовать JavaScript для чтения и экспорта файлов Excel в чистом виде
js-xlsx введение
кSheetJSПроизведено js-xlsx Это очень удобная библиотека инструментов, которой для чтения и экспорта в Excel нужен только чистый JS. Она имеет мощные функции, поддерживает множество форматов и поддерживает xls 、 xlsx 、 ods (Собственный формат файлов таблицы OpenOffice) и более десятка форматов. Вся эта статья основана на xlsx Возьмем, к примеру, формат.
- Официальный гитхаб:https://github.com/SheetJS/js-xlsx
- Онлайн-демонстрационный адрес поддерживающей демонстрации для этой статьи:http://demo.haoji.me/2017/02/08-js-xlsx/
- Эта статья впервые была опубликована у меня синхронноличный блогсБлог сад。
1.1. Совместимость

1.2. Как пользоваться
dist В каталоге много JS-файлов, обычно используйте xlsx.core.min.js довольно, xlsx.full.min.js Он содержит все функциональные модули.

непосредственный script Этикетка может быть введена:
Читать в Excel
Чтение в Excel происходит в основном через XLSX.read(data, ); Способ достижения, ответьте на звонок WorkBook Основные значения типа следующие:
- base64 : Читать в режиме base64;
- binary : Формат BinaryString (n-й байт — это data.charCodeAt (n))
- string : Строка в кодировке UTF8;
- buffer : nodejs Buffer;
- array : Uint8Array, 8-битный беззнаковый массив;
- file : Путь к файлу (поддерживается только в nodejs);
2.1. Получить объект книги
2.1.1. Чтение локальных файлов
Непосредственно по коду:
2.1.2. Чтение сетевых файлов
2.2. Подробная рабочая тетрадь
2.2.1. Workbook Object
workbook Что в нем, распечатаем и посмотрим:

можно увидеть, SheetNames В нем сохраняются все названия листов, а затем Sheets Конкретное содержимое каждого листа сохраняется (мы называем это Sheet Object ). Каждый sheet Через что-то вроде A1 Такое значение ключа сохраняет содержимое каждой ячейки, и мы называем его объектом ячейки ( Cell Object ):

2.2.2. Sheet Object
Каждый Sheet Object Представляет форму, если она не ! Те, что в начале, указывают на обычные cell , В противном случае это означает какое-то особое значение, а именно:
- sheet[‘!ref’] : Указывает диапазон всех ячеек, например, от A1 до F8, он записывается как A1:F8 ;
- sheet[!merges] : Хранить некоторую информацию о слиянии ячеек, это массив, каждый массив состоит из s с e Составьте композицию объекта, s Значит старт, e Означает конец, r Представляет строку, c Представляет столбец;
- и многое другое;
Что касается слияния ячеек, в принципе не проблема понять следующую картину:

Результаты приведены ниже:

2.2.3. Объект Cell
Каждая ячейка — это объект ( Cell Object ),Есть t 、 v 、 r 、 h 、 w И другие поля (см.Здесь):
- t: указывает тип содержимого, s Представляет тип строки, n Представляет числовой тип, b Представляет логический тип, d Представляет тип даты и т. Д.
- v: представляет исходное значение;
- f: представляет формулу, например B2+B3 ;
- h: HTML-контент
- w: форматированный контент
- r: богатый текстовый контент rich text
- и многое другое
2.2.4. Читать книгу
в соответствии с !ref Определите сферу применения Excel, а затем в соответствии с !merges Убедитесь, что ячейки объединены (если есть), и, наконец, выведите всю таблицу, что вызывает затруднения. К счастью, сам плагин уже написал инструмент XLSX.utils Для непосредственного использования, без нашего собственного обхода, выходные данные инструмента в основном включают следующее:

Некоторые из них обычно не используются, наиболее часто используются:
- XLSX.utils.sheet_to_csv : Создать формат CSV
- XLSX.utils.sheet_to_txt : Создать текстовый формат
- XLSX.utils.sheet_to_html : Создать формат HTML
- XLSX.utils.sheet_to_json : Выходной формат JSON
Чаще всего используются sheet_to_csv или же sheet_to_html , Формат, объединение ячеек и другая информация будут игнорироваться при преобразовании в CSV, поэтому сложные таблицы могут быть неприменимы. Если вы конвертируете в html, ячейки будут объединены, но результат будет Код вместо , Это неудобно, когда вам нужно внести некоторые изменения в форму, поэтому вам все равно придется использовать соответствующие инструменты в зависимости от ситуации.
Вот простой пример вывода результатов путем преобразования в CSV, вы можете щелкнуть здесь, чтобы просмотретьДЕМО онлайн:
Экспорт в Excel
Существует два типа экспорта: один основан на существующей модификации Excel, другой — нового поколения, первый относительно прост, здесь мы сосредоточимся на втором.
3.1. Создайте собственный рукописный код
Экспорт файла Excel, в основном, как его создать sheet , Здесь мы пишем простой пример csv для Excel:
Получите объект blob выше, и вы можете загрузить его напрямую, см. Мой предыдущийJS всплывает диалоговое окно загрузкиИнкапсулирован внутри openDownloadDialog метод:
Таким образом, окончательная загрузка выглядит следующим образом:
3.2. Используйте официальные инструменты для создания
На самом деле, нам не нужно писать ни один из вышеперечисленных кодов. Чиновник предоставил нам готовые инструменты, в основном в том числе:
- aoa_to_sheet : Этот класс инструментов является наиболее мощным и практичным.Преобразование двумерного массива в лист автоматически обработает числовые, строковые, логические, даты и другие типы данных;
- table_to_sheet : Поставить один table dom Непосредственно преобразованный в лист, он будет автоматически распознан colspan с rowspan И преобразовать его в соответствующую ячейку и объединить;
- json_to_sheet : Преобразовать массив объектов в лист;
table_to_sheet Еще проще, прямо XLSX.utils.table_to_sheet($(‘table’)[0]) Может
3.3. Решение проблемы слияния ячеек
Вообще говоря, интерфейсное поколение excel Вместо csv Основная цель — решить проблему, заключающуюся в том, что csv не может выполнить слияние ячеек. В противном случае было бы неплохо напрямую экспортировать файл csv. Зачем вводить несколько сотен килобайт плагинов.
Предположим, мы хотим сгенерировать файл Excel в следующем формате, где A1-C1 Чтобы объединить ячейки:

код показан ниже:
Стоит обратить внимание на использование объединенных ячеек. null Зарезервируйте место, иначе следующий контент (в этом примере четвертый столбец Дополнительная информация ) Будет перезаписан.
3.4. Пользовательский стиль
Обычная версия не поддерживает определение шрифтов, цветов, цветов фона и т. Д., Вы можете использовать ее, если вам нужна эта функция.профессиональная версия, Вроде заряжено, потому что официальный сайт не видел адреса загрузки.
Источник
When I was a developer I sometimes had clients that wanted to generate reports but weren’t allowed to use any backend libraries as solutions. Their only option was to use pure JavaScript to generate reports in Excel.
And while that’s not easy to do, it is definitely possible following my instructions below!
Ask Yourself if a CSV File is Good Enough
Don’t worry, I will teach you to to create an actual excel file with pure JavaScript below.
But first, I need you to understand that a CSV (comma separated value) file with no formatting applied is 100x easier to create with JavaScript than an excel file is. So if you don’t need the formatting options that an xlsx file provides, please consider creating a CSV file instead. It will make everyone’s life significantly easier.
And that’s because generating a CSV file is relatively simple. The code below can take a 2D JavaScript array and produce a CSV file in a modern web browser (eg. not IE 7). Simply pass it 2d arrays and you’ll have CSV files popping out the other end.
<!DOCTYPE html>
<html lang="en">
<head>
    <meta charset="UTF-8">
    <title>CSV Export</title>
</head>
<body>
<button id="generateReportButton" onclick='generateFile();'>Generate Report</button>


<script>

function generateFile(){
	exportToCsv("MyFileName.csv",[[1,2],[3,4],[5,6]]);
}


function exportToCsv(filename, rows) {

  var processRow = function (row) {
    var finalVal = '';
    for (var j = 0; j < row.length; j++) {
      var innerValue = '';
      if(row[j] === 0){
        innerValue = row[j].toString();
      }
      if(row[j]){
        innerValue = row[j].toString();
      }
      if (row[j] instanceof Date) {
        innerValue = row[j].toLocaleString();
      };
      var result = innerValue.replace(/"/g, '""');
      if (result.search(/("|,|n)/g) >= 0)
        result = '"' + result + '"';
      if (j > 0)
        finalVal += ',';
      finalVal += result;
    }
    return finalVal + 'n';
  };

  var csvFile = '';
  for (var i = 0; i < rows.length; i++) {
		csvFile += processRow(rows[i]);
  }

  var blob = new Blob([csvFile], { type: 'text/csv;charset=utf-8;' });
  if (navigator.msSaveBlob) { // IE 10+
    navigator.msSaveBlob(blob, filename);
  } else {
    var link = document.createElement("a");
    if (link.download !== undefined) { // feature detection
      // Browsers that support HTML5 download attribute
      var url = URL.createObjectURL(blob);
      link.setAttribute("href", url);
      link.setAttribute("download", filename);
      link.style.visibility = 'hidden';
      document.body.appendChild(link);
      link.click();
      document.body.removeChild(link);
    }
  }

  }


</script>

</body>
</html>
You can likely shorten the exportToCsv method like in this StackOverflow post. Mine is a little longer because I wanted to make special cases for things like dates or random quotes in the array values. Either will work without too much issue though.
How Creating an Excel File in Pure JavaScript Works
This is the fun part. How the heck do we create an actual XLSX file with pure JavaScript?
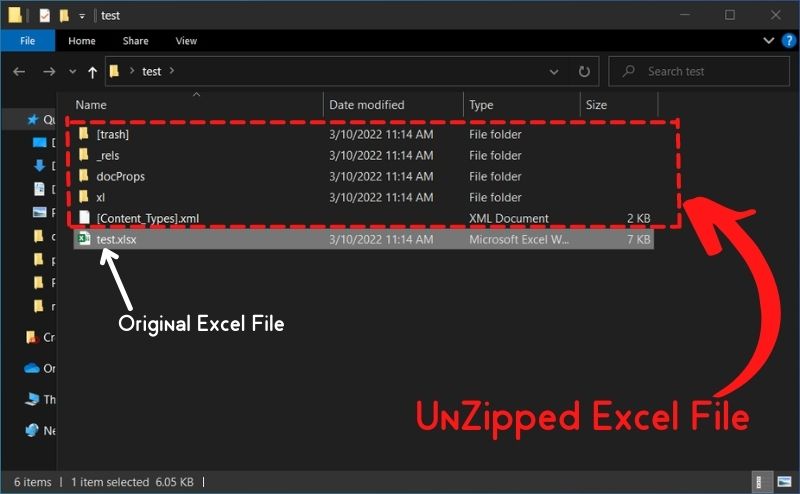
If you research Excel files, you’ll find that they’re just a bunch of XML files zipped together (using the SpreadsheetML specification). In fact, I recommend you take an excel file and unzip it with something like 7-zip to see its inner contents right now.
JavaScript is capable of zipping up files. And JavaScript is capable of creating XML files via strings. So to create an XLSX file with JavaScript all we have to do is reverse the unzipping of your Excel file and we did it! How hard can that be?
Well… Actually it’s really hard. But breathe easy because I’m here to help walk you through it. Let’s start with the easiest step of zipping up files with JavaScript.
Zipping Up Files With JavaScript
When I said we could create excel files with pure JavaScript, hopefully you didn’t take that to mean we could do this without any JavaScript libraries. Don’t get me wrong. You could write your own JavaScript zip utility and file saver utility to do this (it’s all open source so you can see how they did it). The problem is it’s complicated, time consuming, and beyond the scope of this blog post.
So we’re just going to leverage two utilities. The awesome JSZIP library to zip our files and FileSaver.js library to save the files. No need to download them for this demo as I’ll just use CDNJS’s CDN to grab the files in the code below.
Actually let’s demo creating a couple small files and saving them out now just so you can see how that part of the process works.
<!DOCTYPE html>
<html lang="en">
<head>
    <meta charset="UTF-8">
    <title>JavaScript Wtih Excel</title>

    <script src="https://cdnjs.cloudflare.com/ajax/libs/jszip/3.9.1/jszip.min.js"></script>
    <script src="https://cdnjs.cloudflare.com/ajax/libs/FileSaver.js/2.0.0/FileSaver.min.js"></script>
</head>
<body>
<button id="generateReportButton" onclick="generateFiles();">Generate Report</button>

<script>

  function generateFiles(){

	var zip = new JSZip();
	//create a file
	zip.file("Hello.txt", "Hello Worldn");

	//create a folder
	var myfolder = zip.folder("myFolder");
	//put a file in the folder
	myfolder.file("World.txt", "Hello Worldn");

	//save out the zip file
	zip.generateAsync({type:"blob"})
		.then(function(content) {
			// see FileSaver.js
			saveAs(content, "example.zip");
		});
  }

</script>

</body>
</html>
You can hopefully see where we’re going with this now. All we have to do is figure out the minimum amount of SpreadSheetML needed to create an excel file and then zip that SpreadsheetML up using the utilities above.
Creating a “Hello World” SpreadSheet Using JavaScript
While I’ve made this sound easy so far, it’s not.
The part that makes it hard is that the SpreadSheetML needed for a basic XLSX file is effectively spaghetti code and incredibly hard to work with. And as far as I know there’s no good JavaScript utility out there to generate it.
That said, Let’s get right to the final solution that will generate Excel files for you and then I’ll explain how it all works. Simply copy and paste the code below into an HTML file, run it, and you’ll get a full Excel file out the other end.
<!DOCTYPE html>
<html lang="en">
<head>
    <meta charset="UTF-8">
    <title>JavaScript Wtih Excel</title>

    <script src="https://cdnjs.cloudflare.com/ajax/libs/jszip/3.9.1/jszip.min.js"></script>
    <script src="https://cdnjs.cloudflare.com/ajax/libs/FileSaver.js/2.0.0/FileSaver.min.js"></script>
</head>
<body>
<button id="generateReportButton" onclick="generateFiles();">Generate Report</button>

<script>

  function generateFiles(){

   var zip = new JSZip();

      zip.file("[Content_Types].xml", '<?xml version="1.0" encoding="UTF-8" standalone="yes"?>n' +
          '<Types xmlns="http://schemas.openxmlformats.org/package/2006/content-types"><Default Extension="rels" ContentType="application/vnd.openxmlformats-package.relationships+xml"/><Default Extension="xml" ContentType="application/xml"/><Override PartName="/xl/workbook.xml" ContentType="application/vnd.openxmlformats-officedocument.spreadsheetml.sheet.main+xml"/><Override PartName="/xl/worksheets/sheet1.xml" ContentType="application/vnd.openxmlformats-officedocument.spreadsheetml.worksheet+xml"/><Override PartName="/xl/theme/theme1.xml" ContentType="application/vnd.openxmlformats-officedocument.theme+xml"/><Override PartName="/xl/styles.xml" ContentType="application/vnd.openxmlformats-officedocument.spreadsheetml.styles+xml"/><Override PartName="/docProps/core.xml" ContentType="application/vnd.openxmlformats-package.core-properties+xml"/><Override PartName="/docProps/app.xml" ContentType="application/vnd.openxmlformats-officedocument.extended-properties+xml"/></Types>');

      var rels = zip.folder("_rels");
      rels.file(".rels",'<?xml version="1.0" encoding="UTF-8" standalone="yes"?>n' +
          '<Relationships xmlns="http://schemas.openxmlformats.org/package/2006/relationships"><Relationship Id="rId3" Type="http://purl.oclc.org/ooxml/officeDocument/relationships/extendedProperties" Target="docProps/app.xml"/><Relationship Id="rId2" Type="http://schemas.openxmlformats.org/package/2006/relationships/metadata/core-properties" Target="docProps/core.xml"/><Relationship Id="rId1" Type="http://purl.oclc.org/ooxml/officeDocument/relationships/officeDocument" Target="xl/workbook.xml"/></Relationships>')


      var xl = zip.folder("xl");

      var xl_rels = xl.folder("_rels");
      xl_rels.file("workbook.xml.rels",'<?xml version="1.0" encoding="UTF-8" standalone="yes"?>n' +
          '<Relationships xmlns="http://schemas.openxmlformats.org/package/2006/relationships"><Relationship Id="rId3" Type="http://purl.oclc.org/ooxml/officeDocument/relationships/styles" Target="styles.xml"/><Relationship Id="rId2" Type="http://purl.oclc.org/ooxml/officeDocument/relationships/theme" Target="theme/theme1.xml"/><Relationship Id="rId1" Type="http://purl.oclc.org/ooxml/officeDocument/relationships/worksheet" Target="worksheets/sheet1.xml"/></Relationships>');

      xl.file("styles.xml",'<?xml version="1.0" encoding="UTF-8" standalone="yes"?>n' +
          '<styleSheet xmlns="http://purl.oclc.org/ooxml/spreadsheetml/main" xmlns:mc="http://schemas.openxmlformats.org/markup-compatibility/2006" mc:Ignorable="x14ac x16r2 xr" xmlns:x14ac="http://schemas.microsoft.com/office/spreadsheetml/2009/9/ac" xmlns:x16r2="http://schemas.microsoft.com/office/spreadsheetml/2015/02/main" xmlns:xr="http://schemas.microsoft.com/office/spreadsheetml/2014/revision">' +
          '<fonts count="1"><font /></fonts>' +
          '<fills count="1"><fill /></fills>' +
          '<borders count="1"><border /></borders>' +
          '<cellStyleXfs count="1"><xf /></cellStyleXfs>' +
          '<cellXfs count="1"><xf /></cellXfs>' +
          '</styleSheet>');
      xl.file("workbook.xml",'<?xml version="1.0" encoding="UTF-8" standalone="yes"?>n' +
          '<workbook xmlns="http://purl.oclc.org/ooxml/spreadsheetml/main" xmlns:r="http://purl.oclc.org/ooxml/officeDocument/relationships" xmlns:mc="http://schemas.openxmlformats.org/markup-compatibility/2006" mc:Ignorable="x15 xr xr6 xr10 xr2" xmlns:x15="http://schemas.microsoft.com/office/spreadsheetml/2010/11/main" xmlns:xr="http://schemas.microsoft.com/office/spreadsheetml/2014/revision" xmlns:xr6="http://schemas.microsoft.com/office/spreadsheetml/2016/revision6" xmlns:xr10="http://schemas.microsoft.com/office/spreadsheetml/2016/revision10" xmlns:xr2="http://schemas.microsoft.com/office/spreadsheetml/2015/revision2" conformance="strict"><fileVersion appName="xl" lastEdited="7" lowestEdited="7" rupBuild="23801"/><workbookPr dateCompatibility="0" defaultThemeVersion="166925"/><mc:AlternateContent xmlns:mc="http://schemas.openxmlformats.org/markup-compatibility/2006"><mc:Choice Requires="x15"><x15ac:absPath url="C:\Users\534223\Desktop\carlos project\" xmlns:x15ac="http://schemas.microsoft.com/office/spreadsheetml/2010/11/ac"/></mc:Choice></mc:AlternateContent><xr:revisionPtr revIDLastSave="0" documentId="8_{3A289708-EEB4-4C61-80F8-0077D98C4C49}" xr6:coauthVersionLast="46" xr6:coauthVersionMax="46" xr10:uidLastSave="{00000000-0000-0000-0000-000000000000}"/><bookViews><workbookView xWindow="-108" yWindow="-108" windowWidth="23256" windowHeight="12576" xr2:uid="{7AE87E27-093C-4FCA-9244-038BA05B474C}"/></bookViews><sheets><sheet name="180 Days" sheetId="1" r:id="rId1"/></sheets><calcPr calcId="191029"/><extLst><ext uri="{79F54976-1DA5-4618-B147-4CDE4B953A38}" xmlns:x14="http://schemas.microsoft.com/office/spreadsheetml/2009/9/main"><x14:workbookPr/></ext><ext uri="{140A7094-0E35-4892-8432-C4D2E57EDEB5}" xmlns:x15="http://schemas.microsoft.com/office/spreadsheetml/2010/11/main"><x15:workbookPr chartTrackingRefBase="1"/></ext><ext uri="{B58B0392-4F1F-4190-BB64-5DF3571DCE5F}" xmlns:xcalcf="http://schemas.microsoft.com/office/spreadsheetml/2018/calcfeatures"><xcalcf:calcFeatures><xcalcf:feature name="microsoft.com:RD"/><xcalcf:feature name="microsoft.com:Single"/><xcalcf:feature name="microsoft.com:FV"/><xcalcf:feature name="microsoft.com:CNMTM"/><xcalcf:feature name="microsoft.com:LET_WF"/></xcalcf:calcFeatures></ext></extLst></workbook>');

      var worksheets = xl.folder("worksheets");
      worksheets.file("sheet1.xml", '<?xml version="1.0" encoding="UTF-8" standalone="yes"?><worksheet xmlns="http://purl.oclc.org/ooxml/spreadsheetml/main" xmlns:r="http://purl.oclc.org/ooxml/officeDocument/relationships" xmlns:v="urn:schemas-microsoft-com:vml" xmlns:mc="http://schemas.openxmlformats.org/markup-compatibility/2006" mc:Ignorable="x14ac xr xr2 xr3" xmlns:x14ac="http://schemas.microsoft.com/office/spreadsheetml/2009/9/ac" xmlns:xr="http://schemas.microsoft.com/office/spreadsheetml/2014/revision" xmlns:xr2="http://schemas.microsoft.com/office/spreadsheetml/2015/revision2" xmlns:xr3="http://schemas.microsoft.com/office/spreadsheetml/2016/revision3" xr:uid="{7692402F-0706-4FB4-BC3D-F5CCF87FAADF}"><dimension ref="A1"/><sheetViews><sheetView tabSelected="1" workbookViewId="0"/></sheetViews><sheetFormatPr defaultRowHeight="14.4" x14ac:dyDescent="0.3"/><sheetData><row><c t="inlineStr"><is><t>Hello</t></is></c><c t="inlineStr"><is><t>World</t></is></c></row></sheetData><pageMargins left="0.7" right="0.7" top="0.75" bottom="0.75" header="0.3" footer="0.3"/></worksheet>');

      zip.generateAsync({type:"blob"}).then(function(content) {
          // see FileSaver.js
          saveAs(content, "Excel_File.xlsx");
      });

  }

</script>

</body>
</html>
You did it! You created an Excel file with pure JavaScript! Congratulations! Now how does it work?
Well first take note of the minimum number of folders and files I used to make it work. There might be ways to reduce it down further if you study the SpreadsheetML specification, but I was only able to get it down to about 3 folders and 5 files. The structure looks like this.
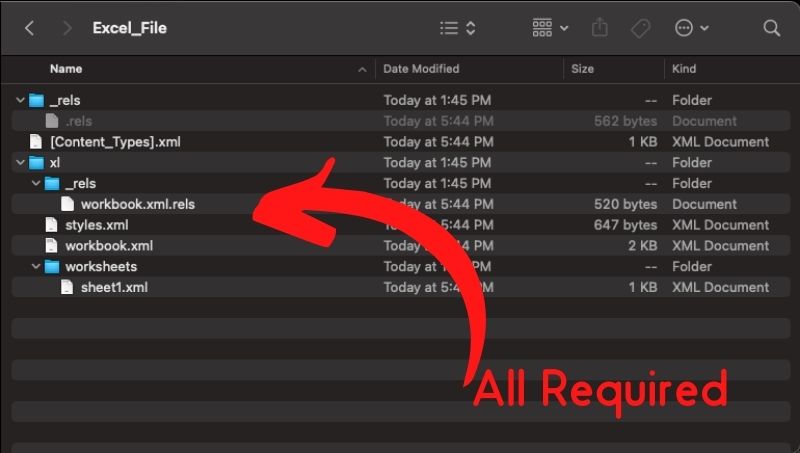
The directories I needed were as follows. They’re not too exciting you just need to create them.
- _rels
- xl
- xl->_rels
- xl->worksheets
And the files I needed were as follows.
- [Content_Types].xml – File is needed to store metadata. It basically says where all the required files are located. If you wanted to try to build this with fewer directories I’d start by modifying this file.
- _rels->.rels – File is needed to store metadata.
- xl->_rels->workbook.xml.rels – More boring metadata that I couldn’t get it to work without.
- xl->styles.xml – Contains styles to apply to your worksheet. I’d actually prefer to remove this document and do styles inline if I could (I don’t think you can) because trying to use this is a complete mess.
- xl->workbook.xml – Contains your workbook. I created a very basic one that basically points to your worksheets.
- xl->worksheets->sheet1.xml – I created a basic worksheet that has a few simple values in the cells. This is where you’re going to do the main work of entering data into your spreadsheet and is really the meat of the whole thing.
I’d post the code for each file but it’s all in the JavaScript you copied earlier. Or, a better way to see it is to unzip the excel file this JavaScript generates and check it out for yourself.
Would I recommend creating excel files in pure JavaScript? No. But, I’ve worked in environments where it would be a super cool feature to have and JavaScript is the only way to produce the file. In a pinch the juice might be worth the squeeze. Let me know what you think in the comments!