
If you frequently create a certain type of document, such as a monthly report, a sales forecast, or a presentation with a company logo, save it as a template so you can use that as your starting point instead of recreating the file from scratch each time you need it. Start with a document that you already created, a document you downloaded, or a new Microsoft template you customized.
Save a template
-
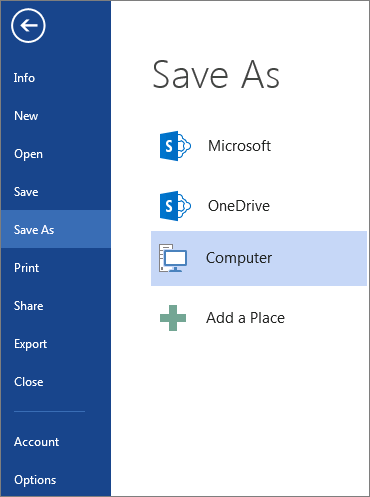
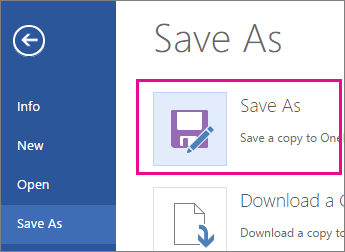
To save a file as a template, click File > Save As.
-
Double-click Computer or, in Office 2016 programs, double-click This PC.

-
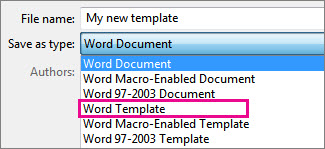
Type a name for your template in the File name box.
-
For a basic template, click the template item in the Save as type list. In Word for example, click Word Template.
If your document contains macros, click Word Macro-Enabled Template.
Office automatically goes to the Custom Office Templates folder.
-
Click Save.
Tip: To change where your application automatically saves your templates, click File > Options > Save and type the folder and path you want to use in the Default personal templates location box. Any new templates you save will be stored in that folder, and when you click File > New > Personal, you’ll see the templates in that folder.
Edit your template
To update your template, open the file, make the changes you want, and then save the template.
-
Click File > Open.
-
Double-click Computer or This PC.
-
Browse to the Custom Office Templates folder that’s under My Documents.
-
Click your template, and click Open.
-
Make the changes you want, then save and close the template.
Use your template to make a new document
To start a new file based on your template, click File > New > Custom, and click your template.
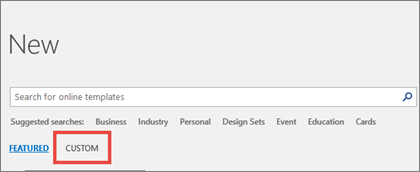
Note: If you’re using Office 2013, this button may say Personal instead of Custom.
Use your templates from earlier versions of Office
If you made templates in an earlier version of Office, you can still use them in Office 2013 and 2016. The first step is to move them into the Custom Office Templates folder so your application can find them. To move your templates quickly, use the Fix it tool.
Word
-
Open the Word document that you want to save as a template.
-
On the File menu, click Save as Template.
-
In the Save As box, type the name that you want to use for the new template.
-
(Optional) In the Where box, choose a location where the template will be saved.
-
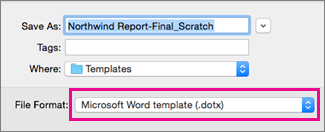
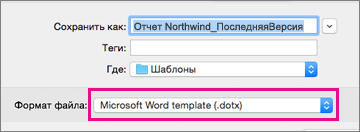
Next to File Format, click Microsoft Word template (.dotx), or, if your document contains macros, click Microsoft Word Macro-Enabled template (.dotm).
-
Click Save.
Unless you select a different location, the template is saved in /Users/username/Library/Group Containers/UBF8T346G9.Office/User Content/Templates.
To change where Word automatically saves your templates, on the Word menu, click Preferences, and then under Personal Settings, click File Locations. Under File Locations, select User templates from the list, and then click Modify. Type the new folder and path you want to use, and Word will save any new templates in that folder.
You can customize an existing template to make it even more useful. Add static information to the existing template, and then save the file again (as a template).
-
On the File menu, click New from Template.
-
Click a template that is similar to the one you want to create, and then click Create.
Note: If you can’t find a template, you can search for it based on keywords in the Search All Templates box.
-
Add, delete, or change any text, graphics, or formatting, and make any other changes that you want to appear in all new documents that you base on the template.
-
On the File menu, click Save as Template.
-
In the Save As box, type the name that you want to use for the new template.
-
(Optional) In the Where box, choose a location where the template will be saved.
-
Next to File Format, click Microsoft Word template (.dotx), or, if your template contains macros, click Microsoft Word Macro-Enabled template.
-
Click Save.
Unless you select a different location, the template is saved in /Users/username/Library/Group Containers/UBF8T346G9.Office/User Content/Templates.
To change where Word automatically saves your templates, on the Word menu, click Preferences, and then under Personal Settings, click File Locations. Under File Locations, select User templates from the list, and then click Modify. Type the new folder and path you want to use, and Word will save any new templates in that folder.
To start a new document based on your template, on the File menu, click New from Template, and then select the template you want to use.
-
In the Finder, open /Users/username/Library/Group Containers/UBF8T346G9.Office/User Content/Templates.
-
Drag the templates that you want to delete to the Trash.
PowerPoint
-
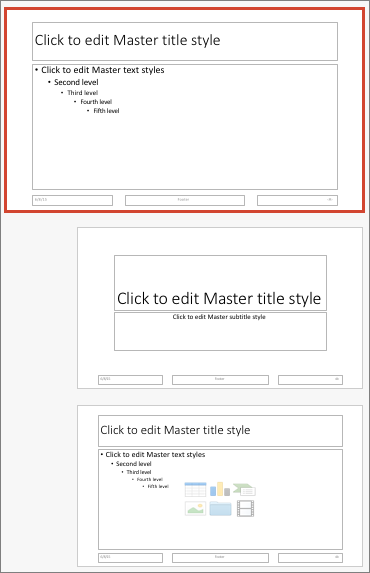
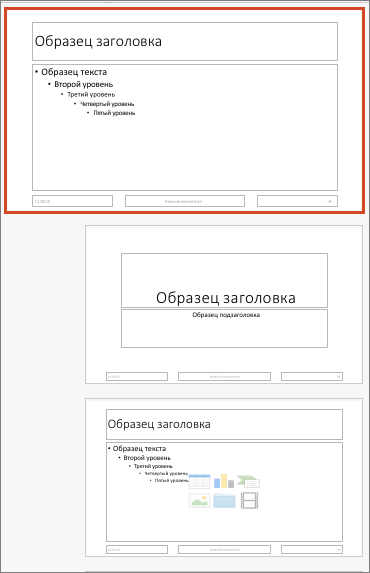
Open a blank presentation, and then on the View tab, click Slide Master.
The slide master is the largest slide image at the top of the slide thumbnail list. Associated layouts are positioned beneath it.
-
To make changes to the slide master or layouts, on the Slide Master tab, do any of these:
-
To add a colorful theme with special fonts, and effects, click Themes, and pick a theme.
-
To change the background, click Background Styles, and pick a background.
-
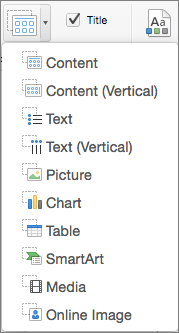
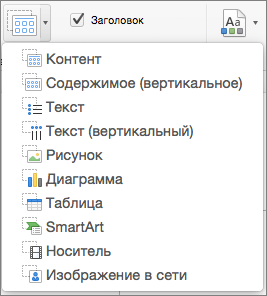
To add a placeholder for text, picture, chart, and other objects, in the thumbnail pane, click the slide layout that you want to hold the placeholder. From Insert Placeholder, pick the type of placeholder you want to add, and drag to draw the placeholder size.
-

-
Open the presentation that you want to save as a template.
-
On the File tab, click Save as Template.
-
In the Save As box, type the name that you want to use for the new template.
-
(Optional) In the Where box, choose a location where the template will be saved.
-
Next to File Format, click PowerPoint Template (.potx), or, if your presentation contains macros, click PowerPoint Macro-Enabled Template (.potm).
-
Click Save.
Unless you select a different location, the template is saved in /Users/username/Library/Group Containers/UBF8T346G9.Office/User Content/Templates.
You can customize an existing template to make it even more useful. Add static information to the existing template, and then save the file again (as a template).
-
On the File menu, click New from Template.
-
Click a template that is similar to the one you want to create, and then click Create.
Note: If you can’t find a template, you can search for it based on keywords in the Search All Templates box.
-
Add, delete, or change any text, graphics, or formatting, and make any other changes that you want to appear in all new presentations that you base on the template.
-
On the File menu, click Save as Template.
-
In the Save As box, type the name that you want to use for the new template.
-
(Optional) In the Where box, choose a location where the template will be saved.
-
Next to File Format, click PowerPoint Template (.potx), or, if your template contains macros, click PowerPoint Macro-Enabled Template (.potm).
-
Click Save.
Unless you select a different location, the template is saved in /Users/username/Library/Group Containers/UBF8T346G9.Office/User Content/Templates.
To start a new presentation based on a template, on the File menu, click New from Template, and then select the template you want to use.
-
In the Finder, open /Users/username/Library/Group Containers/UBF8T346G9.Office/User Content/Templates.
-
Drag the templates that you want to delete to the Trash.
Excel
-
Open the workbook that you want to save as a template.
-
On the File menu, click Save as Template.
-
In the Save As box, type the name that you want to use for the new template.
-
(Optional) In the Where box, choose a location where the template will be saved.
-
Next to File Format, click Excel Template (.xltx), or, if your workbook contains macros, click Excel Macro-Enabled Template (.xltm).
-
Click Save.
Unless you select a different location, the template is saved in /Users/username/Library/Group Containers/UBF8T346G9.Office/User Content/Templates.
You can customize an existing template to make it even more useful. Add static information to the existing template, and then save the file again (as a template).
-
On the File menu, click New from Template.
-
Click a template that is similar to the one you want to create, and then click Create.
Note: If you can’t find a template, you can search for it based on keywords in the Search All Templates box.
-
Add, delete, or change any content, graphics, or formatting, and make any other changes that you want to appear in all new workbooks that you base on the template.
-
On the File menu, click Save as Template.
-
In the Save As box, type the name that you want to use for the new template.
-
(Optional) In the Where box, choose a location where the template will be saved.
-
Next to File Format, click Excel Template (.xltx), or, if your template contains macros, click Excel Macro-Enabled Template (.xltm).
-
Click Save.
Unless you select a different location, the template is saved in /Users/username/Library/Group Containers/UBF8T346G9.Office/User Content/Templates.
To start a new workbook based on a template, on the File menu, click New from Template, and then select the template you want to use.
-
In the Finder, open /Users/username/Library/Group Containers/UBF8T346G9.Office/User Content/Templates.
-
Drag the templates that you want to delete to the Trash.
See also
Differences between templates, themes, and Word styles
Word
-
Open the document.
-
Add, delete, or change any text, graphics, or formatting, and make any other changes that you want to appear in all new documents that you base on the template.
-
On the File menu, click Save As.
-
On the Format pop-up menu, click Word Template (.dotx).
-
In the Save As box, type the name that you want to use for the new template, and then click Save.
Unless you select a different location, the template is saved in /Users/username/Library/Application Support/Microsoft/Office/User Templates/My Templates.
-
On the File menu, click Close.
To organize templates, use the Finder to create a new folder in /Users/username/Library/Application Support/Microsoft/Office/User Templates/My Templates, and then save your template in the new folder.
Note: If you are using Mac OS X 7 (Lion), the Library folder is hidden by default. To show the Library folder, in the Finder, click the Go menu, and then hold down OPTION.
You can customize an existing template to make it even more useful. Add static information to the existing template, and then save the file again (as a template).
-
On the Standard toolbar, click New from template
. -
In the left navigation pane, under TEMPLATES, click All.
Note: If you can’t find a template, you can search for it based on keywords in the Search box.
-
Click a template that is similar to the one that you want to create, and then click Choose.
-
Add, delete, or change any text, graphics, or formatting, and make any other changes that you want to appear in all new documents that you base on the template.
-
On the File menu, click Save As.
-
On the Format pop-up menu, click Word Template (.dotx).
-
In the Save As box, type the name that you want to use for the new template, and then click Save.
Unless you select a different location, the template is saved in /Users/username/Library/Application Support/Microsoft/Office/User Templates/My Templates.
To organize templates, use the Finder to create a new folder in /Users/username/Library/Application Support/Microsoft/Office/User Templates/My Templates, and then save your template in the new folder.
Note: If you are using Mac OS X 7 (Lion), the Library folder is hidden by default. To show the Library folder, in the Finder, click the Go menu, and then hold down OPTION.
 .
.-
On the Standard toolbar, click New from template
. -
In the left navigation pane, under TEMPLATES, click My Templates.
Note: If you created folders to organize your templates, the folders are displayed under My Templates. You need to click the folder to see the templates.
-
Click the template that you created, and then click Choose.
-
In the Finder, open /Users/username/Library/Application Support/Microsoft/Office/User Templates/My Templates.
Note: If you are using Mac OS X 7 (Lion), the Library folder is hidden by default. To show the Library folder, in the Finder, click the Go menu, and then hold down OPTION .
-
Drag the templates that you want to delete to the Trash.
PowerPoint
-
Open the presentation that you want to create the new template from.
-
Add, delete, or change any text, graphics, or formatting, and make any other changes that you want to appear in all new presentations that you base on the template.
-
On the File menu, click Save As.
-
On the Format pop-up menu, click PowerPoint Template (.potx).
-
In the Save As box, type the name that you want to use for the new template, and then click Save.
Unless you select a different location, the template is saved in /Users/username/Library/Application Support/Microsoft/Office/User Templates/My Templates.
To organize templates, use the Finder to create a new folder in /Users/username/Library/Application Support/Microsoft/Office/User Templates/My Templates, and then save your template in the new folder.
Note: If you are using Mac OS X 7 (Lion), the Library folder is hidden by default. To show the Library folder, in the Finder, click the Go menu, and then hold down OPTION.
You can customize an existing template to make it even more useful. Add static information to the existing template, and then save the file again (as a template).
-
On the Standard toolbar, click New from template
. -
In the left navigation pane, under TEMPLATES, click All.
Note: If you can’t find a template, you can search for a template based on keywords in the Search box.
-
Click a template that is similar to the one that you want to create, and then click Choose.
-
Add, delete, or change any text, graphics, or formatting, and make any other changes that you want to appear in all new documents that you base on the template.
If you want to make one change to replicate it in several slide layouts, rather than changing each layout or slide individually, you can edit slide masters.
-
On the File menu, click Save As.
-
On the Format pop-up menu, click PowerPoint Template (.potx).
-
In the Save As box, type the name that you want to use for the new template, and then click Save.
Unless you select a different location, the template is saved in /Users/username/Library/Application Support/Microsoft/Office/User Templates/My Templates.
To organize templates, use the Finder to create a new folder in /Users/username/Library/Application Support/Microsoft/Office/User Templates/My Templates, and then save your template in the new folder.
Note: If you are using Mac OS X 7 (Lion), the Library folder is hidden by default. To show the Library folder, in the Finder, click the Go menu, and then hold down OPTION.
-
On the Standard toolbar, click New from template
. -
In the left navigation pane, under TEMPLATES, click My Templates.
Note: If you created folders to organize your templates, the folders are displayed under My Templates. You need to click the folder to see the templates.
-
In the right navigation pane, you can select the colors, font, and slide size for the template.
-
Click the template that you created, and then click Choose.
-
In the Finder, open /Users/username/Library/Application Support/Microsoft/Office/User Templates/My Templates.
Note: If you are using Mac OS X 7 (Lion), the Library folder is hidden by default. To show the Library folder, in the Finder, click the Go menu, and then hold down OPTION .
-
Drag the templates that you want to delete to the Trash.
Excel
-
Open the workbook that you want to create the new template from.
-
Add, delete, or change any text, graphics, or formatting, and make any other changes that you want to appear in all new documents that you base on the template.
-
On the File menu, click Save As.
-
On the Format pop-up menu, click Excel Template (.xltx).
-
In the Save As box, type the name that you want to use for the new template, and then click Save.
Unless you select a different location, the template is saved in /Users/username/Library/Application Support/Microsoft/Office/User Templates/My Templates.
To organize templates, use the Finder to create a new folder in /Users/username/Library/Application Support/Microsoft/Office/User Templates/My Templates, and then save your template in the new folder.
Note: If you are using Mac OS X 7 (Lion), the Library folder is hidden by default. To show the Library folder, in the Finder, click the Go menu, and then hold down OPTION.
You can customize an existing template to make it even more useful. Add static information to the existing template, and then save the file again (as a template).
-
On the Standard toolbar, click New from template
. -
In the left navigation pane, under TEMPLATES, click All.
Note: If you can’t find a template, you can search for a template based on keywords in the Search box.
-
Click a template that is similar to the one that you want to create, and then click Choose.
-
Add, delete, or change any text, graphics, or formatting, and make any other changes that you want to appear in all new documents that you base on the template.
-
On the File menu, click Save As.
-
On the Format pop-up menu, click Excel Template (.xltx).
-
In the Save As box, type the name that you want to use for the new template, and then click Save.
Unless you select a different location, the template is saved in /Users/username/Library/Application Support/Microsoft/Office/User Templates/My Templates.
To organize templates, use the Finder to create a new folder in /Users/username/Library/Application Support/Microsoft/Office/User Templates/My Templates, and then save your template in the new folder.
Note: If you are using Mac OS X 7 (Lion), the Library folder is hidden by default. To show the Library folder, in the Finder, click the Go menu, and then hold down OPTION.
-
On the Standard toolbar, click New from template
. -
In the left navigation pane, under TEMPLATES, click My Templates.
Note: If you created folders to organize your templates, the folders are displayed under My Templates. You need to click the folder to see the templates.
-
Click the template that you created, and then click Choose.
-
In the Finder, open /Users/username/Library/Application Support/Microsoft/Office/User Templates/My Templates.
Note: If you are using Mac OS X 7 (Lion), the Library folder is hidden by default. To show the Library folder, in the Finder, click the Go menu, and then hold down OPTION .
-
Drag the templates that you want to delete to the Trash.
See also
Modify a slide master
Customize how Excel starts in Excel for Mac
Differences between templates, themes, and Word styles
If you think of your current document as a template, you can save it with a different name to create a new document that’s based on the current one. Whenever you want to create a document like that, you’ll open your document in Word for the web, go to File > Save As, and create a document that’s a copy of the one you started with.
On the other hand, if you’re thinking of the kind of templates you see by going to File > New, then no: you can’t create those in Word for the web.
Instead, do this:
If you have the Word desktop application, use the Open in Word command in Word for the web to open the document in Word on your desktop.

From there, create a template. When you go to File > New in the Word desktop application, you’ll be able to use your template for new documents. And if you store the documents online, you can edit them in Word for the web.
See Also
Microsoft Templates and Themes
Download free, pre-built templates
Free background templates for PowerPoint
Edit templates
Если вы часто создаете документ определенного типа, например ежемесячный отчет, прогноз продаж или презентацию с логотипом компании, сохраните его в качестве шаблона, чтобы использовать его в качестве отправной точки вместо повторного создания файла с нуля каждый раз, когда он вам нужен. Начните с уже созданного документа, скачавшего документа или нового шаблона Майкрософт , который вы настроили.
Сохранение шаблона
-
Чтобы сохранить файл как шаблон, щелкните вкладку Файл и выберите команду Сохранить как.
-
Дважды щелкните пункт Компьютер (в приложениях Office 2016 — Этот компьютер).
-
Введите имя шаблона в поле Имя файла.
-
Чтобы создать базовый шаблон, выберите соответствующий пункт в списке Тип файла. Например, в Word следует выбрать Шаблон Word.
Если ваш документ содержит макросы, щелкните Шаблон Word с поддержкой макросов.
При этом Office автоматически перейдет в папку «Настраиваемые шаблоны Office».
-
Нажмите кнопку Сохранить.


Совет: Чтобы изменить расположение для автоматического сохранения шаблонов, на вкладке Файл выберите пункт Параметры, щелкните категорию Сохранение и укажите путь к нужной папке в поле Расположение личных шаблонов по умолчанию. Все новые шаблоны будут сохраняться в указанном расположении, а если на вкладке Файл выбрать команду Создать и перейти в категорию Личные, будут показаны шаблоны из этой папки.
Редактирование шаблона
Чтобы обновить свой шаблон, откройте файл, внесите необходимые изменения и сохраните шаблон.
-
Щелкните Файл > Открыть.
-
Дважды щелкните пункт Компьютер (или Этот компьютер).
-
Перейдите в папку Пользовательские шаблоны Office, которая находится в папке Документы.
-
Щелкните шаблон и нажмите кнопку Открыть.
-
Внесите необходимые изменения, а затем сохраните и закройте шаблон.
Создание нового документа с помощью шаблона
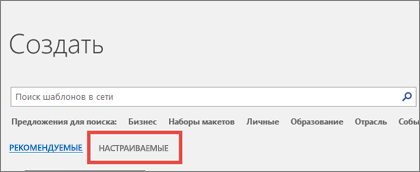
Чтобы запустить новый файл на основе шаблона, щелкните Файл > Создать > Пользовательский и щелкните шаблон.
Примечание: Если вы используете Office 2013, на этой кнопке может быть указано личное , а не настраиваемое.
Использование шаблонов из предыдущих версий Office
Если вы создали шаблоны в более ранней версии Office, то можете использовать их в Office 2013 или 2016. Для этого сначала переместите соответствующие файлы в папку «Настраиваемые шаблоны Office», чтобы они стали доступны в приложении. Для быстрого перемещения шаблонов используйте инструмент Fix it.
Word
-
Откройте документ Word, который требуется сохранить в виде шаблона.
-
В меню Файл выберите команду Сохранить как шаблон.
-
В поле Сохранить как введите имя нового шаблона.
-
(Необязательно) В поле Где выберите расположение, в котором будет сохранен шаблон.
-
Рядом с полем Формат файла щелкните Шаблон Microsoft Word (.dotx) или, если документ содержит макросы, щелкните Microsoft Word Macro-Enabled шаблон (DOTM).
-
Нажмите кнопку Сохранить.
Если вы не выберете другое расположение, шаблон сохраняется в папке /Users/username/Library/Group Containers/UBF8T346G9. Office/User Content/Templates.
Чтобы изменить, где Word автоматически сохраняет шаблоны, в меню Word щелкните Параметры, а затем в разделе Личные параметры выберите пункт Расположения файлов. В разделе Расположения файлов выберите Шаблоны пользователей в списке и нажмите кнопку Изменить. Введите новую папку и путь, которые вы хотите использовать, и Word сохранит все новые шаблоны в этой папке.
Существующий шаблон можно изменить, чтобы сделать его более полезным. Добавьте статические данные в существующий шаблон и повторно сохраните файл (как шаблон).
-
В меню Файл выберите команду Создать из шаблона.
-
Щелкните шаблон, похожий на шаблон, который вы хотите создать, и нажмите кнопку Создать.
Примечание: Если не удается найти шаблон, его можно найти по ключевым словам в поле Поиск по всем шаблонам .
-
Добавьте, удалите или измените текст, изображения или форматирование и внесите в шаблон другие изменения, которые должны отражаться во всех новых документах, основанных на нем.
-
В меню Файл выберите команду Сохранить как шаблон.
-
В поле Сохранить как введите имя нового шаблона.
-
(Необязательно) В поле Где выберите расположение, в котором будет сохранен шаблон.
-
Рядом с полем Формат файла щелкните Шаблон Microsoft Word (.dotx) или, если шаблон содержит макросы, щелкните Microsoft Word Macro-Enabled шаблон.
-
Нажмите кнопку Сохранить.
Если вы не выберете другое расположение, шаблон сохраняется в папке /Users/username/Library/Group Containers/UBF8T346G9. Office/User Content/Templates.
Чтобы изменить, где Word автоматически сохраняет шаблоны, в меню Word щелкните Параметры, а затем в разделе Личные параметры выберите пункт Расположения файлов. В разделе Расположения файлов выберите Шаблоны пользователей в списке и нажмите кнопку Изменить. Введите новую папку и путь, которые вы хотите использовать, и Word сохранит все новые шаблоны в этой папке.
Чтобы открыть новый документ на основе шаблона, в меню Файл щелкните пункт Создать из шаблона, а затем выберите нужный шаблон.
-
В finder откройте /Users/username/Library/Group Containers/UBF8T346G9. Office/User Content/Templates.
-
Перетащите в корзину шаблоны, которые нужно удалить.
PowerPoint
-
Откройте пустую презентацию и на вкладке Вид выберите Образец слайдов.
Образец слайдов — это самое крупное изображение слайда в верхней части списка эскизов слайдов. Под ним расположены связанные с ним макеты.
-
Чтобы изменить образец слайдов или макеты, на вкладке Образец слайдов сделайте следующее:
-
Чтобы добавить красочную тему со специальными шрифтами и эффектами, нажмите Темы и выберите тему.
-
Чтобы изменить фон, щелкните Стили фона и выберите нужный вариант.
-
Чтобы добавить заполнитель для текста, изображения, диаграммы и других объектов, в области эскизов щелкните макет слайда, в котором хотите разместить заполнитель. В разделе Вставить заполнитель выберите тип добавляемого заполнителя и перетаскиванием обозначьте его размер.
-

-
Откройте презентацию, которую нужно сохранить в виде шаблона.
-
На вкладке Файл выберите команду Сохранить как шаблон.
-
В поле Сохранить как введите имя нового шаблона.
-
(Необязательно) В поле Где выберите расположение, в котором будет сохранен шаблон.
-
Рядом с полем Формат файла щелкните Шаблон PowerPoint (.potx) или, если презентация содержит макросы, выберите Элемент PowerPoint Macro-Enabled Шаблон (POTM).
-
Нажмите кнопку Сохранить.
Если вы не выберете другое расположение, шаблон сохраняется в папке /Users/username/Library/Group Containers/UBF8T346G9. Office/User Content/Templates.
Существующий шаблон можно изменить, чтобы сделать его более полезным. Добавьте статические данные в существующий шаблон и повторно сохраните файл (как шаблон).
-
В меню Файл выберите команду Создать из шаблона.
-
Щелкните шаблон, похожий на шаблон, который вы хотите создать, и нажмите кнопку Создать.
Примечание: Если не удается найти шаблон, его можно найти по ключевым словам в поле Поиск по всем шаблонам .
-
Добавьте, удалите или измените текст, изображения или форматирование и внесите в шаблон другие изменения, которые должны отражаться во всех новых презентациях, основанных на нем.
-
В меню Файл выберите команду Сохранить как шаблон.
-
В поле Сохранить как введите имя нового шаблона.
-
(Необязательно) В поле Где выберите расположение, в котором будет сохранен шаблон.
-
Рядом с полем Формат файла щелкните Шаблон PowerPoint (.potx) или, если шаблон содержит макросы, щелкните PowerPoint Macro-Enabled Шаблон (.potm).
-
Нажмите кнопку Сохранить.
Если вы не выберете другое расположение, шаблон сохраняется в папке /Users/username/Library/Group Containers/UBF8T346G9. Office/User Content/Templates.
Чтобы начать новую презентацию на основе шаблона, в меню Файл выберите команду Создать из шаблона, а затем выберите шаблон, который вы хотите использовать.
-
В finder откройте /Users/username/Library/Group Containers/UBF8T346G9. Office/User Content/Templates.
-
Перетащите в корзину шаблоны, которые нужно удалить.
Excel
-
Откройте книгу, которую нужно сохранить в виде шаблона.
-
В меню Файл выберите команду Сохранить как шаблон.
-
В поле Сохранить как введите имя нового шаблона.
-
(Необязательно) В поле Где выберите расположение, в котором будет сохранен шаблон.
-
Рядом с полем Формат файла щелкните Шаблон Excel (.xltx) или, если книга содержит макросы, щелкните Excel Macro-Enabled шаблон (XLTM).
-
Нажмите кнопку Сохранить.
Если вы не выберете другое расположение, шаблон сохраняется в папке /Users/username/Library/Group Containers/UBF8T346G9. Office/User Content/Templates.
Существующий шаблон можно изменить, чтобы сделать его более полезным. Добавьте статические данные в существующий шаблон и повторно сохраните файл (как шаблон).
-
В меню Файл выберите команду Создать из шаблона.
-
Щелкните шаблон, похожий на шаблон, который вы хотите создать, и нажмите кнопку Создать.
Примечание: Если не удается найти шаблон, его можно найти по ключевым словам в поле Поиск по всем шаблонам .
-
Добавьте, удалите или измените содержимое, графику или форматирование, а также внесите любые другие изменения, которые должны отображаться во всех новых книгах, на основе шаблона.
-
В меню Файл выберите команду Сохранить как шаблон.
-
В поле Сохранить как введите имя нового шаблона.
-
(Необязательно) В поле Где выберите расположение, в котором будет сохранен шаблон.
-
Рядом с полем Формат файла щелкните Шаблон Excel (XLTX)или, если шаблон содержит макросы, щелкните Excel Macro-Enabled Шаблон (XLTM).
-
Нажмите кнопку Сохранить.
Если вы не выберете другое расположение, шаблон сохраняется в папке /Users/username/Library/Group Containers/UBF8T346G9. Office/User Content/Templates.
Чтобы запустить новую книгу на основе шаблона, в меню Файл выберите команду Создать из шаблона, а затем выберите шаблон, который вы хотите использовать.
-
В finder откройте /Users/username/Library/Group Containers/UBF8T346G9. Office/User Content/Templates.
-
Перетащите в корзину шаблоны, которые нужно удалить.
См. также
Различия между шаблонами, темами и стилями Word
Word
-
Откройте документ.
-
Добавьте, удалите или измените текст, изображения или форматирование и внесите в шаблон другие изменения, которые должны отражаться во всех новых документах, основанных на нем.
-
В меню Файл выберите пункт Сохранить как.
-
Во всплывающем меню Формат выберите пункт Шаблон Word (.dotx).
-
В поле Сохранить как введите имя нового шаблона, а затем нажмите кнопку Сохранить.
Если вы не выбрали другое расположение, шаблон сохраняется в папке /Users/username/Library/Application Support/Microsoft/Office/User Templates/My Templates.
-
В меню Файл выберите команду Закрыть.
Чтобы упорядочить шаблоны, с помощью Средства поиска создайте новую папку в папке /Users/username/Library/Application Support/Microsoft/Office/User Templates/My Templates, а затем сохраните шаблон в новой папке.
Примечание: В Mac OS X 7 (Lion) папка Library по умолчанию скрыта. Чтобы отобразить папку Библиотека, в finder щелкните меню Перейти , а затем удерживайте нажатой клавишу OPTION.
Существующий шаблон можно изменить, чтобы сделать его более полезным. Добавьте статические данные в существующий шаблон и повторно сохраните файл (как шаблон).
-
На стандартной панели инструментов щелкните Создать из шаблона
. -
В области навигации слева в разделе Шаблоны нажмите кнопку Все.
Примечание: Если не удается найти шаблон, его можно найти по ключевым словам в поле Поиска .
-
Щелкните наиболее подходящий шаблон и нажмите кнопку Выбрать.
-
Добавьте, удалите или измените текст, изображения или форматирование и внесите в шаблон другие изменения, которые должны отражаться во всех новых документах, основанных на нем.
-
В меню Файл выберите пункт Сохранить как.
-
Во всплывающем меню Формат выберите пункт Шаблон Word (.dotx).
-
В поле Сохранить как введите имя нового шаблона, а затем нажмите кнопку Сохранить.
Если вы не выбрали другое расположение, шаблон сохраняется в папке /Users/username/Library/Application Support/Microsoft/Office/User Templates/My Templates.
Чтобы упорядочить шаблоны, с помощью Средства поиска создайте новую папку в папке /Users/username/Library/Application Support/Microsoft/Office/User Templates/My Templates, а затем сохраните шаблон в новой папке.
Примечание: В Mac OS X 7 (Lion) папка Library по умолчанию скрыта. Чтобы отобразить папку Библиотека, в finder щелкните меню Перейти , а затем удерживайте нажатой клавишу OPTION.
 .
.-
На стандартной панели инструментов щелкните Создать из шаблона
. -
В области навигации слева в разделе Шаблоны нажмите кнопку Мои шаблоны.
Примечание: Если для упорядочения шаблонов вы создали папки, они отображаются в разделе Мои шаблоны. Для просмотра шаблонов щелкните нужную папку.
-
Щелкните созданный шаблон и нажмите кнопку Выбрать.
-
В finder откройте /Users/username/Library/Application Support/Microsoft/Office/User Templates/My Templates.
Примечание: В Mac OS X 7 (Lion) папка Library по умолчанию скрыта. Чтобы отобразить ее, в системе поиска щелкните меню Перейти, а затем нажмите и удерживайте клавишу OPTION.
-
Перетащите в корзину шаблоны, которые нужно удалить.
PowerPoint
-
Откройте презентацию, на основе которой нужно создать шаблон.
-
Добавьте, удалите или измените текст, изображения или форматирование и внесите в шаблон другие изменения, которые должны отражаться во всех новых презентациях, основанных на нем.
-
В меню Файл выберите пункт Сохранить как.
-
Во всплывающем меню Формат выберите пункт Шаблон PowerPoint (.potx).
-
В поле Сохранить как введите имя нового шаблона, а затем нажмите кнопку Сохранить.
Если вы не выбрали другое расположение, шаблон сохраняется в папке /Users/username/Library/Application Support/Microsoft/Office/User Templates/My Templates.
Чтобы упорядочить шаблоны, с помощью Средства поиска создайте новую папку в папке /Users/username/Library/Application Support/Microsoft/Office/User Templates/My Templates, а затем сохраните шаблон в новой папке.
Примечание: В Mac OS X 7 (Lion) папка Library по умолчанию скрыта. Чтобы отобразить папку Библиотека, в finder щелкните меню Перейти , а затем удерживайте нажатой клавишу OPTION.
Существующий шаблон можно изменить, чтобы сделать его более полезным. Добавьте статические данные в существующий шаблон и повторно сохраните файл (как шаблон).
-
На стандартной панели инструментов щелкните Создать из шаблона
. -
В области навигации слева в разделе Шаблоны нажмите кнопку Все.
Примечание: Если шаблон не удается найти, можно выполнить поиск по ключевым словам с помощью поля Поиск.
-
Щелкните наиболее подходящий шаблон и нажмите кнопку Выбрать.
-
Добавьте, удалите или измените текст, изображения или форматирование и внесите в шаблон другие изменения, которые должны отражаться во всех новых документах, основанных на нем.
Чтобы не изменять каждый макет или слайд по отдельности, можно применить изменения сразу к нескольким макетам слайдов. Для этого измените образцы слайдов.
-
В меню Файл выберите пункт Сохранить как.
-
Во всплывающем меню Формат выберите пункт Шаблон PowerPoint (.potx).
-
В поле Сохранить как введите имя нового шаблона, а затем нажмите кнопку Сохранить.
Если вы не выбрали другое расположение, шаблон сохраняется в папке /Users/username/Library/Application Support/Microsoft/Office/User Templates/My Templates.
Чтобы упорядочить шаблоны, с помощью Средства поиска создайте новую папку в папке /Users/username/Library/Application Support/Microsoft/Office/User Templates/My Templates, а затем сохраните шаблон в новой папке.
Примечание: В Mac OS X 7 (Lion) папка Library по умолчанию скрыта. Чтобы отобразить папку Библиотека, в finder щелкните меню Перейти , а затем удерживайте нажатой клавишу OPTION.
-
На стандартной панели инструментов щелкните Создать из шаблона
. -
В области навигации слева в разделе Шаблоны нажмите кнопку Мои шаблоны.
Примечание: Если для упорядочения шаблонов вы создали папки, они отображаются в разделе Мои шаблоны. Для просмотра шаблонов щелкните нужную папку.
-
В области навигации справа можно выбрать цвета, шрифт и размер слайда для шаблона.
-
Щелкните созданный шаблон и нажмите кнопку Выбрать.
-
В finder откройте /Users/username/Library/Application Support/Microsoft/Office/User Templates/My Templates.
Примечание: В Mac OS X 7 (Lion) папка Library по умолчанию скрыта. Чтобы отобразить ее, в системе поиска щелкните меню Перейти, а затем нажмите и удерживайте клавишу OPTION.
-
Перетащите в корзину шаблоны, которые нужно удалить.
Excel
-
Откройте книгу, на основе которой нужно создать шаблон.
-
Добавьте, удалите или измените текст, изображения или форматирование и внесите в шаблон другие изменения, которые должны отражаться во всех новых документах, основанных на нем.
-
В меню Файл выберите пункт Сохранить как.
-
Во всплывающем меню Формат выберите пункт Шаблон Excel (.xltx).
-
В поле Сохранить как введите имя нового шаблона, а затем нажмите кнопку Сохранить.
Если вы не выбрали другое расположение, шаблон сохраняется в папке /Users/username/Library/Application Support/Microsoft/Office/User Templates/My Templates.
Чтобы упорядочить шаблоны, с помощью Средства поиска создайте новую папку в папке /Users/username/Library/Application Support/Microsoft/Office/User Templates/My Templates, а затем сохраните шаблон в новой папке.
Примечание: В Mac OS X 7 (Lion) папка Library по умолчанию скрыта. Чтобы отобразить папку Библиотека, в finder щелкните меню Перейти , а затем удерживайте нажатой клавишу OPTION.
Существующий шаблон можно изменить, чтобы сделать его более полезным. Добавьте статические данные в существующий шаблон и повторно сохраните файл (как шаблон).
-
На стандартной панели инструментов щелкните Создать из шаблона
. -
В области навигации слева в разделе Шаблоны нажмите кнопку Все.
Примечание: Если шаблон не удается найти, можно выполнить поиск по ключевым словам с помощью поля Поиск.
-
Щелкните наиболее подходящий шаблон и нажмите кнопку Выбрать.
-
Добавьте, удалите или измените текст, изображения или форматирование и внесите в шаблон другие изменения, которые должны отражаться во всех новых документах, основанных на нем.
-
В меню Файл выберите пункт Сохранить как.
-
Во всплывающем меню Формат выберите пункт Шаблон Excel (.xltx).
-
В поле Сохранить как введите имя нового шаблона, а затем нажмите кнопку Сохранить.
Если вы не выбрали другое расположение, шаблон сохраняется в папке /Users/username/Library/Application Support/Microsoft/Office/User Templates/My Templates.
Чтобы упорядочить шаблоны, с помощью Средства поиска создайте новую папку в папке /Users/username/Library/Application Support/Microsoft/Office/User Templates/My Templates, а затем сохраните шаблон в новой папке.
Примечание: В Mac OS X 7 (Lion) папка Library по умолчанию скрыта. Чтобы отобразить папку Библиотека, в finder щелкните меню Перейти , а затем удерживайте нажатой клавишу OPTION.
-
На стандартной панели инструментов щелкните Создать из шаблона
. -
В области навигации слева в разделе Шаблоны нажмите кнопку Мои шаблоны.
Примечание: Если для упорядочения шаблонов вы создали папки, они отображаются в разделе Мои шаблоны. Для просмотра шаблонов щелкните нужную папку.
-
Щелкните созданный шаблон и нажмите кнопку Выбрать.
-
В finder откройте /Users/username/Library/Application Support/Microsoft/Office/User Templates/My Templates.
Примечание: В Mac OS X 7 (Lion) папка Library по умолчанию скрыта. Чтобы отобразить ее, в системе поиска щелкните меню Перейти, а затем нажмите и удерживайте клавишу OPTION.
-
Перетащите в корзину шаблоны, которые нужно удалить.
См. также
Изменение образца слайдов
Настройка запуска Excel в Excel для Mac
Различия между шаблонами, темами и стилями Word
Если вы считаете текущий документ шаблоном, вы можете сохранить его с другим именем, чтобы создать новый документ на основе текущего. Когда вы хотите создать такой документ, вы откроете документ в Word в Интернете, перейдите в раздел Файл > сохранить как и создадите документ, который является копией того, с которого вы начали.
С другой стороны, если вы думаете о типах шаблонов, которые вы видите, перейдя в файл > Создать, то нет: вы не можете создать их в Word в Интернете.
Вместо этого сделайте следующее.
Если у вас есть классическое приложение Word, используйте команду Открыть в Word в Word в Интернете, чтобы открыть документ в Word на рабочем столе.

Создайте шаблон в программе Word. Вы сможете использовать свой шаблон для новых документов, выбрав команду Файл > Создать в классическом приложении Word. Если документы хранятся в Интернете, их можно изменить в Word в Интернете.
См. также
Шаблоны и темы Майкрософт
Скачивание бесплатных готовых шаблонов
Бесплатные шаблоны с фоном для PowerPoint
Изменение шаблонов
![]()
Download Article
![]()
Download Article
Creating a template in Microsoft Word can be useful and time-saving when you plan on using the same style of document repeatedly on a consistent basis. Templates can be based on existing documents you have already created, or can be downloaded from Word and other third-party websites.
-
1
Open the Word document you want made into a template.
-
2
Click on “File” in the top menu bar and select “Save As.”
Advertisement
-
3
Click on “Computer.”
-
4
Type a name for your template next to “File name.”
-
5
Select “Word Template” from the dropdown menu labeled “Save as type.”
- Alternately, you may select “Word 97-2003 Template” if you plan on using the template in an earlier version of Word, or “Word Macro-Enabled Template” if your word document contains macros.
-
6
Click on “Save.” Your template will now be saved in the folder: “My Documents” on your computer under “Custom Office Templates.”[1]


Advertisement
-
1
Open the Microsoft Word application.
-
2
Click on “File” in the menu bar and select “New.” A list of available templates will display on-screen.
-
3
Click in the search field to the right of “Office.com Templates.”
-
4
Type a keyword or keyword phrase that describes the style of template you want to use. For example, if you want to create a template in brochure style, type “brochure.”
-
5
Click on the arrow to the right of the search field to execute your search. A list of templates that match your description will display on-screen.
-
6
Browse through templates and click on any template to see a preview in the right window pane.
-
7
Click on “Download” below the preview pane to download that particular template. The template will be saved in your computer’s “My Documents” folder under “Custom Office Templates.”[2]


Advertisement
Ask a Question
200 characters left
Include your email address to get a message when this question is answered.
Submit
Advertisement
-
Customize your templates as much as possible to simplify your experience when working with and adding content to documents. Add the font styles, background colors, text colors, font sizes, and themes you want to use consistently when creating templates.
Thanks for submitting a tip for review!
Advertisement
-
When downloading Word templates from a third-party website, make sure that the website is reputable and that the file you are downloading is in the correct format. Some third-party websites may try to trick you into downloading viruses and malware in place of Word templates.
Advertisement
About This Article
Thanks to all authors for creating a page that has been read 61,003 times.
Is this article up to date?
Всем привет! Если вы постоянно работаете с документами одного типа, с одинаковыми параметрами форматирования, то вам проще всего создать единый шаблон в редакторе Word. На самом деле шаблонов может быть несколько для разного рода документов. Таким образом вы сможете сильно сэкономить время, так как вам больше не придется постоянно форматировать новый документ под какие-то описанные стандарты. Готовые шаблоны сохраняются в форматах DOT, DOTX или DOTM. В статье я расскажу – как проще всего сделать шаблон в Ворде.
Содержание
- Коротко про то – что же такое шаблон?
- ШАГ 1: Создание шаблона
- ШАГ 2: Сохранение
- Как же работать с шаблоном?
- Видео
- Задать вопрос автору статьи
Коротко про то – что же такое шаблон?

Как я уже и писал в самом начале – шаблон сохраняется немного в другом формате. Данный файл содержит в себе все нужное для форматирования, которое вы уже настраиваете под себя. Теперь вам не нужно постоянно для каждого нового документа изменять шрифт, отступы, цвет текста, стили для оглавления и т.д. Просто открываем данный файл, заполняем его, а вот при сохранении выбираем обычный Word формат. В программе можно создавать как собственные шаблоны, так и скачивать с интернета уже существующие.
ШАГ 1: Создание шаблона
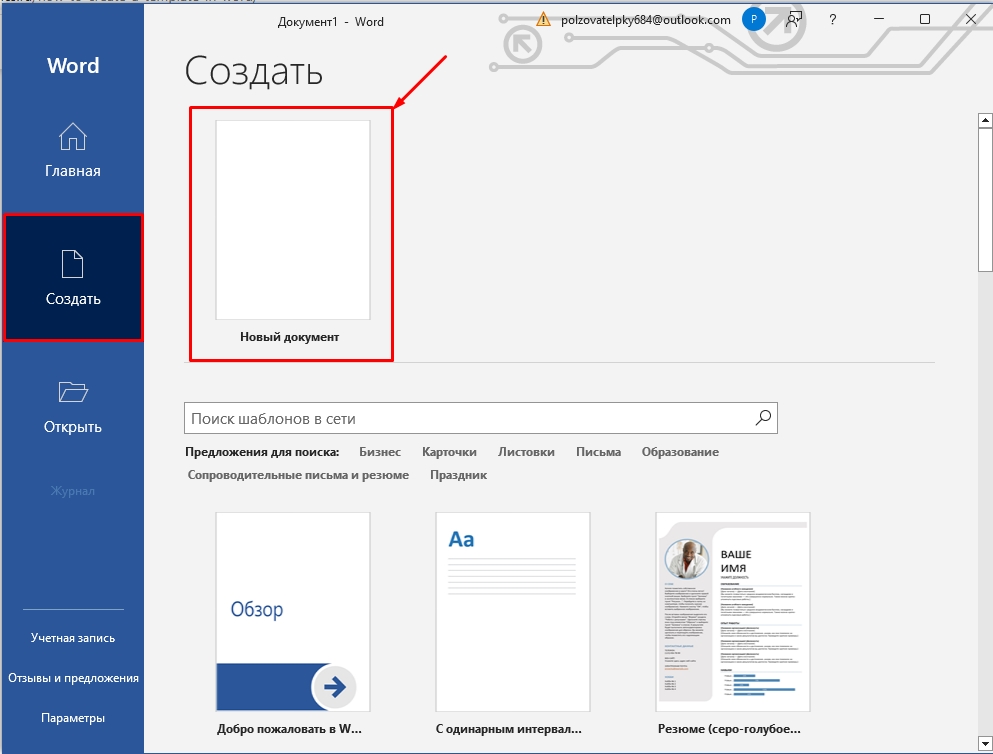
Откройте Word программу. После открытия приложения вам будет предложено создать новый документ – перейдите на вкладку создания. Вы можете заметить чуть ниже есть строка поиска шаблонов в сети интернет. Но мы с вами будем создавать свой собственный шаблон, поэтому выбираем команду «Новый документ».
Далее откроется чистый документ, который впоследствии вы и превратите в шаблон. Для этого вам нужно изменить все те параметры форматирования, которые вам необходимы. Вы можете воспользоваться уроками с нашего сайта:
Советую ознакомиться с нашим бесплатным полным курсом по Word.
- Как изменить формат листа.
- Как сделать заголовок.
- Как изменить или создать поля на листе.
- Межстрочный интервал.
- Межбуквенные интервал.
- Как увеличить или уменьшить шрифт.
- Автоматическое содержание в документе.
- Как сделать список литературы.
Все что вы добавите в шаблон – будет в будущем использоваться в новых документах. Это также касается сносок, текста, графических объектов и даже рисунков.
- Как вставить рисунок.
- Как построить график.
- Нумерация страниц.
Я вам все же советую ознакомиться с курсом, ссылку на который я оставил чуть раньше. Там представлены все возможные варианты форматирования, которые помогут работать вам с любым шаблоном. Если говорить проще, то шаблон – это тот же самый файл, имеющий уже предустановленные настройки. Как только он будет готов – переходим ко второму шагу.
ПРИМЕЧАНИЕ! На самом деле вы можете работать уже с готовыми шаблонами. Просто изменяйте его под свои нужды.
ШАГ 2: Сохранение
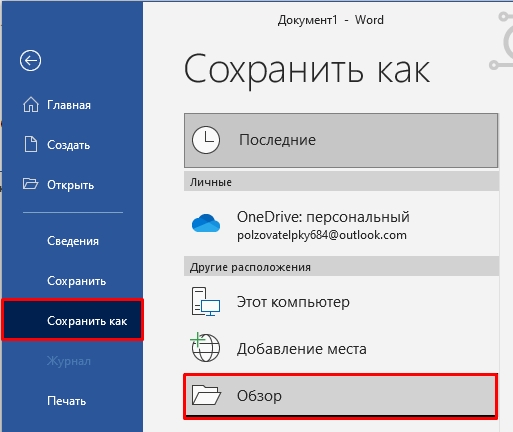
Итак, наш шаблон уже готов, теперь нам останется просто его сохранить. В самом верху нажмите по вкладке «Файл».

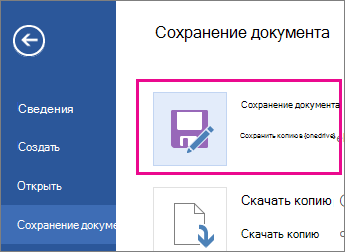
Переходим в раздел «Сохранить как» и кликаем «Обзор», чтобы выбрать место сохранения – ваш компьютер. Но вы можете сохранить файл в том же облаке OneDrive, если вы с ним активно работаете.
Читаем – что такое облако и как им пользоваться.
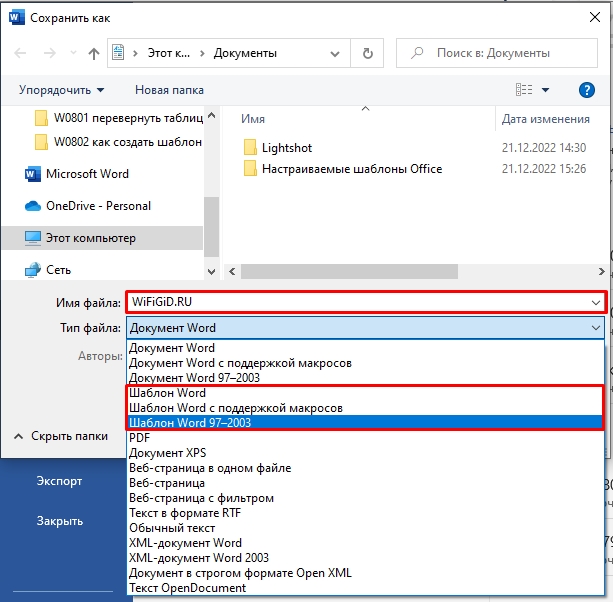
Сначала вписываем название. После этого нам нужно выбрать «Тип файла» – нас интересует три варианта:
- Шаблон Word – если вы будете работать с той же версией Word.
- Шаблон Word с поддержкой макросов – если вы в шаблоне будете использовать макросы, выбираем этот вариант.
- Шаблон Word 97-2003 – для старых версий текстового редактора.
Как же работать с шаблоном?
Все очень просто – открываем сам шаблон и начинаем заполнять его текстом, картинками и другими объектами. Самое главное при этом выполнить сохранение в «Документ Word», а не «Шаблон Word», чтобы изменения сохранялись туда. При этом сам шаблон будет оставаться неизменным. Также вы всегда можете изменить некоторое форматирование, а потом сохранить файл в шаблон.
Как используются для создания документа шаблоны-образцы?
Для этого открываете любой уже готовый шаблон. Вы можете использовать и те шаблоны, которые загружены на сервера Microsoft – их можно найти через поиск при создании. Далее просто изменяем его под свой вкус и сохраняем в формате шаблона. Если вы уже будете работать с ним, как с документом, тогда сохраняем в формате DOC.
Видео
В уроке выше мы почти полностью рассмотрели создание шаблона в Ворде. Если я что-то упустил или забыл – напишите об этом в комментариях. Дополнительно советую посмотреть видео ниже. До новых встреч на портале WiFiGiD.RU.
(Image credit: Windows Central)
If you use Microsoft Word, you’re probably familiar with templates, which are documents with predefined settings (such as sample content, styling, formatting, layout, images, logos, etc.) that you can use to create new documents without the need to start from scratch every time.
Although Office includes many templates you can choose from, if you need a template tailored to your needs, Microsoft Word includes an option to save a document as a template using the «.dotx» format. You can then use the saved template over and over to save time crafting new documents. It’s also useful for when you want to simplify and standardize the creation process of certain documents (for example, standard contracts, sales quotes, resumes, brochures, presentations, and more) in your organization.
In this Windows 10 guide, we’ll walk you through the steps to create a custom Word document template using virtually any supported version of Office.
- How to create Word template in Office 2019
- How to use Word template in Office 2019
How to create Word template in Office 2019
The option to create a template is available on Word included with Microsoft 365, Word 2019, Word 2016, and older versions.
To create a custom Microsoft Word template, use these steps:
- Open Word.
- Click on Home.
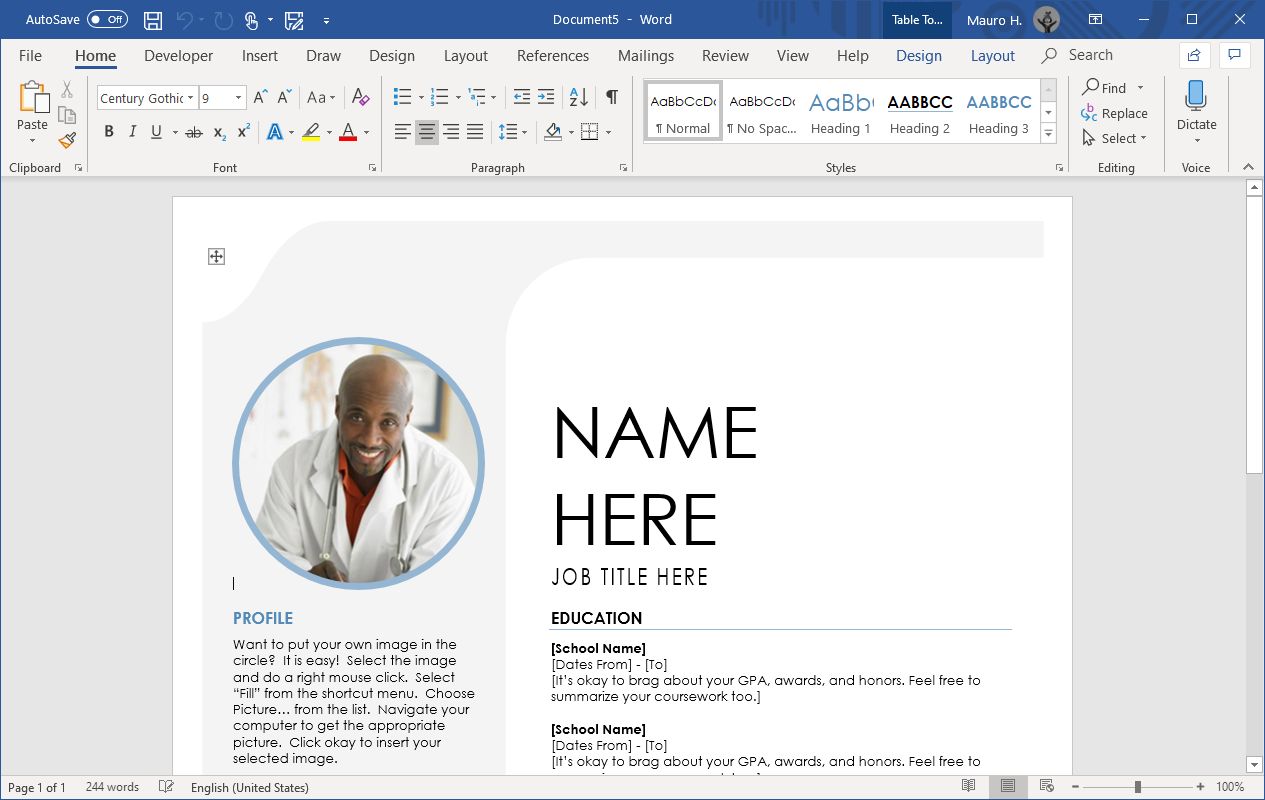
- Click on Blank document.

- Create a document that will serve as a template.Quick note: In this step, you want to create the document structure with a sample of the content, custom formatting, styles, page layout, design themes, special settings, and more.
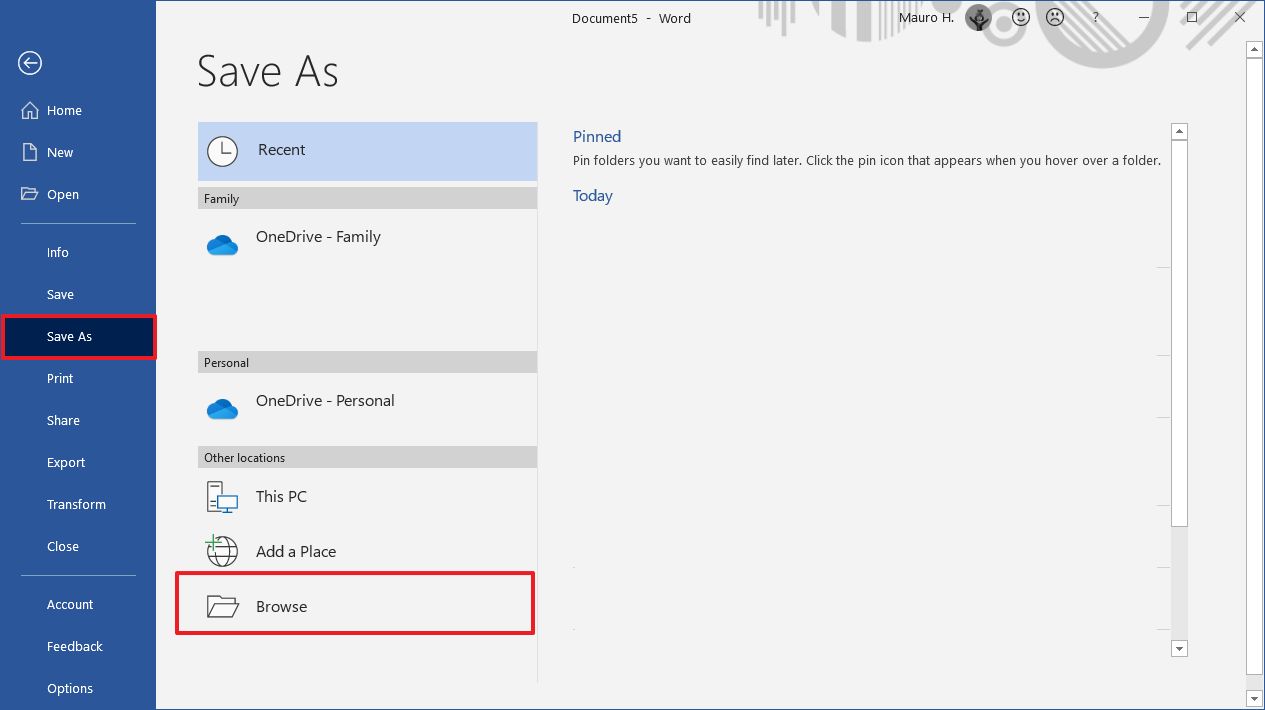
- Click on File.
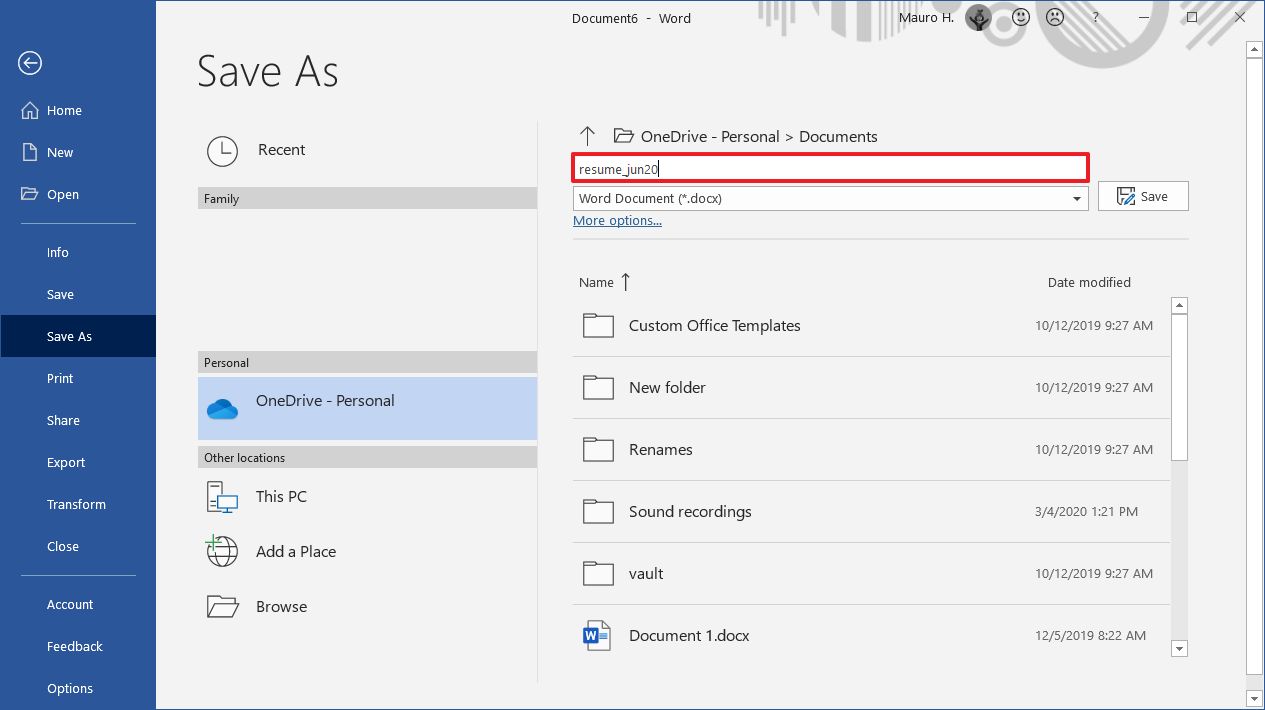
- Click on Save As.
- Under the «Other locations» section, click the Browse option.
- Navigate to the following path:
%HOMEPATH%DocumentsCustom Office TemplatesQuick tip: You can save the template on any location, but it’s best to store the file in the «Custom Office Templates» folder, so Word can display the file in the «Personal» tab when using the «New» experience. - In the «File name» field, specify a name for the template – for example, my_resume_template.
- Use the «Save as type» drop-down menu and select the Word Template (.dotx) option.
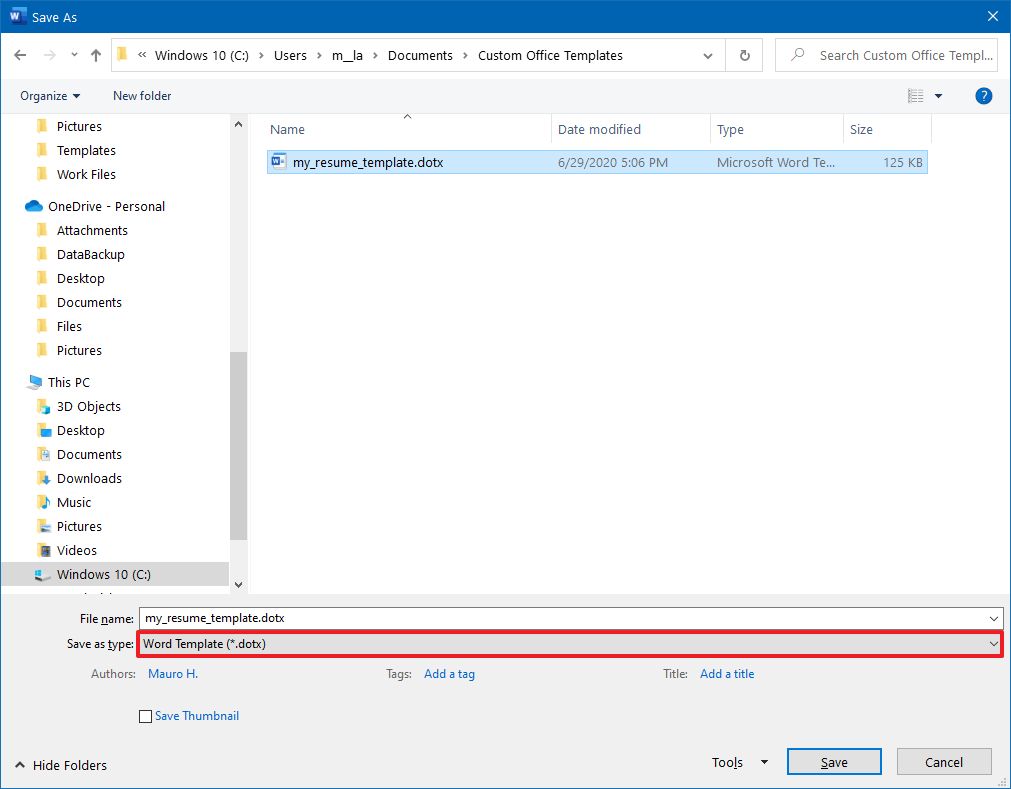
- Click the Save button.
Once you complete the steps, the document will save as a template, which you can then use to quickly create new documents based on the settings you specified.
Alternatively, you can also modify one of the templates freely available in Word, and save it as a «.dotx» document to create a new template based on another template to serve a different or more specific purpose.
If you’re running an older version of Office, it’s now an excellent time to switch to Microsoft 365. Using a subscription-based service, you can always upgrade to the newest version of the most popular office apps in the world to access the latest features at no extra cost, and you get many other benefits, such as sharing the apps with other users, Microsoft Teams, Family Safety, Microsoft Editor, and 1TB of OneDrive storage.
 Get subscribed
Microsoft 365 (formerly Office 365) gives you full access to all the apps and perks, such as 1TB OneDrive storage and Skype minutes. You can also install Word, Excel, PowerPoint, Outlook, and other apps on up to five devices, and depending on the subscription, you can share the account with up to six people.
How to use Word template in Office 2019
To use a custom Microsoft Word template that you created, use these steps:
- Open Word.
- Click on New.
- Click the Personal tab.
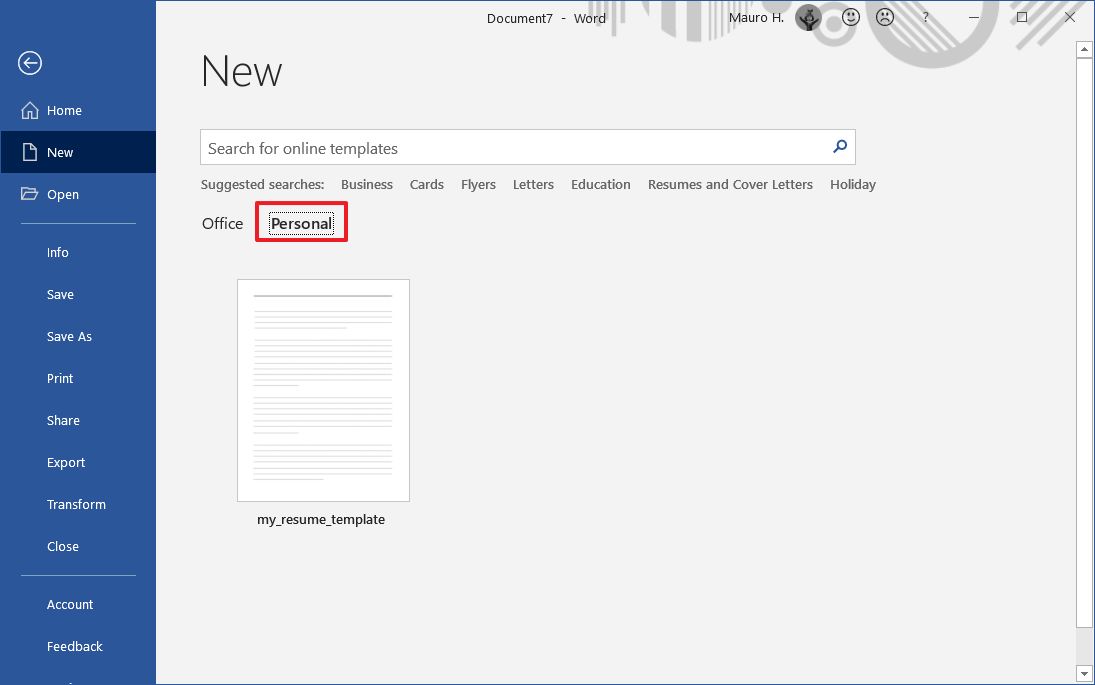
- Select the name of the custom template.
- Create the document following the template.
- Click on File.
- Click on Save.
- Select a location to save the document.
- Specify a name for the file.
- Click the Save button.
After you complete the steps, the document will save as any other Word document without modifying the original template.
The instructions outlined in this guide only work with the desktop version of Word. The web version of the app doesn’t include this feature. When using Word on the web, you can only work with documents created using a specific template, or you can create new documents based on the templates offered by Office.
All the latest news, reviews, and guides for Windows and Xbox diehards.
Mauro Huculak is technical writer for WindowsCentral.com. His primary focus is to write comprehensive how-tos to help users get the most out of Windows 10 and its many related technologies. He has an IT background with professional certifications from Microsoft, Cisco, and CompTIA, and he’s a recognized member of the Microsoft MVP community.
Most Popular
Create, Save, Edit and Use Templates in Microsoft Word
by Avantix Learning Team | Updated February 14, 2021
Applies to: Microsoft® Word® 2013, 2016, 2019 or 365 (Windows)
You can create, save, use and edit templates in Microsoft Word for frequently-used documents such as letters, reports, proposals and manuals. Templates include basic character, paragraph and page formatting and may include text, custom styles, tables, images, macros, sections, headers and footers. If you save a document as a custom template, you can create a new document based on that template.
Recommended article: How to Check Word Count in Microsoft Word (4 Ways)
Do you want to learn more about Microsoft Word? Check out our virtual classroom or live classroom Word courses >
A document can be saved as a Word Template (dotx file) or a Word Macro-Enabled Template (dotm file).
In this article, we’ll take a look at 3 types of templates in Microsoft Word:
- Normal template (the default global template)
- Custom user templates
- Microsoft ready-made templates
Understanding the Normal template
Unless you select a different template, Word bases new documents on the Normal template by default. The Normal template is named Normal.dotm and its default style is the Normal style. It also includes built-in heading styles such as Heading 1, Heading 2 and so on.
Specifying a location for custom user templates
In Word 2013 and later versions, if you want to create your own custom user templates, you will need to specify a location for the templates so you can easily access them.
Custom user templates are typically stored in the following location (in 2013 and later versions):
C:Users[UserName]DocumentsCustom Office Templates
You will need to specify a path to the Custom Office Templates folder (which should be created automatically when you install Microsoft Office) in your Documents folder as the default storage location. If you want, you can select a different folder but this folder is easy to find and use.
To specify the default storage location for your custom user templates in Word 2013 and later versions:
- Create a folder in your Documents folder called Custom Office Templates if it does not already exist (assuming you are going to use this folder as the default personal templates location).
- In Word, click the File tab in the Ribbon.
- Click Options.
- In the left panel, click Save.
- Enter a path for the Default Personal Templates location (see the Options dialog box below).
- Click OK.
For example,
C:UsersNancyDocumentsCustom Office Templates
Note the path for the Default Personal Templates in the Options dialog box:

Some users may prefer to set the default personal templates location as the Templates or User Templates folder in the Appdata folder.
Creating a custom user template in Word
You can create your own custom user template by creating a document and then saving it as a template. If you have created a document based on an existing template, you can modify it and save it as a new template.
To save an existing document as a custom user template in the Custom Office Templates folder:
- In Word, click the File tab in the Ribbon.
- Select Save As.
- Enter a name for the template.
- Double-click This PC or Computer and then navigate to the Custom Office Templates folder (or the folder you specified as the default personal templates location).
- Select Word Template in the Save as type list. You can select Word Macro-Enabled Template if you have created macros in the file.
- Click Save.
Creating a new document based on a custom user template
If you have saved a template in the Custom Office Templates folder, you can easily create a new document based on that template.
To create a new document based on a custom user template you have created and saved in the Custom Office Templates folder:
- In Word, click the File tab in the Ribbon and then click New.
- In Word 2013 and later versions, click Personal. You must have set the file path in the Options dialog box first.
- If necessary double-click the Custom Office Templates folder.
- Double-click the desired template. Word creates a new document based on the template that you can modify.
Understanding the relationship between a Word document and its template
Every Microsoft Word document is based on a template. If you create a new, blank document, Word uses the Normal template.
When a Word document is created, it includes three elements from its template:
- Styles such as Normal, Heading 1, Heading 2 and so on
- Content such as text, tables and images
- Page settings such as margins, page breaks, section breaks, headers and footers
Once a document is created, it is no longer connected to its template so the styles, content and page settings can be modified or deleted.
A template also makes the following available in the document:
- Building Blocks such as QuickParts
- User interface customizations (including Ribbon customizations)
- Keyboard shortcuts
- Macros (if created) and the template was saved as a Macro-Enabled Template
Editing a custom user template
To edit a custom user template:
- In Word, click the File tab in the Ribbon and then click Open.
- Double-click This PC or Computer and navigate to the Custom Office Templates folder.
- Double-click the template you want to edit.
- Make changes to the template.
- Close and save the template.
Creating a document based on a Microsoft ready-made template
You can create new documents based on hundreds of Microsoft ready-made templates. These templates are normally accessed online so you must be connected to the internet to use them. There are templates for all kinds of documents including letters, brochures, flyers, reports and proposals. Templates may differ depending on your version of Microsoft Word.
To create a new document based on one of Microsoft’s ready-made templates:
- In Word, click the File tab in the Ribbon and click New.
- In the Office area, click the suggested searches or enter search criteria in the Search box and press Enter.
- Scroll through the templates.
- Double-click the template you want to use. Word creates a new document based on the template that you can modify.
In the following example, we selected New and then Business in the suggested searches (using Word 365):

Templates can be a huge timesaver, particularly if you are working on long documents like reports and proposals.
Subscribe to get more articles like this one
Did you find this article helpful? If you would like to receive new articles, join our email list.
More resources
How to Insert a Check Mark in Word (5 Ways)
How to View Word Count in Microsoft Word (4 Ways)
How to Keep a Microsoft Word Table Together on One Page
How to Insert or Type an Em Dash in Word (4 Ways with Shortcuts)
10+ Great Microsoft Word Navigation Shortcuts for Moving Around Quickly in Your Documents
Related courses
Microsoft Word: Intermediate / Advanced
Microsoft Excel: Intermediate / Advanced
Microsoft PowerPoint: Intermediate / Advanced
Microsoft Word: Long Documents Master Class
Microsoft Word: Styles, Templates and Tables of Contents
Microsoft Word: Designing Dynamic Word Documents Using Fields
VIEW MORE COURSES >
Our instructor-led courses are delivered in virtual classroom format or at our downtown Toronto location at 18 King Street East, Suite 1400, Toronto, Ontario, Canada (some in-person classroom courses may also be delivered at an alternate downtown Toronto location). Contact us at info@avantixlearning.ca if you’d like to arrange custom instructor-led virtual classroom or onsite training on a date that’s convenient for you.
Copyright 2023 Avantix® Learning
Microsoft, the Microsoft logo, Microsoft Office and related Microsoft applications and logos are registered trademarks of Microsoft Corporation in Canada, US and other countries. All other trademarks are the property of the registered owners.
Avantix Learning |18 King Street East, Suite 1400, Toronto, Ontario, Canada M5C 1C4 | Contact us at info@avantixlearning.ca
How to Create Microsoft Word Templates
Make your own Word templates to save time, but plan them out first
Updated on April 16, 2020
What to Know
- Create a prototype template, then go to File > Save As. Next to File name, give your template a descriptive file name.
- Select the Save as type drop-down arrow and choose Word Template. The file path changes to the default template location.
- Select Save. Your document is now saved as a template with the file extension .dot or .dotx.
This article explains how to create a template in Word, including invoices, packing slips, and form letters. Instructions in this article apply to Word 2019, 2016, 2013, and 2010; and Word for Microsoft 365.
Choose Your Word Template Elements
The first step in making your Word template is to decide what features and formatting you want to include. The time you spend planning will save you time and hassle later.
Here are some suggestions for what to include:
- Text that is always included in the document.
- Formatting like columns, margins, tab stops, endnotes, and footnotes.
- Macros to automate tasks.
- A date field that updates automatically each time the template is opened.
- Address and contact information.
- Fields or AutoText for information that changes such as the page number, document title, or file path in headers and footers.
- Placeholder text with specific formatting such as typeface size. Consider using descriptive words such as TITLE or INTRO as placeholders.
After you’ve outlined all your template elements, create the prototype in a blank Word document. Include the elements you listed, and make appropriate adjustments.
Save Your New Template
After you finish creating the prototype for your template, save the document as a template.
-
Go to File.
-
Select Save As.
-
In the Save As dialog box, in the File name text box, type a descriptive template filename.
-
Select the Save as type drop-down arrow and choose Word Template.
-
The file path changes to the default template location. Templates in this folder appear in the Templates dialog box when you create a new document from a template. However, you can choose another folder if you want to.
-
Select Save. Your document is now saved as a template with the file extension .dot or .dotx and can be used to generate new documents based on it.
What Exactly Is a Template?
A Microsoft Word template is a Word document that includes specific formatting, such as boilerplate text, macros, and headers and footers, as well as custom dictionaries, toolbars, and AutoText entries. These elements are there every time you open the template and cannot be changed even when you change the document text. Use the template as many times as you like.
Thanks for letting us know!
Get the Latest Tech News Delivered Every Day
Subscribe