
If you frequently create a certain type of document, such as a monthly report, a sales forecast, or a presentation with a company logo, save it as a template so you can use that as your starting point instead of recreating the file from scratch each time you need it. Start with a document that you already created, a document you downloaded, or a new Microsoft template you customized.
Save a template
-
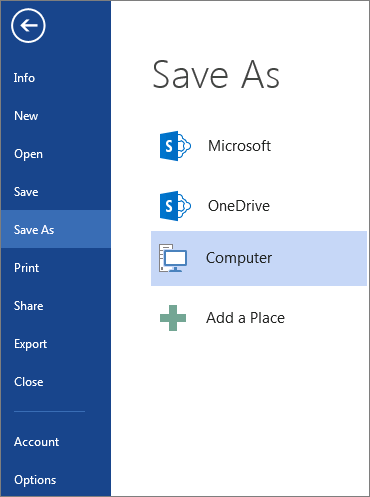
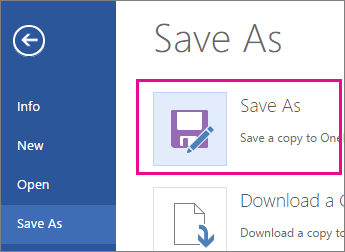
To save a file as a template, click File > Save As.
-
Double-click Computer or, in Office 2016 programs, double-click This PC.

-
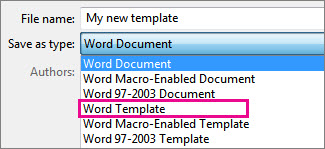
Type a name for your template in the File name box.
-
For a basic template, click the template item in the Save as type list. In Word for example, click Word Template.
If your document contains macros, click Word Macro-Enabled Template.
Office automatically goes to the Custom Office Templates folder.
-
Click Save.
Tip: To change where your application automatically saves your templates, click File > Options > Save and type the folder and path you want to use in the Default personal templates location box. Any new templates you save will be stored in that folder, and when you click File > New > Personal, you’ll see the templates in that folder.
Edit your template
To update your template, open the file, make the changes you want, and then save the template.
-
Click File > Open.
-
Double-click Computer or This PC.
-
Browse to the Custom Office Templates folder that’s under My Documents.
-
Click your template, and click Open.
-
Make the changes you want, then save and close the template.
Use your template to make a new document
To start a new file based on your template, click File > New > Custom, and click your template.
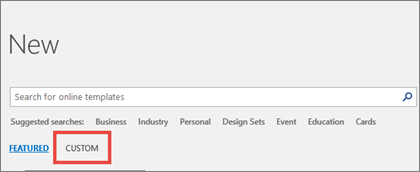
Note: If you’re using Office 2013, this button may say Personal instead of Custom.
Use your templates from earlier versions of Office
If you made templates in an earlier version of Office, you can still use them in Office 2013 and 2016. The first step is to move them into the Custom Office Templates folder so your application can find them. To move your templates quickly, use the Fix it tool.
Word
-
Open the Word document that you want to save as a template.
-
On the File menu, click Save as Template.
-
In the Save As box, type the name that you want to use for the new template.
-
(Optional) In the Where box, choose a location where the template will be saved.
-
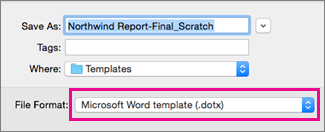
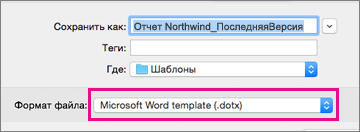
Next to File Format, click Microsoft Word template (.dotx), or, if your document contains macros, click Microsoft Word Macro-Enabled template (.dotm).
-
Click Save.
Unless you select a different location, the template is saved in /Users/username/Library/Group Containers/UBF8T346G9.Office/User Content/Templates.
To change where Word automatically saves your templates, on the Word menu, click Preferences, and then under Personal Settings, click File Locations. Under File Locations, select User templates from the list, and then click Modify. Type the new folder and path you want to use, and Word will save any new templates in that folder.
You can customize an existing template to make it even more useful. Add static information to the existing template, and then save the file again (as a template).
-
On the File menu, click New from Template.
-
Click a template that is similar to the one you want to create, and then click Create.
Note: If you can’t find a template, you can search for it based on keywords in the Search All Templates box.
-
Add, delete, or change any text, graphics, or formatting, and make any other changes that you want to appear in all new documents that you base on the template.
-
On the File menu, click Save as Template.
-
In the Save As box, type the name that you want to use for the new template.
-
(Optional) In the Where box, choose a location where the template will be saved.
-
Next to File Format, click Microsoft Word template (.dotx), or, if your template contains macros, click Microsoft Word Macro-Enabled template.
-
Click Save.
Unless you select a different location, the template is saved in /Users/username/Library/Group Containers/UBF8T346G9.Office/User Content/Templates.
To change where Word automatically saves your templates, on the Word menu, click Preferences, and then under Personal Settings, click File Locations. Under File Locations, select User templates from the list, and then click Modify. Type the new folder and path you want to use, and Word will save any new templates in that folder.
To start a new document based on your template, on the File menu, click New from Template, and then select the template you want to use.
-
In the Finder, open /Users/username/Library/Group Containers/UBF8T346G9.Office/User Content/Templates.
-
Drag the templates that you want to delete to the Trash.
PowerPoint
-
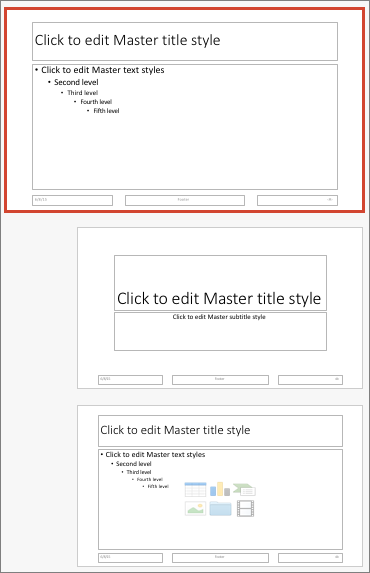
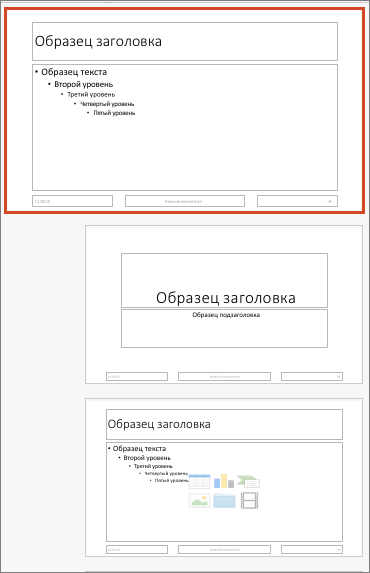
Open a blank presentation, and then on the View tab, click Slide Master.
The slide master is the largest slide image at the top of the slide thumbnail list. Associated layouts are positioned beneath it.
-
To make changes to the slide master or layouts, on the Slide Master tab, do any of these:
-
To add a colorful theme with special fonts, and effects, click Themes, and pick a theme.
-
To change the background, click Background Styles, and pick a background.
-
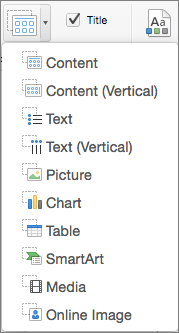
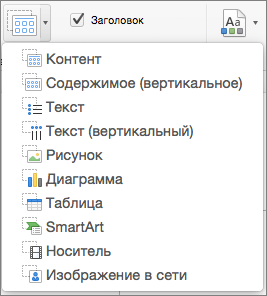
To add a placeholder for text, picture, chart, and other objects, in the thumbnail pane, click the slide layout that you want to hold the placeholder. From Insert Placeholder, pick the type of placeholder you want to add, and drag to draw the placeholder size.
-

-
Open the presentation that you want to save as a template.
-
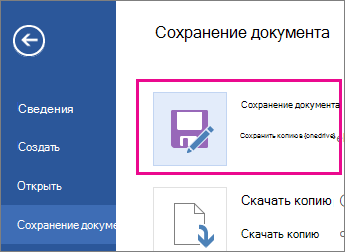
On the File tab, click Save as Template.
-
In the Save As box, type the name that you want to use for the new template.
-
(Optional) In the Where box, choose a location where the template will be saved.
-
Next to File Format, click PowerPoint Template (.potx), or, if your presentation contains macros, click PowerPoint Macro-Enabled Template (.potm).
-
Click Save.
Unless you select a different location, the template is saved in /Users/username/Library/Group Containers/UBF8T346G9.Office/User Content/Templates.
You can customize an existing template to make it even more useful. Add static information to the existing template, and then save the file again (as a template).
-
On the File menu, click New from Template.
-
Click a template that is similar to the one you want to create, and then click Create.
Note: If you can’t find a template, you can search for it based on keywords in the Search All Templates box.
-
Add, delete, or change any text, graphics, or formatting, and make any other changes that you want to appear in all new presentations that you base on the template.
-
On the File menu, click Save as Template.
-
In the Save As box, type the name that you want to use for the new template.
-
(Optional) In the Where box, choose a location where the template will be saved.
-
Next to File Format, click PowerPoint Template (.potx), or, if your template contains macros, click PowerPoint Macro-Enabled Template (.potm).
-
Click Save.
Unless you select a different location, the template is saved in /Users/username/Library/Group Containers/UBF8T346G9.Office/User Content/Templates.
To start a new presentation based on a template, on the File menu, click New from Template, and then select the template you want to use.
-
In the Finder, open /Users/username/Library/Group Containers/UBF8T346G9.Office/User Content/Templates.
-
Drag the templates that you want to delete to the Trash.
Excel
-
Open the workbook that you want to save as a template.
-
On the File menu, click Save as Template.
-
In the Save As box, type the name that you want to use for the new template.
-
(Optional) In the Where box, choose a location where the template will be saved.
-
Next to File Format, click Excel Template (.xltx), or, if your workbook contains macros, click Excel Macro-Enabled Template (.xltm).
-
Click Save.
Unless you select a different location, the template is saved in /Users/username/Library/Group Containers/UBF8T346G9.Office/User Content/Templates.
You can customize an existing template to make it even more useful. Add static information to the existing template, and then save the file again (as a template).
-
On the File menu, click New from Template.
-
Click a template that is similar to the one you want to create, and then click Create.
Note: If you can’t find a template, you can search for it based on keywords in the Search All Templates box.
-
Add, delete, or change any content, graphics, or formatting, and make any other changes that you want to appear in all new workbooks that you base on the template.
-
On the File menu, click Save as Template.
-
In the Save As box, type the name that you want to use for the new template.
-
(Optional) In the Where box, choose a location where the template will be saved.
-
Next to File Format, click Excel Template (.xltx), or, if your template contains macros, click Excel Macro-Enabled Template (.xltm).
-
Click Save.
Unless you select a different location, the template is saved in /Users/username/Library/Group Containers/UBF8T346G9.Office/User Content/Templates.
To start a new workbook based on a template, on the File menu, click New from Template, and then select the template you want to use.
-
In the Finder, open /Users/username/Library/Group Containers/UBF8T346G9.Office/User Content/Templates.
-
Drag the templates that you want to delete to the Trash.
See also
Differences between templates, themes, and Word styles
Word
-
Open the document.
-
Add, delete, or change any text, graphics, or formatting, and make any other changes that you want to appear in all new documents that you base on the template.
-
On the File menu, click Save As.
-
On the Format pop-up menu, click Word Template (.dotx).
-
In the Save As box, type the name that you want to use for the new template, and then click Save.
Unless you select a different location, the template is saved in /Users/username/Library/Application Support/Microsoft/Office/User Templates/My Templates.
-
On the File menu, click Close.
To organize templates, use the Finder to create a new folder in /Users/username/Library/Application Support/Microsoft/Office/User Templates/My Templates, and then save your template in the new folder.
Note: If you are using Mac OS X 7 (Lion), the Library folder is hidden by default. To show the Library folder, in the Finder, click the Go menu, and then hold down OPTION.
You can customize an existing template to make it even more useful. Add static information to the existing template, and then save the file again (as a template).
-
On the Standard toolbar, click New from template
. -
In the left navigation pane, under TEMPLATES, click All.
Note: If you can’t find a template, you can search for it based on keywords in the Search box.
-
Click a template that is similar to the one that you want to create, and then click Choose.
-
Add, delete, or change any text, graphics, or formatting, and make any other changes that you want to appear in all new documents that you base on the template.
-
On the File menu, click Save As.
-
On the Format pop-up menu, click Word Template (.dotx).
-
In the Save As box, type the name that you want to use for the new template, and then click Save.
Unless you select a different location, the template is saved in /Users/username/Library/Application Support/Microsoft/Office/User Templates/My Templates.
To organize templates, use the Finder to create a new folder in /Users/username/Library/Application Support/Microsoft/Office/User Templates/My Templates, and then save your template in the new folder.
Note: If you are using Mac OS X 7 (Lion), the Library folder is hidden by default. To show the Library folder, in the Finder, click the Go menu, and then hold down OPTION.
 .
.-
On the Standard toolbar, click New from template
. -
In the left navigation pane, under TEMPLATES, click My Templates.
Note: If you created folders to organize your templates, the folders are displayed under My Templates. You need to click the folder to see the templates.
-
Click the template that you created, and then click Choose.
-
In the Finder, open /Users/username/Library/Application Support/Microsoft/Office/User Templates/My Templates.
Note: If you are using Mac OS X 7 (Lion), the Library folder is hidden by default. To show the Library folder, in the Finder, click the Go menu, and then hold down OPTION .
-
Drag the templates that you want to delete to the Trash.
PowerPoint
-
Open the presentation that you want to create the new template from.
-
Add, delete, or change any text, graphics, or formatting, and make any other changes that you want to appear in all new presentations that you base on the template.
-
On the File menu, click Save As.
-
On the Format pop-up menu, click PowerPoint Template (.potx).
-
In the Save As box, type the name that you want to use for the new template, and then click Save.
Unless you select a different location, the template is saved in /Users/username/Library/Application Support/Microsoft/Office/User Templates/My Templates.
To organize templates, use the Finder to create a new folder in /Users/username/Library/Application Support/Microsoft/Office/User Templates/My Templates, and then save your template in the new folder.
Note: If you are using Mac OS X 7 (Lion), the Library folder is hidden by default. To show the Library folder, in the Finder, click the Go menu, and then hold down OPTION.
You can customize an existing template to make it even more useful. Add static information to the existing template, and then save the file again (as a template).
-
On the Standard toolbar, click New from template
. -
In the left navigation pane, under TEMPLATES, click All.
Note: If you can’t find a template, you can search for a template based on keywords in the Search box.
-
Click a template that is similar to the one that you want to create, and then click Choose.
-
Add, delete, or change any text, graphics, or formatting, and make any other changes that you want to appear in all new documents that you base on the template.
If you want to make one change to replicate it in several slide layouts, rather than changing each layout or slide individually, you can edit slide masters.
-
On the File menu, click Save As.
-
On the Format pop-up menu, click PowerPoint Template (.potx).
-
In the Save As box, type the name that you want to use for the new template, and then click Save.
Unless you select a different location, the template is saved in /Users/username/Library/Application Support/Microsoft/Office/User Templates/My Templates.
To organize templates, use the Finder to create a new folder in /Users/username/Library/Application Support/Microsoft/Office/User Templates/My Templates, and then save your template in the new folder.
Note: If you are using Mac OS X 7 (Lion), the Library folder is hidden by default. To show the Library folder, in the Finder, click the Go menu, and then hold down OPTION.
-
On the Standard toolbar, click New from template
. -
In the left navigation pane, under TEMPLATES, click My Templates.
Note: If you created folders to organize your templates, the folders are displayed under My Templates. You need to click the folder to see the templates.
-
In the right navigation pane, you can select the colors, font, and slide size for the template.
-
Click the template that you created, and then click Choose.
-
In the Finder, open /Users/username/Library/Application Support/Microsoft/Office/User Templates/My Templates.
Note: If you are using Mac OS X 7 (Lion), the Library folder is hidden by default. To show the Library folder, in the Finder, click the Go menu, and then hold down OPTION .
-
Drag the templates that you want to delete to the Trash.
Excel
-
Open the workbook that you want to create the new template from.
-
Add, delete, or change any text, graphics, or formatting, and make any other changes that you want to appear in all new documents that you base on the template.
-
On the File menu, click Save As.
-
On the Format pop-up menu, click Excel Template (.xltx).
-
In the Save As box, type the name that you want to use for the new template, and then click Save.
Unless you select a different location, the template is saved in /Users/username/Library/Application Support/Microsoft/Office/User Templates/My Templates.
To organize templates, use the Finder to create a new folder in /Users/username/Library/Application Support/Microsoft/Office/User Templates/My Templates, and then save your template in the new folder.
Note: If you are using Mac OS X 7 (Lion), the Library folder is hidden by default. To show the Library folder, in the Finder, click the Go menu, and then hold down OPTION.
You can customize an existing template to make it even more useful. Add static information to the existing template, and then save the file again (as a template).
-
On the Standard toolbar, click New from template
. -
In the left navigation pane, under TEMPLATES, click All.
Note: If you can’t find a template, you can search for a template based on keywords in the Search box.
-
Click a template that is similar to the one that you want to create, and then click Choose.
-
Add, delete, or change any text, graphics, or formatting, and make any other changes that you want to appear in all new documents that you base on the template.
-
On the File menu, click Save As.
-
On the Format pop-up menu, click Excel Template (.xltx).
-
In the Save As box, type the name that you want to use for the new template, and then click Save.
Unless you select a different location, the template is saved in /Users/username/Library/Application Support/Microsoft/Office/User Templates/My Templates.
To organize templates, use the Finder to create a new folder in /Users/username/Library/Application Support/Microsoft/Office/User Templates/My Templates, and then save your template in the new folder.
Note: If you are using Mac OS X 7 (Lion), the Library folder is hidden by default. To show the Library folder, in the Finder, click the Go menu, and then hold down OPTION.
-
On the Standard toolbar, click New from template
. -
In the left navigation pane, under TEMPLATES, click My Templates.
Note: If you created folders to organize your templates, the folders are displayed under My Templates. You need to click the folder to see the templates.
-
Click the template that you created, and then click Choose.
-
In the Finder, open /Users/username/Library/Application Support/Microsoft/Office/User Templates/My Templates.
Note: If you are using Mac OS X 7 (Lion), the Library folder is hidden by default. To show the Library folder, in the Finder, click the Go menu, and then hold down OPTION .
-
Drag the templates that you want to delete to the Trash.
See also
Modify a slide master
Customize how Excel starts in Excel for Mac
Differences between templates, themes, and Word styles
If you think of your current document as a template, you can save it with a different name to create a new document that’s based on the current one. Whenever you want to create a document like that, you’ll open your document in Word for the web, go to File > Save As, and create a document that’s a copy of the one you started with.
On the other hand, if you’re thinking of the kind of templates you see by going to File > New, then no: you can’t create those in Word for the web.
Instead, do this:
If you have the Word desktop application, use the Open in Word command in Word for the web to open the document in Word on your desktop.

From there, create a template. When you go to File > New in the Word desktop application, you’ll be able to use your template for new documents. And if you store the documents online, you can edit them in Word for the web.
See Also
Microsoft Templates and Themes
Download free, pre-built templates
Free background templates for PowerPoint
Edit templates
Если вы часто создаете документ определенного типа, например ежемесячный отчет, прогноз продаж или презентацию с логотипом компании, сохраните его в качестве шаблона, чтобы использовать его в качестве отправной точки вместо повторного создания файла с нуля каждый раз, когда он вам нужен. Начните с уже созданного документа, скачавшего документа или нового шаблона Майкрософт , который вы настроили.
Сохранение шаблона
-
Чтобы сохранить файл как шаблон, щелкните вкладку Файл и выберите команду Сохранить как.
-
Дважды щелкните пункт Компьютер (в приложениях Office 2016 — Этот компьютер).
-
Введите имя шаблона в поле Имя файла.
-
Чтобы создать базовый шаблон, выберите соответствующий пункт в списке Тип файла. Например, в Word следует выбрать Шаблон Word.
Если ваш документ содержит макросы, щелкните Шаблон Word с поддержкой макросов.
При этом Office автоматически перейдет в папку «Настраиваемые шаблоны Office».
-
Нажмите кнопку Сохранить.


Совет: Чтобы изменить расположение для автоматического сохранения шаблонов, на вкладке Файл выберите пункт Параметры, щелкните категорию Сохранение и укажите путь к нужной папке в поле Расположение личных шаблонов по умолчанию. Все новые шаблоны будут сохраняться в указанном расположении, а если на вкладке Файл выбрать команду Создать и перейти в категорию Личные, будут показаны шаблоны из этой папки.
Редактирование шаблона
Чтобы обновить свой шаблон, откройте файл, внесите необходимые изменения и сохраните шаблон.
-
Щелкните Файл > Открыть.
-
Дважды щелкните пункт Компьютер (или Этот компьютер).
-
Перейдите в папку Пользовательские шаблоны Office, которая находится в папке Документы.
-
Щелкните шаблон и нажмите кнопку Открыть.
-
Внесите необходимые изменения, а затем сохраните и закройте шаблон.
Создание нового документа с помощью шаблона
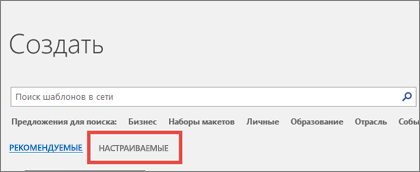
Чтобы запустить новый файл на основе шаблона, щелкните Файл > Создать > Пользовательский и щелкните шаблон.
Примечание: Если вы используете Office 2013, на этой кнопке может быть указано личное , а не настраиваемое.
Использование шаблонов из предыдущих версий Office
Если вы создали шаблоны в более ранней версии Office, то можете использовать их в Office 2013 или 2016. Для этого сначала переместите соответствующие файлы в папку «Настраиваемые шаблоны Office», чтобы они стали доступны в приложении. Для быстрого перемещения шаблонов используйте инструмент Fix it.
Word
-
Откройте документ Word, который требуется сохранить в виде шаблона.
-
В меню Файл выберите команду Сохранить как шаблон.
-
В поле Сохранить как введите имя нового шаблона.
-
(Необязательно) В поле Где выберите расположение, в котором будет сохранен шаблон.
-
Рядом с полем Формат файла щелкните Шаблон Microsoft Word (.dotx) или, если документ содержит макросы, щелкните Microsoft Word Macro-Enabled шаблон (DOTM).
-
Нажмите кнопку Сохранить.
Если вы не выберете другое расположение, шаблон сохраняется в папке /Users/username/Library/Group Containers/UBF8T346G9. Office/User Content/Templates.
Чтобы изменить, где Word автоматически сохраняет шаблоны, в меню Word щелкните Параметры, а затем в разделе Личные параметры выберите пункт Расположения файлов. В разделе Расположения файлов выберите Шаблоны пользователей в списке и нажмите кнопку Изменить. Введите новую папку и путь, которые вы хотите использовать, и Word сохранит все новые шаблоны в этой папке.
Существующий шаблон можно изменить, чтобы сделать его более полезным. Добавьте статические данные в существующий шаблон и повторно сохраните файл (как шаблон).
-
В меню Файл выберите команду Создать из шаблона.
-
Щелкните шаблон, похожий на шаблон, который вы хотите создать, и нажмите кнопку Создать.
Примечание: Если не удается найти шаблон, его можно найти по ключевым словам в поле Поиск по всем шаблонам .
-
Добавьте, удалите или измените текст, изображения или форматирование и внесите в шаблон другие изменения, которые должны отражаться во всех новых документах, основанных на нем.
-
В меню Файл выберите команду Сохранить как шаблон.
-
В поле Сохранить как введите имя нового шаблона.
-
(Необязательно) В поле Где выберите расположение, в котором будет сохранен шаблон.
-
Рядом с полем Формат файла щелкните Шаблон Microsoft Word (.dotx) или, если шаблон содержит макросы, щелкните Microsoft Word Macro-Enabled шаблон.
-
Нажмите кнопку Сохранить.
Если вы не выберете другое расположение, шаблон сохраняется в папке /Users/username/Library/Group Containers/UBF8T346G9. Office/User Content/Templates.
Чтобы изменить, где Word автоматически сохраняет шаблоны, в меню Word щелкните Параметры, а затем в разделе Личные параметры выберите пункт Расположения файлов. В разделе Расположения файлов выберите Шаблоны пользователей в списке и нажмите кнопку Изменить. Введите новую папку и путь, которые вы хотите использовать, и Word сохранит все новые шаблоны в этой папке.
Чтобы открыть новый документ на основе шаблона, в меню Файл щелкните пункт Создать из шаблона, а затем выберите нужный шаблон.
-
В finder откройте /Users/username/Library/Group Containers/UBF8T346G9. Office/User Content/Templates.
-
Перетащите в корзину шаблоны, которые нужно удалить.
PowerPoint
-
Откройте пустую презентацию и на вкладке Вид выберите Образец слайдов.
Образец слайдов — это самое крупное изображение слайда в верхней части списка эскизов слайдов. Под ним расположены связанные с ним макеты.
-
Чтобы изменить образец слайдов или макеты, на вкладке Образец слайдов сделайте следующее:
-
Чтобы добавить красочную тему со специальными шрифтами и эффектами, нажмите Темы и выберите тему.
-
Чтобы изменить фон, щелкните Стили фона и выберите нужный вариант.
-
Чтобы добавить заполнитель для текста, изображения, диаграммы и других объектов, в области эскизов щелкните макет слайда, в котором хотите разместить заполнитель. В разделе Вставить заполнитель выберите тип добавляемого заполнителя и перетаскиванием обозначьте его размер.
-

-
Откройте презентацию, которую нужно сохранить в виде шаблона.
-
На вкладке Файл выберите команду Сохранить как шаблон.
-
В поле Сохранить как введите имя нового шаблона.
-
(Необязательно) В поле Где выберите расположение, в котором будет сохранен шаблон.
-
Рядом с полем Формат файла щелкните Шаблон PowerPoint (.potx) или, если презентация содержит макросы, выберите Элемент PowerPoint Macro-Enabled Шаблон (POTM).
-
Нажмите кнопку Сохранить.
Если вы не выберете другое расположение, шаблон сохраняется в папке /Users/username/Library/Group Containers/UBF8T346G9. Office/User Content/Templates.
Существующий шаблон можно изменить, чтобы сделать его более полезным. Добавьте статические данные в существующий шаблон и повторно сохраните файл (как шаблон).
-
В меню Файл выберите команду Создать из шаблона.
-
Щелкните шаблон, похожий на шаблон, который вы хотите создать, и нажмите кнопку Создать.
Примечание: Если не удается найти шаблон, его можно найти по ключевым словам в поле Поиск по всем шаблонам .
-
Добавьте, удалите или измените текст, изображения или форматирование и внесите в шаблон другие изменения, которые должны отражаться во всех новых презентациях, основанных на нем.
-
В меню Файл выберите команду Сохранить как шаблон.
-
В поле Сохранить как введите имя нового шаблона.
-
(Необязательно) В поле Где выберите расположение, в котором будет сохранен шаблон.
-
Рядом с полем Формат файла щелкните Шаблон PowerPoint (.potx) или, если шаблон содержит макросы, щелкните PowerPoint Macro-Enabled Шаблон (.potm).
-
Нажмите кнопку Сохранить.
Если вы не выберете другое расположение, шаблон сохраняется в папке /Users/username/Library/Group Containers/UBF8T346G9. Office/User Content/Templates.
Чтобы начать новую презентацию на основе шаблона, в меню Файл выберите команду Создать из шаблона, а затем выберите шаблон, который вы хотите использовать.
-
В finder откройте /Users/username/Library/Group Containers/UBF8T346G9. Office/User Content/Templates.
-
Перетащите в корзину шаблоны, которые нужно удалить.
Excel
-
Откройте книгу, которую нужно сохранить в виде шаблона.
-
В меню Файл выберите команду Сохранить как шаблон.
-
В поле Сохранить как введите имя нового шаблона.
-
(Необязательно) В поле Где выберите расположение, в котором будет сохранен шаблон.
-
Рядом с полем Формат файла щелкните Шаблон Excel (.xltx) или, если книга содержит макросы, щелкните Excel Macro-Enabled шаблон (XLTM).
-
Нажмите кнопку Сохранить.
Если вы не выберете другое расположение, шаблон сохраняется в папке /Users/username/Library/Group Containers/UBF8T346G9. Office/User Content/Templates.
Существующий шаблон можно изменить, чтобы сделать его более полезным. Добавьте статические данные в существующий шаблон и повторно сохраните файл (как шаблон).
-
В меню Файл выберите команду Создать из шаблона.
-
Щелкните шаблон, похожий на шаблон, который вы хотите создать, и нажмите кнопку Создать.
Примечание: Если не удается найти шаблон, его можно найти по ключевым словам в поле Поиск по всем шаблонам .
-
Добавьте, удалите или измените содержимое, графику или форматирование, а также внесите любые другие изменения, которые должны отображаться во всех новых книгах, на основе шаблона.
-
В меню Файл выберите команду Сохранить как шаблон.
-
В поле Сохранить как введите имя нового шаблона.
-
(Необязательно) В поле Где выберите расположение, в котором будет сохранен шаблон.
-
Рядом с полем Формат файла щелкните Шаблон Excel (XLTX)или, если шаблон содержит макросы, щелкните Excel Macro-Enabled Шаблон (XLTM).
-
Нажмите кнопку Сохранить.
Если вы не выберете другое расположение, шаблон сохраняется в папке /Users/username/Library/Group Containers/UBF8T346G9. Office/User Content/Templates.
Чтобы запустить новую книгу на основе шаблона, в меню Файл выберите команду Создать из шаблона, а затем выберите шаблон, который вы хотите использовать.
-
В finder откройте /Users/username/Library/Group Containers/UBF8T346G9. Office/User Content/Templates.
-
Перетащите в корзину шаблоны, которые нужно удалить.
См. также
Различия между шаблонами, темами и стилями Word
Word
-
Откройте документ.
-
Добавьте, удалите или измените текст, изображения или форматирование и внесите в шаблон другие изменения, которые должны отражаться во всех новых документах, основанных на нем.
-
В меню Файл выберите пункт Сохранить как.
-
Во всплывающем меню Формат выберите пункт Шаблон Word (.dotx).
-
В поле Сохранить как введите имя нового шаблона, а затем нажмите кнопку Сохранить.
Если вы не выбрали другое расположение, шаблон сохраняется в папке /Users/username/Library/Application Support/Microsoft/Office/User Templates/My Templates.
-
В меню Файл выберите команду Закрыть.
Чтобы упорядочить шаблоны, с помощью Средства поиска создайте новую папку в папке /Users/username/Library/Application Support/Microsoft/Office/User Templates/My Templates, а затем сохраните шаблон в новой папке.
Примечание: В Mac OS X 7 (Lion) папка Library по умолчанию скрыта. Чтобы отобразить папку Библиотека, в finder щелкните меню Перейти , а затем удерживайте нажатой клавишу OPTION.
Существующий шаблон можно изменить, чтобы сделать его более полезным. Добавьте статические данные в существующий шаблон и повторно сохраните файл (как шаблон).
-
На стандартной панели инструментов щелкните Создать из шаблона
. -
В области навигации слева в разделе Шаблоны нажмите кнопку Все.
Примечание: Если не удается найти шаблон, его можно найти по ключевым словам в поле Поиска .
-
Щелкните наиболее подходящий шаблон и нажмите кнопку Выбрать.
-
Добавьте, удалите или измените текст, изображения или форматирование и внесите в шаблон другие изменения, которые должны отражаться во всех новых документах, основанных на нем.
-
В меню Файл выберите пункт Сохранить как.
-
Во всплывающем меню Формат выберите пункт Шаблон Word (.dotx).
-
В поле Сохранить как введите имя нового шаблона, а затем нажмите кнопку Сохранить.
Если вы не выбрали другое расположение, шаблон сохраняется в папке /Users/username/Library/Application Support/Microsoft/Office/User Templates/My Templates.
Чтобы упорядочить шаблоны, с помощью Средства поиска создайте новую папку в папке /Users/username/Library/Application Support/Microsoft/Office/User Templates/My Templates, а затем сохраните шаблон в новой папке.
Примечание: В Mac OS X 7 (Lion) папка Library по умолчанию скрыта. Чтобы отобразить папку Библиотека, в finder щелкните меню Перейти , а затем удерживайте нажатой клавишу OPTION.
 .
.-
На стандартной панели инструментов щелкните Создать из шаблона
. -
В области навигации слева в разделе Шаблоны нажмите кнопку Мои шаблоны.
Примечание: Если для упорядочения шаблонов вы создали папки, они отображаются в разделе Мои шаблоны. Для просмотра шаблонов щелкните нужную папку.
-
Щелкните созданный шаблон и нажмите кнопку Выбрать.
-
В finder откройте /Users/username/Library/Application Support/Microsoft/Office/User Templates/My Templates.
Примечание: В Mac OS X 7 (Lion) папка Library по умолчанию скрыта. Чтобы отобразить ее, в системе поиска щелкните меню Перейти, а затем нажмите и удерживайте клавишу OPTION.
-
Перетащите в корзину шаблоны, которые нужно удалить.
PowerPoint
-
Откройте презентацию, на основе которой нужно создать шаблон.
-
Добавьте, удалите или измените текст, изображения или форматирование и внесите в шаблон другие изменения, которые должны отражаться во всех новых презентациях, основанных на нем.
-
В меню Файл выберите пункт Сохранить как.
-
Во всплывающем меню Формат выберите пункт Шаблон PowerPoint (.potx).
-
В поле Сохранить как введите имя нового шаблона, а затем нажмите кнопку Сохранить.
Если вы не выбрали другое расположение, шаблон сохраняется в папке /Users/username/Library/Application Support/Microsoft/Office/User Templates/My Templates.
Чтобы упорядочить шаблоны, с помощью Средства поиска создайте новую папку в папке /Users/username/Library/Application Support/Microsoft/Office/User Templates/My Templates, а затем сохраните шаблон в новой папке.
Примечание: В Mac OS X 7 (Lion) папка Library по умолчанию скрыта. Чтобы отобразить папку Библиотека, в finder щелкните меню Перейти , а затем удерживайте нажатой клавишу OPTION.
Существующий шаблон можно изменить, чтобы сделать его более полезным. Добавьте статические данные в существующий шаблон и повторно сохраните файл (как шаблон).
-
На стандартной панели инструментов щелкните Создать из шаблона
. -
В области навигации слева в разделе Шаблоны нажмите кнопку Все.
Примечание: Если шаблон не удается найти, можно выполнить поиск по ключевым словам с помощью поля Поиск.
-
Щелкните наиболее подходящий шаблон и нажмите кнопку Выбрать.
-
Добавьте, удалите или измените текст, изображения или форматирование и внесите в шаблон другие изменения, которые должны отражаться во всех новых документах, основанных на нем.
Чтобы не изменять каждый макет или слайд по отдельности, можно применить изменения сразу к нескольким макетам слайдов. Для этого измените образцы слайдов.
-
В меню Файл выберите пункт Сохранить как.
-
Во всплывающем меню Формат выберите пункт Шаблон PowerPoint (.potx).
-
В поле Сохранить как введите имя нового шаблона, а затем нажмите кнопку Сохранить.
Если вы не выбрали другое расположение, шаблон сохраняется в папке /Users/username/Library/Application Support/Microsoft/Office/User Templates/My Templates.
Чтобы упорядочить шаблоны, с помощью Средства поиска создайте новую папку в папке /Users/username/Library/Application Support/Microsoft/Office/User Templates/My Templates, а затем сохраните шаблон в новой папке.
Примечание: В Mac OS X 7 (Lion) папка Library по умолчанию скрыта. Чтобы отобразить папку Библиотека, в finder щелкните меню Перейти , а затем удерживайте нажатой клавишу OPTION.
-
На стандартной панели инструментов щелкните Создать из шаблона
. -
В области навигации слева в разделе Шаблоны нажмите кнопку Мои шаблоны.
Примечание: Если для упорядочения шаблонов вы создали папки, они отображаются в разделе Мои шаблоны. Для просмотра шаблонов щелкните нужную папку.
-
В области навигации справа можно выбрать цвета, шрифт и размер слайда для шаблона.
-
Щелкните созданный шаблон и нажмите кнопку Выбрать.
-
В finder откройте /Users/username/Library/Application Support/Microsoft/Office/User Templates/My Templates.
Примечание: В Mac OS X 7 (Lion) папка Library по умолчанию скрыта. Чтобы отобразить ее, в системе поиска щелкните меню Перейти, а затем нажмите и удерживайте клавишу OPTION.
-
Перетащите в корзину шаблоны, которые нужно удалить.
Excel
-
Откройте книгу, на основе которой нужно создать шаблон.
-
Добавьте, удалите или измените текст, изображения или форматирование и внесите в шаблон другие изменения, которые должны отражаться во всех новых документах, основанных на нем.
-
В меню Файл выберите пункт Сохранить как.
-
Во всплывающем меню Формат выберите пункт Шаблон Excel (.xltx).
-
В поле Сохранить как введите имя нового шаблона, а затем нажмите кнопку Сохранить.
Если вы не выбрали другое расположение, шаблон сохраняется в папке /Users/username/Library/Application Support/Microsoft/Office/User Templates/My Templates.
Чтобы упорядочить шаблоны, с помощью Средства поиска создайте новую папку в папке /Users/username/Library/Application Support/Microsoft/Office/User Templates/My Templates, а затем сохраните шаблон в новой папке.
Примечание: В Mac OS X 7 (Lion) папка Library по умолчанию скрыта. Чтобы отобразить папку Библиотека, в finder щелкните меню Перейти , а затем удерживайте нажатой клавишу OPTION.
Существующий шаблон можно изменить, чтобы сделать его более полезным. Добавьте статические данные в существующий шаблон и повторно сохраните файл (как шаблон).
-
На стандартной панели инструментов щелкните Создать из шаблона
. -
В области навигации слева в разделе Шаблоны нажмите кнопку Все.
Примечание: Если шаблон не удается найти, можно выполнить поиск по ключевым словам с помощью поля Поиск.
-
Щелкните наиболее подходящий шаблон и нажмите кнопку Выбрать.
-
Добавьте, удалите или измените текст, изображения или форматирование и внесите в шаблон другие изменения, которые должны отражаться во всех новых документах, основанных на нем.
-
В меню Файл выберите пункт Сохранить как.
-
Во всплывающем меню Формат выберите пункт Шаблон Excel (.xltx).
-
В поле Сохранить как введите имя нового шаблона, а затем нажмите кнопку Сохранить.
Если вы не выбрали другое расположение, шаблон сохраняется в папке /Users/username/Library/Application Support/Microsoft/Office/User Templates/My Templates.
Чтобы упорядочить шаблоны, с помощью Средства поиска создайте новую папку в папке /Users/username/Library/Application Support/Microsoft/Office/User Templates/My Templates, а затем сохраните шаблон в новой папке.
Примечание: В Mac OS X 7 (Lion) папка Library по умолчанию скрыта. Чтобы отобразить папку Библиотека, в finder щелкните меню Перейти , а затем удерживайте нажатой клавишу OPTION.
-
На стандартной панели инструментов щелкните Создать из шаблона
. -
В области навигации слева в разделе Шаблоны нажмите кнопку Мои шаблоны.
Примечание: Если для упорядочения шаблонов вы создали папки, они отображаются в разделе Мои шаблоны. Для просмотра шаблонов щелкните нужную папку.
-
Щелкните созданный шаблон и нажмите кнопку Выбрать.
-
В finder откройте /Users/username/Library/Application Support/Microsoft/Office/User Templates/My Templates.
Примечание: В Mac OS X 7 (Lion) папка Library по умолчанию скрыта. Чтобы отобразить ее, в системе поиска щелкните меню Перейти, а затем нажмите и удерживайте клавишу OPTION.
-
Перетащите в корзину шаблоны, которые нужно удалить.
См. также
Изменение образца слайдов
Настройка запуска Excel в Excel для Mac
Различия между шаблонами, темами и стилями Word
Если вы считаете текущий документ шаблоном, вы можете сохранить его с другим именем, чтобы создать новый документ на основе текущего. Когда вы хотите создать такой документ, вы откроете документ в Word в Интернете, перейдите в раздел Файл > сохранить как и создадите документ, который является копией того, с которого вы начали.
С другой стороны, если вы думаете о типах шаблонов, которые вы видите, перейдя в файл > Создать, то нет: вы не можете создать их в Word в Интернете.
Вместо этого сделайте следующее.
Если у вас есть классическое приложение Word, используйте команду Открыть в Word в Word в Интернете, чтобы открыть документ в Word на рабочем столе.

Создайте шаблон в программе Word. Вы сможете использовать свой шаблон для новых документов, выбрав команду Файл > Создать в классическом приложении Word. Если документы хранятся в Интернете, их можно изменить в Word в Интернете.
См. также
Шаблоны и темы Майкрософт
Скачивание бесплатных готовых шаблонов
Бесплатные шаблоны с фоном для PowerPoint
Изменение шаблонов
![]()
Download Article
![]()
Download Article
Creating a template in Microsoft Word can be useful and time-saving when you plan on using the same style of document repeatedly on a consistent basis. Templates can be based on existing documents you have already created, or can be downloaded from Word and other third-party websites.
-
1
Open the Word document you want made into a template.
-
2
Click on “File” in the top menu bar and select “Save As.”
Advertisement
-
3
Click on “Computer.”
-
4
Type a name for your template next to “File name.”
-
5
Select “Word Template” from the dropdown menu labeled “Save as type.”
- Alternately, you may select “Word 97-2003 Template” if you plan on using the template in an earlier version of Word, or “Word Macro-Enabled Template” if your word document contains macros.
-
6
Click on “Save.” Your template will now be saved in the folder: “My Documents” on your computer under “Custom Office Templates.”[1]


Advertisement
-
1
Open the Microsoft Word application.
-
2
Click on “File” in the menu bar and select “New.” A list of available templates will display on-screen.
-
3
Click in the search field to the right of “Office.com Templates.”
-
4
Type a keyword or keyword phrase that describes the style of template you want to use. For example, if you want to create a template in brochure style, type “brochure.”
-
5
Click on the arrow to the right of the search field to execute your search. A list of templates that match your description will display on-screen.
-
6
Browse through templates and click on any template to see a preview in the right window pane.
-
7
Click on “Download” below the preview pane to download that particular template. The template will be saved in your computer’s “My Documents” folder under “Custom Office Templates.”[2]


Advertisement
Ask a Question
200 characters left
Include your email address to get a message when this question is answered.
Submit
Advertisement
-
Customize your templates as much as possible to simplify your experience when working with and adding content to documents. Add the font styles, background colors, text colors, font sizes, and themes you want to use consistently when creating templates.
Thanks for submitting a tip for review!
Advertisement
-
When downloading Word templates from a third-party website, make sure that the website is reputable and that the file you are downloading is in the correct format. Some third-party websites may try to trick you into downloading viruses and malware in place of Word templates.
Advertisement
About This Article
Thanks to all authors for creating a page that has been read 61,003 times.
Is this article up to date?
In Microsoft Word, templates are pre-designed documents that you or someone else (such as Microsoft) creates to use as a pattern for a project. The template could be for a business card, brochure, resume, presentation…the list goes on. Regardless of the purpose, templates provide the design consistency that any organization (or individual) needs to look professional. (You can also find templates for Excel, PowerPoint, and other applications, but in this article we’re focusing on Microsoft Word.)
The template contains a specific layout, style, design and, sometimes, fields and text that are common to every use of that template. Some templates are so complete (such as business cards), you only have to change the individual’s name, phone number, and email address. Others, such as business reports or brochures, could require that everything is changed except the layout and design.
Once you create a template, you can use it over and over. Remember that while you open a template to start a project, you save the project as another file type, such as the basic .docx Word format, for editing, sharing, printing, and more. The template file stays the same, unless or until you want to change it (more on that later).
This is a sample template in Microsoft Word. JD Sartain / IDG Worldwide
How to access Microsoft Word’s stock templates
Fortunately for us, Microsoft provides many hundreds of templates for all of its programs. Note that most of Microsoft’s templates are online, which means you cannot access them unless you’re connected to the Internet.
To open one of the system-provided templates in Word:
1. Open Microsoft Word and select New.
2. Peruse the Suggested Search categories: Business, Personal, Industry, Design Sets, Events, Education, or Letters. For this exercise, select Business.
3. Word displays a message that says, “Searching thousands of online templates.”
4. Word displays template search results on-screen, plus a comprehensive list of categories in a scrolling panel on the right.
5. Scroll down the page or choose a different category, then select a template that fits your current project.
Select a template from a category, then start filling in your own data and images. 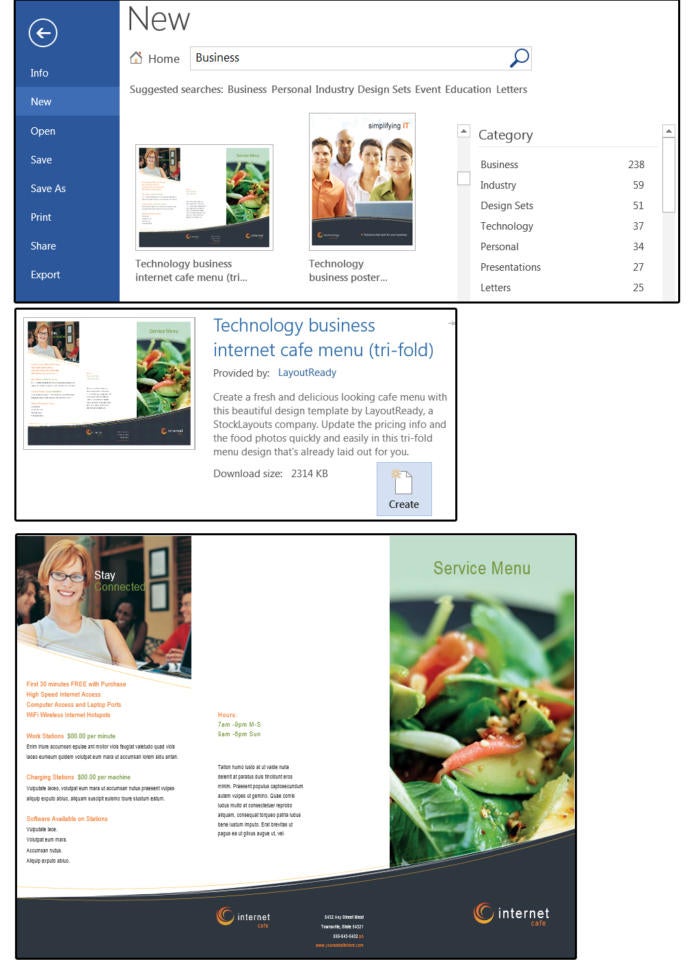 JD Sartain / IDG Worldwide
We selected the Internet Café template. Notice the photos, graphics, and main information, such as hours, are already created in the template. You only have to type over the existing data with your company’s data, and the brochure is complete.
How to modify a Microsoft Word template
You can change the colors, font, photos, logo, and anything else on this template. If you have not selected the Internet Café brochure, please do so now. Before you make any changes, go ahead and save this template with a new filename.
1. If you follow normal document-saving procedures (and you can here), you select File > Save As > Computer > Browse. Then navigate to the applicable folder and give the template a new name.
2. Remember that once you click the down arrow beside the Save As Type in the input box and select Word Template (*.dotx) from the list (and change the name, of course, in the File Name input box), Microsoft automatically puts the file in its own template folder.
3. Once saved as a template, close the file.
4. Now open it again. Note that it is not in the folder you specified. Don’t panic. Navigate to C:UsersownerDocumentsCustom Office Templates and your custom templates are there. Select the one you just saved from the list and open it.
Save the document as a template.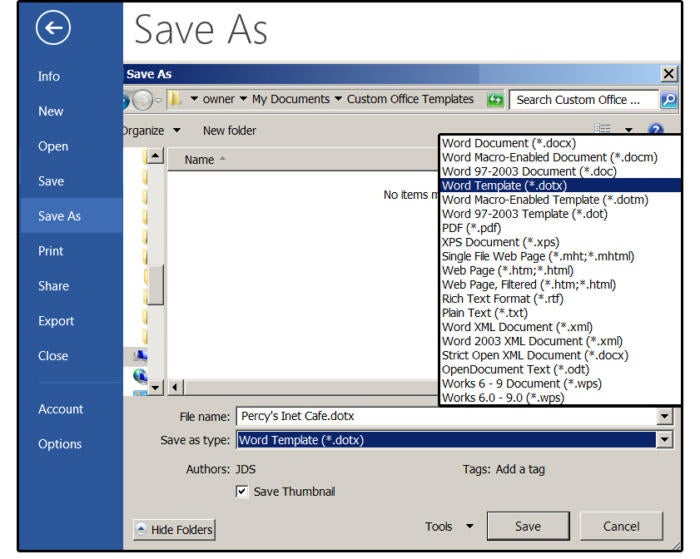 JD Sartain / IDG Worldwide
5. Change the sections on the new template that will be on every brochure, such as the logo, or contact information. Then save it as a template again by pressing Ctrl+ S. It will save in the same location.
6. Next, fill in all the other information and save it—this time, as a document, so you can print it out or share it with others.
Whenever you’re ready to create a new brochure, just open the template, enter the new data, and save the completed brochure as a document.
This Internet Café template has been modified and saved as a document brochure. JD Sartain / IDG Worldwide
Custom templates can be as simple or complex as needed. For example, you might create a template for your company’s newsletter, posters for a seminar, or invitations for corporate events. You can also create interactive templates to load on the Intranet, so others can fill in the blanks to print their own envelopes and letterhead, for instance.
First, create a document—design and format it, add graphics and photos. If it’s interactive, select Controls from the Developer tab and create custom input fields for user interaction.
For this exercise, create an announcement flyer for a Meet & Greet conference including lunch, cocktails, and dinner for the company’s senior management and its new interns.
1. Start with a blank document.
2. Create two columns: The left is 4.5 inches and the right is 2.5 inches, and the space between the columns is about 3/8 of an inch. These measurements are only suggestions. Adjust as necessary for your project and the images and graphics you choose.
3. Add a title.
4. Choose a font (we’re choosing Century Gothic), style (sans serif), and color (white), for that title.
5. Repeat this process for a subtitle. In our example, we’re changing the font color to dark teal.
6. Create some graphic boxes for the title (dark teal) and the subtitle (light teal). Select Insert > Shapes and choose a rectangle from the icon list.
7. Insert an applicable photo in both columns. Choose Insert > Pictures and select photos from your Pictures Library. Adding images gives you an opportunity to eyeball image sizes and column widths and adjust them as needed.
8. Enter the schedule and agenda in column one. Use Century Gothic 14 (in black) for the body text and Century Gothic 18 (in dark teal) for the headers.
9. Enter the time and place plus the conference hosts in column two, with the same fonts and colors for the body text and headers.
Create a custom event template. JD Sartain / IDG Worldwide
10. Once satisfied with the final product, click Save As > Meet+Greet.docx (a regular Word document), so you can share or print.
11. Before you exit, also save this document as a template. Click Save As > Save As Type, choose Word Template [*.dotx] from the list, and save as Meet+Greet.dotx. Next conference, the template is ready to get you started.
Once you have some custom templates in your Custom Office Templates folder, when you open Word and select New, Word provides a new category on the backstage menu called Personal. Click this category to see and open your saved templates.
Open your custom template under New > Personal.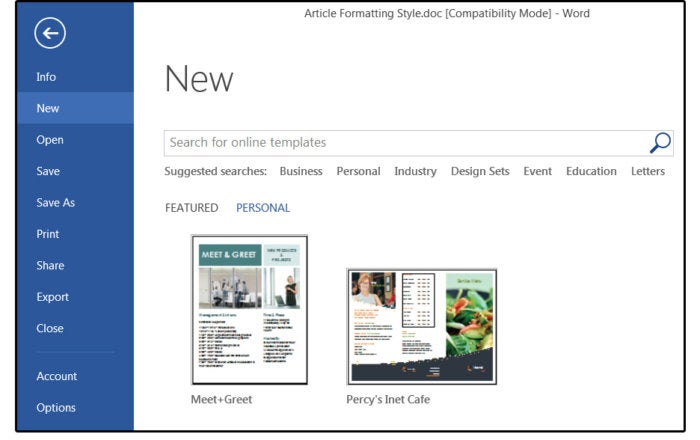 JD Sartain / IDG Worldwide
How to add an interactive component to a template
Some templates use interactive controls for user input. For example, imagine that once a month, the branch managers, assistant managers, and loan originators of a large banking institution have a meeting at one of the 12 branches. It’s your assistant’s job to email the date, time, location, speakers, topics, and agenda to each attendee. Rather than have that person retype the data in a regular template, you can create a template where options can be chosen from a list. For example:
1. First, create the template, then decide which fields (date, time, etc.) can be selected from a list.
2. Click the Developer tab.
3. Position your cursor on the template where the date goes.
4. Select Insert > Text > Quick Parts > Field, then choose Date from the Categories panel and select a date format from the Properties panel. Click OK. Now the date will update automatically.
Insert a date field that automatically updates.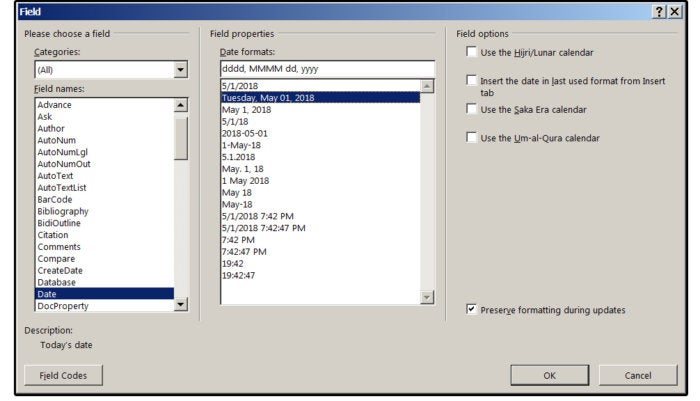 JD Sartain / IDG Worldwide
5. Next, position your cursor on the template where the location goes.
6. Select Developer > Controls > Combo Box Content Control. Word places this item on your template.
7. With the Developer tab still selected, click Controls > Properties, and the Content Control Properties dialog window opens.
8. Click the Add button, enter a branch name in the Add Choice dialog box, then click OK. Repeat this process until all the branch locations are entered, then click OK again to close this dialog window.
Create a Combo Box Control so users can select options from a list.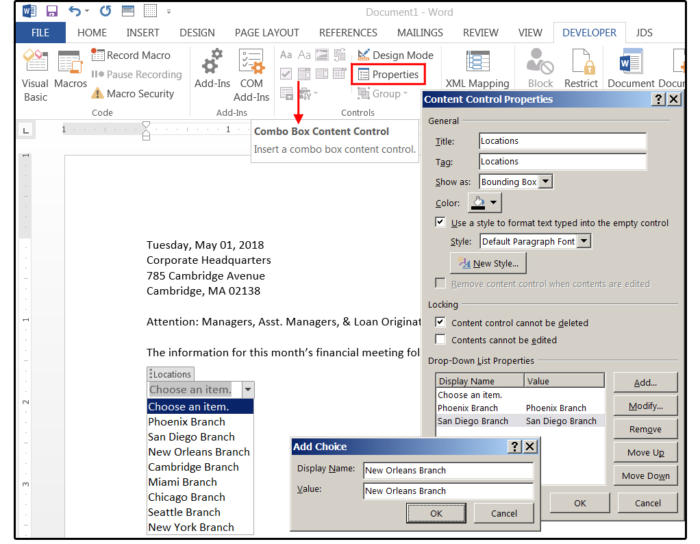 JD Sartain / IDG Worldwide
9. If you want to modify, remove, or move an entry up or down, highlight the entry, then click the appropriate button.
10. You can change the color of the Combo Box frame and change or create a custom style (fonts, color, attributes, etc.) for the typeface used inside the Combo Box.
11. Repeat steps 5 through 8 above to create Combo Box Content Controls for the remaining fields: meeting date and time, speakers, and topics.
12. When finished, save the document as a Word Template (*.dotx).
Template tips: how to create custom stylesheets
The default stylesheet in MS Word is called normal.dotx. It’s not a good idea to alter this stylesheet because, later on, it could result in some unwanted effects. It’s best to create custom stylesheets for each custom template. For example, the normal.dotx font is Calibri, paragraphs are left aligned, spacing is 1.15, etc. Heading 1 is Cambria 16 point, etc. You can change these settings manually throughout your document without saving them to the normal stylesheet, and before you save the document as a template.
Once satisfied, use those custom settings for your new stylesheet, which could be named something similar to the template name. For example, if you’re creating a custom brochure template, you might name it and the stylesheet Brochure1. Then future brochures will be much easier to design.
1. Choose the Home tab, then click the small arrow in the bottom right corner of the group called Styles. From the drop-down menu, click the New Styles button (bottom left).
2. In the popup dialog Create New Style from Formatting, enter the name of the style, such as Brochure1.
3. Next select Paragraph from the Style Type field list, which affects the entire paragraph, as opposed to a Character style, that affects only the characters inside a paragraph.
4. You can choose to make the style based on another style, such as the Normal style, one of the Header styles, or No style. If you plan to use most of the formatting features in the Normal style except a few differences, then base it on the Normal style. If the custom style will be completely different, then choose the No style option.
5. Under Formatting, select a Font and Size, then choose a Font Color such as Brown, Alignment such as Justify, Spacing such as 1.15, and Indents. Notice that the box in the center of the dialog window shows how the paragraph looks with the format options you select.
How to create a custom stylesheet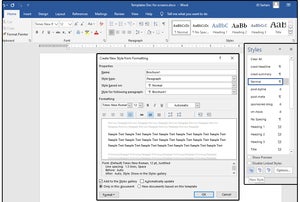 JD Sartain / IDG
6. In the bottom left corner, click the Format button. Notice the nine options in the drop-down list. In the Font dialog, you can further customize the font options such as font style (bold, italic, etc,), underline style; Sub- and Superscript, Small Caps, etc.
7. In the Paragraph dialog, you can customize the Indents & Spacing and the Line & Page Breaks. Use the Tabs dialog to customize the alignment and the leader of your tabs, such as the dots between the chapter name and chapter page number on a table of contents.
8. The Borders & Shading dialog provides Border options such as Box, Shadow, 3D, etc.; and Shading options include colors and patterns. The Language feature is, of course, the language of the paragraph such as French or Italian. Note that if you want only specific words in another language, such as c’est la vie in the middle of a paragraph, then create a character style called French.
9. The Frame option is actually the Text Wrap feature, which includes how the text wraps around a graphic in a paragraph, the spacing around the graphic, and how it’s positioned on the page. Choose Numbering to define how you want the numbers to appear such as the standard Arabic numbers, Roman Numerals, or Characters; how they are spaced; and delineated such as with a period after or parentheses, etc. Bullets are also defined under this list choice, which provides standard and custom bullets.
10. Next is the Shortcut Key options, which lets you choose a custom Shortcut key for your Paragraph or Character style, such as Ctrl+B for bold (which is a Word default), or define your own. Last on the list is Text Effects, which lets you define the color, gradient, pattern, outline, and transparency of a paragraph such as the title on the title page of a book or manual. Additional Text Effects include Shadow, Reflection, Glow, Soft Edges, and 3D Format.
How to format a custom stylesheet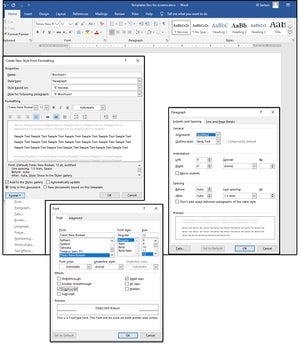 JD Sartain / IDG
Where to find the template files on your computer
The custom templates that you create or modify from one of Microsoft’s stock templates are stored at C:UsersOwnerDocumentsCustom Office Templates, where <Owner> is your login name. When you open the Users folder, you’ll see your login name on the list of folders. If not there, it should be in the folder that’s actually called Owner.
Where the personal custom templates and the stock templates are located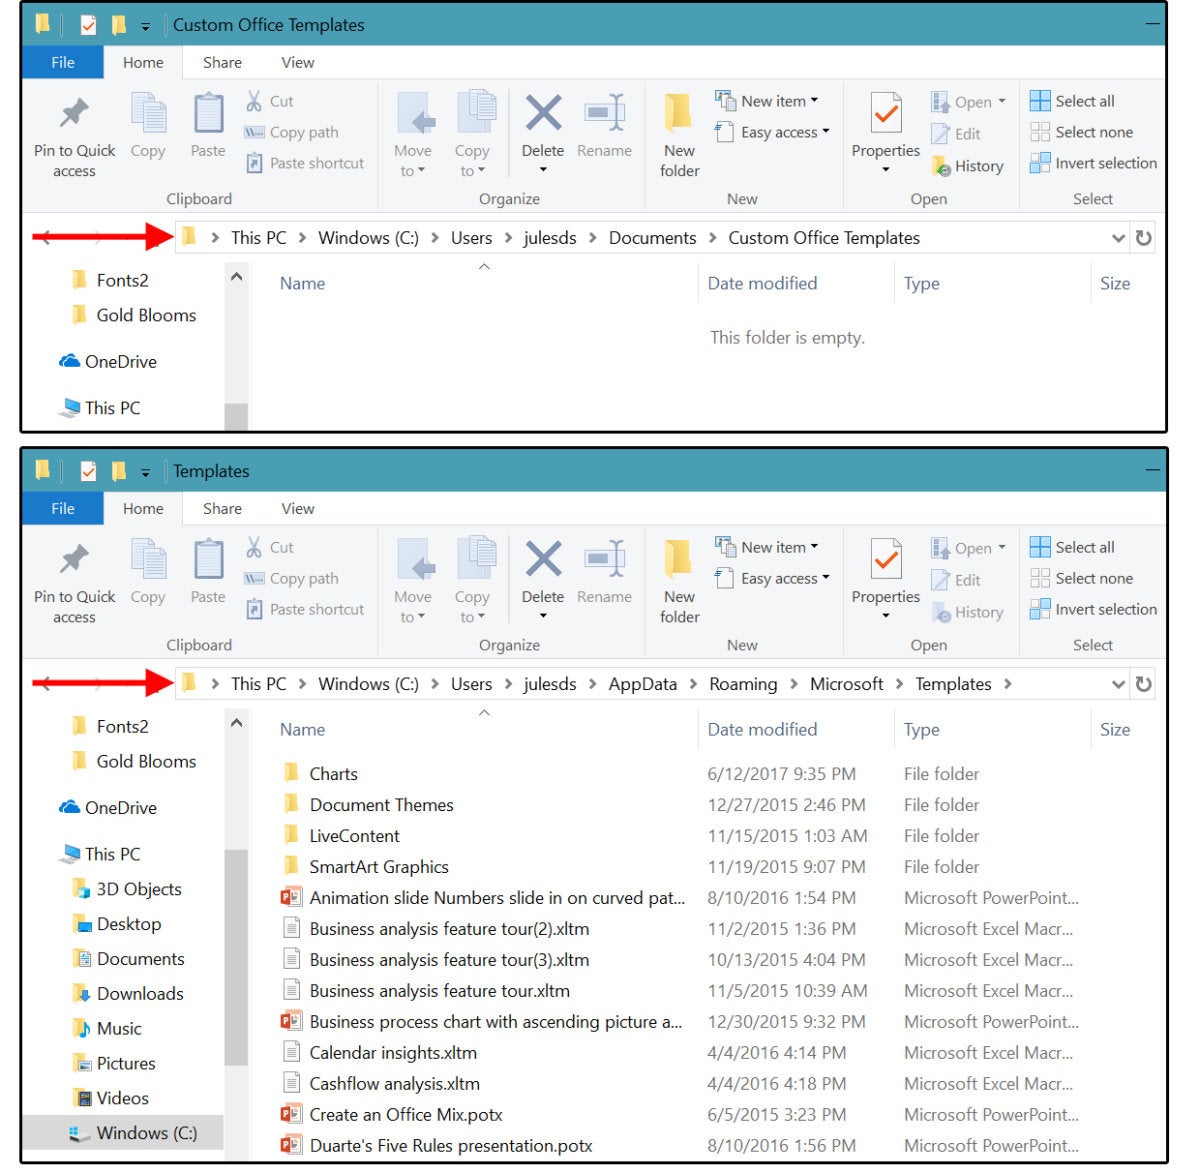 JD Sartain / IDG Worldwide
Microsoft stores its templates at:
C:Users<your login name>AppDataRoamingMicrosoftTemplates
Again, if you failed to create a unique login name, this folder may be called <Owner>. If you can’t find it, the AppData folder and all of its files and subfolders are hidden.
Show Hidden Files and Folders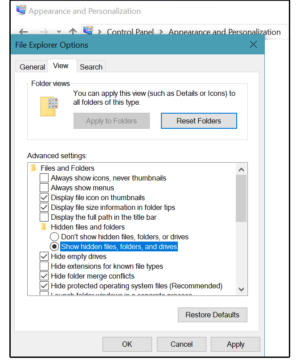 JD Sartain / IDG Worldwide
To view the Hidden files:
- Select the Start/Windows button > Control Panel > Appearance and Personalization
- Select File Explorer Options/Folder Options > Show hidden files and folders
- On the next screen, check the tick mark beside Show hidden files, folders, and drives, then click Apply and OK.
Two more ways to locate the stock templates folder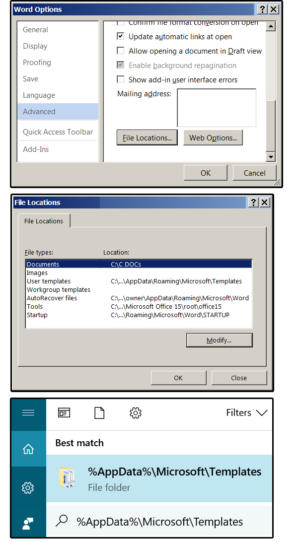 JD Sartain / IDG Worldwide
To discover the actual name of the Templates folder:
- Select File > Options > Advanced
- Scroll about two-thirds of the way down the screen.
- Click the File Locations button, and the File Locations window appears.
- Word displays the locations and paths to all the template-related files.
You can also click the Start button, then copy and paste this: %appdata%MicrosoftTemplates in the Search box and press Enter. The Templates folder appears in the Start box. Double-click to go straight to the stock templates folder.
Всем привет! Если вы постоянно работаете с документами одного типа, с одинаковыми параметрами форматирования, то вам проще всего создать единый шаблон в редакторе Word. На самом деле шаблонов может быть несколько для разного рода документов. Таким образом вы сможете сильно сэкономить время, так как вам больше не придется постоянно форматировать новый документ под какие-то описанные стандарты. Готовые шаблоны сохраняются в форматах DOT, DOTX или DOTM. В статье я расскажу – как проще всего сделать шаблон в Ворде.
Содержание
- Коротко про то – что же такое шаблон?
- ШАГ 1: Создание шаблона
- ШАГ 2: Сохранение
- Как же работать с шаблоном?
- Видео
- Задать вопрос автору статьи
Коротко про то – что же такое шаблон?

Как я уже и писал в самом начале – шаблон сохраняется немного в другом формате. Данный файл содержит в себе все нужное для форматирования, которое вы уже настраиваете под себя. Теперь вам не нужно постоянно для каждого нового документа изменять шрифт, отступы, цвет текста, стили для оглавления и т.д. Просто открываем данный файл, заполняем его, а вот при сохранении выбираем обычный Word формат. В программе можно создавать как собственные шаблоны, так и скачивать с интернета уже существующие.
ШАГ 1: Создание шаблона
Откройте Word программу. После открытия приложения вам будет предложено создать новый документ – перейдите на вкладку создания. Вы можете заметить чуть ниже есть строка поиска шаблонов в сети интернет. Но мы с вами будем создавать свой собственный шаблон, поэтому выбираем команду «Новый документ».
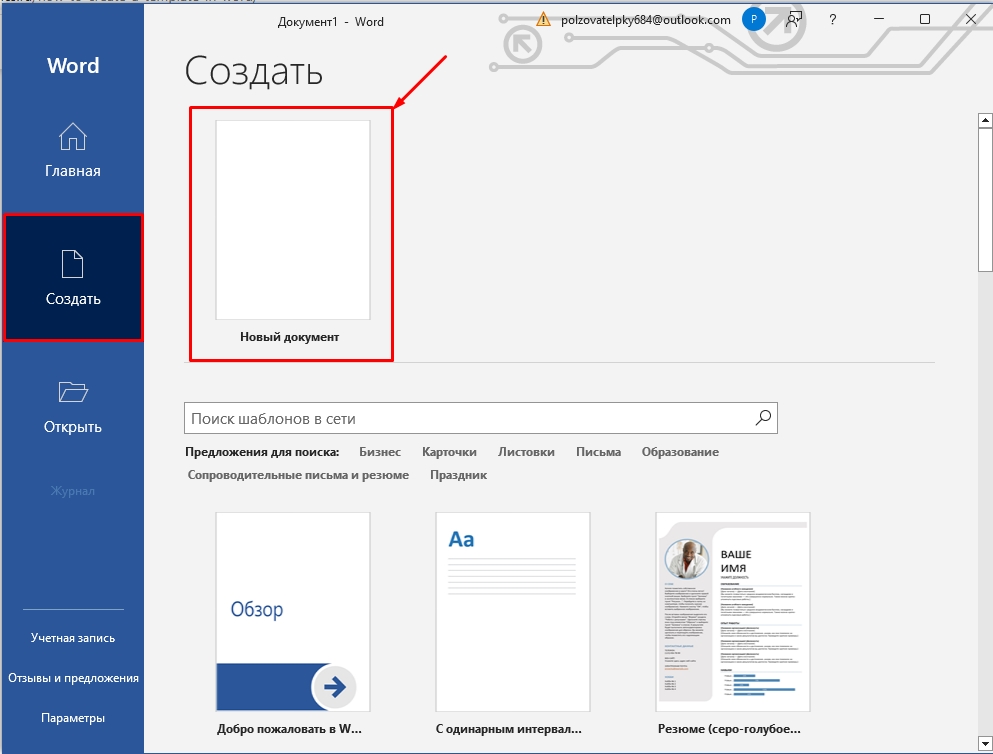
Далее откроется чистый документ, который впоследствии вы и превратите в шаблон. Для этого вам нужно изменить все те параметры форматирования, которые вам необходимы. Вы можете воспользоваться уроками с нашего сайта:
Советую ознакомиться с нашим бесплатным полным курсом по Word.
- Как изменить формат листа.
- Как сделать заголовок.
- Как изменить или создать поля на листе.
- Межстрочный интервал.
- Межбуквенные интервал.
- Как увеличить или уменьшить шрифт.
- Автоматическое содержание в документе.
- Как сделать список литературы.
Все что вы добавите в шаблон – будет в будущем использоваться в новых документах. Это также касается сносок, текста, графических объектов и даже рисунков.
- Как вставить рисунок.
- Как построить график.
- Нумерация страниц.
Я вам все же советую ознакомиться с курсом, ссылку на который я оставил чуть раньше. Там представлены все возможные варианты форматирования, которые помогут работать вам с любым шаблоном. Если говорить проще, то шаблон – это тот же самый файл, имеющий уже предустановленные настройки. Как только он будет готов – переходим ко второму шагу.
ПРИМЕЧАНИЕ! На самом деле вы можете работать уже с готовыми шаблонами. Просто изменяйте его под свои нужды.
ШАГ 2: Сохранение
Итак, наш шаблон уже готов, теперь нам останется просто его сохранить. В самом верху нажмите по вкладке «Файл».

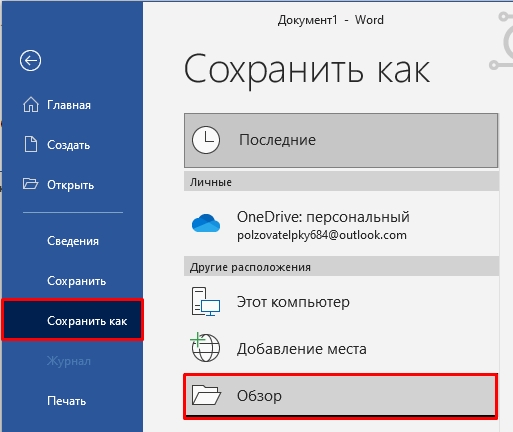
Переходим в раздел «Сохранить как» и кликаем «Обзор», чтобы выбрать место сохранения – ваш компьютер. Но вы можете сохранить файл в том же облаке OneDrive, если вы с ним активно работаете.
Читаем – что такое облако и как им пользоваться.
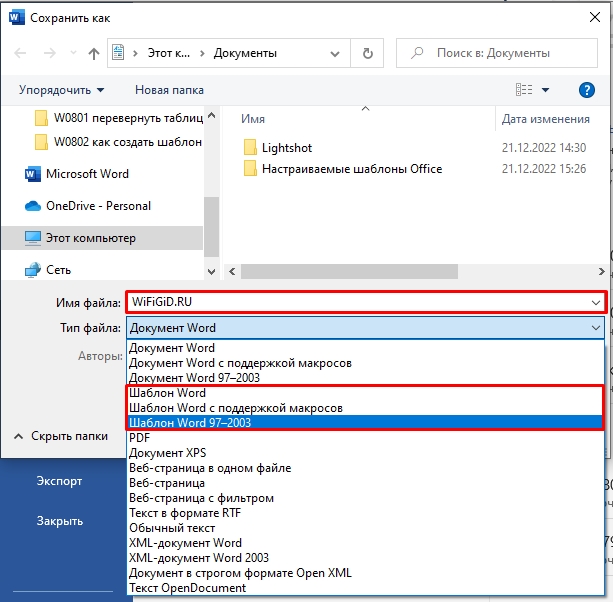
Сначала вписываем название. После этого нам нужно выбрать «Тип файла» – нас интересует три варианта:
- Шаблон Word – если вы будете работать с той же версией Word.
- Шаблон Word с поддержкой макросов – если вы в шаблоне будете использовать макросы, выбираем этот вариант.
- Шаблон Word 97-2003 – для старых версий текстового редактора.
Как же работать с шаблоном?
Все очень просто – открываем сам шаблон и начинаем заполнять его текстом, картинками и другими объектами. Самое главное при этом выполнить сохранение в «Документ Word», а не «Шаблон Word», чтобы изменения сохранялись туда. При этом сам шаблон будет оставаться неизменным. Также вы всегда можете изменить некоторое форматирование, а потом сохранить файл в шаблон.
Как используются для создания документа шаблоны-образцы?
Для этого открываете любой уже готовый шаблон. Вы можете использовать и те шаблоны, которые загружены на сервера Microsoft – их можно найти через поиск при создании. Далее просто изменяем его под свой вкус и сохраняем в формате шаблона. Если вы уже будете работать с ним, как с документом, тогда сохраняем в формате DOC.
Видео
В уроке выше мы почти полностью рассмотрели создание шаблона в Ворде. Если я что-то упустил или забыл – напишите об этом в комментариях. Дополнительно советую посмотреть видео ниже. До новых встреч на портале WiFiGiD.RU.
Life is too short to do the same work twice. If you work in Microsoft Word, it pays to learn how to use Word’s save as template feature so that you don’t have to rebuild Word Documents.


With a template, you’ve got the pre-built elements you need to create documents. Set templates in Word, and you start with all the fields you’re looking for.
This tutorial will teach you how to create a Microsoft Word template that’s easy to re-use. We’ll even show you how to start with premium designs and turn Word docs into templates, even if you started with .docx files. Let’s learn more.
How to Create & Save Word Templates in Microsoft Word Quickly (Video)
In this screencast we’ll show you how to create and save a template using Microsoft Word. We’ll start with a professionally designed Word template and show you how to customize it to create a Word template that’s uniquely yours.

Want to learn even more about how to create a template in Word? Read on for more detailed information and other tips.
Why You Should Learn the Word Save as Template Feature
You’re a busy person, and you’ve got no shortage of skills that you want to learn. While Word is a great tool, it’s just that: simply an app that we use to complete tasks. So, why should you dedicate your valuable time to learning Word’s save as template feature?
Here are three reasons that every user should learn how to save a template in Word:
- Standardize designs. If you lead a team or work with a group consistently, it helps if you share the same design. Use the Word save as template feature to create standard files that everyone uses.
- Share designs with the world. If you’ve got a favorite template, you can share so that others can set templates in Word easily. It’s a great bonus to offer to your readers, mailing list, or social followers.
- Save time for yourself. Building up a personal library of templates is a shortcut to success. Save Word templates and save time for yourself.


It’s easy to see why these benefits make it worthwhile to turn Word docs into templates. Read on to find out how to create a Microsoft Word template.
How to Make a Template in Word Quickly
It’s often useful to create Word template designs of your own. This lets you transform a document into a customizable file that you can use as often as you need it. It only takes a few clicks and saves you time and hard work. Let’s learn how to save a template in Word.
When you think of how to create a Microsoft Word template, consider your objective. The trick is to generate a generic document that you (or other users) can readily adapt to their own needs.
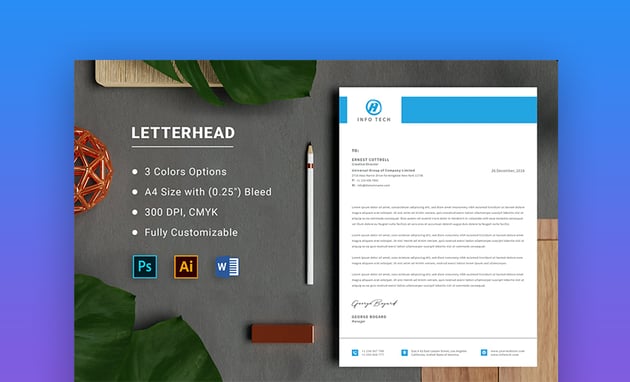
In this tutorial, we’ll create a reusable letterhead set template in Word. Save Word templates like this and use them every day. To follow along, download the Letterhead Word Template from Envato Elements.


Let’s get started:
1. Customize the Microsoft Word Templates
With Letterhead open in Word, take a look at the layout. This is a pre-written letter that you can use as a Word save as template. To create Word template files from it, the key is to make it more generic. This will save you time in the future by avoiding the need to remove large blocks of content.


The body of the letter itself, for example, can be reduced in length. Click into the text box and select its contents. Then, type over it with your own words.
A good option is to use a phrase like «Insert body of letter here.» While you’re familiar with the document layout, others who use the template may not be. This is a good way to guide them.


Then, change out the specific name details to «First Last.» Repeat this with the other placeholders, adding generic phone numbers, emails, and more. This is how to make a template in Word that works well for flexible use.
2. Add Extra Placeholders
We’ve updated the contents, showing how to create a Microsoft Word template from the file. But you can also add brand-new features to any file that you want to use for Microsoft Word templates.
For example, insert a slogan or tagline in the upper right corner of the letter. You might also want a box showing who the letter is CC’d to.
To add new placeholders, go to the Insert tab on Word’s ribbon. From there, click Text Box, then Draw Text Box. Find an open space on your document and click and drag to insert the text box.


Type in your slogan, and you’re all set. This will now appear each time when you create Word template files from the document.
Repeat the same steps to add the CC box. You can perform these same operations anywhere on your document.


You could even choose other options from the Insert tab, like photos, shapes, and more.
3. Customize the Text


When making a document, you may want to use a font besides the default throughout the document.
Start by highlighting the text you want to change. Next, click on the Home tab. Then, click on the Font Menu arrow. When you click on the arrow, a menu drops down. Choose the font.
4. Add Your Logo to the Template


To customize the logo on your template, you first need to have an already saved logo on your computer.
Click on the logo already on the template. Press Delete on your keyboard to remove it.
Next, click on the Insert tab. In the toolbar. Click on the Pictures button. When you click on the Pictures button, a menu drops down. Choose an option depending on where your image is located. Then double click on your logo image file to add it to the template. Adjust as needed.
5. How to Save a Template in Word
You’ve built a generic letterhead in Word. Now, it’s time to learn how to save a template in Word so that you can use it again. It’ll appear in the Templates gallery that opens when you launch the Word app.
Let’s save Word templates like this letter. Find the File dropdown in the upper left corner of your screen. Then, click Save As Template.


On the menu that appears, give your template a name. It’s best to use something short and easy to remember. Here, we’ll call it Letterhead. When you’re finished, click Save.


That’s how to make a template in Word. Now, when you launch the Word app, you’ll see your custom Microsoft Word templates in the Personal section.


This is the best way to create Word template designs that you can use more than once.
Where to Find the Best Microsoft Word Templates in 2022 (Envato Elements)
Chances are, you’re not a creative expert with the time to make your own Microsoft Word templates. Don’t worry: you don’t have to know how to create a Microsoft Word template to use the world’s best designs.
There’s an alternative to learning how to build Word template designs from scratch. Lean on expert designers who know how to make a template in Word that’s sure to impress.
The best place to find stunning Microsoft Word templates is Envato Elements. It’s a flat-rate subscription that offers millions of creative assets. Transform these files into customized templates with the Word save as template functionality.


What’s more: as a subscriber, you’ve got unlimited downloads. That means you can try out as many Microsoft Word templates as you want. Plus, you’ll find stock photos, custom fonts, and other assets that work great for any project.
Still searching for the best templates, but aren’t ready for a subscription? We highly recommend GraphicRiver, a pay-as-you-go marketplace. It’s another way to find the best options to create Word templates you can use, and you’ll pay only for what you download. Jump to GraphicRiver, grab a template, and start today.


As you can see, it’s easy to create Word template styles fast and customize them, thanks to Envato Elements. It takes the guesswork away from how to make a template in Word. Read on to see the best options for saved Word templates.
5 Top Downloads to Set Templates in Word
Not ready to learn how to create a Microsoft Word template? Let’s look at five of the best pre-built options. These help you set templates in Word without doing all the work from scratch:
1. Microsoft Word Certificate


A set template in Word helps you create documents fast. This certificate is a quick way to recognize achievements in style. It comes with both vertical and horizontal layouts, with print-ready graphics. It’s a perfect example of how to make a template in Word work for you. All you’ve got to do is drop key details into the pre-built text placeholders.
2. Letterhead for Microsoft Word Office


Even in our digital age, a classic letterhead helps make a winning impression. Save Word templates like this letterhead for use as print or online letters. You’ll find customizable styles that use stylish free fonts. The design aesthetic is modern and minimalist. If you need help learning how to save a template in Word like this, turn to the included help file.
3. Invoices Microsoft Word Template


Wonder how to make a template in Word that you can use as an invoice? Don’t bother—this sleek design does the work for you. With three color options, you can craft and send invoices with a few clicks. Each one helps you communicate with clients, so you’ll get paid sooner. 300-dpi CMYK print-ready graphics feature throughout.
4. Resume Word


Resume Word: the title speaks for itself. Save Word templates like this one to help land your dream job. With refined, elegant hues, you can create Word template resumes sure to impress. There’s ample room for key details, with plenty of open space to ensure readability. Plus, you’ll find a matching cover letter included in this Microsoft Word templates pack.
5. A5 Landscape Company Profile, Word Template


Ever wondered how to create a Microsoft Word template brochure? A5 Landscape is a key example. This one works well as a company profile or informational flyer. You’ll have plenty of creative options, thanks to 16 custom layouts. All graphics are customizable, and there’s space to include photos and illustrations.
More Top Downloads to Set Templates in Word
There’s no such thing as too many Word templates! On Envato Tuts+, we frequently feature the top options to set templates in Word with pre-built downloads.
Check out more of the top options for designs to set templates in Word. Many of them are packaged as DOCX files. But remember: you can turn word Docs into templates with your new knowledge!
Common Microsoft Word Questions Answered (FAQ)
It’s common to have questions about Microsoft Word. So, here are some common Microsoft Word questions and answers:
1. Can I Format Text in my Word Template?
Formatting text means that you control how the text appears in your document. There are many things you can do to your text. Some of the formatting options are changing the size, color, and font. Learn more in this tutorial:
2. Can I Add a Border to my Word Document?
Yes, you can add a border to your Word document. There are several different border options that you can choose from. Borders can add visual interest to your document. For a tutorial on how to add a border to your Word document, read this article:
3. Do I Need to Add a Letterhead to my Word Document?
A letterhead can be helpful if you’re creating a letter in Word. Letterheads often include your business logo, name, business address, and contact information. Letterheads help the letter receiver know who sent them the letter immediately.
Discover how to create your own letterheads:
4. How Do I Find ClipArt?
ClipArt is an easy way to add illustrations to your document.
To find the ClipArt tool click on the Insert tab. Then click on the Pictures button, and from the menu that drops down, click on the Online Pictures… button. Type a keyword in the search bar that appears in the sidebar. Finally, click on the image that you want.
For more details, review:
5. Should I Add Page Numbers to my Word Document?
If your document is more than one page, it can be helpful to add page numbers to your document. Page numbers can help people if the printed pages get out of order. People can also refer to information on a specific page easier.
For information on how to add page numbers to your Word document, read this tutorial:
Learn More About Microsoft Word
You’ve been learning how to make a template in Word, which is certainly a useful skill. There’s no reason to stop here as you’re mastering Microsoft’s powerful documents app.
On Envato Tuts+, we want to teach you everything you need to know to feel confident while using Microsoft Word. Make sure to check out our fully featured learning guide, Learn How to Use Microsoft Word (Beginner Tutorial Guide.)
Make sure to check out these three tutorials to continue learning how to use Microsoft Word. Each of these help you add new skills that improve the way you save Word templates.
Start to Save Your Own Word Templates Today
You don’t have time to re-design every document in Word. That’s why you just learned how to create a Microsoft Word template: to use your favorite designs, save them for the future, and share them with others.
If you’re still searching for the best Word templates, don’t forget about the premium options from Envato Elements. These advanced designs are the best way to set templates in Word with no work required. Lean on pre-built designs even while learning how to save a template in Word.
Now, it’s your turn. You’ve just learned how to make a Word template and how to save a template in Word. Now, open Word, start designing, and turn your Word doc into templates.
Make sure to share with others when you get a chance—and don’t forget to teach them how to create a Microsoft Word template too!
Editor’s note: This tutorial was originally published on May 31, 2021. It’s been updated to include a video with help from Andrew Childress. The content has been updated by Sarah Joy. Andrew and Sarah are freelance instructors for Envato Tuts+.
Содержание
- Что такое шаблоны в Ворде
- Создание собственного шаблона
- Создание шаблона на основе существующего документа или стандартного шаблона
- Добавление стандартных блоков к шаблону
- Добавление элементов управления содержимым к шаблону
- Добавление элементов управления содержанием
- Добавление пояснительного текста к шаблону
- Вопросы и ответы

Если вы часто работаете в MS Word, сохранение документа в качестве шаблона наверняка вас заинтересует. Так, наличие шаблонного файла, с установленным вами форматированием, полями и прочими параметрами, может во многом упростить и ускорить рабочий процесс.
Шаблон, создаваемый в ворде, сохраняется в форматах DOT, DOTX или DOTM. Последний разрешает работу с макросами.
Урок: Создание макросов в MS Word
Что такое шаблоны в Ворде
Шаблон — это особый тип документа, при его открытии и последующем изменении создается копия файла. Исходный (шаблонный) документ при этом остается неизменным, как и его местоположение на диске.
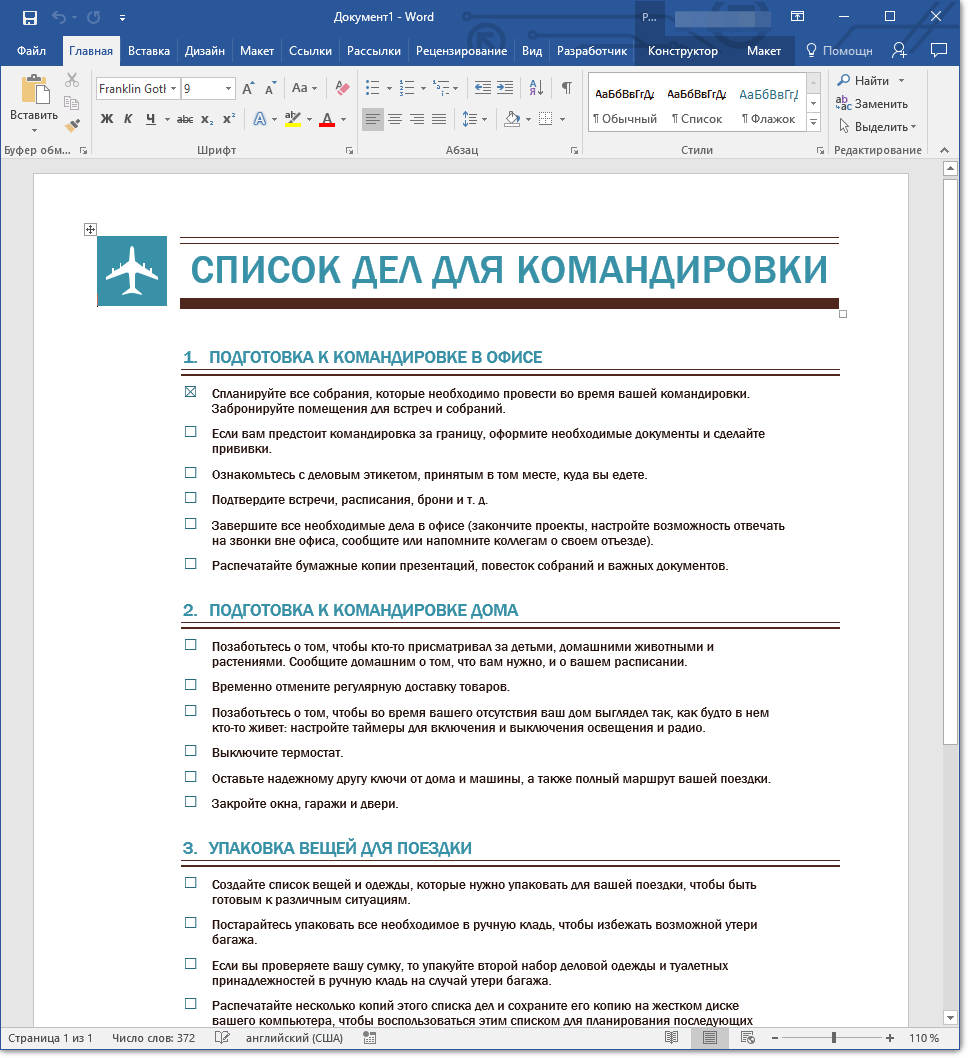
В качестве примера того, каким может быть шаблон документа и зачем вообще он нужен, можно привести бизнес-план. Документы этого типа довольно часто создаются в Word, следовательно, используют их тоже довольно часто.
Так, вместо того, чтобы каждый раз заново создавать структуру документа, выбирать подходящие шрифты, стили оформления, устанавливать размеры полей, можно просто использовать шаблон со стандартным макетом. Согласитесь, такой подход к работе куда более рационален.
Урок: Как добавить новый шрифт в Ворд
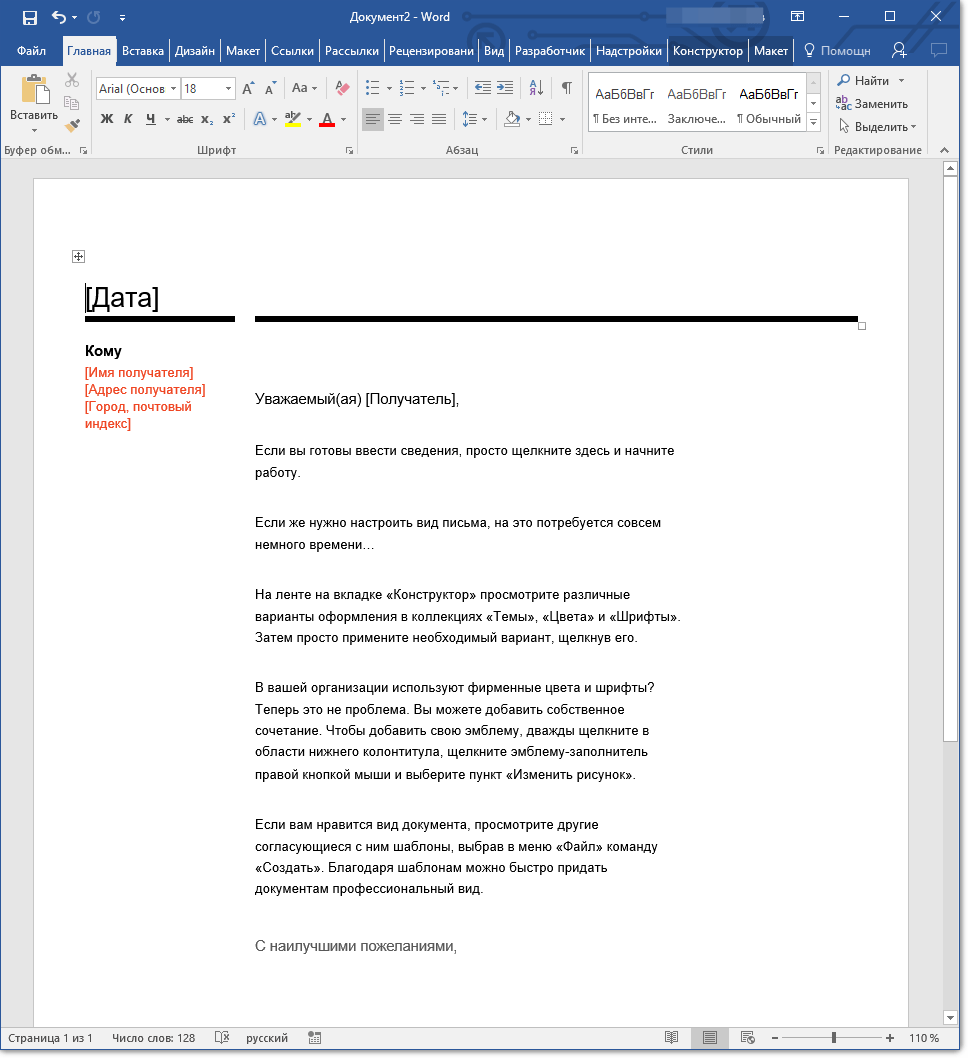
Документ, сохраненный в качестве шаблона, можно открыть и заполнить необходимыми данными, текстом. При этом, сохраняя его в стандартных для Word форматах DOC и DOCX, исходный документ (созданный шаблон), будет оставаться неизменным, как уже было сказано выше.
Большинство шаблонов, которые могут вам понадобиться для работы с документами в Ворде, можно найти на официальном сайте (office.com). Кроме того, в программе можно создавать собственные шаблоны, а также изменять уже существующие.
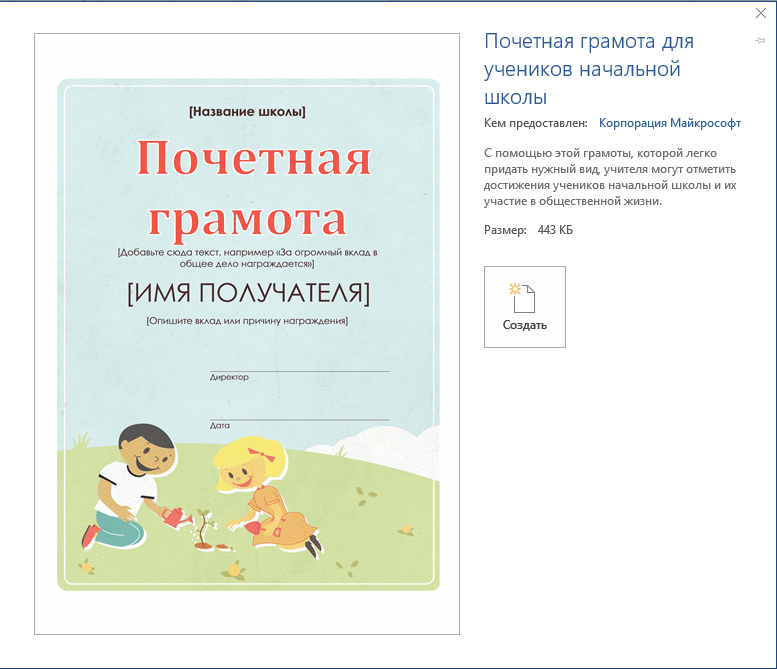
Примечание: Часть шаблонов уже встроена в программу, но часть из них, хоть и отображается в списке, на самом деле находится на сайте Office.com. После того, как вы нажмете на такой шаблон, он будет мгновенно скачан с сайта и доступен для работы.
Создание собственного шаблона
Проще всего будет начать создание шаблона с пустого документа, для открытия которого достаточно просто запустить Word.

Урок: Как в Ворде сделать титульный лист
Если вы используете одну из последних версий MS Word, при открытии программы вас будет встречать стартовая страница, на которой уже можно будет выбрать один из доступных шаблонов. Особенно радует то, что все они удобно рассортированы по тематическим категориям.
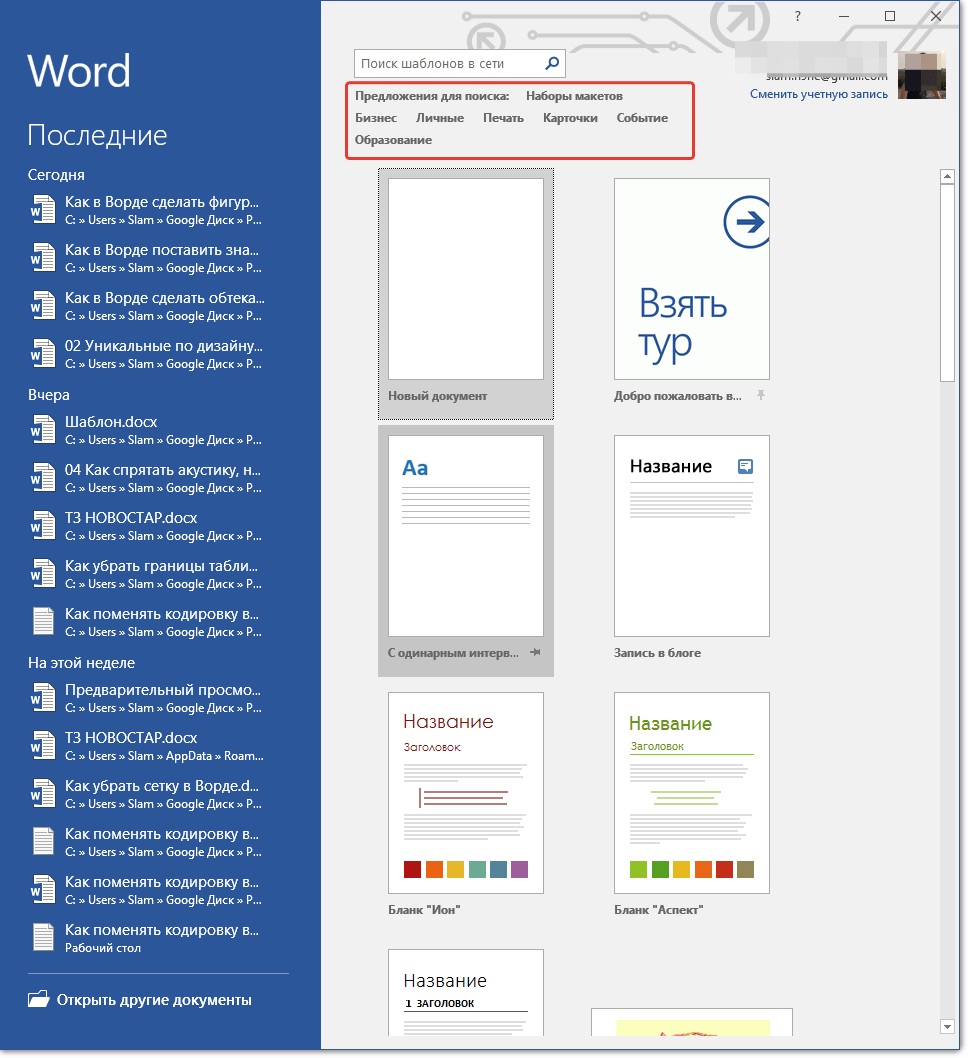
И все же, если вы сами хотите создать шаблон, выберите “Новый документ”. Будет открыт стандартный документ с установленными в нем параметрами по умолчанию. Эти параметры могут быть, как программными (заданными разработчиками), так и созданными вами (если ранее вы сохраняли те или иные значения в качестве используемых по умолчанию).

Используя наши уроки, внесите необходимые изменения в документ, который в дальнейшем будет использоваться в качестве шаблона.
Уроки по работе с Word:
Как сделать форматирование
Как изменить поля
Как изменить интервалы
Как изменить шрифт
Как сделать заголовок
Как сделать автоматическое содержание
Как сделать сноски

Помимо выполнения вышеперечисленных действий в качестве параметров по умолчанию для документа, который будет использоваться как шаблон, можно также добавить подложку, водяные знаки или любые графические объекты. Все, что вы измените, добавите и сохраните в дальнейшем будет присутствовать в каждом документе, созданном на основе вашего шаблона.
Уроки по работе с Ворд:
Вставка рисунка
Добавление подложки
Изменение фона в документе
Создание блок-схем
Вставка знаков и специальных символов
После того, как вы внесете необходимые изменения, зададите параметры по умолчанию в будущий шаблон, его необходимо сохранить.
1. Нажмите кнопку “Файл” (или “MS Office”, если используете старую версию Word).
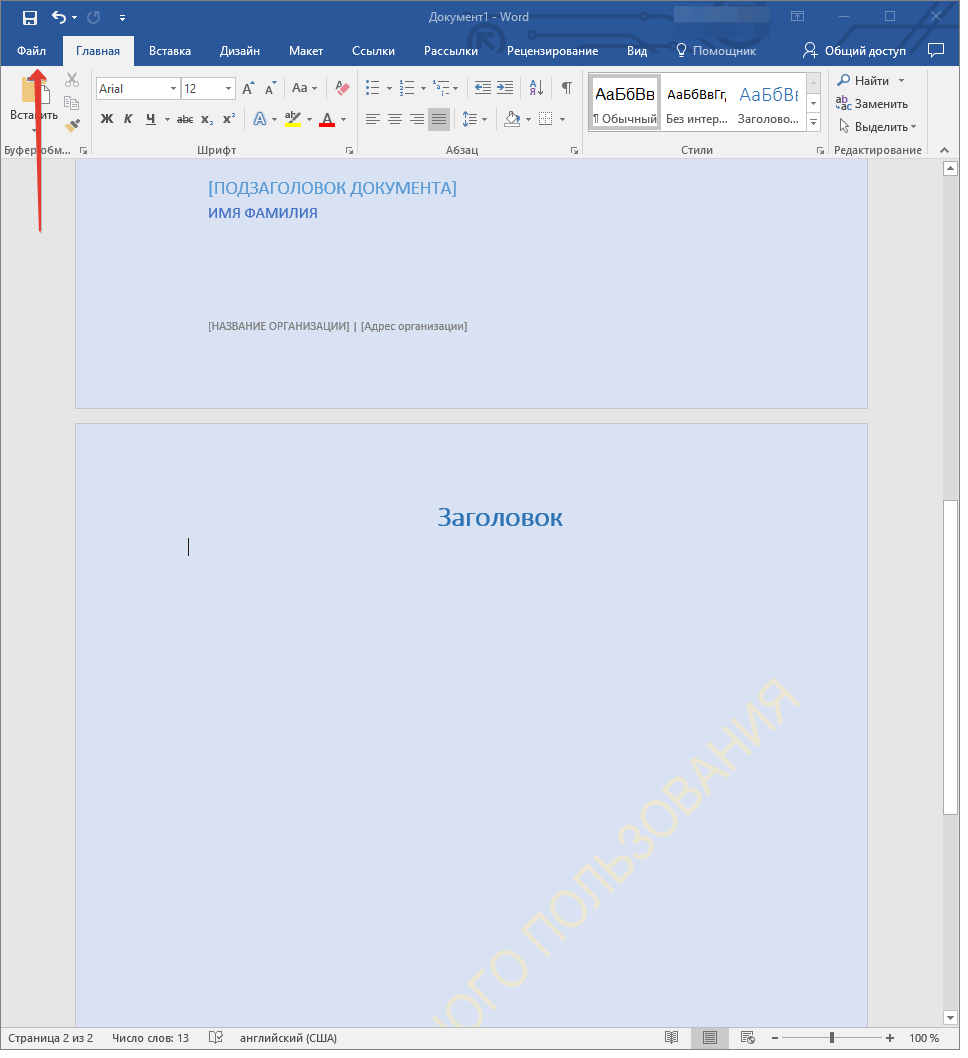
2. Выберите пункт “Сохранить как”.
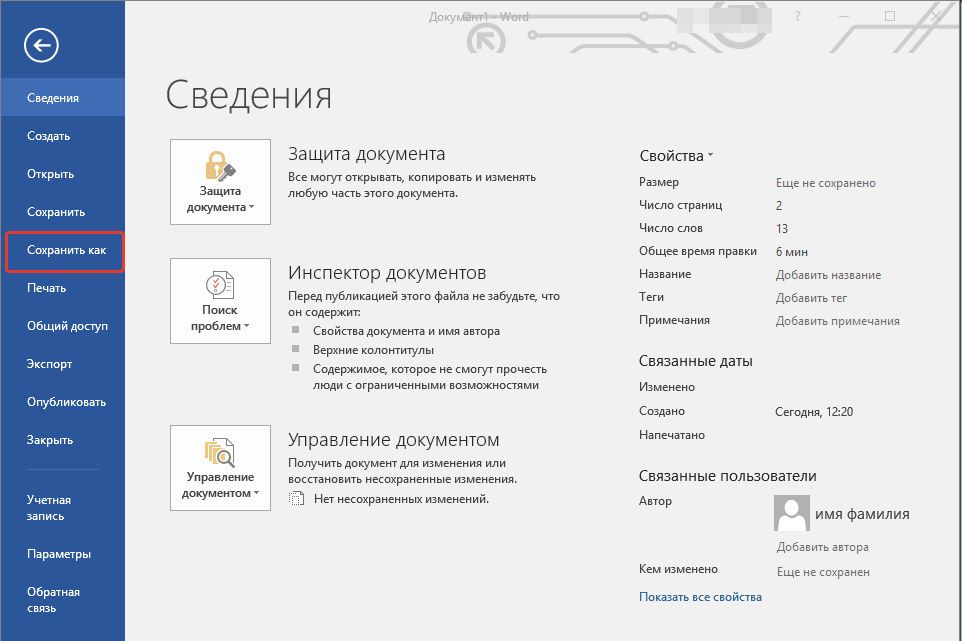
3. В выпадающем меню “Тип файла” выберите подходящий тип шаблона:
- Шаблон Word (*.dotx): обычный шаблон, совместимый со всеми версиями Ворда старше 2003 года;
- Шаблон Word с поддержкой макросов (*.dotm): как понятно из названия, данный тип шаблонов поддерживает работу с макросами;
- Шаблон Word 97 — 2003 (*.dot): совместим со старыми версиями Ворд 1997 — 2003.
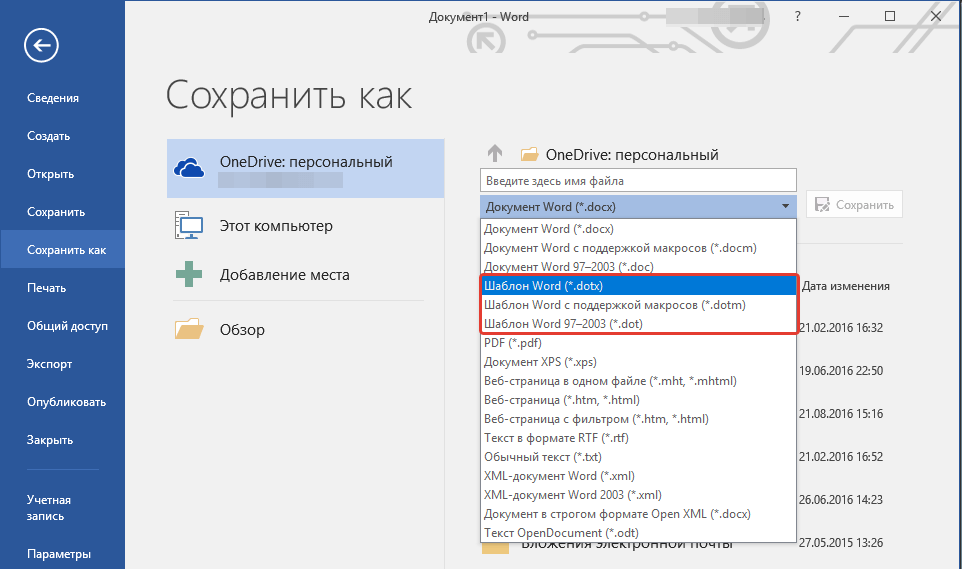
4. Задайте имя файла, укажите путь для его сохранения и нажмите “Сохранить”.
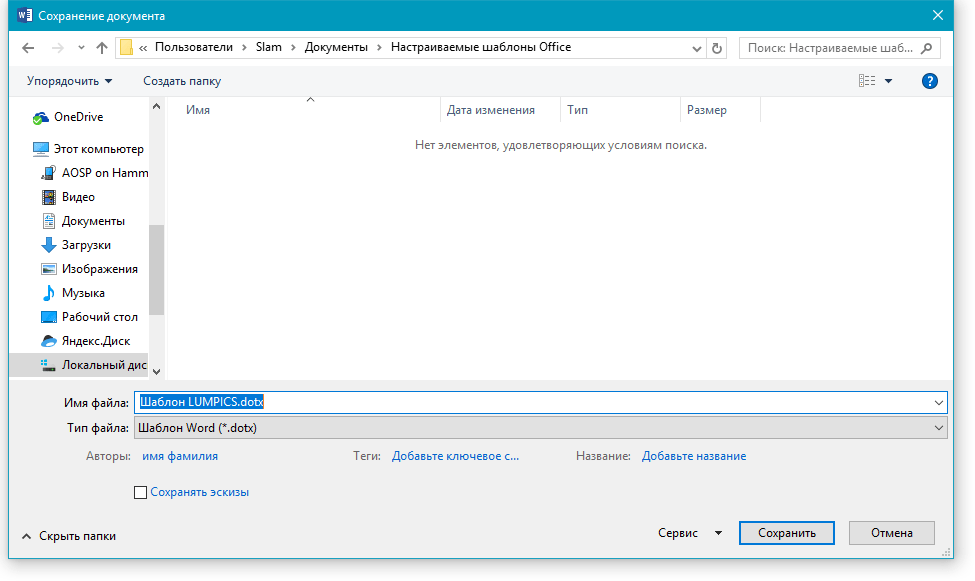
5. Созданный и настроенный вами файл будет сохранен в качестве шаблона в заданном вами формате. Теперь его можно закрыть.
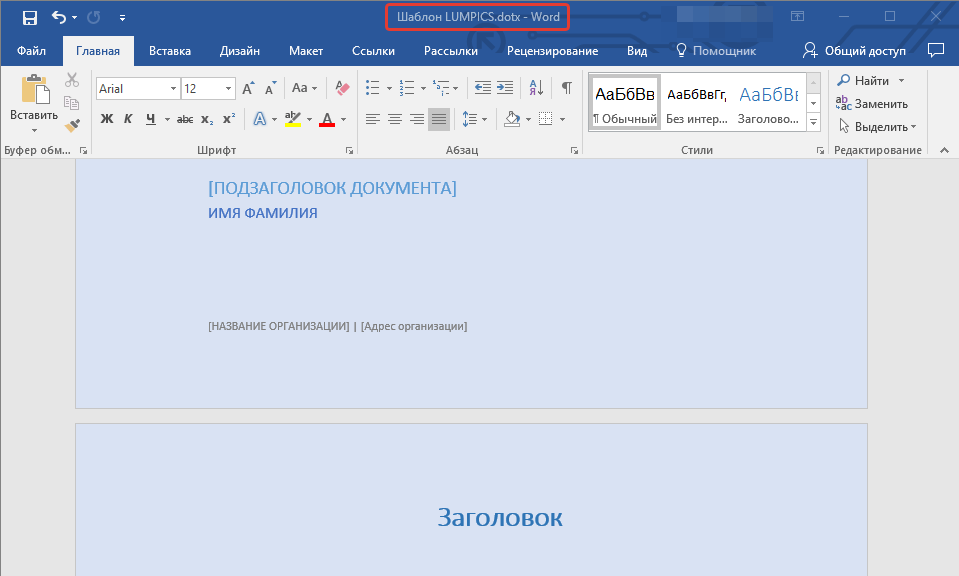
Создание шаблона на основе существующего документа или стандартного шаблона
1. Откройте пустой документ MS Word, перейдите во вкладку “Файл” и выберите пункт “Создать”.
Примечание: В последних версиях Ворда при открытии пустого документа пользователю сразу предлагается перечень шаблонных макетов, на основе которых можно создать будущий документ. Если вы хотите получить доступ ко всем шаблонам, при открытии выберите “Новый документ”, а затем уже выполните действия, описанные в пункте 1.
2. Выберите подходящий шаблон в разделе “Доступные шаблоны”.
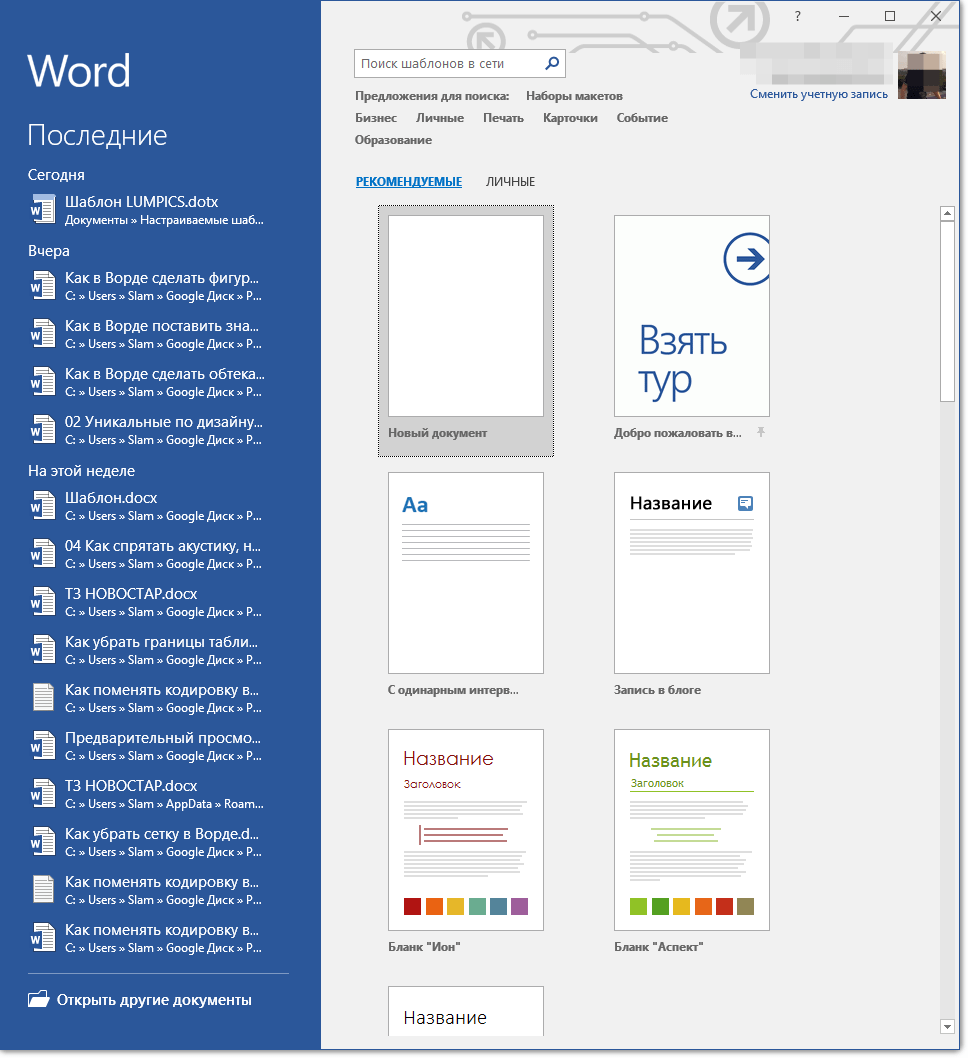
Примечание: В последних версиях Word ничего выбирать не нужно, список доступных шаблонов появляется сразу после нажатия на кнопку “Создать”, непосредственно над шаблонами находится перечень доступных категорий.
3. Внесите в документ необходимые изменения, воспользовавшись нашими советами и инструкциями, представленными в предыдущем разделе статьи (Создание собственного шаблона).
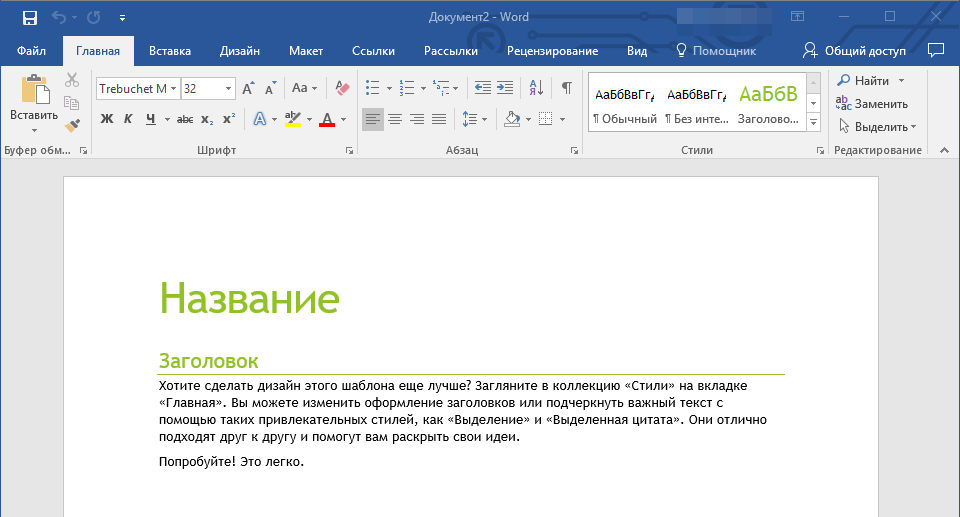
Примечание: Для разных шаблонов стили оформления текста, которые доступны по умолчанию и представлены во вкладке “Главная” в группе “Стили”, могут быть разными и заметно отличаться от тех, что вы привыкли видеть в стандартном документе.
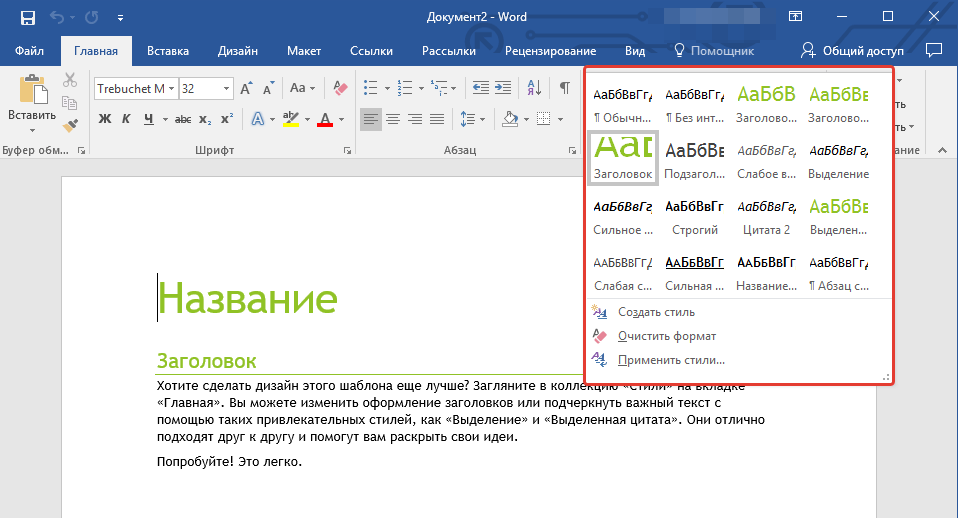
- Совет: Воспользуйтесь доступными стилями для того, чтобы сделать свой будущий шаблон действительно уникальным, не похожим на остальные документы. Конечно, делайте это лишь в том случае, если вас не ограничивают требования к оформлению документа.
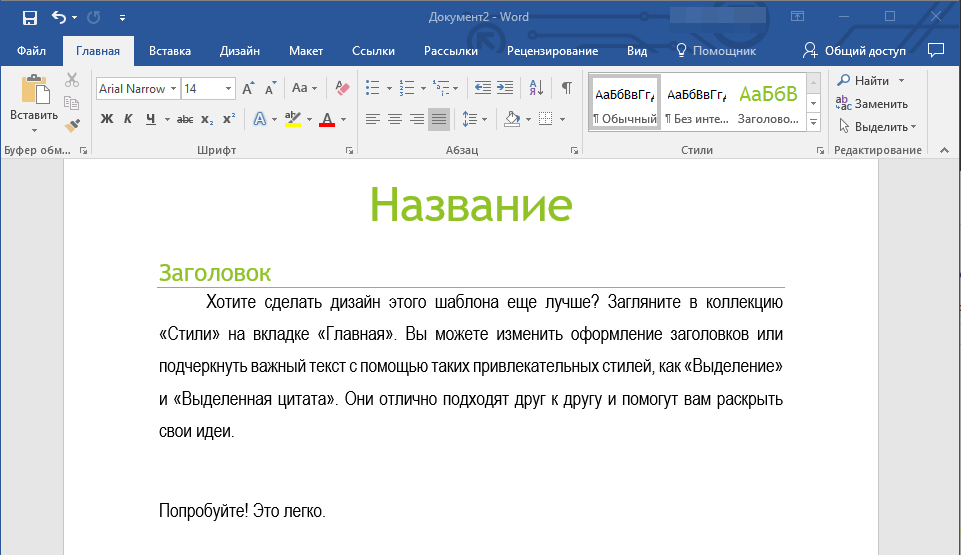
4. После того, как вы внесете необходимые изменения в документ, выполните все те настройки, которые посчитаете нужными, сохраните файл. Для этого нажмите на вкладку “Файл” и выберите “Сохранить как”.
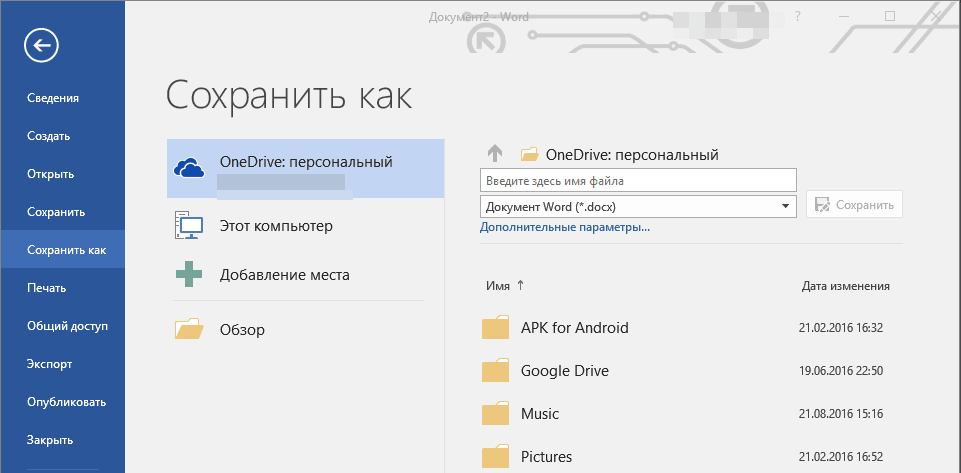
5. В разделе “Тип файла” выберите подходящий тип шаблона.
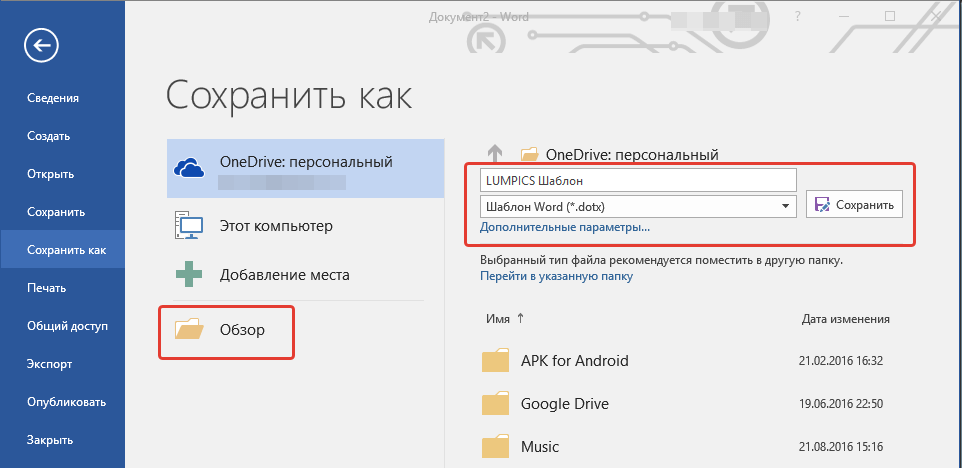
6. Задайте имя для шаблона, укажите через “Проводник” (“Обзор”) путь для его сохранения, нажмите кнопку “Сохранить”.
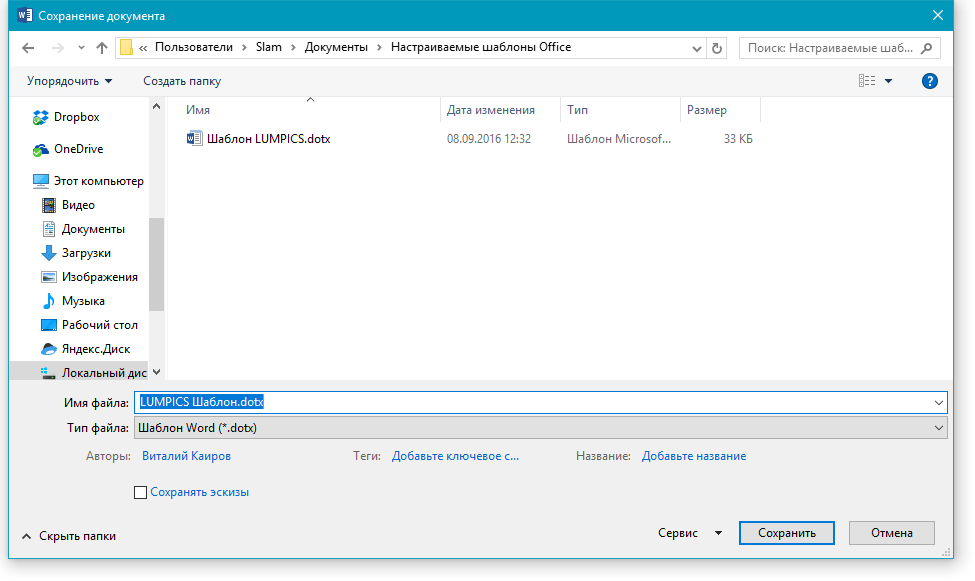
7. Шаблон, созданный вами на основе существующего, будет сохранен вместе со всеми внесенными вами изменениями. Теперь этот файл можно закрыть.
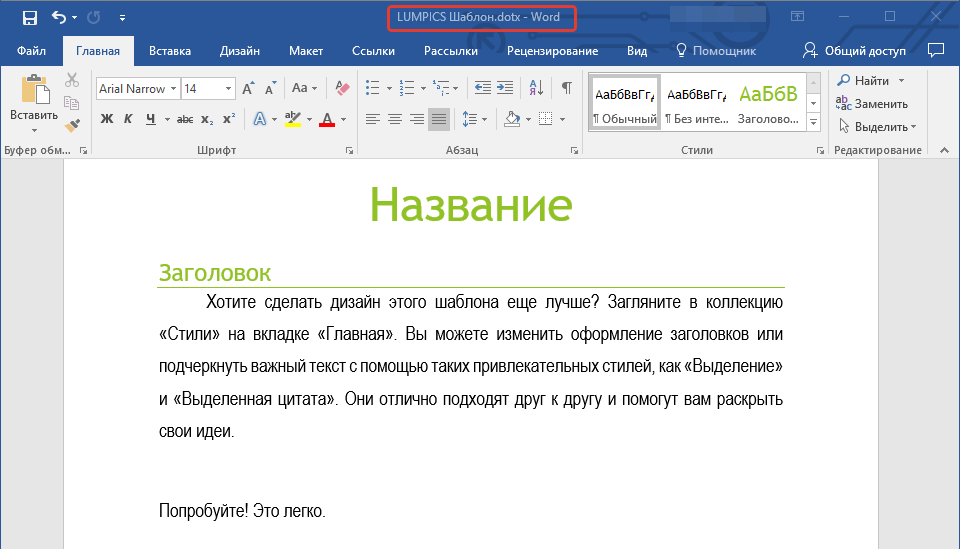
Добавление стандартных блоков к шаблону
Стандартными блоками называют многократно используемые элементы, содержащиеся в документе, а также те компоненты документа, которые хранятся в коллекции и доступны для использования в любое время. Хранить стандартные блоки и распространять их можно с помощью шаблонов.
Так, используя стандартные блоки, вы можете создать шаблон отчета, в котором будут содержаться сопроводительные письма двух и более типов. При этом, создавая новый отчет на основе данного шаблона, другие пользователи смогут выбрать любой из доступных типов.
1. Создайте, сохраните и закройте шаблон, созданный вами с учетом всех требований. Именно в этот файл будут добавляться стандартные блоки, которые в дальнейшем будут доступны другим пользователям созданного вами шаблона.
2. Откройте шаблонный документ, к которому необходимо добавить стандартные блоки.
3. Создайте необходимые стандартные блоки, которые в дальнейшем будут доступны для других пользователей.
Примечание: При введении сведений в диалоговое окно “Создание нового стандартного блока” введите в строке “Сохранить в” имя шаблона, к которому их необходимо добавить (это тот файл, который вы создали, сохранили и закрыли согласно первому пункту данного раздела статьи).
Теперь созданный вами шаблон, содержащий стандартные блоки, может быть предоставлен другим пользователям. Сами же блоки, сохраненные вместе с ним, будут доступны в заданных коллекциях.
Добавление элементов управления содержимым к шаблону
В некоторых ситуациях требуется придать шаблону вместе со всем его содержимым некоторую гибкость. Например, шаблон может содержать раскрывающийся список, созданный автором. По тем или иным причинам этот список может не устроить другого пользователя, которому доведется с ним работать.
Если в таком шаблоне будут присутствовать элементы управления содержимым, второй пользователь сможет подкорректировать список под себя, оставив его неизменным в самом шаблоне. Чтобы добавить в шаблон элементы управления содержимым, необходимо включить вкладку “Разработчик” в MS Word.
1. Откройте меню “Файл” (или “MS Office” в более ранних версиях программы).

2. Откройте раздел “Параметры” и выберите там пункт “Настройка ленты”.
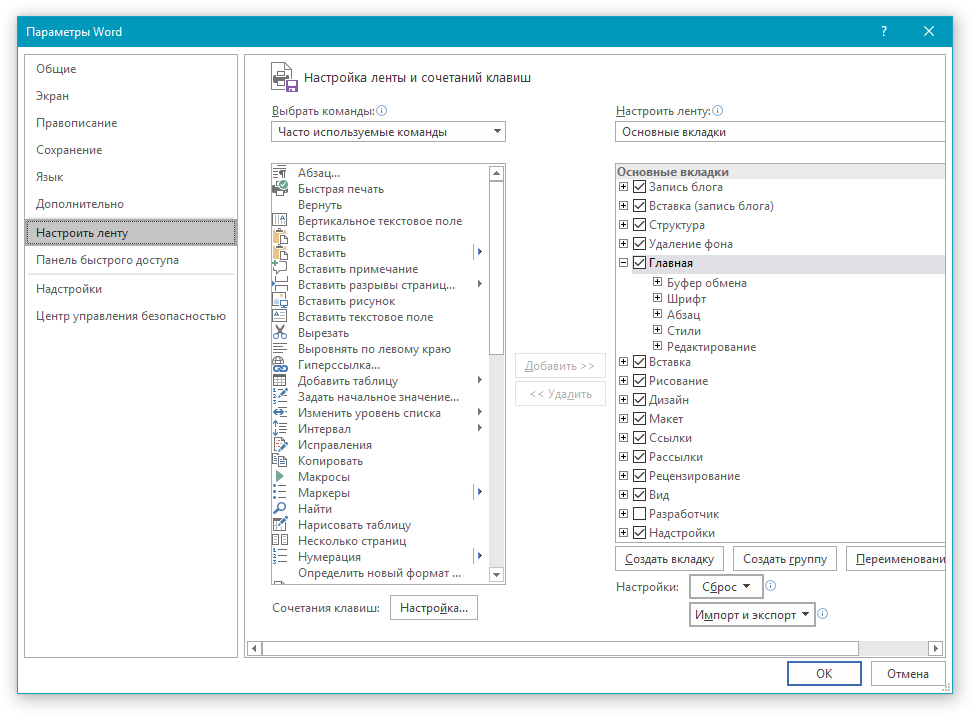
3. В разделе “Основные вкладки” установите галочку напротив пункта “Разработчик”. Для закрытия окна нажмите “ОК”.
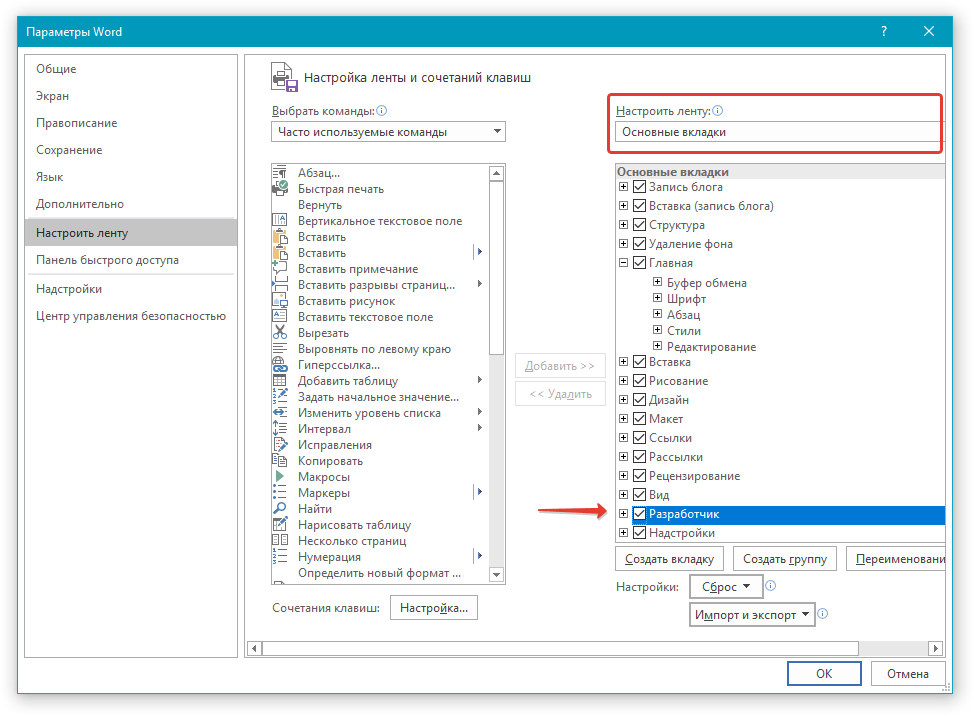
4. Вкладка “Разработчик” появится на панели управления Ворд.
Добавление элементов управления содержанием
1. Во вкладке “Разработчик” нажмите на кнопку “Режим конструктора”, расположенную в группе “Элементы управления”.
Вставьте в документ необходимые элементы управления, выбрав их из представленных в одноименной группе:
- Форматированный текст;
- Обычный текст;
- Рисунок;
- Коллекция стандартных блоков;
- Поле со списком;
- Раскрывающийся список;
- Выбор даты;
- Флажок;
- Повторяющийся раздел.
Добавление пояснительного текста к шаблону
Сделать шаблон более удобным в использовании можно с помощью пояснительного текста, добавленного в документ. Если это необходимо, стандартный пояснительный текст всегда можно изменить в элементе управления содержимым. Для настройки пояснительного текста по умолчанию для пользователей, которые будут использовать шаблон, необходимо выполнить следующие действия.
1. Включите “Режим конструктора” (вкладка “Разработчик”, группа “Элементы управления”).
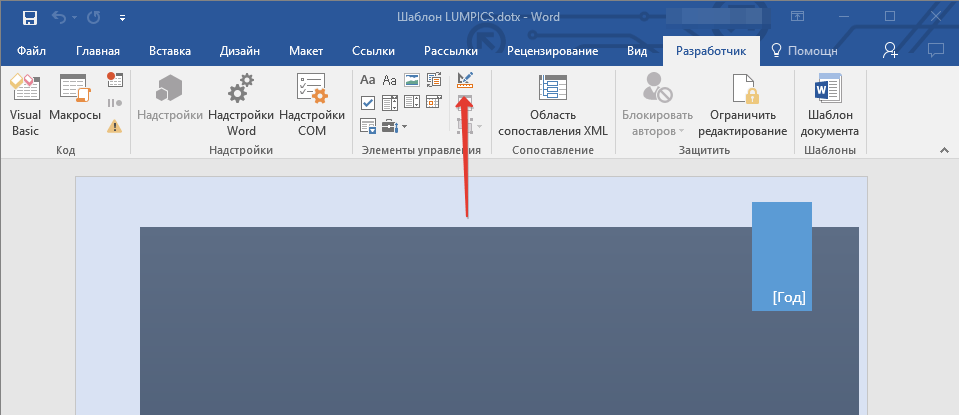
2. Кликните по тому элементу управления содержимым, в котором необходимо добавить или изменить пояснительный текст.
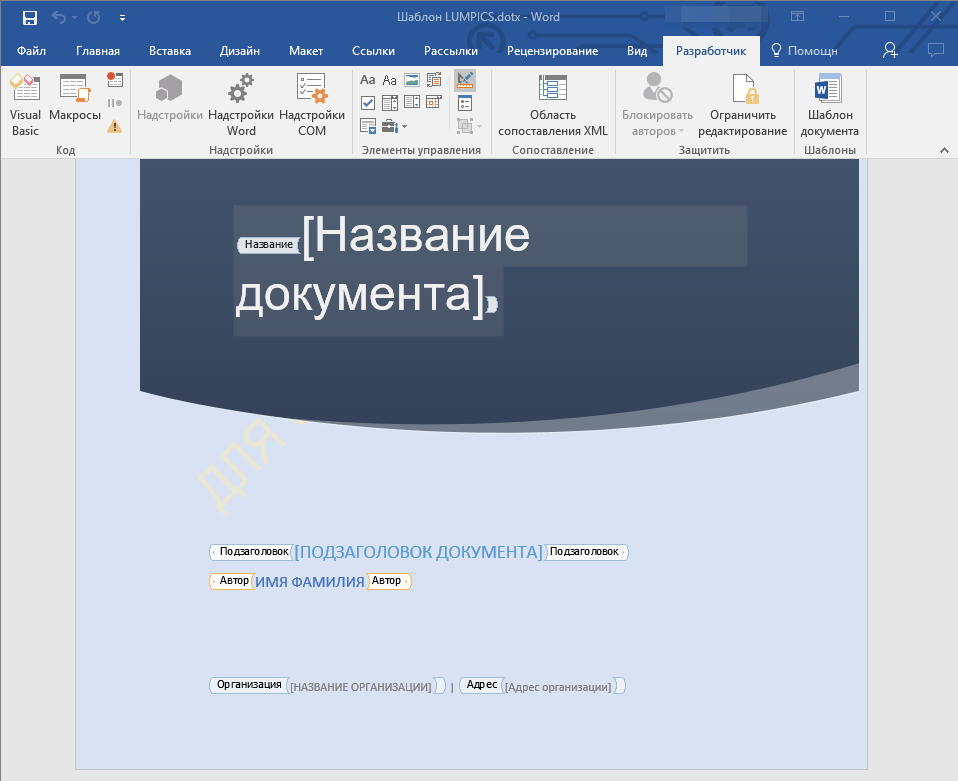
Примечание: Пояснительный текст по умолчанию находится в небольших блоках. Если “Режим конструктора” отключен, эти блоки не отображаются.
3. Измените, отформатируйте замещающий текст.
4. Отключите “Режим конструктора” повторным нажатием на эту кнопку на панели управления.
5. Пояснительный текст будет сохранен для текущего шаблона.
На этом мы закончим, из этой статьи вы узнали о том, что представляют собой шаблоны в Microsoft Word, как их создавать и изменять, а также обо всем том, что с ними можно делать. Это действительно полезная функция программы, во многом упрощающая работу с ней, особенно, если над документами работает не один, а сразу несколько пользователей, не говоря уже о крупных компаниях.
How to Create and Use Microsoft Word Templates
Make your word processing tasks easier with this handy feature
Updated on January 28, 2021
What to Know
- First, open a Microsoft-provided template. Select File > New, then choose a template style and select Create.
- Then, after you open a template, replace the placeholder text and images with your own.
- Create a custom template: Go to File > New > Blank document, format the document, then save it as a Word Template (*.dotx).
This article explains how to create and use Microsoft Word templates. Instructions apply to Word for Microsoft 365, Word 2019, Word 2016, and Word 2013.
How to Open a Word Template
Word offers hundreds of free templates for you to use, or you can create your own.
-
Open Word. Go to the ribbon, select File, then select New.
-
Select a template style.
-
In the template preview screen, select Create.
-
If you don’t like any of the options shown on the main screen, choose one of the categories at the top of the screen, or use the search bar to perform a search.
-
After you open a template, replace the placeholder text with your own or start from scratch in blank areas. You can also add pictures to replace the image placeholders.
To replace existing text, select it and type your own text. To replace an image, right-click the image and select Change Picture.
-
Save the file with a descriptive name.
What Are Microsoft Word Templates?
A template is a Microsoft Word document that has some formatting in place, such as fonts, logos, and line spacing. Templates exist for many types of documents, for example, party invitations, flyers, and resumes. They can be used as a starting point when you want to create a specific type of document without starting from scratch.
How to Create a Word Template
You can also create your own custom Word template. Here’s how:
-
Open Word, then go to the ribbon and select File.
-
Select New > Blank document.
-
Add any elements you like, such as a business name and address, a logo, and other elements. You can also choose specific fonts, font sizes, and font colors.
-
Once you have the document formatted the way you want it, go to the ribbon and select File > Save As.
-
Enter a descriptive name for the template, select the File Type drop-down arrow and choose Word Template (*.dotx), then select Save.
-
To create a new document based on the template, open the template, give it a new name, and edit the document to include the new information.
Thanks for letting us know!
Get the Latest Tech News Delivered Every Day
Subscribe
Create, Save, Edit and Use Templates in Microsoft Word
by Avantix Learning Team | Updated February 14, 2021
Applies to: Microsoft® Word® 2013, 2016, 2019 or 365 (Windows)
You can create, save, use and edit templates in Microsoft Word for frequently-used documents such as letters, reports, proposals and manuals. Templates include basic character, paragraph and page formatting and may include text, custom styles, tables, images, macros, sections, headers and footers. If you save a document as a custom template, you can create a new document based on that template.
Recommended article: How to Check Word Count in Microsoft Word (4 Ways)
Do you want to learn more about Microsoft Word? Check out our virtual classroom or live classroom Word courses >
A document can be saved as a Word Template (dotx file) or a Word Macro-Enabled Template (dotm file).
In this article, we’ll take a look at 3 types of templates in Microsoft Word:
- Normal template (the default global template)
- Custom user templates
- Microsoft ready-made templates
Understanding the Normal template
Unless you select a different template, Word bases new documents on the Normal template by default. The Normal template is named Normal.dotm and its default style is the Normal style. It also includes built-in heading styles such as Heading 1, Heading 2 and so on.
Specifying a location for custom user templates
In Word 2013 and later versions, if you want to create your own custom user templates, you will need to specify a location for the templates so you can easily access them.
Custom user templates are typically stored in the following location (in 2013 and later versions):
C:Users[UserName]DocumentsCustom Office Templates
You will need to specify a path to the Custom Office Templates folder (which should be created automatically when you install Microsoft Office) in your Documents folder as the default storage location. If you want, you can select a different folder but this folder is easy to find and use.
To specify the default storage location for your custom user templates in Word 2013 and later versions:
- Create a folder in your Documents folder called Custom Office Templates if it does not already exist (assuming you are going to use this folder as the default personal templates location).
- In Word, click the File tab in the Ribbon.
- Click Options.
- In the left panel, click Save.
- Enter a path for the Default Personal Templates location (see the Options dialog box below).
- Click OK.
For example,
C:UsersNancyDocumentsCustom Office Templates
Note the path for the Default Personal Templates in the Options dialog box:

Some users may prefer to set the default personal templates location as the Templates or User Templates folder in the Appdata folder.
Creating a custom user template in Word
You can create your own custom user template by creating a document and then saving it as a template. If you have created a document based on an existing template, you can modify it and save it as a new template.
To save an existing document as a custom user template in the Custom Office Templates folder:
- In Word, click the File tab in the Ribbon.
- Select Save As.
- Enter a name for the template.
- Double-click This PC or Computer and then navigate to the Custom Office Templates folder (or the folder you specified as the default personal templates location).
- Select Word Template in the Save as type list. You can select Word Macro-Enabled Template if you have created macros in the file.
- Click Save.
Creating a new document based on a custom user template
If you have saved a template in the Custom Office Templates folder, you can easily create a new document based on that template.
To create a new document based on a custom user template you have created and saved in the Custom Office Templates folder:
- In Word, click the File tab in the Ribbon and then click New.
- In Word 2013 and later versions, click Personal. You must have set the file path in the Options dialog box first.
- If necessary double-click the Custom Office Templates folder.
- Double-click the desired template. Word creates a new document based on the template that you can modify.
Understanding the relationship between a Word document and its template
Every Microsoft Word document is based on a template. If you create a new, blank document, Word uses the Normal template.
When a Word document is created, it includes three elements from its template:
- Styles such as Normal, Heading 1, Heading 2 and so on
- Content such as text, tables and images
- Page settings such as margins, page breaks, section breaks, headers and footers
Once a document is created, it is no longer connected to its template so the styles, content and page settings can be modified or deleted.
A template also makes the following available in the document:
- Building Blocks such as QuickParts
- User interface customizations (including Ribbon customizations)
- Keyboard shortcuts
- Macros (if created) and the template was saved as a Macro-Enabled Template
Editing a custom user template
To edit a custom user template:
- In Word, click the File tab in the Ribbon and then click Open.
- Double-click This PC or Computer and navigate to the Custom Office Templates folder.
- Double-click the template you want to edit.
- Make changes to the template.
- Close and save the template.
Creating a document based on a Microsoft ready-made template
You can create new documents based on hundreds of Microsoft ready-made templates. These templates are normally accessed online so you must be connected to the internet to use them. There are templates for all kinds of documents including letters, brochures, flyers, reports and proposals. Templates may differ depending on your version of Microsoft Word.
To create a new document based on one of Microsoft’s ready-made templates:
- In Word, click the File tab in the Ribbon and click New.
- In the Office area, click the suggested searches or enter search criteria in the Search box and press Enter.
- Scroll through the templates.
- Double-click the template you want to use. Word creates a new document based on the template that you can modify.
In the following example, we selected New and then Business in the suggested searches (using Word 365):

Templates can be a huge timesaver, particularly if you are working on long documents like reports and proposals.
Subscribe to get more articles like this one
Did you find this article helpful? If you would like to receive new articles, join our email list.
More resources
How to Insert a Check Mark in Word (5 Ways)
How to View Word Count in Microsoft Word (4 Ways)
How to Keep a Microsoft Word Table Together on One Page
How to Insert or Type an Em Dash in Word (4 Ways with Shortcuts)
10+ Great Microsoft Word Navigation Shortcuts for Moving Around Quickly in Your Documents
Related courses
Microsoft Word: Intermediate / Advanced
Microsoft Excel: Intermediate / Advanced
Microsoft PowerPoint: Intermediate / Advanced
Microsoft Word: Long Documents Master Class
Microsoft Word: Styles, Templates and Tables of Contents
Microsoft Word: Designing Dynamic Word Documents Using Fields
VIEW MORE COURSES >
Our instructor-led courses are delivered in virtual classroom format or at our downtown Toronto location at 18 King Street East, Suite 1400, Toronto, Ontario, Canada (some in-person classroom courses may also be delivered at an alternate downtown Toronto location). Contact us at info@avantixlearning.ca if you’d like to arrange custom instructor-led virtual classroom or onsite training on a date that’s convenient for you.
Copyright 2023 Avantix® Learning
Microsoft, the Microsoft logo, Microsoft Office and related Microsoft applications and logos are registered trademarks of Microsoft Corporation in Canada, US and other countries. All other trademarks are the property of the registered owners.
Avantix Learning |18 King Street East, Suite 1400, Toronto, Ontario, Canada M5C 1C4 | Contact us at info@avantixlearning.ca