
Its undeniable that creating a flowchart in Lucidchart and then inserting it into your Microsoft Office applications using the Add-Ins is the most efficient way to incorporate flowcharts into your Word documents. However, its still possible to make a flowchart in Word directly and this helpful guide will show you how.
1. Open a blank document in Word
2. Add shapes
To begin adding shapes to your flowchart in Word, you have two options. Begin by going to the Insert tab within the Ribbon and choose SmartArt or Shapes. SmartArt graphics are pre-made collections of shapes within a gallery. The Shapes tool provides a basic selection of shaped objects that can be inserted and edited onto the document.
Adding symbols via SmartArt in Word
A gallery box will pop up when you select SmartArt from the Insert tab. We recommend clicking Process for flowchart-specific options from the left panel in the dialog box, but keep in mind that you are by no means limited to this option and are free to use whatever SmartArt graphic is best for your specific needs. You will then click the SmartArt selection you want to use and a preview of that flowchart graphic will appear in the right panel, along with an explanation of its logic. Click OK to insert the selected graphic into your document.

To replace your graphic with SmartArt at any time, select it and press Delete. You can then click the SmartArt Graphics (Insert > SmartArt) and choose a different chart type. If you prefer to change the layout of a SmartArt graphic, select the shape(s) and select a new style from the Design tab within the Ribbon menu. Rest assured that you can edit the SmartArt chart layout at any time without losing any text.
From the Design tab, you can then continue to add flowchart shapes and connect them with lines until your flowchart is ready. If you find yourself lacking in shape options, you will need to manually add a shape from within the Design tab. To do this, select the shape (or entire chart in some cases) nearest to where you want to add a new shape. Then select Add a Shape.
Adding symbols via Shapes in Word
From the Insert tab within the Ribbon, select a flowchart shape from the dropdown gallery. You can then click and drag it to the size you want on the page to place it. Continue to add shapes and lines to complete your flowchart.
3. Add text
Add text to a SmartArt graphic by clicking the filler text and begin typing. Depending on how much text you add, the shape and font will automatically resize to fit.
For a Shape, add text by double-clicking the object and begin typing. To customize the font, use the toolbox that pops up when a desired shape is selected.
4. Add lines
To draw lines between shapes, click Insert > Shapes and select a line style. Then click and drag on the page to add a line.
5. Format shapes and lines
To really make this flowchart stand out in Word, youll want to do some final formatting. You wont have as many options as you would in Lucidchart, but theres still some significant room for customization when making a flowchart in Word.
For some of the simplest editing options, a menu will appear with basic editing options when you right-click on an object.
To edit text layout click the Layout Options icon that appears when you right-click a text box and pick your preferred layout. You can also view the rest of the option when you click See More.
Move a shape or lines anywhere on the Word document by simply clicking and dragging. If youre trying to resize the image, just click and drag from a corner or edge and use the handle icon to rotate the shape.
If you select a SmartArt graphic:
Change the design of your shapes by selecting your objects and choosing an option from the two new tabs in the Ribbon, Format and Design.
If you select a shape:
When changing the design of an object that was placed using Shapes, the Format tab will appear when you select the flowchart shape to begin your modifications.

Posted on Friday, March 28th, 2014 at 9:20 am by .
It’s been close to two years since we’ve discussed the release of Office 2013 and the new web-based object model for Office, called Napa, which allows developers to build Office add-ins using HTML, CSS and JavaScript.
We thought that after we investigated how to create customization for Google Docs and Google Sheets, it is about time we tackle the Napa Office 365 development tools again. We’ll create a Task Pane app for Microsoft Word, similar to the one we created for Google Docs that will allow the user to shuffle either the selected words, sentences or paragraphs in a Microsoft Word document.
- Creating a Word App for Office 365
- Building the Word app UI
- Shuffling the selected text using JavaScript
Creating an Office App for Word
Before you can start creating and testing your Office App, you need to first provision a Developer site. I won’t go into the steps involved in creating such a site as this article on MSDN does a good job of explaining the necessary steps.
You have two options when creating an app for Microsoft Office, the first is via the Napa development tools inside your browser and the second is using Office Developer Tools for Visual Studio 2013.
Creating a Word app using the Napa development tools
After the Developer site has been provisioned, open it in your browser. You should be presented with the following options:

Click on the “Build an app” button. This will redirect your browser to www.napacloudapp.com, then click on the “Add New Project” button in order to create a new App.

A modal dialog will be shown; prompting you to select the type of app you would like to build. Our app will target Microsoft Word, so select Task pane app for Office from the list.

This will create a project containing all the necessary HTML, CSS and JavaScript files. Because we need the app to run inside Microsoft Word, we have to set this in the project properties. Click on the Properties item in the left hand navigation menu and change the application to launch to Microsoft Word.

You have a choice to either edit the project via the browser or open the project in Visual Studio by clicking on the “Open in Visual Studio” item in the left-hand navigation bar. This will download and open the project in Visual Studio.
Creating a Word app using Visual Studio 2013
You also have the choice of creating a new app by using Visual Studio 2013. Start by creating a new Apps for Office project, by selecting the project template in Visual Studio.

Select Task pane when prompted to choose which app you’d want to create.

We’ll only be targeting Microsoft Word with this app, so only check its checkbox when asked in which Office application your task pane should reflect in.

The project template will add all the necessary files needed to create the MS Word app and your Solution Explorer layout will appear, which will look similar to the following:

If you’ve opted to create your Word app using the Napa tools, the project layout and files will be exactly the same as when creating the project directly from Visual Studio.
Building the app UI
The Home.html file contains a base layout, which already implements the correct styling for Office. This style is defined inside the Office.css and Home.css files. Add any of your own CSS styles, that you would like to use for the app inside the Home.css file.
The app will be a task pane running inside Microsoft Office Word and will look similar to the following image:

The UI is created by specifying the following HTML markup inside the Home.html file:
<!DOCTYPE html>
<html>
<head>
    <meta charset="UTF-8" />
    <meta http-equiv="X-UA-Compatible" content="IE=Edge" />
    <title>WordShuffleIt</title>
    <script src="https://ajax.aspnetcdn.com/ajax/jQuery/jquery-1.9.1.min.js" type="text/javascript"></script>

    <link href="../../Content/Office.css" rel="stylesheet" type="text/css" />
    <script src="https://appsforoffice.microsoft.com/lib/1.1/hosted/office.js" type="text/javascript"></script>

    <link href="../App.css" rel="stylesheet" type="text/css" />
    <script src="../App.js" type="text/javascript"></script>

    <link href="Home.css" rel="stylesheet" type="text/css" />
    <script src="Home.js" type="text/javascript"></script>
</head>
<body>
    <!-- Page content -->
    <div id="content-header">
        <div class="padding">
            <h1>The Word Shuffler</h1>
        </div>
    </div>
    <div id="content-main">
        <div class="padding">
            <p><strong>This app shuffles your selection in MS Word.</strong></p>
            <p>Please select how you would like to shuffle the current selection:</p>
            <p>
                <input type="radio" name="shuffleType" value="Words" checked>Words
            </p>
            <p>
                <input type="radio" name="shuffleType" value="Sentences">Sentences
            </p>
            <p>
                <input type="radio" name="shuffleType" value="Paragraphs">Paragraphs
            </p>
            <button id="do-stuff">Shuffle It!</button>
        </div>
    </div>
</body>
</html>
In the Html mark-up, we added a short instruction text, three radio buttons and a button.
Shuffling the selected text using JavaScript
We define all our app logic inside the Home.js file. The project template created some initial boilerplate code inside this file. The most important item for this app is the initialize function. This function runs as soon as the app is opened inside Word.
Add a click handler for the do-stuff button which will invoke the getDataFromSelection function when the user clicks the button.
Office.initialize = function (reason) {
    $(document).ready(function () {
        app.initialize();
        $('#do-stuff').click(getDataFromSelection);
    });
};
The getDataFromSelection function in turn will check which radio button is selected and store the value inside the shuffleType variable. We’ll then get the currently selected text inside MS Word by calling the getSelectedDataAsync function, the selected text is then passed into the shuffleSelectedText function.
function getDataFromSelection() {
    var shuffleType = $('input[name=shuffleType]:checked').val();
    Office.context.document.getSelectedDataAsync(Office.CoercionType.Text,
		function (result) {
		    if (result.status === Office.AsyncResultStatus.Succeeded) {
		        shuffleSelectedText(result.value, shuffleType);
		    } else {
		        app.showNotification('Error:', result.error.message);
		    }
		}
	);
}
The shuffleSelectedText function will split the selected text based on the type of shuffle the users selected, which could be words, sentences or paragraphs. The Office apps object model does not provide a function to determine whether paragraphs are selected, so we’ll simply split the selected text by the newline character. After the selected text is split according to the user’s selection, we pass it into the shuffle function in order to return an array with the shuffled selection.
We then override the selection with the shuffled text by using the setSelectedDataAsync function and show a notification to the user indicating how many words, sentences or paragraphs where shuffled.
The code for the shuffleSelectedText and shuffle function is as follows:
function shuffleSelectedText(text, shuffleType) {
    var shuffledArray;
    var shuffledText = "";
    if (shuffleType == "Words") {
        shuffledArray = shuffle(text.split(' '));
        for (var i = 0; i < shuffledArray.length; i++) {
            shuffledText += shuffledArray[i] + ' ';
        }
    } else if (shuffleType == "Sentences") {
        shuffledArray = shuffle(text.match(/[^.!?]+[.!?]+/g));
        for (var i = 0; i < shuffledArray.length; i++) {
            shuffledText += shuffledArray[i];
        }
    } else if (shuffleType == "Paragraphs") {
        shuffledArray = shuffle(text.split(/rn|r|n/g));
        for (var i = 0; i < shuffledArray.length; i++) {
            shuffledText += shuffledArray[i] + 'rn';
        }
    }
    Office.context.document.setSelectedDataAsync(shuffledText);
    app.showNotification("Shuffled " + shuffledArray.length + " " + shuffleType);
}

function shuffle(array) {
    var currentIndex = array.length
      , temporaryValue
      , randomIndex
    ;
    while (0 !== currentIndex) {
        randomIndex = Math.floor(Math.random() * currentIndex);
        currentIndex -= 1;
        temporaryValue = array[currentIndex];
        array[currentIndex] = array[randomIndex];
        array[randomIndex] = temporaryValue;
    }

    return array;
}
To test the app, build and run the project. Microsoft Word will open with the app loaded inside a task pane and will resemble the following screenshot:

Thank you for reading. Until next time, keep coding!
Available downloads:
Word Shuffler app
| title | description | ms.date | ms.topic | dev_langs | helpviewer_keywords | author | ms.author | manager | ms.technology | ms.workload | ||||||
|---|---|---|---|---|---|---|---|---|---|---|---|---|---|---|---|---|
|
Walkthrough: Create your first VSTO Add-in for Word |
Create an application-level Add-in for Microsoft Word. This feature is available to the application itself, regardless of which documents are open. |
02/02/2017 |
conceptual |
|
|
John-Hart |
johnhart |
jmartens |
office-development |
office |
Walkthrough: Create your first VSTO Add-in for Word
[!INCLUDE Visual Studio]
This introductory walkthrough shows you how to create a VSTO Add-in for Microsoft Office Word. The features that you create in this kind of solution are available to the application itself, regardless of which documents are open.
[!INCLUDEappliesto_wdallapp]
This walkthrough illustrates the following tasks:
-
Creating a Word VSTO Add-in project.
-
Writing code that uses the object model of Word to add text to a document when it is saved.
-
Building and running the project to test it.
-
Cleaning up the completed project so that the VSTO Add-in no longer runs automatically on your development computer.
[!INCLUDEnote_settings_general]
Prerequisites
You need the following components to complete this walkthrough:
-
[!INCLUDEvsto_vsprereq]
-
Microsoft Word
Create the project
To create a new Word VSTO Add-in project in Visual Studio
-
Start [!INCLUDEvsprvs].
-
On the File menu, point to New, and then click Project.
-
In the templates pane, expand Visual C# or Visual Basic, and then expand Office/SharePoint.
-
Under the expanded Office/SharePoint node, select the Office Add-ins node.
-
In the list of project templates, select a Word VSTO Add-in project.
-
In the Name box, type FirstWordAddIn.
-
Click OK.
[!INCLUDEvsprvs] creates the FirstWordAddIn project and opens the ThisAddIn code file in the editor.
Write code to add text to the saved document
Next, add code to the ThisAddIn code file. The new code uses the object model of Word to add boilerplate text to each saved document. By default, the ThisAddIn code file contains the following generated code:
-
A partial definition of the
ThisAddInclass. This class provides an entry point for your code and provides access to the object model of Word. For more information, see Program VSTO Add-ins. The remainder of theThisAddInclass is defined in a hidden code file that you should not modify. -
The
ThisAddIn_StartupandThisAddIn_Shutdownevent handlers. These event handlers are called when Word loads and unloads your VSTO Add-in. Use these event handlers to initialize your VSTO Add-in when it is loaded, and to clean up resources used by your VSTO Add-in when it is unloaded. For more information, see Events in Office projects.
To add a paragraph of text to the saved document
-
In the ThisAddIn code file, add the following code to the
ThisAddInclass. The new code defines an event handler for the xref:Microsoft.Office.Interop.Word.ApplicationEvents4_Event.DocumentBeforeSave event, which is raised when a document is saved.When the user saves a document, the event handler adds new text at the start of the document.
C#
:::code language=»csharp» source=»../vsto/codesnippet/CSharp/FirstWordAddIn/ThisAddIn.cs» id=»Snippet1″:::
VB
:::code language=»vb» source=»../vsto/codesnippet/VisualBasic/FirstWordAddIn/ThisAddIn.vb» id=»Snippet1″:::
[!NOTE]
This code uses an index value of 1 to access the first paragraph in the xref:Microsoft.Office.Interop.Word._Document.Paragraphs%2A collection. Although Visual Basic and Visual C# use 0-based arrays, the lower array bounds of most collections in the Word object model is 1. For more information, see Write code in Office solutions. -
If you are using C#, add the following required code to the
ThisAddIn_Startupevent handler. This code is used to connect theApplication_DocumentBeforeSaveevent handler with the xref:Microsoft.Office.Interop.Word.ApplicationEvents4_Event.DocumentBeforeSave event.:::code language=»csharp» source=»../vsto/codesnippet/CSharp/FirstWordAddIn/ThisAddIn.cs» id=»Snippet2″:::
To modify the document when it is saved, the previous code examples use the following objects:
-
The
Applicationfield of theThisAddInclass. TheApplicationfield returns a xref:Microsoft.Office.Interop.Word.Application object, which represents the current instance of Word. -
The
Docparameter of the event handler for the xref:Microsoft.Office.Interop.Word.ApplicationEvents4_Event.DocumentBeforeSave event. TheDocparameter is a xref:Microsoft.Office.Interop.Word.Document object, which represents the saved document. For more information, see Word object model overview.
Test the project
To test the project
-
Press F5 to build and run your project.
When you build the project, the code is compiled into an assembly that is included in the build output folder for the project. Visual Studio also creates a set of registry entries that enable Word to discover and load the VSTO Add-in, and it configures the security settings on the development computer to enable the VSTO Add-in to run. For more information, see Build Office solutions.
-
In Word, save the active document.
-
Verify that the following text is added to the document.
This text was added by using code.
-
Close Word.
Clean up the project
When you finish developing a project, remove the VSTO Add-in assembly, registry entries, and security settings from your development computer. Otherwise, the VSTO Add-in will continue to run every time that you open Word on your development computer.
To clean up the completed project on your development computer
- In Visual Studio, on the Build menu, click Clean Solution.
Next steps
Now that you have created a basic VSTO Add-in for Word, you can learn more about how to develop VSTO Add-ins from these topics:
-
General programming tasks that you can perform in VSTO Add-ins: Program VSTO Add-ins.
-
Programming tasks that are specific to Word VSTO Add-ins: Word solutions.
-
Using the object model of Word: Word object model overview.
-
Customizing the UI of Word, for example, by adding a custom tab to the Ribbon or creating your own custom task pane: Office UI customization.
-
Building and debugging VSTO Add-ins for Word: Build Office solutions.
-
Deploying VSTO Add-ins for Word: Deploy an Office solution.
See also
- Office solutions development overview (VSTO)
- Word solutions
- Program VSTO Add-ins
- Word object model overview
- Office UI customization
- Build Office solutions
- Deploy an Office solution
- Office project templates overview
This article contains the very basics of programming MS Word (an Automation Server) from an Automation Controller written in Visual Basic 6. This code will work with MS Word 8.0/9.0 Object Models. It is meant to lead a novice programmer through the basics of creating an Instance of MS Word 97 or 2000. Then adding documents and learning how to call them individually in code with the Range Objects.
The code in the project is loaded with comments and is intended to be stepped through in debug mode with the F8 key in Visual Basic. After each step you should click on the title bar of Word or VB6 to give it focus. DO NOT click in the document area of and instances of MS Word. Before we start look closely at the General Declarations Section of the CreateADoc.frm. You will find the variables and a procedure called IsProgramRunningWord( ). The body of the code looks like this:
If objWord Is Nothing Then ' *********************************************** ' Create new Word instance if word isn't running ' *********************************************** Set objWord = New Word.ApplicationElse ' *********************************************** ' Use an existing instance created by our program ' *********************************************** Set objWord = GetObject(, "Word.Application")End If '}-> If objWord Is Nothing Then
Basically if ObjWord has a value of nothing then we create a new instance. If not we use the GetObject( ) procedure in VB to get a handle of an open iinstance of Word. I cant explain here now. But depending on the version of Word (97/2000) and Windows 95, 98, or W2K you can end up with Multiple instances of MS Word. That is another story when the dust settles and the secrets are weeded out.
After objWord is set up and a instance of Word is established we will proceed to the cmdCreateADoc_Click event. This is where you should set you breakpoint on the first line of the second WITH statement. This is the upper level call to the Application Object of MS Word we created. We will be using WITH statements for several reasons. The most important are speed and good coding form. The speed comes from the fact that we dont have re-enter the application object as we nest into the instance of MS Word.
In a nutshell, these two lines of code are equal to leaving the store each time you buy something and going back in again to purchase another item.
For example:
ObjStore.PickItem.PayforItem.LeaveStoreObjStore.PickItem.PayforItem.LeaveStoreObjStore.PickItem.PayforItem.LeaveStore
This is better and easier to read:
With ObjStore.PickItem.PickItem.PickItem.PayforItem.PayforItem.PayforItem.LeaveStoreEnd With
What would you rather do?
First we enter our Instance of Word.
With objWord
The first line is a call to the Documents collection object with the Add Method. This creates a blank document in MS Word. It automatically adds it to the documents collection.
.Documents.Add
Now we could just use the ActiveDocument for this whole program. But that would be bad form and there is a problem. First you could think of ActiveDocument as being Words own little ME Keyword. But every instance of Word has a ActiveDocument. Plus the instances have to share the document collection information. Word is an Automation Server (is that old lingo now?) It shares space in the registry and all kinds of other goodies mysterious and hidden. This is how you can open one copy of word and then another and one will have Document1 and the other Document2 and so on. Sound like fun yet. Hope we arent scaring you. So we are going to use Call by Name when we can and variables that reference our objects for control, clarity and speed.
Here we created a string variable to hold the name of the document we just created with the Add method.
strWorkingDocName = .ActiveDocument.Name
Next we set a reference to the document in the document variable aThatDoc by calling the document BY NAME (the one in the string variable).
Set aThatDoc = .Documents(strWorkingDocName)
We create another document and repeat the process again for the aThisDoc variable.
.Documents.AddstrWorkingDocName = .ActiveDocument.NameSet aThisDoc = .Documents(strWorkingDocName)
Next we set the range each of the documents in the two range variables. Your wondering what is a Range? The most important object in the Word Object Model in my opinion is the Range Object. Many people make the wrong assumption that it is the Selection Object. This is because when people start to learn VBA they use the Macro recorder to capture an operation they performed in the application and studies that. I still use that method when trying to discover something that is not well documented.
But Microsoft prefers you use the Range Object. Its faster and more powerful and you can have more than one. There are some things you still need the Selection Object for, but that is another story. The Range Object consists of some 73 Properties and 66 Methods. But that is a whole series of articles. Right now this is just a taste of the basics.
Here we are establishing two range variables. Each is set to the starting range of different document.
Set range1 = aThisDoc.RangeSet range2 = aThatDoc.Range
Note the InsertAfter Method then inserts text after the end of the range. When it started it was basically set at the first character position of the document. (Where the insertion cursor is.)
range1.InsertAfter "This is the range object that was just assign the range of " _ & aThisDoc.Namerange2.InsertAfter "This is the range object that was just assign the range of " _ & aThatDoc.Name
Then we use the range1 variable with the Select Method to highlight the Range. Note the insertion cursor in Word.
range1.Select
Next we Collapse the start of the range1 so it equals the end of range1 that was highlighted by the Select Method.
range1.Collapse wdCollapseEnd
Then we use Select again on range1 to highlight the new range so we can see it.
range1.Select
Lets insert some more text.
range1.InsertAfter "We just collapsed to the end of Range1. That means we moved an invisible cursor to the end of sentence."
End the WITH statement and we are done.
End With '}-> With objWord
You should print this out and follow it in the debug mode while running the code from the breakpoint we set at the beginning of the WITH statement. All will be come clear.
You will want to look in the help for all these Range Objects and check out the examples and syntax. The range object is the key object of all the MS Offices larger object models.
I hope this inspires you to explore and play with the different properties and methods. Keep in mind that the Range Object (and Selection Object) are used to specify areas in a document such as Bookmarks, Tables, Cells, Hyperlinks, Endnote, Footnote, etc, etc. etc. The list just goes on and on just in Word alone. So dont stay up too late.
 Download the files!
- Download source files — 19.3 Kb
Introduction
After having written about developing Office COM addins in an earlier article, I get a lot of mail from people trying to write Word addins. Through this article we will discuss common development issues regarding Word addins in general. First, we learn how to build a simple WORD 2000 ATL COM addin. Later in the article, we will get down to Word’s VBA macro side of things, and write an addin that works for all versions of Word, independent of COM addin support.
I’m assuming you have read my previous article on Office addins and taken a look at the sample project. There are a lot of issues in addin development like adding custom menu/toolbars, handling events, property pages etc that are common for all Office addins, including Word. These have already been discussed in that article. Here we are going to write a Word 2000 COM addin, to begin with. Later, we’ll delve into Office and VBA in general, and with respect to with C++ addins.
Writing a Word2000 Addin
To begin, create a new ATL COM Appwizard generated dll project called WordAddin. Next insert an ATL Simple Object called Addin, as in the previous article. Next use the Implement Interface ATL Wizard to implement _IDTExtensibility2. This, as you know, is the at the heart of COM addin support for all Office applications. Next, to program against Word, we need to import Word’s typelib. That means, we need to import 3 interdependent typelibs. In your project’s stdafx.h add the following code:
#import "C:\Program Files\Microsoft Office\Office\mso9.dll"
   rename_namespace("Office2000")
using namespace Office2000;

#import
  "C:\Program Files\Common Files\Microsoft Shared\VBA\VBA6\VBE6EXT.olb"
  rename_namespace("VBE6")
using namespace VBE6;
In your project’s Addin.h file, towards the top, add:
#import "C:\Program Files\Microsoft Office\Office\MSWORD9.olb"
   rename("ExitWindows","MyExitWindows"),named_guids,
   rename_namespace("MSWord")
using namespace MSWord;
Make sure that you change the path to point to the correct locations of the files for your system.
The different locations for the #import statements is needed for the compiler to recognize everything, generate the correct set of wrappers, and compile and link correctly. Moving on, to register your addin with Word2000, add the following code to Addin .rgs registry script file (under FileView->Resource Files) and add the following to the end of the file.
HKCU
{
  Software
  {
    Microsoft
    {
      Office
      {
        Word
        {
          Addins
          {
            'WordAddin.Addin'
            {
              val FriendlyName = s 'WORD Custom Addin'
              val Description = s 'Word Custom Addin'
              val LoadBehavior = d '00000003'
              val CommandLineSafe = d '00000001'
            }
          }
        }
      }
    }
  }
}
Yes, we’d like our addin to be called ‘Word Custom Addin’ (‘I love CodeProject.com Addin’, would have been too blatant!), and loaded when Word starts up. So what else is new? 
If everything has gone right, you now have a working WORD addin to which you should add your own implementation code. By now you already know how to add buttons and menu items in your addin, property sheets etc; all that has been discussed in the previous article holds true. The only thing different in the Word Object Model, and from the code in the Outlook addin example, is that there is no ActiveExplorer object in Word, and you should get the CommandBars interface directly from Application, the topmost in the object model.
Handling Events
Probably in your addin, you’d also be interested in handling some of Word’s events.A case in point is the Application objects DocumentOpen event, with DISPID=4, which is handled here. Word has a complex object model and you will find a host of other such events. If you use the good old OLE/COM Object Viewer to view msword9.olb, you’d find IDL like :
 ....

[id(0x00000003), helpcontext(0x00061a83)]
    void DocumentChange();
    [id(0x00000004), helpcontext(0x00061a84)]
    void DocumentOpen([in] Document* Doc);

......
As before we will use ATL’s IDispEventSimpleImpl<> template class to implement our sink. For brevity, only the changes necessary to the earlier code has been mentioned.
extern _ATL_FUNC_INFO DocumentOpenInfo;

class ATL_NO_VTABLE CAddin :
    public CComObjectRootEx,
    public CComCoClass,
    public ISupportErrorInfo,
    public IDispatchImpl,
    public IDispatchImpl<_IDTExtensibility2, &IID__IDTExtensibility2,
         &LIBID_AddInDesignerObjects>,
    public IDispEventSimpleImpl<1,CAddin,
         &__uuidof(MSWord::ApplicationEvents2)>
{
public:
....
....

void __stdcall DocumentOpen(IDispatchPtr ptr)
{
    CComQIPtr<_Document> spDoc(ptr);
    ATLASSERT(spDoc);
    ....
    ....
}

BEGIN_SINK_MAP(CAddin)
SINK_ENTRY_INFO(1,__uuidof(MSWord::ApplicationEvents2),4,
    DocumentOpen,&DocumentOpenInfo)
END_SINK_MAP()

private:
CComPtr<MSWord::_Application> m_spApp;
};
DocumentOpenInfo is defined at the top of CAddin.cpp as
_ATL_FUNC_INFO DocumentOpenInfo = {CC_STDCALL,VT_EMPTY,1,
    {VT_DISPATCH|VT_BYREF}};
All that remains for us to do is to add the code to setup and break down the connection. Using the ATL template class, therefore all we have to do is call DispEventAdvise() and DispEventUnadvise(). Our CAddin‘s OnConnection() and OnDisconnection(), needless to say, is the right place for doing this.
CComQIPtr<_Application> spApp(Application);
ATLASSERT(spApp);
m_spApp = spApp;
HRESULT hr = DispEventAdvise(m_spApp);
if(FAILED(hr))
return hr;
and in OnDisconnection(),
DispEventUnadvise(m_spApp);
m_spApp = NULL;
Now you have a working Word COM addin template, proudly under your belt. To this you should add your own implementation, error-handling routines etc. Moving on to something different, let’s explore VBA side of WORD. Next, I’ll discuss a very specific scenario where I use a mix of C++ code and VBA macros in my addin.
Macros and the Visual Basic Editor
I was working on a project, where the COM addin model of things suited us fine. Except the client had a large number of Word97 users, and Word97 has no support for COM addins, specifically the IDTExtensibility2 interface. Basically in my addin I needed to add a few custom menu items and buttons, clicking which usually meant displaying a couple of dialogs. Now, a COM addin would be perfect for Word2000 users. But was there some way we could make the addin Word97 compatible?
This leads us to Visual Basic for Applications(VBA). Most Office developers know that MS Office components and applications support a rich scripting object model and a scripting interface known as VBA. Before Office version 4, each application in the suite was very distinct. For developers, wasn’t easy to create integrated solutions using multiple Office applications, because each application had a unique programming environment.
This problem was addressed through MS Visual Basic for Applications (VBA), which made it’s debut in Office 95 — albeit, in a few applications. By Office97, every app in the suite supported standard VBA interfaces. The set of functions that a VBA routine, or macro, can use to control its host application is the same set of functions that the OLE Automation client can use to control the application externally, regardless of the programming language for the controller. Word 97 includes Visual Basic 5.0, a sophisticated development environment that is shared across Office applications: Word, Excel, PowerPoint, and Access.
In Word, VBA and Visual Basic goes beyond being merely a macro language—it is a full-featured programming development environment. The Visual Basic Editor (VBE) uses the familiar programming interface of Microsoft Visual Basic 4.0 as a base for creating and editing script code. Through VBA, Word supported everything from macros to addins to document templates. So what is a document template? A document template(*.dot) is simply a document with macro code (script) embedded in it. In Word, macros are persisted in documents and templates as Visual Basic modules. Although macros are ordinarily stored in the user’s default template, Normal.dot, Word allows you store and use macros in any document or template. Moreover, any such document template in the Office installation’s Startup folder, would be autorun.Additional templates and macros can be loaded using the Templates & Add-ins or Macros dialog box in the Tools menu. Macros and document templates (also supported for WordPerfect) can also be shared across users in a Workgroup.
What is also interesting is, MS Word97 onwards also supports a group of global macros that gets invoked with the host application. These AutoXXX macros like AutoExec(), AutoNew(),AutoOpen(),AutoClose() and AutoExit() gets executed along with the host application, just as their names suggest. This sounds most useful and it is.
How? If we were to create a document template, handle such Auto macros in it, and then create and destroy our addin (which is written as an ActiveX server) through VBA macros — then we should be on the home stretch. This is what IDTExtensibility2 does for COM addins — primarily a way to connect and disconnect to the topmost Application object. So how can we substitute something like this in our Word97 addin? Through document templates. Document templates, by themselves, can be described as VBA addins. Every document template is set up to interact with the Document object associated with the project through the ThisDocument property. We must also remember that all macros implicitly reference the Application object.
Back to the task at hand, suppose we were to write a document template and in it, add code to ourAutoExec() and AutoExit() handlers. In the handlers, we create and release our addin COM class object and subsequently call it’s methods. Moreover, our ATL COM class should implement two methods, Init() and Uninit() through which the Application object is set in the C++ addin. Our macros ought to look like:
Dim o as Application
Dim obj as Object

Sub AutoExec()
Set obj = CreateObject("Word97Addin.Addin")
Set o = ThisDocument.Application
obj.Init o
End Sub

Sub AutoExit()
Set o = ThisDocument.Application
obj.Uninit o
Set obj = Nothing
Set o = Nothing
End Sub
We can choose to automatically load and unload our template by placing it in the Office’s Startup folder.Similarly you can handle AutoClose(),AutoNew() and AutoOpen() macros, which are more document related. For the moment, since I’m handling all button/menu creation and events in my C++ COM object, the communication is unidirectional(i.e. macro->addin), but bidirectional communication is not too difficult.Suppose you have a macro defined in your template called «NewMacro»; one way to trigger this macro from a C++ addin is through Application::Run() or Application::RunOld(), depending on whether you need to pass any parameters. What is interesting is that, you can also trigger the macro through a button click, by setting the OnAction property of the CommandBarButton object of your button or menuitem.
CComQIPtr < Office::CommandBarButton> spCmdButton(spNewBar);
ATLASSERT(spCmdButton);
spCmdButton->PutCaption(_T("Button"));
spCmdButton->put_OnAction(OLESTR("NewMacro"));

spCmdButton->PutVisible(VARIANT_TRUE);
This is just what I did for my project. We have a single solution, consisting of a dll and a dot file, that runs across all versions of Word — from 97 to XP, exposing and encapsulating most of it’s functionilty through compiled C++ code. Unfortunately, this VBA support brings up the security issue, and in later versions of Office like XP, the user can determine the security level in macro execution context. Although this was a non-issue with us, you need to be aware.
All of what we have learnt so far. has been espoused in the accompanied VC++ 6.0 Universal Addin project, which I will briefly describe next.
Universal Addin
Universal Addin is a simple ATL/COM AppWizard generated dll project, to which I inserted an ATL COM IDispatch-based Simple Object called Addin. While the name sounds very pretentious, ‘Universal’ refers to it’s ability to run across all versions of Word.
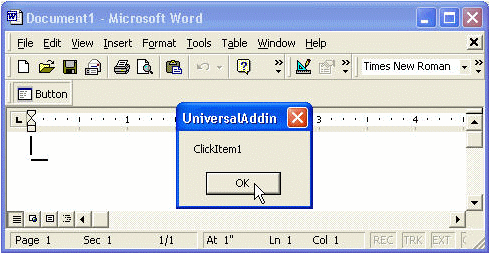
What lends it such universality is the addin.dot Word document template that is a part of the addin, and it’s AutoXXX Macros. Our Addin class has two member methods Init() and Uninit() that take a single IDispatch* to the Application object. Our Uninit() implementation is very simple and we could have done without the IDispatchPtr parameter; might not be so for your implementation.In the project, we add a single button through the addin, clicking which triggers a VBA named macro, that in turn calls a method of our COM class. By all means, you can connect to CommandBarButtonEvents and write C++ code to handle button click, as done previously.
Out aim was to write an addin for Word, bypassing the the COM addin architecture and IDTExtensibility2.That concluded, all that remains for me to say is that whatever you can do with VBA, you can do from C++ and vice versa — the magic is in OLEAutomation.
Acknowledgements
Everything I know about Office development, I learnt at MSDN. You, too, can find a hoard of technical articles and short KB code snippets related to everything from Office development to COM and OLE Automation. MSDN rules — as we all know.
Thanks to Peter Hauptmann (a.k.a Peterchen) for his comments and suggestions.
History
- First revision — 14th April, 2003.