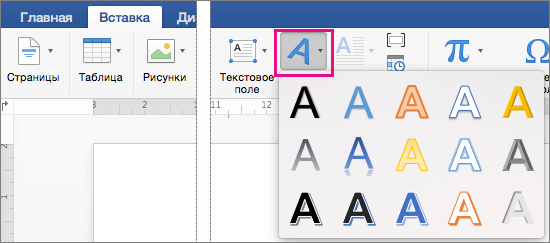
WordArt is a quick way to make text stand out with special effects. You begin by picking a WordArt style from the WordArt gallery on the Insert tab, and then customize the text as you wish.
Try it!
-
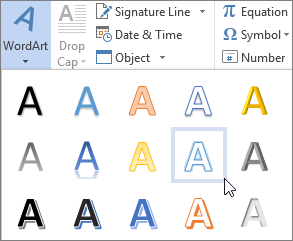
Click Insert > WordArt, and pick the WordArt style you want.
In the WordArt gallery, the letter A represents the different designs that are applied to all text you type.
Note: The WordArt icon is located in the Text group, and it may appear different depending on the program you’re using and the size of your screen. Look for one of these icons:
-
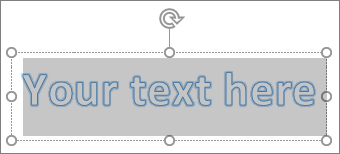
The placeholder text «Your text here» appears, with the text highlighted.
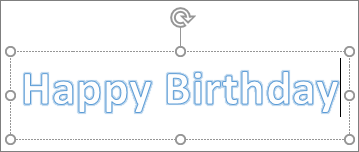
Enter your own text to replace the placeholder text.
Tips:
-
You can enter entire sentences, and even paragraphs, as WordArt. (You may have to change the font size for longer text.) And in Word, you can also convert existing text to WordArt in Word.
-
You can include symbols as WordArt text. Click the location for the symbol, and on the Insert tab, click Symbol, and pick the symbol you want.
Do more things with WordArt
Select a heading below to open it and see the detailed instructions.
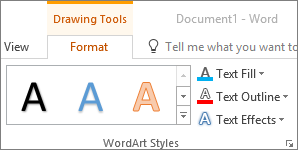
You might have tried using shape styles to change the shape of WordArt and then were puzzled that the text didn’t change. Use the text options in the WordArt Styles group instead. Shape styles and effects apply to the box and background surrounding your WordArt, not to the WordArt text. So, to add effects to your WordArt, such as shadows, rotation, curves, and fill and outline colors, you use the options in the WordArt Styles group, including Text Fill, Text Outline, and Text Effects.
Note: Depending on your screen size, you might only see the icons for WordArt Styles.

-
Select the WordArt text or letters to change.
The Drawing Tools Format tab appears.
-
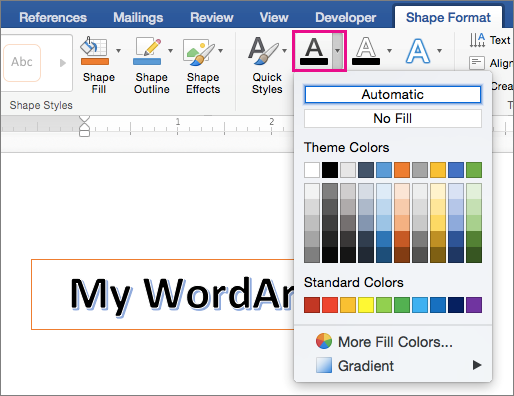
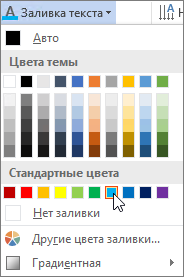
On the Drawing Tools Format tab, click Text Fill or Text Outline, and pick the color you want.
-
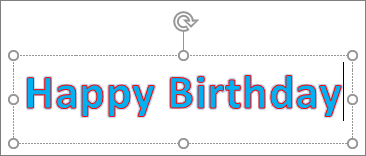
Click outside of your text box to see the effect.
In this example, a light blue text fill and a red text outline were applied.
You can curve text around a circular object.
90 seconds
-
Select the WordArt text or letters to change.
The Drawing Tools Format tab appears.
-
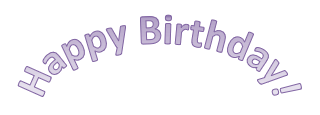
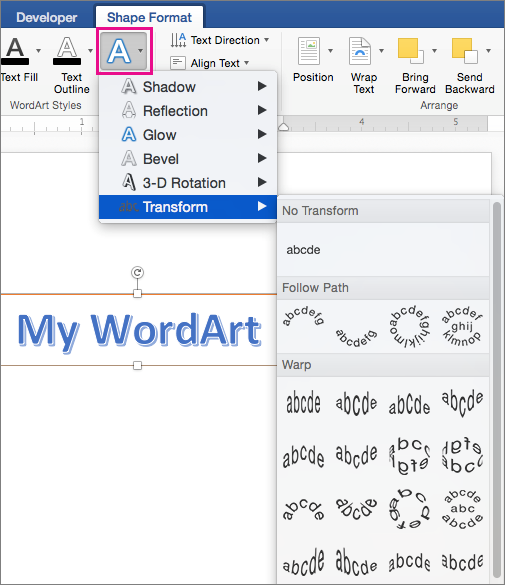
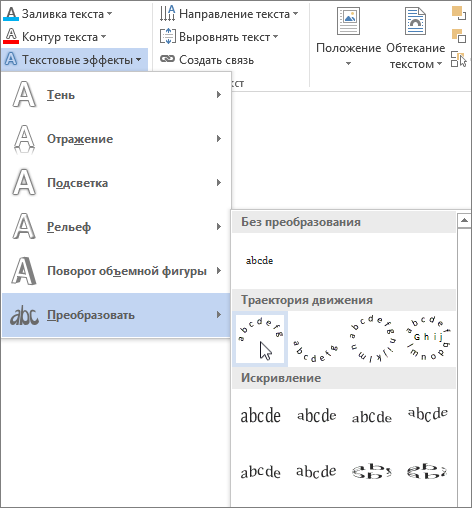
To create a curved effect, on the Drawing Tools Format tab, click Text Effects >Transform and pick the one you want.
Important: The Text Effects
menu is not the same as the Shape Effects
menu. If you don’t see Transform at the bottom of the menu, make sure you’ve clicked the Text Effects menu.
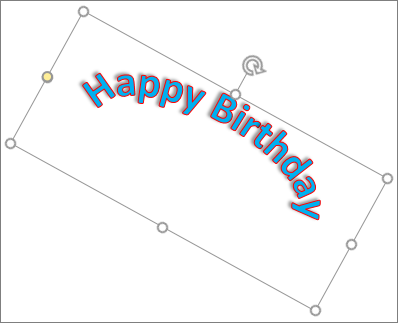
In this example, the first curved transform effect is selected.
-
Click outside of your text box to see the effect.
Use the Text Effects menu to create other effects, such as shadow, reflection, glow, bevels, and 3-D rotation. This example shows WordArt with a curved transform effect and a shadow applied.
-
To rotate WordArt text to any angle, select it, and then drag the circular rotation handle at the top of the box.
-
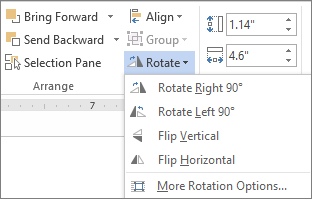
To flip WordArt or rotate it 90 degrees, click the Drawing Tools Format tab, click Rotate in the Arrange group, and then select an option.
To change the font size or style of your WordArt text:
-
Select the WordArt text or letters to change.
-
On the Home tab, select options in the Font group, such as font style, font size, or underline.
-
In your Word document, select the text to convert to WordArt.
-
On the Insert tab, click WordArt, and then pick the WordArt you want.
Double-click the WordArt that you want to remove, and then press Delete.
Insert WordArt
-
Click where you want to insert decorative text in a document.
-
On the Insert tab, in the Text group, click WordArt.
-
Click any WordArt style, and start to type.
Do more things with WordArt
Select a heading below to open it and see the detailed instructions.
-
Click anywhere in the WordArt text that you want to change.
-
Under Drawing Tools, on the Format tab, click any option.
For example, you can change the direction of the WordArt text by clicking Text Direction in the Text group and choosing a new direction for the text.
Double-click the WordArt that you want to remove, and then press Delete.
Add WordArt
Excel
-
On the Insert tab, in the Text group, click WordArt, and then click the WordArt style that you want.
-
Enter your text.
-
You can add a fill or effect to a shape or text box as well as the text in the WordArt.
-
If you have a chart in your 2007 Office release document, you can replace the chart title with WordArt to give the title additional emphasis.
-
Outlook
-
On the Insert tab, in the Text group, click WordArt, and then click the WordArt style that you want.
-
Type your text in the Text box.
You can add a fill or effect to a shape or text box as well as the text in the WordArt.
PowerPoint
-
On the Insert tab, in the Text group, click WordArt, and then click the WordArt style that you want.
-
Enter your text.
-
You can add a fill or effect to a shape or text box as well as the text in the WordArt.
-
If you have a chart in your 2007 Office release document, you can replace the chart title with WordArt to give the title additional emphasis.
-
Publisher
-
On the Objectstoolbar, click Insert WordArt
.
-
In the WordArt Gallery, click the WordArt that you want, and then click OK.
-
Type your text in the Text box.
If you want to change the text in the WordArt, double-click the WordArt that you want to change, and then type the new text in the Text box.
Word
-
On the Insert tab, in the Text group, click WordArt, and then click the WordArt style that you want.
-
Type your text in the Text box.
You can add a fill or effect to a shape or text boxas well as the text in the WordArt.
Do more things with WordArt
Select a heading below to open it and see the detailed instructions.
Excel
Do one or more of the following:
-
To change the text, select it, and then make the changes that you want.
-
To change the font, see Change the font or font size in Excel or Change the color of text in a worksheet.
-
To add an effect to WordArt, see Add or delete a fill, outline, or effect for text or WordArt.
-
To rotate the WordArt, see Rotate or flip a picture, shape, text box, or WordArt in Excel 2007.
-
To resize the WordArt, see Change the size of a picture, shape, text box, or WordArt.
-
To align the WordArt, see Align or arrange a picture, shape, text box, or WordArt.
-
To move the WordArt, see Move a picture, shape, text box, or WordArt.
For more information about selecting WordArt, see Select a shape or other object.
Outlook
Do one or more of the following:
-
To change the text, select it, and then make the changes that you want.
-
To change the font, see Change the size or formatting of text.
-
To add an effect to WordArt, see Add or delete a fill, outline, or effect for text or WordArt.
-
To rotate the WordArt, see Rotate or flip a picture, shape, text box, or WordArt in Outlook 2007.
-
To resize the WordArt, see Change the size of a picture, shape, text box, or WordArt.
-
To align the WordArt, see Align or arrange a picture, shape, text box, or WordArt.
-
To move the WordArt, see Move a picture, shape, text box, or WordArt.
For more information about selecting WordArt, see Select a shape or other object.
PowerPoint
Do one or more of the following:
-
To change the text, select it, and then make the changes that you want.
-
To add an effect to WordArt, see Add or delete a fill, outline, or effect for text or WordArt.
-
To rotate the WordArt, see Rotate or flip a picture, shape, text box, or WordArt in PowerPoint 2007.
-
To resize the WordArt, see Change the size of a picture, shape, text box, or WordArt.
-
To align the WordArt, see Align or arrange a picture, shape, text box, or WordArt.
-
To move the WordArt, see Move a picture, shape, text box, or WordArt.
For more information about selecting WordArt, see Select a shape or other object.
Publisher
Do one or more of the following:
-
To change the text, select it, and then make the changes that you want.
-
To change the font, see Change the font size or Change the color of text.
-
To add an effect to WordArt, see Add or delete a fill, outline, or effect for text or WordArt.
-
To resize the WordArt, see Change the size of a picture, shape, text box, or WordArt.
-
To align the WordArt, see Align or arrange a picture, shape, text box, or WordArt.
-
To move the WordArt, see Move a picture, shape, text box, or WordArt.
For more information about selecting WordArt, see Select a shape or other object.
Word
Do one or more of the following:
-
To change the text, select it, and then make the changes that you want.
-
To change the font, see Change the font size.
-
To add an effect to WordArt, see Add or delete a fill, outline, or effect for text or WordArt.
-
To rotate the WordArt, see Rotate or flip a picture, shape, or WordArt.
-
To resize the WordArt, see Change the size of a picture, shape, text box, or WordArt.
-
To align the WordArt, see Align or arrange a picture, shape, text box, or WordArt.
-
To move the WordArt, see Move a picture, shape, text box, or WordArt.
For more information about selecting WordArt, see Select a shape or other object.
Excel
When you remove the WordArt style from your text, the text remains and changes to plain text.
-
Select the WordArt text that you want to remove the WordArt style from.
-
Under Drawing Tools, on the Format tab, in the WordArt Styles group, click the More button
, and then click Clear WordArt.
To remove the WordArt style from part of your text, select the text that you want to remove the WordArt style from, and then follow the steps above.
PowerPoint
When you remove the WordArt style from your text, the text remains and changes to plain text.
-
Select the WordArt text that you want to remove the WordArt style from.
-
Under Drawing Tools, on the Format tab, in the WordArt Styles group, click the More button
, and then click Clear WordArt.
To remove the WordArt style from part of your text, select the text that you want to remove the WordArt style from, and then follow the steps above.
Do the following for all programs listed in the Applies To at the top of the article.
-
Double-click the WordArt that you want to remove to select it, and then press Delete.
-
In Office for Mac 2016 or later, select the Insert tab on the Ribbon.
or
In Office for Mac 2011, select Insert on the toolbar.
-
Select WordArt, and pick the WordArt style you want.
In the WordArt gallery, the letter A represents the different designs that are applied to all text you type.
-
Enter your text.
Tip: You can also include symbols as WordArt text. To do so, click the location in your document for the symbol, and on the Insert tab, click Advanced Symbol, and pick the symbol you want.
Do more things with WordArt
Select a heading below to open it and see the detailed instructions.
To create curved or circular WordArt text, you add a Transform text effect.
-
Select the WordArt.
When you do that, the Shape Format tab appears.
-
Click Text Effects > Transform and pick the effect you want.
To change the color of the WordArt text, you change the Text Fill.
-
Select the WordArt text or letters to change.
When you do that, the Shape Format tab appears.
-
Click Text Fill, and pick the color you want.
Tip: To change the outline of the WordArt text, on the Shape Format tab, click Text Outline.
-
Select the text to convert to WordArt.
-
On the Insert tab, click WordArt, and then pick the WordArt style you want.
In Microsoft 365 for the web you can see WordArt that’s already in your document, presentation, or worksheet, but to add more WordArt you need to open or edit the doc in the desktop version of Word, PowerPoint, or Excel.
In Microsoft 365 for the web, you can use the Font features on the Home tab to change the font color and size, and apply bolding, italics, or underlines to your text.
If you don’t have the desktop version of Word or PowerPoint, you can try it or buy it in the latest version of Office now.
Нельзя отрицать, что WordArt играет важную роль в привлечении внимания людей с первого взгляда. В маркетинге или презентации WordArt может быть отличным помощником в донесении сообщения до аудитории инновационным способом.
Сложно ли создать WordArt? WordArt — это часть искусства; для создания Word Art может потребоваться определение эстетики и тенденций. Но это старая история; в настоящее время, с развитием интеллектуального анализа данных и бесплатными генераторами WordArt, любой может создать уникальный WordArt, который всем нравится.
Каковы лучшие бесплатные генераторы Word Art для вас? Эта статья позволяет вам узнать новые идеи о Word Art в благородном и адаптивном облаке слов. Мы предоставим вам целостное представление о плюсах и минусах семи лучших бесплатных генераторов WordArt и определим, какое приложение поможет вам добиться максимального качества вашей работы.
Проверьте больше идей искусства слова, доступных в Интернете!
Дополнительные советы с AhaSlides
- Случайные английские слова
- Процесс генерации идей
- АгаСлайды Живой генератор облака слов
Содержание
- Генератор облаков слов AhaSlides
- Inkpx WordArt — онлайн-генератор модной трехмерной текстовой графики
- Monkeylearn Word Cloud Generator — генератор словесных рисунков на базе искусственного интеллекта
- WordArt.com – Лучшая футболка для печати Word Art
- Облака слов. com — расширенный редактор Word Art
- TagCrowd – Визуализация частоты слов
- Сделать WordArt.com — базовое искусство Word
- Выводы
№1. Генератор облака слов AhaSlides — бесплатные генераторы Word Art
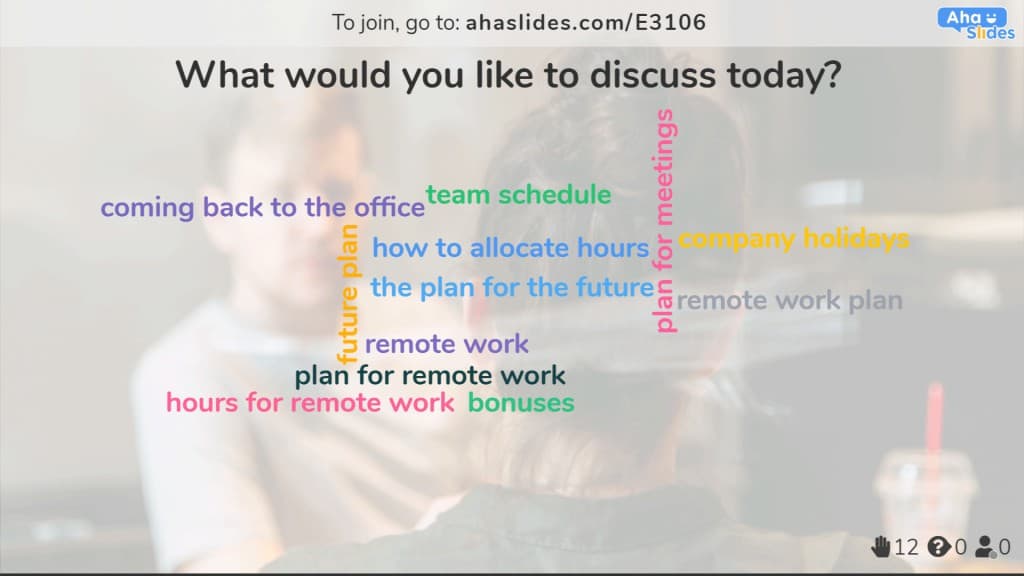
Плюсы: Вы можете настроить свой Word Art с помощью простых шагов с помощью AhaSlides Word Cloud Generator. Его встроенная функция Word Cloud может быть творчески настроена с поддержкой интерактивных и интеллектуальных пользовательских интерфейсов и возможностей. В отличие от других бесплатных генераторов Word Art, AhaSlides Генератор облака слов может воспроизводить длинные фразы и располагать их случайным образом, как по вертикали, так и по горизонтали в привлекательной цветовой гамме радуги.
Его лучшим преимуществом является визуализация живых опросов в презентациях, что позволяет участникам взаимодействовать с размещенными викторинами, например, «Что такое случайные английские слова?». Аудитория может быстро реагировать и одновременно получать доступ к живому отображению Word Cloud со всеми ответами в режиме реального времени.
Минусы: его основная функция — создавать привлекательные объекты Word Art во время интерактивного обучения, поэтому не так много фигур можно настроить.
№ 2. Inkpx WordArt — бесплатные генераторы Word Art
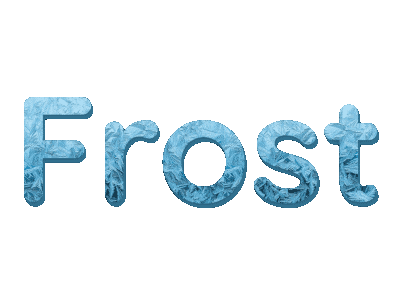
Плюсы: Inkpx WordArt предлагает различную превосходную текстовую графику, которая может немедленно преобразовать ваш вводимый текст в визуальное искусство слова, и вы можете скачать его бесплатно в формате PNG. Если вы хотите создать тематические Word Art, такие как поздравительные открытки и приглашения на день рождения, в течение ограниченного времени, вы можете найти много доступных работ в его библиотеке. Его впечатляющие категории, основанные на стилях, довольно функциональны и удобны для вас, например, натуральные, животные, наложение, фрукты и многое другое, так что вы можете сэкономить время и усилия.
Минусы: функция дизайна карт предлагает 41 шрифт, но когда дело доходит до рисунка из одного слова, шрифты ограничены 7 стилями, поэтому вам довольно сложно создать более сложный шрифт.
№3. Генератор облака слов Monkeylearn — Бесплатный генератор Word Art
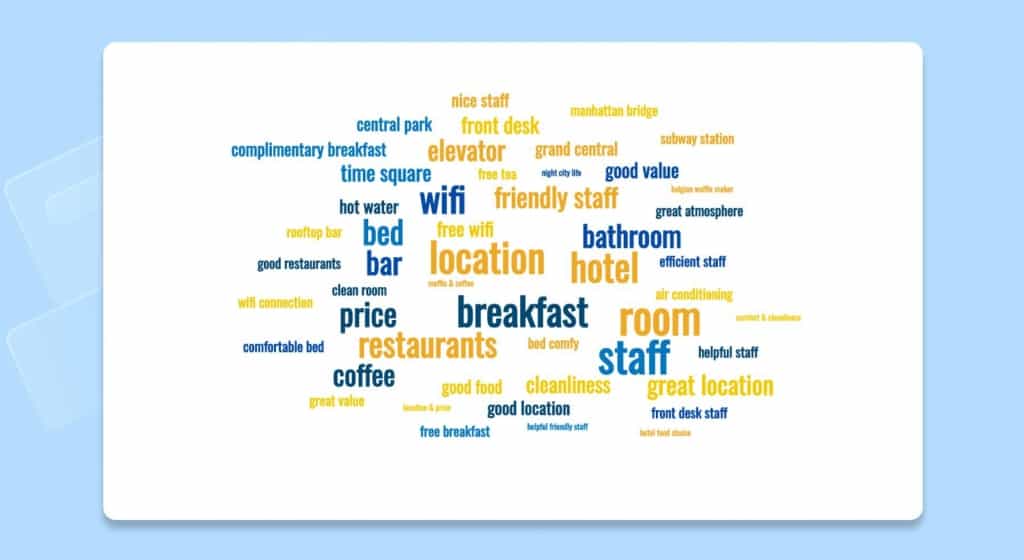
Плюсы: Вы можете настроить Word Art в Word Cloud с помощью Генератор облака слов Monkeylearn гибко изменяя тематические фоны с белого и светлого на темный яркий. Кроме того, словесные шрифты ограничены 7 современными и чистыми стилями, поэтому вы не будете злоупотреблять цветами и шрифтами, что может привести к путанице для зрителей. Кроме того, он предоставляет новые возможности для обнаружения сентиментальных текстов и форматирования неструктурированного текста, такого как статьи, социальные сети и электронные письма… более привлекательные.
Минусы: Несмотря на то, что они могут распознавать пары слов или связанные фразы, если в разных фразах со слишком большим количеством слов есть повторяющиеся слова, повторяющееся слово может исчезнуть или быть отделенным. Вы также не можете изменить стиль шрифта каждого слова. Результат облака слов также отделен от экрана поля ввода текста, поэтому вам нужно снова открыть окно, и облако слов отображается снова и снова.
№ 4. WordArt.com — бесплатный генератор изображений Word Art
Плюсы: Цель WordArt.com заключается в том, чтобы помочь клиентам достичь наилучших результатов с легкостью, весельем и индивидуальной настройкой одновременно. Это бесплатный генератор Word Art, который подходит для новичков, которые ищут профессиональный Word Art за пару шагов. Самая выгодная функция — формировать облако слов так, как вам нравится. Существуют различные формы, которые вы можете редактировать и адаптировать в кратчайшие сроки.
Минусы: Вы можете загрузить образцы фотографий HQ перед покупкой. Их высокое качество используется для преобразования визуально рассчитанных изображений в реальные материалы, такие как наряды, чашки для кружек и многое другое, за которое нужно платить.
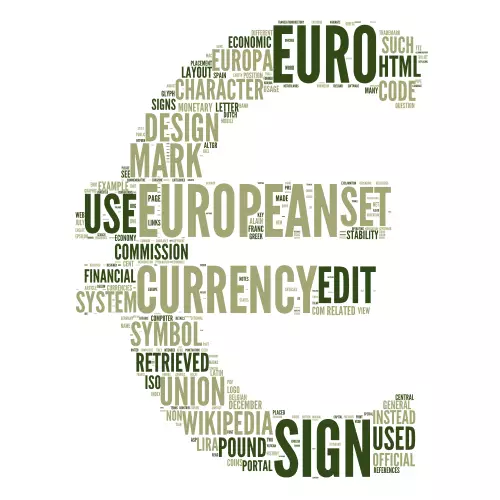
№ 5. Облака слов. com — Бесплатные генераторы Word Art
Плюсы: Очень похоже на функции WordArt.com, wordclouds.com также фокусируется на превращении скучных отдельных текстов и фраз в изобразительное искусство. Вы можете перейти в галерею, чтобы найти образцы и настроить их прямо на основной странице. Это так интересно, что есть сотни форм значков, букв и даже загруженных форм, чтобы вы могли создавать Word Cloud все, что вам нравится.
Минусы: если вы хотите найти интерактивную платформу Word Cloud для обучения, возможно, это не лучший вариант.

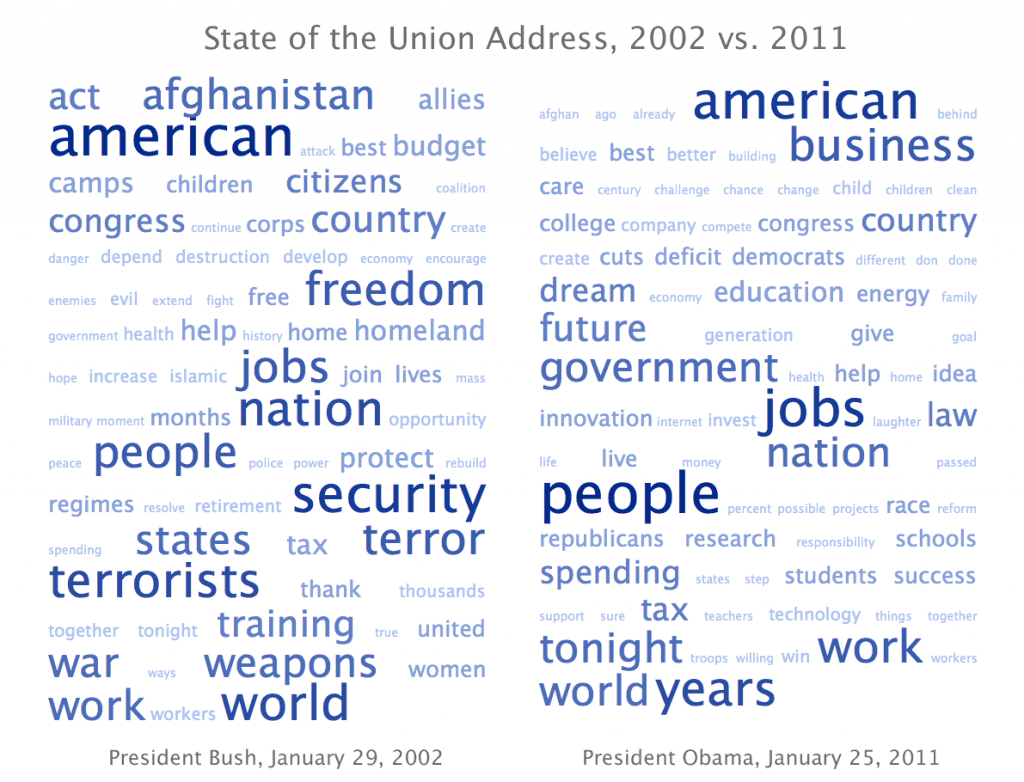
№ 6. TagCrowd — бесплатные генераторы Word Art
Плюсы: чтобы визуализировать частотность слов в любом текстовом источнике, таком как обычный текст, веб-URL или просмотр, вы можете использовать ТегТолпа. Основная функция сосредоточена на преобразовании текстов в элегантный и информативный формат, включая облако слов, текстовое облако или облако тегов. Вы можете проверить частоту появления текста и при необходимости исключить его. Кроме того, приложение поддерживает более 10 языков и автоматически группирует слова в кластеры.
Минусы: минимализм и эффективность являются целями TagCrowd, поэтому вы можете обнаружить, что Word Art довольно монохроматичен или скучен без множества форм, фона, шрифтов и стилей.
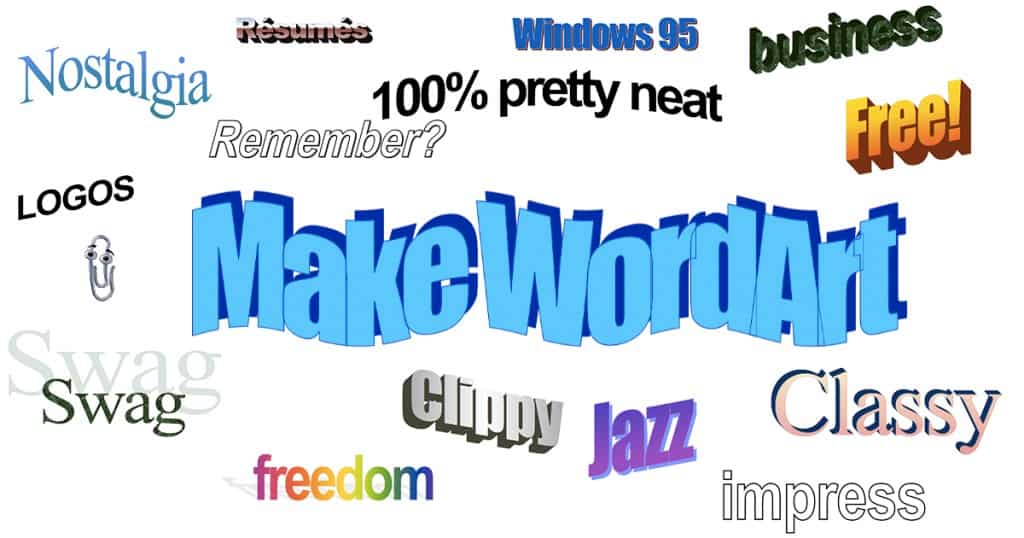
№ 7. Make WordArt.com — бесплатные генераторы Word Art
Плюсы: Еще один бесплатный генератор Word Art, который вы можете попробовать, это Сделать WordArt.com если вы знакомы со стилями Microsoft Word Art. Вы можете создавать простые объекты Word Art с редактируемыми шрифтами, цветами, позициями, размерами и фоном, чтобы печатать их на реальных вещах, таких как футболки. Он прост в использовании и не требует высокотехнологичных навыков.
Минусы: По сравнению с другими генераторами Free Word Art, перечисленными выше, он немного классический и простой и может быть не лучшим выбором для тех, кто любит модный стиль.
Выводы
Вы, наконец, определились со своими любимыми бесплатными генераторами словесных рисунков? Помните, что у каждого свои взгляды на Word Art и методы обучения. В зависимости от ваших мотивов и ресурсов вы можете выбрать лучшие бесплатные генераторы Word Art, которые помогут вам раскрыть свой потенциал и повысить производительность.
Теперь, когда вы четко определили свое восприятие различных генераторов Word Art, вы можете начать создавать свой собственный Word Art. Просто выполните несколько простых кликов, и ваш шедевр ждет вас, чтобы показать. Если вы хотите сочетать совместное изучение словарного запаса с Word Art, Генератор облаков слов AhaSlides является перспективной и выгодной платформой.
Давайте зарядимся энергией и расширим кругозор прямо сейчас с помощью удобного АгаСлайды особенности.
Download Article
Download Article
Word Art is a fun way to make text stand out with special effects. With Word Art, you can add color, shape, and style to text for a birthday card, a presentation, or a display. To create word art, you can use an online word art generator or a computer program. Word art can add variety and interest to any text in just a few short clicks.
-
1
Search for an online word art generator. Online word art generators are easy to find by searching “word art generator” in a search engine. Word art generators are often free and offer a variety of word art styles that you can apply to any text.
- Some word art generators offer more elaborate styles for a small fee. You can decide if you are happy to use the free styles offered or want to pay a little more for a particular style.
-
2
Choose a word art style. Most online word art generators will have a gallery of word art styles that you can choose from to create your word art. Look through the gallery and click on different styles so you can see which one you like.
- You may be given a variety of word art styles, from text that flashes to text in an elaborate font or a bright color.
- Some generators require you to type in the text you want to make into word art. For example, you may type in “Happy Birthday” into the text field. You can then click on a style to see how the style looks on the text.
Advertisement
-
3
Make your own custom word art. Some online word art generators let you make your own custom word art. You may be given the option of selecting the color, font, and animation of the text. You can choose to make the text a certain size and color as well as determine the shape of the text.[1]
- Click through the custom options for the text to select the ones you like. Have fun with the custom options and play around with different styles until you create a style that you like.
-
4
Apply the word art style to the text. Once you have a word art style that you like, type out the text and apply the style. Most online word art generators will have a text box where you can type the text and then click on a word art style to apply it.
- Look over the text once you have applied the word art. Make sure you are happy with it. If not, you can always switch to a different word art style in the gallery or adjust the custom word art style as you see fit.
-
5
Make a word art cloud. Many online word art generators allow you to create a word art cloud, where you cluster or arrange text together in a shape. Look for the word art cloud option on the generator. Often, the generator will create the cloud for you once you put in your preferences.
- You may choose a shape that reflects the intent of the word art. For example, if you are creating word art as a gift for a friend’s baby shower, you may choose a shape like a stork or a baby rattle for the word art cloud.
- You can also choose a shape that you like or that looks appealing to you. For example, you may choose a heart shape or an oval shape for the word art cloud.
-
6
Put the word art on an object or item, if desired. Some online word art generators give you the option of putting your word art on an object or item, such as a t-shirt or a mug. You can also make the word art into a print that you can give as a gift or frame in your home.[2]
- This option will likely cost you, as you will be paying for the cost of printing the word art on the object or item plus shipping.
Advertisement
-
1
Locate the Insert tab and then the word art section. Making word art with a computer program like Microsoft Word, Excel, and PowerPoint can be done in a few easy steps. Start by locating the Insert tab in the computer program. The Insert tab should appear on the main toolbar in the computer program. Once you open the Insert tab, you should see the word art section.[3]
- If you are using a newer version of a computer program like Microsoft Word, you can find the word art option in the Document Elements tab.
- Depending on the version you are using, word art may be called «Smartart» in Microsoft Word.
-
2
Look through the word art styles. Click on the word art section and scroll through the styles. There should be a gallery of different word art styles, from different font colors to different font styles like bold, outline, or highlight. Look through them until you find a style you like for the text.[4]
-
3
Make a custom word art style. If you do not see any word art styles that you like in the gallery or want to adjust an existing style, you can make your own word art style. Use the text options in the word art styles section to customize the text as you see fit. You can also add elements like Text Fill, Text Outline, and Text Effects to the text. This will allow you to add shadows, curves, outline, and fill in the text with specific colors.[5]
- To add a color to fill in the text, use the Text Fill option.
- To add a colored outline to the text, use the Text Outline option.
- To add a curve or shadow to the text, use the Text Effects option.
-
4
Choose a style and enter in your text. Click on a word art style and then start typing your desired text to see how it looks on the page. A placeholder text box may appear on the page where you can then type in your text to apply the word art style.[6]
- You can also type out the text first, such as “Congratulations!”, then choose a word art style and highlight the text to apply the style.
- You can include symbols in the word art as well by clicking the Insert tab and then choosing a symbol to include in the word art.
-
5
Rotate the word art, if desired. If you’d like to rotate the word art so it appears slanted across the page, select it by clicking on it. Then, drag the circular rotation handle at the top of the box to rotate the text as desired.[7]
- You can also flip the word art or rotate it 90 degrees by clicking on the Drawing Tools Format tab. Then, click Rotate in the Arrange group and select an option. You can rotate the text right 90 degrees, rotate the text left 90 degrees, flip it vertically, flip is horizontally, as well as other options.
Advertisement
Ask a Question
200 characters left
Include your email address to get a message when this question is answered.
Submit
Advertisement
Thanks for submitting a tip for review!
About This Article
Thanks to all authors for creating a page that has been read 31,564 times.
Is this article up to date?
Word art is the combination or layering of words in such a way that it makes or resembles an image, shape, or design. It is a visually appealing way to display words and phrases in a unique and creative way and is used in various applications like graphic design, web design, advertising, and social media marketing.
Creating custom word art designs can be time-consuming and require specific design skills. However, with free online word art generators, anyone can create beautiful and unique word art designs with just a few clicks. In this article, we will introduce you to some of the best free online word art generators available on the internet.
Make Word Mosaic
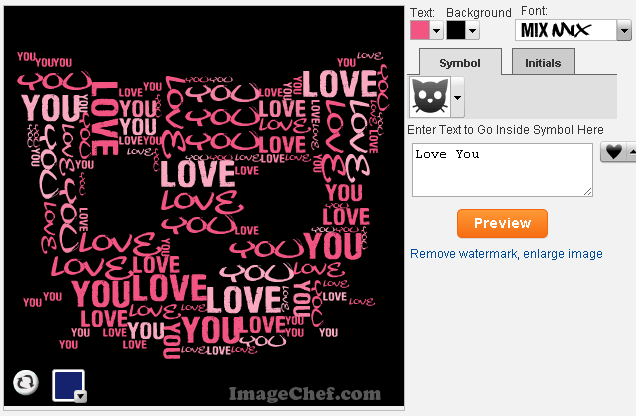
It generates words in the shape of hearts or other symbols.
Minecraft Text Generator
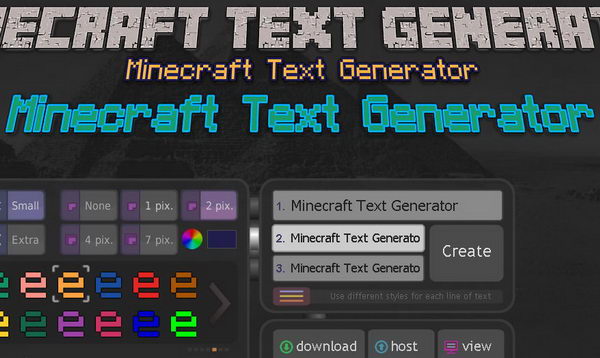
It allows you to create Minecraft and 8-bit style text or logos online. Options include drop shadow, font styles, colored borders and 3d effect.
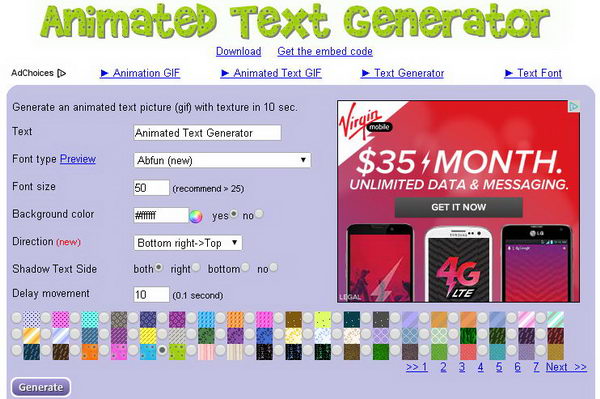
Animated Text Generator
This tool will create an animated text with texture, fonts you can select.
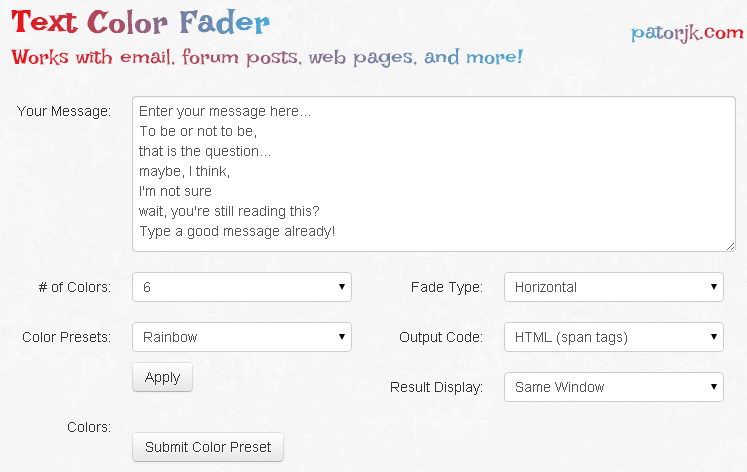
Rainbow Text Generator
Rainbow test effects are used on many places online that will make your message stand out. This tool makes creating rainbow colored text in HTML quite easy.
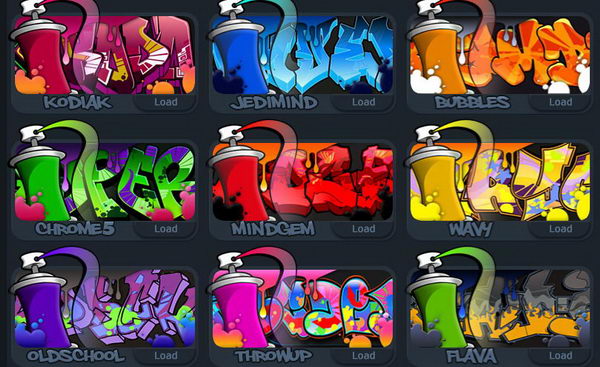
Graffiti Creator
This tool allows you to design your own name or logotype in graffiti-style.
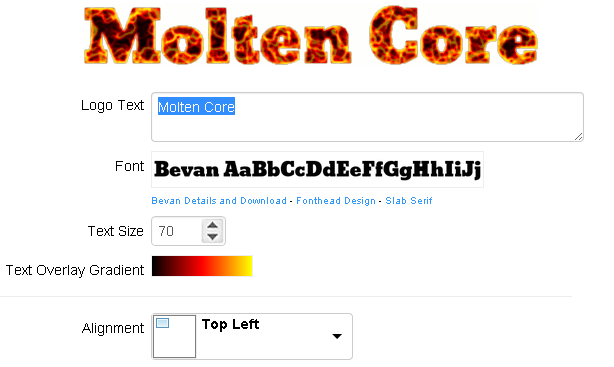
Cool Text
This is a FREE graphics generator for web pages and anywhere else you need an impressive logo without a lot of design work.
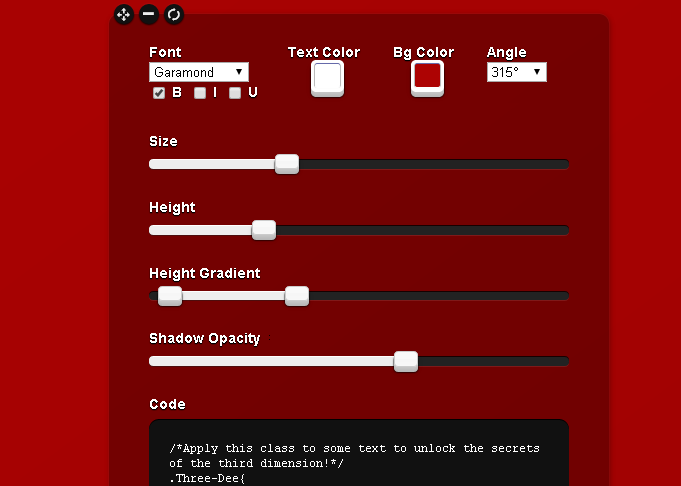
CSS3 3D Text Generator
This tool has a well designed graphical user interface and is quite easy to use. It uses the CSS3 text-shadow property to create 3D text effect and show you the magic of 3D.
Source
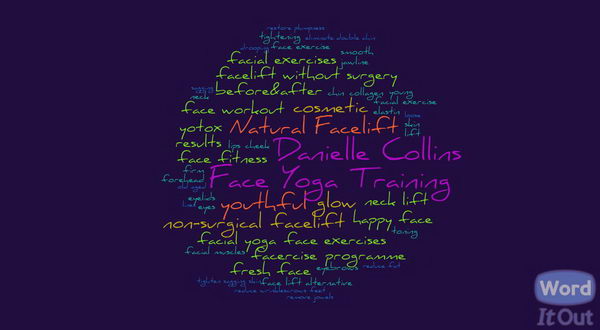
WordItOut
This is a word cloud generator that gives you control with many custom settings.
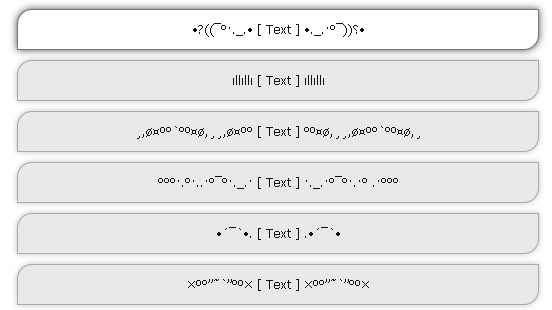
Stylish Text Generator
This stylish text generator lets you add cool effect on a text. You can use your stylish text with various software and web sites like Windows Live Messenger(MSN), Facebook, Twitter and etc.
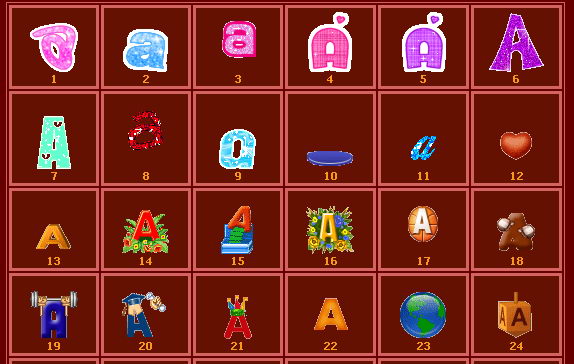
Glitter Text Generator
Glitter text is text with glitters. This text generator allows you to quickly and easily generate glitter text graphics.
Table of Contents
- How do I make my own word art?
- How do you make digital word art?
- What is the best word cloud generator?
- Does Google Docs have WordArt?
- Does Microsoft Word still have WordArt?
- Does Microsoft word still have WordArt?
- Does zoom do word clouds?
- How do I create Word Art in Google Docs?
- How do you make Word Art curve?
- Does Office 365 have WordArt?
- Is there a free tool to create word art?
- Which is the best word cloud art creator?
- Which is the Best AI word art tool?
- Which is the best word art generator for kids?
Add WordArt
- On the Insert tab, in the Text group, click WordArt, and then click the WordArt style that you want.
- Enter your text. You can add a fill or effect to a shape or text box as well as the text in the WordArt.
How do you make digital word art?
How to Create Word Art for Posters
- Create a new document in Adobe Illustrator. Open a new document to begin your poster word art.
- Choose a bold font. Using Adobe Fonts, find a font that is large enough to display art within your text.
- Create a text box.
- Select the Draw Inside mode.
- Add a photo or design.
- Get creative!
What is the best word cloud generator?
The 10 best word cloud generators
- WordArt.com. WordArt.com (formerly Tagul) creates stunning images, and is easily one of the best word cloud generators out there.
- WordClouds.com.
- Wordle.
- Jason Davies’ word cloud generator.
- Abcya.com.
- TagCrowd.
- WordItOut.
- Tagxedo.
Does Google Docs have WordArt?
For Word Art in Google Docs: In the Google Apps drawing window choose Actions then Word Art. You can also insert shapes, arrows, callouts and equations in Google Docs. For a callout, click the Shapes icon and choose callout. The finished product is a Google Doc with Awesome word Art included.
Does Microsoft Word still have WordArt?
Office 365/2013 most certainly does have the WordArt feature. However, if you are looking for the same WordArt as in Word 97-2003 or 2007, then you will need to save the document in Word 97-2003 format. Otherwise, the WordArt is the same as in Word 2010.
Does Microsoft word still have WordArt?
Does zoom do word clouds?
Besides single choice and multiple choice polls, your online participants can send their rating in rating polls and create beautiful word clouds with word cloud polls. Let them write down their own thoughts in open text polls, or lift their spirits with a quiz.
How do I create Word Art in Google Docs?
In your Google Doc, go to Insert > Drawing. Go to Actions > Word Art. In the text box that pops up, enter in the text you’d like to work on. Format the text as you wish, whether it’s changing the fill color, outline color, etc.
How do you make Word Art curve?
Create curved or circular WordArt
- Go to Insert > WordArt.
- Pick the WordArt style you want.
- Type your text.
- Select the WordArt.
- Go to Shape Format > Text Effects > Transform and pick the effect you want.
Does Office 365 have WordArt?
One of the most popular tools for generating word art. It can be downloaded for free. Word Art Generator is, as its name suggests, a utility that lets you create WordArt object. WordArt editing tool integrated with Microsoft Word is now available in the downloadable application. It allows the user to create as many WordArt as required by the user.
Which is the best word cloud art creator?
WordArt.com is an online word cloud art creator that enables you to create amazing and unique word cloud art with ease. Professional quality results can be achieved in no time at all, even for users with no prior knowledge of graphic design. We put a lot of efforts to make WordArt.com easy to use. No prior knowledge of graphic design is required!
Unlike many other word art tools, MonkeyLearn’s AI allows its cloud generator to go beyond single words and recognize word pairs or connected phrases, like “machine learning,” “hundreds of hours,” and “better management decision,” as seen in the cloud above.
Which is the best word art generator for kids?
Try one of these top word art generators, free to use and easy to get started with: 1 MonkeyLearn’s Word Cloud Generator | Create word art with the power of AI 2 WordArt.com | Print your word art on a T-shirt! 3 Wordclouds.com | Word art in clipart-style shapes 4 Tagxedo | Useful integrations 5 ABCya! | A word cloud tool for kids
Стили WordArt обеспечивают быстрый способ выделения текста с помощью специальных эффектов. Стиль WordArt можно выбрать в коллекции WordArt на вкладке Вставка, а затем настроить текст по желанию.
Проверьте, как это работает!
-
Откройте вкладку Вставка, нажмите кнопку WordArt и выберите нужный стиль WordArt.
В коллекции WordArt буква А представляет разные варианты дизайна, применяемые ко всему введенному тексту.
Примечание: Значок WordArt находится в группе Текст и может выглядеть по-разному в зависимости от используемой программы и размеров экрана. Ищите один из следующих значков:
-
Появится выделенный замещающий текст «Поместите здесь ваш текст».
Введите вместо замещающего текста свой собственный.
Советы:
-
В качестве объектов WordArt можно вводить целые предложения и даже абзацы. (Если текст слишком длинный, может потребоваться изменить размер шрифта.) В приложении Word вы также можете преобразовать существующий текст в объект WordArt.
-
Можно включить символы как текст WordArt. Щелкните место для символа, а затем на вкладке Вставка нажмите кнопку Символ и выберите нужный символ.
Дополнительные действия с объектами WordArt
Щелкните заголовок раздела ниже, чтобы открыть подробные инструкции.
Возможно, вы пытались использовать стили фигур, чтобы изменить форму объекта WordArt, но текст не изменялся. Используйте вместо этого параметры текста в группе Стили WordArt. Стили и эффекты фигуры применяются только к полю и фону, окружающим текст WordArt, но не к самому тексту. Таким образом, чтобы добавить эффекты к объекту WordArt, например тени, поворот, изгиб, а также цвета заливки и контура, следует использовать параметры в группе Стили WordArt, в том числе Заливка текста, Контур текста и Текстовые эффекты.
Примечание: В зависимости от размера экрана могут отображаться только значки стилей WordArt.

-
Выделите текст или буквы WordArt, которые нужно изменить.
Откроется вкладка Средства рисования — Формат.
-
На вкладке Средства рисования — Формат нажмите кнопку Заливка текста или Контур текста и выберите нужный цвет.
-
Щелкните за пределами текстового поля, чтобы увидеть результат.
В этом примере применены голубая заливка текста и красный контур.
Текст может быть изогнут вокруг какого-либо круглого объекта.
90 секунд
-
Выделите текст или буквы WordArt, которые нужно изменить.
Откроется вкладка Средства рисования — Формат.
-
Чтобы создать эффект изгиба, на вкладке Средства рисования — Формат выберите пункт Текстовые эффекты > Преобразовать и выберите нужный вариант.
Важно:
Текстовые эффектыи Эффекты фигуры
— это разные меню. Если внизу меню нет команды Преобразовать, убедитесь в том, что открыли именно меню Текстовые эффекты.
В этом примере выбран первый эффект изгиба.
-
Щелкните за пределами текстового поля, чтобы увидеть результат.
Используйте меню Текстовые эффекты, чтобы создать другие эффекты, такие как тень, отражение, подсветка, рельеф и поворот объемной фигуры. В этом примере показан объект WordArt с примененными эффектами искривления и тени.
-
Чтобы повернуть текст WordArt на любой угол, выделите его и перетащите круглый маркер поворота в верхней части поля.
-
Чтобы отразить текст WordArt или повернуть его на 90 градусов, выберите вкладку Средства рисования — Формат, нажмите кнопку Повернуть в группе Упорядочение и выберите один из вариантов.
Чтобы изменить размер или начертание шрифта текста WordArt, выполните указанные ниже действия.
-
Выделите текст или буквы WordArt, которые нужно изменить.
-
На вкладке Главная выберите параметры в группе Шрифт, такие как начертание, размер шрифта или подчеркивание.
-
В документе Word выделите текст, который нужно преобразовать в объект WordArt.
-
На вкладке Вставка нажмите кнопку WordArt и выберите нужный стиль WordArt.
Дважды щелкните объект WordArt, который нужно удалить, затем нажмите клавишу DELETE.
Вставка текста WordArt
-
Щелкните документ там, где хотите вставить декоративный текст.
-
На вкладке Вставка в группе Текст щелкните элемент WordArt.
-
Выберите любой стиль WordArt и начните вводить текст.
Дополнительные действия с объектами WordArt
Щелкните заголовок раздела ниже, чтобы открыть подробные инструкции.
-
Щелкните текст WordArt, который вы хотите изменить.
-
В разделе Средства рисования перейдите на вкладку Формат и выберите нужный элемент.
Например, чтобы изменить направление текста WordArt, в группе Текст щелкните Направление текста и выберите новое направление.
Дважды щелкните объект WordArt, который нужно удалить, затем нажмите клавишу DELETE.
Добавление объекта WordArt
Excel
-
На вкладке Вставка в группе Текст нажмите кнопку WordArt и выберите нужный стиль WordArt.
-
Введите текст.
-
Вы можете добавить заливку или эффект к фигуре или надписи, а также текст в объект WordArt.
-
Если в документе 2007 Office (выпуск) есть диаграмма, для выделения ее заголовка можно заменить его объектом WordArt.
-
Outlook
-
На вкладке Вставка в группе Текст нажмите кнопку WordArt и выберите нужный стиль WordArt.
-
Введите текст в поле Текст.
Вы можете добавить заливку или эффект к фигуре или надписи, а также текст в объект WordArt.
PowerPoint
-
На вкладке Вставка в группе Текст нажмите кнопку WordArt и выберите нужный стиль WordArt.
-
Введите текст.
-
Вы можете добавить заливку или эффект к фигуре или надписи, а также текст в объект WordArt.
-
Если в документе 2007 Office (выпуск) есть диаграмма, для выделения ее заголовка можно заменить его объектом WordArt.
-
Publisher
-
На панели инструментов Объекты нажмите кнопку Вставить объект WordArt
.
-
В списке Коллекция WordArt выберите нужный объект WordArt, а затем нажмите кнопку ОК.
-
Введите текст в поле Текст.
Для изменения текста в объекте WordArt дважды щелкните объект, а затем введите новый текст в поле Текст.
Word
-
На вкладке Вставка в группе Текст нажмите кнопку WordArt и выберите нужный стиль WordArt.
-
Введите текст в поле Текст.
Вы можете добавить заливку или эффект к фигуре или надписи, а также текст в объект WordArt.
Дополнительные действия с объектами WordArt
Щелкните заголовок раздела ниже, чтобы открыть подробные инструкции.
Excel
Выполните одно или несколько из указанных ниже действий.
-
Чтобы изменить текст, выделите его, а затем внесите необходимые изменения.
-
Сведения о том, как изменить шрифт, см. в статье Изменение шрифта или размера шрифта в Excel или Изменение цвета текста на листе.
-
Чтобы добавить эффект, см. статью Добавление и удаление заливки, контура и эффектов для надписей и объектов WordArt.
-
Чтобы повернуть объект WordArt, см. статью Поворот или отражение рисунка, фигуры, надписи или объекта WordArt в Excel 2007.
-
Чтобы изменить размер объекта WordArt, см. статью Изменение размера рисунка, фигуры, надписи или объекта WordArt.
-
Чтобы выровнять объект WordArt, см. статью Выравнивание или расположение рисунка, фигуры, надписи или объекта WordArt.
-
Чтобы переместить объект WordArt, см. статью Перемещение рисунка, фигуры, надписи или объекта WordArt.
Дополнительные сведения о выделении объектов WordArt см. в статье Выделение фигур и других объектов.
Outlook
Выполните одно или несколько из указанных ниже действий.
-
Чтобы изменить текст, выделите его, а затем внесите необходимые изменения.
-
Чтобы узнать, как изменить шрифт, см. статью Изменение размера и форматирование текста.
-
Чтобы добавить эффект, см. статью Добавление и удаление заливки, контура и эффектов для надписей и объектов WordArt.
-
Чтобы узнать, как повернуть объект WordArt, см. статью Поворот и отражение рисунка, фигуры, надписи или объекта WordArt в Outlook 2007.
-
Чтобы изменить размер объекта WordArt, см. статью Изменение размера рисунка, фигуры, надписи или объекта WordArt.
-
Чтобы выровнять объект WordArt, см. статью Выравнивание или расположение рисунка, фигуры, надписи или объекта WordArt.
-
Чтобы переместить объект WordArt, см. статью Перемещение рисунка, фигуры, надписи или объекта WordArt.
Дополнительные сведения о выделении объектов WordArt см. в статье Выделение фигур и других объектов.
PowerPoint
Выполните одно или несколько из указанных ниже действий.
-
Чтобы изменить текст, выделите его, а затем внесите необходимые изменения.
-
Чтобы добавить эффект, см. статью Добавление и удаление заливки, контура и эффектов для надписей и объектов WordArt.
-
Чтобы повернуть объект WordArt, см. статью Поворот или отражение рисунка, фигуры, надписи или объекта WordArt в PowerPoint 2007.
-
Чтобы изменить размер объекта WordArt, см. статью Изменение размера рисунка, фигуры, надписи или объекта WordArt.
-
Чтобы выровнять объект WordArt, см. статью Выравнивание или расположение рисунка, фигуры, надписи или объекта WordArt.
-
Чтобы переместить объект WordArt, см. статью Перемещение рисунка, фигуры, надписи или объекта WordArt.
Дополнительные сведения о выделении объектов WordArt см. в статье Выделение фигур и других объектов.
Publisher
Выполните одно или несколько из указанных ниже действий.
-
Чтобы изменить текст, выделите его, а затем внесите необходимые изменения.
-
Чтобы изменить шрифт, см. статью Изменение размера шрифта или Изменение цвета текста.
-
Чтобы добавить эффект, см. статью Добавление и удаление заливки, контура и эффектов для надписей и объектов WordArt.
-
Чтобы изменить размер объекта WordArt, см. статью Изменение размера рисунка, фигуры, надписи или объекта WordArt.
-
Чтобы выровнять объект WordArt, см. статью Выравнивание или расположение рисунка, фигуры, надписи или объекта WordArt.
-
Чтобы переместить объект WordArt, см. статью Перемещение рисунка, фигуры, надписи или объекта WordArt.
Дополнительные сведения о выделении объектов WordArt см. в статье Выделение фигур и других объектов.
Word
Выполните одно или несколько из указанных ниже действий.
-
Чтобы изменить текст, выделите его, а затем внесите необходимые изменения.
-
Чтобы изменить шрифт, см. статью Изменение размера шрифта.
-
Чтобы добавить эффект, см. статью Добавление и удаление заливки, контура и эффектов для надписей и объектов WordArt.
-
Чтобы повернуть объект WordArt, см. статью Поворот или отражение рисунка, фигуры или объекта WordArt.
-
Чтобы изменить размер объекта WordArt, см. статью Изменение размера рисунка, фигуры, надписи или объекта WordArt.
-
Чтобы выровнять объект WordArt, см. статью Выравнивание или расположение рисунка, фигуры, надписи или объекта WordArt.
-
Чтобы переместить объект WordArt, см. статью Перемещение рисунка, фигуры, надписи или объекта WordArt.
Дополнительные сведения о выделении объектов WordArt см. в статье Выделение фигур и других объектов.
Excel
При удалении стиля WordArt из надписи сама надпись остается в виде обычного текста.
-
Выделите текст WordArt, из которого вы хотите удалить стиль WordArt.
-
В разделе Средства рисования на вкладке Формат в группе Стили WordArt нажмите кнопку Дополнительные параметры
, а затем выберите Очистить WordArt.
Для удаления стиля WordArt из части текста выделите текст, а затем выполните шаги, описанные выше.
PowerPoint
При удалении стиля WordArt из надписи сама надпись остается в виде обычного текста.
-
Выделите текст WordArt, из которого вы хотите удалить стиль WordArt.
-
В разделе Средства рисования на вкладке Формат в группе Стили WordArt нажмите кнопку Дополнительные параметры
, а затем выберите Очистить WordArt.
Для удаления стиля WordArt из части текста выделите текст, а затем выполните шаги, описанные выше.
Эти действия относятся ко всем программам, перечисленным в разделе «Применяется к» вверху этой статьи.
-
Дважды щелкните объект WordArt, чтобы выделить его, а затем нажмите клавишу DELETE.
-
В Office для Mac 2016 или более поздней версии на ленте откройте вкладку Вставка.
Или
В Office для Mac 2011 на панели инструментов выберите пункт Вставка.
-
Нажмите кнопку WordArt и выберите нужный стиль WordArt.
В коллекции WordArt буква А представляет разные варианты дизайна, применяемые ко всему введенному тексту.
-
Введите текст.
Совет: В текст WordArt можно также преобразовать символы. Для этого щелкните в документе место для символа, а затем на вкладке Вставка нажмите кнопку Дополнительные символы и выберите нужный символ.
Дополнительные действия с объектами WordArt
Щелкните заголовок раздела ниже, чтобы открыть подробные инструкции.
Для создания изогнутого или кругового текста WordArt добавьте текстовый эффект Преобразование.
-
Выделите текст WordArt.
После этого появится вкладка Формат фигуры.
-
Щелкните Текстовые эффекты > Преобразование и выберите нужный эффект.
Чтобы изменить цвет текста WordArt, настройте параметр Заливка текста.
-
Выделите текст или буквы WordArt, которые нужно изменить.
После этого появится вкладка Формат фигуры.
-
Щелкните Заливка текста и выберите нужный цвет.
Совет: Чтобы изменить контур текста WordArt, на вкладке Формат фигуры щелкните Контур текста.
-
Выделите текст, к которому нужно применить стиль WordArt.
-
На вкладке Вставка нажмите кнопку WordArt и выберите нужный стиль WordArt.
В Microsoft 365 для Интернета вы можете просматривать объекты WordArt, которые уже содержатся в документе, презентации или на листе, но чтобы добавить другие объекты WordArt, нужно открыть или изменить файл в классической версии Word, PowerPoint или Excel.
Чтобы изменить цвет или размер шрифта, применить к тексту полужирное, курсивное или подчеркнутое начертание, в Microsoft 365 для Интернета можно использовать команды из группы Шрифт на вкладке Главная.
Если у вас нет классического приложения Word или PowerPoint, вы можете скачать пробную версию или купить его в составе последней версии Office.





 menu is not the same as the Shape Effects
  menu. If you don’t see Transform at the bottom of the menu, make sure you’ve clicked the Text Effects menu.


 .
. , and then click Clear WordArt.






 и Эффекты фигуры
  — это разные меню. Если внизу меню нет команды Преобразовать, убедитесь в том, что открыли именно меню Текстовые эффекты.


 .
. , а затем выберите Очистить WordArt.