
Create a basic word-processing document
- To open Pages, click the Pages icon in the Dock, Launchpad, or Application folder.
- Double-click one of the blank templates in the Basic category.
- Start typing.
- To save your document, choose File > Save.
Contents
- 1 How do you create a new Word document on a Mac?
- 2 What is the Mac version of Word?
- 3 Is there word document on Mac?
- 4 Does Mac have free word?
- 5 How do I get Word on my Mac?
- 6 How do I create a Microsoft Word document?
- 7 How do I convert Mac Pages to word?
- 8 Is Microsoft 365 free for Mac?
- 9 How do I create a fillable form in Word for Mac?
- 10 How can I create a Word document online for free?
- 11 How do I create a fillable form in Word for Mac 2020?
- 12 How do I make a Mac Pages document into a PDF?
- 13 How do I convert pages to Word without formatting?
- 14 How do I save a Pages document as word?
- 15 How much does Microsoft Office for Mac cost?
- 16 How do I make a fillable document on a Mac?
- 17 How do I turn a Word document into a fillable form?
- 18 How do I create a fillable Letter in Word?
- 19 Is Microsoft Word online free?
- 20 Is there a free version of Word?
How do you create a new Word document on a Mac?
On your Mac, open an app that lets you create documents. For example, open TextEdit to create a plain text, rich text, or HTML document. Click New Document in the Open dialog, or choose File > New.
What is the Mac version of Word?
Every Mac comes with Apple’s iWork apps: Pages (word processor), Numbers (spreadsheet), and Keynote (presentations).
Is there word document on Mac?
Fun fact: There’s a version of Microsoft Office written just for Mac. So you can use Word, Excel, and PowerPoint on a Mac just like on a PC. macOS also provides built-in support for the latest version of Microsoft Exchange Server.
Does Mac have free word?
Is Microsoft Word for Mac free? No.All you need is a free Microsoft account. The catch is that the MS Word online version is not as advanced as its desktop counterpart, but it’s still good enough for all the basic work with documents and for writing something on your own.
How do I get Word on my Mac?
Use TextEdit to open Word documents on your Apple computer.
- Press “Command-Shift-A” from your Mac’s desktop to open your applications list.
- Double-click “TextEdit” to open the program.
- Click “File.” A drop-down menu opens.
- Click “Open.” An “Open” window appears where you can select a document.
How do I create a Microsoft Word document?
Create a document
- Open Word. Or, if Word is already open, select File > New.
- In the Search for online templates box, enter a search word like letter, resume, or invoice. Or, select a category under the search box like Business, Personal, or Education.
- Click a template to see a preview.
- Select Create.
How do I convert Mac Pages to word?
How to Convert Apple Pages to Word Documents on a Mac
- Open the Pages app on Mac.
- Open the Pages document you want to convert.
- Click File on the menu at the top.
- Click Export to.
- Select Word.
- If you want to, you can add a password.
Is Microsoft 365 free for Mac?
For Apple enthusiasts who want to use Microsoft’s Office software on a Mac, iPad, or iPhone, you can easily download the full Office 365 bundle, or any of its individual apps, from the Mac App Store.There is a free one-month trial for Office 365, after which the subscription is $69.99 a year, or $6.99 a month.
How do I create a fillable form in Word for Mac?
To do this, click on “File” tab > “Options” > “Customize Ribbon”. Then under the “Customize Ribbon”, select the “Developer” checkbox and click “OK”. Step 2: Open a Word document and you will be able to make the Word document fillable.
How can I create a Word document online for free?
Go to office.com/login and select Word.
With Word for the web running in your web browser, you can:
- Create documents to add and format text, images, and page layouts.
- Get to your documents from your computer, tablet, or phone.
- Share and work with others, wherever they are.
How do I create a fillable form in Word for Mac 2020?
Click “Text Box”, “Check Box”, or “Combo Box” in the Developer tab. This will insert a blank fillable field into your document. The Combo Box option creates something like a drop-down menu. Click the Options icon next to the Combo Box icon to access options to turn your combo box into a drop-down menu.
How do I make a Mac Pages document into a PDF?
How to convert Pages to PDF on a Mac
- Open the Pages document you want to convert.
- Click on File from the menu bar.
- Scroll down and click on “Export to.” This will bring up the export dropdown menu.
- In the “Export to” dropdown menu, scroll to and click on PDF.
- Next you will get the PDF menu, asking about image quality.
How do I convert pages to Word without formatting?
Export a large, complex Pages document into Word without crashing/freezing
- Export using the .docx format.
- Export using .doc format.
- Export using RTF format.
- Export using Plain Text format.
- Copy the entire document & paste into a new Word document.
- Copy the entire document & paste into TextEdit, then Save As using either;
How do I save a Pages document as word?
Exporting a Pages File as Word Format from the Mac with Pages App
- Open the Pages file you want to convert / save to Word format into the Pages app for Mac OS X.
- Go to the “File” menu and choose “Export To”, then select “Word” from the submenu list.
How much does Microsoft Office for Mac cost?
Read about Microsoft Office for Mac 2021 in our guide. The latest version of Office for Mac for home users is Office Home & Student 2021 (£119.99/US$149.99). It includes Word, Excel, PowerPoint.
How do I make a fillable document on a Mac?
So here are some tips on how to create a fillable PDF on a Mac.
Transform your document into a fillable form.
- Open the application, click the Tools tab, and select Prepare Form.
- Upload your document.
- Add form fields where appropriate.
- Save and download your form as a PDF.
How do I turn a Word document into a fillable form?
Creating Fillable Forms Using Microsoft Word
- Enable Developer Tab. Open Microsoft Word, then go to the File Tab > Options > Customize Ribbon > check the Developer Tab in the right column > Click OK.
- Insert a Control.
- Edit Filler Text.
- Design Mode button again to exit the mode.
- Customize Content Controls.
How do I create a fillable Letter in Word?
Create a Form
- Place the text cursor where you want to insert the form field.
- Click the Developer tab on the ribbon.
- Click the Design Mode button in the controls group.
- Click a Content Control buttons to insert the selected type of control.
- When you’re done, click the Design Mode button again to exit Design Mode.
Is Microsoft Word online free?
Office online is a free version of Office 365.The Office 365 Mobile Apps include versions of Word, Excel, PowerPoint, OneNote, and Outlook for the iOS and Android platforms. To use these Office 365 mobile apps, you’ll need to have a paid Office 365 subscription.
Is there a free version of Word?
Using Microsoft Word on a smartphone or a tablet might not be your first choice, but it’s possible and it’s also free. Previously, Microsoft had a standalone Word app for both iOS and Android, but it has now merged Word with Excel and Powerpoint on mobile in the single Microsoft Office application.
12 января 202212 января 2022
Если вы перешли с компьютера с Windows на Mac, то вам предстоит многому учиться заново. Например, создавать текстовые документы прямо в папках. На ПК с Windows для этого достаточно правого клика. Как это делается на Mac – расскажем ниже.

Есть несколько способов создать текстовый файл в папке на Mac, и ниже мы о них расскажем.
С помощью Automator
Automator – полезная программа, которая позволяет настроить автоматизацию своего устройства. Мы будем создавать быстрое действие, которое можно будет запускать через Finder. Вы сможете в любой момент создать текстовый документ в любой папке.
- Откройте программу Automator на Mac и начните создавать новое быстрое действие.

- Через поиск найдите пункт «Запустить AppleScript» и перетяните его на правую часть окна. Затем добавьте следующий сценарий:
tell application "Finder" to make new file at (the target of the front window) as alias

- Сохраните действие с названием, вроде «Создать новый текстовый файл».
- Теперь в Finder на Mac выберите папку, в которой хотите создать текстовый документ. В строке меню выберите Finder > «Службы» > «Создать новый текстовый файл».

- Будет создан пустой текстовый файл.

Вы можете пользоваться созданным быстрым действием в любых папках Finder. Этот способ больше всего похож на способ Windows.
С помощью TextEdit
Программа TextEdit на Mac – как WordPad в Windows. С её помощью тоже можно легко создавать текстовые документы.
- Откройте программу TextEdit на Mac.
- В строке меню выберите «Файл» > «Новый».
- Сохраните созданный документ, выбрав в строке меню «Файл» > «Сохранить».
- Выберите место сохранения документа.
Через «Терминал»
- Откройте программу «Терминал» на Mac.
- Используйте следующую команду, добавив место сохранения:
touch text.txt
- К примеру, если вы хотите создать документ на рабочем столе, команда будет выглядеть так:
touch ~/Desktop/text.txt
Содержание
- 1 Как открыть Word на Mac OS?
- 2 Как на маке сделать Вордовский документ?
- 3 Как набрать текст на Маке?
- 4 Как создать новый файл в Mac OS?
- 5 Можно ли скачать ворд на макбук?
- 6 Как открыть файл XLSX на Маке?
- 7 Как открыть документ на Маке?
- 8 Как редактировать PDF файлы на Mac?
- 9 Сколько стоит Word для Mac?
- 10 Как печатать документы на Маке?
- 11 Как сохранить файл на маке?
- 12 Как создать HTML файл на мак?
- 13 Как установить офис на мак?
- 14 Как поменять раскладку клавиатуры на Маке?
Документы, созданные в Microsoft Office, можно открывать в приложениях Pages, Numbers и Keynote на Mac. Документы Microsoft Word можно открывать в приложении Pages . Документы Microsoft Excel можно открывать в приложении Numbers .
Как на маке сделать Вордовский документ?
Включение режима совместимости
- Откройте новый документ.
- В меню Файл выберите команду Сохранить как.
- В поле Сохранить как введите имя документа.
- Во всплывающем меню Формат выберите Документ Word 97-2004 (. doc), а затем нажмите кнопку Сохранить. [Режим совместимости] отобразится в строке заголовка после имени документа.
Как набрать текст на Маке?
Напечатать документ
- Откройте документ, затем выберите «Файл» > «Напечатать» (меню «Файл» расположено в верхней части экрана).
- Нажмите всплывающее меню «Принтер» и выберите принтер. …
- Задайте параметры печати. …
- Нажмите «Напечатать».
Как создать новый файл в Mac OS?
Создание нового документа Чтобы открыть Pages, нажмите значок Pages в Dock, Launchpad или папке «Программы». Если окно выбора шаблона (показано ниже) не отображается, выберите «Файл» > «Новый» при нажатой клавише Option (в строке «Файл» у верхнего края экрана), чтобы открыть это окно.
Можно ли скачать ворд на макбук?
Любопытный факт: существует версия Microsoft Office, разработанная специально для Mac. Вы можете использовать Word, Excel и PowerPoint на Mac — точно так же, как на PC. Кроме того, macOS поддерживает новейшую версию Microsoft Exchange Server.
Как открыть файл XLSX на Маке?
xlsx на Mac с помощью Google Диска и Google Sheets:
- Откройте веб-браузер, перейдите на сайт Google Диска и войдите в систему, используя свою учетную запись Google, если это будет предложено.
- Перетащите файл . …
- После загрузки щелкните правой кнопкой мыши файл и выберите Открыть с помощью> Google Sheets.
Как открыть документ на Маке?
Откройте документ на Mac. Для документа Pages дважды нажмите имя или миниатюру документа либо перетяните документ на значок Pages в Dock или в папку «Программы». Для документа Word перетяните документ на значок Pages (двойное нажатие открывает приложение Word, если оно установлено).
Как редактировать PDF файлы на Mac?
Разметка файлов PDF
- Нажмите кнопку «Текст» на панели инструментов разметки или выберите в меню команды «Инструменты» > «Добавить пометку» > «Текст».
- Чтобы отобразить шрифт, размер и цвет текста в текстовом блоке, нажмите кнопку «Стиль текста» на панели инструментов разметки.
- Чтобы переместить текстовый блок, перетяните его.
Сколько стоит Word для Mac?
Microsoft Office для дома и учёбы 2019 (1 Mac) 6 699.00 pyб.
Как печатать документы на Маке?
Печать документов с компьютера Mac
- Когда на Mac открыт документ, выберите пункт меню «Файл» > «Напечатать» или нажмите сочетание клавиш Command-P. …
- Если Вас устраивают текущие настройки в диалоговом окне «Печать», достаточно просто нажать кнопку «Печать».
Как сохранить файл на маке?
Сохранение копии документа
- Когда документ открыт, удерживайте клавишу Option на клавиатуре и выберите «Файл» > «Сохранить как» (меню «Файл» расположено у верхнего края экрана).
- Введите имя копии, затем нажмите клавишу Return.
Как создать HTML файл на мак?
Создать HTML-файл в TextEdit
- Откройте приложение TextEdit на вашем Mac. Выберите Файл> Новый в строке меню.
- Выберите Формат в строке меню и нажмите Сделать обычный текст . Подтвердите выбор обычного текста в открывшемся окне, нажав ОК.
- Введите код HTML. Например:
- Нажмите Файл > Сохранить . …
- Нажмите Сохранить .
Как установить офис на мак?
Как установить Microsoft Office на Mac
- 1) Первое, что нужно сделать — это скачать сам Microsoft Office. Скачать можете кликнув на эту ссылку.
- 2) У Вас скачается дистрибутив формата . pkg, кликнув два раза курсором на файл начните установку. …
- 3) После установки все приложения от Microsoft Office можете найти в меню «Launchpad».
Как поменять раскладку клавиатуры на Маке?
Как изменить раскладку клавиатуры на «Android»? Вариант 2: Для смены нужно нажать на пробел и провести в любую сторону. Если язык так и не поменялся, зайдите в настройки клавиатуры и добавьте второй язык. Рекомендую использовать клавиатуру от Google – GBoard.

Click on the Word app, or an alias (in Dock or anywhere) Word opens to the Project Gallery. Word Document should be highlighted in the ‘New’ panel. If not, get there and click it. New Channel: Mac Office: How to Use Microsoft Word — The Basics, Tricks and Tips 2017 — How to Use Apple Ma.
- How To Create A New Word File On Mac Download
- How To Create A New Word File On Mac Free
In this article, you will learn 4 effective ways to recover unsaved, lost and deleted Word document on Mac with detailed steps: [1]recover with AutoRecovery; [2]Recover from Temp folder; [3]Recover from Recovered item in Trash; [4]recover with Word file recovery software.
Accidentally closed Word without saving on Mac? Do you know how to recover unsaved Word documents on Mac? According to the unique features of Microsoft Word for Mac, you may find the unsaved item in the AutoRecovery folder, Temporary folder or Recovered item in Trash. Besides, if you unintentionally lost, deleted or formatted your Word document, you can recover a Word document on Mac with EaseUS Word file recovery software.
| Workable Solutions | Step-by-step Troubleshooting |
|---|---|
| Recover Unsaved Word Document |
#1. Recover from the AutoRecovery folder.Full steps |
| Recover Deleted Word Document | #4. Recover with Word file recovery software.Full steps |
How to Recover Unsaved Word Document on Mac
Embedded with more useful features in certain collaborative situations than Pages, Microsoft Word becomes increasingly popular among Mac computers. Office 365 even allows users to create Word files on their Mac. On one hand, Microsoft Word offers standard DOC or DOCX file formats that are compatible in almost every OS platform; On the other hand, Word 2021, 2020, 2019, 2018.2011 is featured with auto-saving, which enables us to recover a Word document before we could hit Save.

Based on the features of Microsoft Word for Mac, there are three potential ways to recover your unsaved Word documents. These methods can also be applied to recover unsaved Excel files on your Mac.
#1. Recover Unsaved Word Docs on Mac with AutoRecovery
The Word for Mac includes an AutoRecovery option. It is turned on by default. The app will automatically save a copy of an open Word file every 10 minutes. If Word freezes while you’re working on a document, or if the computer crashes, you can use the AutoRecovery copy to recover unsaved Word document with the changes or additions that you made in your last Word for Mac session.
Guide: How to recover an unsaved Word document
Unlike recovering unsaved Word document in Windows, the file recovery on Mac from the AutoRecovery folder is different.
Step 1. Open ‘Finder’ on your Mac, then head to ‘Go’ > ‘Go to Folder’.
Step 2. Type: ~/Library/Containers/com.microsoft.Word/Data/Library/Preferences/AutoRecovery and click ‘Go’.
Step 3. Open the AutoRecovery folder, locate all the files that start with the words ‘AutoRecovery save of’. Select the one you want to recover, rename the file, then add the ‘.doc’ filename extension.
Step 4. Double-click the file. The document now opens in Word for Mac.
Step 5. Click the File menu and select ‘Save As’. Type a new name for the file into the Name field, select a folder for the file and click the ‘Save’ button.
#2. Recover Unsaved Word Documents on Mac from TMP Folder
The Word for Mac saves a copy of the unsaved document named as Word Work File in the Temporary folder. Your Mac also temporarily keep files in this folder. Though for many Mac users, it’s not easy to find it.
Guide: How to recover an unsaved Word document on Mac
Step 1. Go to ‘Applications’ > ‘Utilities’ and double-click ‘Terminal’.
Step 2. In Terminal, enter open $TMPDIR and you will be directed to the TMP folder which is used to keep files temporarily.
Step 3. In the TMP folder, find and open the folder named ‘TemporaryItems’. In it, right-click the desired unsaved Word files and ‘Open with.’ Microsoft Word.
Step 4. Save the Word file by clicking on ‘File’ > ‘Save As’ and save it to another location.
#3. Recover Unsaved Word Document on Mac from Recovered Item
The Word for Mac temporarily saves documents that the user has not yet saved themselves in a folder named ‘Recovered items’, located in the Trash. If there are no recovered files, this folder will not appear.
Guide: How to find unsaved Word files on Mac
Step 1. Open ‘Trash’ by clicking its icon on the dock.
Step 2. Look for a folder labeled ‘Recovered items’ and click into it to look for your unsaved Word file. If you cannot find it, try the next solution.
#4. Recover Deleted Word Document with Word Recovery Software
The aforementioned three ways are exclusively for saving the file you’re currently working on but suddenly disappear before clicking the Save button. To be specific, the methods will only work for files that are in the process of being worked on when they disappeared. Hence, if you lost a Word doc that is already existed by deletion, disk formatting or losing its access, you need to turn to other ways to recover a Word document on Mac.
EaseUS Data Recovery Wizard for Mac is third-party specialized Mac data recovery software that can scour your hard drive, external hard drive, SD card, or USB flash drive to find all the lost data that vanishes without a trace on Mac OS X/macOS. It doesn’t matter whether you emptied the trash bin or not, the deleted file will show up after you use the program to scan your selected drive.
For the first attempt, we strongly recommend you download its free version. It won’t cost you a penny to search for your missing files. And since your problem is only for a few lost Word files, the 2GB recovery limit should be more than enough. The scan & recovery process is very simple, we’ll show you how it works.
Guide: How to recover a Word document on Mac
Step 1. Select the location where your important Word documents were lost and click Scan button.

Step 2. EaseUS Data Recovery Wizard for Mac will start immediately a quick scan as well as a deep scan on your selected disk volume. Meanwhile, the scanning results will be presented in the left pane.
Step 3. By Path and Type, you can quickly filter the Word files you’ve lost earlier. Select the target files and click Recover Now button to get them back at once.
How to Increase the Chance of Unsaved Word Data Recovery
After suffering from the fear of losing your Word documents, you must not want to experience this kind of situation again. Thus, it’s necessary for you to know how to avoid losing your Word files. To avoid completely losing your files, you can:
Tip 1. Save the Word Document Whenever You Create a New One
An ever unsaved Word document exists in the computer’s RAM, not on the hard disk. Thus, the chances to save a Word Document that has never been saved before are slim. Knowing this should give you a hint that you should save the word document at least once whenever you create a new one.
Tip 2. Change the AutoSave Interval
After you save your Word document, the AutoSave feature will begin to work. To minimize the loss of the progress on the file you are working, you can change the frequency of AutoSave:
Step 1. Open Microsoft Word on your Mac.
Step 2. Go to ‘Word’ > ‘Preferences’ and click ‘Save’ under Output and Sharing.
Step 3. Check all the items under Save Options (Recommended) and change the interval of AutoSave, for example, from every 10 minutes to every 5 minutes.
If you follow the two tips above, you will substantially decrease the risk of losing your Word documents. What if you carelessly deleted your important Word files on your Mac? No worry. Try the free method to retrieve permanently deleted Word documents with EaseUS Data Recovery Wizard for Mac.
—>
Note
Effective November 2020:
- Common Data Service has been renamed to Microsoft Dataverse. Learn more
- Some terminology in Microsoft Dataverse has been updated. For example, entity is now table and field is now column. Learn more
This article will be updated soon to reflect the latest terminology.
After you create and import Office Word templates into customer engagement apps (Dynamics 365 Sales, Dynamics 365 Customer Service, Dynamics 365 Field Service, Dynamics 365 Marketing, and Dynamics 365 Project Service Automation), with one click users can generate standardized documents automatically populated with data. This feature has some special considerations you should know about to successfully create Word templates.
Tip
Check out the following video: Create documents directly from Dynamics CRM by using Word and Excel templates (2:38)
Warning
There is a known issue when creating templates in Word. This topic contains information on how to prevent interactions that could potentially destabilize Word. See: Important! A known issue and how to avoid it
The following are the supported versions of Word.
| Area | Word Version |
|---|---|
| Creating a Word template | 2013, 2016 |
| Using a Word document generated in customer engagement apps | 2010, 2013, 2016 |
Note
Macro-enabled Word documents (.docm) are not supported.
Follow the steps in this topic to successfully create and use Word templates in customer engagement apps.
Step 1: Create a Word template
Where you can create a template
There are three places in customer engagement apps where you can create a Word template:
-
From the Settings page. Go to Settings > Templates > Document Templates > New(). You’ll need sufficient permissions to access to the Settings page, such as System Administrator or System Customizer.
-
From a record. Open a record such as an account in Sales. Go to Sales > Client_Accounts > My Active Accounts. Click an account to open it, and then click More (…) > Word Templates > Create Word Template. Templates created here are personal and available only to the user creating the template.
-
From a list of records. For example, go to Sales > Client_Accounts > My Active Accounts. Select a single account, and then click More (…) > Word Templates > Create Word Template.
Tip
To delete personal document templates, do the following:
How To Create A New Word File On Mac Download
- Click Advanced Find ().
- For Look for, select Personal Document Templates.
- Click Results (!).
- Select the personal document template to delete and then click Delete ().
After clicking Create Word Template, select an entity to filter with, and then click Word Template > Select Entity.
The relationship selection page appears.
What are 1:N, N:1, and N:N relationships?
This screen requires an understanding of your customer engagement apps data structure. Your administrator or customizer can provide information about entity relationships. For admin content, see: Entity relationships overview.
Here are some example relationships for the Account entity.
| Relationship | Description |
|---|---|
| An account can have multiple contacts. | |
| A lead, account, or contact can have multiple accounts. | |
| An account can have multiple marketing lists. A marketing list can have multiple accounts. |
The relationships you select on this screen determine what entities and fields are available later when you define the Word template. Only select relationships you need to add data to the Word template.
Note
To ensure documents download in a timely matter, there is an upper limit of 100 for the number of related records returned for each relationship. For example, if you’re exporting a template for an account, and you want to include a list of its contacts, the document will return at most 100 of the account’s contacts.
Download the template
Click Download Template on the Select Entity page to create a Word file on your local computer with the exported entity included as XML data.
Important
Document template downloaded from one environment can only be used within that environment. environment to environment migration for Word or Excel templates isn’t currently supported.
Step 2: Enable the Developer tab
Open the Word template file. At this point, the document appears to be blank.
To see and add customer engagement apps XML data, you need to enable the Word Developer tab.
-
Go to File > Options > Customize Ribbon, and then enable Developer.
-
Click OK.
Developer now appears in the Word ribbon.
Important! A known issue and how to avoid it
There’s a known issue with customer engagement apps apps-generated Word templates and Office Word. In the next section, you’ll be adding XML content control fields to the Word template.
Warning
A few things can cause Word to freeze, requiring you to use Task Manager to stop Word:
- You insert a content control other than Picture or Plain Text.
- You make a textual change, such as changing the capitalization or adding text, to a content control. These changes can occur through AutoCorrect as well as user edits. By default, Microsoft Word AutoCorrect capitalizes sentences. When you add a content control field, Word sees it as a new sentence and will capitalize it when focus shifts away from the field.
To prevent issues with control fields, do the following:
Only add fields as Plain Text or Picture
-
You use the XML Mapping Pane to add entity fields to your Word template. Be sure to only add fields as Plain Text or Picture.
Do not make any textual changes to the added content control
-
You can make formatting changes to content control fields, such as bolding the text, but no other textual changes, including capitalization changes.
Little snitch 4.4.3 for macos. If you experience Word freezing or performance degradation, try turning off AutoCorrect.
Turn off AutoCorrect
-
With the template file open in Word, go to File > Options > Proofing > AutoCorrect Options.
-
Deselect Capitalize first letter of sentences and Automatically use suggestions from the spelling checker.
-
Deselect Hyphens (—) with dash (-) on the AutoFormat and AutoFormat as You Type tabs.
-
Click OK.
If you followed the above recommendations, you’re ready to define the Word template.
Step 3: Define the Word template
Use the XML Mapping Pane to define the Word template with entity fields.
-
In your Word template, click Developer > XML Mapping Pane.
The default XML schema is selected.
-
Select the XML schema. It will begin with ‘urn:microsoft-crm/document-template/’. Edit a jpg on mac.
Important
If you have frequent accidental edits that cause Word to freeze or have performance degradation, be sure to turn off the AutoCorrect options according to the section: ‘A known issue and how to avoid it’.
-
Expand the entity, right-click the entity field, and then click Insert Content Control > Plain Text.
The entity field is added to the Word template.
Add additional entity fields, add descriptive labels and text, and format the document.
A completed template might look like this:
Adobe pdf reader download for windows 10 free. Some content control fields you entered likely have multiple lines of data. For example, accounts have more than one contact. https://bestzfil656.weebly.com/m4a-player.html. To include all the data in your Word template, set the content control field to repeat.
How To Create A New Word File On Mac Free
Set content control fields to repeat
-
Put fields with repeating data in a table row.
-
Select the entire table row in the template.
-
In the XML Mapping Pane, right-click the relationship containing the content control fields, and then click Repeating.
When you use the Word template in customer engagement apps to create a document, the table will populate with multiple rows of data.
When the template has the fields and formatting you want, save it and upload it into customer engagement apps.
Step 4: Upload the Word template back into customer engagement apps
When you have your Word template built the way you want, save it so you can upload it into customer engagement apps.
Access to the newly created Word template depends on how you uploaded it and to the access granted to the security role. Be sure to check out Use Security Roles to control access to templates.
Administrators can use the Settings page to upload the Word template into customer engagement apps. A template uploaded in Settings is available to all users in your organization.
For admins: Upload the Word template into customer engagement apps
-
Go to Settings > Templates > Document Templates.
-
Click Upload Template.
-
Drag the Word file in the dialog box or browse to the file.
-
Click Upload.
Non-admin users can upload a template for their own use from a list of records.
For non-admins or admins wanting to create a personal template: Upload the Word template into customer engagement apps
-
Open a page with a list of records, for example, the list of customer accounts in Sales.
-
Select a single item such as an account, click More (…) > Word Templates > Create Word Template.
-
Click Word Template > Upload.
-
Drag the Word file in the dialog box or browse to the file.
-
Click Upload.
Step 5: Generate a document from the Word template
To use the Word template you’ve created, do the following:
-
Open a record with information you want to create a document. For example, open a customer account record in Sales.
-
Click More (…) > Word Templates, and then under Word Templates select the template you created.
If the template you created is not visible, there are two possibilities:
-
Only templates built for the selected record type (entity) will be displayed. For example, if you open an opportunity record, you will not see a template you created with the Account entity.
-
You need to refresh customer engagement apps to see the template. Either refresh your browser or close and reopen customer engagement apps.
After you select your Word template, customer engagement apps create a Word document from the record you selected.
-
Try out the sample Word templates
There are five Word templates included with customer engagement apps.
The sample Word templates were created with a particular record type (entity). You’ll only be able to apply the template to records of the same record type.
| Name | Entity |
|---|---|
| Opportunity Summary | Opportunity (Sales area) |
| Campaign Summary | Campaign (Marketing area) |
| Case Summary | Case (Service area) |
| Invoice | Invoice (Sales area) |
| Account Summary | Client_Account (Sales, Service, and Marketing areas) |
To apply a sample Word template
-
Open a record with information with the entity type that matches the sample template. For example, open a customer account record in Sales to apply the Account Summary template.
-
Click More (…) > Word Templates, and then under Word Templates select the sample template.
Open the newly-created Word template and give it a look.
Note
You can review but not edit templates that are included in customer engagement apps.
Additional considerations
Use Security Roles to control access to templates
Administrators can control access to Word templates with some granularity. For example, you can give salespeople Read but not Write access to a Word template.
-
Click Settings > Security > Security Roles.
-
Select a role, and then click the Business Management tab.
-
Select Document Template to set access for templates available to the entire organization. Select Personal Document Template for templates shared to individual users.
-
Click the circles to adjust the level of access.
Lists in created documents are not in the same order as records
Lists of records created from a custom template may not appear in the same order in Word documents as the order in customer engagement apps. Records are listed in the order of the time and date they were created.
See also
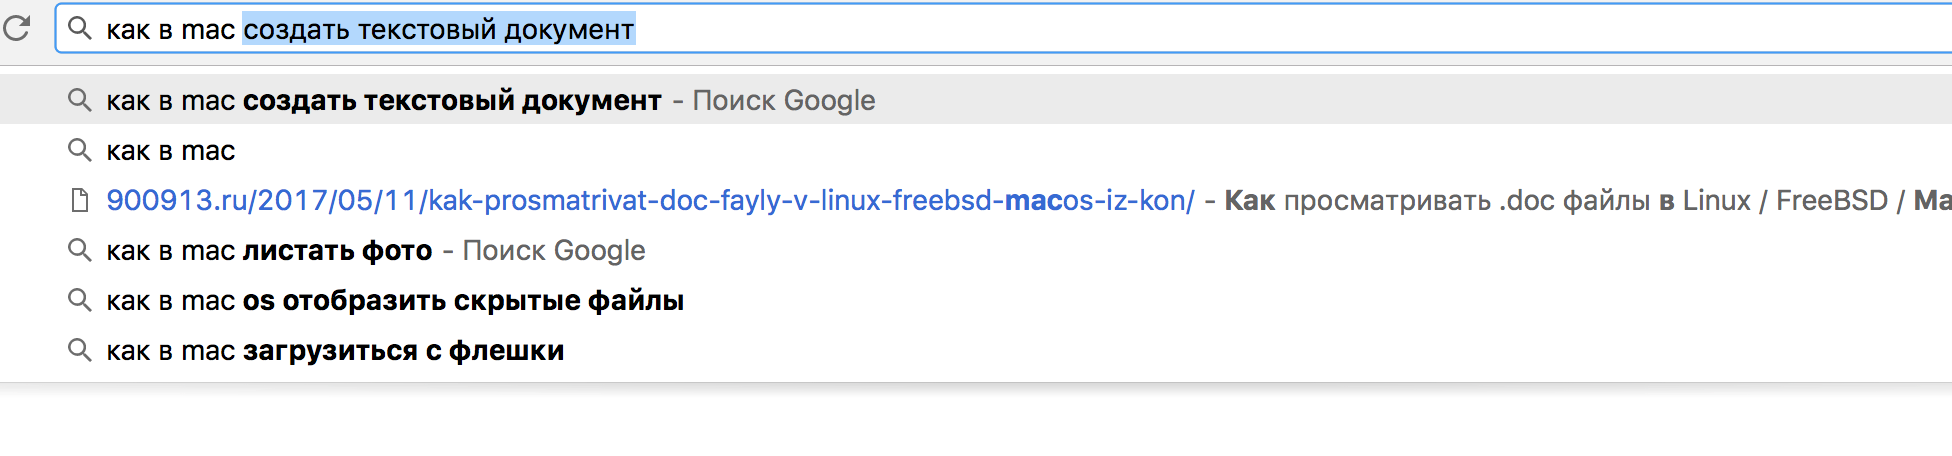
Иной раз интересно узнать, что интересно другим. Звучит как ерунда, но часто сложно понять, чем живут другие люди. Все мы имеем разные знания, но я не ожидал такого. Я набрал в поисковой строке «как в mac os»…
 Да ладно! Признаться, одной из самых сложных вещей при освоении мака для меня стали скриншоты. Да, мне сложно запомнить cmd+shift+4 для того, что я когда-то делал одной клавишей. Возможно, причина тому — отсутствие необходимости у большей массы людей делать снимки экрана.
А вот создание текстового файла для меня вполне обычно:
- открываем терминал,
- с помощью cd переходим в нужную директорию;
$ touch some_text_file.txt
Опять же, скорее всего вы хотели бы не просто создать, а отредактировать файл… Мой вариант:
$ vim /Users/Gosha/Documents/new_note.txt
Но я бы рекомендовал поставить Midnight Commander:
$ brew install mc
И использовать mcedit:
$ mcedit /Users/Gosha/Documents/new_note.txt
В чём разница? Если этот вопрос возник — берите mcedit — в будущем напишу заметку про vim.
Окей, свой вариант я рассказал. Теперь вернёмся с «человеческим». Я почти уверен, что вся проблема сконцентрирована в том, что ребята из Apple решили, что эта функция не нужна в графическом интерфейсе…
 Действительно, зачем это пользователю?.. Чтобы делать заметки? Пффф! Ерунда! Есть же стикеры, заметки, ежедневник… Но кто-то думает, вглядываясь в чистоту «Новый файл.txt»…
Ну что же, я принимаю вызов, MacOS! Я найду способ создать txt файл из графического интерфейса!
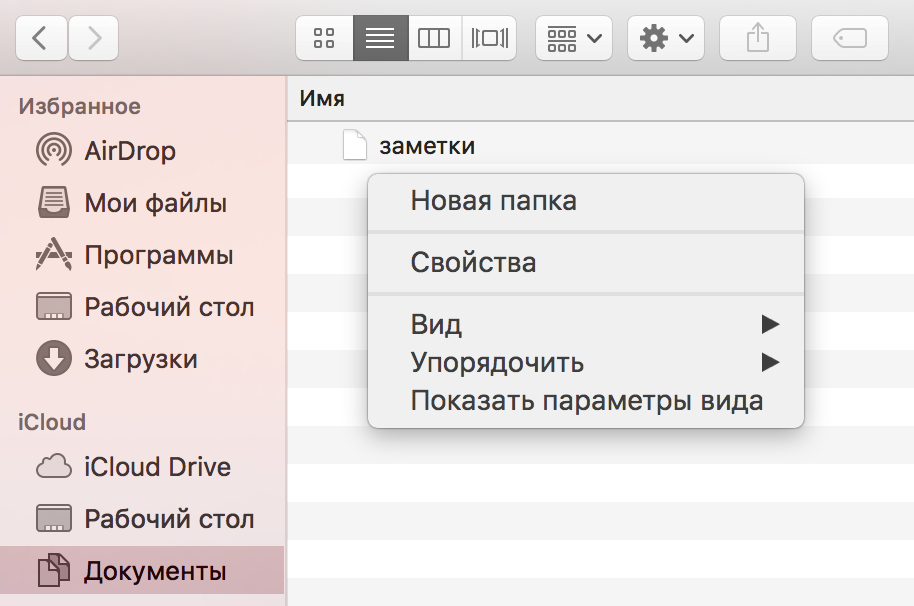
Поблуждав в Finder некоторое время, я понял, что создать файл просто тут нельзя. Это такая программа, которая создаёт папки, изменяет папки, просматривает папки и удаляет папки и файлы…
Но решение было рядом: в одной из папок я нашёл установленные программы:
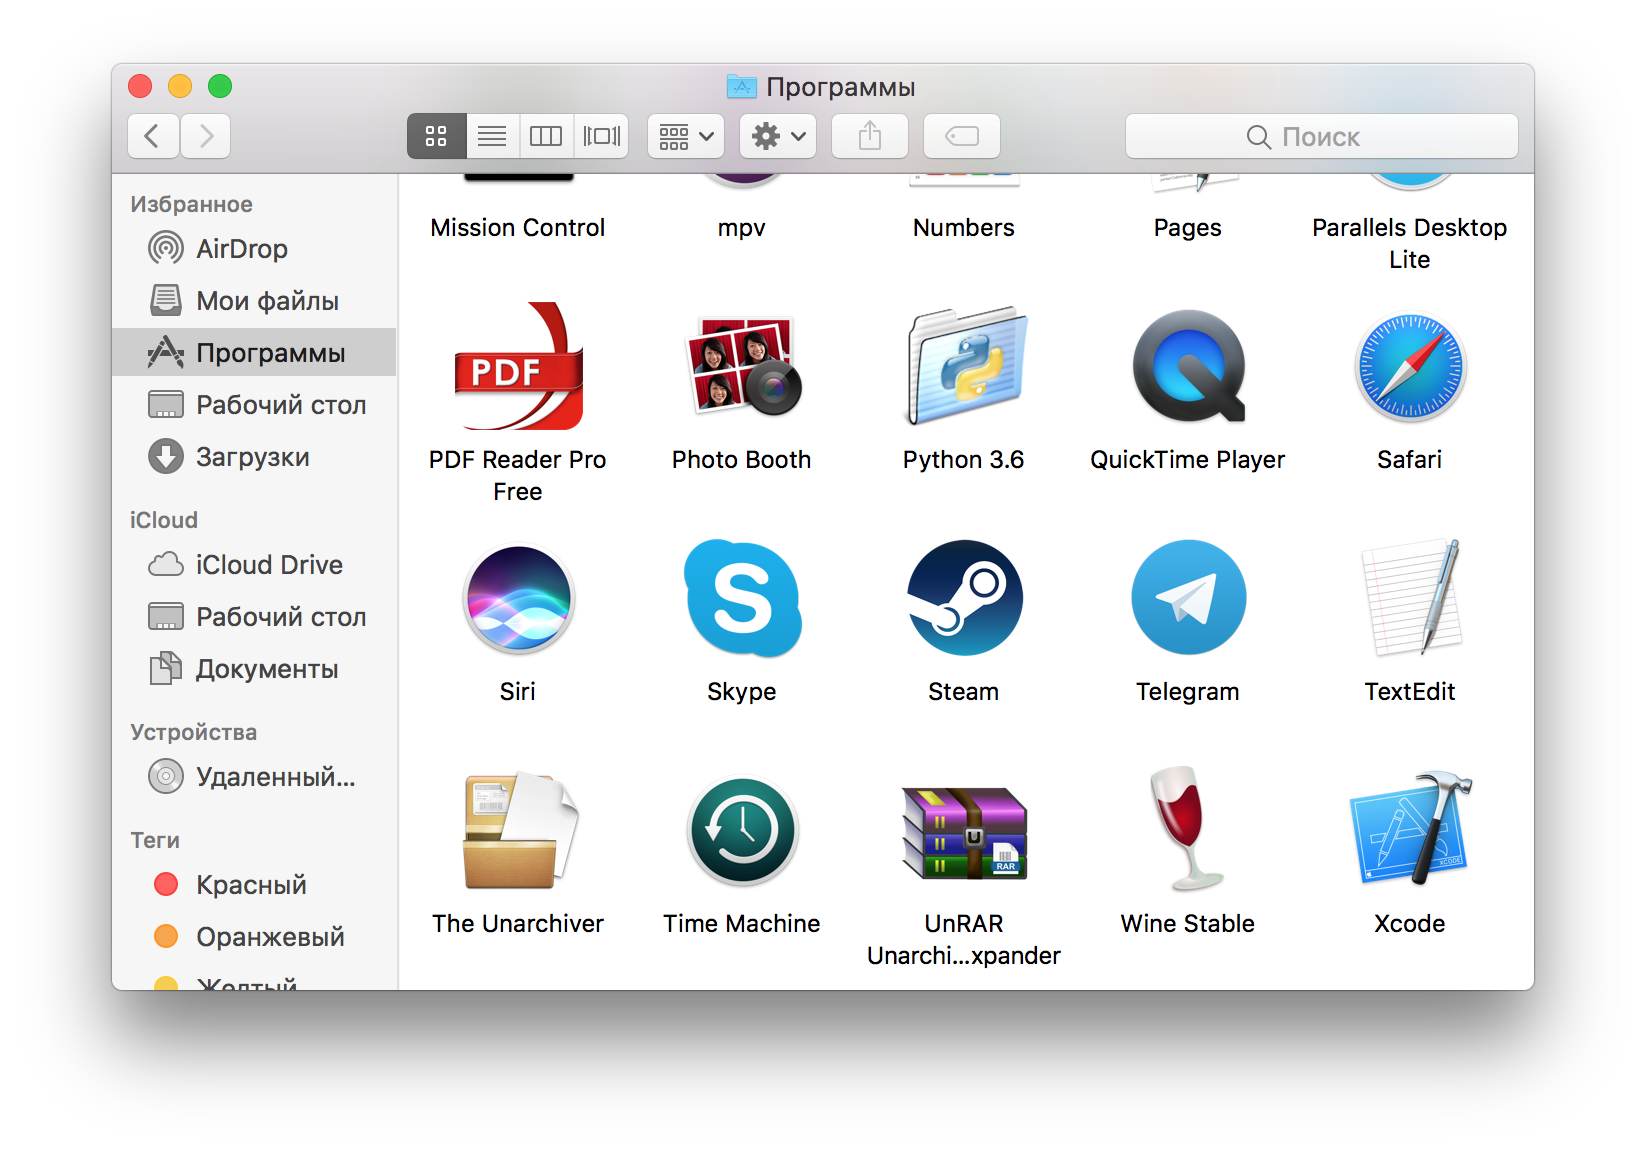 Среди прочих я увидел программу TextEdit. Её логотип сильно напоминает логотип текстового редактора gEdit — в Linux он мне частенько помогал на начальных этапах.
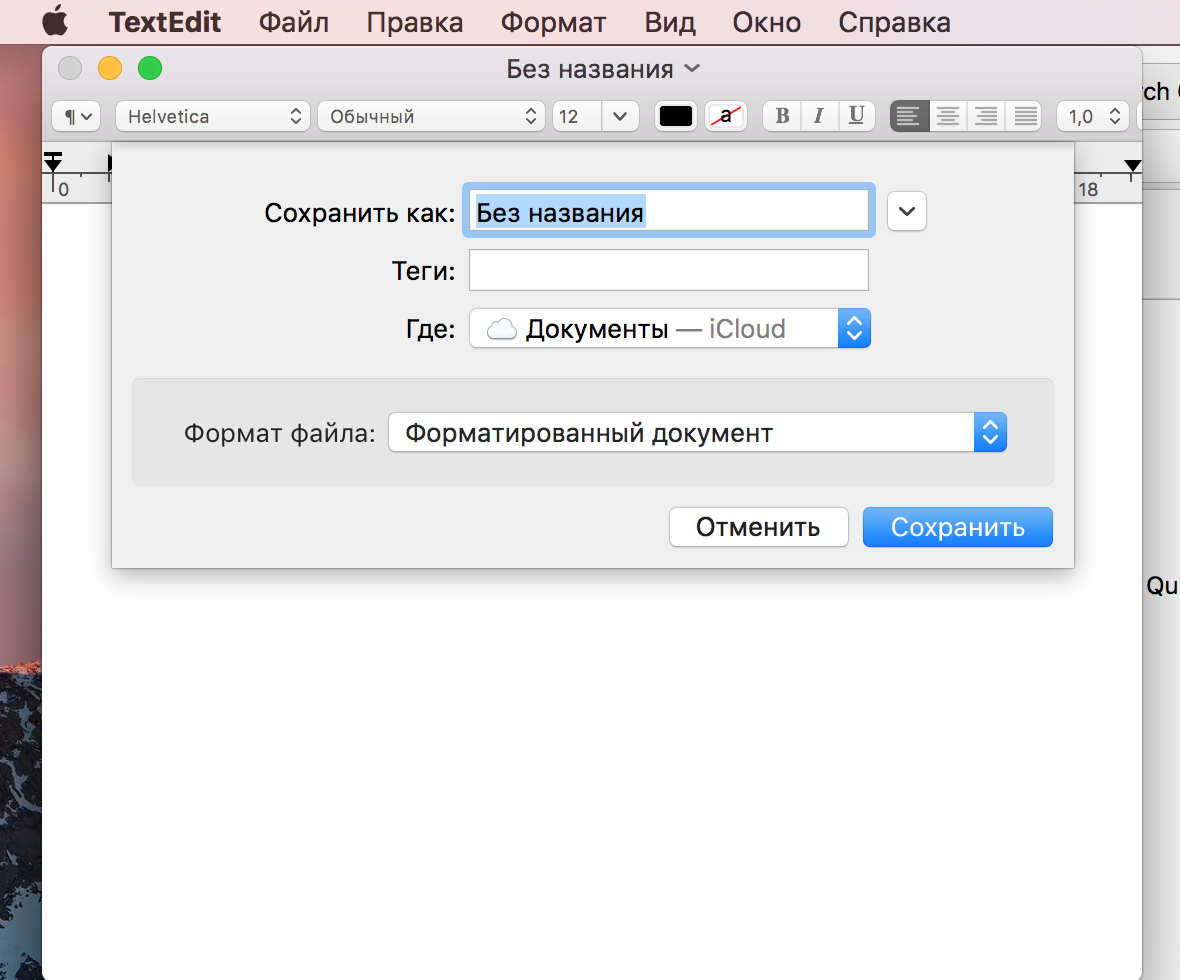
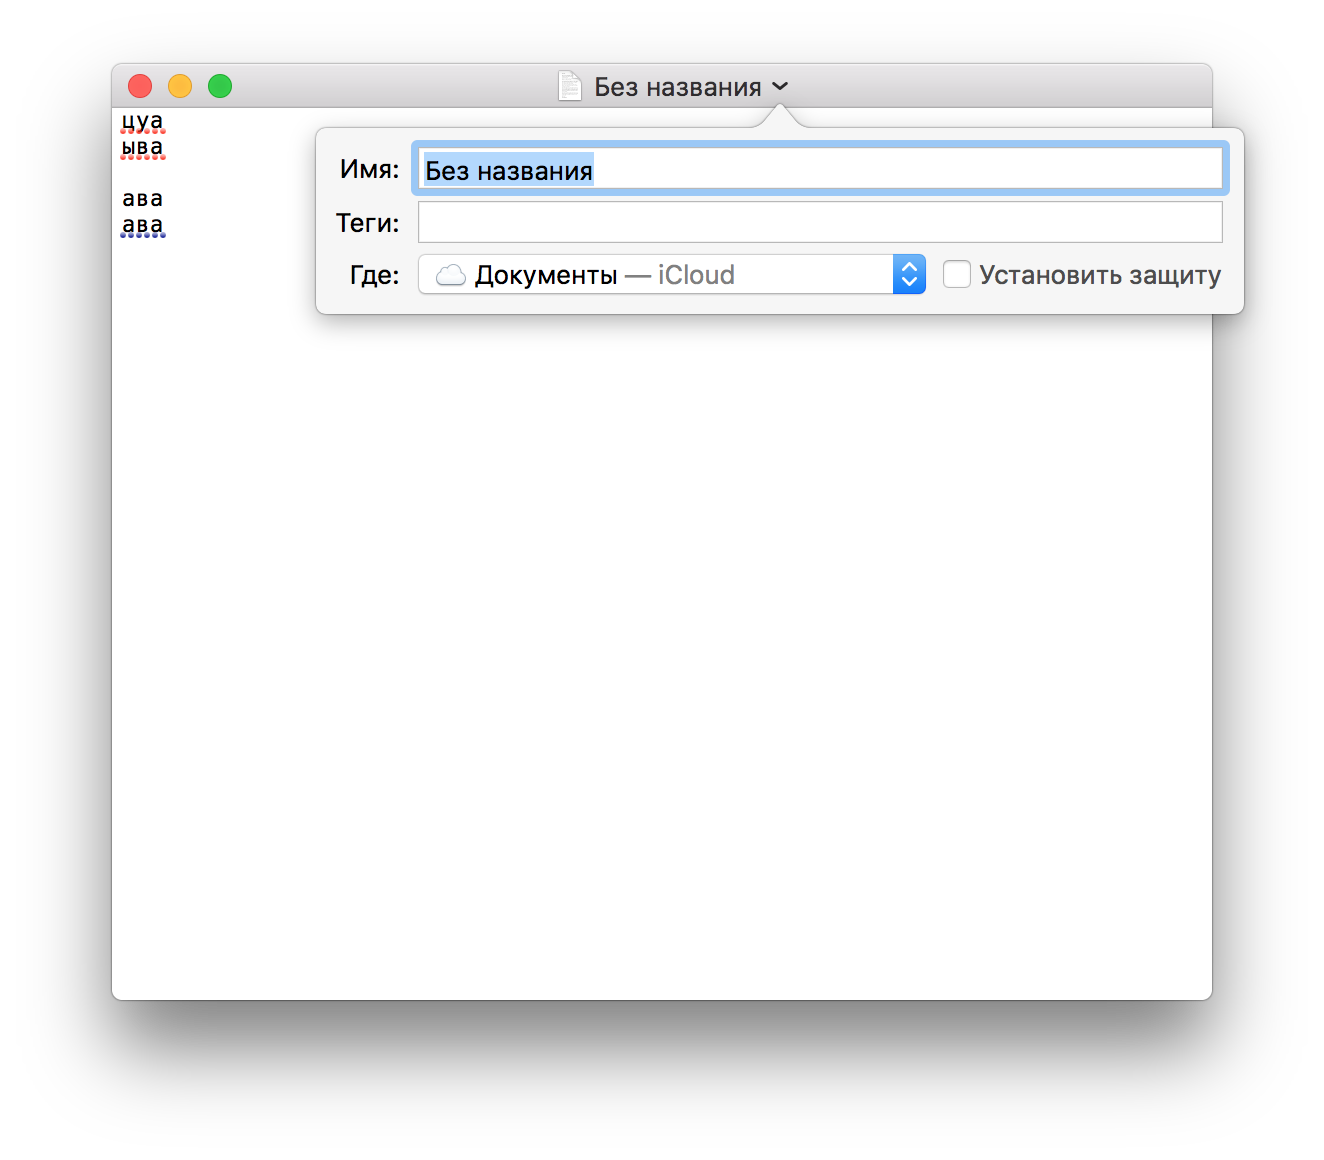
Открыв его, я обнаружил слегка непонятный интерфейс. Выглядит он как Rich Text Editor, идущий в комплекте Microsoft Windows. Но сделаем скидку на странный вид — всё же в меню «Файл» у нас появилась возможность сохранить!
Однако, посмотрим, что мы получили в итоге:
$ cat Без названия.rtf
{rtf1ansiansicpg1251cocoartf1504cocoasubrtf830
{fonttblf0fswissfcharset0 Helvetica;}
{colortbl;red255green255blue255;}
{*expandedcolortbl;;}
paperw11900paperh16840margl1440margr1440vieww10800viewh8400viewkind0
pardtx566tx1133tx1700tx2267tx2834tx3401tx3968tx4535tx5102tx5669tx6236tx6803pardirnaturalpartightenfactor0

f0fs24 cf0 uc0u1094 u1091 u1072
uc0u1099 u1074 u1072

uc0u1072 u1074 u1072
uc0u1072 u1074 u1072 }
— тот самый rich text format! Всё же чувствуется связь с MS…
Однако, в меню «Формат» таки можно найти конвертацию в просто текстовый формат:
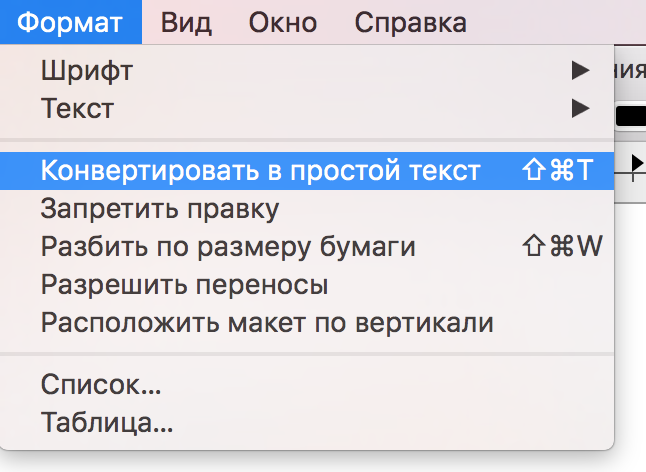
После чего имеем примерно следующее:
 В консоли также видим, что изменение произошло:
$ ls -la
total 32
drwx------@  6 Gosha  staff   204  7 июн 00:09 .
drwxr-xr-x+ 31 Gosha  staff  1054  6 июн 23:24 ..
-rw-r--r--@  1 Gosha  staff  6148  6 июн 23:42 .DS_Store
-rw-------   1 Gosha  staff     0 19 апр 17:34 .localized
-rw-r--r--@  1 Gosha  staff    28  7 июн 00:09 Без названия.txt
-rw-r--r--@  1 Gosha  staff   661 20 апр 22:39 заметки
$ cat Без названия.txt
цуа
ыва

ава
Что же, это была интересная загадка. Я бы даже сказал, «многоходовка». Но зачем Apple сделали так всё запутанно? Или может быть я напридумывал сложностей? В любом случае — было весело!🕹