
- Документы Word
- Создание файлов
- Работа с файлами

Макрос предназначен для программного создания документов Word на основе шаблона
(без использования функции слияния в Word)
В прикреплённом к статье архиве находятся 2 файла:
- шаблон договора в формате Microsoft Word (расширение .dot)
- файл Excel с макросом
Настройки макроса задаются в коде:
Const ИмяФайлаШаблона = «шаблон.dot»
Const КоличествоОбрабатываемыхСтолбцов = 8
Const РасширениеСоздаваемыхФайлов = «.doc»
При нажатии кнопки запуска макрос на основе шаблона dot создаёт очередной файл, и в этом документе производит замену текста («кода поля») из первой строки файла Excel на значение поля (из очередной строки с данными файла Excel)
Папка для сформированных документов создаётся автоматически, и содержит в имени текущую дату и время
(например, созданная папка будет называться Договоры, сформированные 01-05-2011 в 15-03-24)
Имена создаваемых файлов формируются объединением полей фамилия, имя и отчество, с добавлением расширения doc
PS: Макрос был написан достаточно давно, когда я только начинал изучать VBA, — так что код недостаточно универсален.
Но, в качестве примера, пожалуй, подойдёт (если вам нужен более функциональный макрос, воспользуйтесь универсальной надстройкой (см. ниже))
Ознакомьтесь также с универсальной надстройкой формирования документов по шаблонам,
которая может делать всё тоже самое, что и эта программа,
только в качестве шаблонов могут выступать, помимо документов Word, ещё текстовые файлы, и книги Excel.
В надстройке — много возможностей, и полезных дополнений: склонение ФИО в родительный и дательный падежи, автоматический вывод на печать (с заданным количеством копий), размещение созданных файлов в разных папках, создание и рассылка писем со вложениями, и множество других полезных функций.
По вышеприведённой ссылке программа заполнения документов Word из Excel доступна для бесплатного скачивания.
Внимание: просьбы о доработке макроса, описанного в этой статье, не принимаются.
Есть новая (универсальная) версия, — в которой уже есть практически всё, что может понадобиться.
- 196994 просмотра
Не получается применить макрос? Не удаётся изменить код под свои нужды?
Оформите заказ у нас на сайте, не забыв прикрепить примеры файлов, и описать, что и как должно работать.
See all How-To Articles
This tutorial demonstrates how to create a Word document from Excel or Google Sheets.
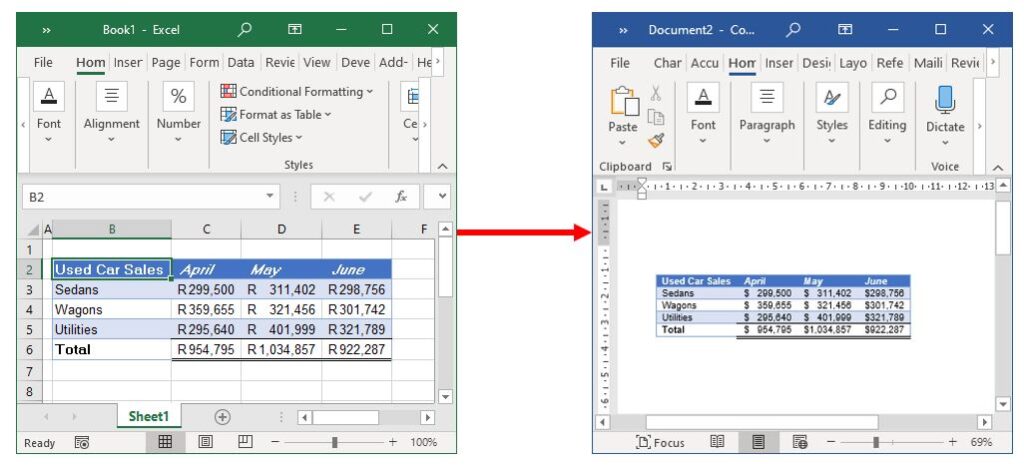
Link From Excel to Word Using Paste Options
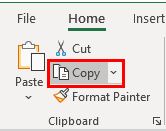
- In the Excel file, select the required data. Then in the Ribbon, select Home > Clipboard > Copy.
- Open Word and create a new document. In the Ribbon, select Home > Clipboard > Paste > Link and Keep Source Formatting.

The selected Excel data is pasted into Word.
Insert Excel Content as an Object Into Word
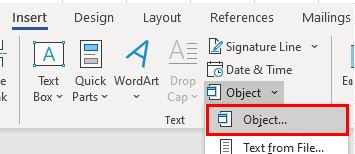
- With a Word document open, in the Ribbon, select Insert > Text > Object.
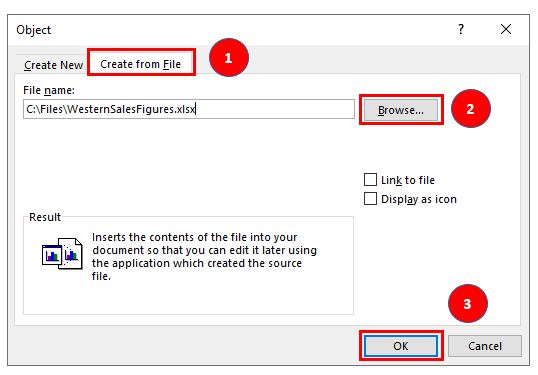
- Select the Create from File tab.
Then use the Browse… button to select the Excel file to be inserted into Word as an object.
Finally, click OK to insert the object into the Word document.
The file contents are inserted into Word.
Paste Unformatted Data From Excel to Word
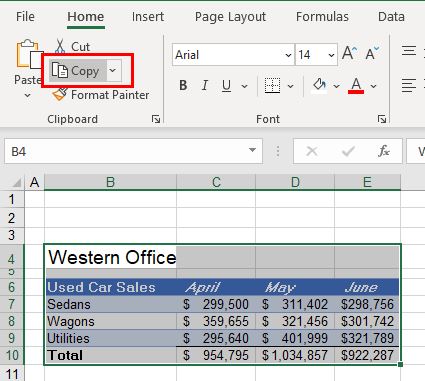
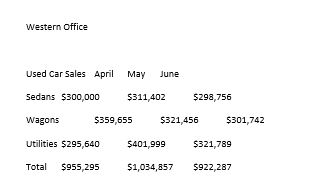
- In Excel, highlight the range of cells you need to copy to Word.
- In the Ribbon, select Home > Clipboard > Copy.
- Switch to an open Word document, or open Word and create a new document.
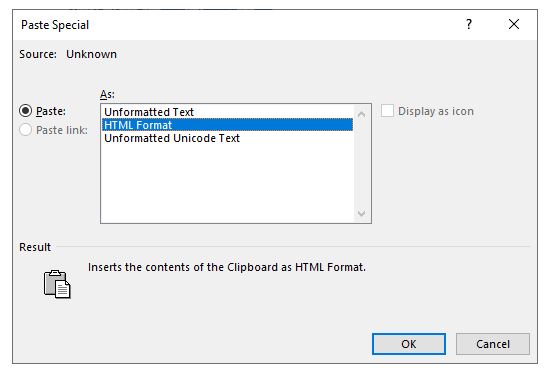
- In the Ribbon, select Home > Clipboard > Paste > Paste Special.
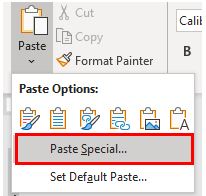
- Select Unformatted Unicode Text form the Paste option, and then click OK.
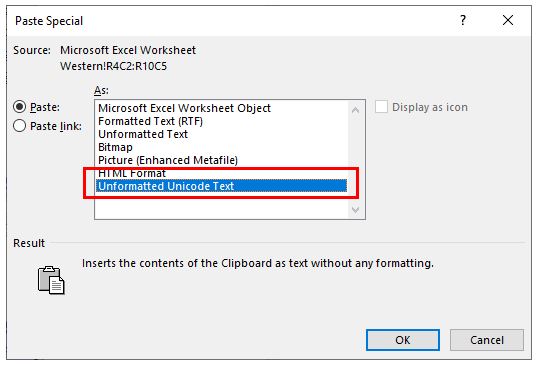
The data from Excel is pasted into Word as raw data (not in a table).
Create a Word Document From Google Sheets
You can copy and paste between a Google sheet and Word document the same way as in Excel.
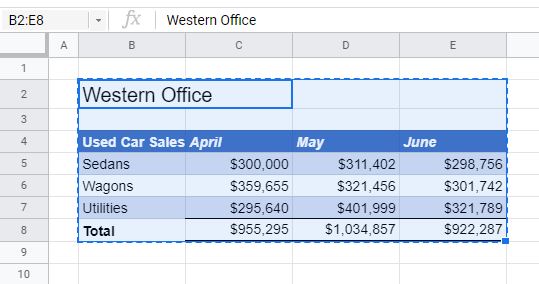
- Select the range of cells in the Google sheet and press CTRL + C to copy the range of cells.
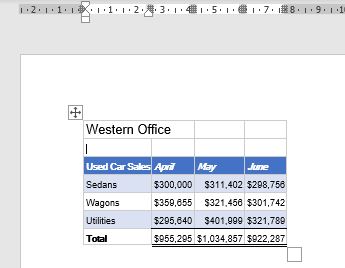
- Open Word and create a new document.
- In the Ribbon, select Home > Clipboard > Paste to paste the range of cells into Word as a table.
Alternatively, select Paste Special and select from the options that are provided.
![]()
Download Article
A simple guide to converting Microsoft Excel projects to Word projects
![]()
Download Article
- Inserting an Excel Chart into Word
- Embedding an Excel Worksheet
- Copying and Pasting Excel Data into Word
- Q&A
- Tips
|
|
|
|
Do you want to export an Excel document into a Microsoft Word document? While Excel can’t directly convert files into Word files, you can insert the Excel file as an Object in Word. You can also copy and paste Excel data into a Word document. After doing so, you can save the Word document. You can also copy and paste an entire Excel chart into Word. This wikiHow will show you how to insert Excel data into a Word document on your Windows or Mac computer.
Things You Should Know
- In Word, click the Insert tab, then Object. Click Create from File, locate your Excel project, then Insert.
- Copy Excel data with CTRL + C (Windows) or CMD + C (Mac). Paste it into a Word document using the Paste icon in the Home tab.
- Right-click an Excel chart, then click Copy. Paste it into a Word document using the Paste icon in the Home tab.
-

1
Open a project in Microsoft Excel. You can use an existing project or create a new one.
- Microsoft Excel is available on Windows and Mac. You can also use the online web version at the Microsoft 365 website.
-
2
Copy the Excel chart. Click the chart you want to copy, then press CTRL + C (Windows) or Command + C.
- You can also right-click the chart and click Copy.
Advertisement
-
3
Open Microsoft Word. You can use the web version of Word or the desktop application.
- You’ll need to open a new or existing project.
-
4
Click Paste. This is the clipboard icon in the Home tab. This will paste the Excel chart into Word.
- You can also move the cursor to the location you’d like your data, and then press CTRL + V (Windows) or Command + V (Mac). The chart will be pasted into Word.[1]
- To select different paste options, click the arrow underneath Paste.
- If you want to link to the original Excel chart so updates are reflected in the destination file, select Use Destination Theme & Link Data.
- If you want to embed the original chart to edit it in Word, select Use Designation Theme & Embed Workbook.
- If you want the chart to act as a picture element, select Picture.
- You can also move the cursor to the location you’d like your data, and then press CTRL + V (Windows) or Command + V (Mac). The chart will be pasted into Word.[1]
-
5
Edit your chart. Click your chart to open the Format Chart Area window on the right panel. You can adjust the Fill and Border.
- You can also click the chart to adjust the Layout Options, Chart Elements, Style, and Values.
-
6
Save your Word document. Click File in the top right corner, then Save As. Choose a name and save location for your document.


Advertisement
-
1
-
2
Place your cursor where you want the Excel data. You can move this around later, but be sure to enter your data in an empty space for easy editing.
-
3
Click Insert tab in the top toolbar. This is located between the Home and Draw tab.
-
4
Click Object. This will be in the Text section of the Insert tab. You can find this next to the Symbols section.
- The Object window will open.
-
5
Click Create from File. This allows you to embed an existing Excel file into your Word document.
- You can also choose Create New then select your Object type. This allows you to embed a new object where you can input data.
-
6
Click Browse. This will open the File Explorer (Windows) or the Finder (Mac). You’ll be able to browse your computer for your file.
-
7
Click your file and click Insert. You may have to search for your file depending on its location.
- The file name and path will be displayed in the File name field.
-
8
Click the box next to Link to file. This will embed the content of the file into your Word document and create a link to the original file. If the original Excel document is updated, the changes will transfer over to the data in your Word document.
- You can check the box next to Display as icon if you only want a quick link to your Excel document from Word. This will override Link to file.
-
9
Save your Word document. Click File in the top right corner, then Save As. Choose a name and save location for your document.
- Your Excel data will be embedded in your Word document. Since the data is linked, you can double-click the Excel chart to open the project in Excel or edit directly in Word.


Advertisement
-
1
-
2
Copy the Excel data. In Excel, click and drag to select the content you’d like to put in the Word document, and then press CTRL + C (Windows) or Command + C.[2]
- On Windows, press CTRL + A to select all the data in a chart, and then press CTRL + C to copy.
- On Mac, press CMD + A to select all the data in a chart, and then press Command +C to copy.
-
3
Open Microsoft Word. You can use the web version of Word or the desktop application.
- You’ll need to open a new or existing project.
-
4
Click Paste. This is the clipboard icon in the Home tab. This will paste the Excel data into Word.
- You can also move the cursor to the location you’d like your data, and then press CTRL + V (Windows) or Command + V (Mac). The table will be pasted into Word.
- To select different paste options, click the arrow underneath Paste. You can choose Keep Original Table Formatting, Merge Table, or Keep Text Only.
- If you don’t see the Paste Options button, you don’t have it enabled. To enable it, go to Word Options and click Advanced. Under Cut, Copy, and Paste, check the Show Paste Options buttons box.[3]
-
5


Advertisement
Our Most Loved Articles & Quizzes
Add New Question
-
Question
Can I do this if I don’t have Word?

Yes. Just search for «free online excel to word converter» and use one of the websites that shows up. You could also download OpenOffice for free, which you can use the same way as Word and where you can save documents in Word format.
-
Question
I copied my Excel cells into Word as a picture. How can I remove the cell border lines in this process?
I assume you are using a screen clipping tool to copy the Excel cells into Word. I would recommend either copying the cells (dragging to select) and pasting as a table into Word, or embedding the spreadsheet into Word. Method one works perfectly for basic Excel content and allows you to further format it to suit the structure and styling of your Word document. Method two allows complicated Excel content such as graphs to appear in Word without making screen clippings. It also can be used to preserve all formulas in the embedded sheet so that you can access them directly in Word. Either of these methods should help your Excel cells appear correctly in your Word document.
Ask a Question
200 characters left
Include your email address to get a message when this question is answered.
Submit
Advertisement
-
Looking for money-saving deals on Microsoft Office products? Check out our coupon site for tons of coupons and promo codes on your next subscription.
Thanks for submitting a tip for review!
Advertisement
About This Article
Article SummaryX
1. Select the data to convert.
2. Press Ctrl + C to copy.
3. Open a document in Word.
4. Click the desired location.
5. Click the Paste menu on the Home tab.
6. Select a paste option.
Did this summary help you?
Thanks to all authors for creating a page that has been read 1,447,414 times.
Is this article up to date?
How to Convert Excel to Word
There are a few ways to copy From Excel to Word
Updated on November 16, 2021
What to Know
- Highlight content in Excel you’d like to copy, press Ctrl+C to copy it, and press Ctrl+V within Word to paste your content.
- In Word, go to Insert > Object > Object, select Create from File, choose your Excel file, and select Insert.
- To convert entire files, use an online conversion tool to directly convert an Excel spreadsheet into a Word document.
With Excel’s spreadsheet power and Word’s processing magic, they’re a power duo for creating projects. Even though a direct conversion method doesn’t exist, if you need to convert from Excel to a Word document, there are a few ways you can do so in Excel and Word 2019, 2016, and Excel and Word for Microsoft 365.
The first method is the simplest, and you’re probably already aware of the it. You can easily convert your work from Excel to Word by copying and pasting.
While Excel does have an Export option, there’s no built-in way to export to Word from within Excel. Instead, you need to use one of the methods described here to move data from an Excel document into a Word Document.
-
To start, open the Excel document you want to copy from.
-
Open the Word document you’re pasting to.
-
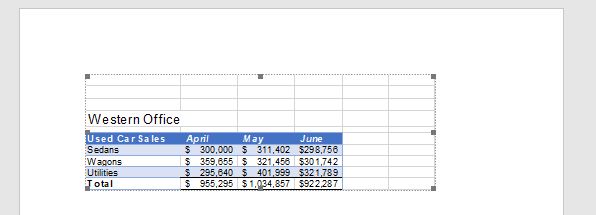
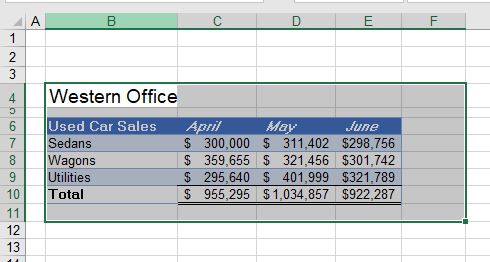
In the Excel document, select the content you want to copy. If you want the entire page, select the triangle icon in the upper left of your work.
-
With the content selected, press Ctrl+C on your keyboard (Cmd+C for Mac users) to copy it.
-
In the Word document, place your cursor where you want to paste your work. Use Ctrl+V (Cmd+V for Mac users) to paste.
You can also use copy and paste to create a new table in Word. Simply create a Word table, select the data in Excel and then copy it directly into the new table you created.
How to Convert Excel to Word Using Insert Object
In contrast to copy and paste, inserting Excel as an object inserts a miniature version of your Excel document in Word, complete with multiple sheets and other features. With Excel and Word open, proceed to the steps to start converting.
How to Convert Excel to Word Using Insert Object on Mac
-
In Word, select Insert from the ribbon.
-
Select the Insert tab and choose the Object icon in the toolbar.
-
Select Text from File in the dialog box and locate your Excel file.
Want your object to automatically update if you change the Excel spreadsheet? Select Options > Link to File.
-
Select Insert in the bottom right corner of the dialog box to place the content.
How to Convert Excel to Word Using Insert Object in Windows
-
In Word, select Insert > Object > Object.
-
Select the Create from File tab > Browse. Locate the file you want to insert.
-
Select Insert. If you want to link it to a file, select the Link to File check box.
-
Select OK.
Convert Excel to Word Using an Online Converter
You can also use an online converter to convert Excel to Word. Locate an online converter by conducting a quick online search. Then upload your two separate documents and allow the converter to do the heavy lifting. When the process is complete, you can download your new document.
Thanks for letting us know!
Get the Latest Tech News Delivered Every Day
Subscribe
Microsoft Excel is a great program for data analysis, data
manipulation, and storing data. It can even function as a small database. On
the other hand, Microsoft Word is a wonderful tool for presenting data. So, they
go hand in hand.
There are well-developed tools and techniques for automating Excel to Word data export.
But the most popular approaches such as mail merge and Macros
have serious shortcomings.
- Mail merge is mainly suitable for simple word templates with small excel data
-
VBA is also used for creating malware and viruses. Hence many organizations
have strict policies around the usage of macros.
Thus document generation tools gained prominence for addressing these limitations.
Start Excel to WORD Population
EDocGen Document Generation Software
It is the NextGen document generation software for the online mail merge.
It offers the simplest and fastest way to export excel file to word template. You can generate
both Word and PDF documents.
It also supports document generation from Office 365 Word templates and Excel.
- Upload your template from OneDrive or SharePoint.
- populate it with Office 365 Excel
- The system syncs generated Word documents to the OneDrive folder.
It offers both App and API for Excel to Word generation.

Ease of Template creation: Business users can use existing document templates.
They can edit the templates in Microsoft Word/PDF editors for adding text, table, image, and QR Code tags.
Top-notch performance: Generates thousands of documents in a few minutes.
Vertical mail merge: You can perform both horizontal (rows) merge and
vertical (columns)) merge. You just have to choose what kind
of merge you want to perform and the system automatically generates documents accordingly.
Many-to-one merge: One of the very few online mail merge software to support
many to one mail merge. Regular mail merge produces one document for each Excel row.
Using EDocGen, you can merge multiple rows grouped by a field into a single Microsoft Word document.
Image population: EDocGen allows you to dynamically populate
images from the web, local computer, or DMS systems. You can define image size inside the template.
The System automatically resizes the populated image.
Content blocks/paragraphs: Dynamically populate paragraphs into templates at
run time. This makes your templates modular. Whenever there is
a change in content block, it recursively propagates the changes in all associated templates.
Loops and Lists: Using loops, populate tables and create lists with Excel data.
Conditional statements: The system supports simple to complex conditional logic. Using it
- You can show/hide sections of your document for a set of users.
- Create multi-lingual documents with a single master template.
It eases the burden of maintaining a separate template for each language. - Dynamically populate content blocks/sub-templates for an Excel value. For example, populate a
relevant sub-template if the checkbox is checked in your Excel.
Word Documents Creation and Distribution
Generate Word documents from Excel data in 3 simple steps.
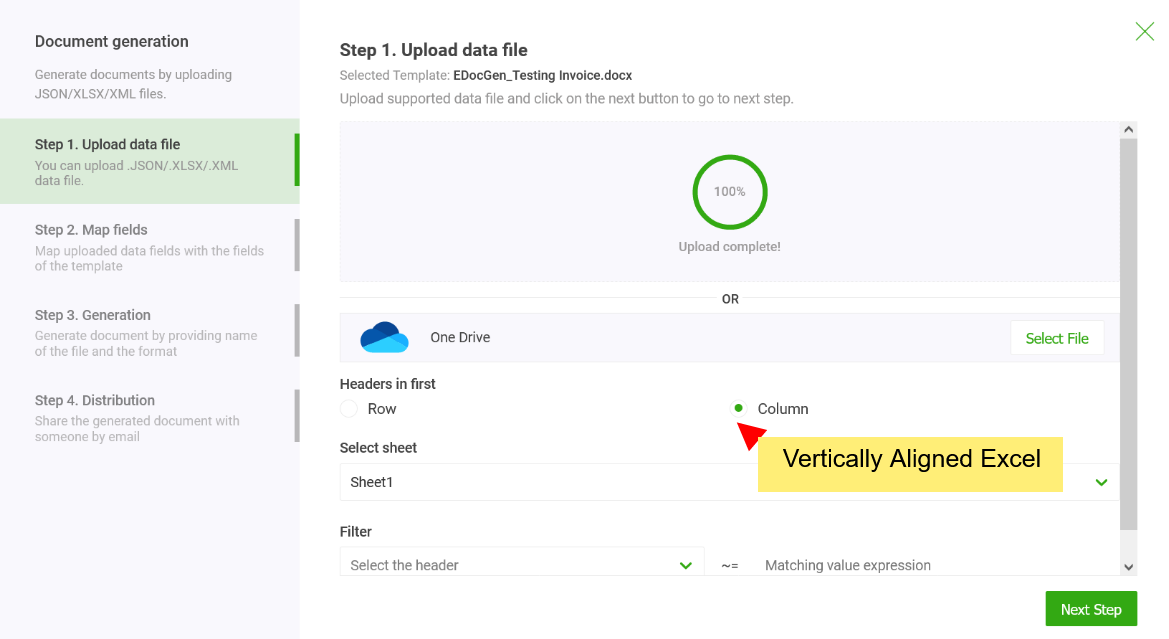
Step1-Upload Excel: Upload the excel file and choose the sheet from which you want to perform the merge.
After that, select the orientation of your excel (rows/columns) data. Horizontal orientation is set as default.

Step2-Map fields: You can populate Excel data as-is. If Excel headers match with the template’s dynamic field names,
the system automatically maps them. Hence, you can skip this step. There is also an option for manual mapping.
Thus you can control the data you wish to show on your
documents.
Step3-Generate files: You can use one of the dynamic fields for naming the files.
The system generates Word files in bulk. There is an option to add dynamic prefixes to the names of the documents, for easy identification.
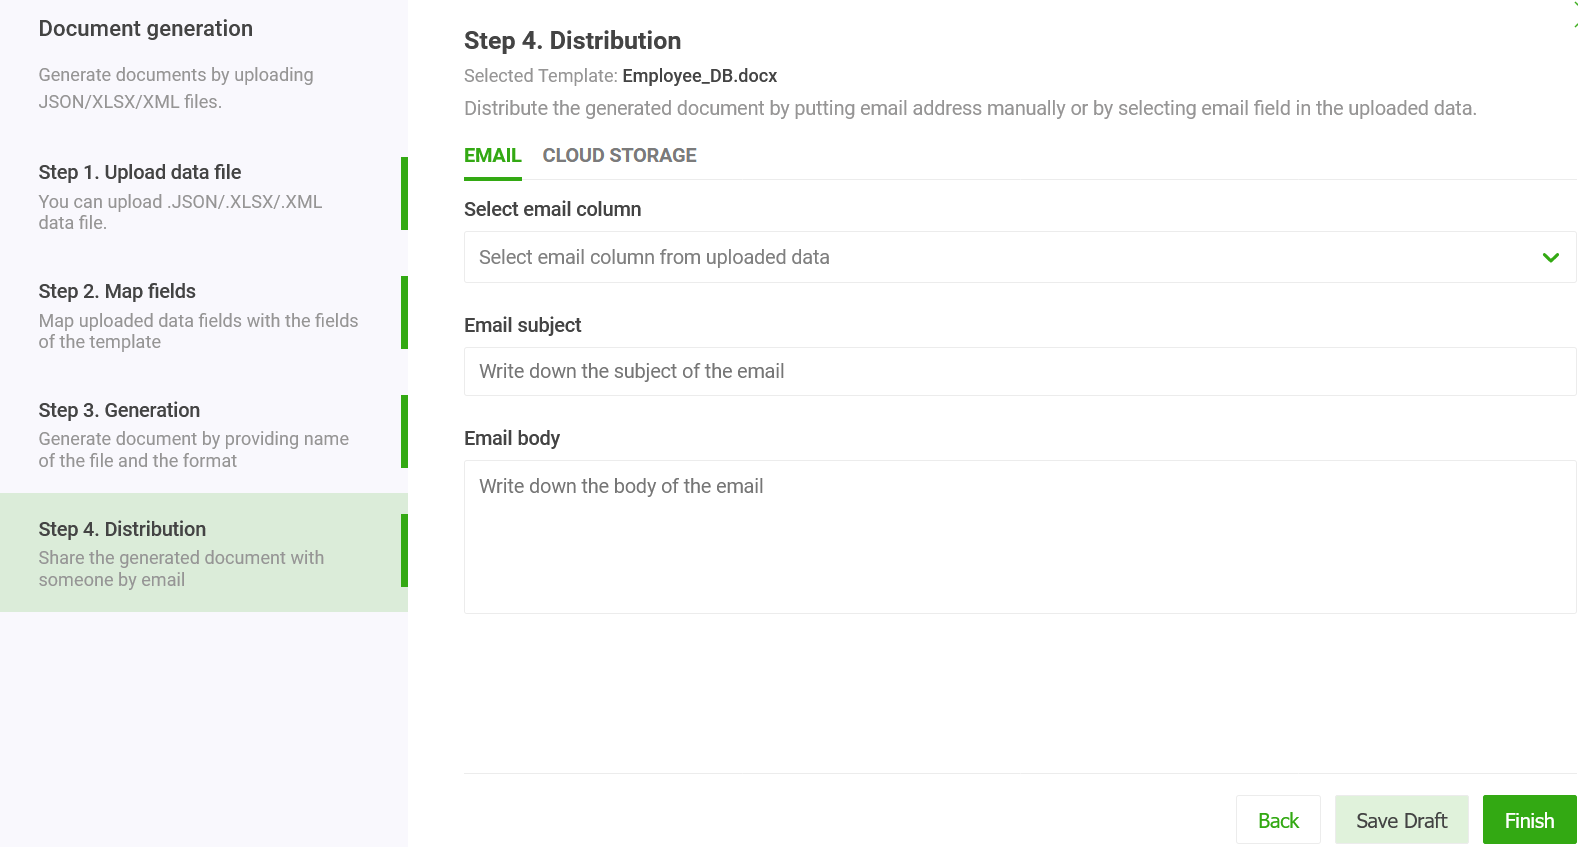
Step4-Document Distribution: This is an optional step. As in the mail merge, you can send generated documents as attachments to
individual recipients. The
system auto-sends generated documents to the listed email ids, with custom email body and subject. You can
use dynamic fields in the body and subject.
You can also configure to send these documents from your business email. The system supports
sending of documents from Office 365, GSuite, SendGrid, and SES.
Apart from email, the system offers other distribution channels including
- E-Signatures
- Sync to cloud storage such as OneDrive.
- Sync SharePoint document management system.
For more details on how
to export Excel to Docx template using App, refer to
examples.
Special Scenarios
Vertical Format Excel
If you have a large number of calculations in your Excel sheet, it’s easy
to perform them from top to bottom. Thus, in loan and mortgage data files, you find excel headers
in the first column. In subsequent columns, each column represents one record.
While populating these Excel files into Word templates, the population has to happen vertically, from
top to bottom and then left to right. Here the calculations are carried out in a certain order, not
necessarily in the «fill order» of the Word template.
Below
is an example of such an excel sheet. The headers are in the first column and invoice records are in the
next three columns.
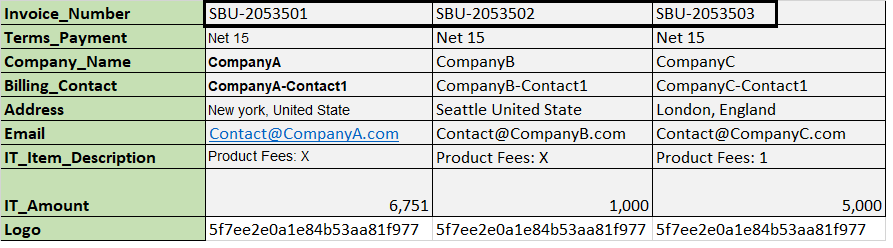
The system addresses this scenario, very elegantly. It produces one invoice
document for each column of invoice data. Select the orientation of your Excel headers. The rest of
the steps to merge cells are very similar to horizontal rows.
Mail merge with the grouping of records
Business users can merge multiple Excel records into a single Word document without any IT help.
They can use the existing Word template and Excel as-is, without any modifications.
Thus, it’s business-user-friendly, secure, and fast.
You can have multiple tables inside the template. The system can compute the sum for each of the table columns.
For more details on how it works, refer to the many-to-one mail merge
REST API
It is an API-first product. The REST API offers an elegant, flexible
solution that works in your preferred programming environment. Developers can integrate it with the
existing IT ecosystem for the creation of documents from enterprise systems and document workflows.
The generated documents can be distributed through various channels including downloads, E-sign, etc.
Conclusion
In summary, for exporting Excel to Word templates, EDocGen is the best solution for business users.
It gives complete freedom to business users, whether they are using simple or complex templates.
They can generate thousands of documents in a few minutes, making the Word document creation
from Excel, a breeze.
Click on the register button to start export Excel to Word document for free.