
Word for Microsoft 365 Word for Microsoft 365 for Mac Word for the web Word 2021 Word 2021 for Mac Word 2019 Word 2019 for Mac Word 2016 Word 2016 for Mac Word 2013 Word 2010 Word 2007 Word Starter 2010 More…Less
Use sections breaks to divide and format documents of all sizes. For example, you can break down sections into chapters, and add formatting such as columns, headers and footers, page borders, to each.
Add a section break
-
Select where you want a new section to begin.
-
Go to Layout > Breaks.

-
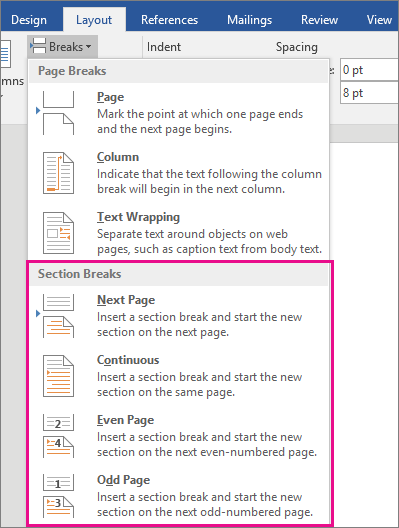
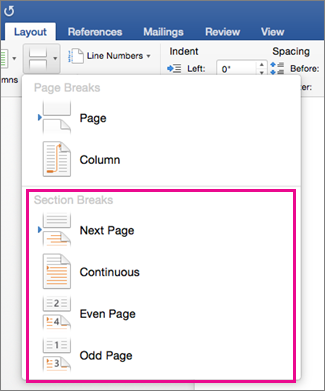
Choose the type of section break you want:
-
Next Page Section break starts the new section on the following page.
-
Continuous Section break starts the new section on the same page. This type of section break is often used to change the number of columns without starting a new page.
-
Even Page Section break starts a new section on the next even-numbered page.
-
Odd Page Section break starts a new section on the next odd-numbered page.
-


Important:
Office 2010 is no longer supported. Upgrade to Microsoft 365 to work anywhere from any device and continue to receive support.
Upgrade now
Insert a section break
-
Select where you want a new section to begin.
-
Go to Page Layout > Breaks.
-
Section break that you want to add:
-
A Next Page section break starts the new section on the next page
-
A Continuous section break starts the new section on the same page.
Tip: You can use Continuous section breaks to create pages with different number of columns.
-
An Even Page or an Odd Page section break starts the new section on the next even-numbered or odd-numbered page.
-

Insert a section break
-
Select where you want a new section to begin.
-
Go to Layout > Breaks, and then choose the type of section break you want.
-
Next Page Starts the new section on the following page.
-
Continuous Starts the new section on the same page. This section break is particularly useful for documents that have columns. You can use it to change the number of columns without starting a new page.
-
Even Page Starts the new section on the next even-numbered page. For example, if you insert an Even Page Break at the end of page 3, the next section will start on page 4.
-
Odd Page Starts the new section on the next odd-numbered page. For example, if you insert an Odd Page Section Break at the end of page 3, the next section will start on page 5.
-
You can add page breaks, but Word for the web can’t add section breaks yet.
If you have the Word desktop application, use the Open in Word command to open the document and add section breaks there. When you’re done and you save the document, it will continue to be stored where you opened it in Word for the web.
See also
Use section breaks to change the layout or formatting in a section of your document
Insert a page break
Need more help?
Want more options?
Explore subscription benefits, browse training courses, learn how to secure your device, and more.
Communities help you ask and answer questions, give feedback, and hear from experts with rich knowledge.
Insert a section break
- Select where you want a new section to begin.
- Go to Layout > Breaks, and then choose the type of section break you want. Next Page Starts the new section on the following page. Continuous Starts the new section on the same page.
Contents
- 1 How do you split a Word document into sections?
- 2 How do I create 4 sections in Word?
- 3 How do I create a new footer section in Word?
- 4 How do I manage sections in Word?
- 5 How do I create a chapter heading in Word?
- 6 How do you create sections in Word for a resume?
- 7 How do I split a Word document into 3 sections?
- 8 How do you make a 4 up flyer in Word?
- 9 How do I change the Footer section?
- 10 How do I change the Footer section number in Word?
- 11 How do you set chapters in Word?
- 12 How do you create chapter headings?
- 13 What are the 4 types of section breaks?
- 14 How do I add columns to my resume in Word?
- 15 How do you put a border on resume in Word?
- 16 How do I split a Word document into two horizontal sections?
- 17 How do I make two columns in one section in Word?
- 18 How do I make 4 per page invitations in Word?
- 19 How do I create 4 sections in Publisher?
- 20 How do I make small flyers in Word?
How do you split a Word document into sections?
Divide a Document into Sections
- Place the insertion point where you want the section break.
- Choose the Page Layout tab.
- Click the down-arrow next to the Breaks button. A menu appears.
- Click the type of section break you want. Word inserts the section break.
How do I create 4 sections in Word?
To split a page to 4 parts, you can insert a table to deal with the job.
- Place the cursor at left-top of the page, then click Insert > Table, select 2×2 Table.
- The table has been inserted, then drag right-corner of the table to resize it as you need.
- Insert texts into the columns and rows separately.
Configure headers and footers for different sections of a…
- Click or tap the page at the beginning of a section.
- Select Layout > Breaks > Next Page.
- Double-click the header or footer on the first page of the new section.
How do I manage sections in Word?
Change a section break
- Click or tap in the section break you want to change.
- Go to Layout and select the Page Setup launcher button .
- Select the Layout tab.
- Select a new section type from the Section Start drop down list.
- Select OK.
How do I create a chapter heading in Word?
Open the header in the first chapter. Go to References > Captions > Cross-reference. Select Heading from the menu as your reference type. Pick the relevant chapter title and click Insert.
How do you create sections in Word for a resume?
Replies (5)
- Move the pointer just to the left of one of the existing sections, such as Experience or Education.
- Click once to select the ‘section’ which is actually a row of the table, then Copy.
- It’s then just a matter of pasting in the preferred location;
How do I split a Word document into 3 sections?
Word 2016 & 2013: Divide Page Into Columns
- Highlight the text you wish to split into columns.
- Select the “Page Layout” tab.
- Choose “Columns” then select the type of columns you wish to apply. One. Two. Three. Left. Right.
How do you make a 4 up flyer in Word?
How to Make 4 Party Flyers on 1 Page
- Click on the “New” icon in your word processing program, such as Microsoft Office.
- Double-click “Flyers” and then “Event Flyers.” Select the event flyer template you would like to customize.
- Personalize your event flyer.
- Save your flyer.
Change or delete a header or footer on a single page
- Double-click the first page header or footer area.
- Check Different First Page to see if it’s selected. If not: Select Different First Page.
- Add your new content into the header or footer.
- Select Close Header and Footer or press Esc to exit.
To choose a format or to control the starting number, go to Header & Footer > Page Number > Format Page Numbers. To change the numbering style, select a different style in Number format. To change the starting page number of the newly created section, select Start at, and then enter a number. Select OK.
How do you set chapters in Word?
Add chapter numbers to captions in Word
- Select the first chapter heading in your document.
- On the Home tab, in the Paragraph group, click the arrow next to Multilevel List.
- Click a chapter-numbering list definition (one that includes the text Heading 1 or Chapter 1).
How do you create chapter headings?
Here are a few ideas for ways you can go about designing a chapter header that’s as great as your manuscript:
- Use text and a simple divider only.
- Accompany your text with a small graphic, symbol, or image.
- Opt for large and intricate artwork that fills the whole page, or even stretches across two pages!
What are the 4 types of section breaks?
The different kinds of section breaks include next page, continuous, even page, and odd page breaks.
How do I add columns to my resume in Word?
To add columns to a document:
Select the Layout tab, then click the Columns command. A drop-down menu will appear. Select the number of columns you want to create. The text will format into columns.
How do you put a border on resume in Word?
Place the cursor in the spot where you want to add a line. Click on Home (located in the upper left-hand corner). Look in the Paragraph section and click the down arrow next to the Borders button. Click on Horizontal Line.
How do I split a Word document into two horizontal sections?
Microsoft Access Divide Word documents into sections using horizontal lines
- Put your cursor in the document where you want to insert the horizontal line.
- Go to Format | Borders And Shading.
- On the Borders tab, click the Horizontal Line button.
- Scroll through the options and select the desired line.
- Click OK.
How do I make two columns in one section in Word?
Select the Page Layout tab, then click the Columns command. A drop-down menu will appear. Select the number of columns you want to create. The text will format into columns.
How do I make 4 per page invitations in Word?
the following may answer your question: if you have a Word document with more than 4 pages, click File > Print and then in the lower right corner of the print dialog, under “Zoom,” select 4 pages per sheet. This will, however, shrink the page to fit in the quarter-page space.
How do I create 4 sections in Publisher?
To make columns in Publisher, click the “Page Design” tab in the Ribbon. Then click the “Guides” button in the “Layout” button group. Then select the “Grid and Baseline Guides…” command from the menu’s drop-down button. Doing this then causes the “Grid Guides” tab in the “Layout Guides” dialog box to appear.
How do I make small flyers in Word?
How to Create a Flyer in Microsoft Word Using Templates
- In Word, go to the File tab and select New.
- Under the search bar, select Flyers.
- Browse through the free flyer templates Word displays until you find a design you like.
- Choose Create.
- To change the text, select it and type the new information.
When you’re working on a long document, separating it into different parts makes it much easier to navigate. Microsoft Word eases your workflow by letting you insert document breaks, namely section and page breaks.


As you’ll see in this article by defining section and page breaks you can apply specific formatting elements in different parts of your document. You’ll also have better control over pagination.
Read on to learn how to use section and page breaks in Word to make your document more visually appealing and easier for readers to make their way around. Finally, we’ll show you some great sources for professionally designed Word templates.
How to Add Breaks in MS Word (Quick Start Video)
Are you ready to learn how how to insert breaks in MS Word? The short video below will give you a head start on inserting, viewing, and deleting MS Word section and page breaks:
To learn even more about breaks in Word (including the difference betwen section breaks and page breaks), study the written tutorial below.
Understanding Section and Page Breaks
Section and page breaks are types of breaks or partitions in a Word document. In this section, you’ll learn some basics:
1. Microsoft Word Section Break vs Page Break
A page break is a partition in the text of the document. At a page break, the succeeding text is automatically placed on top of a new page.


But, with a section break for Word the text is partitioned — along with the formatting associated with it:
- page numbers
- margins
- headers and footers
- paper size and/or orientation
Also, a Microsoft Word section break may or may not begin on a new page (more on that below).
2. Why Use Microsoft Section and Page Breaks?
Section and page breaks are useful for partitioning different parts of a document, especially a long one.
In a book, you’d use section breaks to divide it into chapters as well as delineate the front matter from the back matter. The title page, copyright page, table of contents, individual chapters, index, etc., would be separate sections.
For example, you usually want a new chapter of a book (or similar) document to begin on a new page. This is when a page break is most useful.
A section break for MS Word is useful for visually distinguishing parts of a document. An example of where you might use a section break is in a proposal where you want the summary to have a different layout. In this case, the summary section could have its own header, footer, and margins that are different from the rest of the document.
By using section breaks, each chapter can have a different running header, including the chapter title.


Microsoft Word Section breaks also let you use lower case numbers for page numbers on the introduction of the book and Arabic numerals on the rest of the pages.
Similarly, a section break in Microsoft Word lets you use a two-column format in the index section and a single column everywhere else.
You’ll also want to use section and page breaks when you want to control the pagination of your document. For example, the first page of your document may be a cover page. But you don’t want the cover page to be page 1 of your document. By inserting a section break after the cover page, you can make the next page be page 1.
You accomplish these results by inserting different types of section and page breaks in Word.
3. Types of Microsoft Word Section Breaks
There are four types of section breaks in MS Word:
- Next Page. This type of section break forces the text to the right of the cursor to a new section on the following page. All the formatting associated with the text is carried through to the new section as well.
- Continuous. A continuous section break creates a new section but keeps the text on the same page. This means two different sections can have their own formatting yet remain on the same page.
- Odd Page. This kind of section break moves the text to the right of the cursor to the top of the next odd-numbered page. If you’re on page 3, for example, and you insert an Odd Page Section Break, the next section will start on top of page 5 (page 4 will be blank). Book chapters usually begin on the next odd page of the book.
- Even Page. An Even Page section break moves the text to the right of the cursor to the top of the next even-numbered page. So, if you’re on page 6 and you insert an Even Page Section Break, the new section will begin on page 8 (leaving page 7 blank).
4. Types of Page Breaks
As for Microsoft Word page breaks, there are two kinds:


- Simple Page Breaks. A simple page break moves text to the right of the cursor to the top of the next page.
- Column Breaks. If your document is broken up into columns, a column break moves text to the right of the cursor to the top of the next column.
How to View Existing Breaks in an MS Word Doc
By default, section and page breaks are invisible in Word. You can only see their effects. You’ll see changes in formatting and pagination for each section. That’s because these breaks don’t appear when the document is printed.
As you’re editing and formatting your document, you may need to see page and section breaks. To view existing page and section breaks in Word, on the Home tab, then click on the Paragraph button.


How to Insert Section Breaks in Your Word Docs
To insert a page or section break, place the cursor where you want one section/page to end and the next section/page to begin.
Go to Insert > Break, then choose the specific type of page break or section break you want to insert.


Or, click on the Layout tab. Then click on the Breaks button on the ribbon and select the type of page or section break you wish to insert.


How to Remove/Delete Section and Page Breaks in Word
To remove a section or page break in Word, first display all the breaks.
Select the section or page break you want to remove by highlighting it. Click on either the Delete or Backspace key on your keyboard.


When you delete a section break, the text in the section adopts the formatting of the next section.
Tips for Using Section and Page Breaks in MS Word
Are you just getting comfortable with using Microsoft Word section and page breaks? Here are some extra tips to help you use them effectively:
1. Keep Your Section Breaks to a Minimum
Insert a section break in Word only when you have to (see above for when it’s a good idea to do so). Having more sections than necessary makes it more difficult to make global changes to your document, because you’d have to manually make those changes in each section.
2. Pay Attention to Which Section You’re In
If you’ve divided your document into sections, always be aware of what section you’re in when you make formatting changes. That’s because these changes will apply only to the section you’re currently in — that’s the section where your cursor is. If you want to make a formatting change to apply to the whole document, select the entire document first before making your changes.
3. Microsoft Word May Change a Continuous Section Break to the Other Section Break Types
You may be surprised that your continuous section break has been converted into a different type of section break. This happens when you’ve got a continuous section break. Then, in the next section, you try to apply a different header/footer, pagination, margins, or page size and orientation. Those formatting changes require a page break. And so, Word will automatically change the section break type to one that results in a page break.
Streamline Your Microsoft Word Workflow With Templates


There are other ways to streamline your MS Word workflow. One of them is using premium Word templates, like the ones you’ll find at Envato. Premium templates for Microsoft Word are created by professional designers to provide impressive layouts. These templates are customizable with your content, images, and branding. You can also adjust the design and layout as you please.
Envato Elements gives you unlimited downloads of Word templates as well as other inputs you need to complete your projects — fonts, graphics, stock photos, and more — all for one flat monthly subscription fee.


Or, go to GraphicRiver for Microsoft Word templates and other creative elements on a pay-per-use basis. It’s a terrific source for one-off projects.
Make Your Document Easier to Read and Navigate
Now you know how to use section and page breaks in Microsoft Word to better organize your document. Section breaks also let you have more granular control over the formatting of specific parts of your document. These make your document look better as well as easier to read and navigate through.
Use the steps you learned in this article to properly use section and page breaks. Also, use Word templates to make it much easier and faster to create impressive documents. Envato Elements provides unlimited downloads of templates for Word for one monthly subscription. For occasional projects, GraphicRiver is an excellent source of Word templates where you pay for each use.
Editorial Note: This tutorial has been updated to add a video by Andrew Childress.
Содержание
- Создание раздела
- Вставка разрыва страницы
- Форматирование и настройка раздела
- Очевидная польза разбивки документа на разделы
- Вопросы и ответы

Большинство команд форматирования в Microsoft Word применяются ко всему содержимому документа или к области, которая была предварительно выделена пользователем. В числе таких команд установка полей, ориентация страницы, ее размер, колонтитулы и т.д. Все бы хорошо, вот только в некоторых случаях требуется по-разному отформатировать разные части документа, а для этого следует разбить документ на разделы.
Урок: Как убрать форматирование в Ворде
Примечание: Несмотря на то, что создавать разделы в Microsoft Word очень просто, ознакомиться с теорией по части данной функции лишним уж точно не будет. Именно с этого мы и начнем.
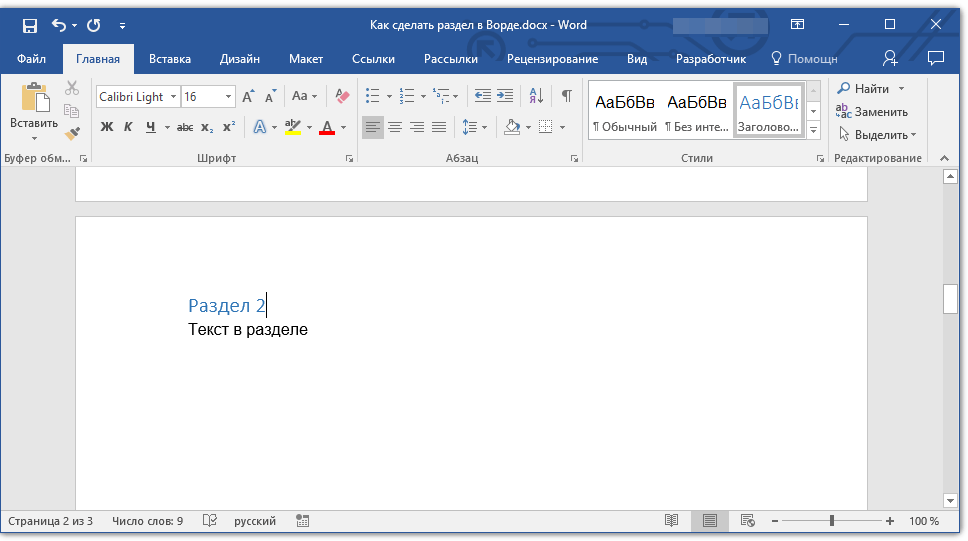
Раздел — это как документ внутри документа, точнее, независимая его часть. Именно благодаря такому разбиению можно изменить размеры полей, колонтитулы, ориентацию и ряд других параметров для отдельной страницы или определенного их количества. Форматирование страниц одного раздела документа будет происходить независимо от остальных разделов этого же документа.
Урок: Как убрать колонтитулы в Ворде
Примечание: Разделы, о которых идет речь в данной статье, это не часть научной работы, а элемент форматирования. Отличие вторых от первых заключается в том, что при просмотре распечатанного документа (как и его электронной копии) никто не догадается о разбиении на разделы. Такой документ выглядит и воспринимается как целостный файл.
Простой пример одного раздела — титульная страница. К этой части документа всегда применяются особые стили форматирования, который не должен распространяться на остальную часть документа. Именно поэтому без выделения титульной страницы в отдельный раздел попросту не обойтись. Также, можно выделить в раздел таблицы или любые другие фрагменты документа.
Урок: Как сделать титульную страницу в Word
Создание раздела
Как было сказано в начале статьи, создать раздел в документе не сложно. Для этого нужно добавить разрыв страницы, а затем выполнить еще несколько простых манипуляций.
Вставка разрыва страницы
Добавить разрыв страницы в документ можно двумя способами — с помощью инструментов на панели быстрого доступа (вкладка «Вставка») и с помощью горячих клавиш.
1. Установите указатель курсора в том месте документа, где должен заканчиваться один раздел и начинаться другой, то есть, между будущими разделами.
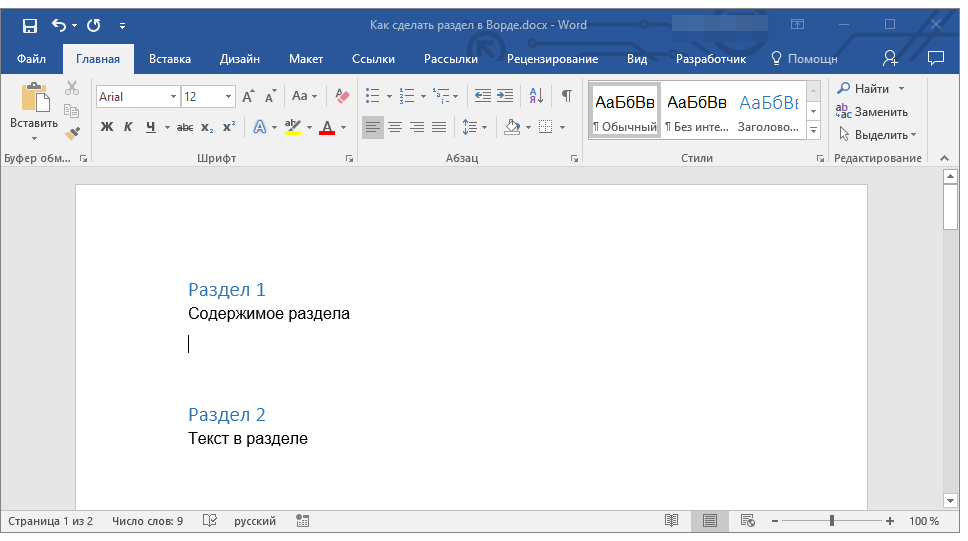
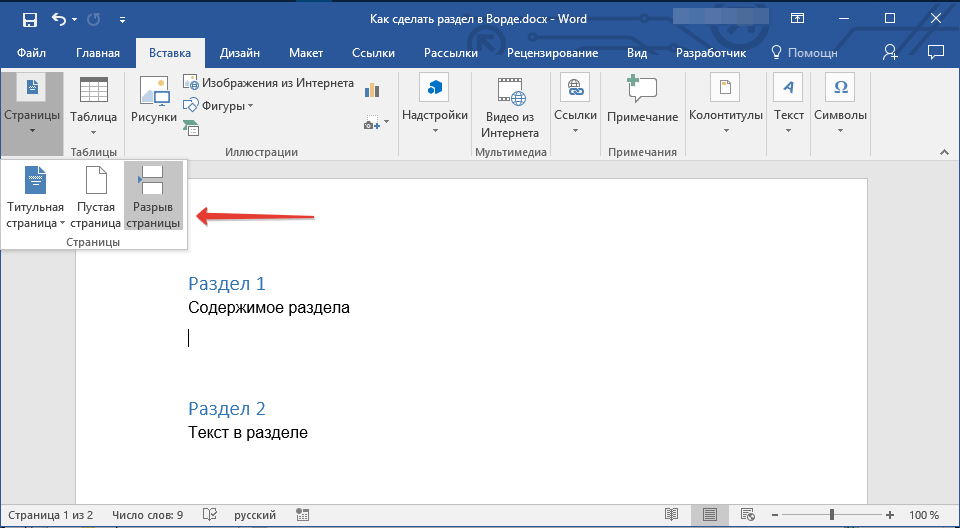
2. Перейдите во вкладку «Вставка» и в группе «Страницы» нажмите кнопку «Разрыв страницы».

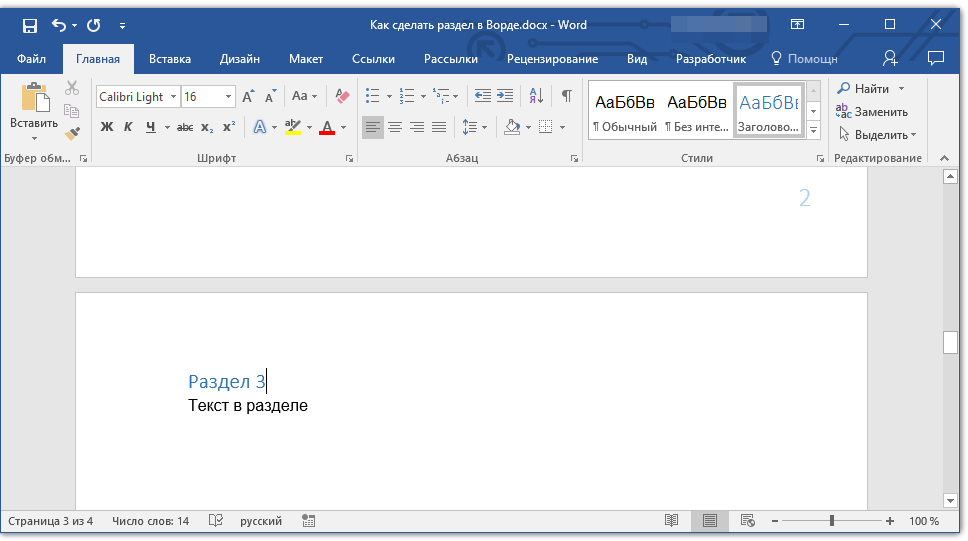
3. Документ будет разделен на два раздела с помощью принудительного разрыва страницы.
Для вставки разрыва с помощью клавиш просто нажмите «CTRL+ENTER» на клавиатуре.
Урок: Как в Ворд сделать разрыв страницы
Форматирование и настройка раздела
Разделив документ на разделы, которых, как вы понимаете, вполне может быть и больше двух, можно смело переходить к форматированию текста. Большинство средства форматирования располагаются во вкладке «Главная» программы Word. Правильно отформатировать раздел документа вам поможет наша инструкция.

Урок: Форматирование текста в Ворде
Если в разделе документа, с которым вы работаете, содержатся таблицы, рекомендуем ознакомиться с детальной инструкцией по их форматированию.
Урок: Форматирование таблиц Word
Помимо использования определенного стиля форматирования для раздела, возможно, вы пожелаете сделать отдельную нумерацию страниц для разделов. Наша статья вам в этом поможет.
Урок: Нумерация страниц в Ворде
Наряду с нумерацией страниц, которая, как известно, располагается в верхних или нижних колонтитулах страниц, при работе с разделами также может возникнуть необходимость изменения этих самых колонтитулов. О том, как их изменить и настроить вы можете прочесть в нашей статье.
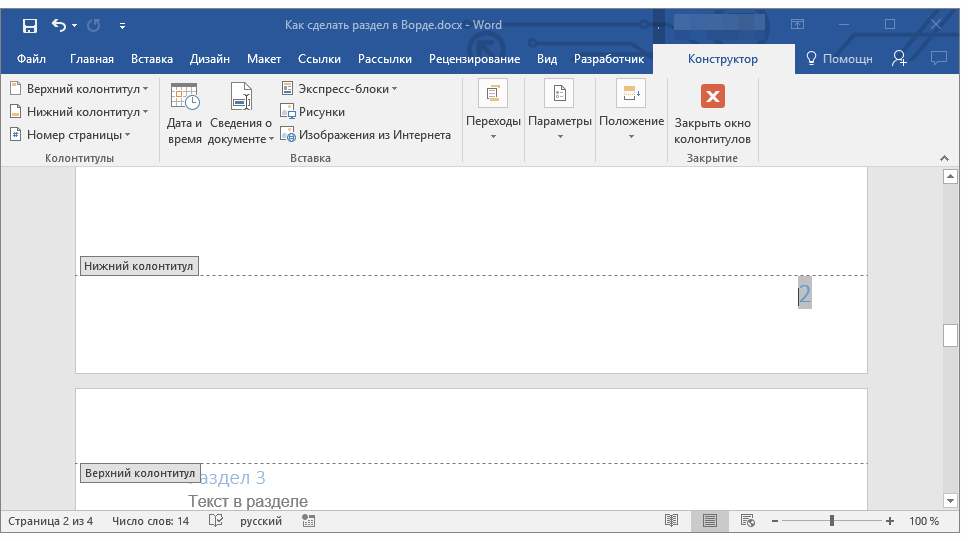
Урок: Настройка и изменение колонтитулов в Word
Очевидная польза разбивки документа на разделы
Помимо возможности выполнения независимого форматирования текста и прочего содержимого части документа, разбивка на разделы имеет еще одно явное преимущество. Если в документ, с которым вы работаете, состоит из большого количества частей, каждую из них лучше всего вывести в независимый раздел.
Например, титульный лист — это первый раздел, введение — второй, глава — третий, приложение — четвертый, и т.д. Все зависит лишь от количества и типа текстовых элементов, входящих в состав документа, с которым вы работаете.
Обеспечить удобство и высокую скорость работы с документом, состоящим из большого количества разделов, поможет область навигации.
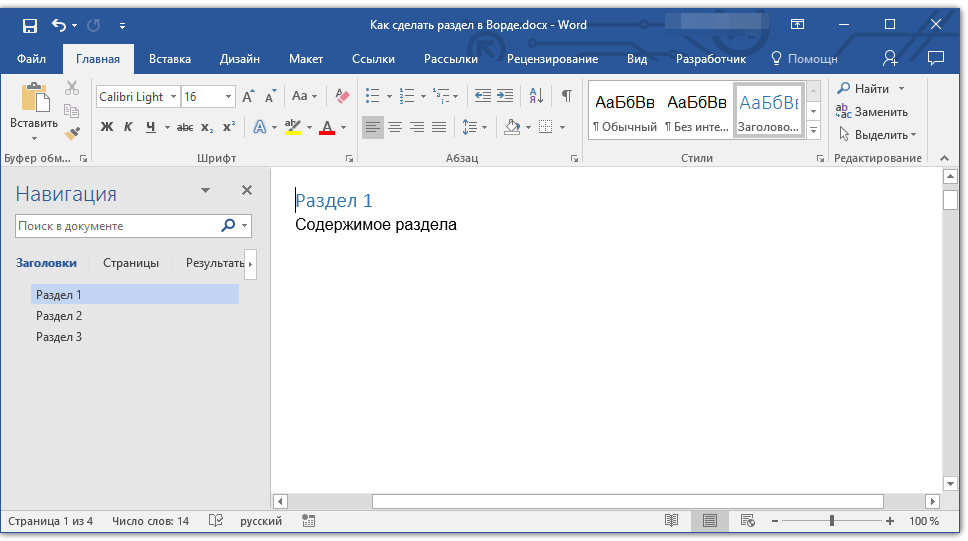
Урок: Функция навигации в Ворде
Вот, собственно, и все, из этой статьи вы узнали, как создавать разделы в документе Word, узнали об очевидной пользе этой функции в целом, а заодно и о ряде других возможностей этой программы.

Inserting a Section Break in a Word document gives you a number of ways to split up large walls of text. This feature is useful not just for breaking up text by pages but also for multi-column layouts.
Insert a Section Break
Click anywhere on the page. This is where your new section will begin, so it’s a good idea to avoid breaking up words or sentences and instead look for opportunities to break the page at the end of a paragraph or at least a sentence.

Click the “Layout” tab on the ribbon at the top of the Word window.

Click “Breaks” under “Page Setup” to open a new drop-down menu with multiple options for both Page and Section Breaks.

Under “Section Breaks,” select the type of break you want to insert on the page. If you’re unsure, there’s a description of each below.

-
Next Page:
Breaks the text at the cursor. Anything to its right (or below it) will move to its own page. -
Continuous:
Starts a new section on the same page. This is often used on documents with multiple columns. -
Even Page:
Starts a new section at the next even-numbered page. -
Odd Page:
Starts a new section at the next odd-numbered page.
Delete a Section Break
To remove a section break from your Word document, first click the “Home” tab.

Click the “non-printing characters” icon. It looks a bit like a backwards “P.”

Click the space to the left of the break you want to delete and then press the “Delete” key on the keyboard.

Change to a Different Type of Section Break
To change a section break to a different type of break, first find the Section Break you want to change and click just to the left of it.

Switch to the “Layout” tab on the ribbon.

Click “Breaks” to open the “Page and Section Breaks” menu.

Choose the new type of section break you want by clicking on any of the options. It will automatically change the type of Section Break based on what you choose.

Your document will now be broken up into whatever type of sections you selected.

In the process of drafting documents such as making theses, projects, or essays, etc., we often have the need to present the text so that it is richer, more beautiful and more diverse.
For example, you want your text on the first 5 pages to be Roman numbered, the next 5 pages to be numbered naturally, the second page to rotate horizontally, and the remaining pages to rotate vertically, creating many different Header and Footer systems. , different protection mode for each paragraph…… in the same text. That’s a lot of requests!
To do so many requests on the same document, it is imperative that you use the Section feature in Word.
So how to use Sections in Word, in this article I will show you how to create Sections and delete Sections in Word in the simplest and easiest way.
Read more:
#first. Create Section in Word
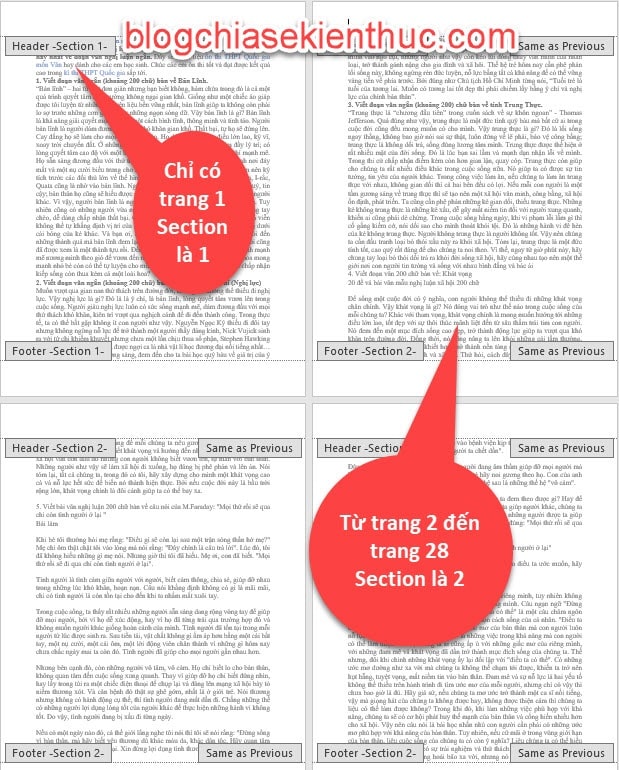
Assuming my document has 28 pages, I want to number the pages from page 2 to page 28, then I will create a Section from pages 2 to 28. Separate from the Section of Page 1.
To create Section On page 2, I do the following:
+ Step 1: Place the mouse pointer at Page 2 to create a new Section for Trang 2..
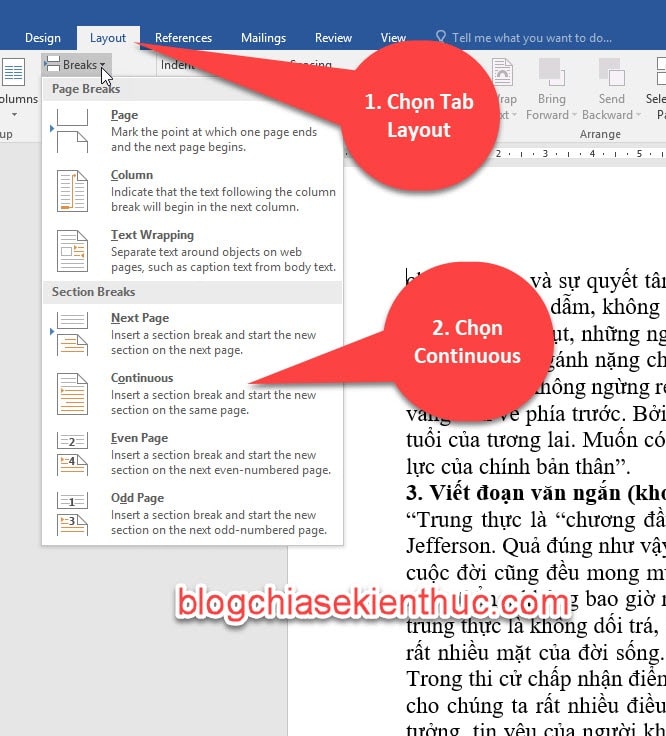
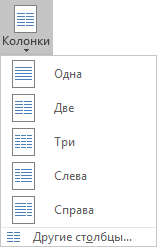
+ Step 2: Select Tab Layout (In Word 2007 and Word 2010, you go to Page layout) => select the item Breaks => then select Continuous to create Selection.
In there:
- Next page: New section starts at the top of the next page.
- Continuous: New section starts at the cursor position.
- Even page: New section starts from the next even page.
- Odd page: New section starts from the next odd page.
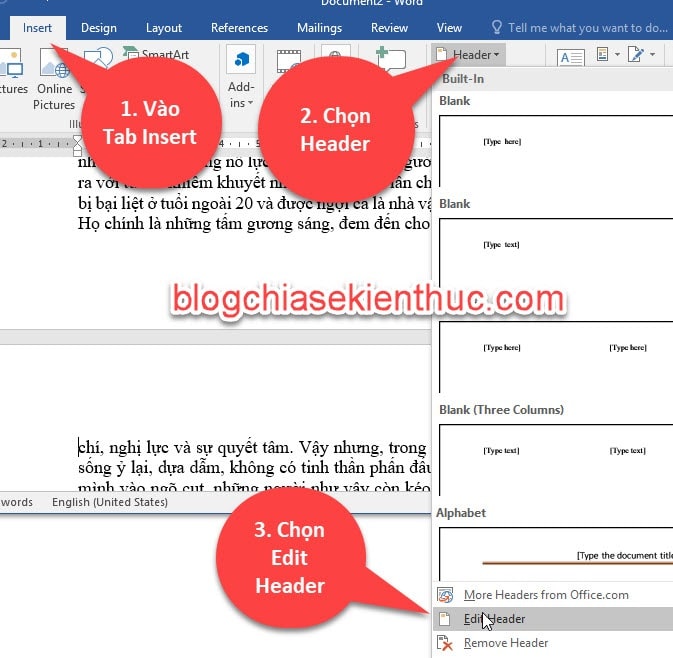
+ Step 3: Check it out Section created successfully or not by going to Tab Insert => choose Header => and choose Edit Header.
+ Step 4: Look now from page 2 to 28 you will see that it is in Section 2, and only Trang 1 to be Section 1 => So you have successfully created the Section already.
=> Turn off Section view, then click Close Header and Footer. Or double click in the middle of the text.
Then you put the mouse pointer at page 2 => and number the page in Word normally, but it does not affect Page 1.
Similarly, if you want xoay ngang trang 3 then you split Trang 3 then separate it into another Section, and remember to check if it has become a separate Section, when it becomes a separate Section, you can do it.
In short, if you want to fulfill any need on a certain page or piece of text, you must separate it into a separate Section. Then select that Section and do as usual, the operation only affects in that Section, all other Sections will not be affected.
#2. How to delete a Section in Word
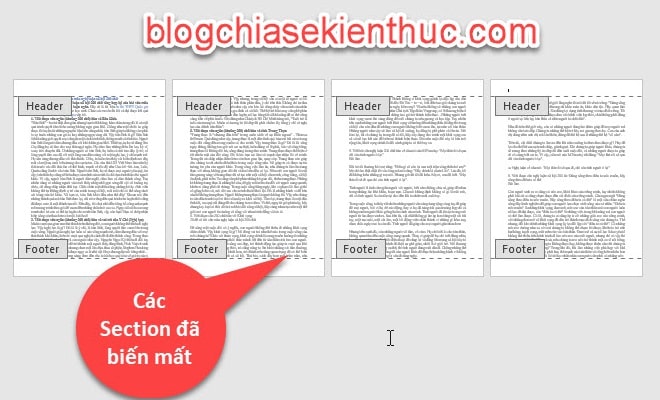
When your document has many sections, or you copy documents on the Internet to many different sources, your Word document will now appear in many different sessions.
This makes it very difficult to edit and unify Header and Footer items to create an automatic table of contents in Word, or page numbering in Word …..
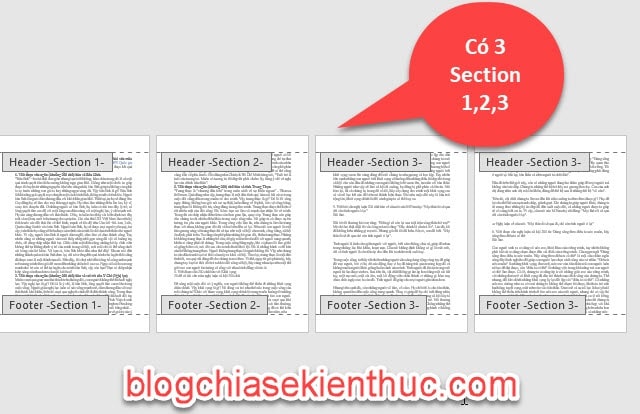
Assuming here my text has 3 Sections, how do I delete the Section?
Do the following:
+ Step 1: Press the key combination Ctrl + H => now the dialog box Find and Replace will appear.
+ Step 2: You type in the box FIND WHAT alphanumeric characters: ^b, still in the cell Replace with then you leave it blank => then click the . button Replace All to apply to the entire Word document file.
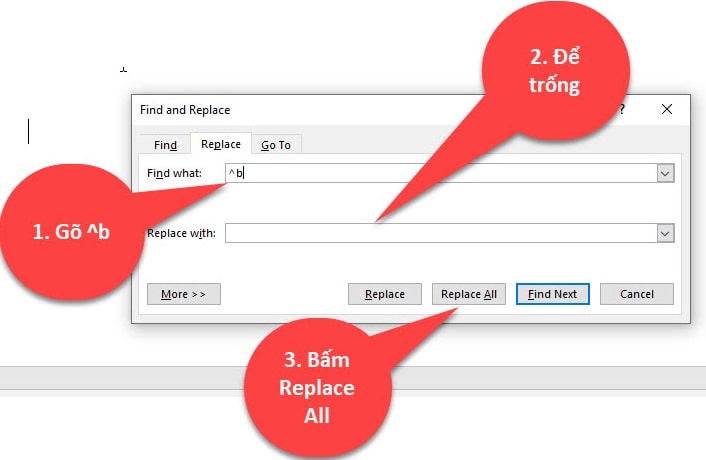
+ Step 3: Go to Tab Insert => choose Header => and choose Edit Header to check the result => then click Close Header and Footer to exit view.
So the Sections have been completely deleted on the Word document, you can number the pages or do what you want right now ^^
#3. Conclude
Yes ! So in this article, I have detailed instructions for you How to create a Section in Word, and delete Section in Word in a very easy way.
In general, Section is a relatively important component, so we should know this section carefully so that when we meet, you will not be surprised. Good luck !
CTV: Ngoc Cuong – techtipsnreview
The article achieved: 4.6/5 stars – (There are 19 reviews)
Note: Was this article helpful to you? Don’t forget to rate the article, like and share it with your friends and family!
Source: The easiest way to create and delete Sections in Word!
– TechtipsnReview

Inserting a Section Break in a Word document gives you a number of ways to split up large walls of text. This feature is useful not just for breaking up text by pages but also for multi-column layouts.
Click anywhere on the page. This is where your new section will begin, so it’s a good idea to avoid breaking up words or sentences and instead look for opportunities to break the page at the end of a paragraph or at least a sentence.

Click the “Layout” tab on the ribbon at the top of the Word window.
Click “Breaks” under “Page Setup” to open a new drop-down menu with multiple options for both Page and Section Breaks.
Under “Section Breaks,” select the type of break you want to insert on the page. If you’re unsure, there’s a description of each below.
- Next Page: Breaks the text at the cursor. Anything to its right (or below it) will move to its own page.
- Continuous: Starts a new section on the same page. This is often used on documents with multiple columns.
- Even Page: Starts a new section at the next even-numbered page.
- Odd Page: Starts a new section at the next odd-numbered page.
Delete a Section Break
To remove a section break from your Word document, first click the “Home” tab.
Click the “non-printing characters” icon. It looks a bit like a backwards “P.”
Click the space to the left of the break you want to delete and then press the “Delete” key on the keyboard.
Change to a Different Type of Section Break
To change a section break to a different type of break, first find the Section Break you want to change and click just to the left of it.
Switch to the “Layout” tab on the ribbon.
Click “Breaks” to open the “Page and Section Breaks” menu.
Choose the new type of section break you want by clicking on any of the options. It will automatically change the type of Section Break based on what you choose.
Your document will now be broken up into whatever type of sections you selected.
READ NEXT
- › How to Add and Link to Bookmarks in Microsoft Word
- › How to Organize a Microsoft PowerPoint Slideshow Using Sections
- › How to Remove Section and Page Breaks in Microsoft Word
- › 8 Microsoft Word Tips for Professional Looking Documents
- › How to Cross-Reference in Microsoft Word
- › How to Make Only One Page Landscape in a Word Document
- › The New NVIDIA GeForce RTX 4070 Is Like an RTX 3080 for $599
- › Expand Your Tech Career Skills With Courses From Udemy
How-To Geek is where you turn when you want experts to explain technology. Since we launched in 2006, our articles have been read billions of times. Want to know more?
Insertar un salto de sección en un documento de Word le ofrece una serie de opciones para dividir grandes paredes de texto. Esta característica es útil no solo para dividir texto por página, sino también para diseños de varias columnas.
Insertar un salto de sección
Haga clic en cualquier parte de la página. Su nueva sección comienza aquí. Por lo tanto, evite dividir palabras u oraciones y, en su lugar, busque formas de dividir la página al final de un párrafo o al menos una oración.
En la parte superior de la cinta, haga clic en la pestaña Diseño. Ventana de palabras.

En Configuración de página, haga clic en Saltos para abrir un nuevo menú desplegable con varias opciones para saltos de página y de sección.

En Saltos de sección, seleccione el tipo de salto que desea agregar a la página. Si no está seguro, puede encontrar una descripción de cada uno a continuación.

- Siguiente página:Interrumpe el texto en el cursor. Todo a la derecha (o debajo) se mueve a su propia página.
- Continuamente:Comienza una nueva sección en la misma página. Esto se usa a menudo para documentos con múltiples columnas.
- Lado par:Comienza una nueva sección en la página siguiente.
- Página impar:Comienza una nueva sección en la siguiente página impar.
Eliminar un salto de sección
Cómo eliminar un salto de sección de su documento de Word, primero haga clic en la pestaña Inicio.

Haga clic en el icono Caracteres no imprimibles. Se parece un poco a una «P» mirando hacia atrás.

Haga clic en el espacio a la izquierda de la pausa que desea eliminar, luego presione la tecla Eliminar en su teclado.

Cambiar a un tipo diferente de salto de sección
Para cambiar un salto de sección a un tipo diferente de salto, primero busque el salto de sección que desea cambiar y haga clic a la izquierda del mismo.

Cambie a la pestaña «Diseño» en la barra multifunción.

Haga clic en el botón Saltos para abrir el menú Saltos de página y sección.

Seleccione el tipo de nuevo salto de sección que desee haciendo clic en una de las opciones. Cambiará automáticamente la forma en que cambia de sección según su selección.

Su documento ahora se dividirá en las secciones que seleccionó.
Введение
Сам по себе факт существование разделов неизвестен большинству пользователей Word.
И это при том, что вновь создаваемый документ уже состоит из раздела.
Кроме того, он занимает высший уровень в иерархии объектной модели, выше него только сам документ.
Важность данного объекта сложно переоценить, так как ряд крайне востребованных свойств описываются именно для него, а не для документа, как полагают почти все.
Доступ к этим материалам предоставляется только зарегистрированным пользователям!
На следующем рисунке показано внешнее отображение всех видов разрывов при включенном отображении непечатаемых знаков.

Колонки
Разбиение текста на колонки производится для текущего раздела.
Доступ к настройкам осуществляется через вкладку Макет ⇒ модуль Параметры страницы ⇒ кнопка Колонки.
Доступ к этим материалам предоставляется только зарегистрированным пользователям!
Колонтитулы
Различают верхний (header) и нижний (footer) колонтитулы, располагающиеся у соответствующих краев листа.
Кроме того, при задании зеркальных страниц, мы получим левую и правую пару.
Также можно настроить индивидуальные колонтитулы для первой страницы раздела.
Таким образом, каждый раздел может иметь от двух до шести колонтитулов, возможно, одинаковых.
Работа с колонтитулами в основном осуществляется через вкладку Ленты «Конструктор», возникающую при входе в режим редактирования любого колонтитула.
![]()
Создание колонтитулов (переход в режим их редактирования) может быть произведено несколькими способами.
Доступ к этим материалам предоставляется только зарегистрированным пользователям!
Форматирование колонтитулов всегда производится с помощью табуляции.
Использование для этого таблицы иногда бывает оправдано, но должно быть однозначно обосновано, так как порождает множество дополнительных факторов,
в том числе тех, которые невозможно контролировать в автоматическом режиме.
Например, ширина колонок.
Автоматический колонтитул
При создании достаточно сложных колонтитулов существует возможность формировать их на основе уже имеющейся информации, то есть избавиться от рутинного контроля содержания.
Позволю себе сразу огорчить читателя тем, что за автоматизацию в данном случае нужно расплачиваться квалификацией пользователя и соблюдением порядка, не всегда подконтрольного зрению.
Естественно, речь пойдет не о номере и количестве страниц.
Для примера я сразу использую наиболее сложный вариант, применяемый в журналах, когда колонтитулы внутри одной статьи чередуются, например,
на левой приводятся авторы, а на правой — название статьи.
Доступ к этим материалам предоставляется только зарегистрированным пользователям!
Возможный алгоритм примитивной работы.
Примитивность в этом случае подразумевает отсутствие перечисленных выше потенциальных трудностей.
Доступ к этим материалам предоставляется только зарегистрированным пользователям!
Другой алгоритм.
Доступ к этим материалам предоставляется только зарегистрированным пользователям!
Очевидным недостатком такого способа будет принципиальная невозможность форматирования отдельных символов, а в текстах высокой категории сложности это относится к почти обязательным вариантам.
Колонцифра (номер страницы)
В издательском деле для обозначения номера страницы используется термин колонцифра, заодно подчеркивающий норму размещения этого элемента в колонтитуле.
Расположение колонцифры определяется правилами или задачей, которая ложится на нее в конкретном издании.
Обобщенная оценка. Всего мы можем выделить 6 точек, расположенных по 3 в верхнем и нижнем колонтитулах.
Доступ к этим материалам предоставляется только зарегистрированным пользователям!
Перечисленное не имеет почти никакого отношения к реальным критериям выбора, так как доминируют тезисы «мы так привыкли» и «нам так красиво».
Логические предпосылки для использования нумерации страниц достаточно просты и определяются её важностью.
Доступ к этим материалам предоставляется только зарегистрированным пользователям!
Одной из актуальных тем является задание стартовой страницы.
Наиболее важны две ситуации:
- исключение из нумерации первой (титульной) страницы;
- разбиение большого документа на множество файлов с продолжающейся нумерацией (книга).
Доступ к этим материалам предоставляется только зарегистрированным пользователям!
Как обычно, названная проблема решается посредством VBA.
Для случая, когда вы хотите, чтобы в документе нумерация начиналась с N-ой страницы есть несколько решений с единой основой.
Доступ к этим материалам предоставляется только зарегистрированным пользователям!
Для форматирования колонцифры используется встроенный стиль «Номер страницы»!
Алгоритмы простых типовых действий
Поворот отдельной страницы
Такая необходимость всегда появится, если иллюстрации размещаются по тексту, а таблица или рисунок не помещаются в ширину полосы набора.
Примитивизированный алгоритм действий:
Доступ к этим материалам предоставляется только зарегистрированным пользователям!
Разбиение на колонки
Стандартным вариантом почти для всех случаев является переменное количество колонок в документе.
То есть, например, части сделаны на всю полосу набора (1 колонка), другие — иначе (2 колонки…).
Это, в том числе, относится ко всем научным журналам, издаваемым в большом формате (близком к A4).
Алгоритм действий, применимый по сути к любым ситуациям:
Доступ к этим материалам предоставляется только зарегистрированным пользователям!
Типовые ошибки при разбиении на колонки
Доступ к этим материалам предоставляется только зарегистрированным пользователям!
Все перечисленные ошибки встречаются в практической работе крайне часто!
Изменение типа разрыва раздела
Вопреки утверждениям на сайте
Microsoft,
сделать это совсем не так просто.
Иначе говоря, данная технология работала раньше, но не работает теперь.
Доступ к этим материалам предоставляется только зарегистрированным пользователям!