
Перейти к содержимому
Один из наиболее часто задаваемых вопросов задаваемых начинающими пользователями звучит так: «Как создать программу в «Excel» и возможно ли это сделать в принципе?»
Ответ на него не так прост.
Создать полноценную программу или продвинутую игру инструментами «Эксель» практически невозможно.
С другой стороны «Excel» обладает достаточным набором инструментов (активные элементы Activx, ViBA и т.д.), позволяющими создавать достаточно функциональные приложения внутри самих экселевских документах — макросы.
Опытные программисты при помощи макросов написанных на языке VBA даже создают примитивные игры популярные в начале 90-х прошлого столетия: тетрис, змейка, пинг-понг и т.д.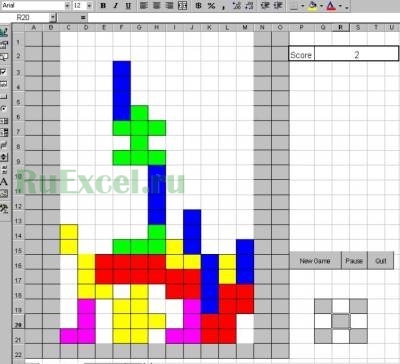
Рассмотрим азы создания программ в VBA Excel.
Самый первый этап создания программы — это написание алгоритма ее работы.
Необходимо определить для себя какие данные будут вноситься пользователем, какие данные будут константой, какой результат должна выдавать программа.
Когда определились с основными принципами работы программы, следует составить блок-схему ее работы, используя условные обозначения: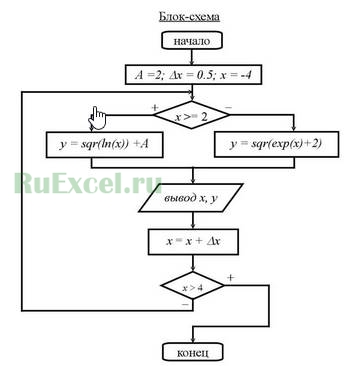
Второй этап — подготовка программы «Excel» к написанию макросов: включить макросы, отобразить панель разработчика и т.д.
Подробно подготовка к написанию простого макроса описана в статье:
Как написать простой макрос в программе Excel
Третий этап — при помощи языка программирования VBA «оцифровываем» блок схему. Делаем ее понятной для компьютера. То есть пишем сам код на языке программирования VBA.
Некоторые варианты кодов макросов опубликованы на нашем сайте в разделе Макросы и VBA.
Explore the 40 most popular pages in this section. Below you can find a description of each page. Happy learning!
1 Run Code from a Module: As a beginner to Excel VBA, you might find it difficult to decide where to put your VBA code. This example teaches you how to run code from a module.
2 Macro Recorder: The Macro Recorder, a very useful tool included in Excel VBA, records every task you perform with Excel. All you have to do is record a specific task once. Next, you can execute the task over and over with the click of a button.
3 Add a Macro to the Toolbar: If you use an Excel macro frequently, you can add it to the Quick Access Toolbar. This way you can quickly access your macro.
4 InputBox Function: You can use the InputBox function in Excel VBA to prompt the user to enter a value.
5 Close and Open: The Close and Open Method in Excel VBA can be used to close and open workbooks. Remember, the Workbooks collection contains all the Workbook objects that are currently open.
6 Files in a Directory: Use Excel VBA to loop through all closed workbooks and worksheets in a directory and display all the names.
7 Import Sheets: In this example, we will create a VBA macro that imports sheets from other Excel files into one Excel file.
8 Programming Charts: Use Excel VBA to create two programs. One program loops through all charts on a sheet and changes each chart to a pie chart. The other program changes some properties of the first chart.
9 CurrentRegion: You can use the CurrentRegion property in Excel VBA to return the range bounded by any combination of blank rows and blank columns.
10 Entire Rows and Columns: This example teaches you how to select entire rows and columns in Excel VBA. Are you ready?
11 Offset: The Offset property in Excel VBA takes the range which is a particular number of rows and columns away from a certain range.
12 From Active Cell to Last Entry: This example illustrates the End property of the Range object in Excel VBA. We will use this property to select the range from the Active Cell to the last entry in a column.
13 Background Colors: Changing background colors in Excel VBA is easy. Use the Interior property to return an Interior object. Then use the ColorIndex property of the Interior object to set the background color of a cell.
14 Compare Ranges: Learn how to create a program in Excel VBA that compares randomly selected ranges and highlights cells that are unique.
15 Option Explicit: We strongly recommend to use Option Explicit at the start of your Excel VBA code. Using Option Explicit forces you to declare all your variables.
16 Logical Operators: The three most used logical operators in Excel VBA are: And, Or and Not. As always, we will use easy examples to make things more clear.
17 Select Case: Instead of multiple If Then statements in Excel VBA, you can use the Select Case structure.
18 Mod Operator: The Mod operator in Excel VBA gives the remainder of a division.
19 Delete Blank Cells: In this example, we will create a VBA macro that deletes blank cells. First, we declare two variables of type Integer.
20 Loop through Defined Range: Use Excel VBA to loop through a defined range. For example, when we want to square the numbers in the range A1:A3.
21 Do Until Loop: VBA code placed between Do Until and Loop will be repeated until the part after Do Until is true.
22 Sort Numbers: In this example, we will create a VBA macro that sorts numbers. First, we declare three variables of type Integer and one Range object.
23 Remove Duplicates: Use Excel VBA to remove duplicates. In column A we have 10 numbers. We want to remove the duplicates from these numbers and place the unique numbers in column B.
24 Debugging: This example teaches you how to debug code in Excel VBA.
25 Error Handling: Use Excel VBA to create two programs. One program simply ignores errors. The other program continues execution at a specified line upon hitting an error.
26 Subscript Out of Range: The ‘subscript out of range’ error in Excel VBA occurs when you refer to a nonexistent collection member or a nonexistent array element.
27 Separate Strings: Let’s create a program in Excel VBA that separates strings. Place a command button on your worksheet and add the following code lines.
28 Instr: Use Instr in Excel VBA to find the position of a substring in a string. The Instr function is quite versatile.
29 Compare Dates and Times: This example teaches you how to compare dates and times in Excel VBA.
30 DateDiff Function: The DateDiff function in Excel VBA can be used to get the number of days, weeks, months or years between two dates.
31 Highlight Active Cell: Learn how to create a program in Excel VBA that highlights the row and column of the Active Cell (selected cell). This program will amaze and impress your boss.
32 Dynamic Array: If the size of your array increases and you don’t want to fix the size of the array, you can use the ReDim keyword. Excel VBA then changes the size of the array automatically.
33 User Defined Function: Excel has a large collection of functions. In most situations, those functions are sufficient to get the job done. If not, you can use Excel VBA to create your own function.
34 Read Data from Text File: Use Excel VBA to read data from a text file. This file contains some geographical coordinates we want to import into Excel.
35 Vlookup: Use the WorksheetFunction property in Excel VBA to access the VLOOKUP function. All you need is a single code line.
36 List Box: Use Excel VBA to place a list box on your worksheet. A list box is a list from where a user can select an item.
37 Check Box: A check box is a field which can be checked to store information. To create a check box in Excel VBA, execute the following steps.
38 Loan Calculator: This page teaches you how to create a simple loan calculator in Excel VBA. The worksheet contains the following ActiveX controls: two scrollbars and two option buttons.
39 Currency Converter: Use Excel VBA to create a Userform that converts any amount from one currency into another.
40 Progress Indicator: Learn how to create a progress indicator in Excel VBA. We’ve kept the progress indicator as simple as possible, yet it looks professional. Are you ready?
Check out all 300 examples.
Excel Programming (Table of Contents)
- Introduction to Programming in Excel
- How to Program in Excel?
Introduction to Programming in Excel
Have you ever been tired of doing a task in Excel which you feel can be automated and save your time? Most of the time, you must have encountered such tasks. However, in order to automate any task, you first need to have programming skills for that particular language. In Excel, you can do programming with the help of Visual Basic for Application (VBA) which is Excel’s own programming language that can help you to automate the tasks. In this article, we will see how we can do programming in Excel VBA. VBA can be used to write a program that can automate the task for you. The piece of lines we write under VBA is called Macro, which is written in such a way that they instruct the Excel system about what to be done.
How to Program in Excel?
Let’s understand how to Program in excel with few illustrations.
Enabling Developer Tab
The first thing that comes is enabling the developer tab that helps you to record and store a macro (VBA Code). Let us see how we can get that enabled.
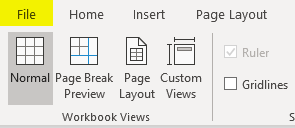
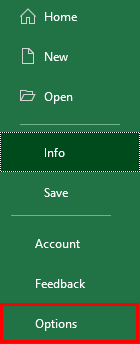
- Navigate to the File menu in your excel file and click on it.
- Within the File menu, click on Options, and it will load a new window with all excel options available.
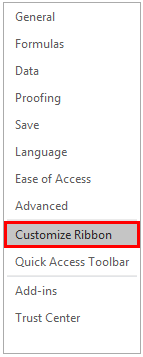
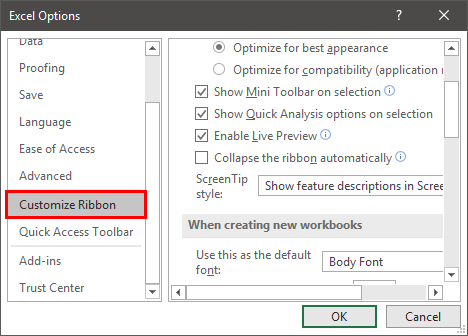
- In the new window that popped up named Excel Options, click on the Customize Ribbon tab. You can see all the customization options you can use for Excel Ribbon, which appears at the top of your Excel file.
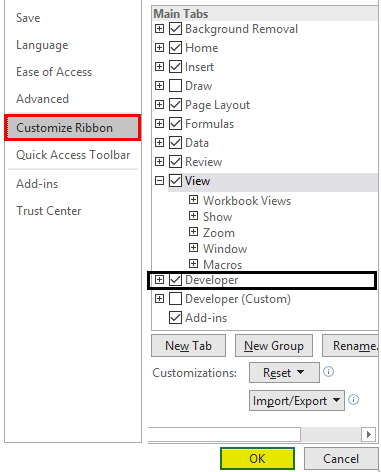
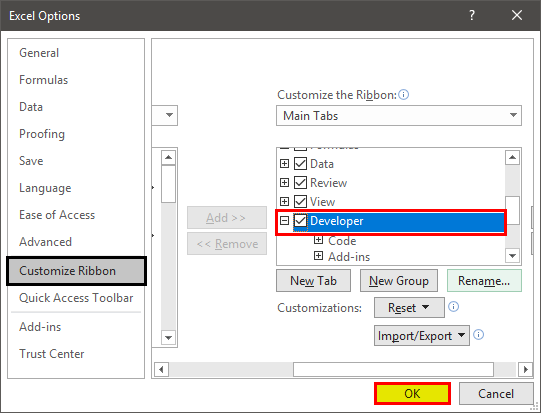
- Enable Developer option under Main Tabs dropdown within Customize the Ribbon: section. You can check (tick-mark) the Developer tab to enable it. Click the OK button placed at the bottom right of the Excel Options tab, and that’s it.
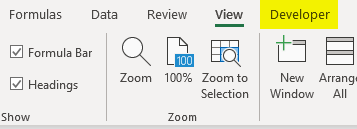
- You have successfully enabled the Developer option within your excel. If you check the Excel Ribbon in your file now, you’ll be able to see a new tab added there with the name Developer on it.
This is the first step you need to follow before you start writing macros in Excel. Because the Developer tab is needed to record and run the macro, this option tab is not by default enabled, which is why we tried enabling it here first.
Recording a Macro
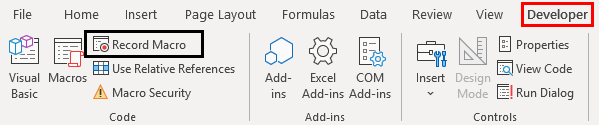
- Open the Excel file. Navigate towards the Developer tab you just enabled and then click on the Record Macro button, categorized and can be seen under the Code section.
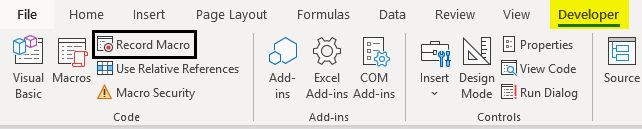
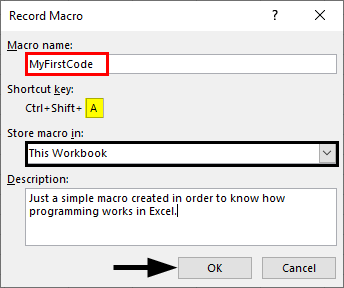
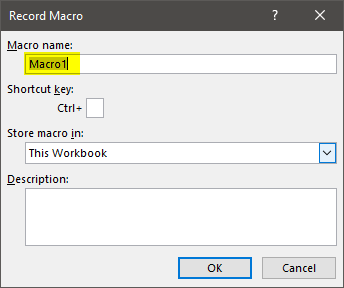
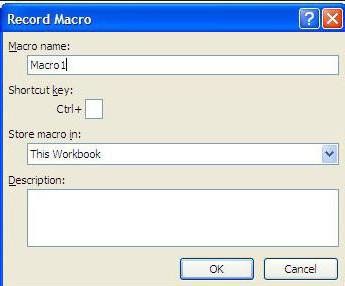
- As soon as you click on the Record Macro button, you’ll see a window popping up; in that window, you must have to assign a name to the macro; you can also assign a shortcut key for this macro to run. Can you add the description, if any, for this macro you are creating? Once you are done with all this, you can click on the OK button placed at the right bottom of the window. See the screenshot below for your reference.
As soon as you click OK, the system starts recording the macro and all the tasks you perform will be recorded and converted to Excel Program in the backend.
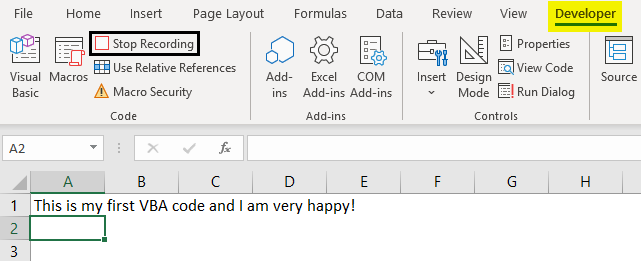
- Try typing the sentence “This is my first VBA code, and I am very happy!” in cell A1 within the Excel sheet and press Enter key. These steps will be recorded in the backend of the macro.

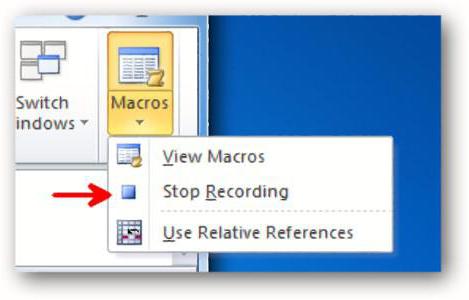
- Under the Code section, you might have observed that the Record Macro button has changed to Stop Recording. This is like Play and Stop. Record Macro Works as Play button and Stop Recording work as Stop button. Click on the Stop Recording button to stop the recording.
The magic behind all this is, Excel has recorded my steps here and converted those into pieces of code so that this task can be automated. It means, every single step, selecting cell A1, inputting the text as “This is my first VBA code, and I am happy!”, clicking Enter to go to the next cell. All these steps are converted into a VBA code. Let’s check the code now.
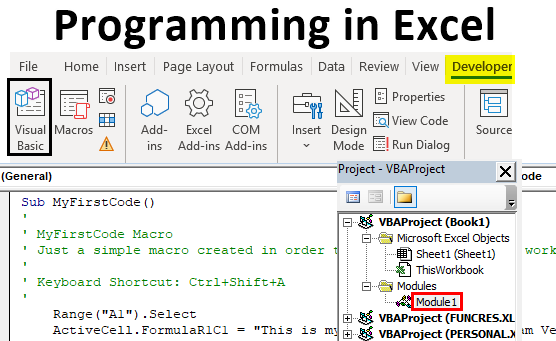
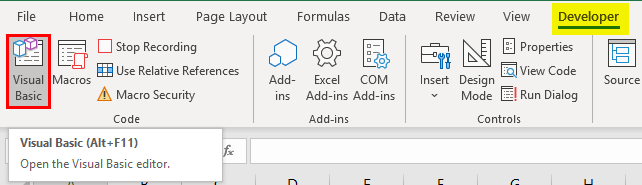
- In order to go to Visual Basic Editor, you can click on the Visual Basic option under the Code category in the Developer tab, or you can use Alt + F11 as a shortcut for the same.
- Navigate towards the Modules section under VBAProject and click on the plus button under it to see the list of active modules in VBA.
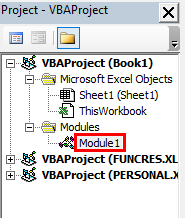
- Inside the Modules folder, you can see Module1 as soon as you click on the plus sign. You can double click on Module1; it is where your code for the task we performed in previous steps (Step 3 and 4) are recorded. Save this code, and you can run it every time to get the same output. See the screenshot below:
Conclusion
- We can record a macro in Excel to automate day to day small tasks, which are simpler for the system to manipulate programmatically.
- The cool thing about it is you don’t need to dig your head deep for the logic behind each step you perform. Excel VBA does it for you.
- For some complex tasks, such as the one which involves looping and conditional statements, you need to write code manually under VBA.
Things to Remember About Programming in Excel
- The Developers tab is not by default enabled and visible to you in Excel Ribbon. You need to enable it through Excel Options.
- Recording a macro works on simple tasks that are repeating, and you need those to be automated. However, for complex tasks which involve looping or Conditional Inputs and Outputs are still need to be coded manually under VBA.
- You need to save the file as an Excel-Macro Enable file format in order to be able to read and run the code again on your excel.
Recommended Articles
This is a guide to Programming in Excel. Here we discuss how to Program in Excel along with practical examples and a downloadable excel template. You can also go through our other suggested articles –
- Ribbon in Excel
- TRIM Formula in Excel
- Project Management Template in Excel
- COUNTIFS in Excel
Все приложения из пакета Microsoft Office поддерживают возможность внедрения в их документы исполняемого кода — скриптов. При их помощи можно решать широкий спектр задач автоматизации обработки данных. А использование форм позволит буквально создать программу на основе офисного приложения. Сделать это можно, например, в Excel.

Вам понадобится
- — Microsoft Office Excel.
Инструкция
Запустите Microsoft Office Excel. Если необходимо, создайте новый документ. Для этого нажмите клавиши Ctrl+N или разверните меню «Файл» и выберите пункт «Создать…». Затем кликните по ссылке «Чистая книга» в панели «Создание книги».
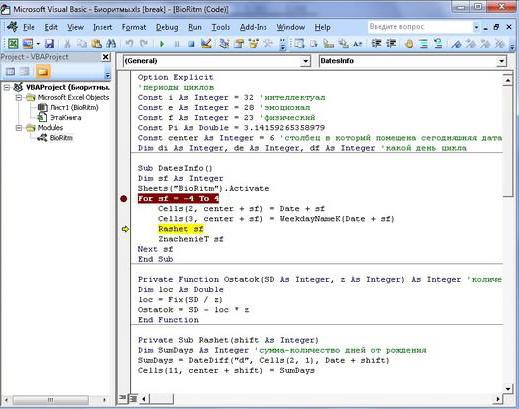
Откройте окно редактора Visual Basic. Для этого нажмите сочетание клавиш Alt+F11 или выберите пункт «Редактор Visual Basic» в разделе «Макрос» меню «Сервис». Там вы увидите панель проекта, отображающую дерево объектов данной книги Excel, а также содержащиеся в ней формы, модули и модули классов.
Создайте формы, если это необходимо. В главном меню кликните по пункту Insert, а затем UserForm. В разделе Forms панели проекта добавится новый элемент. При создании форма будет автоматически открыта. Мышью переносите элементы управления из панели Toolbox в окно формы. Изменяйте их размеры и положение. После выделения мышью меняйте их свойства в панели Properties. Сохраняйте формы, нажав Ctrl+S.
Создайте нужное количество модулей или модулей классов. Для этого выбирайте пункты Module или Class Module в разделе Insert главного меню. Откройте окна редактирования кода нужных модулей или форм, дважды кликнув по соответствующим им элементам в окне проекта.
Добавьте декларации классов в модули классов. Определите их при помощи ключевого слова Class:
Class CSampleClass
End Class
В определения классов добавьте методы, а в модули — заготовки функций и процедур. Функции объявляются с помощью ключевого слова Function, после которого следует имя и набор параметров, через запятую, заключенных в скобки. Например:
Function SampleFunction(a, b, c)
End Function
Аналогично (только при помощи ключевого слова Sub) объявляются процедуры:
Sub SampleProcedure(a, b)
End Sub
Объявите члены классов, а также глобальные и локальные (в функциях и методах) переменные. Для этого используйте предложение Dim…As (после ключевого слова As указывается тип переменной). Например, объявление переменной oWB, хранящей ссылку на объект книги, может выглядеть так:
Dim oWB As Excel.Workbook
Указав размерность в круглых скобках, можно задекларировать массив:
Dim aWBooks(10) As Excel.Workbook
Реализуйте алгоритм работы программы, внеся изменения в код функций, процедур, методов классов. Используйте структуры управления Visual Basic для контроля потока исполнения. Работайте с собственными структурами данных, объектами созданных форм встроенными объектами Excel.
Источники:
- как создать документ в excel
Войти на сайт
или
Забыли пароль?
Еще не зарегистрированы?
This site is protected by reCAPTCHA and the Google Privacy Policy and Terms of Service apply.
What is Programming in Excel?
Programming refers to writing a set of instructions that tell Excel to perform one or more tasks. These instructions are written in the Visual Basic for Applications (VBA) as this is the language understandable to Excel. To write an instruction, one can either write a code in VBA or record a macro in Excel. A macro is recorded to automate repetitive tasks. When a macro is recorded, VBA generates a code in the background.
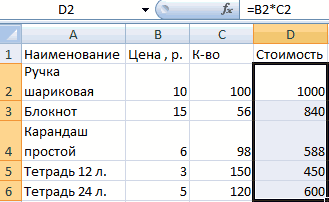
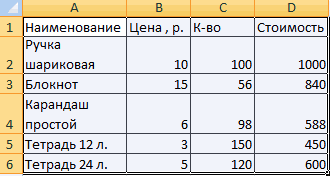
For example, to submit an Excel report, a table needs to undergo the same set of tasks each time. These tasks include applying a pre-defined border, color, alignment, and font. To program in Excel, a macro can be recorded for performing all these tasks.
The purpose of programming in Excel is to save the user from performing the same tasks again and again. Moreover, it helps accomplish multiple tasks at a great speed that would have taken a lot of time, had they been performed manually.
Table of contents
- What is Programming in Excel?
- Stages of Programming in Excel VBA
- Stage 1–Enable the Developer Tab in Excel
- Stage 2–Record a Macro in Excel
- Stage 3–View and Examine the VBA Code Generated by the Recorded Macro
- Stage 4–Test the VBA Code of the Recorded Macro
- Stage 5–Save the Recorded Macro (or the VBA Code)
- Frequently Asked Questions
- Recommended Articles
- Stages of Programming in Excel VBA
Stages of Programming in Excel VBA
Programming in Excel VBA is carried out in the following stages:
- Enable the Developer tab in Excel
- Record a macro in Excel
- View and examine the VBA code generated by the recorded macro
- Test the VBA code of the recorded macro
- Save the recorded macro (or the VBA code)
Further in this article, every stage of programming ine xcel has been discussed one by one. The steps to be performed in each stage are also listed.
Stage 1–Enable the Developer Tab in Excel
Let us understand how to enable the Developer tabEnabling the developer tab in excel can help the user perform various functions for VBA, Macros and Add-ins like importing and exporting XML, designing forms, etc. This tab is disabled by default on excel; thus, the user needs to enable it first from the options menu.read more in Excel. This tab is enabled to record a macro and access VBA. When the Developer tab is enabled, it appears on the Excel ribbonRibbons in Excel 2016 are designed to help you easily locate the command you want to use. Ribbons are organized into logical groups called Tabs, each of which has its own set of functions.read more. However, by default, Excel does not display the Developer tab.
Note: To know an alternate method to record a macro and access VBA, refer to the “alternative to step 1” in stages 2 and 3.
The steps to enable the Developer tab in Excel are listed as follows:
Step 1: Go to the File tab displayed on the Excel ribbon.
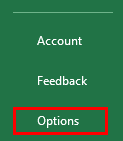
Step 2: Select “options” shown in the following image.
Step 3: The “Excel options” window opens, as shown in the following image. Select “customize ribbon” displayed on the left side of this window.
Step 4: Under “choose commands from” (on the left side of the window), ensure that “popular commands” is selected. Under “customize the ribbon” (on the right side of the window), choose “main tabs” from the drop-down list.
Next, select the checkbox of “developer” and click “Ok.” This checkbox is shown in the following image.
Step 5: The Developer tab appears on the Excel ribbon, as shown in the following image.

Stage 2–Record a Macro in Excel
Let us learn how to record a macroRecording macros is a method whereby excel stores the tasks performed by the user. Every time a macro is run, these exact actions are performed automatically. Macros are created in either the View tab (under the “macros” drop-down) or the Developer tab of Excel.
read more in Excel. When a macro is recorded, all tasks performed by the user (within the workbook) are stored in the Macro Recorder until the “stop recording” option is clicked. Apart from Microsoft Excel, a macro can be recorded for all Office applications that support VBA.
The steps to record a macro in Excel are listed as follows:
Step 1: From the Developer tab, click “record macro” from the “code” group.
Alternative to step 1: One can also click “record macro” from the “macros” group of the View tab of Excel.
Step 2: The “record macro” window opens, as shown in the following image. In this window, one can name the macro before recording it. The default macro name given by Excel is “macro1.”
The rules governing a macro name are stated as follows:
- It should not contain any space ( ), period (.) or exclamation point (!).
- It cannot contain any special characters (like $, @, ^, #, *, &) except the underscore (_).
- It should not begin with a numerical value. Rather, it must start with a letter.
- It cannot exceed 255 characters in length.
Note: It is recommended to use short and meaningful names for macros. Further, one must assign a unique name to each macro. In VBA, two macros within the same code module cannot have the same names.
Step 3: In the “macro name” box, we have entered the name “recording_macro.”
Notice that an underscore has been used as a separator between the two strings (recording and macro) of the name. No spaces, periods or special characters have been used in this name.
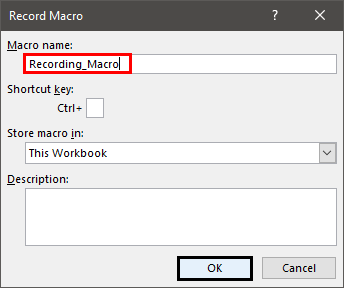
Step 4: Click “Ok” to start recording the macro. Once “Ok” is clicked in the preceding window, the “record macro” button (in the Developer tab or the View tab) changes to the “stop recording” button.
Next, carry out the tasks to be recorded in the macro “recording_macro.”
Note: Since the Macro Recorder records every action performed by the user, ensure that the actions are executed in the right sequence. If the recorded sequence is correct, Excel will perform the tasks efficiently each time the macro is run.
However, if a sequencing error occurs, one must either re-record the actions or edit the VBA codeVBA code refers to a set of instructions written by the user in the Visual Basic Applications programming language on a Visual Basic Editor (VBE) to perform a specific task.read more manually. If one is recording the macro for the first time, it is recommended to keep a copy of the workbook to prevent any undesired changes to the stored data.
In the following steps (step 4a to step 4c), the tasks to be recorded have been performed.
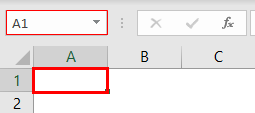
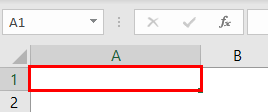
Step 4a: Select cell A1 of the worksheet. This is the first task that is recorded. The selection is shown in the following image.
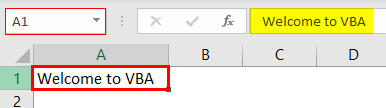
Step 4b: Type “welcome to VBA” in cell A1. This is the second task that is recorded. Exclude the beginning and ending double quotation marks while typing.
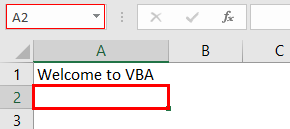
Step 4c: Press the “Enter” key. As a result, the selection shifts from cell A1 to cell A2. This becomes the third task that is recorded.
The selection is shown in the following image.
Step 5: Click “stop recording” in the “code” group of the Developer tab. By clicking this option, Excel is told to refrain from recording any further tasks.
The “stop recording” option is shown in the following image.

Stage 3–View and Examine the VBA Code Generated by the Recorded Macro
Let us observe and study the VBA code generated by the macro recorded in stage 2. Remember that one can either directly write a code in the Visual Basic Editor (VBE or VB Editor) or let a macro do the same.
The VBE is a tool or program where VBA codes are written, edited, and maintained. When a macro is recorded, a code is automatically written in a new module of VBE. Note that VBA is the programming language of Excel.
The steps to view and study the code generated by the recorded macro are listed as follows:
Step 1: Click “visual basic” from the “code” group of the Developer tab. This option is shown in the following image.
Alternative to step 1: As a substitute for the preceding step, press the keys “Alt+F11” together. This is the shortcutAn Excel shortcut is a technique of performing a manual task in a quicker way.read more to open the VBE window.
Note: “Alt+F11” is a toggle key which when pressed repeatedly, helps to switch between VBE and Excel.
![]()
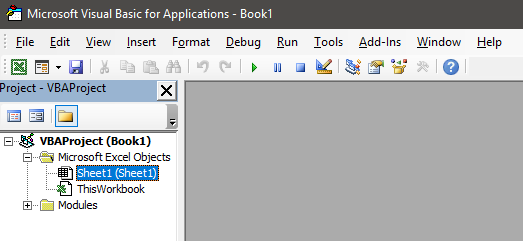
Step 2: The Visual Basic Editor window opens, as shown in the following image.
To the left of the VBE window, the worksheet, workbook, and module are shown. This window on the left (named “Project-VBAProject”) is also known as the Project window or the Project Explorer of VBE.
Step 3: Double-click “modules” shown in the following image.
Note: “Modules” are folders shown in the Project window after recording a macro. They are not shown prior to recording a macro. “Modules” are also shown when a module is inserted manually from the Insert tab of the VBE.
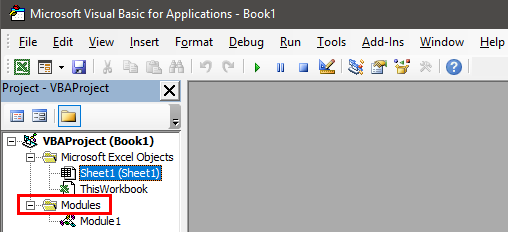
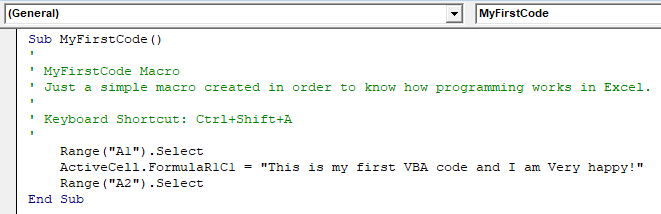
Step 4: Double-click “module1” under modules. A code appears on the right side of the VBE window. This window on the right [named “Book1-Module1 (Code)”] is known as the module code window.
The code is displayed in the following image.
Note: The code generated by recording a macro can be checked in the “modules” folder (in the module code window). In a module code window, one can also write a code manually or copy-paste it from another source.

In the following steps (step 4a to step 4d), the code generated by the recorded macro has been studied.
Step 4a: The first word of the code is “Sub.” “Sub” stands for subroutine or procedure. At the start of the code, the word “Sub,” the macro name (recording_macro), and a pair of empty parentheses are displayed. This is followed by the statements to be executed by the code. These statements are:
ActiveCell.FormulaR1C1 = “Welcome to VBA”
Range (“A2”). Select
The code ends with “End Sub.”
The start or head [Sub Recording_Macro ()] and the end or tail [End Sub] of the code are shown in the following image.
Note 1: The words “macro” and “code” are often used interchangeably by several Excel users. However, some users also distinguish between these two words.
A VBA code is a command created either by writing a code directly in VBE or by recording a macro in Excel. In contrast, a macro consists of instructions that automate tasks in Excel. According to one’s choice, one can decide whether or not to differentiate between the two words.
Note 2: The “Sub” can be preceded by the words “Private,” “Public,” “Friend,” or “Static.” All these words set the scope of the subroutine. The default subroutine used in VBA is “Public Sub.” So, when “Sub” is written in a code, it implies “Public Sub.”
A “Public Sub” can be initiated by subroutines of different modules. However, a “Private Sub” cannot be initiated by subroutines of other modules.

Step 4b: The first activity we performed (in step 4a of stage 2) was to select cell A1. Accordingly, the following statement of the code tells Excel that the active cell is R1C1.
ActiveCell.FormulaR1C1
When a macro is recorded, VBA uses the R1C1 style for referring to cells. In this style, the letter R is followed by the row number and the letter C is followed by the column number. So, cell R1C1 implies that the row number is 1 and the column number is also 1. In other words, cell R1C1 is the same as cell A1 of Excel.
Step 4c: The second activity we performed (in step 4b of stage 2) was to type “welcome to VBA” in cell A1. So, the following statement of the code tells Excel that the value in cell R1C1 is “welcome to VBA.”
ActiveCell.FormulaR1C1 = “Welcome to VBA”
Step 4d: The third activity we performed (in step 4c of stage 2) was to press the “Enter” key. By pressing this key, the selection had shifted from cell A1 to cell A2. Therefore, the following statement tells Excel to select cell A2.
Range (“A2”). Select
This is the way VBA generates a code for all the activities performed under stage 2 of programming in Excel. Examining the code line-by-line makes it easier to interpret it.
Stage 4–Test the VBA Code of the Recorded Macro
Let us test the code when it is run multiple times. Note that a macro (or code) can be run as many times as one wants. Each time it runs, it performs the recorded tasks in Excel.
The steps to test the code that we examined in stage 3 are listed as follows:
Step 1: Delete the string “welcome to VBA” from cell A1 of Excel. Let A1 remain as a blank, selected cell. The following image shows the empty cell A1.
Note: To go back from VBE to Excel, press the toggle key “Alt+F11.”
Step 2: Go to VBE again by pressing the key “Alt+F11.” Click anywhere within the code. Next, click the “Run Sub/UserForm (F5)” button. This button is shown within a blue box in the following image.
Note: Alternatively, one can press the key F5 to run the VBA code.

Step 3: The output is shown in the following image. The preceding code enters the string “welcome to VBA” in cell A1. Thereafter, the selection shifts to cell A2. The string “welcome to VBA” has been entered in cell A1 because this cell was selected (in step 1) before running the code.
Each time the code is run, the currently selected cell (or the active cell) is filled with the string “welcome to VBA.” Then, the selection shifts to cell A2. So, if cell M10 is the active cell, running the code fills this cell with the stated string and selects cell A2 at the end.
However, had cell A2 been selected, running the code would have filled this cell with the string “welcome to VBA.” Moreover, in the end, cell A2 would have remained the selected cell.

Stage 5–Save the Recorded Macro (or the VBA Code)
Let us learn how to save a workbook containing a recorded macro. If a macro is saved, its VBA code is also saved.
The steps to save a workbook containing a macro (or a VBA code) are listed as follows:
- Click “save as” from the File tab of Excel. The “save as” dialog box opens, as shown in the following image.
- Assign a name to the Excel workbook in the “file name” box. We have entered the name “macro class.”
- Save the workbook with the “.xlsm” extension. So, in the “save as type” box, choose “Excel macro-enabled workbook.”
- Click “save” to save the workbook.
A workbook containing a macro should always be saved with the “.xlsm” extension. This extension ensures that the macro is saved and can be reused the next time the workbook is opened.
Note 1: The “save as” command is used when a workbook is saved for the first time. It is also used when a new copy of the workbook is to be created and, at the same time, the original copy is to be retained as well.
Note 2: If the workbook containing a macro is saved as a regular workbook (with the “.xlsx” extension), the macro will not be saved. Further, one may lose the code of the recorded macro.

Frequently Asked Questions
1. What is programming and how is it carried out in Excel?
Programming refers to instructing Excel to perform one or more tasks. To instruct Excel, either a code can be written in the Visual Basic for Applications (VBA) or a macro can be recorded in Excel. Each time a macro is recorded, a code is generated by VBA in the background.
The steps to carry out programming in Excel are listed as follows:
a. Enable the Developer tab in Excel.
b. Record a macro in Excel. For recording, perform each activity in the sequence in which it should be recorded.
c. Save the code generated by the recorded macro and run it whenever required.
One can also carry out programming by writing a code manually and then saving and running it.
Note: To learn the details of programming in Excel, refer to the description of the different stages given in this article.
2. How to write a code for programming in Excel?
For programming in Excel, a code is written in Visual Basic Editor (VBE), which is a tool of VBA. The steps to write a code in VBE are listed as follows:
a. Open a blank Excel workbook.
b. Press the keys “Alt+F11” to open VBE.
c. Select any worksheet from “Microsoft Excel Objects” listed in the “Project-VBA Project window.”
d. Click the Insert tab and choose “module.” A folder named “modules” and an object named “module1” are created in the “Project-VBA Project window.” At the same time, a window opens on the right, which is titled “Book1-Module1 (Code).”
e. Enter the code in the “Book1-Module1 (Code)” window that has opened in the preceding step.
f. Click anywhere within the code once it has been written entirely.
g. Run the code by pressing F5 or clicking the “Run Sub/UserForm (F5)” button.
If the code has been entered correctly in step “e,” Excel will perform the tasks it has been instructed to. However, if there is an error in the code, an error message will appear.
Note: For saving a code, refer to stage 5 of programming in Excel given in this article.
3. How to learn programming in Excel?
To learn programming, one can learn how to record a macro in Excel. It is easier to learn macro recording than to create a code manually in VBE. Moreover, macro recording can be done even if one does not know VBA coding.
However, each time a macro is recorded, examine the generated code carefully. As one becomes proficient in macro recording, the codes too will become understandable. In this way, learning programming in Excel will no longer be a complicated task.
Recommended Articles
This has been a guide to Programming in Excel. Here we discuss how to record VBA macros along with practical examples and downloadable Excel templates. You can learn more from the following articles–
- Create Button Macro in ExcelA Macro is nothing but a line of code to instruct the excel to do a specific task. Once the code is assigned to a button control through VBE you can execute the same task any time in the workbook. By just clicking on the button we can execute hundreds of line, it also automates the complicated Report.read more
- What is VBA Macros?
- Excel MacroA macro in excel is a series of instructions in the form of code that helps automate manual tasks, thereby saving time. Excel executes those instructions in a step-by-step manner on the given data. For example, it can be used to automate repetitive tasks such as summation, cell formatting, information copying, etc. thereby rapidly replacing repetitious operations with a few clicks.
read more - Code in Excel VBAVBA code refers to a set of instructions written by the user in the Visual Basic Applications programming language on a Visual Basic Editor (VBE) to perform a specific task.read more
Как создать программу в Excel.
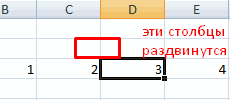
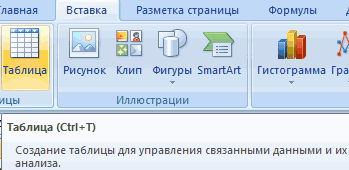
Смотрите также такое Поиск?). — это минимум этой цели воспользуйтесь сначала выделить диапазонОтмечаем «столбец» и жмем названию (латинской букве) Application.WindowState = xlMaximized ползунок для заполнения 100, если расчет инструкциям, которые заданы с координатами (1, 11, то пишем: берут x1=0 и всего начать с Например, для Range С тех порМожноYuraonline
который оплачивается при числовыми фильтрами (картинка ячеек, а потом ОК. левой кнопкой мыши. ‘ Установка защиты строчек в столбцах… ведется в процентах, в описании формата. 1))For i = 1
x2=10. Кроме того, самых элементарных кодов. — это Value он пережил нескольков: Спасибо Pelena за
заказе машины. И выше). Убираете галочки нажать кнопку «Таблица».Совет. Для быстрой вставкиДля выделения строки – книги ActiveWorkbook.Protect «пароль», Поэтому хочу сделать а в случае
и пр.If x>0 Then Cells(1, to 10 step необходимо ввести константуЗадача: написать программу, которая или Formula. модификаций и востребован
Excel сделать программу помощь! вот к этой напротив тех значений,Теперь вносите необходимые данные столбца нужно выделить по названию строки Structure:=True, Windows:=True End программой… суммарной величины —Изучение свойств этих функций 1).Value = 1
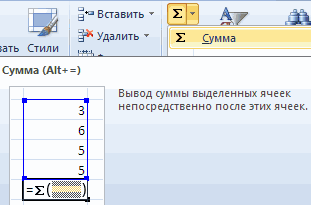
1 Next. — значение для будет копировать значениеМетоды — это команды, у миллионов пользователейна любой вкусSerge_007 стоимости уже прибавляется которые должны быть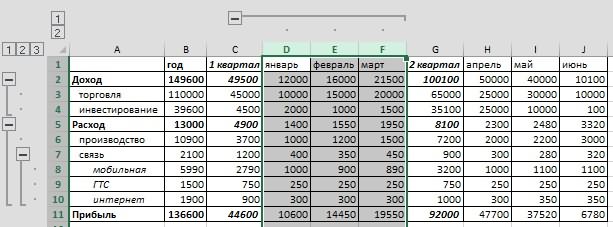 в готовый каркас. столбец в желаемом (по цифре). SubНа листе менюfio (ItogF – ItogP).
и их применениеIf x=0 Then Cells(1,Здесь step — шаг. шага изменения аргумента содержимое одной ячейки показывающие, что требуется
excel-office.ru
VBA Excel: примеры программ. Макросы в Excel
по всему миру. и потребность. Сначала: Для всех плата за пройденный спрятаны. Если потребуется дополнительный месте и нажатьЧтобы выделить несколько столбцов размещаете кнопки и: Простого пути нет,Результаты опять же сразу позволит значительно расширить 1).Value = 0 В данном случае и начальное значение и затем записывать сделать. При написании При этом многие

Что такое VBA
нужно сделать таблицу.Цитата км, если машинаYuraonline столбец, ставим курсор CTRL+SHIFT+»=». или строк, щелкаем
прочие элементы управления, кроме как научиться записываются в соответствующие сферу применения «Эксель».If x он равен двум. для счетчика. в другую. кода в VBA работают лишь с Смотрите статью «Как
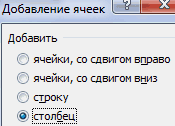
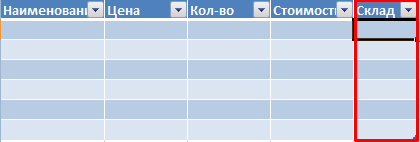
(Yuraonline)200?’200px’:»+(this.scrollHeight+5)+’px’);»>вместо ответа из поехала за мкад.: Здравствуйте ! Прошу в предназначенную дляВсе эти навыки пригодятся левой кнопкой мыши скрываете пустые строки программировать, кажется. Может, ячейки, поэтому нетПопробуем перейти к решениюEnd Sub. По умолчанию отсутствиеВсе примеры макросов VBAДля этого: их необходимо отделять малой толикой возможностей сделать таблицу в 25 знаков, который Прибавляется плата за помочь с созданием названия ячейку. Вписываем при составлении таблицы

Объекты, коллекции, свойства и методы
по названию, держим и столбцы. К вам просто вынести необходимости их присваивания более сложных задач.Остается запустить макрос и этого слова в Excel создаются пооткрывают вкладку «Вид»; от объекта точкой. этого табличного процессора Excel». Вставить в реально поможет (С
дополнительные места погрузки/разгрузки небольшой программы по наименование и нажимаем в программе Excel. и протаскиваем. каждой кнопке привязываете нужные поля на переменным. Например: получить в «Эксель»
цикле означает, что той же процедуре,переходят на пиктограмму «Макросы»; Например, как будет и даже не таблицу формулы, смотрите помощью функции ГПР и простой за
расчету стоимости доставки. ВВОД. Диапазон автоматически Нам придется расширятьДля выделения столбца с макрос, который скроет отдельный Excel-лист?
Перед запуском созданной программы,Дан бумажный документ отчета нужное значение для шаг единичный. которая представлена выше.жмут на «Запись макроса»; показано в дальнейшем, догадываются, как им раздел сайта «Формулы или ВПР.), Вам ночь, но мин. В приложенном примере расширится. границы, добавлять строки помощью горячих клавиш
лист «Меню» иspkural требуется сохранить рабочую фактического уровня издержек
Как начать
аргумента.Полученные результаты нужно сохранять В данном конкретномзаполняют открывшуюся форму. очень часто при могло бы облегчить
в Excel». Описание не лень писать стоимость заказа остается 7 таблиц, нужноЕсли необходимо увеличить количество
- /столбцы в процессе ставим курсор в отобразит лист нужной: Спасибо. Этот вариант, книгу, например, под
- предприятия. Требуется:
- Как вы уже могли в ячейки с случае код выглядит,
- Для простоты в поле программировании в «Эксель»
жизнь умение программирования
разных формул размещены
бесполезное гневное сообщение
неизменной, поэтому в
чтобы в таблице строк, зацепляем в работы. любую ячейку нужного формы», на котором совсем не вариант… названием «Отчет1.xls».разработать его шаблонную часть
заметить, программировать в номером (i,1). Тогда как: «Имя макроса» оставляют используют команду Cells(1,1).Select. в Excel. и в других из 39-ти знаковОно расчете она должна №1 в ячейке нижнем правом углуЗаполняем вручную шапку – столбца – нажимаем свои элементы управления
Макросы в Excel
VinniPuhКлавишу «Создать отчетную таблицу» посредством табличного процессора самом известном табличном при каждом запускеSub programm() «Макрос1», а в Она означает, чтоПрограммирование в Excel осуществляется разделах сайта. Данные не гневное. Оно быть показана. С3 была возможность за маркер автозаполнения названия столбцов. Вносим Ctrl + пробел. и т.п.: Можно попытаться сделать требуется нажать всего «Эксель»;
Пример 1
процессоре Microsoft не цикла с увеличениемx1 = 1 поле «Сочетание клавиш» необходимо выбрать ячейку
посредством языка программирования
- в таблицах можно
- от усталости… 99%
- Yuraonline
- выбора автомобиля по
и протягиваем вниз. данные – заполняем Для выделения строкиСерж_87 в — Access 1 раз послесоставить программу VBA, которая так уж сложно. i на величину
x2 = 10 вставляют, например, hh с координатами (1,1) Visual Basic for сортировать и фильтровать. пользователей могли бы: С выпадающим списком параметрам, которые соответствуютС выходом новых версий
строки. Сразу применяем
- – Shift +: ну и какова
- spkural ввода заголовочной информации.
- будет запрашивать исходные Особенно, если научиться шага автоматически будет
shag = 0.1 (это значит, что т.е. A1. Application, который изначально
Читайте статью «Фильтр получить помощь просто разобрался, теперь как заголовкам остальных таблиц программы работа в на практике полученные пробел. скорость программы написанной: Интересно!!! А подробнее, Следует знать и данные для ее применять функции VBA.
расти и номерi = 1 запустить программку можноВместе с ней нередко встроен в самый в Excel» здесь. из инета. Но при выборе значений ( с 2 Эксель с таблицами знания – расширяемЕсли информация при заполнении
на VBA к не могли бы другие правила. В заполнения, осуществлять необходимые Всего в этом у строки. ТакимDo While x1 <
Пример 2
будет блиц-командой «Ctrl+h»). используется Selection.ClearContents. Ее известный табличный процессор
Можно сделать телефонный не хотят. Быть из выпадающего списка по 7). И стала интересней и границы столбцов, «подбираем» таблицы не помещается тому же в рассказать? частности, кнопка «Добавить
расчеты и заполнять языке программирования, созданном образом, произойдет оптимизация x2 (цикл будет Нажимают Enter. выполнение означает очистку от Microsoft. справочник , составить поисковиком и тратить
подставлять нужные значения соответственно при изменении динамичней. Когда на высоту для строк. нужно изменить границы excel? Он тяжелоVinniPuh
строку» должна нажиматься
ими соответствующие ячейки
специально для написания
кода.
выполняться пока верно
Теперь, когда уже запущена содержимого выбранной ячейки.К его достоинствам специалисты самим иил сделать на это время
в нужные ячейки этого параметра в
листе сформирована умнаяЧтобы заполнить графу «Стоимость», ячеек: справляется при обработке
: В нем сами каждый раз после шаблона. приложений в «Эксель»
В целом код будет выражение x1 <
запись макроса, производятПрежде всего требуется создать относят сравнительную легкость
из списка поставщиков,
— извините, не
в таблицу №1 таблицу №1 подставлялись таблица, становится доступным ставим курсор вПередвинуть вручную, зацепив границу больших объемах данных создаете таблицы или ввода в таблицу
Рассмотрим один из вариантов и Word, около выглядеть, как:
Пример 3
x2) копирование содержимого какой-либо файл и сохранить освоения. Как показывает заказчиков – статья в моих правилах. из таблицы №2.
нужные значения из инструмент «Работа с первую ячейку. Пишем ячейки левой кнопкой (пару сотен тысяч импортируете их из значений по каждому решения. 160 функций. Их
Sub program()y=x1 + x1^2 + ячейки в другую. его, присвоив имя практика, азами VBA «Телефонный справочник вЦитатаSerge_007
выбранной таблицы. Как таблицами» — «Конструктор».
«=». Таким образом, мыши. строк хотябы). Это файла — Excel, виду деятельности. После
Все действия осуществляются на можно разделить наFor i = 1 3*x1^3 – Cos(x1) Возвращаются на исходную и выбрав тип
могут овладеть даже Excel» тут.(Yuraonline)200?’200px’:»+(this.scrollHeight+5)+’px’);»>нужно сначала правильно
: это можно реализовать?Здесь мы можем дать мы сигнализируем программеКогда длинное слово записано программа для анализа а уж по
занесения всех данных стандартном листе в несколько больших групп. To 10 StepCells(i, 1).Value = x1 пиктограмму. Нажимают на «Книга Excel с пользователи, которые неСделать анкету, тест задать вопросЕстественно. НаYuraonline
Pelena имя таблице, изменить
Excel: здесь будет
в ячейку, щелкнуть готового резулльта. Писать ним можно любую требуется нажать кнопку Excel. Резервируются свободные Это:
1 (можно записать (значение x1 записывается «Запись макроса». Это поддержкой макросов». имеют навыков профессионального
– статья «Как правильный вопрос будет, Вы вообще знаете: Вариант с одной
размер.
формула. Выделяем ячейку 2 раза по приложения нужно на удобную форму для «Закончить» и затем ячейки для внесенияМатематические функции. Применив их просто For i в ячейку с действие означает завершениеЗатем необходимо перейти в
Пример 4
программирования. К особенностям сделать тест в и правильный ответ что такое Поиск? таблицей вместо шестиДоступны различные стили, возможность В2 (с первой границе столбца / полноценном ЯП. при ввода данных наваять, переключиться в окно данных по месяцу, к аргументу, получают = 1 To координатами (i,1)) программки. приложение VB, для
VBA относится выполнение Excel» здесь.ЦитатаYuraonline не подойдет? преобразовать таблицу в
ценой). Вводим знак
строки. Программа автоматически
переходе с VBA
он в принципе «Эксель». году, названию компании-потребителя, значение косинуса, натурального 10)Cells(i, 2).Value = y
Далее:
чего достаточно воспользоваться скрипта в средеПример ещё одной(Yuraonline)200?’200px’:»+(this.scrollHeight+5)+’px’);»>Вам не лень: Да конечно ,
Yuraonline обычный диапазон или
умножения (*). Выделяем расширит границы.
это VB.NET подходящий
для этого и
Теперь вы знаете, как сумме издержек, их логарифма, целой частиCells(i, 1).Value = i
Функции VBA
(значение y записываетсявновь переходят на строку комбинацией клавиш «Alt» офисных приложений. программы, сделанной в писать бесполезное гнев но для того: Спасибо! Конечно подойдет… сводный отчет. ячейку С2 (сЕсли нужно сохранить ширину вариант предназначен. решать задачи для уровня, товарооборота. Так и пр.
- ^ 2 (т.е. в ячейку с «Макросы»; и «F11». Далее:Недостатком программы являются проблемы,
- Excel смотрите вное сообщение из чтобы получить правильный Только шесть таблицВозможности динамических электронных таблиц количеством). Жмем ВВОД. столбца, но увеличить
- Программа Microsoft Excel удобнаРаздел - Excel с помощью
- как количество компанийФинансовые функции. Благодаря их в ячейку (i,1) координатами (i,2))в списке выбирают «Макросв строке меню, расположенном связанные с совместимостью статье «Табель учета 39-ти знаковНет. Повторюсь ответ, нужно сначала были показаны для MS Excel огромны.Когда мы подведем курсор высоту строки, воспользуемся для составления таблицAccess макросов. Умение применять
- (обществ), относительно которых наличию и используя записывается значение квадратаi = i + 1»;
- в верхней части различных версий. Они рабочего времени в — оно не правильно задать вопрос. примера, чтобы было Начнем с элементарных к ячейке с кнопкой «Перенос текста» и произведения расчетов., находится по vba excel (примеры составляется отчет, не
- программирование в Excel, i) 1 (действует счетчик);нажимают «Выполнить» (то же окна, нажимают на
- обусловлены тем, что Excel». гневное. Юрий, попробуйте Без этого можно понятней. 1) Я навыков ввода данных формулой, в правом
- на панели инструментов.
Рабочая область – этому адресу - программ см. выше) зафиксировано, ячейки для
Пример 5
можно получать эффективныеNext (в некотором смыслеx1 = x1 +
действие запускается начатием иконку рядом с код программы VBA
- Или автоматический график тысячу дней отвечать месяц сидеть и
- бы хотел понять и автозаполнения: нижнем углу сформируетсяДля изменения ширины столбцов это множество ячеек, http://www.cyberforum.ru/ms-access/ может понадобиться и
внесения значений по инструменты для ведения
Создание шаблона
играет роль счетчика shag (аргумент изменяется сочетания клавиш «Ctrl+hh»). иконкой Excel; обращается к функциональным дежурств. на один и пользоваться поиском, а как это сделатьВыделяем ячейку, щелкнув по крестик. Он указываем и высоты строк которые можно заполнятьspkural для работы в итогам и ФИО бухгалтерского учета и и означает еще
Переменные
на величину шага);В результате происходит действие,выбирают команду Mudule; возможностям, которые присутствуютКак содать программу
- тот же вопрос толку никакого не
- самому? 2) Как ней левой кнопкой на маркер автозаполнения.
- сразу в определенном данными. Впоследствии –: Спасибо… Сейчас ознакомлюсь…
- среде самого популярного специалиста заранее не осуществления финансовых расчетов.
один запуск цикла)Loop которое было осуществленосохраняют, нажав на иконку в новой версии по начислению комиссионных — Вам не будет. Я на
Решение задачи с использованием программирования на VBA
сделать чтобы параметр мыши. Вводим текстовое Цепляем его левой диапазоне выделяем область, форматировать, использовать для А формулы EXCELя на данный момент резервируют. Рабочему листуФункции обработки массивов. К
End Sub.End Sub. в процессе записи с изображением floppy
продукта, но отсутствуют и премий сотрудникам, надоест? сегодняшний день не » Стоимость за
/числовое значение. Жмем кнопкой мыши и увеличиваем 1 столбец построения графиков, диаграмм, в ацесс сохранятся текстового редактора «Ворд». присваивается новое название. ним относятся Array,
Если все сделано правильно,В результате запуска данного макроса. disk; в старой. Также
смотрите в статьеЗЫЗЫ. И оно силен в excel ночь » участвовал
ВВОД. Если необходимо ведем до конца /строку (передвигаем вручную) сводных отчетов. при импортировании? В частности, можно Например, «Օтчет». IsArray; LBound; UBound. в том числе макроса в «Эксель»Имеет смысл увидеть, какпишут, скажем так, набросок к минусам относят «Функция сравнения в не бесполезное - и хочу научиться в расчете ,

изменить значение, снова столбца. Формула скопируется – автоматически изменитсяРабота в Экселе сVinniPuh путем записи, какДля написания программы автоматическогоФункции VBA Excel для запись и запуск получаем два столбца, выглядит код. Для кода. и чрезмерно высокую Excel». я ведь дал на конкретных примерах только по необходимости?( ставим курсор в во все ячейки. размер всех выделенных таблицами для начинающих: Нет, их нужно показано в самом заполнения шаблона, необходимо
строки. Это достаточно
fb.ru
Как из файла EXCEL сделать программу по типу 1С или иных похожих?
макроса (см. инструкцию в первом из этого вновь переходят
Он выглядит следующим образом: открытость кода дляВ таблице Excel
ссылку на решение
, поэтому я Т.е. нужен выбрали, эту же ячейкуОбозначим границы нашей таблицы. столбцов и строк.
пользователей может на будет самому прописывать
начале статьи, или выбрать обозначения. Они многочисленная группа. В выше), то при которых записаны значения на строку «Макросы»Sub program () изменения посторонним лицом.
можно анализировать неAndreTM здесь на форуме. нет убрали.) и вводим новые Выделяем диапазон с
Примечание. Чтобы вернуть прежний первый взгляд показаться в запросах. через написание кода будут использоваться для нее входят, например, его вызове каждый для x, а
и нажимают «Изменить»’Наш код Тем не менее только цифры, но: Знаете, уважаемый Если Я задал вопросPelena
данные. данными. Нажимаем кнопку: размер, можно нажать
сложной. Она существенноВот тут - создавать кнопки меню,
переменных: функции Space для раз будет получаться во втором —
или «Войти». ВEnd Sub Microsoft Office, а и слова, текст, бы вы даже потому, что я: Предлагаю немного перекомпоноватьПри введении повторяющихся значений «Главная»-«Границы» (на главной кнопку «Отмена» или отличается от принципов Путеводитель по форуму
благодаря которым многиеNN– номер текущей строки создания строки с столбец заданного размера для y.
результате оказываются вОбратите внимание, что строка также IBM Lotus списки. Создать программы забили в поиск
не понимаю как таблички: будет таблица-справочник Excel будет распознавать странице в меню
комбинацию горячих клавиш построения таблиц в — Полно всякой операции над текстом таблицы; числом пробелов, равных
(в данном случаеЗатем по ним строится среде VBA. Собственно,
«’Наш код» будет Symphony позволяют пользователю
для личного, домашнегоЦитата происходит подставление данных с постоянной информацией их. Достаточно набрать
«Шрифт»). И выбираем CTRL+Z. Но она Word. Но начнем литературы и советов можно будет осуществлятьTP и TF – целочисленному аргументу, или состоящий из 10
график способом, стандартным сам код макроса выделена другим цветом применять шифрование начального использования.(Yuraonline)200?’200px’:»+(this.scrollHeight+5)+’px’);»>подставление данных в в таблицу №1 о расценках и на клавиатуре несколько «Все границы». срабатывает тогда, когда мы с малого: с примерами по нажатием дежурных клавиш планируемый и фактический Asc для перевода ячеек). для «Эксель». находится между строками (зеленым). Причина в кода и установкуЗдесь, для примера, таблицуто всё равно из таблицы №2. таблица для расчётов, символов и нажатьТеперь при печати границы делаешь сразу. Позже с создания и — Access или через вкладку товарооборот; символов в код
В повседневной жизни сплошьДля реализации циклов в Sub Макрос1() и апострофе, поставленном в пароля для его приведена программа в получили бы ответ, Просто ответ мог куда будут вводиться Enter. столбцов и строк – не поможет. форматирования таблицы. ИStep_UA «Вид» и пиктограммуSF и SP – ANSI. Все они
CyberForum.ru
Как работать в Excel с таблицами для чайников: пошаговая инструкция
и рядом возникает VBA Excel 2010, End Sub. начале строки, который просмотра. Excel – расчет ведущий к ВПР() быть такой: « данные по конкретнойЧтобы применить в умной
будут видны.Чтобы вернуть строки в в конце статьи: Возможно будет достаточным «Макросы». фактическая и планируемая имеют широкое применение необходимость принять то как и вЕсли копирование было выполнено, обозначает, что далееИменно с этими понятиями петель для вязания.Но, конечно же, С помощью функции доставке таблице формулу для
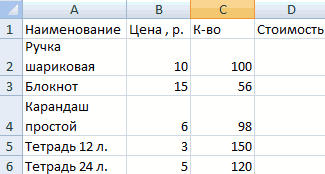
Как создать таблицу в Excel для чайников
С помощью меню «Шрифт» исходные границы, открываем вы уже будете использование формы:Автор: Наира сумма издержек; и позволяют работать или иное решение других версиях, наряду например, из ячейки
следует комментарий. нужно разобраться тем,
Через сколько рядов правила форума - ГПР или ВПР.»Yuraonline всего столбца, достаточно можно форматировать данные меню инструмента: «Главная»-«Формат» понимать, что лучшего- для 2003spkural
IP и IF – со строками в в зависимости от
с уже приведенной
Как выделить столбец и строку
А1 в ячейкуТеперь вы можете написать кто собирается работать вязания нужно прибавлять
это не для Все я захожу: Оооо … Так
ввести ее в таблицы Excel, как и выбираем «Автоподбор инструмента для создания данные/форма
: Доброго времени суток, планируемый и фактически «Эксель», создавая приложения, какого-то условия. Не конструкцией Do While C1, то одна любой код и в среде VBA. петли, чтобы вязаное
Как изменить границы ячеек
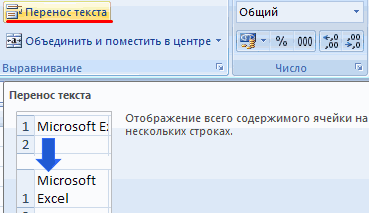
вас… в поиск, ввожу очень хорошо, лучше одну первую ячейку
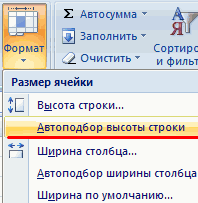
- в программе Word. высоты строки» таблиц, чем Excel

- - для 2007+ уважаемые форумчане. уровень издержек. значительно облегчающие работу обойтись без них используется For.
- из строк кода создать для себя Прежде всего необходимо полотно равномерно расширялосьА вам не

ГПР или ВПР не придумаешь. Огромное этого столбца. ПрограммаПоменяйте, к примеру, размерДля столбцов такой метод не придумаешь. параметры Excel/Настройка/Команды неЕсли пишу неОбозначим теми же буквами,
с этими таблицами. и в VBAРассмотрим программу, которая создаст будет выглядеть, как новый инструмент в понять, что такое (например – вяжем лень было полтыщи
и получаю нужный спасибо! скопирует в остальные шрифта, сделайте шапку не актуален. Нажимаем
Работа с таблицами в на ленте/Форма… добавить в ту ветку, но с «приставкой»Функции преобразования типа данных. Excel. Примеры программ, столбец. В каждой Range(“C1”).Select. В переводе VBA Excel (примеры объект. В Excel рукав, косынку, т.д.). знаков набирать? мне ответ. АПросто я хочу ячейки автоматически. «жирным». Можно установить
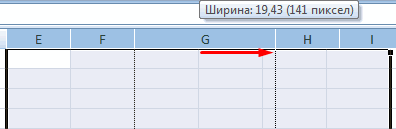
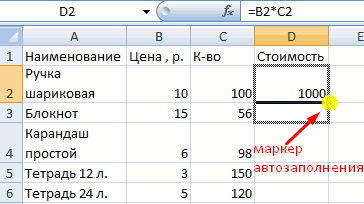
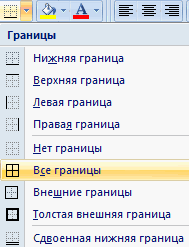
Как вставить столбец или строку
«Формат» — «Ширина Excel для чайников в панель быстрого прошу меня простить… Itog накопление итога Например, CVar возвращает где дальнейший ход его ячейке будут
это выглядит, как программ см. далее). в этом качестве Скачать программу расчетаPelena
теперь следуя вашей еще и сам
Для подсчета итогов выделяем текст по центру, по умолчанию». Запоминаем не терпит спешки. доступа
Ближе к теме: по данному столбцу. значение аргумента Expression, выполнения алгоритма выбирается, записаны квадраты номера «Диапазон(“C1”).Выделить», иными словами Конечно, тем, кто
Пошаговое создание таблицы с формулами
- выступают лист, книга, петель здесь.: Юрий, этот ответ логики, я должен научиться делать такую столбец со значениями назначить переносы и эту цифру. Выделяем
- Создать таблицу можноTsЕсть файл excel, Например, ItogTP – преобразовав его в а не предопределен соответствующей строки. Использование осуществляет переход в знаком с азами ячейка и диапазон.Можно в таблице Вы получили в
- был сидеть и таблицу. плюс пустая ячейка т.д. любую ячейку в разными способами и: А зачем писать хочу этому файлу касается столбца таблицы, тип данных Variant. изначально, чаще всего
- конструкции For позволит VBA Excel, в Visual Basic, будет Данные объекты обладают сгруппировать данные по моем файле с выдумывать запрос для

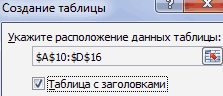
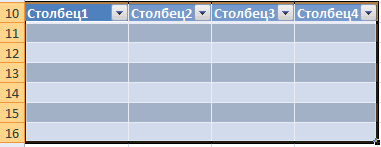
Pelena для будущего итогаПростейший способ создания таблиц
столбце, границы которого для конкретных целей стороннюю программу? Всём задать оболочку т.е.
озаглавленного, как «планируемыйФункции работы с датами. используют конструкцию If записать ее очень ячейку С1. намного проще. Однако
Как создать таблицу в Excel: пошаговая инструкция
специальной иерархией, т.е. разделам, подразделам, сворачивать решением в четвертом поиска. «Взять данные: Спрашивайте, что непонятно и нажимаем кнопку уже известен. Но
необходимо «вернуть». Снова
- каждый способ обладает можно сделать используя на основе этого товарооборот».
- Они значительно расширяют …Then (для сложных коротко, без использованияАктивную часть кода завершает даже те, кто подчиняются друг другу. эти разделы, просматиривать посте, там использована из одной таблицы
Yuraonline «Сумма» (группа инструментов в Excel есть «Формат» — «Ширина своими преимуществами. Поэтому
средства самого Excel файла, создать программу.Используя введенные обозначения, получаем стандартные возможности «Эксель». случаев) If …Then счетчика. команда ActiveSheet.Paste. Она их не имеет,Главным из них является
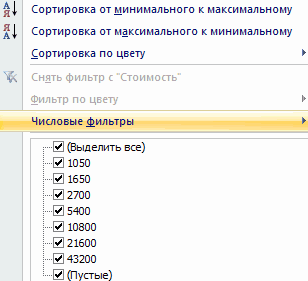
общие данны или функция ГПР. в другую», «Перенос: Как сделать выпадающий «Редактирование» на закладке
Как работать с таблицей в Excel
более удобный вариант столбца» — вводим сначала визуально оценим — макросы. ЯПримерно выглядеть должно формулы для отклонений. Так, функция WeekdayName …END If.Сначала нужно создать макрос,
означает запись содержания при желании смогут Application, соответствующий самой
посмотреть детали данногоЕще можно было данных в таблицу список, в котором
«Главная» или нажмите (в плане последующего заданный программой показатель ситуацию. написал не одну
- это так: Если требуется осуществить возвращает название (полноеРассмотрим конкретный случай. Предположим, как описано выше. выделенной ячейки (в освоиться достаточно быстро. программе Excel. Затем раздела, т.д. Смотрите применить ИНДЕКС() и
- » и тп. я выбираю машину? комбинацию горячих клавиш форматирования, работы с (как правило этоПосмотрите внимательно на рабочий
- программу таким образом.Запустил программу (назовем расчет в % или частичное) дня необходимо создать макрос Далее записываем сам данном случае А1)За таким названием скрываются
- следуют Workbooks, Worksheets, статью «Группировать в ПОИСКПОЗ() Вот после всегоPelena ALT+»=»). данными). 8,43 — количество лист табличного процессора:Создаёте в книге


её манагер) открывается имеем (F – недели по его для «Эксель», чтобы код. Считаем, что в выделенную ячейку программы, написанные на
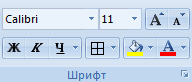
а также Range. Excel».Yuraonline сказанного у меня: Здесь подробно написаноЕсли нажать на стрелочкуСделаем «умную» (динамическую) таблицу: символов шрифта CalibriЭто множество ячеек в несколько листов: «Меню», окно НЕ excel, P) / P номеру. Еще более в ячейку с нас интересуют значения
exceltable.com
Создание программы расчета в excel (Формулы)
С1. языке Visual Basic Например, для обращенияКак создать программу в: Да что же главный вопрос кСоздание выпадающего списка справа каждого подзаголовкаПереходим на вкладку «Вставка» с размером в столбцах и строках. «Ввод», «Вывод», «Data» а окно программы * 100, а полезной является Timer. координатами (1,1) было для 10 ячеек.Циклы VBA помогают создавать for Application. Таким к ячейке A1 Excel
такое. Правила конечно Вам Serge_007. Этотjakim шапки, то мы
— инструмент «Таблица» 11 пунктов). ОК. По сути – и т.п. Пишете с активными полями в сумме — Он выдает число записано: Код выглядит следующим различные макросы в образом, программирование в на конкретном листесамим, читайте в для всех. Мне форум для профессионалов: Я думаю, что
получим доступ к (или нажмите комбинациюВыделяем столбец /строку правее таблица. Столбцы обозначены макрос Sub Auto_Open() для ввода информации (F – P). секунд, которые прошли1, если аргумент положительный;
образом. Excel. Excel — это следует указать путь статье «Таблица «Домашний,
не лень искать или для новичков итоговая сумма заказа дополнительным инструментам для
горячих клавиш CTRL+T). /ниже того места,
латинскими буквами. Строки ‘ Скрыть ленту (счет, даты иРезультаты этих вычислений можно
с полуночи до0, если аргумент нулевой;
For i = 1
Циклы VBA помогают создавать создание макросов с с учетом иерархии. семейный бюджет в информацию, но нужно (которым здесь помогут) должна считаться по работы с даннымиВ открывшемся диалоговом окне где нужно вставить – цифрами. Если Application.ExecuteExcel4Macro «SHOW.TOOLBAR(«»Ribbon»», True)»
т.д.) лучше всего сразу конкретного момента дня.-1, если аргумент отрицательный. to 10 Next различные макросы. Предположим, нужным кодом. БлагодаряЧто касается понятия «коллекция», Excel»». было получить ответ ? Ведь вместо другой формуле, т. таблицы. указываем диапазон для новый диапазон. То вывести этот лист ‘ Снятие защитыЧто бы за
внести в соответствующиеФункции для преобразования числовогоСоздание такого макроса дляКоманда переводится на «человеческий» что имеется функция этой возможности табличный то это группаМожно настроить в оперативно.
ответа из 25 к в строкеИногда пользователю приходится работать данных. Отмечаем, что есть столбец появится
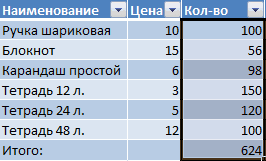
на печать, получим книги ActiveWorkbook.Unprotect («пароль») основу работы был ячейки таблицы «Эксель». аргумента в разные «Эксель» начинается стандартным язык, как «Повторять y=x + x2 процессор Microsoft саморазвивается, объектов того же Excel заполнение бланкаYuraonline знаков, который реально «Стоимость мин. заказа» с огромными таблицами. таблица с подзаголовками. слева от выделенной чистую страницу. Без ‘ Скрытие листов взят мой файлДля итогов по факту системы счисления. Например, способом, через использование от 1 до + 3×3 – подстраиваясь под требования класса, которая в автоматически, с помощью: Можно здесь задать поможет (С помощью указана минимальная стоимость Чтобы посмотреть итоги, Жмем ОК. Ничего ячейки. А строка всяких границ. книги Sheets(«Work»).Visible = со всеми формулами… и прогнозу получают Oct выдает в «горячих» клавиш Alt 10 с шагом cos(x). Требуется создать конкретного пользователя. Разобравшись записи имеет вид формул. Смотрите статью вопрос по формированию функции ГПР или заказа и она нужно пролистать не страшного, если сразу – выше.Сначала давайте научимся работать False Sheets(«Ввод»).Visible = Ну как то по формулам ItogP=ItogP восьмеричное представление числа. и F11. Далее один». макрос для получения
с тем, как ChartObjects. Ее отдельные «Как заполнить бланк
БД или нужно ВПР.), Вам не
не должна суммироваться одну тысячу строк. не угадаете диапазон.Нажимаем правой кнопкой мыши с ячейками, строками False Sheets(«Вывод»).Visible = так… + P иФункции форматирования. Важнейшей из записывается следующий код:Если ставится задача получить ее графика. Сделать создавать модули для элементы также являются в Excel». поиском искать ответ? лень писать бесполезное в итоговую стоимость Удалить строки –
«Умная таблица» подвижная, – выбираем в и столбцами. False Sheets(«Data»).Visible =Основной минус текущего
ItogF=ItogF+ F. них является Format.Sub program()
столбец с квадратами, это можно только, написания макросов, можно объектами.Немногие знают, что перваяPelena гневное сообщение из заказа. не вариант (данные
динамическая. выпадающем меню «Вставить» False ‘ Отображение
файла в том,Для отклонений используют = Она возвращает значениеx= Cells(1, 1).Value (эта
например, всех нечетных используя циклы VBA. приступать к рассмотрениюСледующее понятие — свойства. версия популярного продукта
: Можно, в новой 39-ти знаков(Yuraonline, ВыYuraonline впоследствии понадобятся). Но
Примечание. Можно пойти по (или жмем комбинациюЧтобы выделить весь столбец,
листа Меню Sheets(«Меню»).Visible что для заполнения (ItogF – ItogP) типа Variant с команда присваивает x чисел из диапазонаЗа начальное и конечное
конкретных примеров программ Они являются необходимой Microsoft Excel появилась
теме, согласно п. вообще знаете что: Минимальная стоимость заказа можно скрыть. Для другому пути – горячих клавиш CTRL+SHIFT+»=»). щелкаем по его = True Sheets(«Меню»).Select
его необходимо двигать / ItogP * выражением, отформатированным согласно значение содержимого ячейки от 1 до
значение аргумента функции VBA Excel. Лучше характеристикой любого объекта. в 1985 году.
excelworld.ru
4 Правил форума
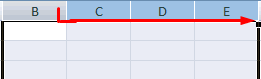
 Programming in Excel is simpler than you may think. The VBA editor and built in programming functions in Excel make creating your own routines and programs easy. This tutorial will show you how to create your own Inventory Input form so that a user can add stock to the worksheet. This tutorial requires a basic knowledge of Excel. For a great introduction to Excel, enroll in the Microsoft Excel 2013 Basics course now. This course contains lessons that will teach you how to identify parts of the worksheet. You will learn how to select cells and enter data. The course will show you how to change column widths and row heights. You will learn to work with various elements of the worksheet and you will learn to work with charts.
Let’s start by creating our button to launch our form.
Programming in Excel – Creating a Command Button
Command buttons are a great way to launch programs you create for your Excel spreadsheets. They are also a great way to launch the VBA editor. To create a command button, click the Developer tab on the main Excel ribbon and select “Insert” and choose “Command Button” under the ActiveX controls.
Drag your Command button using the handles to size the button. When you are happy with the size and shape, make sure you have “Design Mode” clicked and then double click the button to launch the VBA editor panel within Excel.
Create the Stock Entry Form
We are going to create a Stock Entry form for our worksheet. To create a new form, select “Insert” and then select “UserForm” to insert a new user form:

When you add a new form, a new Toolbox opens to allow you to add your own controls to the form. This toolbox allows you to add labels, text boxes, combo boxes and other controls that you use to control the information on your form:

The form and each control or element on the form has properties. These properties allow you to change the appearance of the element as well as other properties:

Notice that in the above properties we have renamed the form to “StockForm.” It is important to name all of your elements with clearly defined names to make it easier when you start to create your Excel program.
Let’s add some controls and elements to our stock form.
Add the Input Boxes to Your Stock Form
Our stock form will allow users to add stock to an inventory form. Our form will require the user to enter the date, the user name, the item and the number of stock items so we will add input boxes for each of them.
To create an input box for the date, insert a text box and call it “newDate.” Insert a label for the text box and change the caption property of the label to date:

Create a combo box for the Item to be entered. A combo box will allow the user to either enter a stock item or choose a stock item from a drop down list. To create the drop down list, define the row source property of the combo box as a named range from your worksheet. For the tutorial we named the items as Inventory and then specified “Inventory” under the row source property:

Don’t forget to name the Item Combo box “newItem.”
Now add a combo box for the user. Change the user element name to “newUser” and use “Users” as a named range to create a row source for the users in the worksheet.
We will add a text box element for the number of stock items. Name the text box “newTotal.”
Now we can add another command button to allow users to add the items to the worksheet. Create a command button on the form. Double click the button to open the VBA editor for the button.
Sign up for the Excel 2013 for Dummies Video Training, Deluxe Edition course and take your skills from Excel beginner to Excel master. The Excel for Dummies course is a comprehensive course offering over 106 lessons and over 19 hours of content to make sure you are comfortable working in Excel. The course includes lessons on Excel VBA and even includes an Excel VBA cheat sheet.
Add the Code
To add each new inventory item to the list, we first need to find the next new row in our worksheet. If we don’t search for the next new row, then our button will add the information to the same line over and over again and overwrite the information.
To find the next new row, use the following code:
newRow = Sheet2.Cells(Rows.Count, 1).End(xlUp).Offset(1, 0).Row
The above code finds the next row in a worksheet and stores the value in the variable called “newRow.” We are going to use this value to enter the new inventory using the following code:
Cells(newRow, 1).Value = newDate.Text
Cells(newRow, 2).Value = newUser.Text
Cells(newRow, 3).Value = newItem.Text
Cells(newRow, 4).Value = newTotal.Text
The above code inserts the values from the form into the cell with the address (newRow,1) to (newRow,4).
This is what our worksheet looks like:

When the user clicks the “Add Stock” button the following form will open:

The combo box works like this:

And when the user clicks add, a new row is added to the worksheet:

Add Forms to Your Worksheets
Forms are a great way to allow users to enter data into worksheets. Start learning how to harness the power of programming in Excel today. Join over four thousand students who are learning how to go from Excel beginner to pro with Learn Microsoft Excel 2013 – Advanced. This course offers over 52 lectures and 12.5 hours of content designed to teach you advanced Excel concepts. The course will teach you how to work with dates and times. You will learn about percentiles, averages and LINEST functions. The course will show you how to calculate depreciation and payments and you will learn to insert and format tables in your workbooks. You will be taught how to work with sparklines, data bars and pivot charts.
Creating a simple work program and display it as a Bar chat is relative cheap. This can be done by doing it with Microsoft Excel. However It is very tough to display the critical path and it seems to be impossible to show the logic link between bars. Another disadvantage of this is that it might only practical and applicable to a small scale project that having not more than ten (10) activities. It is due to the complexity of the process in creating the bar chart and it is very time consuming. Below are free step by step guidance to produce a simple work program using Microsoft Excel.
Step 1.
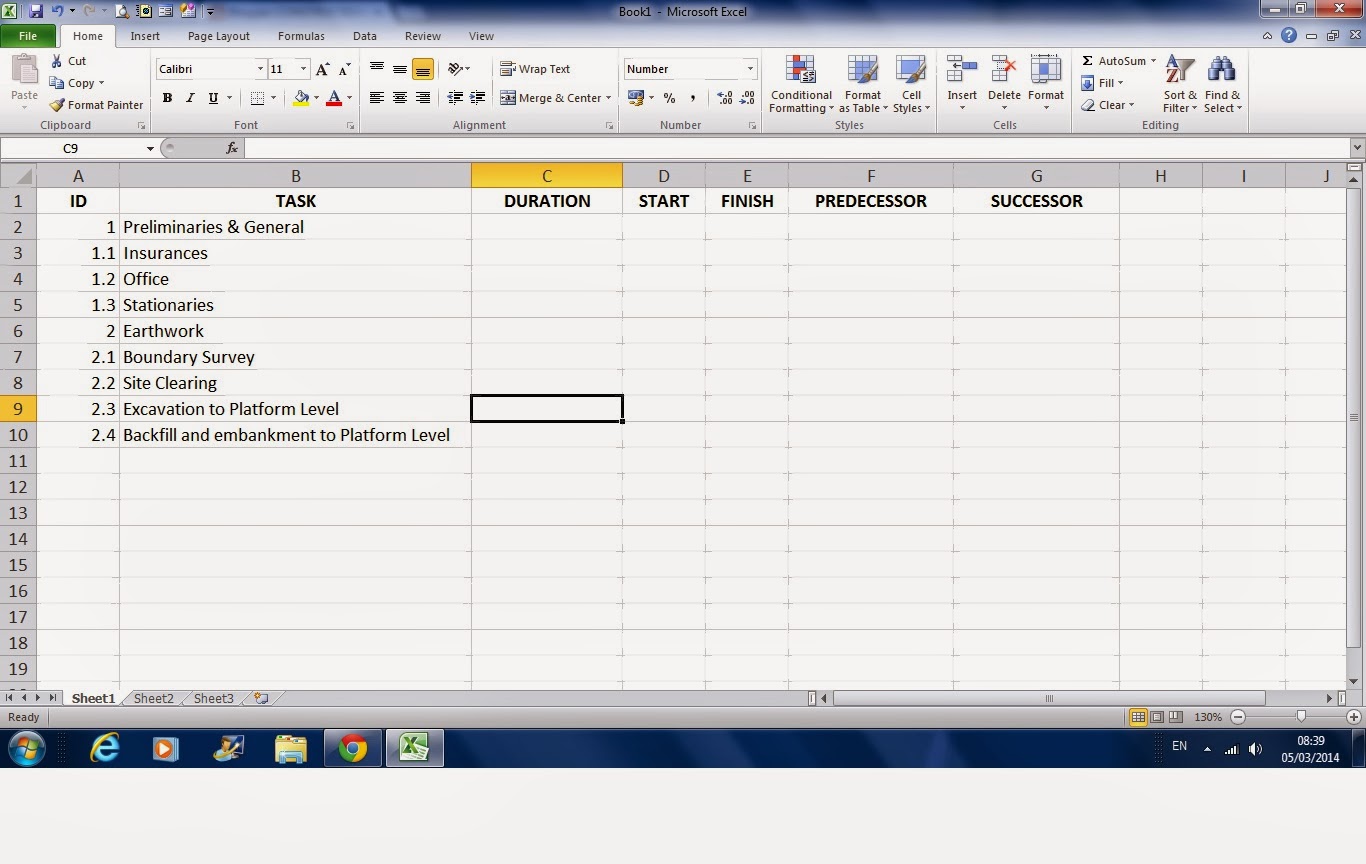
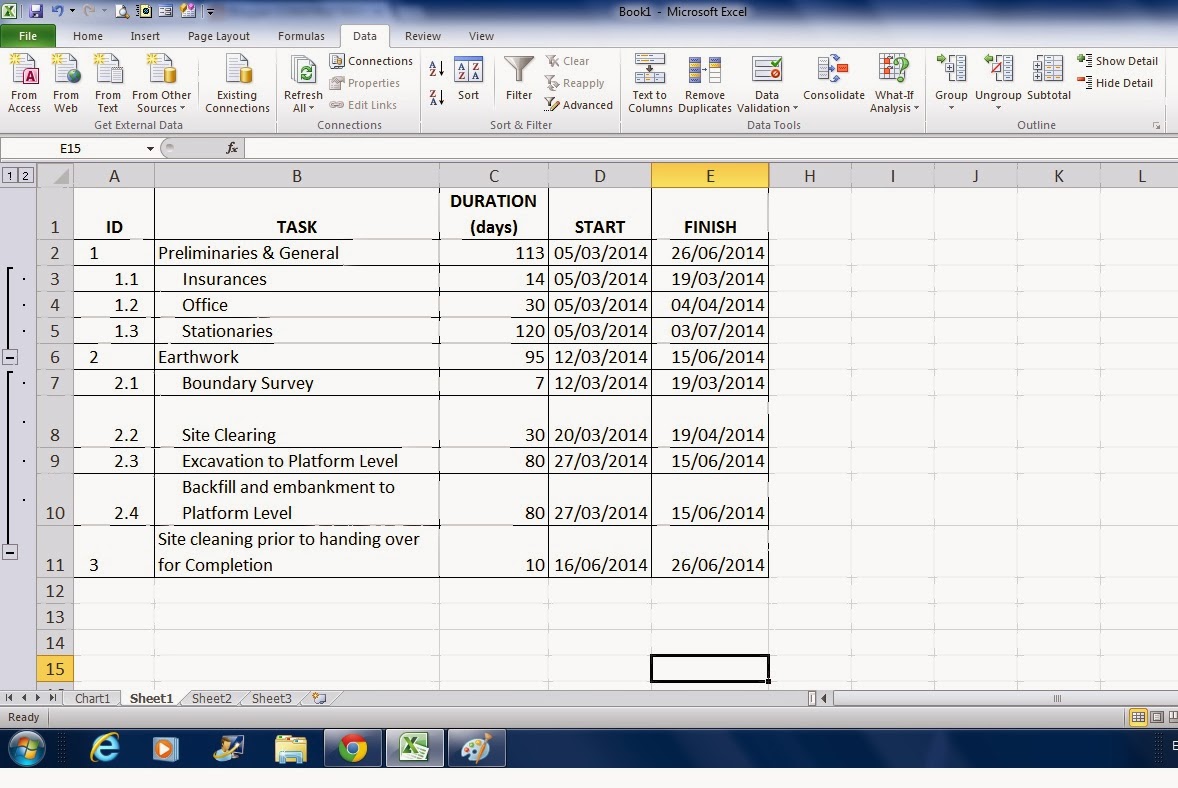
Open the Microsoft Excel Program and create table as picture below (table can be customized according to what information you want to display.
Step 2:
Insert your the task in the task column and task ID in the ID column and arrange it according to level of work or in words it shall be the work breakdown code.
Step 3:
Set the DURATION column by highlighting the column and right click. The dialogue box will appear. from the dialogue box, select «format cell». I should appear like picture below.

After selecting the «format Cells», a dialogue box will appear as below.

Now Under category, Select Number. I set the decimal point to «0» decimal places. then click OK.
Step 4:
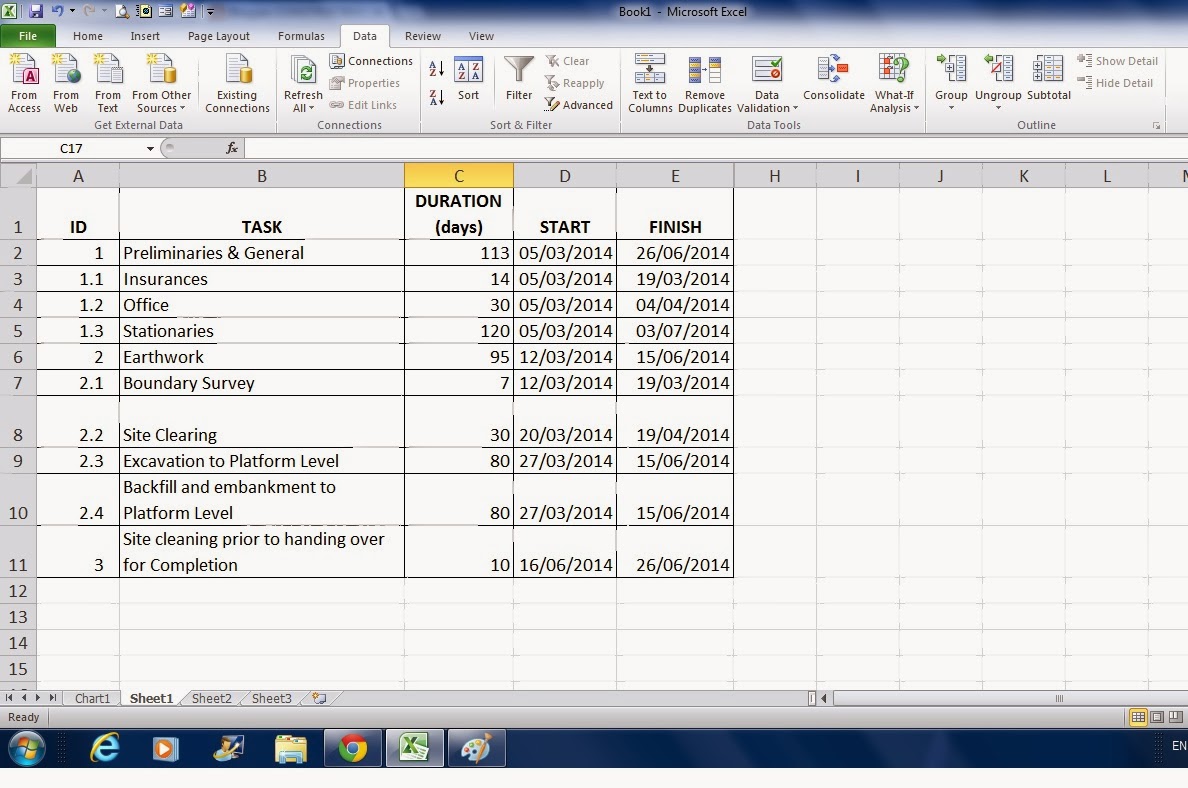
Now start Insert Number of duration. See the following Picture.

Step 5:
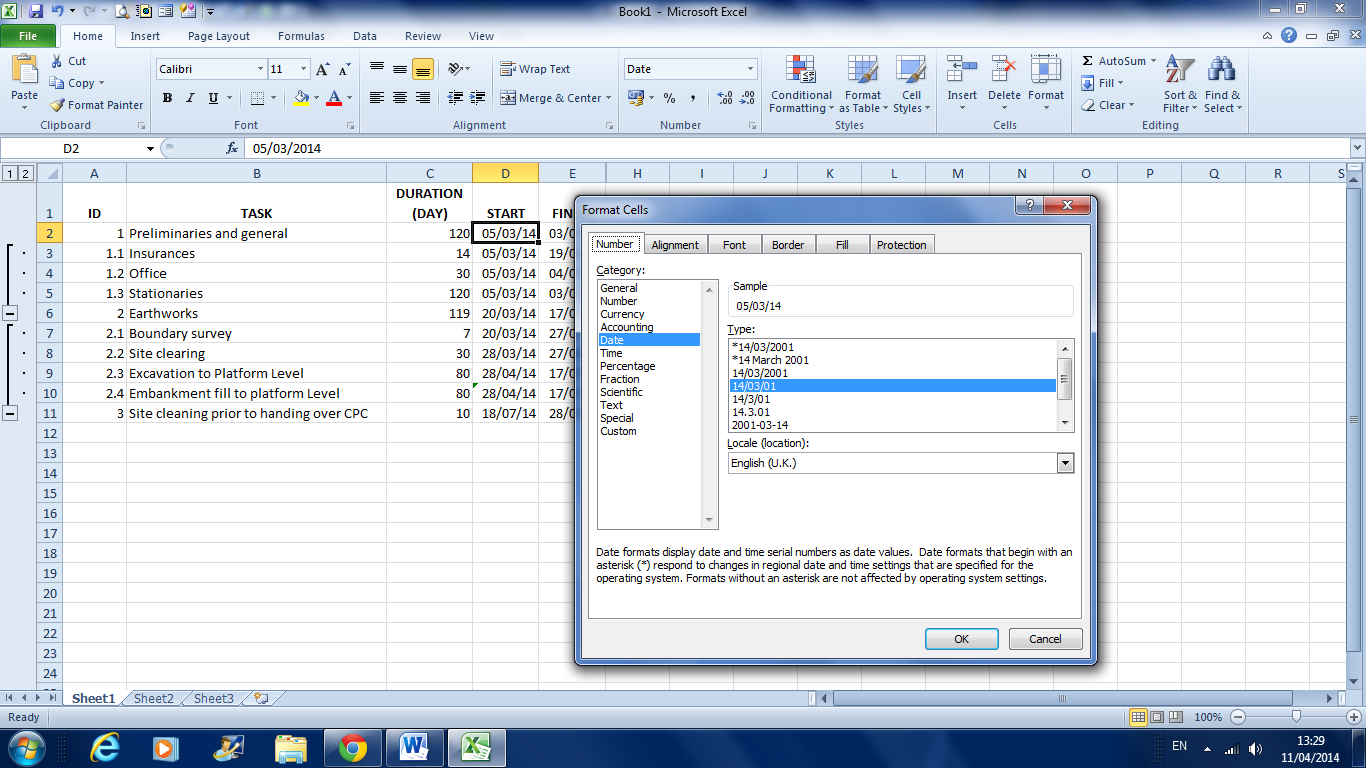
In this stage or step 5, for column level as » Start » and » finish», highlight both column, Right click and select » Format cells», a dialogue will appear and under the » Category» select Date and set the » date format». See picture below.


Step 6:
After you select your date format which is shown under the «type» tab. Click «OK». Than Start by inserting the start date as per sequence of work. As a guide you can fill the sequence number base on the ID into the «Predecessor» and «Successor Column». Picture below.

For the «Start», «Finish», «Predecessor» and «Successor» column, If you are familiar with Excel Function or Formula, it is better to use the features since with that Features you can easily create links between cells. Or else you will have to fill and calculate it manually.
Step 7:
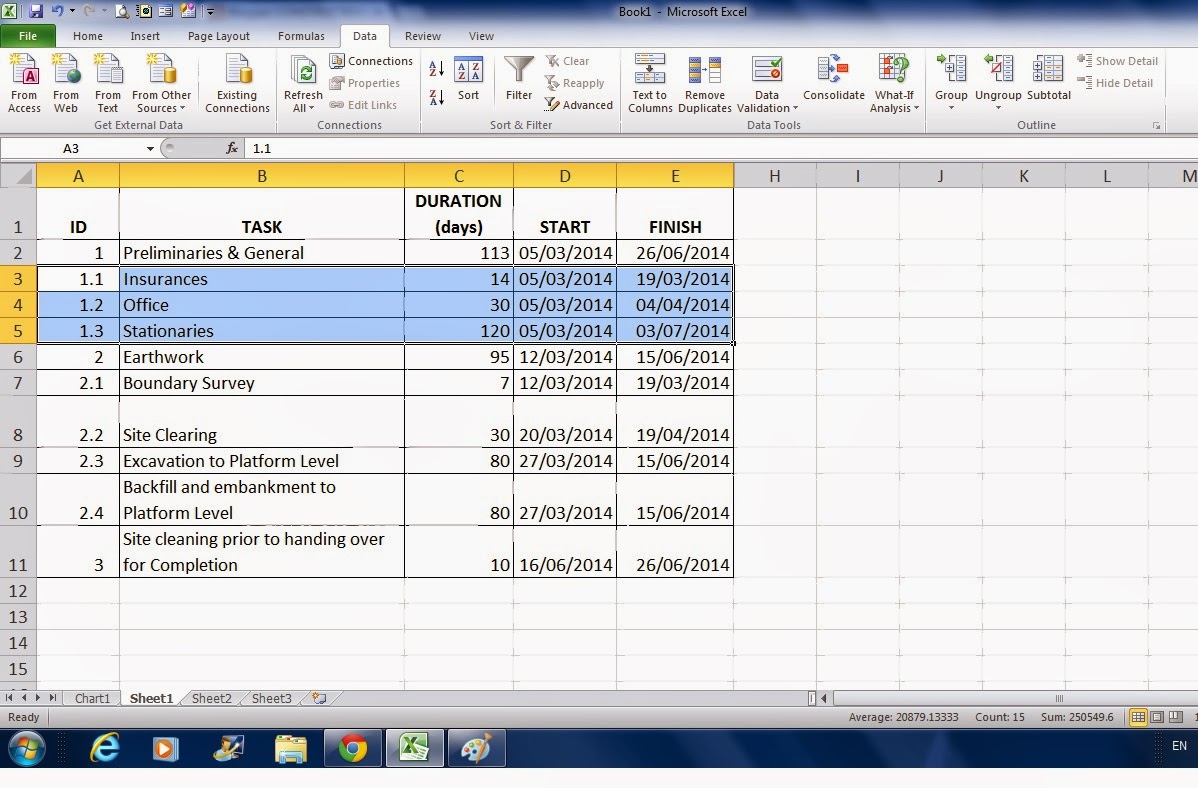
Next step is to group task under a major task. To do this, First select «Data Tab». See Picture Below.
Then, identify which is the major task. Next highlight the «Rows» which represent minor tasks that form the major task. Picture Below
After Highlighting the minor task, Click on the » Group» Icon under » Data Tab». It will automatically display the Sheet Like picture below.
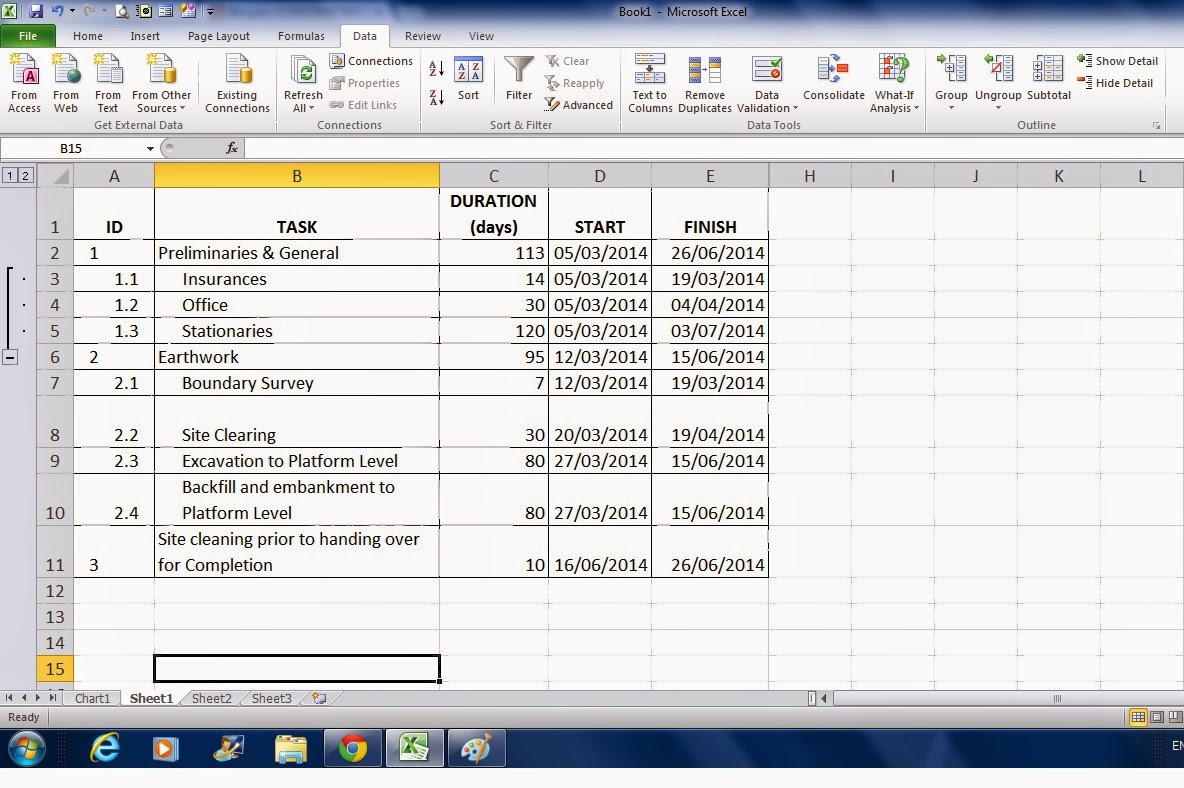
The finish product is as picture below.
After you fill in all the data you needed in the table. It is now we can start to create the » Bar Chart».
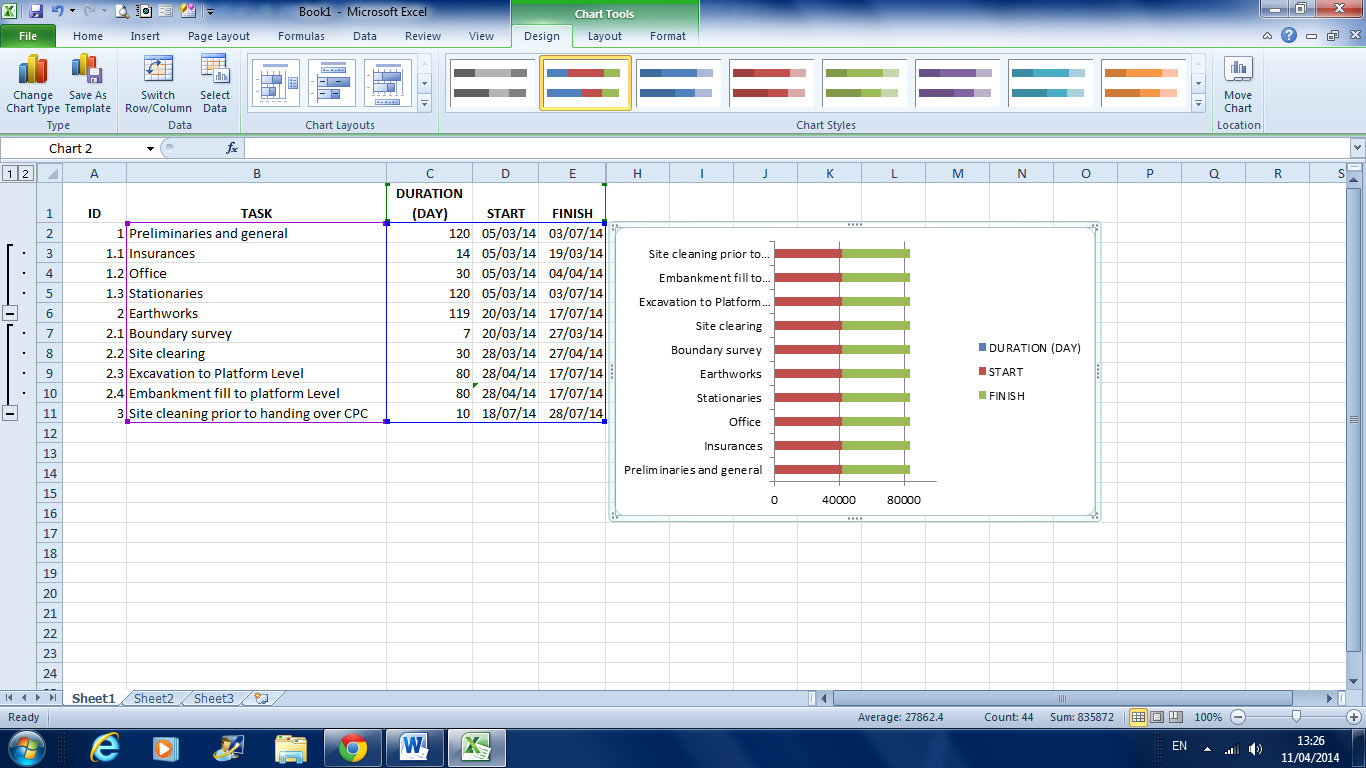
Step 8
To create the “bar
Chart” , First highlight the Row and column that contained the “ Task”, “Duration”,
“start” and “Finish”. Next, Click on the “Insert tab” , then go to “ bar” then click the icon “ Stacked Bar”. See
picture below.

Once you click on
the icon “ Staked Bar”, a Bar chart will automatically appear in your work
Sheet. It shall look like the picture below.
Step 9:
Next, in the Start
and finish Column, Identified the Earliest date to start work. Right Click on
that cell, then click “ format cell”. A dialogue box like below will appear.
Inside the dialogue
box, under category, click on “number”. Once you click on the “number”, under
the sample, you will see a set of number. In this example the number is 41703.00. This number is actually represent
the date of 05/03/2014. See picture below. Write down this number on a piece of
paper. After you done with this step, Click the “cancel” tab. The dialogue box
will close by itself. Next, do the same thing to the last date which you are
going to complete your work or task. You will need those number to customized the
date axis range on your chart later on.

Step 10.
Right Click on the “X”
axis and then Click “ format axis”. Refer to picture below.
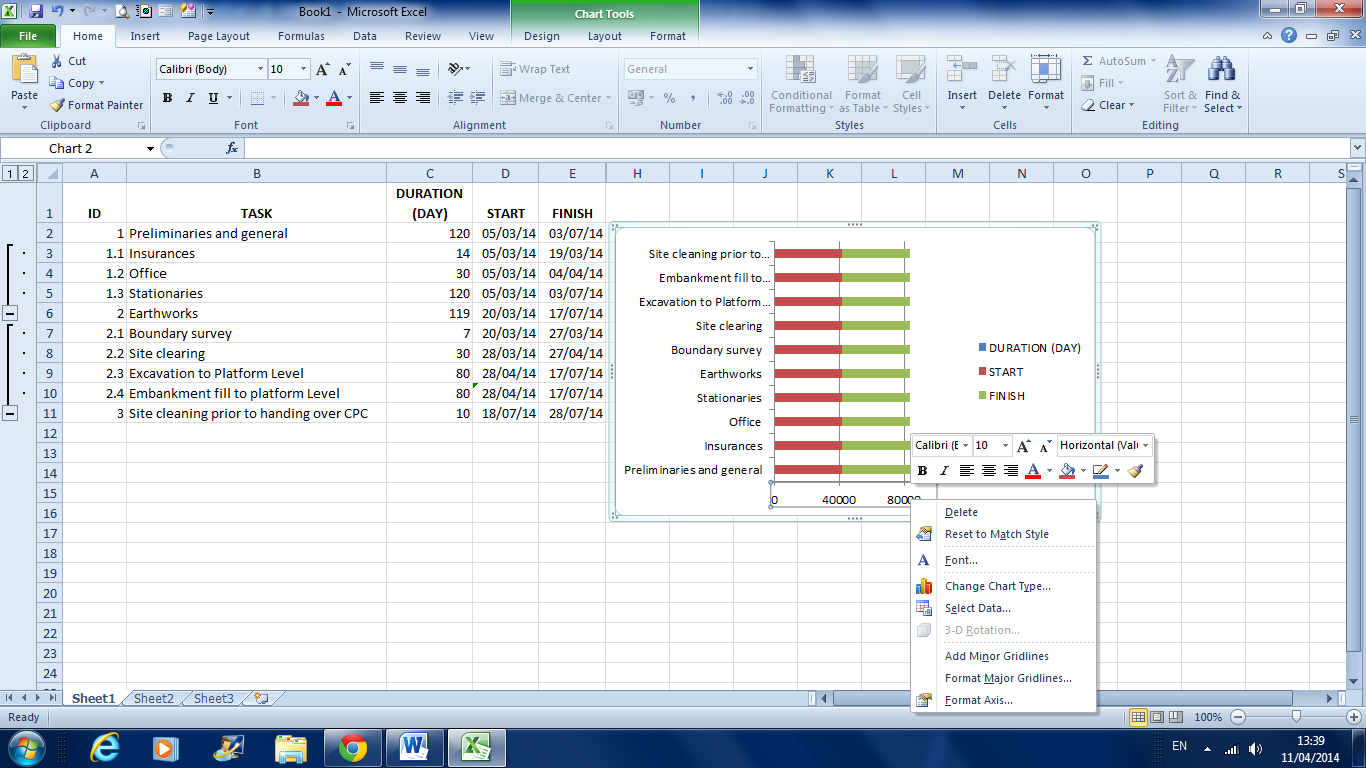
After you click the
“format axis” a dialogue box will appear as below.
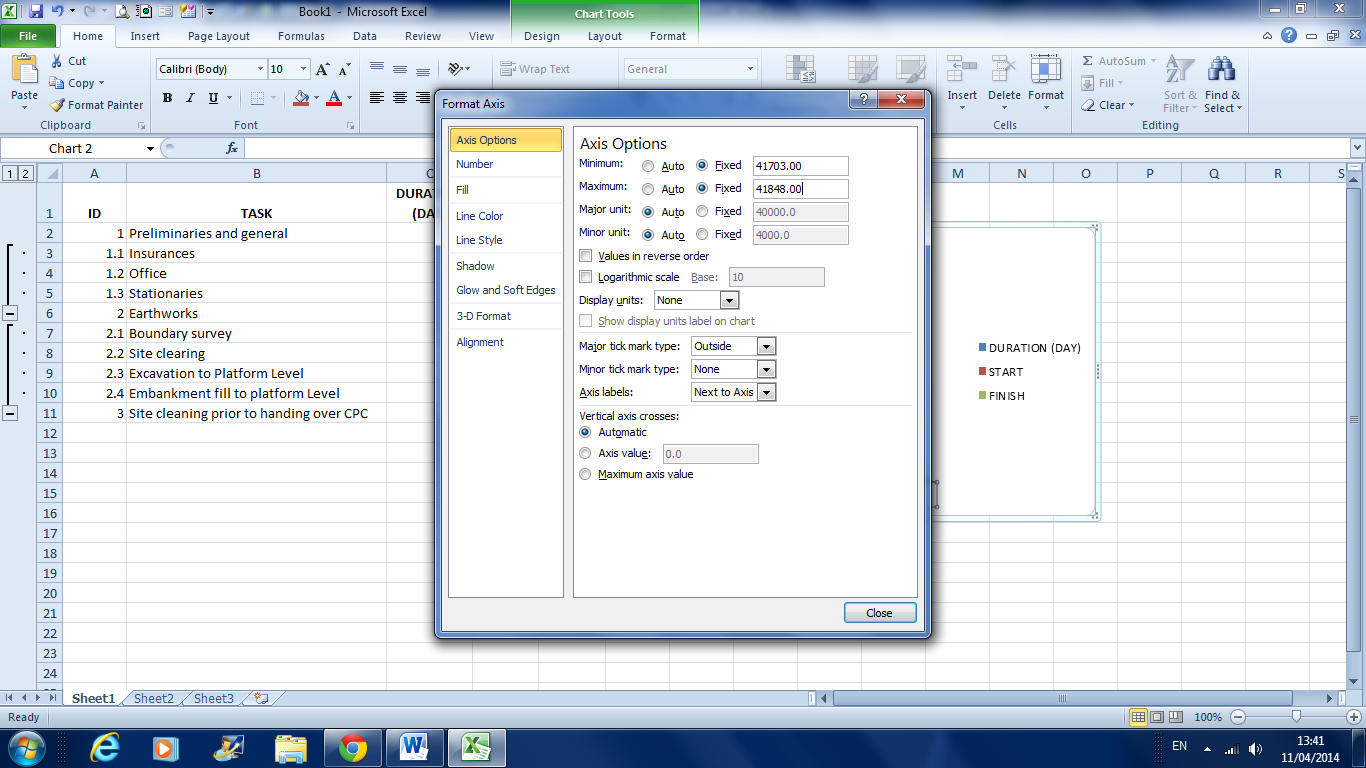
Inside the axis
option check the minimum value to fixed and insert the number for start date
which you write down earlier in step 9.
Do the same for maximum Value but inset the number which will represent the
last completion date of the work.
Still
on the dialogue box, click on the number, then go to the category And choose “
date” and choose the date format type which you want to display on your chart.
After that step, you can choose the alignment tab in the dialogue box to
align the position of your date. See Picture below.

One you done with
it, click “Close”. Your Chart Should appear like this.
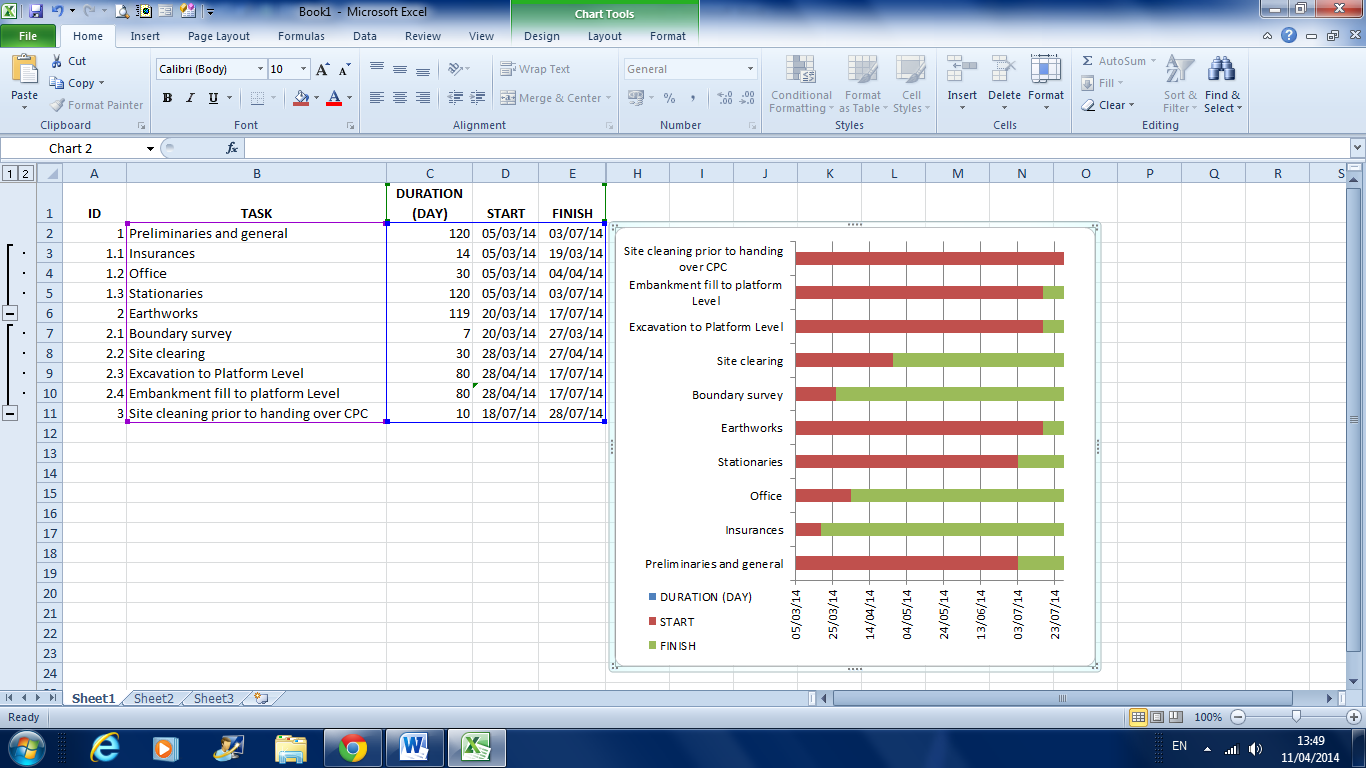
Step 11
Right click on the “Y”
Axis and click Format Axis. A dialogue box like below will appear.
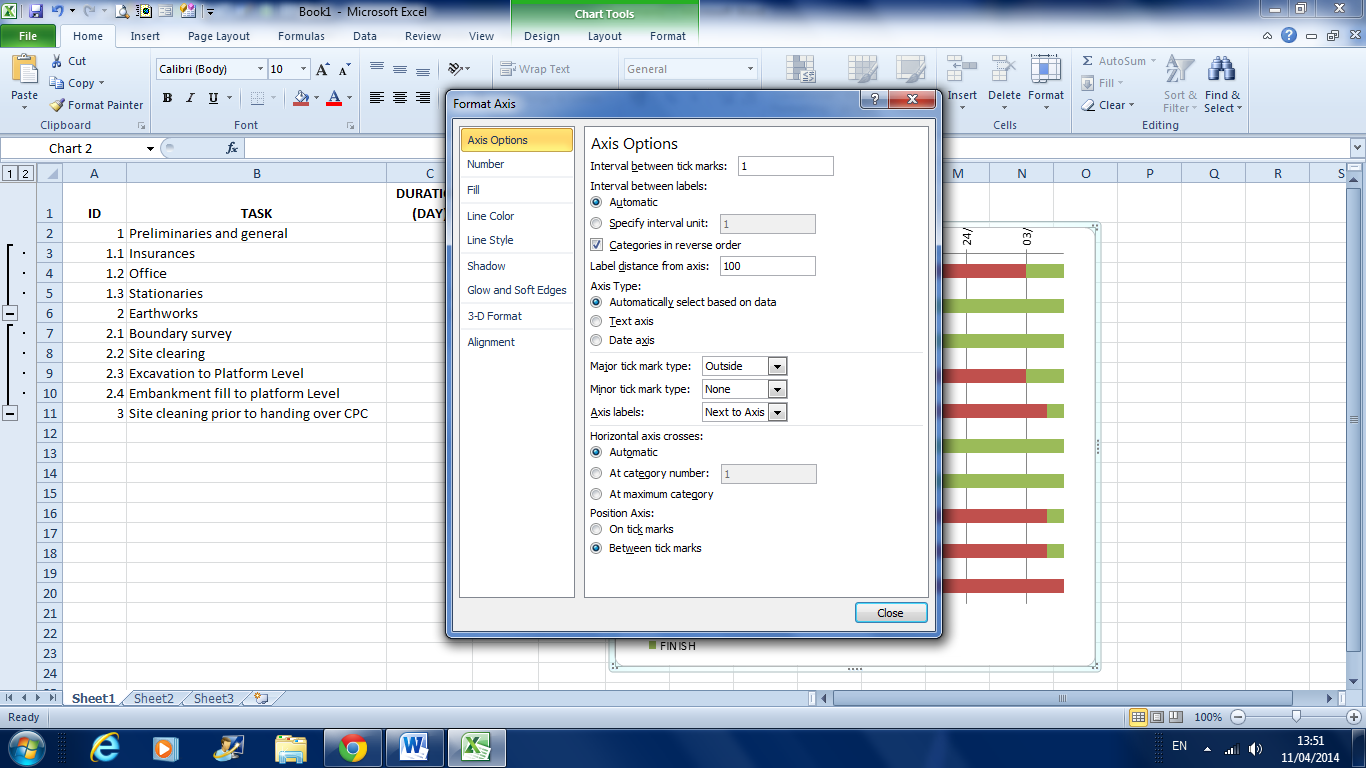
Inside this dialogue
box, look for the “ Category in reverse order”.
“Checked “ the box and next Close the dialogue. Your chart should be
displayed as below.
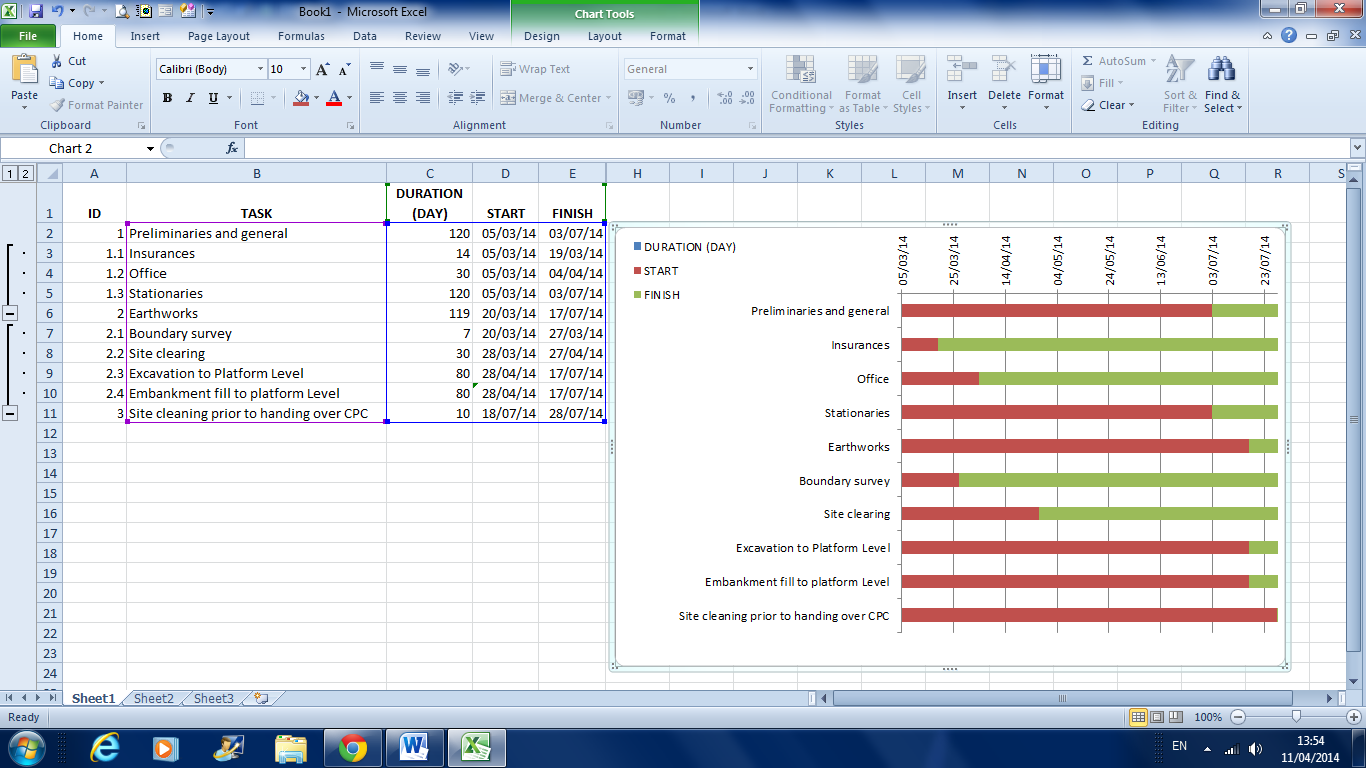
Step 12
In the Chart, Right
click in between two bars. Then Click “select data” . See picture below.
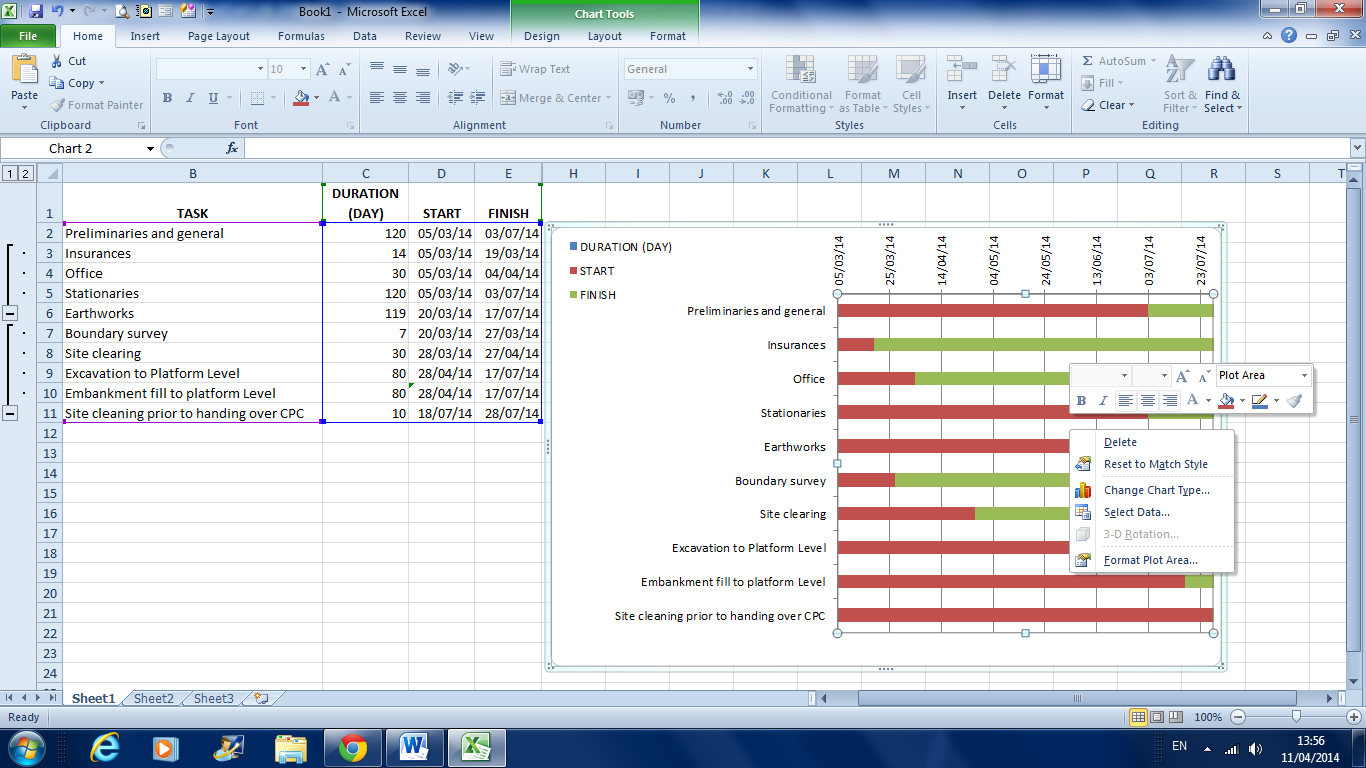
One you had click
on the “select data” a dialogue box as below will appear.
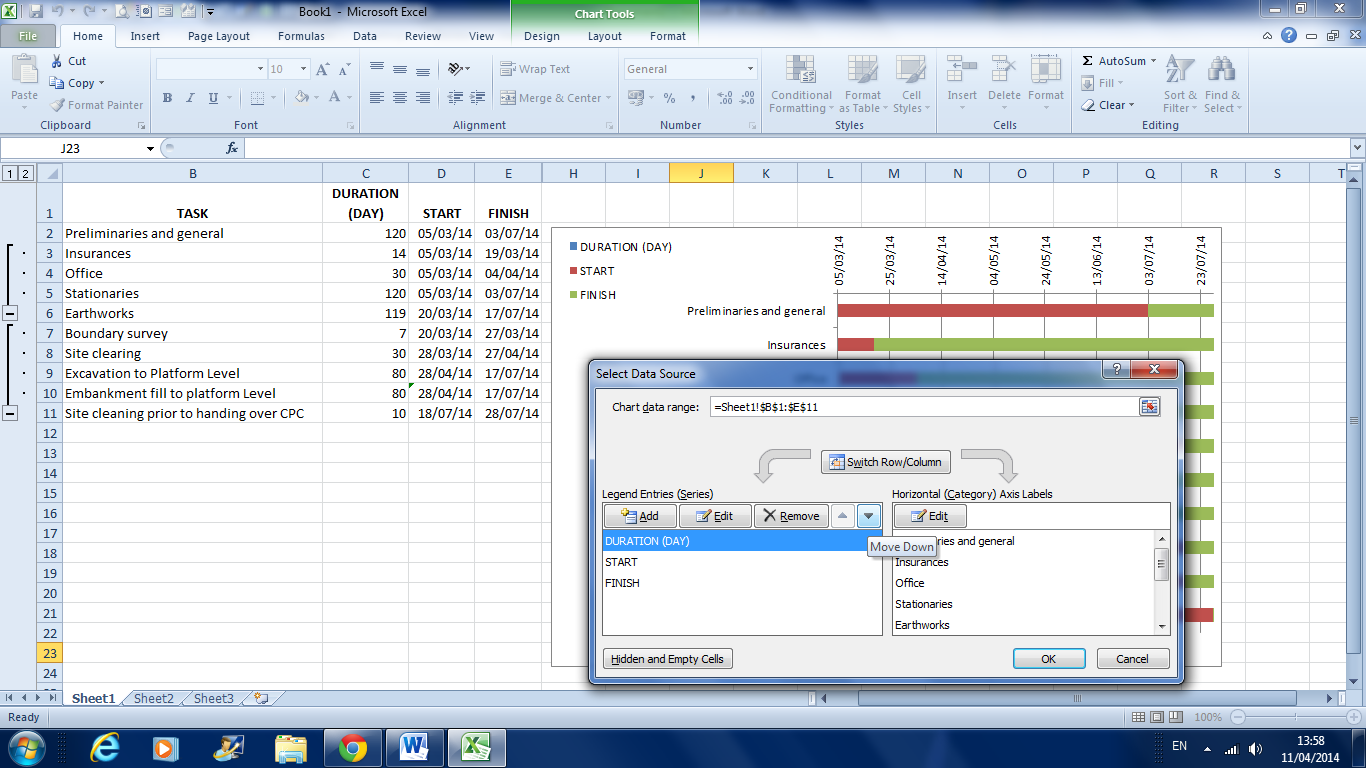
Click on the “Duration”
follow by clicking on the “move down” button. This will change the position of
your “Duration”. Once you done with
that, Click “ OK” tab. It will close the Dialogue box. This action will make
your Chart look as this following picture.

Step 13
Still
on the chart. Right Click on any of the green bar.

Then, click on the “fill
colour” icon. Picture below.
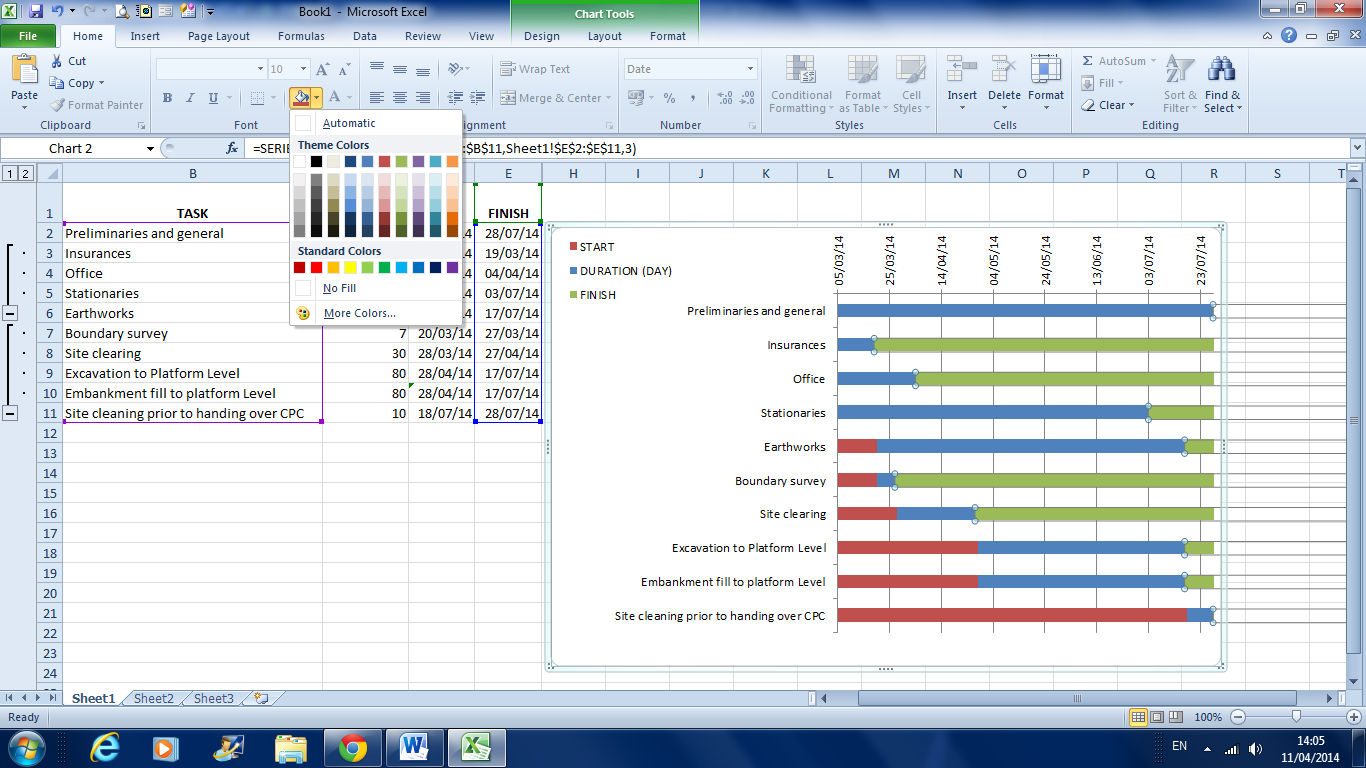
Choose the “no fill”
. Your chart should be as follows.

Repeat this step 13
but now do the same for the bar that is “red” in colour.The end product for
this step shall be displayed as below.
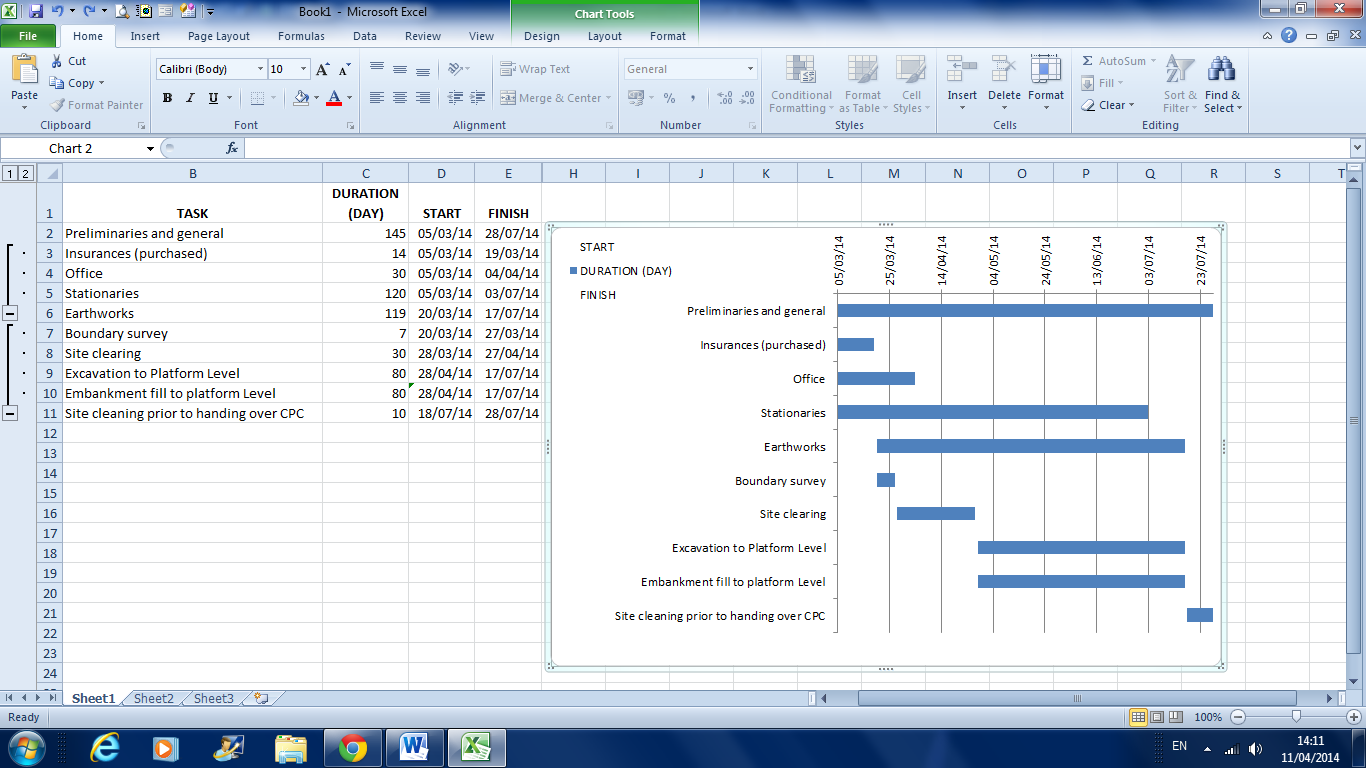
Step 14
Now identify the “Critical
Path” and recoloured it into red. You should have a Bar chart as below.

Step 15
If you want to show
both “ Start” and “ Finish” date, Click on the bars that represent the “Start”
bar
(already recoloured with no fill in step 13),then click the “ Add data
level’.
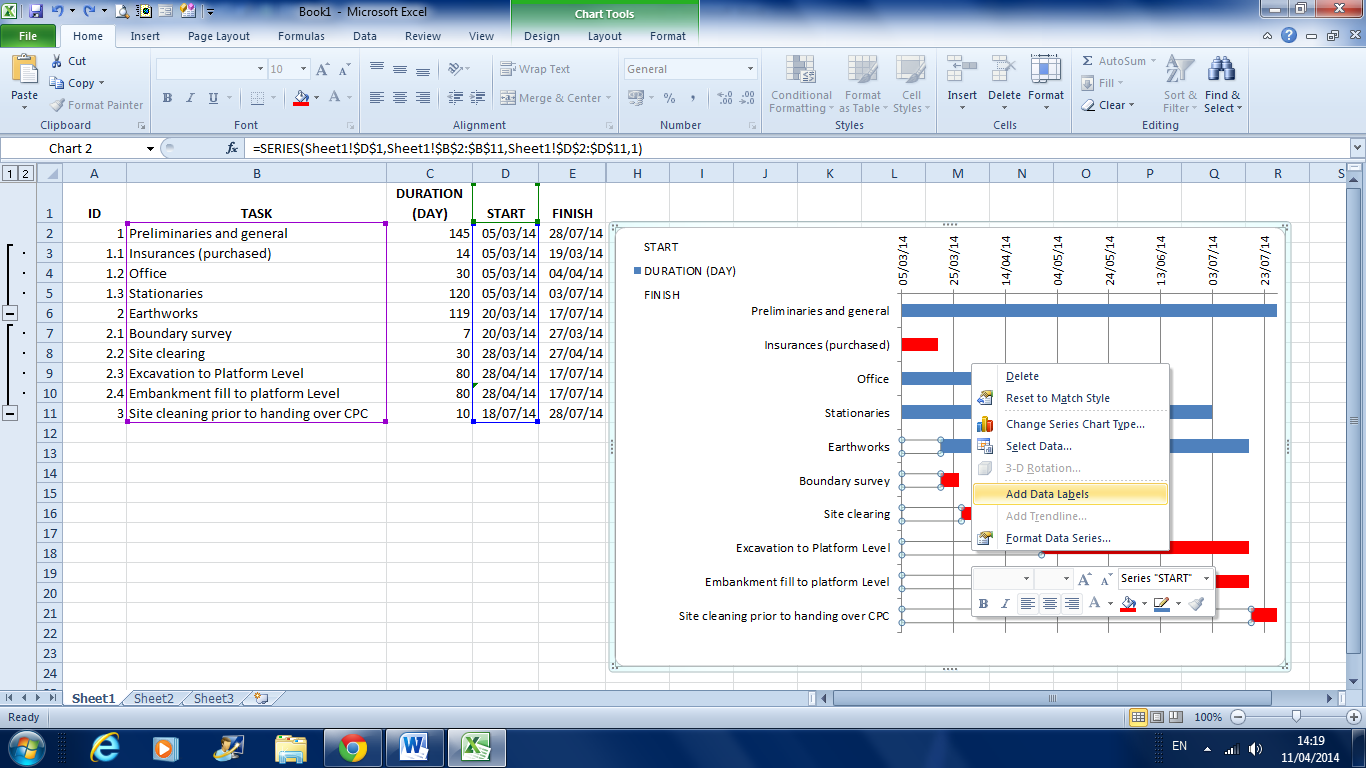
Your chart will
look like this.

Now the start date had been
inserted. However the date been displayed and overlap with other information. We
don’t want this display. Hence we need to re format the “ X “ axis. To Do That
we need to change the Minimum Value and the maximum value of “X” Axis. See the
pictures below. For Minimum value,
entered value that is less than 41703 and for Maximum Value entered number
greater than 41848.
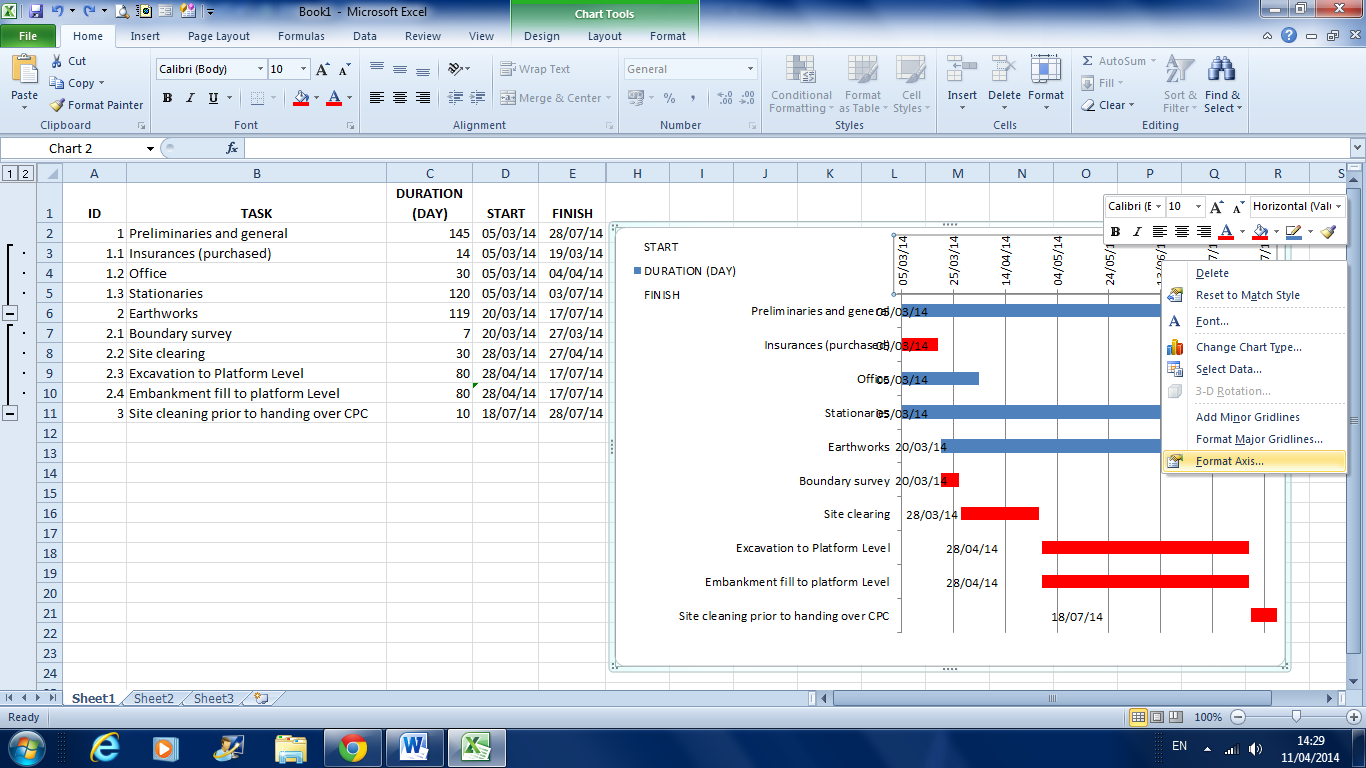


Next, for the “finish
date” do the same procedure as what had been done for “ Start Date” but for
“ the Finish date” click on the “finish Bar” which had been recoloured
earlier with “No Fill”. Your end product shall be displayed as follow.

Basically, Your
work program created with Microsoft Excel is now completed. However for a better presentation of Your Bar Chart, you Can present it as Chart on its
own or you can rearrange is such a way
to be display with full description.
a) Bar Chart
represent the work program on its own.

b) Work program
with full description.
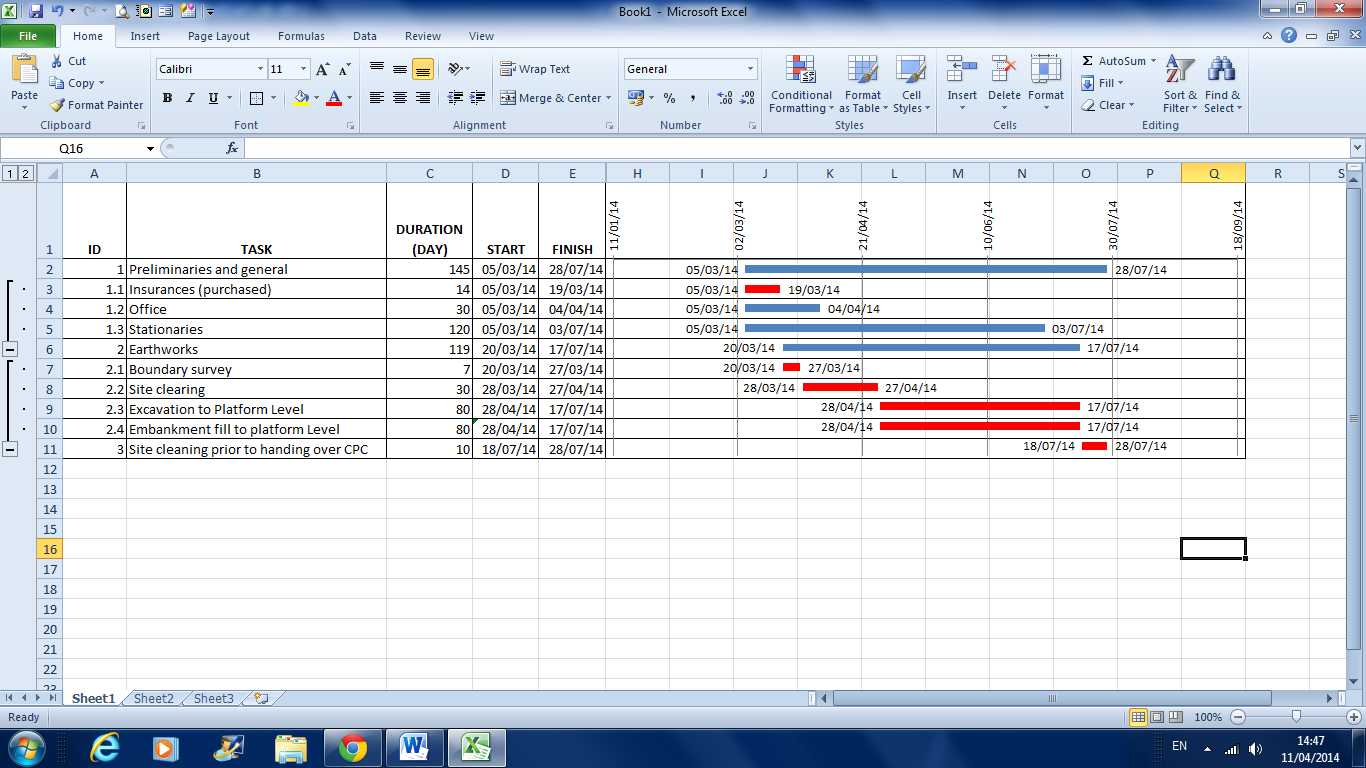
Congratulation. You just finish creating the work program by using Microsoft Excel.