
![]()
Download Article
Learn the basics of formatting a Microsoft Word document
![]()
Download Article
- Formatting the Layout
- Formatting Text
- Adding Pictures, Graphs, & Tables
- Using a Formatted Template
- Saving in Other Formats
- Q&A
|
|
|
|
|
Microsoft Word is the world’s most popular word processing app. Depending on what kind of legal, formal, or personal paper you’re writing, each has its own formatting guidelines. Fortunately, Microsoft Word makes it easy to format the layout, text, and other objects in your document. If you’re new to using Microsoft Word, don’t worry. You can be formatting your document like a pro in no time. This wikiHow guide will teach you simple ways to format a Word document on your PC or Mac computer.
Things You Should Know
- You can find most of the formatting tools you’ll need in the Ribbon menu at the top of your document.
- If you don’t want to do all the formatting from scratch, try using one of Word’s premade templates.
- Save your document in different file formats using the Save a Copy or Save As menu.
-

1
Explore the Word user interface. You can access most of Word’s formatting tools from the Menu Bar or the Ribbon at the top of the window. You can modify which tools are visible using the View menu.
- The Menu Bar is the area at the top of the screen where you will find File, Edit, View, and other important menu commands.
- The Ribbon is at the top of your workspace and contains icons, menus, and shortcuts to common tasks.
-
2
Align your document. Different types of documents call for different text alignments. You can choose whether to align your entire document to the left, right, or at the center on the Home tab by clicking the Alignment buttons in the «Paragraph» section.
- These are the buttons that look like a small version of a document, with small black lines arranged according to their button’s alignment function.
- You can also adjust alignment by selecting the text and objects you want to align, right-clicking the selection, and choosing Paragraph. Select your preferred alignment from the Alignment menu under the General header.
- You can either set the alignment for the whole document or just a selected piece of text.
Advertisement
-
3
Set the line spacing of your document. Need to change your document to single or double-space? You can adjust the spacing of your entire document, or for selected text.
- If you haven’t begun typing or adding content to your Word document, click the Home tab, click the «Line and Paragraph Spacing» icon (a row of lines with vertical arrows to the left of the lines pointing up and down, and select an option.
- If your document already has text or other content, press Ctrl + A (PC) or Cmd + A (Mac) to select everything in the document, right-click the selection, and choose Paragraph. You can then choose your desired spacing from the «Line Spacing» menu.
- For a single-spaced document, choose 1.0. For double-spacing, choose 2.0.
- Many professional documents, like college essays and cover letters, should be double-spaced.
-
4
Adjust the page orientation. If you need to write the document in a different orientation, click the Layout tab at the top of Word, select Orientation, and choose either Portrait or Landscape.
-
5
Change the size of the paper. If you need to print the document on a specific paper size, click the Layout tab, click Size, and then select your desired size from the drop-down list.
- This will change the virtual size of the document you’re writing as well as the actual size of the printout.
-
6
Adjust the headers and footers. A header contains details that will appear on every page of the paper, such as page numbers, your name, or the document title.
- To set the header of your document, double-click on the topmost part of the page, and the header field will appear. You can also click the Insert tab and select Header.
- Footers are just like headers. All text in the footer will appear at the bottom of each page of your document. To set the footer, double-click on the bottommost part of the page, and the footer field will appear. You can also use the Footer button on the Insert tab.
- You can also format your headers and footers by selecting the View tab and clicking Header and Footer on the list. This action will open the headers and footers on your page and allow you to edit them.
-
7
Insert page or section breaks with the Breaks menu. Go to the Layout tab in the and click Breaks if you want to start a new page or section in your document. You can choose from a variety of types of breaks, including Page, Column, and Section. This is a very useful tool if you need to format different sections of your document in different ways.[1]
- For example, you can use section or page breaks to help you format your page numbers so that the numbering restarts with each new section.
-
8
Adjust the margin size with the Margins tool. Click the Margins button in the Layout tab and select a margin from the pre-defined margin settings listed on the drop-down list.
- If you want to use your own margin measurements, click Custom Margins at the very bottom of the drop-down list to set your own.
-
9
Add columns to split your text vertically on the page. If you need to create a newspaper-like document, you can do so by adjusting the format of the document to columns. Click the Layout tab, select the Columns option, and choose the number and alignment of columns from the drop-down list.
- The Columns button looks like a rectangle with two vertical columns of blue lines on it.
- If you want to create one, two, or three columns, you can do so from the preset options. If you’d like to create more, you’ll need to choose More Columns from the bottom of the dropdown menu.
- Note that this column option is different from the columns you get when you insert items like tables on your document.
-
10
Add bullets and numbers to make lists. Highlight the text that you would like to be numbered or bulleted and click the Numbering or Bullets button on the Home tab of the Ribbon.
- These buttons can be found side by side on the Ribbon, near the alignment buttons. The Numbering button displays three small lines with numbers to the left of the lines and the Bullets button displays three small lines with bullet points to the left of the lines.
- There’s also a third button that allows you to create more elaborate multi-level list styles, which is useful for formatting outlines.
-
11
Experiment with document styles. All documents have standard built-in styles (for example, Normal, Title, Heading 1). The default style for text is Normal. The template that a document is based on (for example, Normal.dotx) determines which styles appear on the Ribbon and on the Styles tab. You can see the current style presets for your document in the Home tab of the Ribbon.
- Before you apply a style, you can see all of the available styles and preview how they will appear when applied.
- On the Home tab, click a style to apply it to selected text.
- Click the Styles Pane button (the arrow pointing down and to the right) to view and select from advanced Style options.
- By default, Word applies a paragraph style (for example, Heading 1) to the entire paragraph. To apply a paragraph style to part of a paragraph, select only the specific part that you wish to modify.
-
12
Reveal hidden formatting symbols if you’re having trouble. Word documents often contain hidden code that can cause frustrating problems when you’re trying to modify your formatting. For instance, an invisible extra paragraph mark or section break can create unwanted spaces between paragraphs or lines of text. To see formatting symbols that are normally hidden so you can delete or modify them, you can click the ¶ button in the Home tab, or try one of the following:[2]
- On Windows, open File, select Options, and click Display. Tick the box next to Show all formatting marks.
- In Word for Mac, open the Word menu, then Preferences, then View. Check the box next to All in the Show Non-Printing Characters section of the View menu.
-
13
Use the View menu to change your view of the document. The View menu can let you change how your document looks in Word without actually making changes to the format. For example, Print Layout will show approximately what your document will look like when it’s printed out, while Web Layout will display the whole document in one long chunk without any page breaks.
- The View menu also lets you zoom in and out on your document.
- You can also change your view with the buttons and zoom slider at the bottom right side of the document pane, or with the View tab in the Ribbon.


Advertisement
-
1
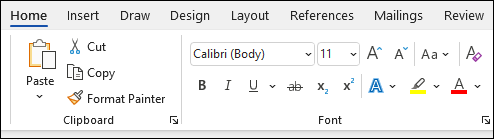
Change the font face. On the Home tab, you will a drop-down menu containing a list of fonts to choose from. Use your mouse to select the text you want to change, then choose a font from the list.
-
2
Change font size and color. Also on the Home tab, you can change the size, color, and highlighting for your font. Select the text you want to format, then choose your options.
- By default, they will be set to the size and font associated with your document’s current Style settings. For example, if you’re using Word’s default template, the Normal style will use Calibri as the default font and 12 pt. as the default text size.
- Always consider the formatting guidelines of the document you are writing when choosing the font style and size.
- The standard font for most college and professional papers is Times New Roman font, text size 12.
-
3
Make text bold, underlined, or italicized. Besides setting the font style and size, you can also adjust the emphasis of words and lines in your document. Near the font and text size menus, you will see the Bold, Italics, and Underline buttons.
- Just click the buttons to make your text bold, underlined, or italicized.
- In this section, you can also find special text formatting options such as Strikethrough, Subscript, and Superscript.
-
4
Highlight text on the page. If you would like to change the background color behind selected text, similar to using a highlighter on a printed page, click the Text Highlight icon, which is a pen above a colored line.
- You can also add special text effects with the Text Effects button, which looks like a capital A with a glowing blue border.


Advertisement
-
1
Drag an image into your document. This is a quick way to add a picture to your Word document. Simply select an image on your desktop and drag and drop it into the document window. Make sure your image is placed exactly where you want it before you drop it.
- You can also insert an image by going to the Insert tab, then clicking Pictures. Select one of the options to browse for images on your computer, the web, or Word’s gallery of stock photos.
- You can also insert graphics or other media (such as video or audio clips) using the Shapes, Icons, or 3D Models, and Media buttons.
-
2
Enable text wrapping. Text wrapping changes the layout of your document, allowing the text to flow around the image no matter where it is placed. To turn on text wrapping:
- Right-click (or ctrl-click, on a Mac) on the image and hover over Wrap Text. Select the alignment that best suits your document. You will see a preview as you hover over each option.
- To change the location of the image in the document, select the image and then hold the Ctrl key. While holding the key, use the arrow keys to move the picture around the document.
- When you right-click or ctrl-click your image, you’ll also see an option in the context menu to add a caption under your image.
-
3
Edit your image in the Picture Format tab. Once you insert your image, you can select it to open a new Picture Format tab in the ribbon. From there, you can choose from a variety of tools, such as:
- Making corrections or adding artistic filters to the image
- Adding style effects, such as a drop shadow or frame, to the picture
- Entering alt text
- Tweaking the position of your image or changing the text-wrap settings
-
4
Add a graph or chart in the Insert tab. Click the Insert tab on the Ribbon, and then click the Chart option. Choose your preferred type of graph, such as a pie or bar chart, from the dropdown menu.
- Depending on the type of chart or graph you choose, Word may automatically launch Excel and create a new spreadsheet, where you can enter data for your chart.
-
5
Modify your graph. When you choose a graph type, a new tab will appear in the Ribbon menu called Chart Design. Navigate to that tab with the chart selected to make changes to the look of your graph or chart, or choose the Edit in Excel button to make changes to the data in your chart.
-
6
Use the Table tool to insert a table. If you want to add a table to your document, head over to the Insert tab and click the Table button. A menu will pop open where you can either scroll over a grid of squares to select your number of rows and columns, or select an option like Insert Table or Draw Table.
- Insert Table opens a pop-up menu where you can specify parameters like the number of rows and columns and whether or not the contents of the table autofit your document window.
- The Draw Table tool allows you to draw the table with your mouse directly in the document.
- Once you start creating a table, you’ll see several new table editing tools in the Layout tab.


Advertisement
-
1
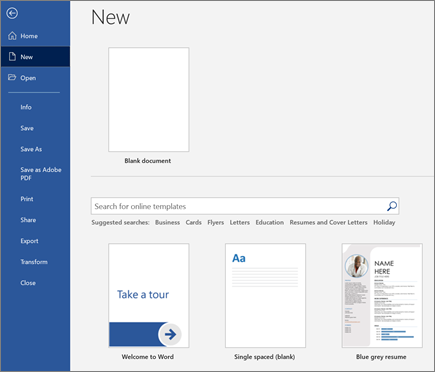
Choose a template from the New Documents pane. Templates are a great way to create a nice-looking document without having to do all the formatting from scratch. To use one, open Word and select New from the side menu to create a new document, or select New from Template from the File menu. Click one of the templates on the screen to select it.[3]
- If you don’t see a template you like, use the Search bar at the top of the window to find one that fits your needs. For instance, use keywords like “flyer,” “resume,” or “research paper” to find different styles of templates.
-
2
Click Create to open the template. The template will open as a new document.
-
3
Select text within the template to modify it. Word templates are simply preformatted documents with text, graphics, and other elements already in place. To add your own text, select text anywhere on the document and type in your own. The new text will have the same format as whatever text you selected and replaced. You can also click on a blank area of the document and start typing to add new text.
- To select a single word, double-click it. You can select longer pieces of text by clicking and dragging your mouse, or positioning your cursor at the start of the selection and holding down Shift while pressing the Right Arrow key.
- You can also select and move, delete, or replace other elements in the template, such as images, graphs, or tables.
-
4
Modify your template with the Styles pane. Templates use styles to create their distinctive looks. If you want to change the look of the template, click the Styles button in the Home tab of the ribbon toolbar. Click the down arrow next to any of the style elements and select Modify Style… to make changes.
- You can also make any other types of changes you like using the rest of the tools in the ribbon menu or Format menu.
-
5
Save your modified template as a document. When you’ve made the changes you want to the template, save it the same way you would any other Microsoft Word document.


Advertisement
-
1
Click the file menu and select Save a Copy…. If you want to save a document as a file type other than .DOCX, you can do so with the Save a Copy function.
- If it’s a brand-new document that you haven’t already saved, select Save As… instead.
-
2
Open the File Format dropdown menu. You’ll see this menu at the bottom of the Save a Copy or Save As window.
-
3
Select the format you want from the menu. In addition to common formats like .DOC, .DOCX, .TXT and .RTF, you can also save your document as a PDF, an XML file, or a macro-enabled Word file.
- Check out the list of file formats that are supported in word here.


Advertisement
Add New Question
-
Question
What is Microsoft publishing?

UK_Gamer05
Community Answer
Publisher is a tool for making posters, leaflets, booklet,s etc. It’s for when you need to create something that isn’t a standard document.
-
Question
How do I move from page one to page two of a Word document?
UK_Gamer05
Community Answer
In Word 2016, on the insert tab, either select insert new page or page break.
Ask a Question
200 characters left
Include your email address to get a message when this question is answered.
Submit
Advertisement
Thanks for submitting a tip for review!
Tip
- Unless free-handedly writing your paper, consult the guidelines of your document first before adjusting its format.
- Besides the header, footer, and page layout formats (which affect the entire document), all the other formatting tools can be applied only on specific parts of the document.
About This Article
Thanks to all authors for creating a page that has been read 309,741 times.
Is this article up to date?
Create a document in Word

With Word on your PC, Mac, or mobile device, you can:
-
Create documents from scratch, or a template.
-
Add text, images, art, and videos.
-
Research a topic and find credible sources.
-
Access your documents from a computer, tablet, or phone with OneDrive.
-
Share your documents and work with others.
-
Track and review changes.
Create a document
-
On the File tab, click New.
-
In the Search for online templates box, enter the type of document you want to create and press ENTER.
Tip: To start from scratch, select Blank document. Or, for practice using Word features, try a learning guide like Welcome to Word, Insert your first table of contents, and more.
Add and format text
-
Place the cursor and type some text.
-
To format, select the text and then select an option: Bold, Italic, Bullets, Numbering, and more.
Add Pictures, Shapes, SmartArt, Chart, and more
-
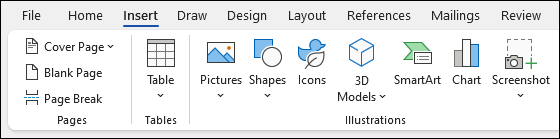
Select the Insert tab.
-
Select what you want to add:
-
Tables — select Table, hover over the size you want, and select it.
-
Pictures — select Pictures, browse for pictures from your computer, select a stock image, or even search Bing.
Note:
Older versions of Word may have Online Pictures on the ribbon next to Pictures. -
Shapes — select Shapes, and choose a shape from the drop-down.
-
Icons — select Icons, pick the one you want, and select Insert.
-
3D Models — select 3D Models, choose from a file or online source, go to the image you want, and select Insert.
-
SmartArt — select SmartArt, choose a SmartArt Graphic, and select OK.
-
Chart — select Chart, select the chart you want, and select OK.
-
Screenshot — select Screenshot and select one from the drop-down.
-
Next:
Save your document to OneDrive in Word
Need more help?
Want more options?
Explore subscription benefits, browse training courses, learn how to secure your device, and more.
Communities help you ask and answer questions, give feedback, and hear from experts with rich knowledge.
Find solutions to common problems or get help from a support agent.

In this lesson, we’re going to delve into tables, which are a huge part of laying out well formatted documents. After we discuss tables, we’ll cover some other controls that will help round out your formatting prowess, including adding links, using symbols, creating math equations, and quite a bit more!
By now, you should be very well acquainted with getting your documents up to a level where you can adjust the tabbing and indenting, paragraph alignments, line spacing, and create quick, customized lists. If you need a refresher of what we’ve covered so far, you should check out Lesson 1 and Lesson 2 so you can bring yourself up to speed.
One of the most common formatting elements you will use in Microsoft Word are tables, so much so that it’s probably a surprise we aren’t covering them until now!
Tables are a tried-and-true method of presenting data in rows and columns. They are very simple to insert and manipulate in Word. When you click on the “Tables” button on the “Insert” tab, you’re given several options.

Here you see a grid that allows you to quickly spec out a table but you can also insert, draw, or pick from some predefined “Quick Tables”.
The fast way is to simply trace out the table you want using the provided grid. In the screenshot, you see we trace out a 6 x 5 table, which is previewed in the document.
With your table now placed into your document, you can set out about formatting it, which we’ll cover shortly.
Insert Table
Secondly, you can “Insert Table,” which means you just input the number of columns and rows and how you want the column to “AutoFit.” If you choose fixed column width, you can select “auto” or you can assign a size. Alternatively, you can AutoFit columns to fit the contents, or you can have the content AutoFit to the window.
Finally, if you intend to reproduce the table or you use that size frequently, you can have the “Insert Table” dialog remember those dimensions for new tables.
Draw Table
When you draw a table, the cursor is changed to a pencil and you can “draw” out the column and rows. In this way you can size the table to your liking.
Once you draw your first cell, you can then draw further cells, and create the table that is more based on how you want it to look than necessarily what it requires.
Convert Text to Table
Let’s imagine you have a bunch of text and numbers, and you realize that it would be easier to read if it were in neat columns and rows. Not to fear, text to table will allow you to quickly and easily convert all that data into a table that you can then format to your heart’s content.
So how does this work? Simply, when you want to convert a section of your document to a table, you select the section using your mouse pointer and then select “Convert Text to Table.” The resulting dialog box allows you to choose how many columns you want.
The number of rows will be automatically determined by line breaks, so for example, if you have a block of text divided with flour line breaks, your table will have four rows.
Columns are determined by commas, tabs, paragraph breaks, or another symbol you can manually assign.
Quick Tables
Quick tables are fairly easy to reason out. Let’s say you want to insert a quick calendar, matrix, or a tabular list. You can also create your own table and save it to the list for later, quick use. Simply select the table you want to save, and select “Save Selection to Quick Tables Gallery.”
There’s not a whole lot to master here. Keep in mind, when you insert a quick table, you can then edit and format as you would any table that you created from scratch. And, on that note, let’s actually dive into all that formatting information we’ve been alluding to throughout this lesson.
Formatting Tables
On the Ribbon, the “Table Tools” tabs are contextual tabs that appears whenever you create or click on a table. The functions found here give you an easier visual way of quickly manipulating tables where you might otherwise use right-click options.
The “Table Tools” are divided into two tabs. “Layout” (pictured above), which lets you add and remove columns, adjust height and width, and text alignment. Many of these controls can be accessed directly from the right-click context menu, but it’s nice to have all your options arrayed before you.
Note though, the context menu you get, will depend on where you click. If you click on the little table control in the upper-left corner:
You get a larger variety of tools at your disposal. Note also, you can delete a table easily this way:
Back to the Ribbon, on the far right side of the “Layout” tab, you’ll find some handy controls for controlling your “Alignment” and “Data.”
So, for example, if you want your headers to be perfectly centered within their cells, while having your data cells left-justified, you’d simply select the cells to affected and click the alignment you desire.
You can also “Sort” cell data, insert formulas, convert your table to plain text, and repeat header rows. The last option is useful if you have a table that spans multiple pages, you can designate “header rows,” which will persist as you scroll through the table. This is useful for keep track of what column is what in long tables.
The “Design” tab by contrast is all about how your table(s) appear.
Note when you click on the scrollbar in “Table Styles” a larger menu appears granting you greater built-in options.
At the bottom of this menu, you can modify your table’s style if the current selection of tables doesn’t suit you. When you make changes, they will be previewed so you can see them before you commit.
While formatting or modifying a table, if the built-in selections aren’t close to what you want, you may just want to start from scratch. In this case, you can you the “New Style” dialog, which will be allow you to build a new table style based on current table styles.
There’s little difference to this dialog and the modify dialog except that modifying is based off an existing table design.
In the end, formatting your tables is going to come down to what kind of data you’re presenting and personal preference. We suggest that if you want to fully master tables, you create a blank document and mess around to your heart’s content. We are certain you’ll be creating and formatting eye-catching data-sets in less than it takes to say “columns and rows!”
Excel Spreadsheet
You can actually create an Excel spreadsheet table in Word. This will act and function just like a regular Excel spreadsheet. So you can copy and paste existing spreadsheet values in, or make a new one with Excel formulas and functions.
Note, if you want to learn more about Excel formulas and functions, check out our How-to Geek School series on Excel Formulas and Functions!
Once you have inserted or filled in the spreadsheet with the values, it will appear similar to a table though it is technically known as a “workbook object.”
With your data inserted and table created, you can right-click on it and do some basic formatting like changing the borders and adjusting the shading, but it won’t be the same as formatting a traditional Word table.
Other Formatting Controls
On the right half of the Insert tab are some further formatting controls you should be aware of. Some of these may be of limited daily value to you, but we think it’s important to know about them in case you ever have need for them.
Links
Hyperlinks, bookmarks, and cross-references are all classified as “Links” on the “Insert” toolbar.
Hyperlinks allow you to link pieces of text to locations on your computer, network, or the Internet. You can also select your text, right-click and choose “Hyperlink” from the context menu. In the “Insert Hyperlink” dialog, paste or type your address in the provided space.
It doesn’t have to be an Internet URL either, it can simply refer to a location on your computer or another location in your document. Mostly though, you will probably want to refer to an Internet location, such as the best place on earth to get your geek fix!
Header, Footer, and Page Number
Headers and footers are useful for repeating the same piece of information at the top and/or bottom of each page, such as if you want to have the title of your book at the top of each page, or similarly, page numbers.
When you click on either the header or the footer button, you can choose from an assorted of predefined styles.
When you choose a style, the header or footer will open and the Ribbon will change to present you with special formatting options.
So you can type in your header or footer, and then decide where you want to position it, whether it’s the same across each page, and so on.
In the same vein, when you add page numbers, you can place it anywhere within a header or footer, picking from a pre-defined list of numbering styles.
If you want to “Format Page Numbers,” you’ll be presented with dialog box, which will allow you to change the number format, add chapter numbers, and dictate from where it starts.
Overall, the header and footer controls are quite easy to grasp and master. So, if you have an instructor who’s a bit old-fashioned and demands you include them in your paper, or you want the title of your book, or your name on every page, or simple page numbers – you should have no problem adding and manipulating them.
Equations
We’re not going to spend a great deal of time explaining the “Equation” functions in Word 2013. We’re guessing the vast majority of people using Word, will never have occasion to insert an equation into their documents.
That said, let’s explain the function exists in the first place. In Word, you can write a simple like “A=πr2” because you can insert the symbol for pi and then use superscript font to show radius squared.
However, if you want to write out anything more complicated than that, you’ll need to insert it using the “Equation” function. You can either select a pre-built equation from the dropdown list:
Alternatively, you can build your own by simply placing the cursor at your desired insertion point and clicking the “Equation” button, which will place something akin to an equation text box into your document.
Note, the Ribbon immediately changes when you insert an equation to the “Equation Tools,” which offers a wide array of math symbols and operators, so you don’t have to try to figure out how to do it on your own.
So, if you’re a bit of a math geek or you’re taking a class and need to write a paper on a mathematical theory, you can present it ϥώwith all the necessary equations to show your work.
Symbols
Symbols are characters that aren’t immediately found on your everyday, run-of-the-mill keyboard. For things like the copyright symbol and British Pounds, you need to insert the symbol using the “Symbols” function on the “Insert” tab.
Most recent and commonly-used symbols are displayed first, such as for foreign currencies (€, ₤, ¥), the aforementioned copyright symbol (©), and others. To access symbols beyond what is immediately displayed, click “More Symbols” at the bottom of the menu.
For example, if you want to write “façade” and using the cedilla (ç), you’d pick it from the “Latin” subset. Similarly, something like café with its acute accent, can be added using the “Symbol” dialog box.
Note that you can also insert foreign letters using shortcut keys. You can see which shortcut key is used for each symbol at the bottom of the “Symbol” dialog box.
If you want to change the shortcut (keep in mind, other symbols or functions might be mapped to other shortcuts), you can click the “Shortcut Key” button and change it to something else.
Note, that in the above instance, you’re not going to type “CTRL + ‘ + , + E” rather it’s “CTRL + ‘ + E.” The comma is simply there to tell you must first hold down the “CTRL” button, then press the apostrophe and “e” to insert an “é” in your document. Similarly, hold down “CTRL” plus comma and “c” to insert a “ç” and so on.
Coming up Next…
And so ends Lesson 3. We hope you enjoyed it and learned a thing or two. Knowing how to lay out tables in Word will give you a great deal of control over how you present data. Rather than simply having information in sentences or making lists, you can arrange it in neat rows and tables complete with customized colors and borders. The only limit is your creativity!
Moreover, if you’re going for a more published look and feel to your document, adding headers, footer, and page numbers is a great skill to have. Meanwhile, placing links in your documents will help readers navigate and read up on things you might otherwise have to explain with footnotes and such.
Tomorrow, in Lesson 4, we will dive into adding illustrations (such as pictures and shapes) to your documents, allowing you to create eye-popping layouts with tons of variety. You can even embed video for a true multimedia experience. We’ll end with how to add and use multiple languages, so you don’t want to miss out!
READ NEXT
- › How to Adjust and Change Discord Fonts
- › HoloLens Now Has Windows 11 and Incredible 3D Ink Features
- › BLUETTI Slashed Hundreds off Its Best Power Stations for Easter Sale
- › The New NVIDIA GeForce RTX 4070 Is Like an RTX 3080 for $599
- › This New Google TV Streaming Device Costs Just $20
- › Google Chrome Is Getting Faster
While formatting Microsoft Word documents, do you format each paragraph or heading? Do you sometimes forget which formatting you used for each level of subheading? Do you have to work out why the contents table does not list all headings?
😰 😰 😰
Do you insert page breaks manually to make content to fit well on the page? Do you get confused adding page numbers, headers or footers, and section breaks? Does the formatting need fixing after pasting in new content?
You are not alone. Formatting Microsoft Word documents can take a lot of time. Time that could be spent writing great content.
Below, I explain five formatting principles that will help you create Word documents that look good and consistent. They are easy to apply and do not require you to spend lots of time on formatting.
If you apply these principles, you will automatically have:
- a clean document with consistent layout for text, headings, lists, images, boxes or any other content
- page numbering on each page
- a table of contents that updates automatically
- illustrations that stay with their captions
- clear tables that wrap if needed
- a document that looks good to print at any time.
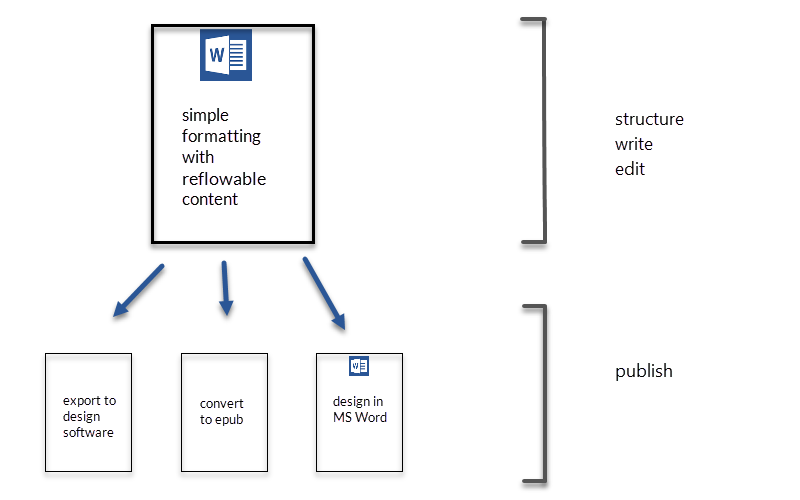
There are many reasons why good formatting habits in Word are important, but easy conversion to ebook is usually not one of the reasons cited. And yet, if you adopt the five simple formatting principles below, you will be using the reflowable content method for epub ebook conversion. This method is used to prepare a Microsoft Word document for conversion to ebook epub format and is very suitable to use during the writing and editing process.
The simple formatting principles below are based on keeping the text free-flowing or reflowable. Reflowable content is important for ebooks, as they do not have a fixed page size. It gives ebooks the capacity to be read on any device, irrespective of the size of the page. By using the reflowable content in Word, content will fit on the page at any time of the writing process. That means you can print it at any time without needing to adjust the page layout.
I have summarised the reflowable content method for formatting Microsoft Word documents in five main principles that are easy to apply, even to complex content. If you follow these principles, you can save many hours of formatting time.
Quick content links
1. Apply Word styles to ALL content in your document
Styles are the most important feature when formatting Microsoft Word documents and are easy to use. The fastest way to apply a style is to write a paragraph, place your cursor anywhere in the paragraph and click on the appropriate style provided on the Word Home ribbon (i.e. apply Normal style to text, Heading 1 style to your chapter or main headings, Heading 2 and following styles to subsection headings, a list style to a list element, etc.).
Most Word users will be familiar with using styles for headings, but many users do not apply styles to other content. However, Word requires that all content in your document has a style.

So, even if you do not apply a style, Word will apply the default style, Normal, to all content. By not applying your own style to your content, you are missing out on a great tool that can be used to automate your layout.
Styles are the most important tool to create reflowable content and format your document. It is therefore essential that you apply a styles to all text, bullets, quotes or other content in your document.
Advantages of using styles
The first clear advantage of applying heading styles to all your headings will be that, when you insert a table of contents, it will include all headings and subheadings. The table of contents will also update automatically whenever you make a change to any heading text.
The second advantage is that you can automate how your styled paragraphs behave in the document. The Word styles provided on the Home ribbon are basic and will get you started to apply styles for text, quotes, bullet lists, boxed text, captions or notes. Even if you do not like these styles initially, you can easily change them into a style you like.
The important message of this first principle in simple formatting is to apply a style to each paragraph in your document.
Spacing
There is another aspect to this principle. It also requires that you remove the blank lines that you have inserted in your document to create white space. These blank lines will prevent the principle of creating reflowable content from working well, and should be removed. Instead, you need to create automated white space, by defining spaces before and after paragraphs when you format your style.
In summary, the essence of the simple formatting method is that you know how to use styles in MS Word. This is not hard to learn. If you have specific questions about how to create styles, notify me in the comments below.
2. Do not use page breaks or section breaks in the document
Page breaks and section breaks in Word are used for specific layout and are not required while writing or editing your document. If you do not intend to publish the Word version of your document, but will import it into Indesign or another graphic layout program, there is no need to do a page layout with section breaks in Word. If you will publish in Word, leave the final page layout formatting until the very end, after the writing and editing phases, when your content is complete. This will allow you to export your document to epub ebook before doing the final layout formatting in Word AND will prevent you wasting time on layout during the writing process.
Section breaks and page breaks are the cause of many formatting problems, as they control all the headers and footers and will affect pagination if you are not aware of how they work.
So, how can you add breaks at the correct places in your document without using section or page breaks? You use styles. If you would like a chapter or table to start on a new page, apply a ‘start new page’ paragraph format to the heading style (e.g. Heading 1) that needs to start on a new page. This will automatically start a new page without adding a real ‘page break’ element to the document.

You can do the same for boxes, figures or tables that need to start on a new page (i.e. change the style definition of the box, table or figure name and apply a ‘start new page’ paragraph format).
3. Add a simple centred page number to the document footer
Page numbering is essential. During the pre-publication process, you will need to print the document and discuss it with collaborators. However, you do not need different page numbering for front matter and actual content, or odd and even page number locations while you are working on the document. These are complex formatting features linked to section breaks and can be difficult to fix if you are not aware of how they work.
All the document needs is a page number centred in the footer. This method of pagination is clear. It also works for double-sided printing. You can use this simple pagination throughout the writing process, the editing process, and up to the final proofing of the content. By simplifying the page numbering and removing section breaks, you will eliminate most problems involving header/footer formatting.

If you wish to have a document draft number or date in the footer, you can easily add this next to the centred page number in the footer or add it to the header.
If you require cross-references that refer the reader to other sections in the document, do not use page numbers as cross-reference, but use the Word cross-reference feature to insert an automatically updating link to the correct location in the document.
4. Always insert images and other object graphics in line with text
To add images, graphs or flow charts to your document, use copy and paste — or the Insert ribbon — to add these to your document. However, always make sure you place each image on a separate line and set the image position to ‘In Line with Text’. Do not apply any text wrapping but keep the image on its own line (i.e. paragraph). This will ensure the image does not float around in the document, disappear behind the text, or cover the text.

Then, create a style for the paragraph with the image and apply this style to all the paragraphs with images in the document. By applying a style to the image paragraph, you can easily format its horizontal placement (e.g. left, centre or right alignment). If you apply this style to all images in your document, they will automatically look consistent. These basic settings will be sufficient until the document is ready for design.
If you need to overlay text on the image or graphic, do not do this in Word, but edit the image before importing into Word. I do not recommend using text boxes to overlay text on images. This will only lead to problems. Text boxes are easily lost on the page if not inserted correctly, and they are hard to edit in track changes. In addition, the content of a text box can easily be lost when importing the document into a design program for page layout.
The simplest way to clarify or annotate an illustration during the writing process, is to use a caption or note paragraph style below the illustration. Format the style the way you like and then apply it to all captions in the document. This will present all illustrations in your document in a consistent way.
Note that images sized to display at the full with of the document page will require re-scaling if you decide later on to change the document page width.
5. Insert tables using the Insert ribbon and do not change the page orientation
Tables are most accessible when they have the same orientation as the text. If your table is too large for portrait page layout and requires landscape orientation, it is most likely complex and hard to read. To insert landscape pages, you will need to insert section breaks and increase the chance of document corruption during the pre-publication process. Therefore, I strongly recommend reorganising a table for portrait orientation, rather than trying to create a landscape page.
By reorganising your table, you will make it easier to read and scan. This, in turn, will also make your document more accessible. So, start early and organise the information in your tables to improve clarity and easy scanning.
To insert a table, use the Insert ribbon and click the Table icon to specify how many table rows and columns you will need. This inserts a simple table format.

Using styles to format the table content
To format the table, create three styles: a table header style, a table text style and a table number style. Apply paragraph formatting to these three styles so they format the table text the way you like. For example, you can apply bold font and centred alignment for the table header style; normal font and left alignment for the table text style, and normal font with centred or right alignment for the table number style. I also recommend using a basic table style. A simple table that has cells with borders shows the content clearly separated during the writing process.
If you need to use other paragraph formats in the table, always create a style for it. Try to create styles that can be used in most tables rather than special styles for just one table. There is no need to spend time on formatting of tables during the writing and editing phases. This is the time where you have to make sure table content is clear and correct. After the editing phase there will be time for a designer to apply your favourite design features.
In addition, to ensure that the table will be easy to read when it wraps to the next page, always set the header row to repeat. To make sure the table adjusts to the page width, always set the width to 100%.
If you apply these simple settings to each table in your document, all tables will look consistent.
Your document is always print-ready
If you follow these five principles for formatting Microsoft Word documents, you will have a document that is clear and consistently formatted. Paragraphs and headings and other text elements will look consistent. Tables will be easy to read and illustration text will not disappear or move in an undesirable way. The document should have very few formatting issues or problems.
This means your document will be ready to share at any time without layout fixes. You can quickly send it to a co-writer, supervisor, senior executive or editor. The layout will always be suitable for printing. Pages will not need cleaning up and will not be prone to layout corruption.
These five simple Word formatting principles ensure that you can take your document quickly through the writing and editing phases without wasting time on layout formatting.
An easy path to epub ebook conversion and publishing
When you have finished writing and editing, your document will be ready for the next step in the publication process. The content will be ready to import into design software for traditional publishing. It can also be quickly converted into epub ebook format.
If you do want to publish in Microsoft Word, now is the time to pass the document to a skilled formatter. They can quickly attach your company template to your document in Word or apply fancy design. As the text is still free-flowing, the page print size can be changed up to the last minute without much effort.
Time is important during the publication process. I hope this method will save you lots of time when producing your next document and give you more time to focus on the content. Once you have created your document styles, they can be transferred to all your documents, saving you even more time.
Do you apply a similar method when formatting Microsoft Word documents? Which method do you use?
Try out this method and let me know your experiences. If you have any formatting questions, please let me know. You can use the comments field below to submit a comment or question.
For more tips and tutorials on formatting Microsoft Word documents, sign up for the newsletter below this post.
Happy formatting!
Hashtags: #WordFormatting, #books, #ebooks, #WritersToolkit
☙ ❧