
Create a document in Word

With Word on your PC, Mac, or mobile device, you can:
-
Create documents from scratch, or a template.
-
Add text, images, art, and videos.
-
Research a topic and find credible sources.
-
Access your documents from a computer, tablet, or phone with OneDrive.
-
Share your documents and work with others.
-
Track and review changes.
Create a document
-
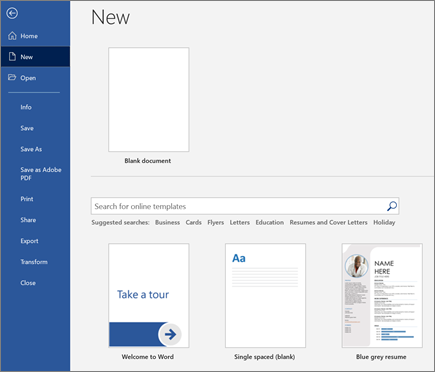
On the File tab, click New.
-
In the Search for online templates box, enter the type of document you want to create and press ENTER.
Tip: To start from scratch, select Blank document. Or, for practice using Word features, try a learning guide like Welcome to Word, Insert your first table of contents, and more.
Add and format text
-
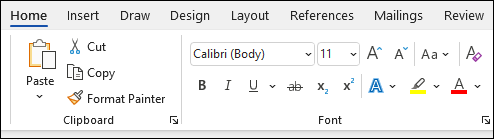
Place the cursor and type some text.
-
To format, select the text and then select an option: Bold, Italic, Bullets, Numbering, and more.
Add Pictures, Shapes, SmartArt, Chart, and more
-
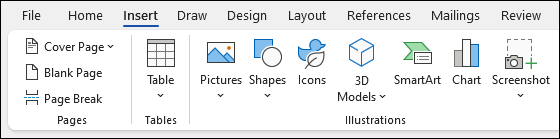
Select the Insert tab.
-
Select what you want to add:
-
Tables — select Table, hover over the size you want, and select it.
-
Pictures — select Pictures, browse for pictures from your computer, select a stock image, or even search Bing.
Note:
Older versions of Word may have Online Pictures on the ribbon next to Pictures. -
Shapes — select Shapes, and choose a shape from the drop-down.
-
Icons — select Icons, pick the one you want, and select Insert.
-
3D Models — select 3D Models, choose from a file or online source, go to the image you want, and select Insert.
-
SmartArt — select SmartArt, choose a SmartArt Graphic, and select OK.
-
Chart — select Chart, select the chart you want, and select OK.
-
Screenshot — select Screenshot and select one from the drop-down.
-
Next:
Save your document to OneDrive in Word
Need more help?
Introduction
In order to attract your readers and to provide them with a great reading experience, it’s important that you as a writer think about the layout and the design of your article – as well as the contents. There are a number of tools in Word 2013 that can help you create an attractive article.
Introduction to the document
Here I have a text that I have written for an article on “Running effective meetings”. I’m going to show you how I can use the formatting tools within Word to make the article look like this instead, a much more attractive article.
How to change margins in Word?
First I want to make better use of the paper by reducing the margins. To change the margins of a document, go to the “PAGE LAYOUT” tab and click “Margins”. Here you can select from a number of pre-defined margin settings. You can also define exactly how wide you want the margins to be by clicking “Custom” and entering the exact measurements. I’ll click Cancel here and go back to the Margin settings. If you have set up custom margins before, the last used custom settings are available on the menu. In this case, I’ll select “Narrow” margins and as you can see the text now fills out more of the page.
How to arrange text in columns in Word?
Now I want to change the layout of the text into two columns. I want the title or the headline and the sub-headline to remain in one column, I only want the body text of the article to be arranged into two columns. To arrange text into columns, mark the text you want to re-arrange. To mark large chunks of text place the marker at the beginning of the text and then scroll down to the end, hold down Shift on the keyboard and then mark the end of the text. On the “PAGE LAYOUT” tab click “Columns.” Select the number of columns you want, here I’ll select “Two” columns.
The text is now arranged into two columns. If you want to change the spacing between the columns open up the ruler by clicking the “VIEW” tab and then mark the “Ruler” option. To change the width between the columns, move your mouse until it becomes a double-sided arrow, now hold down the left mouse button and then move the marker with your mouse.
How to work with images in Word?
Now I want to add some pictures to make the article easier to digest. To insert a picture into your document, place the cursor where you want to position the picture and click the “INSERT” tab. I want to insert a picture from the Internet so I’ll click “Online Pictures”. In this case, I want to use a royalty-free image from Microsoft’s ClipArt library on Office.com. I’ll write “meeting” in the search text box and select this one by marking it and clicking “Insert”.
The image is a bit too big, so I’ll click “Crop” and then I’ll crop the picture to an appropriate size. Now I want to change the image a bit by adding an artistic effect to it. To apply an artistic effect to your picture, mark the image and click “Artistic Effects” in the “PICTURE TOOLS” menu. You get a live preview of what different effects look like. The “Blur” effect is great if you want to censor something, like a face or a credit card number. The “Film Grain” effect is good if you want to make something look older. Here I’ll select the “Crisscross Etching” effect which is quite subtle.
How to position images in Word?
I’ll insert one more image, this time I want to insert a picture that I have on my computer so I’ll click “INSERT”, “Pictures” and select my image.
When you insert an image in Word 2013 a layout button appears. Click on the “LAYOUT OPTIONS” buttons to see how you can position your image.
Here you can select if you want your image to be placed in line with text, or if you want it with text wrapping. The default layout is “In Line with Text”. I’ll select to position the image with text wrapping using the “Square” option. If you often use this layout you can set it as the default by right-clicking and select “Set as Default”.
You can also select if you want the image to be positioned relative to the text or relative to the page. I want this image to be located at the bottom right corner of the page, so I’ll select, “Fix position on page” and then I’ll close down the “LAYOUT OPTIONS”. Now I can position the picture where I want it on the page. I get a live preview of what the positioning of the image will look like. The new alignment guides help me position the images more precisely. The little anchor shows me what text the image belongs.
Even though I’ve said I want the image to have a fixed position on the page, the image always belongs to a defined text that needs to be on the same page. In this case, the image belongs to the paragraph starting with “Taking good meeting notes”. So to anchor the image with that text, I’ll just grab the anchor and move it to that paragraph. If I insert a page break and move the paragraphs after the anchored text, the image will remain in the position since the anchoring text is still on the same page. If however, I change the page break so that the anchored text moves to the next page, the image will also move, having the same fixed position, but on the next page.
Again I want to apply the same artistic effect to this picture so I’ll mark the image, Click “Artistic Effects” and select the “Crisscross Etching” effect.
How to insert a caption for an image in Word?
I want to add a caption to this image. Along with the title, the lead, and section headings, captions are the most commonly read words in an article, so they should be concise and informative. To insert a caption go to the “REFERENCES” tab and click “Insert Caption”.
I don’t want the caption to have a label, but even if I select the option “Exclude label from caption” the caption number will be shown, so I’ll just leave this option and delete the label from the text box instead. I’ll write the caption and then click “OK”. Now I’ll remove the caption label from the text box by marking it and pressing Delete. I’ll mark the image, right-click and select “Group”. This way the caption stays with the image no matter where I move it.
How to add a Callout in Word 2013?
To capture my reader’s attention further I’ll insert two callout bubble shapes highlighting some of the text in the article. To insert a callout shape, click “INSERT”, “Shapes” and then select the one you want to insert.
I’ll select this bubble callout and write my text in the bubble. I’ll click the “LAYOUT OPTIONS” button and select to position the shape wrapped with text with the square option. Now I can position the bubble exactly where I want it. I’ll click the “Shape Styles” to apply a nice design. I’m not thrilled about the color, but I’ll change that later.
To insert one more similar shape, I’ll just copy this by pressing CTRL C on my keyboard and then CTRL V to paste it in again. I’ll position the second one and change the text. There!
How to apply a theme in Word?
Now I want to change the look and feel of my article. I’ll click the “DESIGN” tab and then browse through one of the many themes in Word 2013. A theme is a collection of styles and color combinations. I will select this one called “Parallax”.
I’ll click the “Colors” drop down to select another color combination. I’ll select this green color theme. But I’d like to change the shading a bit. I’ll click “Colors” again and select “Customize Colors”.
I’d like to choose a dark green that goes well with the image of the article so I’ll change the first accent color to a dark green. I’ll save the custom color combination and name it, “Dark Green”.
Now I want to make some changes to the title. I’ll mark the title and change the font to “Adobe Hebrew”, I’ll increase the font size so that the title covers the full page width. Finally, I’ll change the color by selecting the “Dark Green” in the applied color theme. I’ll update the title style by right-clicking and select “Update Title to Match Selection”.
How to insert a Drop Cap in Word?
Now I want to highlight the beginning of the text by enlarging the first letter, by inserting a so-called Drop Cap. To insert a Drop Cap, place your cursor by the word where you want the Drop Cap inserted, click “INSERT” and then “Drop Cap”. Here you get a live preview so that you can select which layout option you prefer. I’ll select the one where the letter is dropped into the text.
To make it stand out even more I’ll mark the Drop Cap and change the font to “Adobe Hebrew”. I’ll also change the color and select a dark green in the color theme. There, now the beginning of the article stands out more.
How to distribute columns evenly in Word?
The final touch is to even out the text on the second page to balance the article. I’ll move the callout shape and position it at the top of the page. The marker is placed where I want to break the text to even it out. I will click the “PAGE LAYOUT” tab, “Breaks” and then select to insert a “Column” break.
The text is now split, evening out the article.
Closing
What I’ve shown you here are just a few examples of how the built-in tools in Word 2013 can help you create a really attractive article.
4 Comments
![]()
Download Article
![]()
Download Article
- Designing Your Paper
- Creating Your Paper
- Q&A
- Tips
- Warnings
|
|
|
|
This wikiHow teaches you how to create a newspaper using Microsoft Word’s built-in features. Once you have an idea of what your newspaper will look like, you can create a newspaper in Word on both Windows and Mac computers.
-

1
Examine a few different newspapers. To understand how the basic elements of a newspaper work together, look at how the following elements of each paper come together:
- Stories — The meat of the paper, where the majority of the text is.
- Images — Photos and graphics are an essential piece of newspaper design. They break up large swaths of text and help provide context for stories.
- Headlines — The headline is the first thing the reader will see before deciding whether or not the story is worth their time.
-
2
Account for printer size. Unless you have access to an industrial-sized printer, your document won’t be able to be more than the 8.5-inch-by-11-inch size that most printer paper comes in.
- This is the default page size setting for Microsoft Word on most computers.
Advertisement
-
3
Plan your layout before beginning. It will help to have a basic idea of your paper’s design before opening Word and messing with the formatting. Take a few sheets of scratch paper and sketch out a few different designs.
- Design different pages. The front page will look significantly differently than inside pages, and different sections will have slightly different styles.
- Draw lines to see how columns will affect the flow of your paper. Too many columns will make your text too crowded, while too few columns will lead to your stories appearing blocky.
- Try placing text blocks in different places on your scratch page. Wrap text around images, or try placing an image directly above or below the story that it’s related to.
- Experiment with headline placement. Headlines need to grab the reader’s attention, but they can’t be so large that they’re distracting.


Advertisement
-
1
Open Microsoft Word. Double-click the Word program icon, which resembles a white «W» on a dark-blue background.
-
2
Click Blank document. It’s a white box in the upper-left side of the page. Doing so will open a new, blank document.
- Skip this step on a Mac.
-
3
Add a title to your newspaper. Type in the title of your newspaper or the headline that you want to use.
-
4
Start a new line. Press the ↵ Enter key to jump down to a new line.
- This step is so that you can add columns without dividing the title.
-
5
Click Layout. This tab is in the dark-blue ribbon at the top of the Word window. Doing so will open the Layout toolbar below the ribbon.
-
6
Click Columns. It’s on the left side of the Layout toolbar. A drop-down menu will appear.
-
7
Click More Columns…. This option is at the bottom of the Columns drop-down menu. A window will appear with additional options.
-
8
Select a column number. For example, click Two at the top of the window to divide your paper into two columns.
- You can also change the number in the «Number of columns» box to your preferred number of columns.
-
9
Click the «Apply to» drop-down box. It’s in the lower-left side of the window.
-
10
Click This point forward. This option is in the drop-down menu. Doing so will apply your columns to your document with the exception of your title.
-
11
Click OK. This will split your Word document into two or more columns (depending on how many you chose).
-
12
Add your written content. Start with a title, then press Enter}} and begin writing a piece. When you get to the end of a piece, skip a couple of lines and then begin another title and piece.
- As you type, the left-most column will fill up first and then feed into the right column(s).
-
13
Insert photos. Click the place in your newspaper where you want to insert a photo, then click the Insert tab, click Pictures, select a picture, and click Insert in the bottom-right corner of the window.
- You can shrink or enlarge your photo by clicking and dragging one of the picture’s corner knobs in or out.
- To wrap text around the photo, click the photo, then click the Format tab, click Wrap Text, and click a wrap text option.
-
14
Center your newspaper’s title. Click the Home tab, highlight the title, and then click the «Centered» icon, which resembles a stack of centered horizontal lines in the «Paragraph» section of the toolbar.
-
15
Format your newspaper. There are countless things you might want to change about your newspaper before you save it, but there are a few main things you’ll likely need to change:
- Text Font and Size — Highlight the text that you want to change, then click the downward-facing arrow next to the current font in the «Font» section of the Home tab. Select a new font, then select a size in the numbered drop-down box next to the font box.
- Bold Titles — Highlight the title(s) you want to change, then click B in the «Font» section to make the text bold. You can also click the U or I button here to underline or italicize the text, respectively.
-
16
Save your work. Press Ctrl+S (Windows) or ⌘ Command+S (Mac) to save your newspaper, then select a save location, enter a title, and click Save. Your newspaper is ready to go!


Advertisement
Add New Question
-
Question
How can I make the first letter larger like newspapers do?

Place your text cursor on the letter in question, then click «insert» and select «drop cap.»
-
Question
What is the font used in newspapers?
Times New Roman is the most common ‘newspaper’ font. This will give it the authentic look.
-
Question
How can I add a picture in the first column only so that the text will still flow?
Wrap the image specifically, so text surrounds it. Place it where you want it, then click wrap image.
See more answers
Ask a Question
200 characters left
Include your email address to get a message when this question is answered.
Submit
Advertisement
-
Check out handy newspaper fonts, like Old English Text. In order to really make your Microsoft Word publication look «newsy,» you may want to look into what kinds of fonts are most popular with established newspapers. A variety of websites and print resources can show you the fonts that newspaper printers have used over the years.
Thanks for submitting a tip for review!
Advertisement
-
If you don’t select «Black and White» when printing your newspaper, the printing itself will likely be expensive.
Advertisement
About This Article
Article SummaryX
Before creating your newspaper in Word, consider planning out your newspaper’s content and design so that you have a general idea of how to format the Word document. Once you know what your newspaper should look like, create a new Word document and add your newspaper’s title at the top. You can insert columns by clicking Layout, clicking Columns, and selecting a number of columns. Write your newspaper articles’ content in the columns; if you want to add images, click Insert, click Pictures, and select a photo from your computer.
Did this summary help you?
Thanks to all authors for creating a page that has been read 638,463 times.
Reader Success Stories
-

Shilpa Suresh
Jun 24, 2017
«I have created 2 or 3 newsletters but after reading the tips, I am sure to make a better newsletter. Thank you…» more
Is this article up to date?
Introduction
The ACM article template allows authors to use LaTeX or Microsoft Word to prepare high-quality articles for publication in the ACM Digital Library. An important concept for authors to understand is the separation of content and style. The input format — whether Word or LaTeX — is intentionally simple in appearance, making creation and editing simpler, as well as reviewing. Authors provide metadata — through associating styles with content in a Word document — «this is a paragraph, this is a subtitle,» and LaTeX commands — title{}, section{} and so on. TAPS (The ACM Production System) takes Word or LaTeX documents as input, and produces well-formatted, high-quality PDF and HTML5 documents for publication. For more information on TAPS, please see our TAPS Workflow page.
The article creation process can be summed up in a few steps.
-
Prepare your source material using Word or LaTeX, starting with the Word submission template or a LaTeX document that uses the «acmart» document class (documentclass[manuscript]{acmart}). The submission version is one column, with minimal styling of content.
-
Submit your article for review to a conference or journal.
-
If your article is accepted for publication, you will be asked to complete the ACM rights form, then prepare a final version of your article and submit the source to TAPS for processing.
-
Review the PDF and HTML versions of your article generated by TAPS, correct errors necessary, and reprocess or contact support and then approve the output. Your output will then be reviewed by the production editor for final approval.
Important to Note: Communication between the author and ACM regarding your rights form is done via e-mail; please make that e-mail from «rightsreview@acm.org» goes to your inbox, so that you don’t miss any communication from ACM. Please do the same for tapsadmin@aptaracorp.awsapps.com as well so that the emails from TAPS also safely reach your inbox.
This document explains how to use Microsoft Word to prepare your ACM article for submission, and for publication. If you are using LaTeX to prepare your ACM article, you should review Preparing Your Article with LaTeX instead. The same topics are covered, and the emphasis there is on using LaTeX to accomplish the task.
The ACM Article Template: Using Microsoft Word
Authors who use Microsoft Word to prepare their articles need to first use the «submission template» which contains style information used to tag the elements of your article, and then the «primary article template» that contains macros for citation, reference, figure and image cross-linking, and manuscript validation.
Windows and Macintosh users will start with the same submission template Word document, adding their content to it and applying styles to each of the major elements — title, paragraph, figure, and so on — to it.
There are separate versions of the «primary article template» for Microsoft Word for Windows, Macintosh Office 2011, and Macintosh Office 2016 — please download the version appropriate for your operating system and Microsoft Word version. (The Macintosh Office 2016 version also works with the Microsoft Office 365 version of Microsoft Word for Macintosh.) This is not a new document but rather a template/add-in to attach to the submission document you sent for review. Please choose the correct template version based on your platform.
Attaching the «primary article template» to your existing Word document is done in slightly different ways, dependent on your computer’s operating system.
To set this up in Word (for Macintosh):
-
select «Templates and Add-Ins» from the «Tools» menu.
-
select the «Attach…» button and then select the primary article template file.
-
select the «OK» button.
To set this up in Word (for Windows):
-
select «Options» from the «File» menu.
-
select «Add-Ins» from the «Word Options» dialog box.
-
select «Templates» from the «Manage» option menu, and then select the primary article template file.
-
(If you get a security warning about disabled macros, please select the «Enable Content» button.)
Attach the ACM Article Template to your accepted submission version and prepare your paper (still in single-column format) via these instructions for validation.
Working in Draft Mode
When preparing an article using Microsoft Word, you should be working in «Draft» mode (and not «Print Layout» mode) and have set up Word so that the applied styles are clearly visible on the left side of your document.
To set this up in Word (for Macintosh):
-
select «Draft» from the «View» menu.
-
select «Preferences» from the Word menu, select «View» and set «Style area width» to 1.5 inches.
To set this up in Word (for Windows):
-
select «Options» from the «File» menu
-
select the «Advanced» tab from the «Word Options» dialog box
-
in the «Display» section, set the value of «Style area pane width in Draft and Outline views» to 1.5 inches.
Important to Note: Figures will not show up in «Draft» mode, and it’s fine to switch between «Print Layout» and «Draft» mode while you are working on your document.
Review Version and Final Document Versions: What’s the Difference?
When preparing an article for submission to an event or journal for REVIEW, the amount of tagging — applying styles to discrete elements of your article — which must be done is reduced. The emphasis at this point is on the content you are presenting. Your article should contain figures and images, and citations and references, and the text of your presentation.
If and when your article is accepted for publication, you will need to perform additional work in order to make your article ready to submit to TAPS.
-
Adding alt-text to figures, tables, and images,
-
cross-linking citations and references,
-
and validation of your article are the next steps in the process.
Important to Note: You do NOT need to add any rights information to your Word document. This will be automatically added to the PDF and HTML5 versions of your article when they are generated by TAPS.
Which Template Style to Use?
Authors who use Microsoft Word to prepare their articles do not need to set the template style; the appropriate template — set by the organizers of the event or journal — will be used by TAPS in the preparation of the PDF and HTML5 versions of your article.
Estimating the Page Count
Sponsored events and journal publications often use page counts to segregate articles into several classes — «long papers,» «short papers,» «abstracts» and the like. The simplified input format of Word documents may make it difficult to determine a correspondence between «word count» and the «page count» of a well-formatted PDF document.
The following table illustrates — in general terms — a correspondence between word count and page count. These estimations do not include figures, tables, or other elements typically found in an article, and this was exclusive of references or appendices.
| Word Count | Page Count (approximate) |
|---|---|
| 1,300 words | 2 pages of formatted, two-column output. |
| 2,000 words | 3 pages of formatted, two-column output. |
| 3,100 words | 4 pages of formatted, two-column output. |
| 4,000 words | 5 pages of formatted, two-column output. |
| 7,000 words | 8 pages of formatted, two-column output. |
| 8,000 words | 9 pages of formatted, two-column output. |
| 10,000 words | 11 pages of formatted, two-column output. |
When preparing the author list for an article, please keep the following in mind:
-
Authors’ full names — «Donald E. Knuth» — should be used, without abbreviation — «D. E. Knuth» and «D. Knuth» are not acceptable alternatives. (This is true of references as well; authors’ full names are easier to clearly identify for citation linking.)
-
You are required to include a separate e-mail address for each author to be published on the PDF and HTML output.
-
Authors must define each author and affiliation separately, even when authors share an affiliation, and apply the «Authors» and «Affiliation» tag to each author and affiliation.
-
These data need to be identical to the data entered into the Conference/Journal review and ACM eRights systems. Any discrepancies in data, including author sort order will cause inconsistencies in output and further delay processing and approval of your output files in TAPS.
-
ACM’s ORCID Requirement will expand to include Conferences in 2022. A unique author ID (ORCID) can be set up at orcid.org/register and be connected to the ACM Profile. ORCIDs allow ACM to more reliably identify authors, even when there are variants in the use of their names or when multiple authors share the same name.
If your conference’s review process will be double-anonymous: The submitted document should not include author information and should not include acknowledgements, citations or discussion of related work that would make the authorship apparent. Submissions containing author identifying information may be subject to rejection without review. Upon acceptance, the author and affiliation information must be added to your paper.
Citations and References
References should be prepared in the ACM reference format. The default citation format for ACM publications is the «numbered» format. Articles presented at conferences sponsored by ACM SIGGRAPH and ACM SIGPLAN use the «author year» format.
Authors who use Microsoft Word should choose the first — «1» — option when cross-linking their citations and references for the numbered format, and the second — «2» — option for the «author year» format.
CCS Concepts and Keywords
ACM’s Computing Classification System (CCS) is a taxonomy for the computing field. Authors are expected to select one or more descriptors (or «concepts») from the CCS and add them to your document.
A list of CCS descriptors can be built for your article from https://dl.acm.org/ccs/ccs.cfm. Authors can select one or more descriptors and assign a priority to them.
When a list of CCS descriptors has been built, that information must be added to your document. In Microsoft Word, adding CCS concepts to your document is a two-step process:
- select the formatted list of concept(s) from the Web interface — here’s an example:
• Computer systems organization~Real-time operating systems
— paste it into your document, and style with the «CCSDescription» tag. - select «view CCS TeX Code» and check the «Show the XML only» box, copy the XML and paste into your Word document in the following location (Mac):
- select «Properties» from the «File» menu
- select the «Summary» tab
- paste the XML into the «Comments» area
- select «view CCS TeX Code» and check the «Show the XML only» box, copy the XML and paste into your Word document in the following location (Windows):
- select «Properties» from the «File» menu
- select «Advanced Properties»
- select the «Summary» tab
- paste the XML into the «Comments» area
It is important to perform both parts of this task — inserting the formatted list into the body of your Word document and applying the appropriate style, AND inserting the XML representation of your selected CCS concepts into the metadata of your Word document.
Users may augment the ACM taxonomy with user-defined keywords. The Keywords section is a comma-separated list of keywords, each styled with the «Keyword» tag.
Abstract
Your article should begin with a short — one or two paragraphs — abstract in English, providing an overview of the work to be presented. Style the abstract with the «Abstract» tag.
Sectioning
There are four different sectioning levels available to authors, with the «Head1» through «Head4» styles. A top-level section would be styled with the «Head1» tag, a subsection would use the «Head2» style, and so on. Please use these sectioning tags /…
Paragraphs
Paragraphs must be styled with the «Para» tag. The exception to this is when an equation, table, or other element is placed within the paragraph. In this case, the remainder of the current paragraph is styled with the «ParaContinue» tag so that no indentation of the text occurs.
Math
Equations can be added with the built-in Equation Editor or a third-party application such as MathType. Use the «DisplayFormula» (for equations with an equation number) or «DisplayFormulaUnnum» (for equations with no equation number) styles as appropriate.
When equations occur in the middle of a paragraph of text, please use the «ParaContinue» style on the part of the paragraph that occurs after the equation.
Algorithms
When an algorithm is included in an article, the declaration of the algorithm starts the algorithm, and is styled with the «AlgorithmCaption» tag. The algorithm itself follows, and all of its lines are styled with the «Algorithm» tag.
Figures and Tables
Figures and tables are «float elements» which should be inserted in the Word document after their first occurrence.
When working in «draft» mode, figures are not visible — there will be a blank space where the figure occurs. Switching to «Print Mode» will reveal the figure.
Figures
The «Image» style should be applied to the figure, and the «FigureCaption» style to its caption. Figure captions go below the figure, and captions are required elements.
Images that occupy a single column should be sized to fit within the column — 3 inches (7.62 cm) wide is a reasonable value. (In general, you should scale images to the size they will occupy in the finished two-column PDF output.)
If you wish to have an image or figure that spans multiple columns OR wish to have multiple images in a single figure, this should be done only after your article has been accepted for publication and you are preparing your article for TAPS.
Figures with multiple images — three smaller images in the same figure, for example, or a three by three grid of images in the same figure — are accomplished by creating a table with the necessary number of rows and columns, and inserting an image into each of the table’s cells. These kinds of figures must have the caption styled with the «TableCaption» tag.
All of the figures in your article must have descriptive (or «alt-text») text included for accessibility. («Alt-text» is used by screen reader software.) Once an figure has been added to your article, the descriptive text is added by:
-
right-clicking on the figure, and selecting the «Edit Alt Text» option (Macintosh) or selecting «Format Picture,» then the «Layout & Properties» icon, and the «Alt Text» option from there. (Windows)
Tables
Please use Word’s built-in table editor to create tables in your Word document.
The table’s head row should be selected and styled with the «TableHead» tag, found under «Body Elements.»
The «TableCaption» style should be applied to the table’s caption. Table captions go above the table, and is a required element.
Column-Spanning Tables and Figures
Figures and Tables that should span both columns of your formatted article need additional styling applied to them, so that TAPS will properly format them.
After the appropriate figure and/or table styles have been applied to the figure or table which will span multiple columns, select both the figure or table AND its caption, and style them with the «Large Float» tag, found under «Body Elements.»
Cross-Linking Tables and Figures
Providing links to figures and tables from elsewhere in your article is straightforward. This is done after the «primary article template» has been added to your Word document.
- each figure and table should have a consistent label at the start of its caption: «Figure 2» or «Table 1» or similar.
- the link to a figure or table should use the same language: «…as seen in Figure 2,»
Cross-linking the citations and the figures and tables is accomplished by selecting «Reference and Cross Linking» -> «Cross-referencing» -> «Floats and Bibliography» and allowing Word to run that macro. If successful, both the label in the figure or table, and the citation to the figure or table should now be active links and colored, rather than plain text.
The «Floats and Bibliography» macro is the same one used to link references and citations in your article.
Lists
Lists — numbered, bullets, etc. — can be created using the standard Word list commands, and should be styled with the «List Paragraph» tag when complete.
Headings and Their Styles
There are a number of styles in the «submission» template that must be used to tag various heading elements:
- Title_document — the style for your article’s title
- Subtitle — the style for your article’s subtitle if it has one
- AbsHead — the «Abstract» heading
- AckHead — the «Acknowledgments» heading
- CCSHead — the «CCS Concepts» heading
- KeyWordHead — the «Keywords» heading
- ReferenceHead — the «References» heading
Acknowledgments
Acknowledgments are placed before the references, and should include any required or desired mention of support, sponsorship, or funding. The «GrantSponser» and «GrantNumber» tags should be used to style the grant sponsor and grant number information, respectively.
Appendices
Appendices should follow the references. There are three — «AppendixH1,» «AppendixH2,» and «AppendixH3» — section heading styles for use in an appendix, analogous to the «Head1,» «Head2,» and «Head3» styles used in the body of your article. All other styles can and should be used in the appendix in the same manner as they are used in the body of your article.
For Conference Proceedings Authors Only: Submitting Your Article to TAPS for Publication
Please see the TAPS Workflow page for the information on how to use TAPS.
Technical Support
ACM’s production vendor has 24/7 technical support available via e-mail to acmtexsupport@aptaracorp.com.
[published March 2022; instructions written by Stephen Spencer, Univ. of Washington, Seattle Washington]
When creating documents in Microsoft Word, there may be times that want to place text in an exact position on the page, and perhaps enable your text to flow from one place to another. A classic example would be when creating a newsletter or article. Just the thought of doing this can strike panic into a VA with thoughts of “this is going to be difficult” or ‘Help! I’m not a graphic designer!” – but fear not! Creating an article template for your clients to use really doesn’t need to be a cause for panic and here’s how to do it easily using just a few simple text boxes.
The idea here is that we will position a number of individual text boxes on the page, and place them at fixed positions, to allow space for images or graphics inserted around them. We are then able to connect these text boxes together so that the words flow from one text box to another, automatically flowing to the next connected element and adjusting the text in each box accordingly as it changes. This eliminates the need for you to fiddle around changing font sizes or having to manually paste the content into each box (and redo it every time the content is edited!). What’s great is that if you edit, add or delete a text box, Word will automatically move the text for you.
Create your article template
The easiest way to start is often to use one of the pre designed templates from Microsoft Word, there are many available. So if you are worried that your creative skills aren’t up to scratch, this is a great place to start, or even a great place to browse through for ideas on layout etc. Alternatively if you are feeling brave, you can start with a blank page.
So I started by creating the template below. Put together in just a few minutes:
Add a header
Insert a rectangular banner or image at the top of the page. You will need to prepare your image or banner beforehand or you can use the edit functions in Word to do this. Choose Insert > Picture and browse to your image. Click OK to insert it.
Your image will appear on the page, and perhaps need to be repositioned. Before attempting this, right click on the image and choose Format Picture > Layout > Advanced.
In the resulting box, you have two tabs, first click ‘Position’ tab to set the position of this image on your page:
- Under Horizontal settings choose ‘Absolute Position’ and set it to 1cm to the right of Page
- Under vertical settings choose ‘Absolute Position’ and set it to 1cm below Page
- Tick the options for allow overlap and placeholder
- Ensure the box for ‘Move object with text’ is unchecked

Next click the tab for ‘Text Wrapping’ and click the option for ‘In front of text’.
This will now position your header in a fixed location on your page and ensure it doesn’t move around as you are working on the rest of your article. To change the picture in future, simply right click on the image and choose ‘Change Picture’ to browse to a new picture and change it, without changing the size and position of your header image – this makes creating future articles dead easy!

Note: if you want to position the header closer/further away from the margins or in a different place, you can now click and drag the box to move it, or repeat the steps above and play with the horizontal and vertical positioning to place it elsewhere on the page
Add your text boxes
Next we want to create a layout with a sidebar and two columns of text, with a couple of pictures in there too. We’ll add and position these in exactly the same way as we did our header image.
Click Insert > Text Box. You’ll then be able to draw your text box directly onto the page in the rough position that you want it to be (don’t worry, you can move it afterwards!) We’re then going to position it in exactly the same way as we did with our header image:
Right click on the text box and choose Format Shape > Layout > Advanced.
Under ‘Position’ tab to set the position of this image on your page:
- Under Horizontal settings choose ‘Absolute Position’ and set it to 1cm to the right of Page
- Under vertical settings choose ‘Absolute Position’ and set it to 8cm below Page
- Tick the option for allow overlap, leave all others unchecked
- Ensure the box for ‘Move object with text’ is unchecked – this important to stop the text box moving as you edit the document
As before, under ‘Text Wrapping’ click the option for ‘In front of text’ then click OK.

Note: The same as for your header, you can edit the horizontal and vertical positioning to place the text box anywhere on your page. It’s sometimes a case of trial and error until you get it right.
If you want to, you can then edit the background colour or outline of your text box to make your sidebar stand out.
When you are happy with your side bar, repeat the processes above to add another 2 text boxes and 2 pictures, to match your desired layout. Remember to alway set the positioning to absolute and text wrapping to in front of text and do not move with text to ensure you don’t struggle with editing your document. When you are done, you’ll have an article template that looks something like this:

Add your content
So now you have your template, the finishing touch is to add your text.
Your text boxes work just the way any normal text box would, you can edit the contents, change the font, formatting and colours just as you would normally. There’s so much you can do – you’re only limited by your imagination! Try adding some content to your side bar, you can type this straight in, or copy and paste from elsewhere.
Next, you want to add your article content, but before doing so, we need to link up the text boxes so that the words flow between them. To to do this. we create a link between the text boxes.
1. Click on your first text box. Then under under Drawing Tools > Format tab > Text group choose Create Link

2. You’ll then see your cursor change to a small ‘jug’ icon. Move the jog to the text box that you want to link to, and click on it. Word immediately creates the link and you’re good to go.
3. You can repeat this process as many times as needed to link multiple text boxes
4. If you want to break a link, simply click onto a linked text box and Drawing Tools > Format tab > Text group choose Break Link
As a final step, simple copy and paste or type in the content for your article, and watch as the text magically flows from one text box to another. You now have a template that can reused over and over simply by changing the pictures and the content as necessary!
