
Microsoft Editor runs in Word for Microsoft 365 to analyze your document and offer suggestions for spelling, grammar, and stylistic issues, like making sentences more concise, choosing simpler words, or writing with more formality.
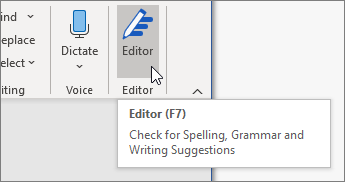
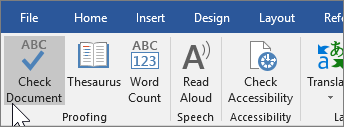
To use Editor, on the Home tab choose Editor.
Reviewing suggestions
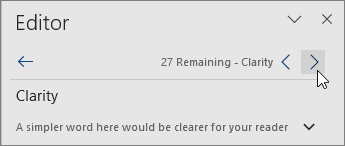
To focus on the issues you care most about, choose a correction or refinement type, like Grammar or Clarity. Then, use the arrows near the top of the pane to step through each of that type of issue.
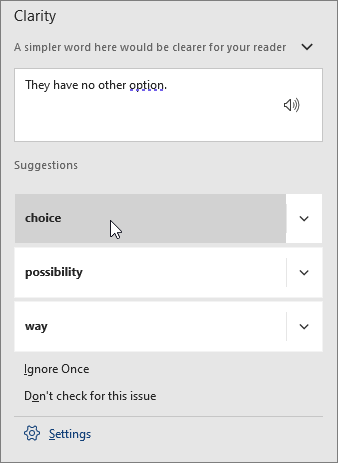
Choose a suggestion to incorporate it into your document. If you don’t like the suggestion, choose Ignore Once. Or, if you never want this type of suggestion, choose Don’t check for this issue.

Note: If you change your mind about an issue you ignored, close and reopen the document, and go back to Editor. Editor will find the issue again.
Tailor what Editor checks for
By default, Editor checks for several categories of issues, and the suggestions may or may not suit your writing style. To finely tune Editor for suggestions you want, do the following:
-
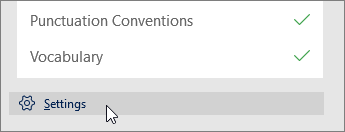
In the Editor pane, choose Settings.

-
In the Word Options dialog box, next to Grammar & Refinements, choose Settings.
-
Scroll through the list of options. Select issues you want Editor to check, and clear the issues you want Editor to ignore.
Note: Choosing Reset All returns to the default settings.
-
Choose OK.
Tip: Editor is designed to empower you to bring out the best in your writing. We are continually making updates to its suggestions and experimenting to learn which suggestions are most welcome. If you have feedback for us, choose Help Improve Office? at the top of the Word window to open the Feedback pane.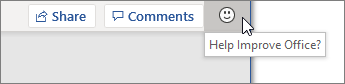
You might notice Editor’s red, blue, and purple underlines in your document even when the Editor pane is closed. That’s because Editor is always running in the background, checking for spelling, grammar, and some style issues.
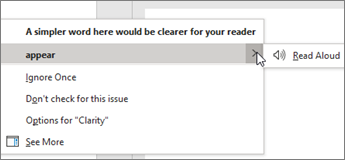
Right-click the underlined text to see the suggestion. Use context menu to:
-
Listen to the suggestion by clicking the arrow next to the suggestion and then choosing Read Aloud.
-
Skip this instance of the issue by choosing Ignore Once.
-
Tell Editor to stop checking for this issue by choosing Don’t check for this issue.
-
Fine tune the settings for this type of issue by choosing the Options link.
-
Get more information about the issue by choosing See More.
Your document might be written in more than one language, or you might want to switch to another language for Editor to check. If you are set up to use multiple authoring languages (File > Options > Language), Word detects the language you’re writing in, and Editor will check for issues in that language.
However, you might be writing in a language that Word doesn’t detect automatically. In that case, you can get Editor to check text in that language by selecting the text and going to Review > Language > Set Proofing Language, and then choose your language.

When Editor is checking more than one language, the Editor pane lists corrections and refinements for each language in the document.
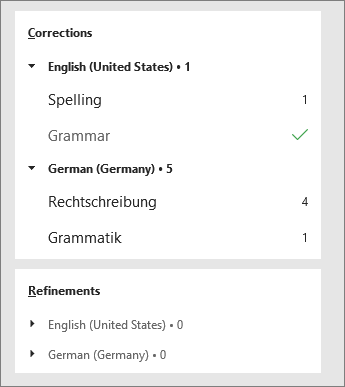
For information about the issues that Editor checks in various languages, see Editor’s spelling, grammar, and refinement availability by language.
When you work on documents in Word on the web, Editor provides a rich set of features that are coming soon to Word for Windows. Even when you’re not using Word, the Editor browser extension helps you with writing on websites like LinkedIn, Twitter, Facebook, and Gmail.
Word marks spelling, grammar, and stylistic issues with an underline. Right-click the underlined word, and then choose the suggestion you want, or learn more about the error and how to correct it.
Or, open the Editor pane to address issues by category.
-
On the Review tab, select Check Document.
-
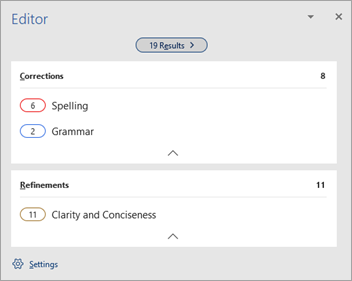
The Editor pane categorizes spelling, grammar, and stylistic issues.
-
Click each category to address the issues.
Note: For keyboard shortcuts in the Editor pane, there’s no need to press Alt. Just use the underlined letter to select the command (like i for Ignore Once, g for Ignore All, etc) .
-
In the Editor pane, click Settings.
-
Under When correcting spelling and grammar in Word, select Settings
-
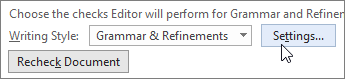
For Writing Style, select Grammar & Refinements .
-
Scroll down to see all of the options available, and select or clear the rules you want. The settings apply to all the documents that you edit, not just the current one.
Requirements and availability of the Editor pane include the following:
-
Internet connection: Make sure your connection is working.
-
Intelligent Services switched on: Go to File > Options > General and turn on Office Intelligence Services.
-
Language availability: For information about the issues that Word checks for in various languages, see Editor’s spelling, grammar, and refinement availability by language.
Word marks spelling, grammar, and stylistic issues with an underline. Control-click the word or phrase and choose one of the options.
If Word incorrectly underlined a word as misspelled and you want to add that word to your dictionary so that Word will properly recognize it in the future, see Add or edit words in a spell check dictionary.
If spelling or grammatical errors aren’t underlined, you might need to turn on automatic spelling and grammar checking, as follows.
Turn on (or off) automatic spelling and grammar checking
-
On the Word menu, click Preferences > Spelling & Grammar.
-
In the Spelling & Grammar dialog box, under Spelling, check or clear the Check spelling as you type box.
-
Under Grammar, check or clear the Check grammar as you type box.
-
Close the dialog box to save your changes.
-
On the Review tab, click Spelling & Grammar.
-
Word displays the issues it finds in the Spelling & Grammar dialog box.
-
To address an issue, do one of the following:
-
Type the correction in the box and then click Change.
-
Under Suggestions, click the word you want to use, and then click Change.
To skip the error, do one of the following:
-
Click Ignore Once to skip only that instance of the error.
-
Click Ignore All to skip all instances of the error.
-
For a grammatical error, click Next Sentence to skip that instance of the error and move to the next error.
To skip a misspelled word in all documents, click Add to add it to the dictionary. This only works for spelling. You can’t add custom grammar to the dictionary.
-
-
After you correct, ignore, or skip an issue, Word moves to the next one. When Word finishes reviewing the document, you’ll see a message that the spelling and grammar check is complete.
-
Click OK to return to your document.
You can clear or reset the list of Ignored Words and Grammar so Word will check for spelling and grammar issues you previously told it to ignore.
Note: When you reset the list of Ignored Words and Grammar, the list is cleared only for the currently open document. Any spelling or grammar issues you told Word to ignore in other documents won’t be affected.
-
Open the document that needs to be checked.
-
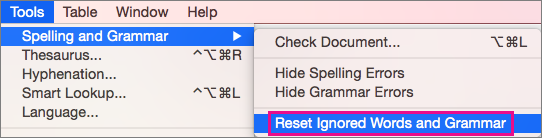
On the Tools menu, point to Spelling and Grammar, and then click Reset Ignored Words and Grammar.
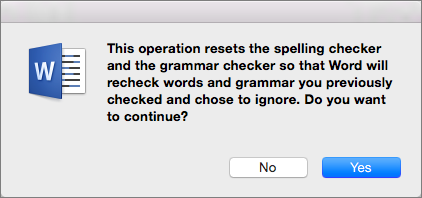
Word displays a warning about the operation resetting the spelling checker and the grammar checker.
-
Click Yes to proceed.
-
Click the Review tab, and then click Spelling & Grammar to check spelling and grammar.
Word marks potential spelling errors with a red squiggly line, and potential grammatical errors are marked with a blue squiggly line.
Right-click on the underlined word or phrase and choose a correction, or ignore the suggestion.
Note: If Word is flagging words as misspelled but you have it spelled the way you want it, select Add to Dictionary to teach Word not to flag that word as misspelled in the future. For more information on this see: Add or edit words in a spell check dictionary.
If you don’t want Office to mark potential errors with squiggly lines while you are working, you can turn automatic spelling and grammar checking off:
-
On the File menu, click Options, and then click Proofing.
-
Select or clear the Check spelling as you type and Mark grammar errors as you type check boxes.
Note: You can turn the spelling checker on or off for the document you’re working with or for all new documents. Select an option in the Exceptions for list, and then select or clear the Hide spelling errors in this document only and Hide grammar errors in this document only check boxes.
If you don’t want Word to check grammar at all (either when running a spell check or automatically as you type), you can turn it off:
-
On the File menu, click Options, and then click Proofing.
-
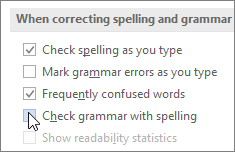
Clear the Mark grammar errors as you type and Check grammar with spelling check boxes.
-
On the File menu, click Options > Proofing> Recheck Document.
-
Click Yes when you see the warning message about resetting the spelling and grammar checker.
-
Click OK in the dialog box to get back to the document, and then run the spelling and grammar checker again.
See also
For more information about Microsoft Editor, see Microsoft Editor checks grammar and more in documents, mail, and the web.
For more topics on spelling and grammar, see Spelling and grammar in Word.
To try Microsoft Editor for yourself, download the Editor in Word Tutorial.
 Please Note:
This article is written for users of the following Microsoft Word versions: 2007, 2010, 2013, and 2016. If you are using an earlier version (Word 2003 or earlier), this tip may not work for you. For a version of this tip written specifically for earlier versions of Word, click here: Correcting Student Papers.
![]()
Written by Allen Wyatt (last updated March 29, 2021)
This tip applies to Word 2007, 2010, 2013, and 2016
If you are an instructor and have a need to correct papers submitted to you electronically via Word, there are a wide range of approaches you can use when adding your corrections. These include the following:
- Using the Comment feature.
- Using the Track Changes feature.
- Inserting text boxes or callouts.
- Use TC fields to create and then generate a table of comments.
- Create special comment styles that call out your comments in a different font, color, or format. Use the styles to format your comments entered directly in the document.
- Using footnotes or endnotes.
- Using hidden text.
As you can imagine, discussing each of these in depth is a bit much for a simple tip. However, the techniques for each of these methods have been covered in other WordTips.
So what is the key to deciding which method is best for you? You need to find which one is the most comfortable and then adapt it to your needs. You can even mix and match methods, if desired. In all instances, however, you should keep a copy of the original submitted by the student, and they should be instructed to keep a copy of whatever they sent you in the first place.
When all is said and done, many people still consider a good old hand-written commentary on a hard-copy essay using arrows and marginal notes to be the most effective.
WordTips is your source for cost-effective Microsoft Word training.
(Microsoft Word is the most popular word processing software in the world.)
This tip (4357) applies to Microsoft Word 2007, 2010, 2013, and 2016. You can find a version of this tip for the older menu interface of Word here: Correcting Student Papers.
Author Bio
With more than 50 non-fiction books and numerous magazine articles to his credit, Allen Wyatt is an internationally recognized author. He is president of Sharon Parq Associates, a computer and publishing services company. Learn more about Allen…
MORE FROM ALLEN
Inserting a Voice Annotation in Your Worksheet
Excel can, once in a while, try to be a «multimedia program.» Here’s how you can add short sound files to your worksheet …
Discover More
Patterns of Numbers with a Formula
Want to create a sequential pattern using formulas? It’s easy to do if you take a look at how your data repeats. This tip …
Discover More
A Shortcut for Switching Focus
Word provides keyboard shortcuts for lots of things, but it doesn’t provide one for switching to the desktop and back to …
Discover More
More WordTips (ribbon)
Turning Off Hyphenation for Individual Words
Word does a semi-decent job when it comes to automatically hyphenating your documents. It even lets you exclude certain …
Discover More
Creating a Master Document Using Existing Subdocuments
If you decide to create a master document, it is easy to do by just adding one or more subdocuments to an existing …
Discover More
Creating a Transcription
In many offices, it is necessary to covert audio files (such as meeting recordings) into text. Some versions of Word have …
Discover More
Write Confidently
Become a Word Wonder
No matter what you write, LanguageTool ensures flawless and stylistically superior writing to help you communicate your message clearly and effortlessly.
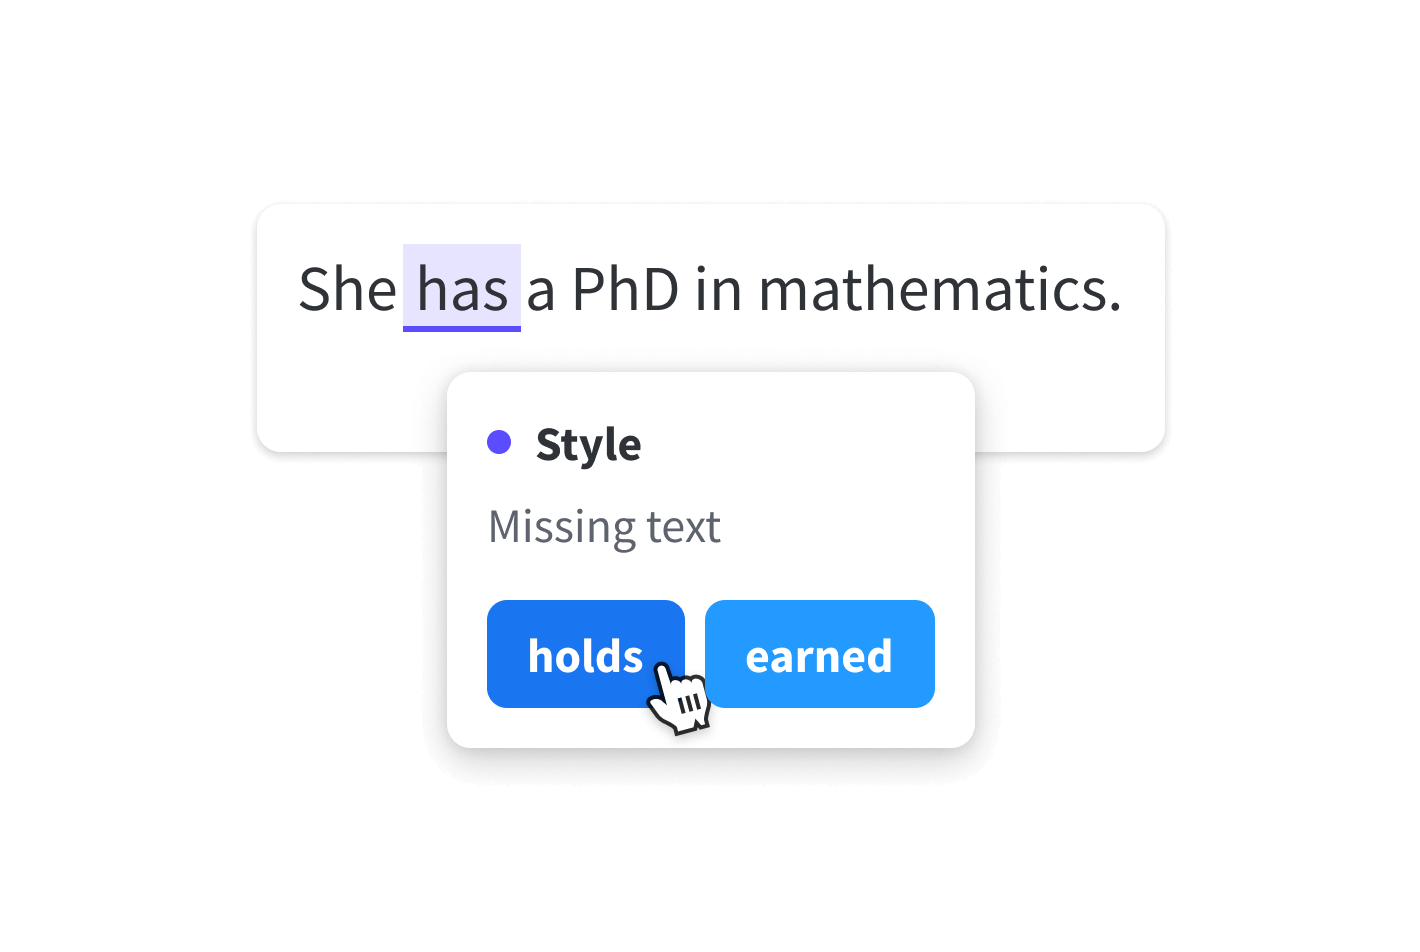
Style Suggestions
Style That Will Wow Your Audience
LanguageTool refines your writing style by suggesting improvements that’ll enhance your tone, voice, and word choice, making your writing more effective.
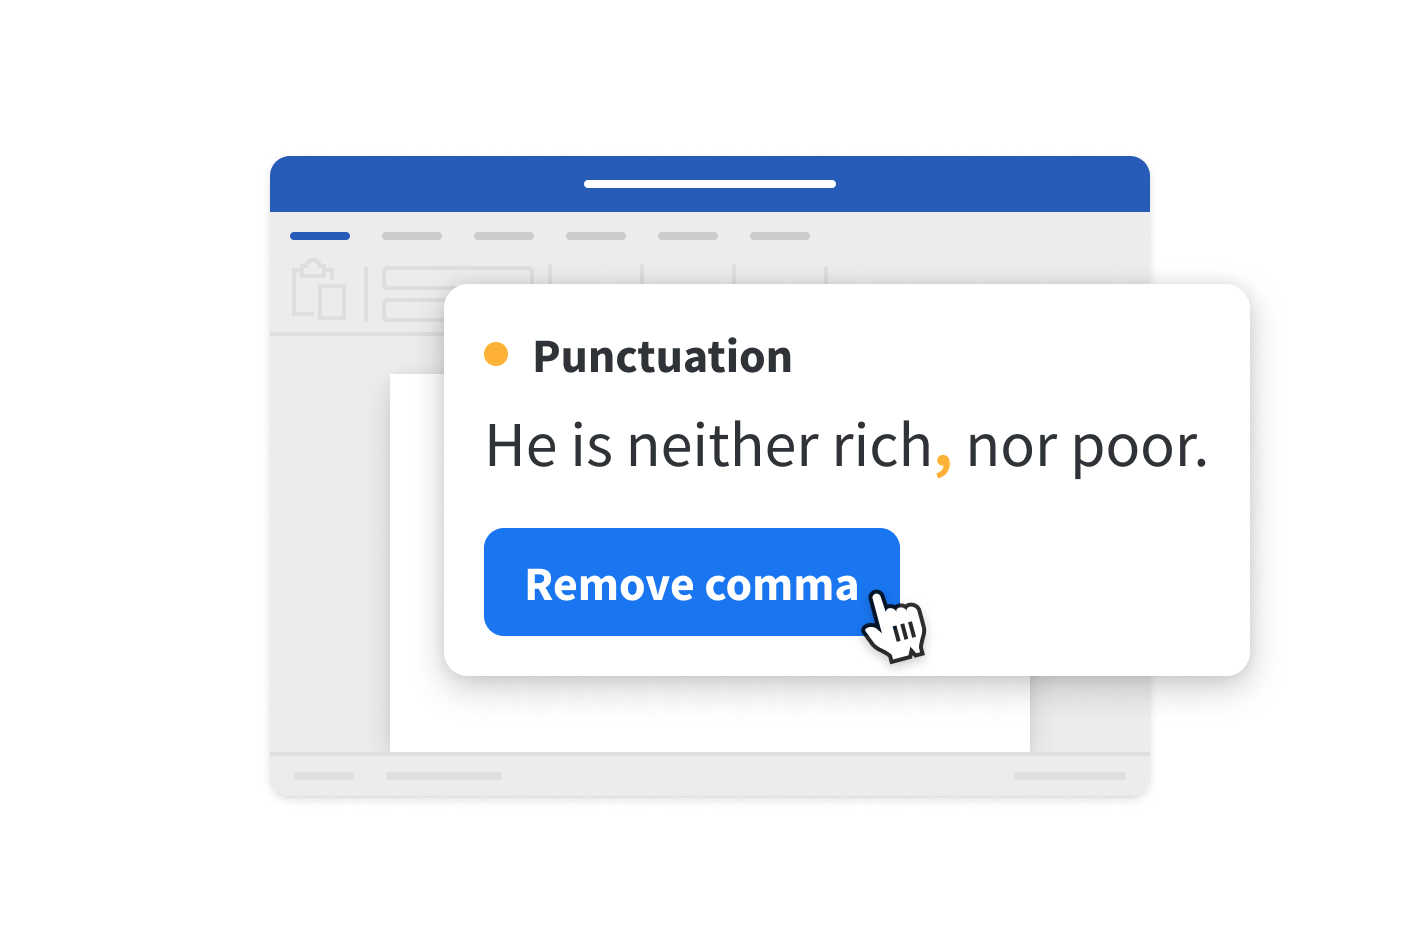
Grammar, Spelling, and Punctuation
Crystal-Clear Communication
Say goodbye to spelling, grammar, and punctuation errors and hello to clarity. With LanguageTool, there’s need to worry about typos and mistakes slipping into your writing.
Multilingual Support
Worldly Writing in 30+ Languages
LanguageTool supports more than thirty languages and dialects, meaning your text will be perfecto, regardless of which language you’re writing in.
Write Wonderfully
Wherever, Whenever
Whether you’re using the add-in or integrated LanguageTool with Word on the Mac app, you can rest assured that your text will leave a lasting impression with every word you write.
Share this article
If you are not already using MS Word’s many settings designed to ensure accurate proofreading, you are doing yourself a disservice. After spending countless hours writing, you want to ensure you are presenting your work as professionally as possible. In this article, I explain how to get the most out of MS Word when proofreading your own writing.
Note that the following instructions apply to Word 2007 and later.
Spelling and Grammar Check Basics
You probably already know how to perform a spell check, but do you know how to ensure that your spell check is appropriate for your document and that all text is included in the spell check? The following two steps will ensure your document is being thoroughly and correctly spell checked.
Check Your Language Settings
To check your language settings:
- Highlight your entire document (Ctrl+A).
- Go to the ‘Review’ tab.
- Click on the ‘Language’ dropdown menu and select ‘Set Proofing Language’. This will bring up the Language box.
- Select the most suitable version of English, which will be ‘English (Australia)’ for Australian writers submitting to an Australian university or journal.
- Ensure that the ‘Do not check spelling and grammar’ box is clear (i.e. unticked). If you do not do this, some sentences may not be spell checked.

Check Your Proofing Options
It is also a good idea to check your Proofing Options:
- Go to ‘File’.
- Click on ‘Options’. This opens the Word Options window.
- In the menu on the left-hand side, choose ‘Proofing’.
- Under ‘When correcting spelling and grammar in Word’, check that ‘Grammar & more’ (if using Word 2016, otherwise this will be ‘Grammar & Style’) is selected from the dropdown menu.
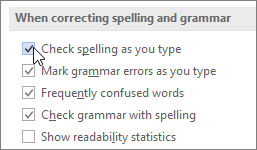
- Check that the boxes are ticked that allow for errors to be pointed out as you type and for grammar and spelling errors to be checked together.
- Under ‘Exceptions for’, you will need to check that spelling and grammar errors are not being hidden.
Note: If you were checking the formatting of your reference list, you might like to check it once for spelling and then turn off grammar and spell check so that you can check it again closely for formatting. There are times when hiding the grammar and spell check errors is useful.

Taking Control of Your Spell and Grammar Check
Personalising Your Grammar Settings
In the image above, where you selected ‘Grammar & more’ from the dropdown menu, you can also change the settings of the grammar checker. Clicking ‘Settings’ opens the Grammar Settings window. Here, you can decide which error types you want Word to check for and which you don’t. For example, if you are writing in a field that requires the use of passive voice, you might like to turn off that check. You should also check that all necessary checks are ticked.

Adding to Your Personal Dictionary
If you are writing in a field with a technical vocabulary, Word may incorrectly identify some words as misspelled. Rather than ‘ignoring’ these, you should ‘Add them to Dictionary’. This adds those words to your custom dictionary. To manage the words in your custom dictionary (e.g. if you have accidentally added a misspelled word to the dictionary):
- Go to Proofing Options (as above) and look for ‘Custom Dictionaries’.
- The tick box ‘Suggest from main dictionary only’ should be clear. This way, Autocorrect will make suggestions from your custom dictionary as well.
- Click on ‘Custom Dictionaries’ to open a window.
- Select the default custom dictionary and select ‘Edit Word List’. You can then delete entries.

Running Your Final Spell Check
Having adjusted all of the above settings, not only will you have been able to correct your typos and grammar errors as you type, but your final grammar and spell check will also be considerably faster and more effective.
- You will be sure that your whole document is being checked according to your target language.
- You will have excluded any grammar checks that you do not require, saving time.
- You will have excluded any correctly spelled words that are not recognised by Word’s spell check (e.g. technical vocabulary, author names), saving even more time.
- By reducing the length of the grammar and spell check, you will be less likely to rush the check, missing important errors.
by Tobias
November 6, 2021
written by Tobias
November 6, 2021

Word: Activate and Use Correction Mode
Word’s correction mode helps enormously when you are working on a document with several people. With it, the changes and comments of your colleagues are clearly visible to everyone. In this tutorial, we will show you how to activate and use the correction mode.
Activate and use correction mode in Word
Activate and use correction mode in Word
- Once you have finished writing a text and want to have it corrected or critically reviewed by experts, save it in activated correction mode. To do this, proceed as follows:
- In the Word menu, open the “Review” tab and activate the “Track Changes” command in the “Track” button. The symbol and command are now highlighted in blue. Everything that is deleted or added now appears red or crossed out in red in your document by default.
- You can select which changes should be displayed in your text in the submenu “Show Markup”. This becomes visible when you click on the small triangle next to “Show Markup”. Put a tick in front of the entries whose corrections you want to see in the document.
-
You can also change the formatting of the corrections. To do this, go to the submenu “Show Markup” and select the entry “Speech Bubbles”. The default setting is “Show only formatting and comments in balloons”. For example, if you want to see all changes outside the text, put a tick in front of “Show revisions in balloons”.
- When you get back a corrected and commented text, you can decide whether you want to apply all the changes directly or whether you want to check them step by step. Open the submenu to the “Accept” command on the “Review” tab and determine there how you want to proceed.
- Your proofreaders may also have had comments on the content of the text. These can be inserted by clicking on the command “New Comment” in the menu of the “Review” tab. A comment is now inserted at the position of the mouse in the text.
- If you return a commented document, you can jump from comment to comment using the commands “Previous element” and “Next element” in the “Comments” button.
MS OFFICE, MS Word, Correction mode, GUIDE

Related Articles
Leave a Comment
Letter is 8.5″ x 11″, and A4 is 8.27″ x 11.69″. If he had set a 1″ margin all around, he had effectively 7.5″ x 10″ for his text.
Perhaps if he changes the page size to A4 and sets a custom 0.77″ (0.38″ + 0.39″) x 1.69″ (0.84″ + 0.85″) margin, the content won’t move around/re-flow as much.
answered Feb 18, 2013 at 20:34
![]()
KaranKaran
55.6k20 gold badges117 silver badges189 bronze badges
we can solve it in printing only by go to file print then from each page for one paper choose Appropriate paper size to a4 then print
answered Apr 26, 2016 at 10:00
![]()
1
On the Review tab, click Spelling & Grammar. If Word finds a potential error, the Spelling & Grammar dialog box will open, spelling errors will be shown as red text, and grammatical errors will be shown as green text. To fix an error, do one of the following: Type the correction in the box and then click Change.
Contents
- 1 How do I correct a word document?
- 2 How do you fix a misspelled word?
- 3 How do I AutoCorrect all mistakes in word?
- 4 How do you mark changes in Word?
- 5 How do I edit comments in a Word document?
- 6 How can I check my sentence is correct or not?
- 7 What is used to correct commonly misspelled words in MS word?
- 8 How do you edit someone else’s Word document?
- 9 How do I edit a Word document online?
- 10 Why can’t I accept changes in Word?
- 11 How can we add comments to the changes made?
- 12 How do you correct a sentence with grammatically?
- 13 How do you use the word correctly in a sentence?
- 14 How do you edit a document?
- 15 Can I edit a DOCX file?
- 16 How do I accept corrections in Word?
- 17 How do you accept changes?
- 18 How do I accept all changes in word and remove comments?
How do I correct a word document?
How to Make Corrections on a Word Document
- Open the Word document.
- Click on the “Review” tab and select “Track Changes.”
- Make the corrections you want within the document.
- Accept or reject corrections within the document by clicking the “Accept” or “Reject” button under the “Changes” panel.
How do you fix a misspelled word?
A quick way to correct a misspelled word in Microsoft Word is to right-click on the word that has a red wavy underline. The resulting pop-up menu contains spelling suggestions which you can then select and have the misspelled word replaced.
How do I AutoCorrect all mistakes in word?
1. Press the F7 function key to run the spell checker. 2. When the spell checker comes to a commonly misspelled or mistyped word click on the AutoCorrect button.
How do you mark changes in Word?
Display changes by type of edit or by reviewer
- On the Review tab, go to Tracking and select Show Markup.
- Do one of the following: Select the type of change that you want to display. For example, select Comments, Insertions and Deletions, or Formatting. The check mark next to the item indicates that the item is selected.
How to edit a comment in Microsoft Word documents
- Open the Word document.
- Make all comments visible.
- Click in the comment.
- Edit the text for that comment.
- Click out of the comment to save changes.
How can I check my sentence is correct or not?
Grammarly is more than a grammar check, more than a spell check, and more than a punctuation corrector. It’s a comprehensive writing tool that helps you write clear, flawless text that will impress your readers.
What is used to correct commonly misspelled words in MS word?
AutoCorrect is a great way to correct your spelling, particularly if you misspell the same words over and over. Here’s a quick way to configure AutoCorrect for your commonly misspelled words. When automatically capitalizing the beginning of sentences, Word relies on how you historically have done your typing.
How do you edit someone else’s Word document?
Select Edit Document > Edit in Browser. If anyone else is working on the document, you’ll see their presence and the changes they’re making. We call this coauthoring, or real-time collaboration. From here, if you’d rather work in your Word app, switch from Editing to Open in Desktop App, near the top of the window.
How do I edit a Word document online?
How do I edit a Word document online? To edit, click Edit Document in the top left corner and select Edit in Word Online. The document will then open in the editor and allow you to make changes to the document.
Why can’t I accept changes in Word?
The most common reason is that the document is Protected. Go to Tools> Protect Document in the main menu to see whether the box for Protect document for: is checked. If so you may need a password to remove the protection.
2. How can we add comments to the changes made?
- Select the text or item that you want to comment on, or click to insert the cursor near the text that you want to comment on.
- On the Review tab, under Comments, click New.
- Type the comment text in the comment balloon.
How do you correct a sentence with grammatically?
In order for a sentence to be grammatically correct, the subject and verb must both be singular or plural. In other words, the subject and verb must agree with one another in their tense.
How do you use the word correctly in a sentence?
(1) We have not yet learned to punctuate correctly. (2) Make sure all the components remain correctly orientated. (3) If I recall correctly, he lives in Luton. (4) She was from Henan, if I remember correctly.
How do you edit a document?
- On your Android phone or tablet, open a document in the Google Docs app .
- Tap Edit .
- To select a word, double-tap it. Move the blue markers to select more text.
- Start editing.
- To undo or redo an action, click Undo or Redo .
Can I edit a DOCX file?
A . docx file will open quite happily in Word for Mac, of course, but it can also be edited in Pages, the nearest thing to a first-party Apple equivalent. Simply drag the file on to Pages or Word in your dock and it’ll open in the chosen application. (Alternatively, you can right-click the file and select Open With.
How do I accept corrections in Word?
Accept or reject changes
- Click or tap at the beginning of the document.
- On the Review tab, go to Tracking.
- Select Accept or Reject. As you accept or reject changes, Word will move to the next change.
- Repeat until you’ve reviewed all of the changes in your document.
How do you accept changes?
How to start gracefully accepting this change:
- Admit and surrender to the words: “I don’t know.”
- Avoid asking everyone you know for their help and opinions.
- Stay moving.
- Externalize the change.
- Lean on your practice.
How do I accept all changes in word and remove comments?
To review changes one at a time, click Review then Accept or Reject. To finalize the document all at once, click Accept All Changes or Reject All Changes. On the Review tab, in the Comments group, click the arrow below Delete, then click Delete All Comments in Document.
Presentation on theme: «Correcting Papers With the REVIEW Feature in Microsoft Office June 16 th Teacher InService.»— Presentation transcript:
1
Correcting Papers With the REVIEW Feature in Microsoft Office June 16 th Teacher InService
2
Open the “What It Looks Like” document on the WikiPage
3
Click the REVIEW tab
4
5
Comments Menu Allows you to type a comment right onto a document. The comment can show up in a “balloon” or on the same line as the text.
6
7
8
Look! A Comment!
9
10
11
Your Turn!
12
Tracking Menu Allows you to keep “track” of all the changes you make in a document, use balloons, and change the look of the document
13
14
15
Your Turn!
16
Balloons Menu
17
Your Turn!
18
19
20
21
22
Your Turn! Decide what “mark-ups” you want to see and which ones you don’t. Ex: Comments, Inserts and Deletions, or even certain reviewers’ changes.
23
24
Your Turn!
25
26
27
28
29
30
31
32
33
On Your Own Open a document on WikiSpace and “play” with the buttons we reviewed today After review, save document as your last name and practice uploading it to a WikiPage Open someone else’s reviewed document and respond to their comments Save document as their name and your name then upload that document to the WikiPage Go back to your original document and see who responded to you, delete all of THEIR comments and revisions
You’re going over your report with the CEO and realize you misspelled “recommendation.”
Will she think I’m an idiot? Will this hurt my performance report? Can she still take make my ideas seriously?
Your cheeks flush. Your hands freeze. You can’t breathe. Such a small mistake, but if you make enough of them, they’ve got big consequences.


Spelling and grammatical errors not only destroy your credibility. They also get in the way of effective communication.
And you can easily avoid them by using Microsoft Word’s spelling and grammar checker.
The spelling and grammar checker are built into Microsoft Word to help you find mistakes. So, you can correct them before putting your document out into the world.
This article shows you the basics of using Word’s spell and grammar checker. You’ll learn how to set up spelling grammar check in Word. It also goes over some of the advanced grammar checker features for Word, and it also includes how to troubleshoot common issues.
Note: For the step-by-step instructions below, I use Microsoft Word for macOS. If you’re using a different version of MS Word, then your screens may look different.
How to Run Spell Check and Grammar Check in Word Automatically
If you’re on Word for macOS, then the spell and grammar checks are probably running automatically. This means that spelling and grammar errors are flagged while you type. On macOS, Word marks possible spelling errors with a red squiggly line and potential grammar errors with blue double underlines.
If not, follow these steps:
1. Opens the Word Preferences Dialog
Go to Word > Preferences….
2. Go to Spelling & Grammar
Click on the Spelling & Grammar button. The Spelling Grammar dialog opens.


3. Activate Spelling and Grammar Check
Check the buttons for Check spelling as you type and Check grammar as you type.


You can also change other spelling and grammar settings in this dialog box.
When you’re happy with the settings, click on the X in the corner of the screen to close it.
Word will now check your spelling and grammar and flag possible errors as you type in your document.
How to Run Spell Check and Grammar Check in Word Manually
You may prefer to switch off automatic spelling and grammar check. After all, seeing your mistakes as you type can distract you from the writing process.
In that case, you’ll want to run the spelling and grammar check when you’re done drafting your document.
First, make sure your cursor is at the beginning of the document. Then, follow these steps to manually run the spelling and grammar checks:
1. Open the Spelling & Grammar Dialog Box
Click on the Review tab > Spelling & Grammar.


2. View Potential Errors
The Spelling & Grammar dialog box opens. Potential spelling mistakes are in red, while possible grammar errors are in blue.


3. Correct or Ignore Potential Errors
Microsoft Word gives you suggestions to correct the potential error. If you want to accept the suggestion, click on the word in the box, then click Change.


If Word doesn’t have a suggestion, or you’d like to correct it your own way, type the correction in the box. Click Change.


You can also choose to ignore the potential errors that were flagged. Click Ignore Once to skip only this specific instance of the error. Or, click Ignore All to skip all instances of the error.


Whichever you choose, Word moves onto the next sentence with a possible error.
How to Use Advanced Spelling and Grammar Check Features
Word’s Spelling & Grammar checker has a few advanced features you can use to improve your workflow:
1. Add or Edit Words in a Spell Check Dictionary
Sometimes Word flags words as misspelled even though they’re not. This may happen with jargon that’s specific to your industry, less frequently used words, and proper names. If you’ll be using these words often, you’ll want to add them to the Spell Check Dictionary on your computer. This way, Word recognizes these words and will stop flagging them as potential errors.
You’ve got three options to do that:
Option 1. If Spell Check Is on as You Type
When a word is flagged as a potential error, right-click on the word then click Add to Dictionary.


Option 2. When Spell Checking Manually
If the word was flagged while you’re checking manually, click on the Add button.


Option 3. Through Word Preferences
Go to Word > Preferences… > Spelling & Grammar.
From the Spelling Grammar dialog, click Dictionaries….


The Custom Dictionaries dialog pops up. Click Edit.


The File Conversion — Custom Dictionary dialog opens. Click OK.


Another document opens with your custom words. Add new words or edit the existing ones as you see fit. Note that the words are in alphabetical order.


Save and close the Custom Dictionary.


2. Using AutoCorrect
AutoCorrect is another feature in Word that can streamline your workflow. Use it to correct errors you frequently make, or to skip having to perform certain tasks. For example, set up AutoCorrect to automatically capitalize the first letter of each sentence.
Here’s how to do that:
1. Go to Word > Preferences… > AutoCorrect


The AutoCorrect dialog opens.
2. Choose the AutoCorrect Settings You Want to Apply


Check the button for Automatically correct spelling and formatting as you type. Check or uncheck specific items as you wish. Note that this is where you can create shortcuts for emoticons and symbols.
When you’re done, click on the X in the corner of the dialog box to close it. Word will now AutoCorrect misspelled words as you type.
3. Grammar and Writing Style Settings
Refine how Word identifies grammar mistakes by tweaking the grammar settings.
Not only that, Word can even make you a better writer! How? By flagging weaknesses in your writing style. Specify which writing style best practices you want Word to check, such as clarity, conciseness, and inclusiveness.
Note: Some of these settings are available only with an Office 365 Subscription.
Follow these steps:
1. Open the Spelling & Grammar dialog.
Go to Word > Preferences… > Spelling & Grammar.
2. Go to Writing Style Settings.
On Writing style: Grammar, click Settings….


The Grammar Settings dialog opens.
3. Choose Your Grammar and Style Options


Check or uncheck items under Grammar and style options. You can choose between Grammar and Grammar & Refinements. The only difference is that the Grammar & Refinements mode has Wordiness and Nominalizations checked.
Scroll down to see the entire list. The Microsoft Office website has a detailed explanation of each option. Set how Word checks Punctuations Required With Quotes and Space Between Sentences.
When you’re happy with the settings, click OK.
4. Spelling and Grammar Check in a Different Language
Occasionally you may use pieces of text in a language different from the default language setting in your document. Change the language of the dictionary Word uses for its spelling and grammar check by following these steps:
Select the text that’s in a different language.
1. Click Review > Language


2. Select the Language You Want to Use


Scroll down to find the language you wish to use. Click on it to select it, then click OK.
3. Change the Default Language
At this point, you can also change the default language Word uses for the entire document. Click on Default….


When prompted whether you want to change the default language, click Yes.


Common Problems with Grammar Check and Spell Check in Word and How to Fix Them
What if the Microsoft Word spell check or grammar check is not working?
Sometimes spell and grammar check in Word don’t work the way you expect them to. Below are some common problems and the most likely fix for each one:
Problem: Word Isn’t Flagging a Misspelled Word
Possible Cause 1: You may have inadvertently added a misspelled word into your custom dictionary.
Fix: Edit the custom dictionary and delete the misspelled word. Follow the steps outlined above for how to edit words in a Spell Check dictionary.
Possible Cause 2: The wrong dictionary is being applied to the text or document.
Fix: Under the Review tab, click on Language, and make sure the correct language is selected.
Problem: Spelling and Grammar Check Aren’t Running Automatically
Cause: The boxes for Check spelling as you type and Check grammar as you type are unchecked.
Fix: Go to Word > Preferences… > Spelling & Grammar and check the boxes for Check spelling as you type and Check grammar as you type.
Word Templates: Another Helpful Tool for Your Word Workflow
Another way to make a good impression with your Word document is by using a professionally designed Word template. This way, the hardest design decisions are already made for you. This means you can focus on the actual content of your document and save time on its design and layout.


If you want to be able to download an unlimited number of Word templates, then a good source for you is Envato Elements. For a small, fixed subscription fee, download as many templates you want—along with fonts, photos, icons, and other ingredients you need to make effective and attractive documents.


But, if you only need the one-off template for Microsoft Word, then GraphicRiver may be a better source. You also have access to professional Word templates as well as custom fonts, photos, and other components, all on a pay-per-use basis.
Say Goodbye to Credibility-Busting Mistakes
With grammar and spell check in Word, there’s no more excuse to have careless mistakes in your document. You’ve just learned how to check grammar and spelling in Word. By following the steps above, you can have Microsoft Word spell and grammar check flag potential mistakes as you type. Or run the checkers manually when you’re done drafting your document.
And make sure to give your masterpiece an impressive design and layout. Use a template for Word created by a professional. Great sources for Word templates include Envato Elements, if you want unlimited downloads. Turn to GraphicRiver, if you want to pay for each use of a template for Word.
These tools not only improve your workflow, but they also help you create documents that uplift your brand, reinforce your credibility, and get you the results you’re hoping for.