

- Copy and paste the document as an image
- Use the Snip & Sketch tool
- Use an online document converter
Method 1: Save a Word Document by Copying and Pasting it as an Image
In this method, we’ll walk you through the steps on how to easily copy your document and paste it as an image. This, by far, is the fastest and the most direct way to save a Word file as an image without using another application.
Here are the steps to do just that!
Step 1: Open up a Word document.

Step 2: Select the content.
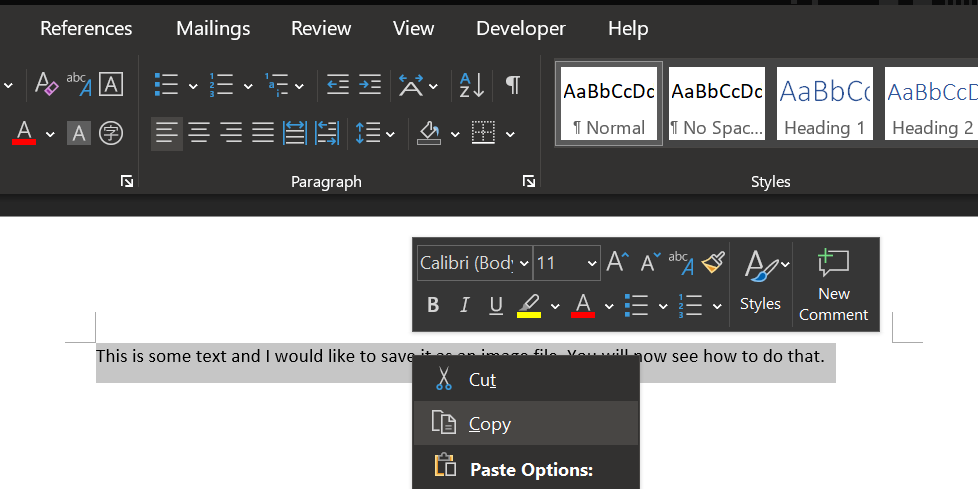
Now that we have our document opened, select the part of your file or the entire document that you need to save as an image. Then, right-click on the selection and click the Copy option.

Alternatively, hit the CTRL + C shortcut keys on your keyboard to copy.
Step 3: Paste the copied content.
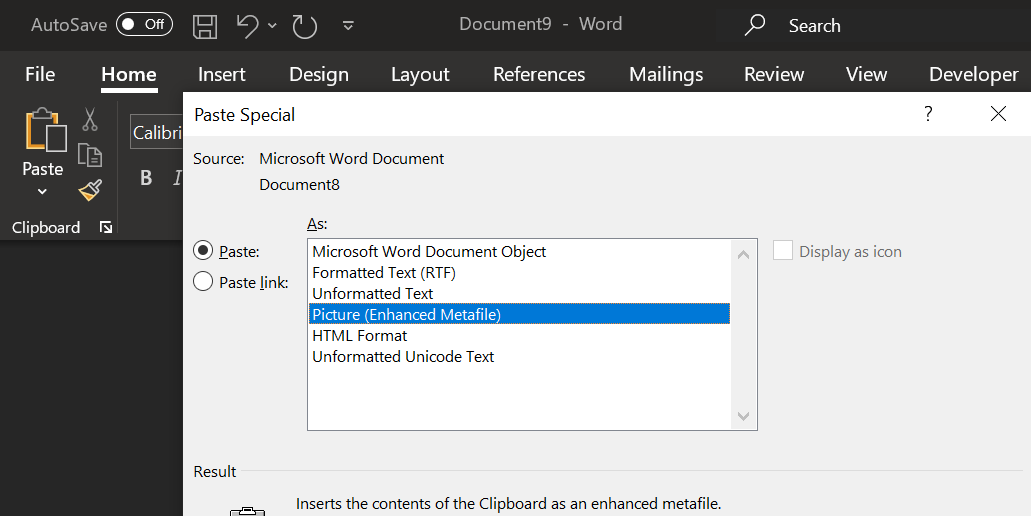
Open a new Word document. You should see the Paste button in the Home tab. Click on the down arrow below the button to access the Paste drop-down menu. Then, select the Paste Special option.

This will launch the Paste Special dialogue box right in the middle of your screen. Now, select the Picture (Enhanced Metafile) option and click the OK button to paste the selected document as a picture. Otherwise, click the Cancel button.

Step 4: Save the picture as an image file.
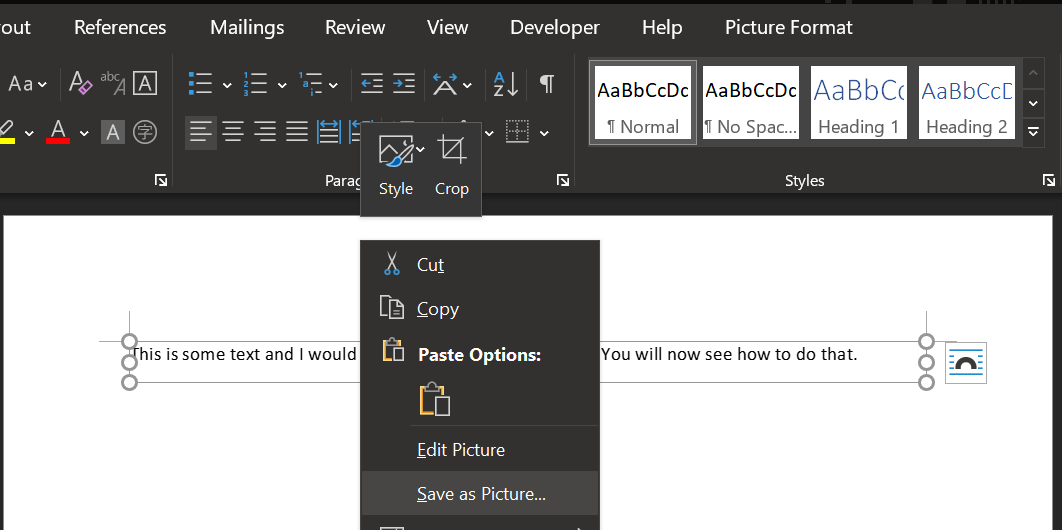
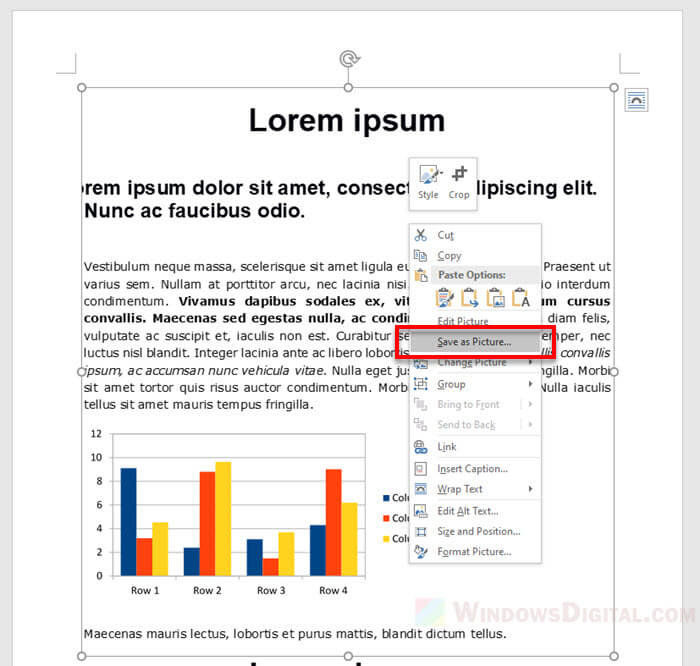
- Select the picture you pasted and right-click on it. It will open a list of options to choose from. Now, click on Save as Picture.

This launches the File Save dialogue box.
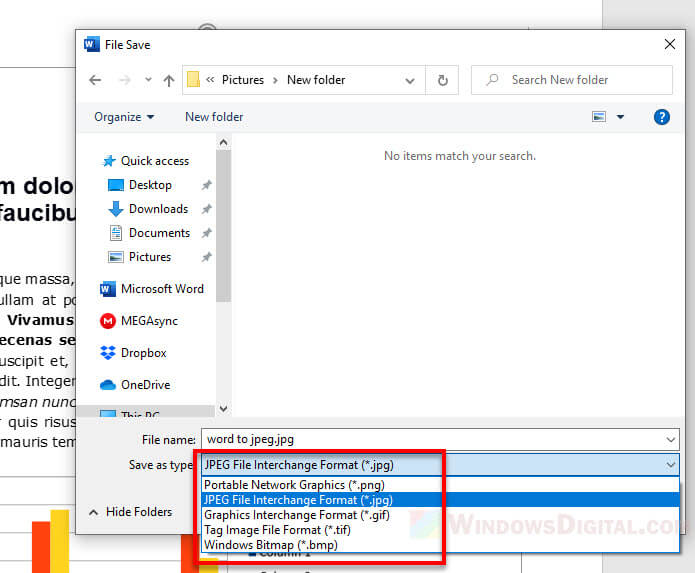
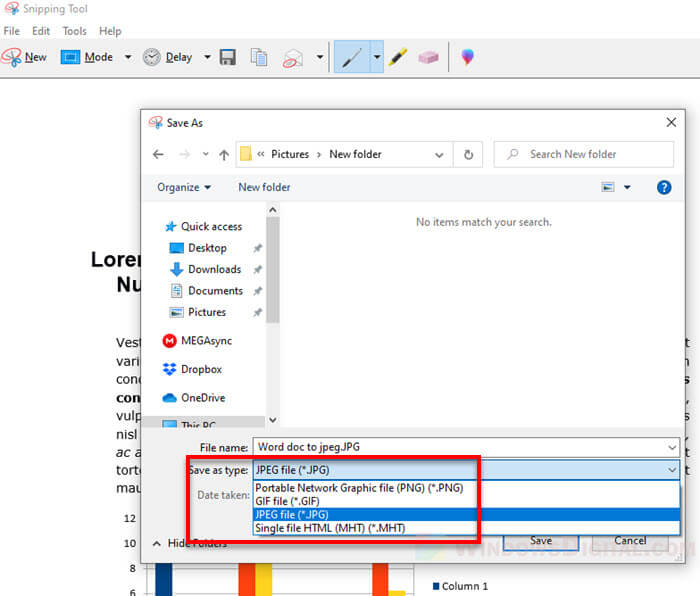
Locate the folder where you want your image file to be saved. Type in the filename in the File Name field, then click on the Save as Type drop-down menu.
After that, select the image file type that suits your needs. If you haven’t decided yet, you can always choose the default Portable Network Graphics file type.

Method 2: Save a Word Document as an Image Using the Snip & Sketch Tool
In this method, we’ll use Windows 10 Snip & Sketch Tool to quickly snip the part of the document you want to be saved as an image. This can come in handy especially if you need to take a snapshot from different parts of your file.
Step 1. Open up a Word document.

Step 2. Launch the Snip & Sketch Tool.
On your keyboard, press the Windows logo + SHIFT + S keys to launch the Snip & Sketch tool.
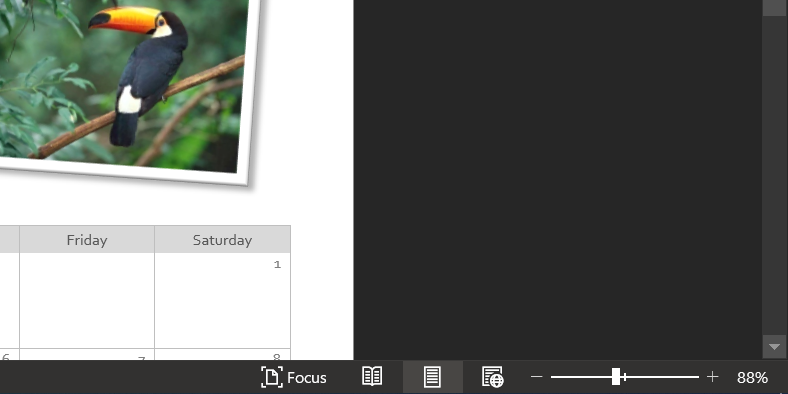
Now, click and drag your mouse from the top left of the part you wish to capture to its bottom right.
This will highlight a rectangular shape snipping of the part of the document.

Finish the snipping by letting go of the cursor. A notification-like memo will appear at the lower right corner of your window.
Now, click the memo to launch the Snip & Sketch work window.

Step 3. Save the image.
On the Snip & Sketch window, move your cursor to the top-right corner of the window. Click the Save icon to launch the Save As dialogue box.

The steps to save using the Save As dialogue box are the same as the previous method.
Method 3: Save a Word Document as an Image Using an Online Document Converter
While this method requires the use of an online document converter, this is by far the most convenient way to save multiple pages as image files.
Here’s how you can use an online document converter!
Step 1. Open a web browser.
To start off, let’s open up a web browser. In the address bar, type in https://www.zamzar.com/convert/doc-to-jpg/. Of course, you can opt to use similar online document converters other than this. This is just what Google gave us when we searched for “Word to JPG”. Feel free to leave us a comment below if you found something better.

Step 2. Upload the Word file.
Once you’re on the site, click the Add Files button to start uploading your Word file. This will launch the Open dialogue box of your computer. Locate your file and click the Open button.

Step 3. Choose the image file type.
After adding the Word file, click the File Type drop-down button to choose the image file type that you want.
If you haven’t decided yet, simply leave it as jpg.
You should see your file listed in the Files to Convert table. Once verified, click the Convert Now button to start the conversion.

You will be redirected to another page in order for you to download your converted document.
Now, click the Download button to finish the process. If you need to convert more documents, click the Convert more files button.

Note that you will get multiple image files if your Word document contains more than one page.
Conclusion
save as an image.
We hope you’ve found this article helpful!
Here’s how to save Word docs as images for easy sharing or archiving purposes.
If you need to send a Word document to someone who doesn’t have the app installed or want to keep a copy of it for your records, saving it as an image is a viable option. This lets you share it with anyone while preventing them from editing it.
Let’s look at some of the methods to turn your Word document into an image.
1. Take a Screenshot of the Document
If you’re only looking to save a single page as an image from your Word document, using Word’s screenshot feature is convenient.
You can use this feature for multi-page documents as well, but that requires you to take a screenshot for each of your pages. Using one of the other methods mentioned below will be more convenient in that case.
Here’s how you turn one of the pages in your Word document into an image with a screenshot:
- Open your document with Microsoft Word.
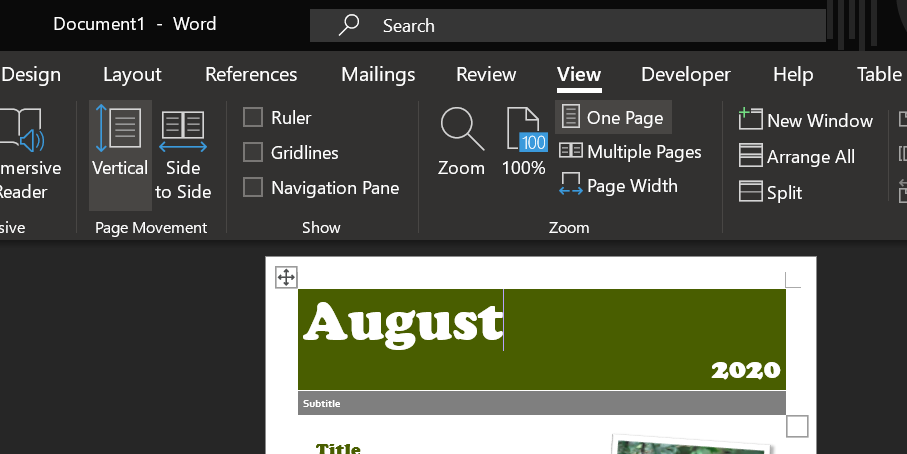
- Click the View tab at the top and select One Page from the Zoom section.

- Scroll to the page that you want to save as an image. Make sure the page takes up the full document view in Word.
- Press Ctrl + N to create a new Word document.
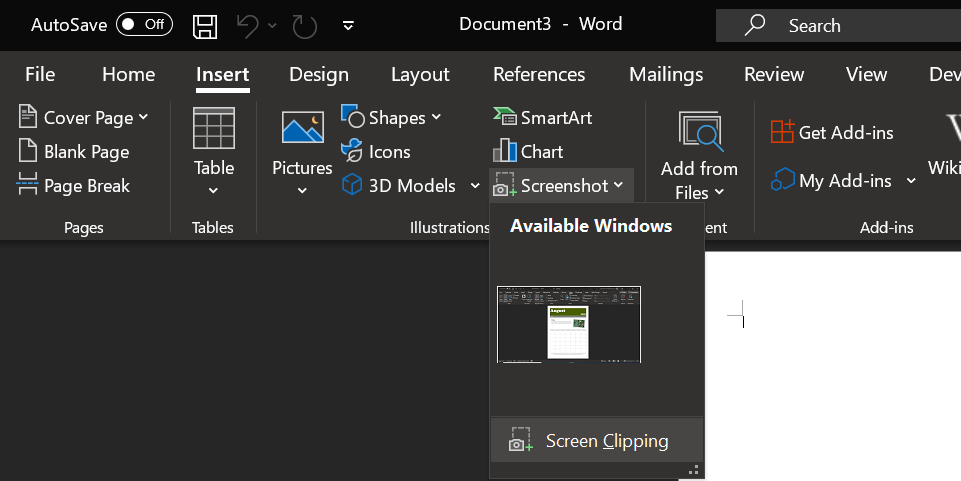
- In your newly created document, click the Insert tab and select Screenshot, followed by Screen Clipping.

- You can now select the portion of your screen that you want to save as an image. Select the part of your screen that has your Word document.
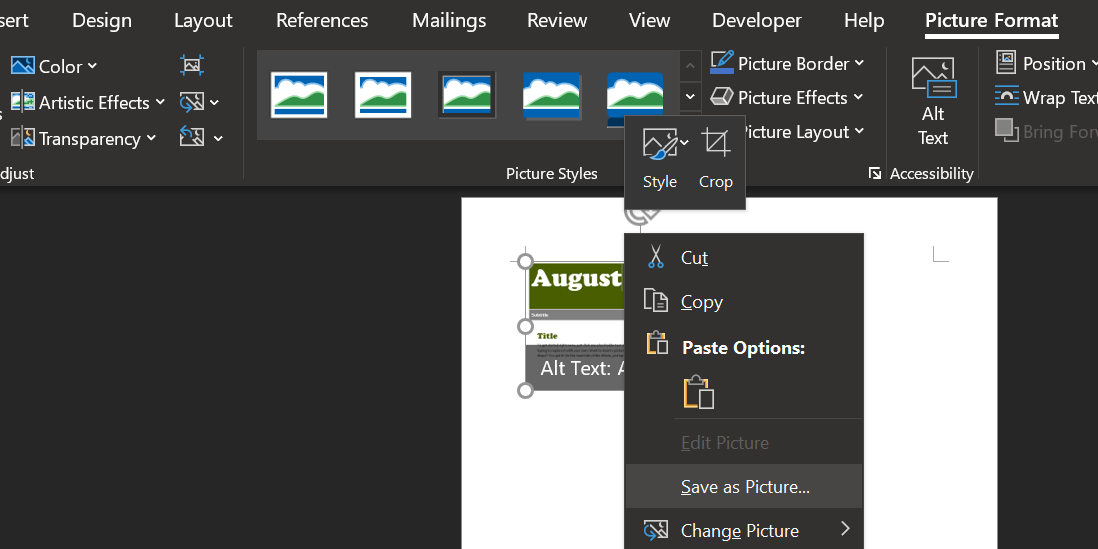
- Word will capture a screenshot and add it to your new document. Right-click on this screenshot and select Save as Picture.

- The standard save box will open, letting you save your Word document as an image. Enter a name for the image, select a file type from the dropdown menu, and click Save.
2. Use Snip & Sketch to Save Word Documents to Images
Snip & Sketch is a built-in app for taking screenshots on Windows 10. Since you can use it for screenshot tasks, it follows that the app works to save Word documents as an image file too.
This tool offers custom area selection, allowing you to precisely select the area where your Word document appears and take a screenshot of it. Here’s how you do this:
- Launch your document with Microsoft Word.
- Go to the page that you want to save as an image.
- At the bottom-right corner of your screen, you’ll find a slider that lets you change the zoom level of your document. Use the slider to make your page fully visible, as you can only save an image of what you can see.

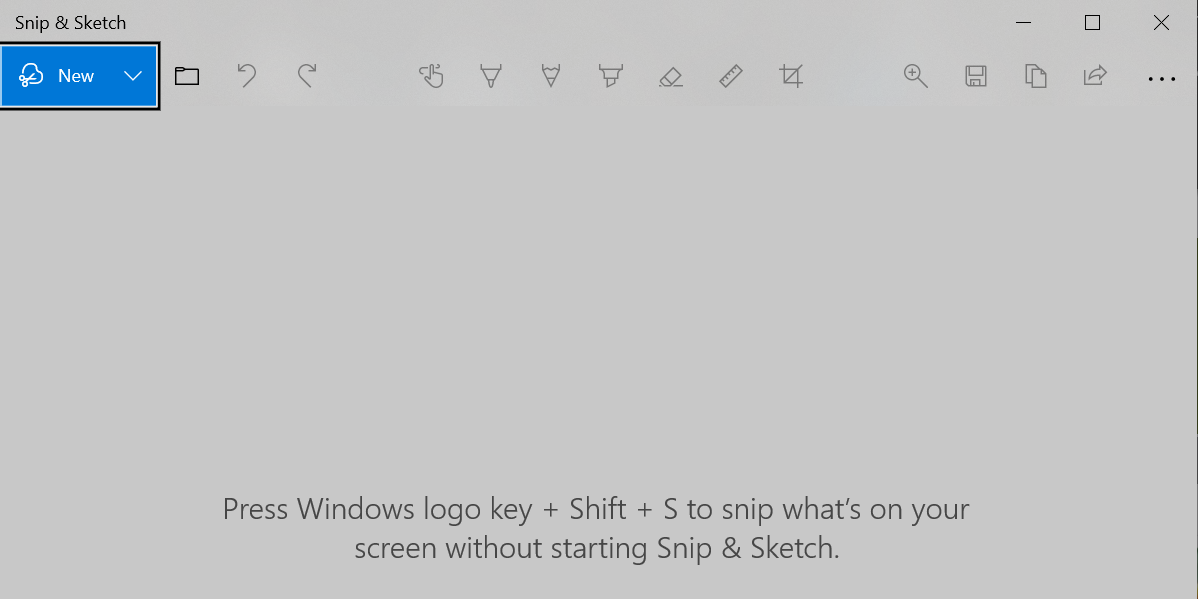
- Press the Win key, search for Snip & Sketch, and open the app. You can also press Win + Shift + S as a shortcut.
- Click the New option in the utility to take a new screenshot.

- Drag your cursor to select the entire area on your page that you want to save as an image.
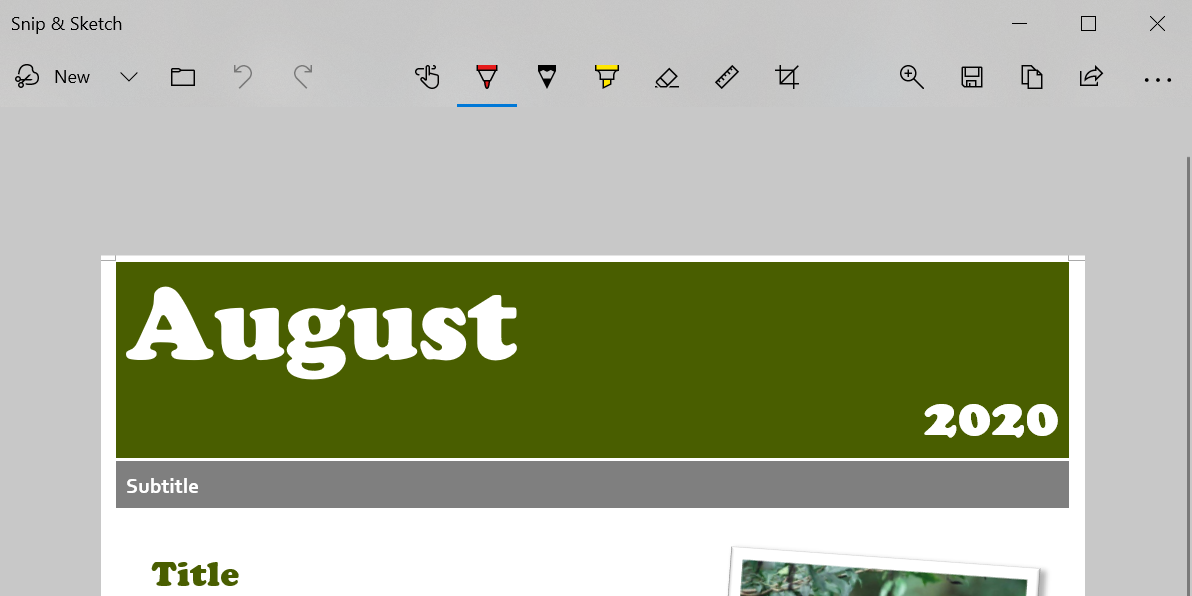
- The image version of your page will open in Snip & Sketch. Use the Crop tool to trim anything if needed, then click the Save icon in the toolbar to save the image file to your PC.

3. Use Paste Special to Save Word Documents as an Image
Paste special is an option in Microsoft Word that lets you choose how to paste your copied content. There’s an option in this feature that helps you paste your copied content as an image in your current Word document.
To use this, simply copy the content from your Word document, create a new document, and paste the copied content as an image. We’ll show you how you do it step-by-step:
- Open your Word document and select the content that you’d like to save as an image. If you want to save the entire document, press Ctrl + A to select everything.
- Right-click on your selected content and choose Copy (or use Ctrl + C) to copy the content.

- Create a new Word document by pressing the Ctrl + N keyboard shortcut.
- In the new document, go to the Home tab and click Paste, followed by Paste Special.
- A box will open on your screen letting you specify how you want to paste your content. Select the Paste radio button and then choose Picture (Enhanced Metafile).
- Click OK to paste your content as an image.

- You’ll see your copied content as an image in your document. If everything looks good, right-click on your image and choose Save as Picture.

- Enter a name for your image, select a file type, and click Save to save your document as a photo.
4. Save Word Documents as PDF and Convert to Images
Word offers you the option to save your files in many formats, aside from the standard Word document. One of these formats is PDF, which actually allows you to convert your document into an image since PDFs are easy to convert to an image file.
There are two stages to this procedure: first convert the document to PDF, then save the PDF as an image file. Here’s how it works.
1. Save Your Word Document as PDF
You can use the built-in option to save a document as PDF in Word as follows:
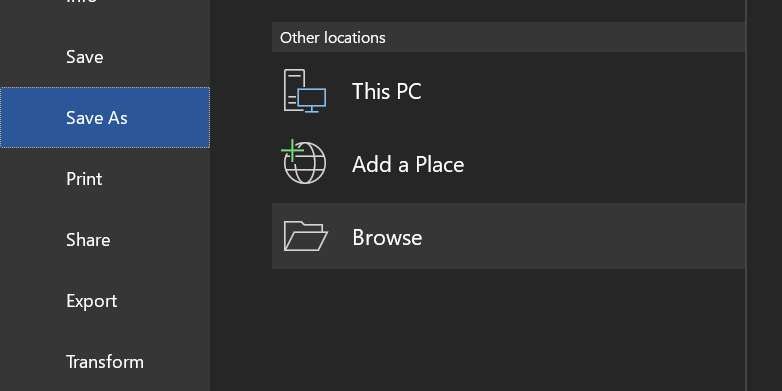
- While your document is open in Word, click the File menu at the top and select Save As, followed by Browse.

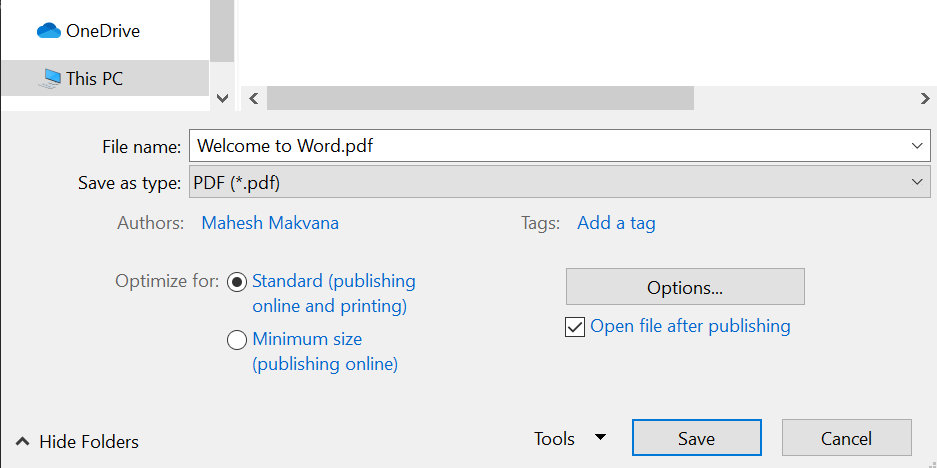
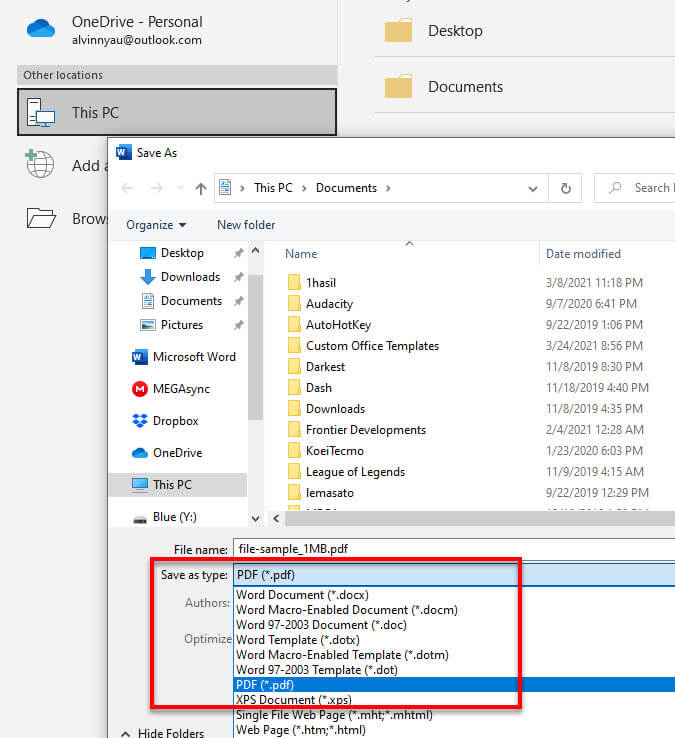
- The familiar save box will open on your screen. Select PDF from the Save as type dropdown menu, enter a name in the File name field, and click Save at the bottom.

Make sure you can find the newly created PDF on your computer.
2. Convert Your PDF to an Image Format
It’s time to turn your PDF into an image, which you can do using a free app. We detail how to do this with a Windows 10 Store app below, but you can also use a web service like PDF to Image if you don’t want to install anything.
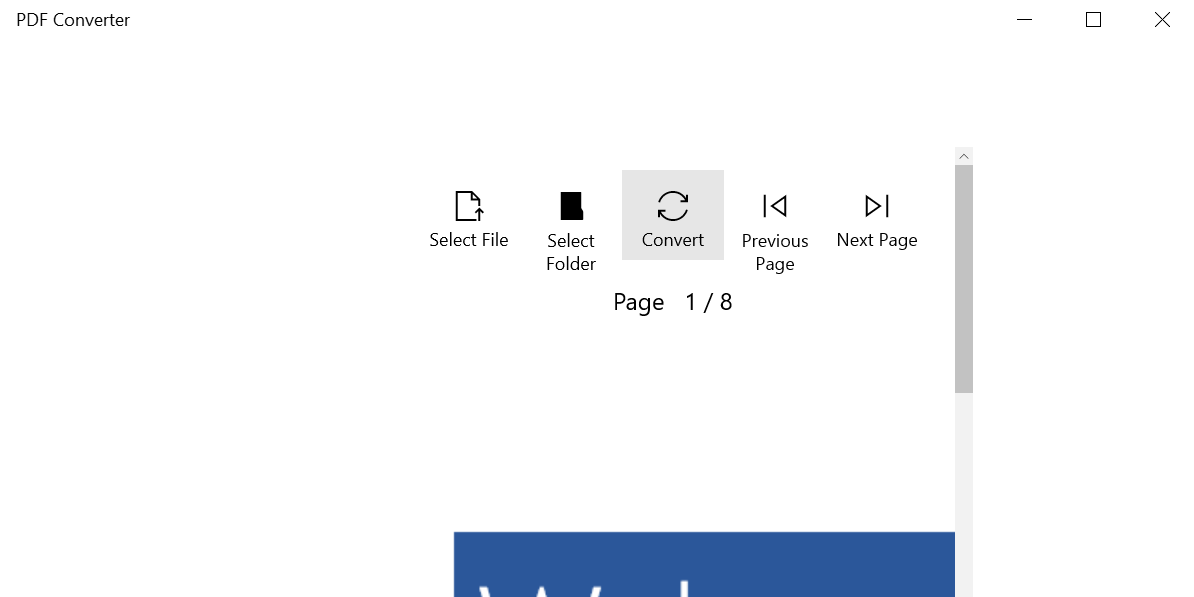
- Launch the Microsoft Store, search for PDF to JPEG, and click the app when it appears in the search results.
- Click on the Get button to download the app to your computer.
- Click on Launch once the app is downloaded and installed.
- On the main app interface, click on Select File and select the PDF you converted earlier.
- You’ll see previews of the pages in your PDF file. Click Select Folder at the top and choose a folder to save your image files.
- Finally, click Convert to start converting your PDF to an image file.

- When the conversion is finished, you’ll find one image for each page in your PDF document.
If you don’t find it convenient to share multiple images with your recipient, you can combine your images together and send them as a single file.
5. Save a Word Document as an Image Online
There are a few online services that let you convert your Word documents to image files. You can use these services without downloading or installing anything on your computer.
Let’s look at two of these services that you can use to save a Word document as an image file.
1. Zamzar
Zamzar is a popular online file conversion service, which you can use to turn your single or multi-page Word documents into image files. It supports several image formats, including popular ones like JPG and PNG.
You can use it as follows:
- Head to the Zamzar site and click Add Files to add your Word document.
- Select an image format from the dropdown menu and click Convert Now.

- Once the document is converted to an image format, click Download to download the images to your computer.

2. Word to JPEG
Word to JPEG is another online service that helps you convert your Word documents to images in JPEG format. Here’s how you use it:
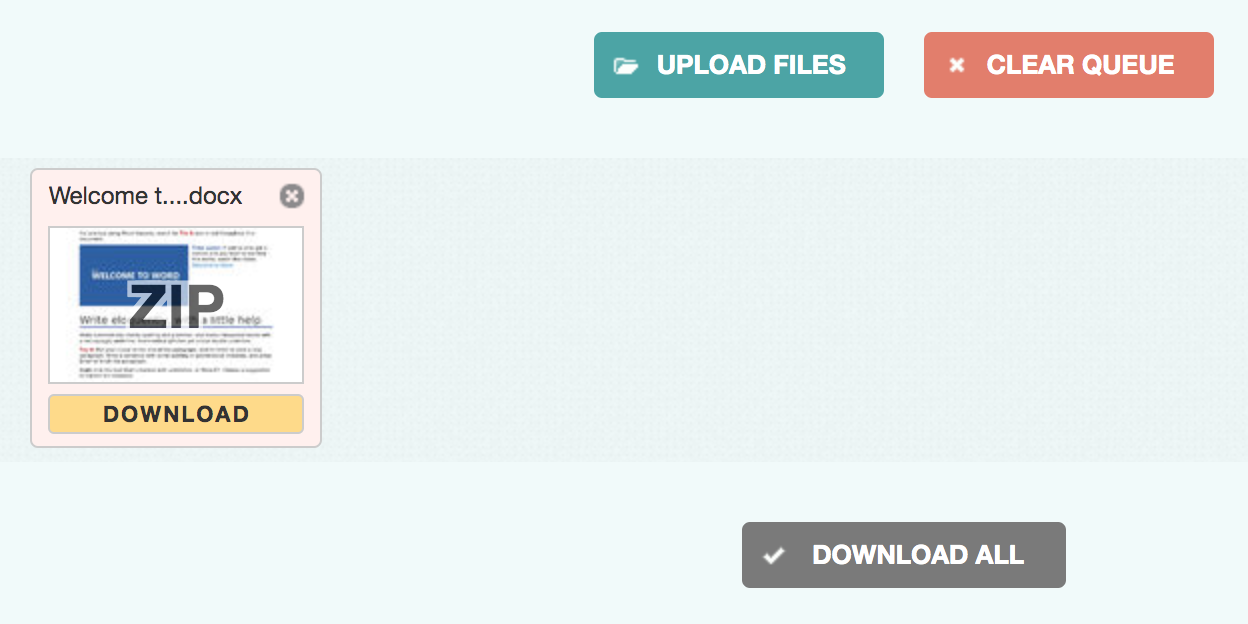
- Open the Word to JPEG site and click Upload Files to upload your Word document.
- It will automatically start converting your document once it’s uploaded.
- Click the Download All button to download your converted files.

You Don’t Need Word to View Word Documents
If your recipient only needs to read your document and not modify it, you can save your Word document as an image file and send it over to them. They’ll be able to view it no matter what device they use.
Not sure of the best way to send it off? You have lots of choices when it comes to sharing photos with your friends and family.

Sometimes you just want to save a document you are working on in Microsoft Word as a picture. It’s not a common problem, but there is a simple solution. You’ll have to save your Word document as a picture page by page, as follows:
- Open the document you want to save as a picture in Microsoft Word.
- Maximize your Microsoft Word window. Zoom in or out and scroll until exactly what you want to save as a picture is visible on the screen.
- Press the Alt key and the Print Screen key at the same time [source: Microsoft Windows]. This will copy what you see into your computer’s clipboard. You’ve just created a screen capture.
- Open up a new image in a picture editor such as Paint or Photoshop.
- Press Ctrl and V at the same time, or click edit and then select paste from the drop-down menu to insert the screen capture of your Word document from your clipboard into the new image file [source: Microsoft Windows].
- Crop your image so you don’t see the window around your Word document in the final picture, if you want.
- Click File, and then select Save as from the drop-down menu.
- Click the down arrow on the right side of the Save as type box. Choose which type of image you would like to save your picture as. JPEG is a compressed file that may lose some pixels but is ideal for Web or e-mail use. GIF and PNG are lossless types of files that are compressed by means of eliminating unused colors. Some Web browsers may not support PNG files [source: Grossman].
- Enter a name for your file in the File name box.
- Check that all the information is correct, and click Save.
- Repeat this procedure if you’d like to save more than one page of your document as a picture.
- You’ve just saved a Word document as a picture.
Originally Published: Jun 7, 2011
Copy Word Document FAQ
Can I save a Word document as an image file?
Word doesn’t have the option to save a document as an image file. The best way to get around this is to take a screenshot. Zoom in on the document so that it’s clear enough to read. Then press the PrtScn key to take a screenshot. Open up Paint or Photoshop and press Ctrl+V to paste the image. Then to go File > Save As and select the format you want to save the picture as. Click “Save” and you’re done.
Can I retrieve a Word document that I saved over?
The AutoRecover function in Word enables you to retrieve previous versions of a document to restore any work you mistakenly saved over. To do this, go to the File tab at the top left corner, which should open the taskbar. Then select Information > Presentation Management > Restore.
How do I uncorrupt a Word document?
Sometimes, Word files get damaged or corrupted, making them seemingly impossible to open. To uncorrupt a document, go to File, Open and Browse the location where you have saved the now-corrupt document. Select the file and click the lower arrow next to “Open.” You’ll see a dropdown menu where you can select “Open and Repair”. In many cases, this fixes the file.
How do I add or remove permissions from a Word document?
To remove restrictions and permissions, click File >Info > Protect Document. A list of options will appear from the dropdown menu. To remove editing restrictions. Click “Stop Protection” or “Change Permission” under the associated options. To add restrictions, choose “Restrict Permission By People” or “Restrict Editing,” depending on what protections you want.
How do I convert a TXT file to Word?
Open the TXT file that you wish to change. Navigate to File > Save As. You’ll be prompted to choose the location where you want to store the new file. Select the location and click the dropdown menu that reads “Save as type”. Select the .doc extension and click “Save.” The document format has now been changed.
Saving or converting a word document as an image format was never a native function in Microsoft Word. However, depending on what you want to achieve, there are a couple of alternative methods to save a word document as a JPEG image or other image format.
Depending on what result you are after, whether you want the JPEG image to be exactly the same size as the word document that would fit into a page when printed, or you want to save only a part of the word document as an image file, this tutorial will show you 4 different methods to convert a word doc to jpg image in Windows 11 or Windows 10.
Also see: How to Convert CSV or TXT to Excel in Windows 11
Copy, paste, and save as picture in Microsoft Word
The easiest and quickest method to force saving a word document as JPEG image is by copying and pasting a part of the word document, and then save it as a JPEG image in Microsoft Word. This method can be done directly in the Microsoft Word itself without relying on any third party software. Here’s how to do it.
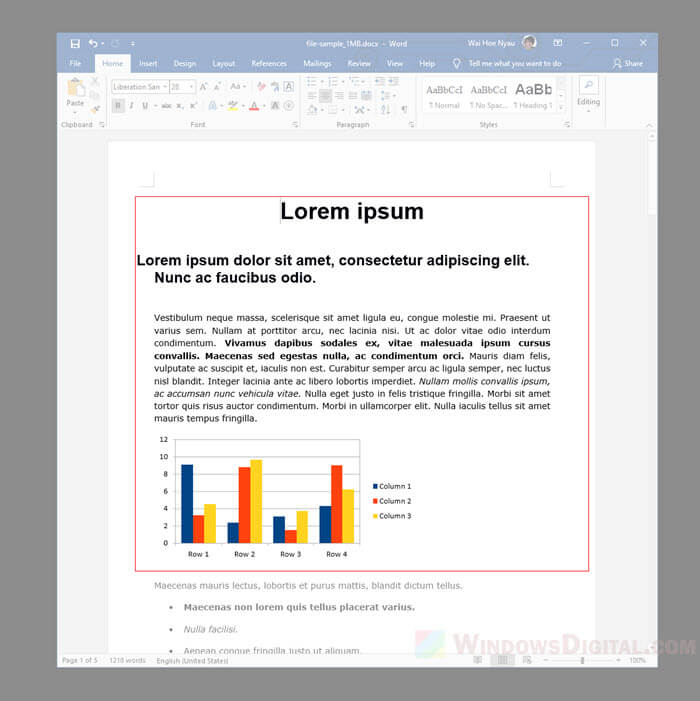
Step 1: While opening the word document, highlight the part of the document which you wish to save as JPEG image. Press CTRL + C keys to copy the highlighted part.
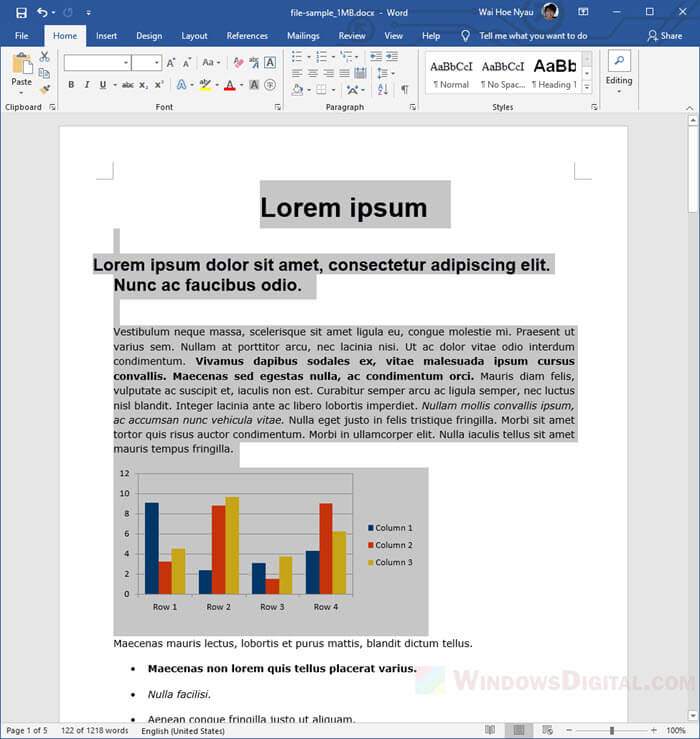
Step 2: On a new word document, or anywhere in the existing document, click on Home from the toolbar. Then, click on the Paste button and select Picture.
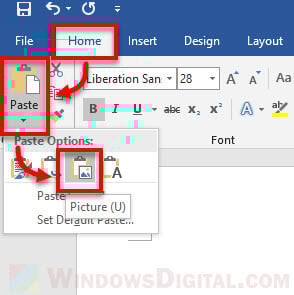
Step 3: Right-click on the pasted picture and then select “Save as Picture” from the context menu.
Step 4: Browse to the location where you want to save the image to. Enter a name for the image file and select JPEG (.jpg) from the “Save as type” drop-down menu to save the image in JPEG format.
Take a screenshot of the DOC and save as JPEG
Another more commonly used method to convert word document to JPEG is to simply capture a screenshot of the word document using the Windows built-in Snipping Tool or any other print screen software, and then save it as a JPEG image. Here’s how to do it.
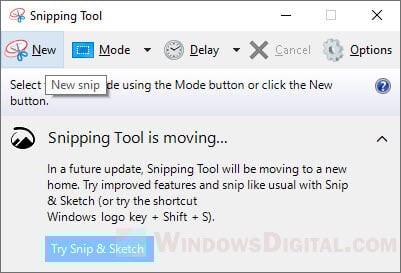
Step 1: Search for and open Snipping Tool from the Windows search bar.

Step 2: While opening the word document on your screen, click on the New snip button from the Snipping Tool window.
Step 3: Drag to highlight the part of the word document which you want to save as JPEG image.
Step 4: Once the screenshot is captured, in Snipping tool, click on File, then Save as. Browse to the location where you wish to save the image. Give a name to the image file and select JPEG file as the image format from the “Save as type” drop-down menu.
Word document to PDF, then PDF to JPEG
If you want to convert a word document to a JPEG image that fit perfectly to a page, for example, the common A4 size page, so that you can print it or send it nicely, especially if you need to convert an entire page or several pages of a word document, you will have to first save the word document as PDF, and then use a software or online tool that support converting PDF to image file to convert the PDF to JPEG.
First, save the word document as PDF in Microsoft Word. To do so, while opening the word document, click on File, then Save as. Browse to the location where you want to save the PDF file, and select PDF as the “Save as type” to save the document as a PDF file.
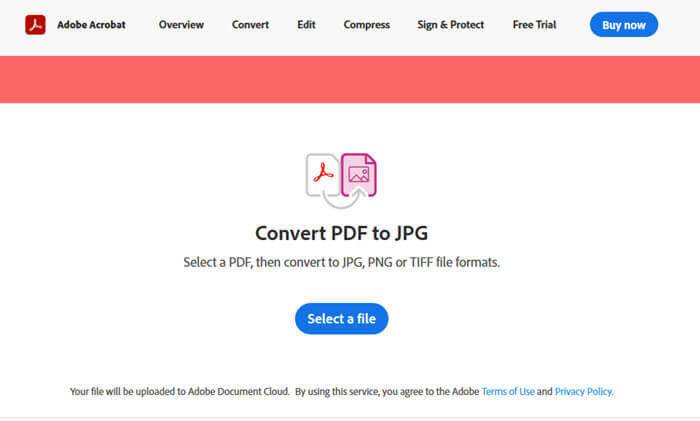
There plenty of websites that let you convert a PDF file to JPEG image. We recommend Adobe PDF to JPG converter. If you prefer other converters, do a Google search for “pdf to jpg” and you should find plenty of similar tools.
Print Word document to Snagit and save as JPEG
Another method that is able to convert word document to JPEG that fits perfectly to a printed page is by using a screen capturing software called Snagit. The software is not free, but they do provide a free trial. With Snagit, you can directly print the the word document to Snagit printer, which will then open the printed document on Snagit Editor, where you can save it as JPEG or other image format.
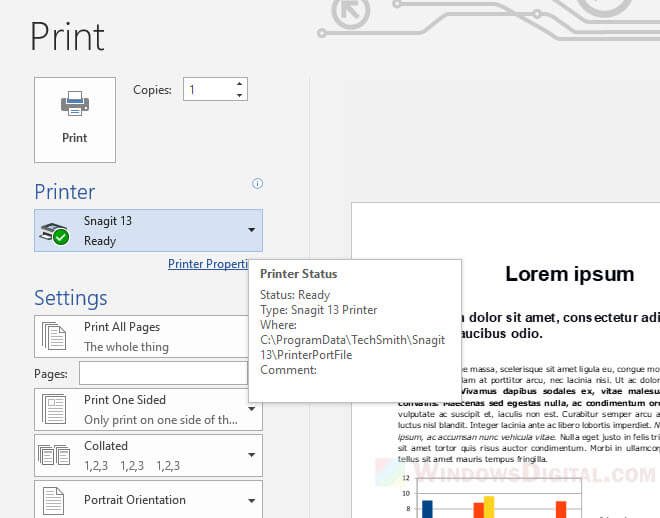
If you have Snagit installed, in Microsoft Word, while opening the Word document that you want to convert to JPEG, click on File, then Print. Select Snagit from the list of printers, and then click on Print.
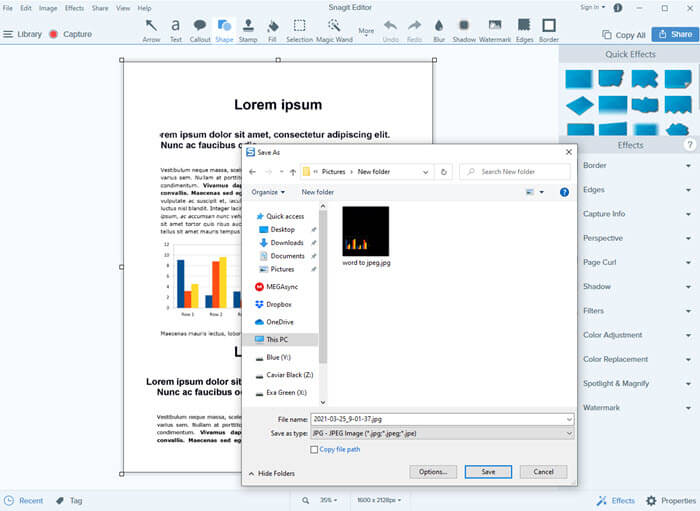
Doing so will open the document in Snagit Editor. From there, you can save the printed document as JPEG image by clicking File, then Save as in Snagit Editor.
![]()
Download Article
![]()
Download Article
Want to save a Word document as an image that you can easily share with others? It’s actually pretty simple—you’ll just need to save it as a PDF first, which is a format that’s easy to convert to PDF. This wikiHow will show you how to convert any Microsoft Word document into a JPEG image on your Windows PC or Mac.
-

1
Open the Word document. Double-click the document you want to convert into a JPEG. This will open the document in Microsoft Word.
-
2
Click File. It’s in the top-left corner of the Word window. A pop-out menu will appear.
Advertisement
-
3
Click Save As. This is in the pop-out menu on the left side of the page.
-
4
Double-click This PC. It’s in the middle of the page. Doing so opens a File Explorer window.
-
5
Select a save location. Click the folder in which you want to save your converted Word file on the left side of the window.
- For example, to save the file on the desktop, you would click Desktop.
-
6
Click the «Save as type» drop-down box. It’s at the bottom of the window. Doing so prompts a drop-down menu.
-
7
Click PDF. This is in the drop-down menu.
- You can’t convert a Word document directly to a JPEG file, but you can convert a PDF to a JPEG.
-
8
Click Save. It’s in the bottom-right corner of the window. Your Word file will be copied to a PDF file in your selected location.
-
9
Install the free PDF to JPEG converter. This app is free in the Microsoft Store:
- Open
, then type in store and click Microsoft Store at the top of the menu.
- Click Search.
- Type in pdf to jpeg, then press ↵ Enter.
- Click the black-and-white PDF to JPEG icon.
- Click Get in the upper-left side of the window.
- Open
-
10
Open PDF to JPEG. Click Launch when prompted, or open Start
, type in pdf to jpeg, and click PDF to JPEG in the results.
-
11
Click Select File. It’s at the top of the window. Doing so opens a File Explorer window.
-
12
Open your PDF. Go to the location in which you saved your PDF and click the PDF file, then click Open in the bottom-right corner of the window. This will open the PDF in the PDF to JPEG converter.
-
13
Select a save location. Click Select Folder at the top of the converter window, then click the folder in which you want to save the converted JPEG file and click Select Folder in the bottom-right corner.
-
14
Click Convert. It’s at the top of the window. This will convert your PDF into a JPEG file and store it in your selected location.


Advertisement
-
1
Open the Word document. Double-click the document you want to convert into a JPEG. This will open the document in Microsoft Word.
-
2
Click File. It’s an option in the top-left corner of your Mac’s screen.
-
3
Click Save As. This option is near the top of the drop-down File menu.
-
4
Click the «Format» drop-down box. You’ll see this box toward the middle of the «Save As» window. A drop-down menu will appear.
-
5
Click PDF. It’s near the middle of the drop-down menu.
- While a DOC (Word) file isn’t directly convertible to a JPEG file, a PDF is.
-
6
Click Save. It’s a blue button in the bottom-right corner of the window. Your file has now been saved as a PDF; you’ll likely find it on the desktop.
-
7
Open the PDF file with Preview. To be able to save the PDF as a JPEG, you need to use the Preview application on the Mac because not all third-party PDF applications have this feature. To do this:
- Click once the PDF file.
- Click File at the top of the screen.
- Select Open With in the drop-down menu.
- Click Preview.
-
8
Click File. This option is in the top-left corner of the screen. A drop-down menu will appear.
-
9
Click Export. It’s toward the middle of the drop-down menu.
-
10
Click Format. This box is near the bottom of the «Export» page.
-
11
Click JPEG. Doing so will allow you to save the PDF version of your Word document as a JPEG file.
- You’ll see a slider appear below the Format box; clicking and dragging it right will increase your JPEG’s quality, while dragging it left will decrease the quality. This is helpful if you need to lower the image’s size (wherein you would lower the quality).
-
12
Click Save. It’s in the bottom-right corner of the screen. Your Word document is now preserved in JPEG format.


Advertisement
-
1
Open the Word-to-JPEG converter. Go to http://wordtojpeg.com/ in your computer’s web browser. This is a free website that can convert Word and PDF files into the JPEG format.
-
2
Click UPLOAD FILES. It’s the green button near the center of the page.
-
3
Select a Word document and click Open. A thumbnail of the file will appear below the “UPLOAD FILES” button.
- If your Word document contains more than one page, this tool will create a separate JPEG for each page.
-
4
Click DOWNLOAD. It’s at the bottom of the thumbnail. This downloads a ZIP folder containing the image to your computer.
- You may have to select a download location and click Save or OK.
-
5
Extract the ZIP folder you just downloaded. This will vary depending on whether you’re using a Windows computer or a Mac:
- Windows — Double-click the ZIP folder, click Extract at the top of the window, click Extract all, and click Extract all when prompted.
- Mac — Double-click the ZIP folder and wait for it to finish extracting.
-
6
Open your JPEG file. In the extracted folder, you should see one JPEG file for each page of the Word document you converted; double-clicking a JPEG file will open it in your computer’s default photo program.


Advertisement
Add New Question
-
Question
I already used the snipping tool and everything went well, except the lines under the words. How can I get rid of them?

If you mean the lines that indicate spelling or grammar errors, all you have to do is click «Review» in the top menu and select «Spelling and Grammar». Then click through, changing or ignoring the errors as you please. The lines should disappear as you fix everything.
-
Question
Can I change a multi-page Word document to a jpeg?
You can take screenshots of it on a Mac (Command + Shift+ «4») and it will turn into a png or a jpeg based on the settings on your computer.
Ask a Question
200 characters left
Include your email address to get a message when this question is answered.
Submit
Advertisement
-
If you have Word on your iPhone or Android, you can take a screenshot of the document to preserve it as a picture file.
-
Most sites that support JPEG will also support PNG (screenshot) files.
Thanks for submitting a tip for review!
Advertisement
-
If you choose to use an online converter, keep in mind that the service will be able to see the document, therefore you’ll want to avoid online converters if the document is sensitive.
-
Converting your document to a JPEG may cause your file to lose quality. This shouldn’t be an issue unless your Word document is largely visual, and even then you shouldn’t notice too much of a difference.
Advertisement
About This Article
Article SummaryX
1. Open the file in Word.
2. Click the File menu.
3. Click Save As.
4. Select a save location.
5. Select PDF from the «Save as type» menu.
6. Click Save.
7. Install PDF to JPEG from the Microsoft Store.
8. Use PDF to JPEG to covert the file.
Did this summary help you?
Thanks to all authors for creating a page that has been read 4,544,303 times.