
Word for Microsoft 365 Word for Microsoft 365 for Mac Word 2021 Word 2021 for Mac Word 2019 Word 2019 for Mac Word 2016 Word 2016 for Mac Word 2013 Word 2010 Word for Mac 2011 More…Less
A text box is an object you can add to your document that lets you put and type text anywhere in your file. Text boxes can be useful for drawing attention to specific text and can also be helpful when you need to move text around in your document.
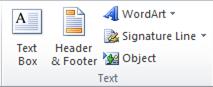
Add a text box
-
Place cursor where you want the text box to appear.
-
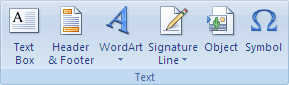
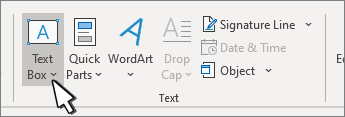
Go to Insert and in Illustrations select Drawing.
-
Select Text Box and use your cursor to create the text box.
-
Insert text in box and apply any styling needed.
-
Select Save andClose.
If you aren’t using a mouse
-
Press Alt + Period (.) and then press N.
-
Then press D to select drawings.
-
Press Alt + Period (.) and then press N.
-
Type the text that you want.
-
Press the Esc key 3 times.
-
Press Enter to save textbox.
Notes:
-
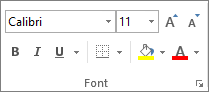
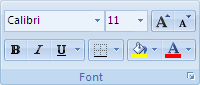
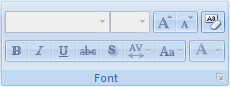
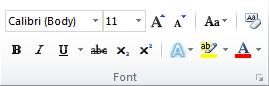
To format the text in the text box, select the text, and then use the formatting options in the Font group on the Home tab.
-
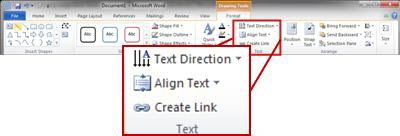
To format the text box itself, use the commands on the Shape Format contextual tab that appears when you select a text box.
-
To position the text box, select it, and then when the pointer becomes a
 four-headed arrow, drag the text box to a new location.
 -
You can also change or remove a border from a text box or shape.
-
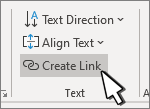
If you have multiple text boxes, you can link them together so that text will flow from one box to another. Select one of the text boxes and on the Shape Format tab, select Create Link.
-
 four-headed arrow, drag the text box to a new location.
Editing in a text box
-
Double click the textbox.
-
In Drawing (Preview), select the textbox to place your cursor and edit text.
-
When finished select Save and Close to view updated text box.
Copy a text box
-
Select the border of the text box that you want to copy.
-
Press Ctrl+C.
Note: Make sure the pointer is on the border of the text box, not inside it. If the pointer is inside, pressing Ctrl+C will copy the text, not the text box.
-
Select a location and press Ctrl+V to paste the text box.
Delete a text box
-
Select the border of the text box that you want to delete, and then press Delete.
Note: Make sure the pointer is on the border of the text box and not inside it. If the pointer is inside the box, pressing Delete will delete the text inside the text box, not the box.
Add a text box
-
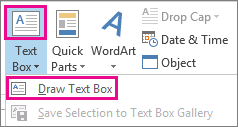
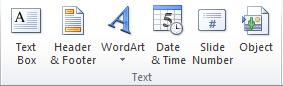
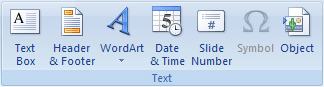
Go to Insert > Text Box, and then select Draw Text Box.
-
Click or tap in the document, and drag to draw the text box the size that you want.
-
To add text to a text box, select inside the text box, and then type or paste text.
Notes:
-
To format the text in the text box, select the text, and then use the formatting options in the Font group on the Home tab.
-
To format the text box itself, use the commands on the Format contextual tab, which appears under Drawing Tools when you select a text box.
-
To position the text box, select it, and then when the pointer becomes a
, drag the text box to a new location. -
You can also change or remove a border from a text box or shape.
-
If you have multiple text boxes, you can link them together so that text will flow from one box to another. Select one of the text boxes and on the Format tab, under Drawing Tools, and then select Create Link.
-
Copy a text box
-
Select the border of the text box that you want to copy.
-
Go to Home > Copy
.Make sure that the pointer is not inside the text box, but rather on the border of the text box. If the pointer is not on the border, pressing Copy will copy the text inside the text box and not the text box.
-
Go to Home and select Paste.
 .
.
Delete a text box
-
Select the border of the text box and then press DELETE.
Make sure that the pointer is not inside the text box, but rather on the border of the text box. If the pointer is not on the border, pressing DELETE will delete the text inside the text box instead.
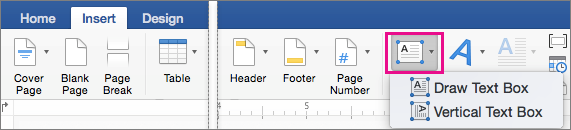
Add a text box
-
Go to Insert > Text Box and then select either Draw Text Box (where the text aligns horizontally on the page) or Vertical Text Box (where the text aligns vertically on the page).
-
Select in the document, and then drag to draw the text box the size that you want.
-
To add text to a text box, click or tap inside the text box, and then type or paste text.
-
To format the text in the text box, select it, and then Control + Click the text and select Font.
-
To add different effects to the text box, select the text box, and use the options on the Shape Format tab (such as changing the text direction or aligning the text at the top, middle or bottom of the text box).
-
To position the text box, select and hold it, and then when the pointer becomes a
, drag the text box to a new location.
-
Note: If you have drawn multiple text boxes, you can link them together so that text will flow from one box to another. You can only link an empty text box to the one that you’ve selected. To do this, select the text box that you want to link to another text box, and then go to Shape Format > Create Link.
Copy a text box
-
Select the text box you want to copy.
Make sure that the pointer is on the border of the text box and not inside the text box. If the pointer is not on the border, the text inside the text box is copied.
-
Press Control + Click, and then select Copy. Or, press
+ C. -
Select the location in your document where you want to paste the text box, press Control + Click, and then select Paste. Or, press
+ V.
 + C.
+ C.Remove a text box
-
Select the border of the text box that you want to delete, and then press DELETE.
Make sure that the pointer is on the border of the text box and not inside the text box. If the pointer is not on the border, pressing DELETE will delete the text inside the text box.
Add a text box
-
Go to Insert > Text Box.
-
Click in your file where you’d like to insert the text box, hold your mouse button down, then drag to draw the text box the size that you want.
-
After you’ve drawn the text box click inside it to add text.
Copy a text box
-
Select the text box you want to copy.
Make sure that the pointer is on the border of the text box and not inside the text box. If the pointer is not on the border, the text inside the text box is copied.
-
Press Control + Click, and then select Copy. Or, press
+ C. -
Select the location in your document where you want to paste the text box, press Control + Click, and then select Paste. Or, press
+ V.
Remove a text box
-
Select the border of the text box that you want to delete, and then press DELETE.
Make sure that the pointer is on the border of the text box and not inside the text box. If the pointer is not on the border, pressing DELETE will delete the text inside the text box.
Need more help?
Want more options?
Explore subscription benefits, browse training courses, learn how to secure your device, and more.
Communities help you ask and answer questions, give feedback, and hear from experts with rich knowledge.
You can add, copy, or delete text boxes in your Microsoft Office applications. A text box lets you add text anywhere in your file. For example, you can create pull quotes or sidebars that call attention to important information. For Word, see Add, copy, or remove a text box in Word.
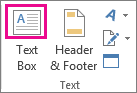
Add a text box
To learn how to add a text box, select an application from the drop-down list.
-
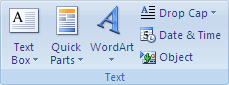
On the Insert tab, in the Text group, click Text Box.
-
In the worksheet, click and drag to draw the text box the size that you want.
-
To add text, click inside the box and type or paste your text.
Notes:
-
To format text in the text box, select the text, and then use the formatting options in the Font group on the Home tab.
-
To position the text box, click it, and then when the pointer becomes crossed arrows (
), drag the text box to a new location. -
You can also change or remove a border from a text box or shape.
-
Top of page
-
Click in the body of an open email message.
-
On the Insert tab, in the Text group, click Text Box, and then click Draw Text Box.
-
Click and drag in the message body to draw a text box the size that you want.
-
To add text, click inside the box and type or paste your text.
Notes:
-
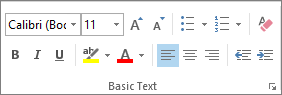
To format text in the text box, select the text, and then use the formatting options in the Basic Text group on the Message tab.
-
To position the text box, click it, and then when the pointer becomes a
, drag the text box to a new location. -
To control how text wraps around the box, click Layout Options
, and then select an option from the list.
-
You can also change or remove a border from a text box or shape.
-
 , and then select an option from the list.
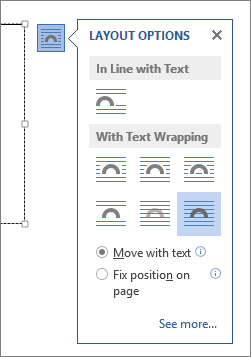
Top of page
-
On the Insert tab, in the Text group, click Text Box.
-
Click in the presentation, and then drag to draw the text box the size that you want.
-
To add text, click inside the box and type or your paste text.
If you aren’t using a mouse
-
Press Alt+N to go to the Insert tab.
-
Use the arrow keys to move to the Text Box button.
-
Press Ctrl+Enter to add the text box to your slide, then type your text.
Notes:
-
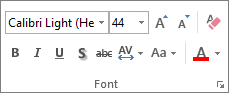
To format text in the text box, select the text, and then use the formatting options in the Font group on the Home tab.
-
To position the text box, click it, and then when the pointer becomes a
, drag the text box to a new location. -
You can also change or remove a border from a text box or shape.
-
Top of page
-
In a project with a Gantt chart, click the Format tab and click Drawing.
-
Click Text Box, and then drag in the Gantt chart to draw the text box to the size you want.
-
To add text, click inside the box and type or paste your text.
Notes:
-
To format text in the text box, select the text, click the Task tab, and use the formatting options in the Font group.
-
You can also change or remove a border from a text box or shape.
-
Copy a text box
-
Click the border of the text box that you want to copy.
-
Press Ctrl+C.
Note: Make sure the pointer is on the border of the text box, not inside it. If the pointer is inside, pressing Ctrl+C will copy the text, not the text box.
-
Select a location and press Ctrl+V to paste the text box.
Delete a text box
-
Click the border of the text box that you want to delete, and then press Delete.
Note: Make sure the pointer is on the border of the text box and not inside it. If the pointer is inside the box, pressing Delete will delete the text inside the text box, not the box.
Add a text box
To learn how to add a text box, select an application from the drop-down list.
-
On the Insert tab, in the Text group, click Text Box.
-
Click in the worksheet, and then drag to draw the text box the size that you want.
-
To add text to a text box, click inside the text box, and then type or paste text.
Notes:
-
To format text in the text box, select the text, and then use the formatting options in the Font group on the Home tab.
-
To position the text box, click it, and then when the pointer becomes a
, drag the text box to a new location. -
You can also change or remove a text box or shape border.
-
Top of page
-
Click in the body of an open email message.
-
On the Insert tab, in the Text group, click Text Box, and then click Draw Text Box.
-
Click and drag in the message body to draw a text box the size that you want.
-
To add text, click inside the box and type or paste your text.
Notes:
-
To format text in the text box, select the text, and then use the formatting options in the Basic Text group on the Message tab.
-
To position the text box, click it, and then when the pointer becomes a
, drag the text box to a new location. -
To control how text wraps around the box, click Layout Options
, and then select an option from the list.
-
You can also change or remove a border from a text box or shape.
-
Top of page
-
On the Insert tab, in the Text group, click Text Box.
-
Click in the presentation, and then drag to draw the text box the size that you want.
-
To add text to a text box, click inside the text box, and then type or paste text.
Notes:
-
To format text in the text box, select the text, and then use the formatting options in the Font group on the Home tab.
-
To position the text box, click it, and then when the pointer becomes a
, drag the text box to a new location. -
You can also change or remove a text box or shape border.
-
Top of page
Copy a text box
-
Click the border of the text box that you want to copy.
-
On the Home tab, in the Clipboard group, click Copy
.Make sure that the pointer is not inside the text box, but rather on the border of the text box. If the pointer is not on the border, pressing Copy will copy the text inside the text box and not the text box.
-
On the Home tab, in the Clipboard group, click Paste.
Delete a text box
-
Click the border of the text box that you want to delete, and then press DELETE.
Make sure that the pointer is not inside the text box, but rather on the border of the text box. If the pointer is not on the border, pressing DELETE will delete the text inside the text box and not the text box.
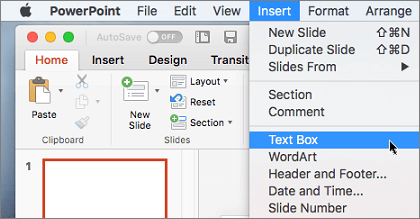
Add a text box
To learn how to add a text box, select an application from the drop-down list.
-
On the Insert tab, in the Text group, click Text Box.
-
Click in the worksheet, and then drag to draw the text box the size that you want.
-
To add text to a text box, click inside the text box, and then type or paste text.
Notes:
-
To format text in the text box, use the formatting options in the Font group on the Home tab.
-
To position the text box, click it, and then when the pointer becomes a
, drag the text box to a new location. -
You can change or remove a border from a text box or shape or add a fill or effect to a shape or text box.
-
Top of page
-
In an e-mail message, on the Insert tab, in the Text group, click Text Box, and then click Draw Text Box.
-
Click in the e-mail message, and then drag to draw the text box the size that you want.
-
To add text to a text box, click inside the text box, and then type or paste text.
Notes:
-
To format text in the text box, use the formatting options in the Font group on the Format Text tab.
-
To position the text box, click it, and then when the pointer becomes a
, drag the text box to a new location. -
You can change or remove a border from a text box or shape or add a fill or effect to a shape or text box.
-
If you have drawn multiple text boxes, you can link them together so that text will flow from one box to another. Click one of the text boxes and then under Text Box Tools, on the Format tab, in the Text group, click Create Link.
-


Top of page
-
On the Insert tab, in the Text group, click Text Box.
-
Click in the presentation, and then drag to draw the text box the size that you want.
-
To add text to a text box, click inside the text box, and then type or paste text.
Notes:
-
To format text in the text box, use the formatting options in the Font group on the Home tab.
-
To position the text box, click it, and then when the pointer becomes a
, drag the text box to a new location. -
You can change or remove a border from a text box or shape or add a fill or effect to a shape or text box.
-
Top of page
Copy a text box
-
Click the border of the text box that you want to copy.
-
Right-click and select Copy from the menu.
Make sure that the pointer is not inside the text box, but rather on the border of the text box. If the pointer is not on the border, pressing Copy will copy the text inside the text box and not the text box.
-
Place your cursor where you want the copied text box to be, right-click, and then click Paste.
Delete a text box
-
Click the border of the text box that you want to delete, and then press DELETE.
Make sure that the pointer is not inside the text box, but rather on the border of the text box. If the pointer is not on the border, pressing DELETE will delete the text inside the text box and not the text box.
-
To delete multiple check boxes at the same time, hold down CTRL, and click the border of each text box in turn, and then press DELETE.
-
To delete a text box but save the text inside it, select the text inside the text box, and then press CTRL+C to copy the text onto the clipboard before you delete the text box.
How to Copy and Paste Text from Multiple Locations in Microsoft Word
- Select the block of text you want to copy.
- Press Ctrl+F3.
- Repeat the two steps above for each additional block of text to copy.
- Go to the document or location where you want to paste all of the text.
- Press Ctrl+Shift+F3.
Contents
- 1 How do you select multiple text boxes in Word?
- 2 How do you duplicate text boxes?
- 3 How do you copy multiple sections of text?
- 4 How do you copy multiple text in Word?
- 5 Can you group text boxes in Word?
- 6 How do you select multiple text boxes in Word 2019?
- 7 How do I copy an entire text box in Word?
- 8 How do I copy multiple text boxes in a PDF?
- 9 How do you select items that are not next to each other?
- 10 How do I select multiple sections of text in pages?
- 11 How do I group text boxes and images in Word?
- 12 How do I group a text box and shape in Word?
- 13 Why can’t I select multiple objects in Word?
- 14 How do I make multiple text boxes in one?
- 15 How do you select multiple objects in Word?
- 16 How do I select a text box?
- 17 How do you select multiple text boxes in Word for Mac?
- 18 Why are my text boxes not showing in Word?
- 19 How do I move entire pages in Word?
- 20 How do I copy and paste a text box in PDF?
How do you select multiple text boxes in Word?
Step 2: Click on the text boxes.
Now, press and hold the CTRL key and click the next one. Repeat the same steps to go over all of the text boxes in your document. There you have it! That’s how you use the CTRL key and your mouse to select multiple text boxes in Word.
How do you duplicate text boxes?
Copy a text box
- Click the border of the text box that you want to copy.
- Press Ctrl+C. Note: Make sure the pointer is on the border of the text box, not inside it. If the pointer is inside, pressing Ctrl+C will copy the text, not the text box.
- Select a location and press Ctrl+V to paste the text box.
How do you copy multiple sections of text?
Start by selecting the first block of text with the mouse. Then, scroll to the next block of highlighted text and hold down the Ctrl key while you select that. Once you’ve selected all the blocks you want to copy, press Ctrl + C.
Copy and paste multiple items using the Office Clipboard
- Open the file that you want to copy items from.
- Select the first item that you want to copy, and press CTRL+C.
- Continue copying items from the same or other files until you have collected all of the items that you want.
- Click where you want the items to be pasted.
Can you group text boxes in Word?
Grouping text boxes
To group, press CTRL and click on the borderlines of all text boxes one by one. Release the CTRL button and right-click on the selected text boxes. From the right-click menu, select Group under Grouping.
How do you select multiple text boxes in Word 2019?
Just hold the mouse button down (don’t release it). You can hold down the Ctrl key while clicking the edge of each text box.
How do I copy an entire text box in Word?
Press Ctrl + A on your keyboard to highlight all text in your document. Tip: You can also highlight your entire document by placing your mouse cursor in the left margin and then quickly clicking the left mouse button three times in a row. Press Ctrl + C to copy the entire highlighted selection.
How do I copy multiple text boxes in a PDF?
To select multiple columns of text (horizontally), hold down Ctrl (Windows) or Option (Mac OS) as you drag across the width of the document. To select a column of text (vertically), hold down Ctrl+Alt (Windows) or Option+Command (Mac OS) as you drag the length of the document.
How do you select items that are not next to each other?
More Information
- Select the first item that you want. For example, select some text.
- Press and hold CTRL.
- Select the next item that you want. Important Be sure to press and hold CTRL while you select the next item that you want to include in the selection.
How do I select multiple sections of text in pages?
Select a range of text: Click in front of the first character, then hold down the Shift key on your keyboard and click at the end of the text you want to select. You can select just a few characters or a large amount of text across paragraphs or pages.
How do I group text boxes and images in Word?
Group shapes, pictures, or objects
Press and hold CTRL while you select the shapes, pictures, or objects that you want to group. The Wrap Text option for each object must be other than In line with Text. For more info, see Wrap Text. , and then select Group.
How do I group a text box and shape in Word?
Group shapes, pictures, or other objects
- Press and hold CTRL while you click the shapes, pictures, or other objects to group. You will need to select more than one shape, picture or object in order to enable the Group button.
- Select the Arrange button and choose Group.
Why can’t I select multiple objects in Word?
Word cannot select multiple pictures at a time by default. To achieve this goal, in addition to adding Select Multiple Objects, you must also modify the Layout Options of the pictures and document format.The document format is a new format and you cannot select multiple pictures at once.
How do I make multiple text boxes in one?
Click on each additional box whilst holding the Shift key. This will add each new text block to the selection. Once all are selected, choose Text->Text Box->Merge Vertically to join the separate boxes into one.
How do you select multiple objects in Word?
To select one object, click or tap the object. To select multiple shapes in a group, press and hold Shift or Ctrl while you click or tap the shapes.
How do I select a text box?
To select the text box, you need to click the border of the text box, and the insertion point disappears. If you press Tab or Ctrl+Tab while the insertion point is visible in the text box, then you only modify the text in the text box; you don’t select the next object.
How do you select multiple text boxes in Word for Mac?
The quickest way to select multiple objects in Word for Mac is with your mouse. Click the first object you want to select, hold down the “Command” key and select each additional object.
Why are my text boxes not showing in Word?
Click the Microsoft Office Button, and then click Word Options. Click Advanced. Under Show document content, click to select the Show drawings and text boxes on screen check box. Click OK.
How do I move entire pages in Word?
Open Word and the document to reorder. Scroll to the page you want to move. Hold down the left mouse button and drag down to the right to select a whole page. Release the mouse and the page is highlighted.
How do I copy and paste a text box in PDF?
Choose Edit > Copy to copy the selected text to another application. Right-click on the selected text, and then select Copy. Right-click on the selected text, and then choose Copy With Formatting. You can paste copied text into comments and bookmarks as well as into documents authored in other applications.
In Microsoft Word, the user can create the text boxes in several built-in styles, predefined Textboxes offered in Word. If any of the built-in styles do not meet the user’s, interest there is a feature in Word that allows the user to draw the text box. There is an option where you can get more textboxes from Office.com and can save the selection to the text box gallery.
In this tutorial, we will explain:
- How to insert a Built-in Styles Text Box.
- How to insert text into Text Box.
- How to copy the Text Box to a new location.
- How to change the direction of text in the selected Text Box.
- How to Format the Text Box.
- How to change the default formatting for a Text Box.
- How to save a selected Text Box as a Building Block.
What is Text Box in Microsoft Word
A Text Box is a feature in Word that focuses on its content and displays essential text such as headings and quotes.
1] How to insert a Built-in Styles Text Box
![]()
Click the Insert tab on the menu bar.
On the Insert tab in the Text group, click the drop-down arrow of the Text Box button.
You will see a list of text box built-in styles you can choose from; select the one you desire.
The text box you selected will appear in the document.
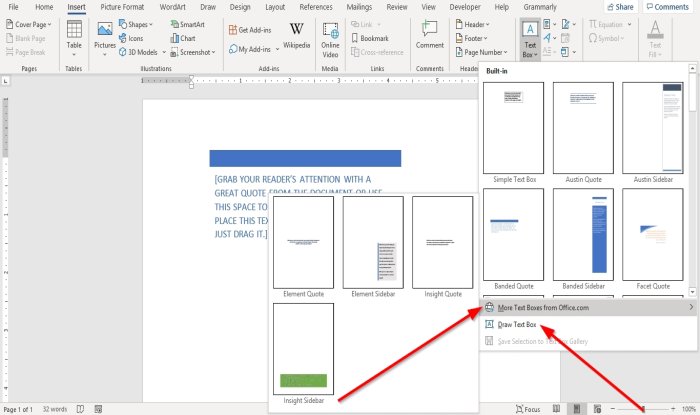
You can use More Text Boxes from Office.com to insert text boxes in the document.
In the Text Box drop-down list, you can also select Draw Text Box and draw a text box into the document.
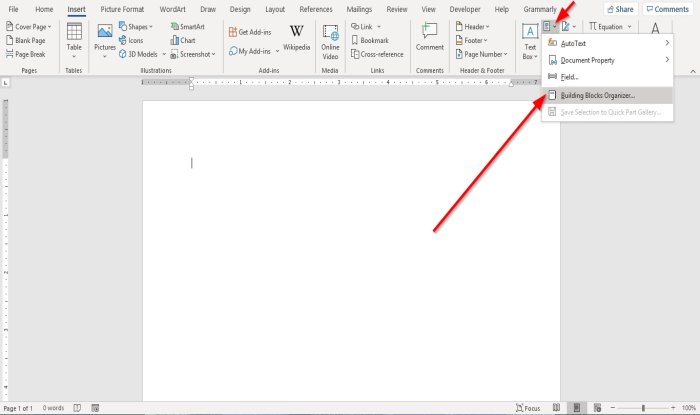
The other option to insert a Built-in Style text box is to your document is to click on the Explore Quick Parts button.
In the drop-down list, select Building Blocks Organizer.
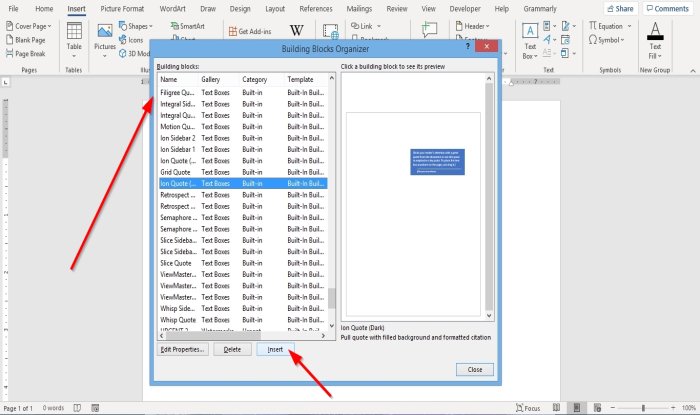
A Building Blocks Organizer dialog box will appear.
In the dialog box, scroll down until you see the text box gallery.
Click any text box of your choice and click Insert.
The text box is inserted into the document.
2] How to insert text into Text Box
For a built-in style text box, click into the text box and press the Delete Key to delete the default text inside it and type your text.
For the text box you draw, click inside the text box and enter your text.
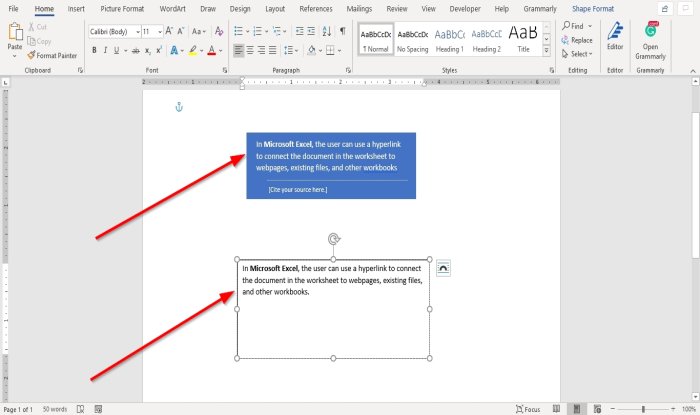
3] How to copy the Text Box to a new location
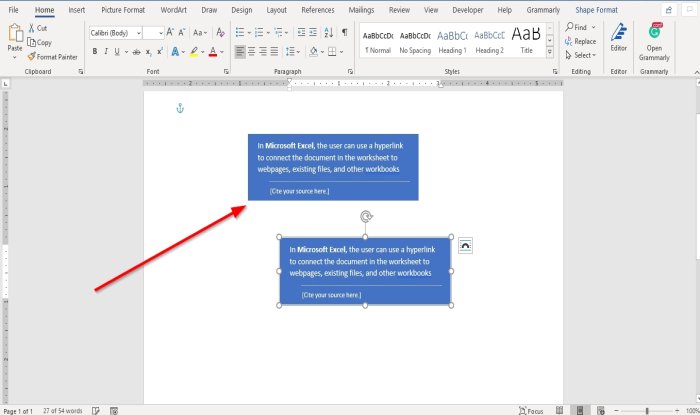
Place the cursor near the text box’s frame, hold the CTRL-key down, and drag the textbox.
You will notice that the text box is copied.
4] How to change the direction of text in the selected Text Box
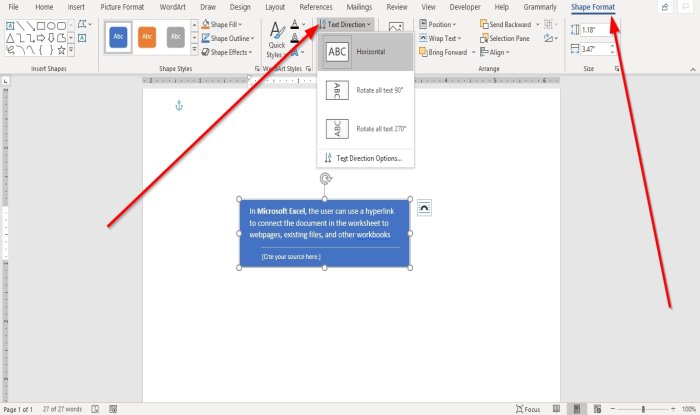
Go to the Shape Format tab.
On the Shape Format tab in the Text group, click Text Direction.
In the drop-down list, choose the direction you want the text to be in the text box.
5] How to Format the Text Box
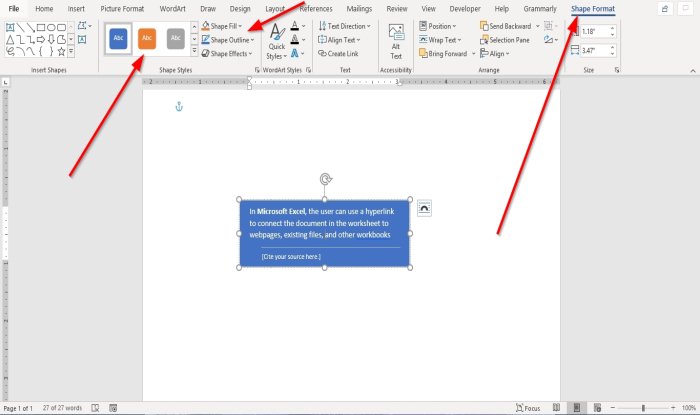
Click on the text box on the Shape Format tab in the Shape Styles group. You can choose the built-in styles you like.
You can format the text box by selecting Shape Fill, Shape Outline, and Shape Effects.
6] How to change the default formatting for a Text Box
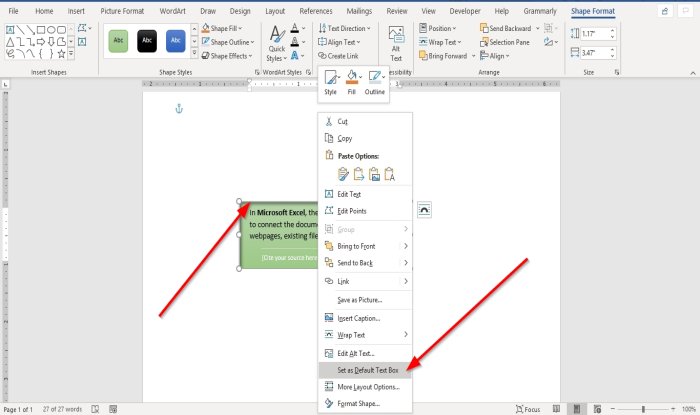
Right-click a formatted text box border and select Set as Default Text Box.
7] How to save a selected Text Box as a Building Block
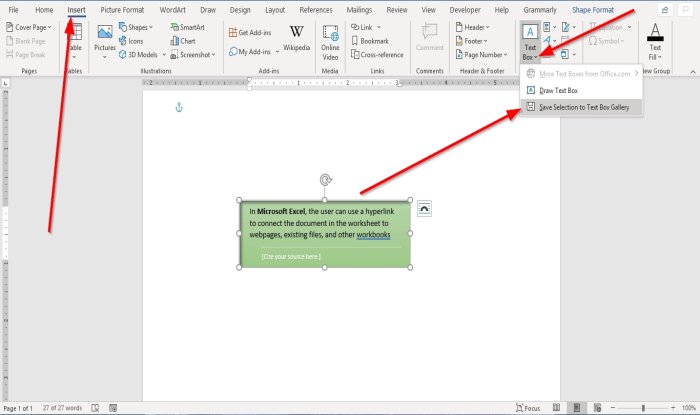
Go on the Insert tab in the Text group and select the Text Box button.
In the drop-down list, select Save Selection to Text Box Gallery.
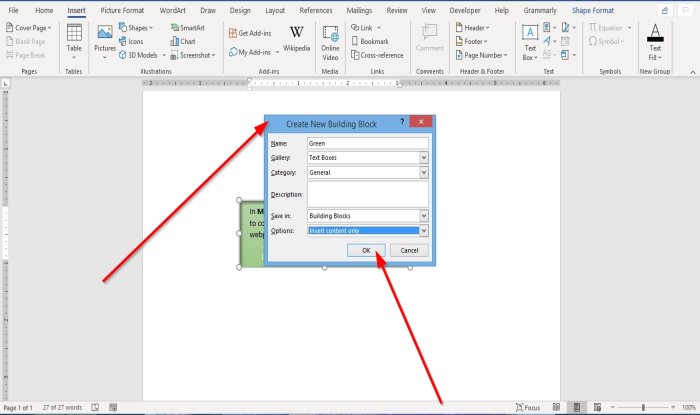
A Create New Building Block dialog box will appear, enter a name, select a category, or any changes you wish to make in the dialog box.
Click Ok.
If you want to see if the textbox you save is in the Building Block, click the Explore Quick Parts button in the Text group.
In the drop-down list, select Building Block Organizer.
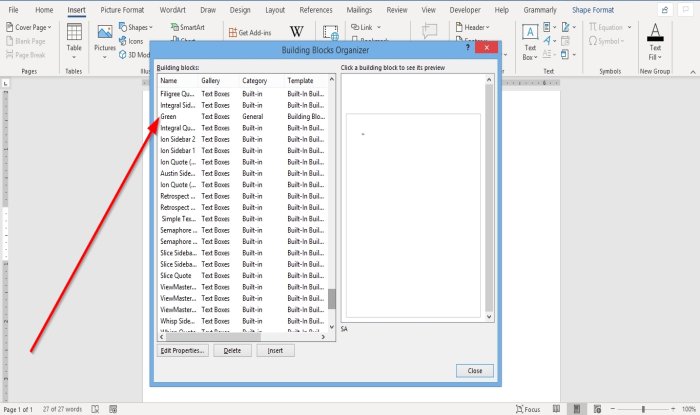
A Building Blocks Organizer dialog box will appear; Scroll down until you see the name of the text box you name.
I hope this helps; if you have questions, please comment below.
Read next: How to print hidden text in Word on Windows and Mac.
Add copy or remove a text box in word
A text box is an object you can add to your document that lets you put and type text anywhere in your file. Text boxes can be useful for drawing attention to specific text and can also be helpful when you need to move text around in your document.
Add a text box
-
Go to Insert > Text Box, and then select one of the pre-formatted text boxes from the list, select More Text Boxes from Office.com, or select Draw Text Box.
-
If you select Draw Text Box, click in the document, and then drag to draw the text box the size that you want.
-
To add text, select inside the box and type or your paste text.
If you aren’t using a mouse
-
Press and release ALT, N, and then press X.
-
Press the arrow keys to select the text box that you want, and then press ENTER.
-
Type the text that you want.
-
When you are finished typing and want to switch back to editing text in your document, press ESC.
Notes:
-
To format the text in the text box, select the text, and then use the formatting options in the Font group on the Home tab.
To format the text box itself, use the commands on the Format contextual tab, which appears under Drawing Tools when you select a text box.
-
To position the text box, click it, and then when the pointer becomes a
, drag the text box to a new location. -
You can also change or remove a border from a text box or shape.
-
If you have multiple text boxes, you can link them together so that text will flow from one box to another. Click one of the text boxes and on the Format tab, under Drawing Tools, in the Text group, click Create Link.
-
Copy a text box
-
Select the border of the text box that you want to copy.
-
Press Ctrl+C.
Note: Make sure the pointer is on the border of the text box, not inside it. If the pointer is inside, pressing Ctrl+C will copy the text, not the text box.
-
Select a location and press Ctrl+V to paste the text box.
Delete a text box
-
Select the border of the text box that you want to delete, and then press Delete.
Note: Make sure the pointer is on the border of the text box and not inside it. If the pointer is inside the box, pressing Delete will delete the text inside the text box, not the box.
Add a text box
-
Go to Insert > Text Box, and then select Draw Text Box.
-
Click or tap in the document, and drag to draw the text box the size that you want.
-
To add text to a text box, select inside the text box, and then type or paste text.
Notes:
-
If you have problems printing text boxes, go to File > Options > Display and under Printing Options, select Print drawings created in Word.
-
To format text in the text box, select the text, and then use the formatting options in the Font group on the Home tab.
-
To position the text box, select it, and then when the pointer becomes a
, drag the text box to a new location. -
You can also change or remove a text box or shape border.
-
If you have drawn multiple text boxes, you can link them together so that text will flow from one box to another. Select one of the text boxes and then under Drawing Tools, on the Format tab, in the Text group, click Create Link.
-
Copy a text box
-
Select the border of the text box that you want to copy.
-
Go to Home > Copy
.Make sure that the pointer is not inside the text box, but rather on the border of the text box. If the pointer is not on the border, pressing Copy will copy the text inside the text box and not the text box.
-
Go to Home and select Paste.
Delete a text box
-
Select the border of the text box and then press DELETE.
Make sure that the pointer is not inside the text box, but rather on the border of the text box. If the pointer is not on the border, pressing DELETE will delete the text inside the text box instead.
Add a text box
-
Go to Insert > Text Box and then select either Draw Text Box (where the text aligns horizontally on the page) or Vertical Text Box (where the text aligns vertically on the page).
-
Select in the document, and then drag to draw the text box the size that you want.
-
To add text to a text box, click or tap inside the text box, and then type or paste text.
-
To format the text in the text box, select it, and then Control + Click the text and select Font.
-
To add different effects to the text box, select the text box, and use the options on the Shape Format tab (such as changing the text direction or aligning the text at the top, middle or bottom of the text box).
-
To position the text box, select and hold it, and then when the pointer becomes a
, drag the text box to a new location.
-
Note: If you have drawn multiple text boxes, you can link them together so that text will flow from one box to another. You can only link an empty text box to the one that you’ve selected. To do this, select the text box that you want to link to another text box, and then go to Shape Format > Create Link.
Copy a text box
-
Select the text box you want to copy.
Make sure that the pointer is on the border of the text box and not inside the text box. If the pointer is not on the border, the text inside the text box is copied.
-
Press Control + Click, and then select Copy. Or, press
+ C. -
Select the location in your document where you want to paste the text box, press Control + Click, and then select Paste. Or, press
+ V.
Remove a text box
-
Select the border of the text box that you want to delete, and then press DELETE.
Make sure that the pointer is on the border of the text box and not inside the text box. If the pointer is not on the border, pressing DELETE will delete the text inside the text box.
Add a text box
-
Go to Insert > Text Box.
-
Click in your file where you’d like to insert the text box, hold your mouse button down, then drag to draw the text box the size that you want.
-
After you’ve drawn the text box click inside it to add text.
Copy a text box
-
Select the text box you want to copy.
Make sure that the pointer is on the border of the text box and not inside the text box. If the pointer is not on the border, the text inside the text box is copied.
-
Press Control + Click, and then select Copy. Or, press
+ C. -
Select the location in your document where you want to paste the text box, press Control + Click, and then select Paste. Or, press
+ V.
Remove a text box
-
Select the border of the text box that you want to delete, and then press DELETE.
Make sure that the pointer is on the border of the text box and not inside the text box. If the pointer is not on the border, pressing DELETE will delete the text inside the text box.