
Excel for Microsoft 365 Excel for the web Excel 2021 Excel 2019 Excel 2016 Excel 2013 Excel 2010 Excel 2007 More…Less
Occasionally, dates may become formatted and stored in cells as text. For example, you may have entered a date in a cell that was formatted as text, or the data might have been imported or pasted from an external data source as text.
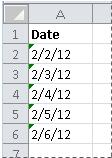
Dates that are formatted as text are left-aligned in a cell (instead of right-aligned). When Error Checking is enabled, text dates with two-digit years might also be marked with an error indicator:  .
.
Because Error Checking in Excel can identify text-formatted dates with two-digit years, you can use the automatic correction options to convert them to date-formatted dates. You can use the DATEVALUE function to convert most other types of text dates to dates.
If you import data into Excel from another source, or if you enter dates with two-digit years into cells that were previously formatted as text, you may see a small green triangle in the upper-left corner of the cell. This error indicator tells you that the date is stored as text, as shown in this example.
You can use the Error Indicator to convert dates from text to date format.
Notes: First, ensure that Error Checking is enabled in Excel. To do that:
-
Click File > Options > Formulas.
In Excel 2007, click the Microsoft Office button
 , then click Excel Options > Formulas.
 -
In Error Checking, check Enable background error checking. Any error that is found, will be marked with a triangle in the top-left corner of the cell.
-
Under Error checking rules, select Cells containing years represented as 2 digits.
 , then click Excel Options > Formulas.
Follow this procedure to convert the text-formatted date to a normal date:
-
On the worksheet, select any single cell or range of adjacent cells that has an error indicator in the upper-left corner. For more information, see Select cells, ranges, rows, or columns on a worksheet.
Tip: To cancel a selection of cells, click any cell on the worksheet.
-
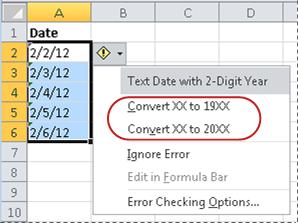
Click the error button that appears near the selected cell(s).
-
On the menu, click either Convert XX to 20XX or Convert XX to 19XX. If you want to dismiss the error indicator without converting the number, click Ignore Error.
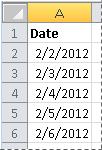
The text dates with two-digit years convert to standard dates with four-digit years.
Once you have converted the cells from text-formatted dates, you can change the way the dates appear in the cells by applying date formatting.

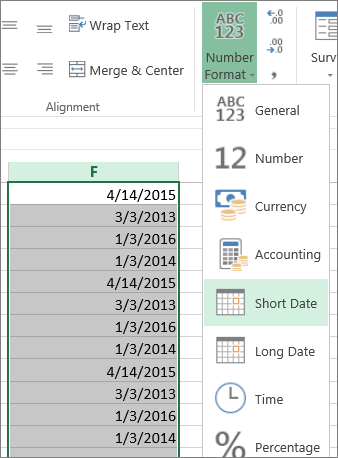
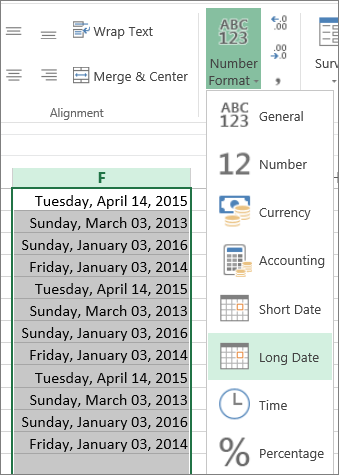
If your worksheet has dates that were perhaps imported or pasted that end up looking like a series of numbers like in the picture below, you probably would want to reformat them so they appear as either short or long dates. The date format will also be more useful if you want to filter, sort, or use it in date calculations.

-
Select the cell, cell range, or column that you want to reformat.
-
Click Number Format and pick the date format you want.
The Short Date format looks like this:
The Long Date includes more information like in this picture:
To convert a text date in a cell to a serial number, use the DATEVALUE function. Then copy the formula, select the cells that contain the text dates, and use Paste Special to apply a date format to them.
Follow these steps:
-
Select a blank cell and verify that its number format is General.
-
In the blank cell:
-
Enter =DATEVALUE(
-
Click the cell that contains the text-formatted date that you want to convert.
-
Enter )
-
Press ENTER, and the DATEVALUE function returns the serial number of the date that is represented by the text date.
What is an Excel serial number?
Excel stores dates as sequential serial numbers so that they can be used in calculations. By default, January 1, 1900, is serial number 1, and January 1, 2008, is serial number 39448 because it is 39,448 days after January 1, 1900.To copy the conversion formula into a range of contiguous cells, select the cell containing the formula that you entered, and then drag the fill handle
across a range of empty cells that matches in size the range of cells that contain text dates.
-
-
After you drag the fill handle, you should have a range of cells with serial numbers that corresponds to the range of cells that contain text dates.
-
Select the cell or range of cells that contains the serial numbers, and then on the Home tab, in the Clipboard group, click Copy.
Keyboard shortcut: You can also press CTRL+C.
-
Select the cell or range of cells that contains the text dates, and then on the Home tab, in the Clipboard group, click the arrow below Paste, and then click Paste Special.
-
In the Paste Special dialog box, under Paste, select Values, and then click OK.
-
On the Home tab, click the popup window launcher next to Number.
-
In the Category box, click Date, and then click the date format that you want in the Type list.
-
To delete the serial numbers after all of the dates are converted successfully, select the cells that contain them, and then press DELETE.
 across a range of empty cells that matches in size the range of cells that contain text dates.
Need more help?
You can always ask an expert in the Excel Tech Community or get support in the Answers community.
Need more help?
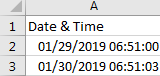
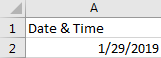
Sometimes we want to convert date and time format to date only format in excel for example convert 01/29/2019 06:51:03 to 01/29/2019, we can convert format by Formula or Format Settings. The two ways are easy to learn, so you can select one you like to convert date and time format.
Table of Contents
- Convert Date & Time to Date by Formula
- Convert Date & Time to Date by Format Settings
- Related Functions
Convert Date & Time to Date by Formula
Prepare a table with date and time, the format is MM/DD/YYYY HH/MM/SS.
If we want to convert them to date format, we can follow below steps:
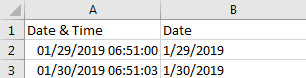
Step 1: In B2, enter the formula =MONTH(A2) & “/” & DAY(A2) & “/” & YEAR(A2).

Step 2: Click Enter to get the result. Verify that format is changed to date properly, time part is cleared.

Step 3: Drag the Fill Handle down to fill B3. Verify that B3 is changed to date format properly.
Convert Date & Time to Date by Format Settings
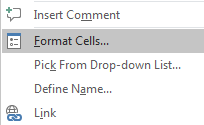
Step 1: On A2, right click to load menu, select Format Cells.
Step 2: In Format Cells window, under Number tab, in Category list, select Date; then in Type list select one format you want to show the date. Then the date format is displayed in Sample field.
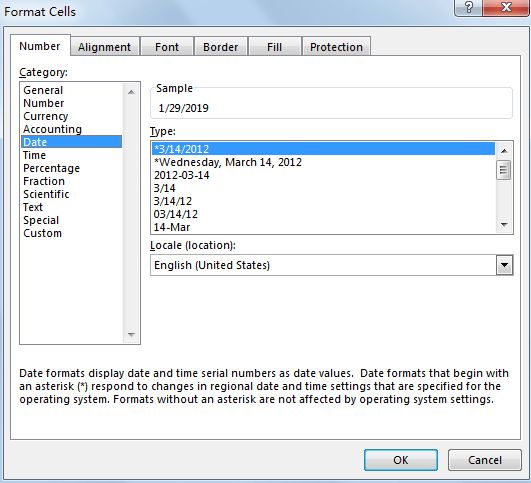
Step 3: Click OK. Verify that previous date and time is changed to date format.
- Excel YEAR function
The Excel YEAR function returns a four-digit year from a given date value, the year is returned as an integer ranging from 1900 to 9999. The syntax of the YEAR function is as below:=YEAR (serial_number)… - Excel MONTH function
The Excel MONTH function returns the month of a date represented by a serial number. And the month is an integer number from 1 to 12. The syntax of the MONTH function is as below:=MONTH (serial_number)… - Excel DAY function
The Excel DAY function returns a day of a date (from 1 to 31).The DAY function is a build-in function in Microsoft Excel and it is categorized as a DATE and TIME Function.The syntax of the DAY function is as below:= DAY (date_value)…
How do I convert the following text into {dd/mm/yyyy} format, in excel:
Dec 3, 2012
Nov 1, 2012
Oct 2, 2012
Sep 3, 2012
Aug 1, 2012
Jul 2, 2012
Jun 1, 2012
The expected results should be:-
3/12/2012 {dd/mm/yyyy}
1/11/2012
![]()
Ellesa
10.8k2 gold badges38 silver badges52 bronze badges
asked Mar 11, 2013 at 11:37
5
Try using «Text to columns» functionality to convert «in situ»
Select column of dates then use
Data > Text to columns > Next > Next > under «column data format» choose «Date» > in dropdown select MDY > OK
Now you should have valid dates which you can reformat any way you want, e.g. dd/mm/yyyy
See here
answered Mar 11, 2013 at 12:26
![]()
barry houdinibarry houdini
10.8k1 gold badge20 silver badges25 bronze badges
5
You can use Excel’s DATEVALUE function to convert each of the date strings to Excel date values, then format the cells as dates.
To format the cells, select them and right-click. Choose «Format cells» on the menu that appears, select Format Cells and choose a date format.
![]()
Ellesa
10.8k2 gold badges38 silver badges52 bronze badges
answered Mar 11, 2013 at 12:08
![]()
chuffchuff
3,4641 gold badge15 silver badges19 bronze badges
4
Your dates are already in a format that Excel should be able to recognize (MMM DD, YYYY), but sometimes importing data can lead to the cells being formatted as Text.
Here’s one way to fix your problem:
-
Type
0into a cell and copy it. You may also copy a blank cell. -
Select all the dates in your range. Right-click the cells > Paste Special > Add. Click OK.
Your dates should now look like these:
-
With your dates still selected, press Ctrl + F1 (assuming you’re on Windows) and then change the Number format to
mm/dd/yyyy,dd/mm/yyyyor whichever you prefer.


You can also try others ways to fix your dates, like:
- Copy the cells with the text dates and paste them into blank cells using Paste Special > Add.
- Highlight the cells with the dates, change the number format to
m/dd/yyyyand then manually pressF2for each cell. But this is too tedious. - As chuff mentioned above, use
DATEVALUE.
![]()
answered Mar 11, 2013 at 23:53
![]()
EllesaEllesa
10.8k2 gold badges38 silver badges52 bronze badges
If you are ok to store date in format like 20120312 Then you can use below formula
=DATE(LEFT(C7;4);MID(C7;5;2);RIGHT(C7;2))
Please try below
=TEXT(A1;"dd/mm/yyyy")
answered Mar 11, 2013 at 11:56
6
if you right click, you need to choose the format cells option, select the Custom option (all the way at the bottom), then in the Type box enter dd/mm/yyyy and click ok
answered Mar 11, 2013 at 11:48
![]()
7
This article will explain how to convert the date YYYYMMDD to DD/MM/YYYY. You can use one of two techniques:
- Formulae
- Excel tool
Convert YYYYMMDD date with formulas
With this technique, you must extract each part of a date with the text functions.
So if you have a YYYYMMDD format to transform, here are the steps to follow.

Step 1: Extract the year
=LEFT(A1,4) => 2018

Step 2: Extract the day
=RIGHT(A1,2) => 25

Step 3: Extract the month
This step is a little bit more difficult because you must extract 2 characters in the middle of your string. In that case, you use the function MID.
=MID(A1,5,2) => 12
You extract 2 characters from the 5th position

Step 4: Convert each part as a date
Now we are going to gather each part of the date to return a «real» date. To do this we use the DATE function.
=DATE(B1,D1,C1)

Convert YYYYMMDD without formula
But you can convert YYYYMMDD date, or any other date format, to your local date format with the tool Text to Columns. Normally this tool is used to split text with a delimiter.
1. Select your date(s) to convert

2. Go to the menu Data > Text to Columns

3. Skip the 2 first steps because there is no need to split your column 😉

4. The key to the technique is the 3rd step. With the dropdown list, you can select the type of date format that you have in your column.
So, in our example, we are going to select YMD because our dates are written YYYYMMDD.

5. Press Finish and that’s it 😃

Formula or not ?
Well, it depends on what you want to do. Of course, the technique with the tool «Text to Columns» is easier than the formulas.
But if your list will be updated often, creating formulas to perform the conversion is a good solution to avoid redoing the 5 steps.
When you enter a date into Microsoft Excel, the program will format it according to the default date settings. For example, if you want to enter the date February 6, 2020, the date could appear as 6-Feb, February 6, 2020, 6 February, or 02/06/2020, all depending on your settings. You may find that if you change a cell’s formatting to “Standard,” your date becomes stored as integers. For example, February 6, 2020 would become 43865, because Excel bases date formatting off of January 1, 1900. Each of these options are ways to format dates in Excel. To help with organizing data in Excel, learn about how to change the date format in Excel.
Choosing from the Date Format List
Formatting dates in Excel is easiest with the date formats list. Most date formats you may want to use can be found in this menu.
How to Change The Excel Date Format
- Select the cells you want to format
- Click Ctrl+1 or Command+1
- Select the “Numbers” tab
- From the categories, choose “Date”
- From the “Type” menu, select the date format you want

Creating a Custom Excel Date Format Option
To customize the date format, follow the steps for choosing an option from the date format list. Once you’ve selected the closest date format to what you want, you can customize it and change it.
- In the “Category” menu, select “Custom”
- The type you chose earlier will appear. The changes you make will only apply to your customized setting, not to the default
- In the “Type” box, enter the correct code to alter the date
- If you are trying to change the date display to DD/MM/YYYY, simply go to Format Cells > Custom
- Next, Enter DD/MM/YYYY in the available space given.

Converting Date Formats to Other Locales
If you are using dates for several different locations, you might need to convert to a different locale:
- Select the right cell or cells
- Hit Ctrl+1 or Command+1
- From the “Numbers” menu, select “Date”
- Underneath the “Type” menu, there’s a drop-down menu for “Locale”
- Select the right “Locale”

You can also customize the locale settings:
- Follow the steps for customizing a date
- Once you’ve created the right date format, you need to add the locale code to the front of the customized date format
- Choose the right locale codes. All locale codes are formatted as [$-###]. Some examples include:
- [$-409]—English, United States
- [$-804]—Chinese, China
- [$-807]—German, Switzerland
- Find more locale codes

Tips for Displaying Dates in Excel
Once you have the right date format, there are additional tips to help you figure out how to organize data in Excel for your datasets.
- Make sure the cell is wide enough to fit the entire date. If the cell isn’t wide enough, it will display #####. Double click on the right border of the column to make your column expand enough to display the date correctly.
- Change the date system if negative numbers appear as dates. Sometimes Excel will format any negative numbers as a date because of the hyphens. To fix this, select the cells, open the options menu, and select “Advanced.” On that menu, select “Use 1904 date system.”
- Use functions to work with today’s date. If you want a cell to always display the current date, use the formula =TODAY() and press ENTER.
- Convert imported text to dates. If you import from an external database, Excel will automatically register the dates as text. The display may look the same as if they were formatted as dates, but Excel will treat the two differently. You can use the DATEVALUE function to convert.
Why Your Date Format May Not Be Having Issues Changing
There are many reasons why you might be experiencing issues changing the date format in Excel. Listed are a few common difficulties.
- There could be text in the column, not dates (which are actually numbers).
- Dates are left-aligned
- An apostrophe could be included in the date
- A cell may be too wide.
- Negative numbers are formatted as dates
- Excel TEXT function is not being utilized.
Even with correctly formatted dates and displays, organizing data in Excel can only work as well as the data does. Messy data won’t lead to insights during analysis, however, it’s formatted.
Data Preparation with Excel
Formatting data, by doing things like formatting dates, is part of a larger process known as “data preparation,” or all of the steps required to clean, standardize, and prepare data for analytic use.
While data preparation is certainly possible in Excel, it becomes exponentially more difficult as analysts work with larger and more complex datasets. Instead, many of today’s analysts are investing in modern data preparation platforms like Designer Cloud to accelerate the overall data preparation process for data big or small.
Schedule a demo of Designer Cloud to see how it can improve your data preparation process, or try the platform for yourself by getting started with Designer Cloud today.