
In Microsoft Word and other word processor programs, pressing Ctrl+Home moves to the beginning of the document, if not already there. If you pressed Ctrl+Shift+Home, everything from the text cursors current position to the start of the document would be highlighted.
Contents
- 1 What does Ctrl home do in Microsoft Word?
- 2 What happens when you press Ctrl home?
- 3 Where is Ctrl home on laptop?
- 4 What are the Ctrl commands for word?
- 5 Why does Ctrl home not work?
- 6 What is the Home key in Mac?
- 7 What is the Home key in Excel?
- 8 What is control home on a Mac for Excel?
- 9 How do you use Ctrl home?
- 10 What does home button look like?
- 11 How do I save using Ctrl?
- 12 What are the 20 shortcut keys?
- 13 What does Ctrl Z do in Word?
- 14 How do you go to home on a Mac?
- 15 How do you get the home button on the 60 keyboard?
- 16 Where is control home in Excel?
- 17 What are the home keys on a keyboard?
- 18 What does Alt F9 do in Excel?
- 19 What is alt home?
- 20 What are home keys Class 9?
Ctrl+Home moves the cursor to the Home position—that is, the beginning of the document.
What happens when you press Ctrl home?
Ctrl + Home – Pressing Ctrl and Home at the same time takes you to the very beginning of the document, text, worksheet, or page. With languages that write left-to-right, pressing Ctrl+Home moves to the top-left of the page.
Where is Ctrl home on laptop?
The Home key is commonly found on desktop and laptop keyboards. The key has the opposite effect of the End key. In limited-size keyboards where the Home key is missing the same functionality can be reached via the key combination of Fn + ← . Its standard symbol ⇱ from ISO/IEC 9995-7, ie.
What are the Ctrl commands for word?
General Program Shortcuts
- Ctrl+N: Create a new document.
- Ctrl+O: Open an existing document.
- Ctrl+S: Save a document.
- F12: Open the Save As dialog box.
- Ctrl+W: Close a document.
- Ctrl+Z: Undo an action.
- Ctrl+Y: Redo an action.
- Alt+Ctrl+S: Split a window or remove the split view.
Why does Ctrl home not work?
If you are trying to use the Home/7 key on the number keypad, you must be sure that Number Lock is not activated; even then, on some keyboards, this keyboard combination may not be recognized in the simulation. Therefore, the best practice is to use the dedicated Home key on your keyboard.
What is the Home key in Mac?
The “Home” button on a Mac keyboard: Fn + Left Arrow
This is the exact same function as hitting the “Home” button on a Windows PC.
What is the Home key in Excel?
The keyboard’s Home key by itself takes you to the cell in column A of your active cell’s row, or with Ctrl+Home takes you to cell A1. If Freeze Panes is being used, Home takes you to the Freeze Panes column of the active cell’s row, and Ctrl+Home takes you to the Freeze Panes’ intersecting cell.
What is control home on a Mac for Excel?
Using a laptop or other ‘condensed’ keyboard? If so, in order to get the left arrow key to work as the Home key you need to use the fn key as well, so the stroke would be: fn+Cmd+Left Arrow or fn+Ctrl+Left Arrow – either will work.
How do you use Ctrl home?
Alternatively referred to as Control Home and C-Home, Ctrl+Home is a shortcut key that moves the cursor to the end of a document. To use the keyboard shortcut Ctrl+Home, press and hold either Ctrl key on the keyboard and while continuing to hold, press the Home key with either hand.
What does home button look like?
The Home key is usually a round or square software button situated in the middle of your navigation bar.
How do I save using Ctrl?
Save as is located in the file tab of the worksheet in excel but there are also some keyboard shortcuts of using it, one being on the quick access tool bar or we can press F12 and display the save as option or we press the keyboard shortcut CTRL + S which opens the save as dialog box for us to save the file in the
What are the 20 shortcut keys?
Basic Windows keyboard shortcuts
- Ctrl+Z: Undo. No matter what program you’re running, Ctrl+Z will roll back your last action.
- Ctrl+W: Close.
- Ctrl+A: Select all.
- Alt+Tab: Switch apps.
- Alt+F4: Close apps.
- Win+D: Show or hide the desktop.
- Win+left arrow or Win+right arrow: Snap windows.
- Win+Tab: Open the Task view.
What does Ctrl Z do in Word?
To reverse your last action, press CTRL+Z. You can reverse more than one action. To reverse your last Undo, press CTRL+Y. You can reverse more than one action that has been undone.
How do you go to home on a Mac?
Click Finder in the Dock to make sure it’s the active application. Push command+shift+H for home. Or, push command+shift+G for ‘go’ and enter ~/ to go to your home folder. Or in the top menu bar, click on Go > Home.
How do you get the home button on the 60 keyboard?
For example, you can still get Home by pressing Fn-Pn-semicolon (press and hold both Fn and Pn, then press the semicolon key). However don’t worry, you will not have to do that to get Home, because it will be on Fn-P.
Where is control home in Excel?
Useful Excel keyboard shortcuts
| Action | Windows key combination | Mac key combination |
|---|---|---|
| GENERAL SHORTCUTS | ||
| Move to the cell to the left | Shift-Tab | left arrow |
| Move to the beginning of a row | Home | Home or Fn-left arrow |
| Move to the beginning of a worksheet | Ctrl-Home | Control-Home or Control-Fn-Left arrow |
What are the home keys on a keyboard?
The home keys are where you place your fingers when you are learning to type. The home keys include F, D, S, and A on the left of the keyboard, and J, K, L, and ; (semicolon) on the right of the keyboard.
What does Alt F9 do in Excel?
Ctrl+Alt+F9: Calculates all worksheets in all open workbooks, regardless of whether they have changed since the last calculation.
What is alt home?
Alt+Home is a keyboard shortcut most often used to open the homepage in the active tab.Alt+Home in Internet browsers. Alt+Home in Microsoft Word. Related keyboard shortcuts and keys.
What are home keys Class 9?
Home key is the one which is used to return the cursor to the beginning of the line. This happens in documents only where we can edit. In cases where the documents cannot be edited, the home key is used to return the cursor to the beginning of the document.
Updated: 03/13/2021 by

Alternatively written as Control+Home and C-Home, Ctrl+Home is a keyboard shortcut that moves the cursor to the beginning of a document.
How to use the Ctrl+Home keyboard shortcut
To use this keyboard shortcut, press and hold either Ctrl key, and while continuing to hold, press the Home key.
Ctrl+Home in an Internet browser
In all major Internet browsers (e.g., Chrome, Edge, Firefox, IE, Opera), pressing Ctrl+Home scrolls to the beginning of the web page, if not already there.
- Firefox shortcuts
- Google Chrome shortcuts
- Internet Explorer shortcuts
Ctrl+Home in Excel and other spreadsheet programs
In Microsoft Excel, pressing Ctrl+Home moves to the A1 cell.
Tip
If you pressed Ctrl+Shift+Home, everything from the text cursor’s current position to A1 would be highlighted.
- Full list of Excel shortcuts.
Ctrl+Home in Word and other word processors
In Microsoft Word and other word processor programs, pressing Ctrl+Home moves to the beginning of the document, if not already there.
Tip
If you pressed Ctrl+Shift+Home, everything from the text cursor’s current position to the start of the document would be highlighted.
- Full list of Microsoft Word shortcuts.
Ctrl+Home in command line edit command
When editing a file using the edit command in an MS-DOS or Windows command line, pressing Ctrl+Home scrolls to the top of the document.
Below are links to related keyboard shortcuts and individual key pages.
- Alt+Home
- Ctrl
- Home
Ctrl, Home key, Keyboard shortcut, Keyboard terms
This article describes the keyboard shortcuts and function keys in Word for Windows.
Notes:
-
To quickly find a shortcut in this article, you can use Search. Press Ctrl+F, and then type your search words.
-
If an action that you use often does not have a shortcut key, you can record a macro to create one. For instructions, go to Create or run a macro or Use a screen reader to create a macro in Word.
-
If you are using Microsoft Word Starter, be aware that not all the features listed for Word are supported in Word Starter. For more information about the features available in Word Starter, go to Word features that are not fully supported in Word Starter.
-
Get these keyboard shortcuts in a Word document at this link: Word 2016 for Windows keyboard shortcuts.
In this topic
-
Frequently used shortcuts
-
Ribbon keyboard shortcuts
-
Navigate the document
-
Preview and print documents
-
Select text and graphics
-
Edit text and graphics
-
Work with web content
-
Work with tables
-
Review a document
-
Work with references, citations, and indexing
-
Work with mail merge and fields
-
Work with text in other languages
-
Work with document views
-
Use function key shortcuts
Frequently used shortcuts
This table shows the most frequently used shortcuts in Microsoft Word.
|
To do this |
Press |
|---|---|
|
Open a document. |
Ctrl+O |
|
Create a new document. |
Ctrl+N |
|
Save the document. |
Ctrl+S |
|
Close the document. |
Ctrl+W |
|
Cut the selected content to the Clipboard. |
Ctrl+X |
|
Copy the selected content to the Clipboard. |
Ctrl+C |
|
Paste the contents of the Clipboard. |
Ctrl+V |
|
Select all document content. |
Ctrl+A |
|
Apply bold formatting to text. |
Ctrl+B |
|
Apply italic formatting to text. |
Ctrl+I |
|
Apply underline formatting to text. |
Ctrl+U |
|
Decrease the font size by 1 point. |
Ctrl+Left bracket ([) |
|
Increase the font size by 1 point. |
Ctrl+Right bracket (]) |
|
Center the text. |
Ctrl+E |
|
Align the text to the left. |
Ctrl+L |
|
Align the text to the right. |
Ctrl+R |
|
Cancel a command. |
Esc |
|
Undo the previous action. |
Ctrl+Z |
|
Redo the previous action, if possible. |
Ctrl+Y |
|
Adjust the zoom magnification. |
Alt+W, Q, then use the Tab key in the Zoom dialog box to go to the value you want. |
|
Split the document window. |
Ctrl+Alt+S |
|
Remove the document window split. |
Alt+Shift+C or Ctrl+Alt+S |
Top of Page
Close a task pane
To close a task pane using the keyboard:
-
Press F6 until the task pane is selected.
-
Press Ctrl+Spacebar.
-
Use the arrow keys to select Close, and then press Enter.
Ribbon keyboard shortcuts
The ribbon groups related options on tabs. For example, on the Home tab, the Font group includes the Font Color option. Press the Alt key to display the ribbon shortcuts, called Key Tips, as letters in small images next to the tabs and options as shown in the image below.

Note: Add-ins and other programs can add new tabs to the ribbon and might provide access keys for those tabs.
You can combine the Key Tips letters with the Alt key to make shortcuts called Access Keys for the ribbon options. For example, press Alt+H to open the Home tab, and Alt+Q to move to the Tell Me or Search field. Press Alt again to see Key Tips for the options for the selected tab.
Depending on the version of Microsoft 365 you are using, the Search text field at the top of the app window might be called Tell Me instead. Both offer a largely similar experience, but some options and search results can vary.
In Office 2013 and Office 2010, most of the old Alt key menu shortcuts still work, too. However, you need to know the full shortcut. For example, press Alt, and then press one of the old menu keys E (Edit), V (View), I (Insert), and so on. A notification pops up saying you’re using an access key from an earlier version of Microsoft 365. If you know the entire key sequence, go ahead and use it. If you don’t know the sequence, press Esc and use Key Tips instead.
Use the Access Keys for ribbon tabs
To go directly to a tab on the ribbon, press one of the following access keys. Additional tabs might appear depending on your selection in the document.
|
To do this |
Press |
|---|---|
|
Move to the Tell Me or Search field on the Ribbon to search for assistance or Help content. |
Alt+Q, then enter the search term. |
|
Open the File page to use Backstage view. |
Alt+F |
|
Open the Home tab to use common formatting commands, paragraph styles, and the Find tool. |
Alt+H |
|
Open the Insert tab to insert tables, pictures and shapes, headers, or text boxes. |
Alt+N |
|
Open the Design tab to use themes, colors, and effects, such as page borders. |
Alt+G |
|
Open the Layout tab to work with page margins, page orientation, indentation, and spacing. |
Alt+P |
|
Open the References tab to add a table of contents, footnotes, or a table of citations. |
Alt+S |
|
Open the Mailings tab to manage Mail Merge tasks and to work with envelopes and labels. |
Alt+M |
|
Open the Review tab to use Spell Check, set proofing languages, and to track and review changes to your document. |
Alt+R |
|
Open the View tab to choose a document view or mode, such as Read Mode or Outline view. You can also set the zoom magnification and manage multiple document windows. |
Alt+W |
Top of Page
Work in the ribbon with the keyboard
|
To do this |
Press |
|---|---|
|
Select the active tab on the ribbon and activate the access keys. |
Alt or F10. To move to a different tab, use access keys or the arrow keys. |
|
Move the focus to commands on the ribbon. |
Tab key or Shift+Tab |
|
Move between command groupings on the ribbon. |
Ctrl+Left or Right arrow key |
|
Move among the items on the ribbon. |
Arrow keys |
|
Show the tooltip for the ribbon element currently in focus. |
Ctrl+Shift+F10 |
|
Activate the selected button. |
Spacebar or Enter |
|
Open the list for the selected command. |
Down arrow key |
|
Open the menu for the selected button. |
Alt+Down arrow key |
|
When a menu or submenu is open, move to the next command. |
Down arrow key |
|
Expand or collapse the ribbon. |
Ctrl+F1 |
|
Open the context menu. |
Shift+F10 Or, on a Windows keyboard, the Windows Menu key (between the right Alt and right Ctrl keys) |
|
Move to the submenu when a main menu is open or selected. |
Left arrow key |
Top of Page
Navigate the document
|
To do this |
Press |
|---|---|
|
Move the cursor one word to the left. |
Ctrl+Left arrow key |
|
Move the cursor one word to the right. |
Ctrl+Right arrow key |
|
Move the cursor up by one paragraph. |
Ctrl+Up arrow key |
|
Move the cursor down by one paragraph. |
Ctrl+Down arrow key |
|
Move the cursor to the end of the current line. |
End |
|
Move the cursor to the beginning the current line. |
Home |
|
Move the cursor to the top of the screen. |
Ctrl+Alt+Page up |
|
Move the cursor to the bottom of the screen. |
Ctrl+Alt+Page down |
|
Move the cursor by scrolling the document view up by one screen. |
Page up |
|
Move the cursor by scrolling the document view down by one screen. |
Page down |
|
Move the cursor to the top of the next page. |
Ctrl+Page down |
|
Move the cursor to the top of the previous page. |
Ctrl+Page up |
|
Move the cursor to the end of the document. |
Ctrl+End |
|
Move the cursor to the beginning of the document. |
Ctrl+Home |
|
Move the cursor to the location of the previous revision. |
Shift+F5 |
|
Move the cursor to the location of the last revision made before the document was last closed. |
Shift+F5, immediately after opening the document. |
|
Cycle through floating shapes, such as text boxes or images. |
Ctrl+Alt+5, and then the Tab key repeatedly |
|
Exit the floating shape navigation and return to the normal navigation. |
Esc |
|
Display the Navigation task pane, to search within the document content. |
Ctrl+F |
|
Display the Go To dialog box, to navigate to a specific page, bookmark, footnote, table, comment, graphic, or other location. |
Ctrl+G |
|
Cycle through the locations of the four previous changes made to the document. |
Ctrl+Alt+Z |
Top of Page
Navigate the document using the browse options in Word 2007 and 2010
In Word 2007 and 2010, you can browse the document by various types of objects, such as fields, footnotes, headings, and graphics.
|
To do this |
Press |
|---|---|
|
Open the list of browse options to define the type of object to browse by. |
Ctrl+Alt+Home |
|
Move to the previous object of the defined type. |
Ctrl+Page up |
|
Move to the next object of the defined type. |
Ctrl+Page down |
Top of Page
Preview and print documents
|
To do this |
Press |
|---|---|
|
Print the document. |
Ctrl+P |
|
Switch to print preview. |
Ctrl+Alt+I |
|
Move around the preview page when zoomed in. |
Arrow keys |
|
Move by one preview page when zoomed out. |
Page up or Page down |
|
Move to the first preview page when zoomed out. |
Ctrl+Home |
|
Move to the last preview page when zoomed out. |
Ctrl+End |
Top of Page
Select text and graphics
|
To do this |
Press |
|---|---|
|
Select text. |
Shift+Arrow keys |
|
Select the word to the left. |
Ctrl+Shift+Left arrow key |
|
Select the word to the right. |
Ctrl+Shift+Right arrow key |
|
Select from the current position to the beginning of the current line. |
Shift+Home |
|
Select from the current position to the end of the current line. |
Shift+End |
|
Select from the current position to the beginning of the current paragraph. |
Ctrl+Shift+Up arrow key |
|
Select from the current position to the end of the current paragraph. |
Ctrl+Shift+Down arrow key |
|
Select from the current position to the top of the screen. |
Shift+Page up |
|
Select from the current position to the bottom of the screen. |
Shift+Page down |
|
Select from the current position to the beginning of the document. |
Ctrl+Shift+Home |
|
Select from the current position to the end of the document. |
Ctrl+Shift+End |
|
Select from the current position to the bottom of the window. |
Ctrl+Alt+Shift+Page down |
|
Select all document content. |
Ctrl+A |
Top of Page
Extend a selection
|
To do this |
Press |
|---|---|
|
Start extending the selection. |
F8 In the extend selection mode, clicking a location in the document extends the current selection to that location. |
|
Select the nearest character to the left or right. |
F8, Left or Right arrow key |
|
Expand the selection. |
F8 repeatedly to expand the selection to the entire word, sentence, paragraph, section, and document. |
|
Reduce the selection. |
Shift+F8 |
|
Select a vertical block of text. |
Ctrl+Shift+F8, then press the arrow keys |
|
Stop extending the selection. |
Esc |
Top of Page
Edit text and graphics
|
To do this |
Press |
|---|---|
|
Delete one word to the left. |
Ctrl+Backspace |
|
Delete one word to the right. |
Ctrl+Delete |
|
Open the Clipboard task pane and enable the Office Clipboard, which allows you to copy and paste content between Microsoft 365 apps. |
Alt+H, F, O |
|
Cut the selected content to the Clipboard. |
Ctrl+X |
|
Copy the selected content to the Clipboard. |
Ctrl+C |
|
Paste the contents of the Clipboard. |
Ctrl+V |
|
Move the selected content to a specific location. |
F2, move the cursor to the destination, and then press Enter. |
|
Copy the selected content to a specific location. |
Shift+F2, move the cursor to the destination, and then press Enter. |
|
Define an AutoText block with the selected content. |
Alt+F3 |
|
Insert an AutoText block. |
The first few characters of the AutoText block, and then press Enter when the ScreenTip appears. |
|
Cut the selected content to the Spike. |
Ctrl+F3 |
|
Paste the contents of the Spike. |
Ctrl+Shift+F3 |
|
Copy the selected formatting. |
Ctrl+Shift+C |
|
Paste the selected formatting. |
Ctrl+Shift+V |
|
Copy the header or footer used in the previous section of the document. |
Alt+Shift+R |
|
Display the Replace dialog box, to find and replace text, specific formatting, or special items. |
Ctrl+H |
|
Display the Object dialog box, to insert a file object into the document. |
Alt+N, J, J |
|
Insert a SmartArt graphic. |
Alt+N, M |
|
Insert a WordArt graphic. |
Alt+N, W |
Top of Page
Align and format paragraphs
|
To do this |
Press |
|---|---|
|
Center the paragraph. |
Ctrl+E |
|
Justify the paragraph. |
Ctrl+J |
|
Align the paragraph to the left. |
Ctrl+L |
|
Align the paragraph to the right. |
Ctrl+R |
|
Indent the paragraph. |
Ctrl+M |
|
Remove a paragraph indent. |
Ctrl+Shift+M |
|
Create a hanging indent. |
Ctrl+T |
|
Remove a hanging indent. |
Ctrl+Shift+T |
|
Remove paragraph formatting. |
Ctrl+Q |
|
Apply single spacing to the paragraph. |
Ctrl+1 |
|
Apply double spacing to the paragraph. |
Ctrl+2 |
|
Apply 1.5-line spacing to the paragraph. |
Ctrl+5 |
|
Add or remove space before the paragraph. |
Ctrl+0 (zero) |
|
Enable AutoFormat. |
Ctrl+Alt+K |
|
Apply the Normal style. |
Ctrl+Shift+N |
|
Apply the Heading 1 style. |
Ctrl+Alt+1 |
|
Apply the Heading 2 style. |
Ctrl+Alt+2 |
|
Apply the Heading 3 style. |
Ctrl+Alt+3 |
|
Display the Apply Styles task pane. |
Ctrl+Shift+S |
|
Display the Styles task pane. |
Ctrl+Alt+Shift+S |
Top of Page
Format characters
|
To do this |
Press |
|---|---|
|
Display the Font dialog box. |
Ctrl+D or Ctrl+Shift+F |
|
Increase the font size. |
Ctrl+Shift+Right angle bracket (>) |
|
Decrease the font size. |
Ctrl+Shift+Left angle bracket (<) |
|
Increase the font size by 1 point. |
Ctrl+Right bracket (]) |
|
Decrease the font size by 1 point. |
Ctrl+Left bracket ([) |
|
Switch the text between upper case, lower case, and title case. |
Shift+F3 |
|
Change the text to all upper case. |
Ctrl+Shift+A |
|
Hide the selected text. |
Ctrl+Shift+H |
|
Apply bold formatting. |
Ctrl+B |
|
Add a bulleted list. |
Ctrl+Shift+L |
|
Apply underline formatting. |
Ctrl+U |
|
Apply underline formatting to the words, but not the spaces. |
Ctrl+Shift+W |
|
Apply double-underline formatting. |
Ctrl+Shift+D |
|
Apply italic formatting. |
Ctrl+I |
|
Apply small caps formatting. |
Ctrl+Shift+K |
|
Apply subscript formatting. |
Ctrl+Equal sign ( = ) |
|
Apply superscript formatting. |
Ctrl+Shift+Plus sign (+) |
|
Remove manual character formatting. |
Ctrl+Spacebar |
|
Change the selected text to the Symbol font. |
Ctrl+Shift+Q |
Top of Page
Manage text formatting
|
To do this |
Press |
|---|---|
|
Display all nonprinting characters. |
Ctrl+Shift+8 (do not use the numeric keypad) |
|
Display the Reveal Formatting task pane. |
Shift+F1 |
Top of Page
Insert special characters
|
To do this |
Press |
|---|---|
|
Insert a line break. |
Shift+Enter |
|
Insert a page break. |
Ctrl+Enter |
|
Insert a column break. |
Ctrl+Shift+Enter |
|
Insert an em dash (—). |
Ctrl+Alt+Minus sign (on the numeric keypad) |
|
Insert an en dash (–). |
Ctrl+Minus sign (on the numeric keypad) |
|
Insert an optional hyphen. |
Ctrl+Hyphen (-) |
|
Insert a nonbreaking hyphen. |
Ctrl+Shift+Hyphen (-) |
|
Insert a nonbreaking space. |
Ctrl+Shift+Spacebar |
|
Insert a copyright symbol (©). |
Ctrl+Alt+C |
|
Insert a registered trademark symbol (®). |
Ctrl+Alt+R |
|
Insert a trademark symbol (™). |
Ctrl+Alt+T |
|
Insert an ellipsis (…) |
Ctrl+Alt+Period (.) |
|
Insert the Unicode character for the specified Unicode (hexadecimal) character code. For example, to insert the euro currency symbol ( Tip: To find out the Unicode character code for a selected character, press Alt+X. |
The character code, then press Alt+X |
|
Insert the ANSI character for the specified ANSI (decimal) character code. For example, to insert the euro currency symbol, hold down Alt and press 0128 on the numeric keypad. |
Alt+the character code (on the numeric keypad) |
 ), type
 Top of Page
Work with web content
|
To do this |
Press |
|---|---|
|
Insert a hyperlink. |
Ctrl+K |
|
Go back one page. |
Alt+Left arrow key |
|
Go forward one page. |
Alt+Right arrow key |
|
Refresh the page. |
F9 |
Top of Page
Work with tables
Move around in a table
|
To do this |
Press |
|---|---|
|
Move to the next cell in the row and select its content. |
Tab key |
|
Move to the previous cell in the row and select its content. |
Shift+Tab |
|
Move to the first cell in the row. |
Alt+Home |
|
Move to the last cell in the row. |
Alt+End |
|
Move to the first cell in the column. |
Alt+Page up |
|
Move to the last cell in the column. |
Alt+Page down |
|
Move to the previous row. |
Up arrow key |
|
Move to the next row. |
Down arrow key |
|
Move one row up. |
Alt+Shift+Up arrow key |
|
Move one row down. |
Alt+Shift+Down arrow key |
Top of Page
Select table content
|
To do this |
Press |
|---|---|
|
Select the content in the next cell. |
Tab key |
|
Select the content in the previous cell. |
Shift+Tab |
|
Extend a selection to adjacent cells. |
Shift+Arrow keys |
|
Select a column. |
Select the top or bottom cell of the column, and then press Shift+Up or Down arrow key |
|
Select a row. |
Select the first or last cell in the row, and then press Shift+Alt+End or Home. |
|
Select the whole table. |
Alt+5 on the numeric keypad, with Num Lock switched off |
Top of Page
Insert paragraphs and tab characters in a table
|
To do this |
Press |
|---|---|
|
Insert a new paragraph in a cell. |
Enter |
|
Insert a tab character in a cell. |
Ctrl+Tab |
Top of Page
Review a document
|
To do this |
Press |
|---|---|
|
Insert a comment. |
Ctrl+Alt+M |
|
Turn change tracking on or off. |
Ctrl+Shift+E |
|
Close the Reviewing Pane. |
Alt+Shift+C |
Top of Page
Work with references, citations, and indexing
Use the following shortcuts to add references to your document, such as a table of contents, footnotes, and citations.
|
To do this |
Press |
|---|---|
|
Mark a table of contents entry. |
Alt+Shift+O |
|
Mark a table of authorities entry (citation). |
Alt+Shift+I |
|
Choose citation options. |
Alt+Shift+F12, Spacebar |
|
Mark an index entry. |
Alt+Shift+X |
|
Insert a footnote. |
Ctrl+Alt+F |
|
Insert an endnote. |
Ctrl+Alt+D |
|
Go to the next footnote. |
Alt+Shift+Right angle bracket (>) |
|
Go to the previous footnote. |
Alt+Shift+Left angle bracket (<) |
Top of Page
Work with mail merge and fields
To use the following keyboard shortcuts, the Mailings ribbon tab must be selected. To select the Mailings tab, press Alt+M.
Perform a mail merge
|
To do this |
Press |
|---|---|
|
Preview the mail merge. |
Alt+Shift+K |
|
Merge a document. |
Alt+Shift+N |
|
Print the merged document. |
Alt+Shift+M |
|
Edit a mail-merge data document. |
Alt+Shift+E |
|
Insert a merge field. |
Alt+Shift+F |
Top of Page
Work with fields
|
To do this |
Press |
|---|---|
|
Insert a DATE field. |
Alt+Shift+D |
|
Insert a LISTNUM field. |
Ctrl+Alt+L |
|
Insert a PAGE field. |
Alt+Shift+P |
|
Insert a TIME field. |
Alt+Shift+T |
|
Insert an empty field. |
Ctrl+F9 |
|
Update the linked information in a Word source document. |
Ctrl+Shift+F7 |
|
Update the selected fields. |
F9 |
|
Unlink a field. |
Ctrl+Shift+F9 |
|
Switch between a selected field code and its result. |
Shift+F9 |
|
Switch between all field codes and their results. |
Alt+F9 |
|
Run GOTOBUTTON or MACROBUTTON from a field displaying field results. |
Alt+Shift+F9 |
|
Go to the next field. |
F11 |
|
Go to the previous field. |
Shift+F11 |
|
Lock a field. |
Ctrl+F11 |
|
Unlock a field. |
Ctrl+Shift+F11 |
Top of Page
Work with text in other languages
Set the proofing language
Every document has a default language, typically the same default language as your computer’s operating system. If your document also contains words or phrases in a different language, it’s a good idea to set the proofing language for those words. This not only makes it possible to check spelling and grammar for those phrases, but it also enables assistive technologies like screen readers to handle them appropriately.
|
To do this |
Press |
|---|---|
|
Display the Language dialog box to set the proofing language. |
Alt+R, U, L |
|
Set default languages. |
Alt+R, L |
Top of Page
Insert international characters
To type a lowercase character by using a key combination that includes the Shift key, hold down the Ctrl+Shift+symbol keys simultaneously, and then release them before you type the letter.
Note: If you type extensively in another language, you might prefer to switch to a different keyboard instead.
|
To insert this |
Press |
|---|---|
|
à, è, ì, ò, ù, |
Ctrl+Grave accent (`), the letter |
|
á, é, í, ó, ú, ý |
Ctrl+Single quotation mark (‘), the letter |
|
â, ê, î, ô, û |
Ctrl+Shift+Caret (^), the letter |
|
ã, ñ, õ |
Ctrl+Shift+Tilde (~), the letter |
|
ä, ë, ï, ö, ü, ÿ, |
Ctrl+Shift+Colon (:), the letter |
|
å, Å |
Ctrl+Shift+At sign (@), a or A |
|
æ, Æ |
Ctrl+Shift+Ampersand (&), a or A |
|
œ, Œ |
Ctrl+Shift+Ampersand (&), o or O |
|
ç, Ç |
Ctrl+Comma (,), c or C |
|
ð, Ð |
Ctrl+Single quotation mark (‘), d or D |
|
ø, Ø |
Ctrl+Forward slash (/), o or O |
|
¿ |
Ctrl+Alt+Shift+Question mark (?) |
|
¡ |
Ctrl+Alt+Shift+Exclamation point (!) |
|
ß |
Ctrl+Shift+Ampersand (&), s |
Top of Page
Use Input Method Editors for East Asian languages
|
To do this |
Press |
|---|---|
|
Switch to the Japanese Input Method Editor (IME) for a 101-key keyboard, if available. |
Alt+Tilde (~) |
|
Switch to the Korean Input Method Editor (IME) for a 101-key keyboard, if available. |
Right Alt |
|
Switch to the Chinese Input Method Editor (IME) for a 101-key keyboard, if available. |
Ctrl+Spacebar |
Top of Page
Work with document views
Word offers several different views of a document. Each view makes it easier to do certain tasks. For example, Read Mode enables you view the document as a horizontal sequence of pages, which you can quickly browse using the Left and Right arrow keys.
Switch the document view
|
To do this |
Press |
|---|---|
|
Switch to the Read Mode view. In Word 2007 and 2010, this is called Full Screen Reading view. |
Alt+W, F |
|
Switch to the Print Layout view. |
Ctrl+Alt+P |
|
Switch to the Outline view. |
Ctrl+Alt+O |
|
Switch to the Draft view. |
Ctrl+Alt+N |
Top of Page
Outline a document
These shortcuts only apply when the document is in the Outline view.
|
To do this |
Press |
|---|---|
|
Promote a paragraph. |
Alt+Shift+Left arrow key |
|
Demote a paragraph. |
Alt+Shift+Right arrow key |
|
Demote the paragraph to body text. |
Ctrl+Shift+N |
|
Move the selected paragraphs up. |
Alt+Shift+Up arrow key |
|
Move the selected paragraphs down. |
Alt+Shift+Down arrow key |
|
Expand the text under a heading. |
Alt+Shift+Plus sign (+) |
|
Collapse the text under a heading. |
Alt+Shift+Minus sign (-) |
|
Expand or collapse all text or headings. |
Alt+Shift+A |
|
Hide or display the character formatting. |
Forward slash (/) (on the numeric keypad) |
|
Switch between showing the first line of body text and showing all body text. |
Alt+Shift+L |
|
Show all headings with the Heading 1 style. |
Alt+Shift+1 |
|
Show all headings with the specified heading level. |
Alt+Shift+Heading level number |
|
Insert a tab character. |
Ctrl+Tab |
Top of Page
Move through the document in Read Mode
|
To do this |
Press |
|---|---|
|
Move to the beginning of the document. |
Home |
|
Move to the end of the document. |
End |
|
Go to a specific page. |
Type the page number, then press Enter |
|
Exit Read Mode. |
Esc |
Top of Page
Use function key shortcuts
|
Key |
Description |
|---|---|
|
F1 |
|
|
F2 |
|
|
F3 |
|
|
F4 |
|
|
F5 |
|
|
F6 |
|
|
F7 |
|
|
F8 |
|
|
F9 |
|
|
F10 |
|
|
F11 |
|
|
F12 |
|
Top of Page
See also
Word help center
Basic tasks using a screen reader with Word
Use a screen reader to explore and navigate Word
Screen reader support for Word
This article describes the keyboard shortcuts and function keys in Word for Mac.
Notes:
-
The settings in some versions of the Mac operating system (OS) and some utility applications might conflict with keyboard shortcuts and function key operations in Microsoft 365 for Mac. For information about changing the key assignment for a keyboard shortcut, see Mac Help for your version of macOS, your utility application, or refer to Shortcut conflicts.
-
If you don’t find a keyboard shortcut here that meets your needs, you can create a custom keyboard shortcut. For instructions, go to Create a custom keyboard shortcut for Office for Mac.
-
Many of the shortcuts that use the Ctrl key on a Windows keyboard also work with the Control key in Word for Mac. However, not all do.
-
To quickly find a shortcut in this article, you can use Search. Press Command+F, and then type your search words.
For the best experience using your keyboard with the ribbon, enable your keyboard to access all controls.
-
To open the System Preferences, press
 +Spacebar, type system preferences, and press Return.
 -
To go to Keyboard Settings, type keyboard and press Return.
-
In the Shortcuts tab, press Control+F7 to change the Full Keyboard Access setting from Text boxes and lists only to All Controls.
In this topic
-
Frequently used shortcuts
-
Shortcut conflicts
-
Navigate the document
-
Select text and graphics
-
Edit text and graphics
-
Work with tables
-
Drawing
-
Work with fields
-
Outline a document
-
Review a document
-
Use footnotes and endnotes
-
Work with right-to-left languages
-
Use function key shortcuts
Frequently used shortcuts
This table lists frequently used shortcuts in Word for Mac.
|
To do this |
Press |
|---|---|
|
Undo the previous action. |
|
|
Redo the previous action, if possible. |
|
|
Cut the selected content to the Clipboard. |
|
|
Copy the selected content to the Clipboard. |
|
|
Paste the contents of the Clipboard. |
|
|
Display the shortcut menu for the selected item. * |
Shift+F10 |
|
Display the Go To dialog box. |
|
|
Display the Spelling and Grammar dialog box. |
|
|
Enable extended selection mode. |
F8 |
|
Switch to the next window. |
|
|
Switch to the previous window. |
|
|
Display the Save As dialog box. |
|
|
Find text (move focus to the Search in Document box). |
|
|
Display the Find and Replace pane. |
Control+H |
|
Display the Print dialog box. |
|
|
Close the current document. |
|
|
Expand or minimize the ribbon. |
|
|
Find the next spelling or grammatical error. The Check spelling as you type feature must be enabled. |
Option+F7 |
|
Open the Dictionary. |
In Word 2011, Option+Shift+F7 |
Top of Page
Shortcut conflicts
Some Word for Mac keyboard shortcuts conflict with default macOS keyboard shortcuts. This topic flags such shortcuts with an asterisk ( * ). To use these shortcuts, you may have to change your Mac keyboard settings to change the shortcut for the key.
Change system preferences for keyboard shortcuts
-
From the Apple menu, select System Preferences.
-
Select Keyboard.
-
Select the Shortcuts tab.
-
Select Mission Control.
-
Clear the check box for the keyboard shortcut conflicting with the Word for Mac shortcut that you want to use.
Navigate the document
|
To do this |
Press |
|---|---|
|
Move the cursor one word to the left. |
Option+Left arrow key |
|
Move the cursor one word to the right. |
Option+Right arrow key |
|
Move the cursor up by one paragraph. |
|
|
Move the cursor down by one paragraph. |
|
|
Move the cursor to the beginning of the current line. |
Home |
|
Move the cursor to the end of the current line. |
End |
|
Move the cursor to the top of the previous page. |
On a MacBook, press |
|
Move the cursor to the top of the next page. |
On a MacBook, press |
|
Move the cursor to the beginning of the document. |
On a MacBook, press |
|
Move the cursor to the end of the document. |
On a MacBook, press |
|
Move the cursor to the previous insertion point. |
Shift+F5 |
|
Move the cursor by scrolling the document view up by one screen. |
Page up |
|
Move the cursor by scrolling the document view down by one screen. |
Page down |
Top of Page
Select text and graphics
Tip: If you know the key combination to move the cursor, you can generally select the text by using the same key combination while holding down Shift. For example,  +Right arrow moves the cursor to the next word, and +Shift+Right arrow selects the text from the cursor to the beginning of the next word.
|
To do this |
Press |
|---|---|
|
Select multiple items that are not next to each other. |
Select the first item that you want, hold down |
|
Select text. |
Shift+Arrow keys |
|
Select the word to the left. |
Shift+Option+Left arrow key |
|
Select the word to the right. |
Shift+Option+Right arrow key |
|
Select from the current position to the beginning of the current line. |
Shift+Home |
|
Select from the current position to the end of the current line. |
Shift+End |
|
Select from the current position to the beginning of the current paragraph. |
|
|
Select from the current position to the end of the current paragraph. |
|
|
Select from the current position to the top of the screen. |
Shift+Page up |
|
Select from the current position to the bottom of the screen. |
Shift+Page down |
|
Select from the current position to the beginning of the document. |
|
|
Select from the current position to the end of the document. |
|
|
Select from the current position to the bottom of the window. |
|
|
Select all document content. |
|
Top of Page
Extend a selection
|
To do this |
Press |
|---|---|
|
Start extending the selection. * |
F8 In the extend selection mode, clicking a location in the document extends the current selection to that location. |
|
Select the nearest character to the left. |
F8, Left arrow key |
|
Select the nearest character to the right. |
F8, Right arrow key |
|
Expand the selection. |
F8 repeatedly to expand the selection to the entire word, sentence, paragraph, section, and document. |
|
Reduce the selection. * |
Shift+F8 |
|
Select a vertical block of text. |
|
|
Stop extending the selection. |
Esc |
Top of Page
Edit text and graphics
|
To do this |
Press |
|---|---|
|
Cut the selected content to the Clipboard. |
F2 |
|
Copy the selected content to the Clipboard. |
F3 |
|
Paste the contents of the Clipboard. |
F4 |
|
Display the Paste Special dialog box. |
|
|
Cut the selected content to the Spike. |
|
|
Paste the contents of the Spike. |
|
|
Copy the selected formatting. |
|
|
Paste the copied formatting. |
|
|
Create an AutoText entry. |
Option+F3 |
Top of Page
Align and format paragraphs
|
To do this |
Press |
|---|---|
|
Center the paragraph. |
|
|
Justify the paragraph. |
|
|
Align the paragraph to the left. |
|
|
Align the paragraph to the right. |
|
|
Indent the paragraph. |
Control+Shift+M |
|
Remove a paragraph indent. |
|
|
Create a hanging indent. |
|
|
Remove a hanging indent. |
|
|
Apply single-spacing to the paragraph. |
|
|
Apply double-spacing to the paragraph. |
|
|
Apply 1.5-line spacing to the paragraph. |
|
|
Enable AutoFormat. |
|
|
Apply the Normal style. |
|
|
Apply the Heading 1 style. |
|
|
Apply the Heading 2 style. |
|
|
Apply the Heading 3 style. |
|
|
Apply the List style. |
|
|
Insert a nonbreaking space. |
Option+Spacebar |
Top of Page
Format characters
|
To do this |
Press |
|---|---|
|
Increase the font size. |
|
|
Decrease the font size. |
|
|
Increase the font size by 1 point. |
|
|
Decrease the font size by 1 point. |
|
|
Display the Font dialog box. |
|
|
Switch the text between upper case, lower case, and title case. |
Shift+F3 |
|
Change the text to all upper case. |
|
|
Apply bold formatting. |
|
|
Add a bulleted list. |
|
|
Apply underline formatting. |
|
|
Apply underline formatting to the words, but not the spaces. |
|
|
Apply double-underline formatting. |
|
|
Apply italics formatting. |
|
|
Apply small caps formatting. |
|
|
Apply strike-through formatting. |
|
Top of Page
Insert special characters
|
To do this |
Press |
|---|---|
|
Insert an empty field. |
|
|
Insert a line break. |
Shift+Return |
|
Insert a page break. |
|
|
Insert a column break. |
|
|
Insert a nonbreaking hyphen. |
|
|
Insert a registered trademark symbol (®). |
Option+R |
|
Insert a trademark symbol (™). |
Option+2 |
Top of Page
Work with tables
Move around in a table
|
To do this |
Press |
|---|---|
|
Move to the next cell and select its content. |
Tab key |
|
Move to the previous cell and select its content. |
Shift+Tab |
|
Move to the next row. |
Down arrow key |
|
Move to the previous row. |
Up arrow key |
|
Move to the first cell in the row. |
Control+Home |
|
Move to the last cell in the row. |
Control+End |
|
Move to the first cell in the column. |
Control+Page up |
|
Move to the last cell in the column. |
Control+Page down |
|
Add a new row to the bottom of the table. |
Tab key, at the end of the last row |
|
Insert a row. |
|
Top of Page
Select table content
|
To do this |
Press |
|---|---|
|
Select the content in the next cell. |
Tab key |
|
Select the content in the previous cell. |
Shift+Tab |
|
Extend a selection to adjacent cells. |
Shift+Arrow keys |
|
Select a row. |
Select the first or last cell in the row, and then press Shift+Alt+End or Home. |
Top of Page
Resize table columns with the ruler
|
To do this |
Press |
|---|---|
|
Retain the column sizes to the right and change the table width. |
Drag the column boundary in the ruler |
|
Move a single column line and retain the table width. |
Shift+Drag the column boundary in the ruler |
|
Equally resize all columns to the right and retain the table width. |
|
|
Proportionally resize all columns to the right and retain the table width. |
|
Top of Page
Resize table columns directly in a table
Tip: To finely adjust the column width and display the column’s measurements in the ruler when you resize the column, turn off the snap-to functionality by pressing Option with the shortcut keys.
|
To do this |
Press |
|---|---|
|
Move a single column line and retain the table width. |
Drag the column boundary |
|
Retain column sizes to the right and change the table width. |
Shift+Drag the column boundary |
|
Equally resize all columns to the right and retain the table width. |
|
|
Proportionally resize all columns to the right and retain the table width. |
|
Top of Page
Insert paragraphs and tab characters in a table
|
To do this |
Press |
|---|---|
|
Insert a new paragraph in a cell. |
Return |
|
Insert a Tab character in a cell. |
Option+Tab |
Top of Page
Drawing
|
To do this |
Press |
|---|---|
|
Toggle drawing mode. |
|
Top of Page
Work with fields
|
To do this |
Press |
|---|---|
|
Insert a DATE field. |
Control+Shift+D |
|
Insert a LISTNUM field. |
|
|
Insert a PAGE field. |
Control+Shift+P |
|
Insert a TIME field. |
Control+Shift+T |
|
Insert an empty field. |
|
|
Update the selected fields. * |
F9 |
|
Switch between a field code and its result. * |
Shift+F9 |
|
Switch between all field codes and their results. |
Option+F9 |
|
Run GOTOBUTTON or MACROBUTTON from a field displaying field results. |
Option+Shift+F9 |
|
Lock a field. |
|
|
Unlock a field. |
|
Top of Page
Outline a document
These shortcuts only apply when the document is in the Outline view.
|
To do this |
Press |
|---|---|
|
Promote a paragraph. |
Control+Shift+Left arrow key |
|
Demote a paragraph. |
Control+Shift+Right arrow key |
|
Demote the paragraph to body text. |
|
|
Move the selected paragraphs up. * |
Control+Shift+Up arrow key |
|
Move the selected paragraphs down. * |
Control+Shift+Down arrow key |
|
Expand the text under a heading. |
Control+Shift+Plus sign (+) |
|
Collapse text under a heading. * |
Control+Shift+Minus sign (-) |
|
Expand all body text and headings, or collapse all body text. |
Control+Shift+A |
|
Switch between showing the first line of body text and showing all body text. |
Control+Shift+L |
|
Show all headings with the specified heading level. |
Control+Shift+Heading level number |
Top of Page
Review a document
|
To do this |
Press |
|---|---|
|
Insert a comment. |
|
|
Turn change tracking on or off. |
|
|
Move to the beginning of a comment. |
Home |
|
Move to the end of a comment. |
End (The End key is not available on all keyboards.) |
|
Move to the beginning of the list of comments. |
|
|
Move to the end of the list of comments. |
|
Top of Page
Use footnotes and endnotes
|
To do this |
Press |
|---|---|
|
Insert a footnote. |
|
|
Insert an endnote. |
|
Top of Page
Work with right-to-left languages
Word supports right-to-left functionality for languages that work in a right-to-left or a combined right-to-left, left-to-right environment for writing, editing, and displaying text. In this context, right-to-left languages refers to any writing system that is written from right to left and includes languages that require contextual shaping, such as Arabic, and languages that do not.
Before you can use these keyboard shortcuts, you need to ensure keyboard shortcuts are enabled for the language you are using:
-
Go to Apple > System Preferences > Keyboard.
-
On the Input Sources tab, select the language for which you want to enable shortcuts.
-
On the right side of the tab, select the check box for Enable keyboard shortcuts.
|
To do this |
Press |
|---|---|
|
Switch the writing direction to right-to-left. |
Control+ |
|
Switch the writing direction to left-to-right. |
Control+ |
Top of Page
Use function key shortcuts
Word for Mac uses the function keys for common commands, including Copy and Paste. For quick access to these shortcuts, you can change your Apple system preferences so you don’t have to press the Fn key every time you use a function key shortcut.
Note: Changing system function key preferences affects how the function keys work on your Mac, not just in Word. After changing this setting, you can still perform the special features printed on a function key. Just press the Fn key. For example, to use the F12 key to change your volume, press Fn+F12.
If a function key doesn’t work as you expect it to, press the Fn key in addition to the function key. If you don’t want to press the Fn key each time, you can change your Apple system preferences. For instructions, go to Change function key preferences.
The following table provides the function key shortcuts for Word for Mac.
|
Key |
Description |
|---|---|
|
F1 |
|
|
F2 |
|
|
F3 |
|
|
F4 |
|
|
F5 |
|
|
F6 |
|
|
F7 |
|
|
F8 |
|
|
F9 |
|
|
F10 |
|
|
F11 |
|
Top of Page
Change function key preferences
-
In the Apple menu, select System Preferences.
-
Select Keyboard.
-
On the Keyboard tab, select the check box for Use all F1, F2, etc. keys as standard function keys.
See also
Word help center
Basic tasks using a screen reader with Word
Use a screen reader to explore and navigate Word
Screen reader support for Word
This article describes the keyboard shortcuts in Word for the web.
Notes:
-
If you use Narrator with the Windows 10 Fall Creators Update, you have to turn off scan mode in order to edit documents, spreadsheets, or presentations with Microsoft 365 for the web. For more information, refer to Turn off virtual or browse mode in screen readers in Windows 10 Fall Creators Update.
-
To quickly find a shortcut in this article, you can use Search. Press Ctrl+F and then type your search words.
-
When you use Word for the web, we recommend that you use Microsoft Edge as your web browser. Because Word for the web runs in your web browser, the keyboard shortcuts are different from those in the desktop program. For example, you’ll use Ctrl+F6 instead of F6 for jumping in and out of the commands. Also, common shortcuts like F1 (Help) and Ctrl+O (Open) apply to the web browser – not Word for the web.
In this topic
-
Frequently used shortcuts
-
Ribbon keyboard shortcuts
-
Navigate the document
-
Edit and format the document
-
Work with comments
Frequently used shortcuts
This table lists the most frequently used shortcuts in Word for the web.
Tip: To quickly create a new document in Word for the web, open your browser, type Word.new in the address bar, and then press Enter.
|
To do this |
Press |
|---|---|
|
In the Reading view, open a PDF-based view tagged to work with screen readers. |
Press the Tab key until you reach the Accessibility Mode button, and then press Enter |
|
Find text in the Reading view. |
Ctrl+F or F3 |
|
Find text in the Editing view. |
Ctrl+F or Ctrl+G |
|
Find and replace text in the Editing view. |
Ctrl+H |
|
Hide the task pane, if one is open. |
Esc |
|
Switch to the Zoom control. |
Alt+Period, W, then Q or Alt+Windows logo key, W, then Q |
|
Print the document. |
Ctrl+P |
|
Move to the next landmark region. |
Ctrl+F6 |
|
Go to the Tell Me or Search text field. |
Alt+Q |
Top of Page
Ribbon keyboard shortcuts
Word for the web offers shortcuts called access keys to navigate the ribbon. If you’ve used access keys to save time on Word for desktop computers, you’ll find access keys very similar in Word for the web.
On a Windows computer, access keys all start with Alt+Period (.) or Alt+Windows logo key, then add a letter for the ribbon tab. For example, to go to the Review tab, press Alt+Period, R or Alt+Windows logo key, R.
If you’re using Word for the web on a Mac computer, press Control+Period (.) to start.

-
To get to the ribbon, press Alt+Period or Alt+Windows logo key. You can alternatively press Ctrl+F6 until you reach the Home tab.
-
To move between tabs on the ribbon, press the Tab key.
-
To hide the ribbon so you have more room to work, press Ctrl+F3. Repeat to display the ribbon again.
Go to the access keys for the ribbon
To go directly to a tab on the ribbon, press one of the following access keys:
|
To do this |
Press |
|---|---|
|
Open the Tell Me or Search text field on the ribbon to type a search term. |
Alt+Period, Q or Alt+Windows logo key, Q |
|
Open the File tab to use the Backstage view. |
Alt+Period, F or Alt+Windows logo key, F |
|
Open the Home tab to format text and use the Find tool. |
Alt+Period, H or Alt+Windows logo key, H |
|
Open the Insert tab to insert a picture, link, comment, header or footer, or a page number. You can also access the Symbol gallery. |
Alt+Period, N or Alt+Windows logo key, N |
|
Open the Page Layout tab to set page margins, orientation, and size, and paragraph spacing. |
Alt+Period, A or Alt+Windows logo key, A |
|
Open the References tab to insert a table of contents, footnotes, or endnotes. |
Alt+Period, S or Alt+Windows logo key, S |
|
Open the Review tab to check spelling, add comments, or track and review changes to your document. |
Alt+Period, R or Alt+Windows logo key, R |
|
Open the View tab to choose a view, open the Navigation pane, edit the Header & Footer, and to Zoom the document view. |
Alt+Period, W or Alt+Windows logo key, W |
Top of Page
Use Search
To find an option or perform an action quickly, use the Search text field. To learn more about the Search feature, go to Find what you need with Microsoft Search.
Note: Depending on the version of Microsoft 365 you are using, the Search text field at the top of the app window might be called Tell Me instead. Both offer a largely similar experience, but some options and search results can vary.
-
Select the item or place in your document, presentation, or spreadsheet where you want to perform an action.
-
To go to the Search text field, press Alt+Q.
-
Type the search words for the action that you want to perform. For example, if you want to add a bulleted list, type bullets.
-
Press the Down arrow key to browse through the search results.
-
Once you’ve found the result that you want, press Enter to select it and to perform the action.
Work in the ribbon tabs and menus
The following shortcuts can save time when you work with the ribbon tabs and ribbon menus.
|
To do this |
Press |
|---|---|
|
Select the active tab on the ribbon, and activate the access keys. |
Alt+Period or Alt+Windows logo key. To move to a different tab, use an access key or the Tab key. |
|
When a Ribbon tab is selected, move the focus to the tab commands. |
Enter, then Tab key or Shift+Tab |
|
Activate a selected button. |
Spacebar or Enter |
|
Open the list for a selected command. |
Spacebar or Enter |
|
Open the menu for a selected button. |
Alt+Down arrow key |
|
When a menu or submenu is open, move to the next command. |
Down arrow key |
|
Collapse or expand the ribbon. |
Ctrl+F3 |
Top of Page
Navigate the document
|
To do this |
Press |
|---|---|
|
Move the cursor right by one word. |
Ctrl+Right arrow key |
|
Move the cursor left by one word. |
Ctrl+Left arrow key |
|
Move the cursor up by one paragraph. |
Ctrl+Up arrow key |
|
Move the cursor down by one paragraph. |
Ctrl+Down arrow key |
|
Move the cursor to the beginning of the current line. |
Home |
|
Move the cursor to the end of the current line. |
End |
|
Move the cursor to the beginning of the document. |
Ctrl+Home |
|
Move the cursor to the end of the document. |
Ctrl+End |
|
Select text. |
Shift+Arrow keys |
|
Select the word to the right. |
Shift+Ctrl+Right arrow key |
|
Select the word to the left. |
Shift+Ctrl+Left arrow key |
|
Select the paragraph above. |
Shift+Ctrl+Up arrow key |
|
Select the paragraph below. |
Shift+Ctrl+Down arrow key |
|
Select from the current position to the beginning of the line. |
Shift+Home |
|
Select from the current position to the end of the line. |
Shift+End |
|
Select from the current position to the beginning of the document. |
Shift+Ctrl+Home |
|
Select from the current position to the end of the document. |
Shift+Ctrl+End |
|
Select all document content. |
Ctrl+A |
Top of Page
Edit and format the document
|
To do this |
Press |
|---|---|
|
Cut the selected content to the Clipboard. |
Ctrl+X |
|
Copy the selected content to the Clipboard. |
Ctrl+C |
|
Paste the content from the Clipboard. |
Ctrl+V |
|
Undo the previous action. |
Ctrl+Z |
|
Redo the previous action. |
Ctrl+Y |
|
Shrink the font size. |
Ctrl+Left bracket ([) |
|
Grow the font size. |
Ctrl+Right bracket (]) |
|
Apply bold formatting to the selected text. |
Ctrl+B |
|
Apply italic formatting to the selected text. |
Ctrl+I |
|
Underline the selected text. |
Ctrl+U |
|
Align the paragraph to the left. |
Ctrl+L |
|
Align the paragraph to the right. |
Ctrl+R |
|
Center the paragraph. |
Ctrl+E |
|
Justify the paragraph. |
Ctrl+J |
|
Create a bulleted list. |
Ctrl+Period (.) |
|
Create a numbered list. |
Ctrl+Slash (/) |
Top of Page
See also
Word help center
Basic tasks using a screen reader with Word
Use a screen reader to explore and navigate Word
Screen reader support for Word
Overview
This chapter summarizes the differences in use between OpenOffice.org Writer 2.0 and Microsoft Word (various versions). The information in this chapter builds upon the information given in General Differences in Use between OpenOffice.org and Microsoft Office.
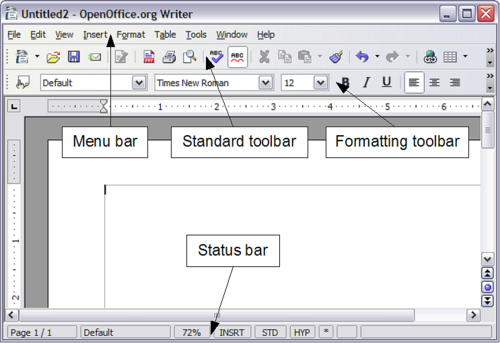
The Writer interface
The main Writer workspace is shown below. The menus and toolbars are similar to those in Word, with the exceptions described in this chapter.
Views
Word has 4 or 5 views, depending on the version (here with the 5 views of Word 2003) called:
Normal: Recommended view (by Microsoft) for doing most of your typing and editing. Writer has no real equivalent view.
Print Layout: This shows the document (more or less) as it will print. This is the closest equivalent to the Print Layout view in Writer.
Web Layout: In theory, this shows the document as if viewed on-line. Writer’s equivalent is a view option called Web Layout. To access this view, select View > Web Layout.
Reading Layout: Reading Layout view formats your screen to make reading your document more comfortable. Writer has no real equivalent view, but you can go to View > Zoom to choose the view that will fit the best for you on your screen.
Outline: For working with heading hierarchies. Outline view displays the document in outline form. Headings can be displayed without the text. If you move a heading, the accompanying text moves with it. Writer has the Navigator, which is detailed later in this chapter.
Writer also has an HTML source view that only shows when editing an HTML document. To access this view, select View > HTML Source.
When field codes are turned on, Writer displays less information about the field than does Word. To get detailed information, right-click the field > Fields (or select the field > Edit > Fields).
Status bar
The status bar is similar to Word’s except it does not show the current location of the cursor on the page (row number and number of characters across). It does however show the position within a table in spreadsheet style format; for example, Top left cell =A1.
Navigator
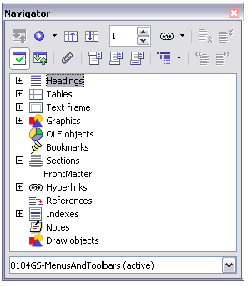
Word does not have a similar concept to the Navigator and, in the author’s opinion, it is such a useful tool it is worth taking the time to learn more about it.
To launch the Navigator, press F5 or click the Navigator icon on the Standard toolbar.
To get a detailed description of what each of the buttons does, press Shift+F1 and hover the cursor over the buttons.
The Headings at the top of the list box in the Navigator are the closest equivalent to Word’s Outline View.
With the List Box on there is a drop-down list box at the bottom of the Navigator. With this list box it is possible to select any of the open Writer documents so that their contents are available for dragging and dropping. What happens when the selection is dropped is determined by the drag mode specified by the Drag Mode button. Click the arrow next to the Drag Mode button to see the available options (Insert as: Hyperlink, Link, or Copy).
When viewing a master document, the Navigator is quite different. For more details, see Working with Master Documents in the Writer Guide.
| Graphics, indexes, OLE objects, and references cannot be dragged and dropped when in the Insert as link or Insert as Copy modes. |
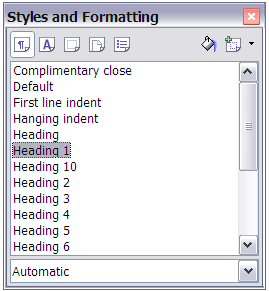
Formatting and Styles
For a more detailed guide on using styles, see “Use templates and styles” and the Chapter Working with Styles in the Getting Started Guide, or Chapter Introduction to Styles and Chapter Working with Styles in the Writer Guide.
Use Shift+F1 to check out the different buttons on the Styles and Formatting window. Use the bottom list box to change the style group that is displayed. For example, Applied Styles only shows those styles that have been used in the document.
Keyboard
When some text has a character attribute at the end of a paragraph (say bold or a hyperlink) but the new text does not require that attribute, press the right arrow key before typing.
Deleting paragraph marks: pressing Delete at the end of a paragraph effectively moves the text of the following paragraph into the current paragraph, and the paragraph formatting of the top paragraph remains. Press Backspace at the start of a paragraph and the format of the lower paragraph remains.
| An aid to remember this is: the format of the paragraph that has the cursor will be the format of the combined paragraph, unless the current paragraph is empty; in that case, backspacing will leave the previous paragraph’s formatting. |
Control+Home when in tables: In Word, Control+Home always positions the cursor to the top of the document; in Writer Control+Home first positions the cursor at the start of the cell, then at the start of the table and then the start of the document. Control+End has similar behavior.
How to select multiple parts of the text
To copy, cut, format, or delete parts of the text in different areas of the document, use:
- Control + selection with one click, double-click or sliding.
or
- Click once on the field “STD” (STanDard) in the status bar. The field now shows “EXT” (EXTended selection).
- Another click and it changes to “ADD” (ADD to selection).
| The ADD mode is the equivalent to Control + click and EXT is equivalent to Shift + click. |
Multiple selections and tables
The following limitations apply when selections involve tables:
- It is possible to have multiple selections within a cell, or even parts of other cells, but only one selection is possible that involves at least one entire cell.
- A selection that starts in a table cannot extend beyond the table.
- A selection that starts outside a table will include the entire table (that is, a selection cannot start outside a table and also contain a portion of a table).
Comparison of shortcut keys
| Function | Word standard shortcut | Writer standard shortcut |
|---|---|---|
| Underline words not spaces | Control + Shift + W | No equivalent |
| Thesaurus | Shift + F7 | Control + F7 |
| Show/hide non-printing characters | Control + Shift + * | Control + F10 |
| Hanging indent | Control + T | No standard equivalent |
| “Unhang” indent | Control + Shift + T | No standard equivalent |
| Indent | Control + M | No standard equivalent |
| UnIndent | Control + Shift + M | No standard equivalent |
| Superscript | Control + Shift = | Control + Shift + P |
| Subscript | Control + = | Control + Shift + B |
| Remove character formatting | Control + Space bar | Right-click > Default |
| Remove paragraph formatting | Control + Q | Right-click > Default |
| Jump to previous edit point | Shift + F5 | Need to use the reminders on the Navigator |
| Shift paragraph up | No equivalent | Control + Up |
| Shift paragraph down | No equivalent | Control + Down |
| Find | Control + F | Control + F |
| Replace | Control + H | Control + F |
See AltKeyHandler.sxw (available from http://homepages.paradise.net.nz/hillview/OOo/) for macros that extend Writer’s key shortcut ability – including the indent functionality similar to that provided in Word.
Mouse use
Some differences are:
- No quick selection of paragraphs or lines by clicking to the left of the paragraph.
- Control + click does not select a sentence, but a triple-click does (a quadruple-click selects the paragraph).
Tables
Selections involving tables
Tables are like one special paragraph so when selecting text using the keyboard (Shift+arrow) from, say, above the paragraph, the whole table is selected followed by the line below it.
The location for displaying the table grid when a table has no borders is not particularly intuitive: use Tools > Options > OpenOffice > Appearance and select the Table boundaries checkbox.
Heading rows
By default new tables have a heading row. This default behavior can be changed by Tools > Options > OpenOffice Writer > Table.
When creating a new table using Table > Insert Table, you can choose to turn on or off the heading row, by checking Heading in Options > OpenOffice Writer > Table
Whether the top row(s) repeat at the start of each new page can be altered by selecting the relevant top row(s) > Table > Repeat on each page. This does not change the format of the rows, only whether they repeat at each page break.
Adjusting column widths and row heights using the keyboard
The different methods of adjusting the column width available via Tools > Options > OpenOffice Writer > Table are:
- Fixed: Overall width of the table stays the same, but the adjoining column shrinks or grows correspondingly.
- Fixed Proportional: The current column and the end column change by corresponding amounts, keeping the overall width the same.
- Variable: Only the current column changes so the overall width of the table changes.
Use Alt and the arrow keys as follows to adjust the width of columns (or height of rows):
- Alt and arrow keys adjusts the right side (bottom for rows).
- Alt+Shift and arrow keys adjusts the left side (top for rows).
- Alt+Control+left or right arrow keys adjusts the current cell only.
Copying and pasting cells in a table
Writer never inserts new rows or columns when pasting data, it always overwrites the contents of the cells. This makes it clear as to what will happen. To avoid overwriting cells, first insert the required number of rows or columns.
Inserting and deleting rows or columns
If you use Table > Insert > Row or Table > Insert > Column or right-click > Insert Row or Insert Column, you can choose whether to insert before or after the current row or column.
The icons on the Table toolbar insert below for rows and to the right for columns (opposite of Word).
| This is a surprising inconsistency as Calc inserts above and to the left. |
In Linux, to insert rows or columns using the keyboard: Alt+Insert > arrow key (this is hold down Alt and Insert keys together, release the keys, then press the arrow key). To delete rows or columns using the keyboard: Alt+Delete > arrow key. The insertion or deletion is in the direction of the arrow key. For example, Alt+Insert > Up inserts a row above the current row.
Equal row heights and column widths
On the Table toolbar there is a long click button called Optimize. The Optimize button becomes active when more than one cell is selected. This presents a tear-off menu for easily adjusting row heights and column widths to being the same.
Splits and merges
Merge cells last, as you would in Word.
To merge cells: Select cells to be merged > Table > Merge cells (or use the Merge cells button on the Table toolbar).
To split cells: Select merged cells > Table > Split cells (or use the Split cells button on the Table toolbar).
To split a table (horizontally): Table > Split Table.
To join two tables, they need to be one below the other, then Table > Merge Table. If there is a table above and below the current table you will be prompted for which one you wish to join.
Sorting
To sort a table:
- Select the cells to be sorted; do not include the headings. The option to sort only becomes available when something is selected.
- Tools > Sort.
Unlike Word, the sort dialog uses column number rather than the names of the column.
Entering numbers and formulas
Unlike Word, tables in Writer can work much more like spreadsheets. For example, calculated values change as the data is input (no more selecting and pressing F9 to update calculated results).
With number recognition turned on, when entering a number Writer will automatically format the number according to a specified number format. To change this behavior, right-click when the cursor is in a table and click on Number Recognition to deselect it.
To change the number format, select the cells, Table > Number Format.
To enter a formula like SUM():
- Select the cell where the result is to go.
- Press F2 to display the Formula bar.
- Click and hold the Formula button to display the formula menu.
- Select the desired function (list separator is for separating constants, for example =mean 5 | 12 | 20).
- Click and drag on cells to input ranges.
- Press Enter to finish.
To enter a formula like “this cell plus that cell minus that cell”:
- Select the cell where the result is to go.
- Press F2 to display the Formula bar.
- Click on a cell.
- Type or select the desired operator.
- Click on the next cell.
- Repeat steps 4 and 5 until done.
- Press Enter to finish.
Creating a table from a data source
To create a table from a data source:
- Display the Data source viewer (F4).
- In the Data explorer window, navigate to the desired table or query.
- Drag the name of the table or query into the document.
- Select the desired fields and set other properties as required in the dialog.
Charts in Writer
Charts copied from a Calc spreadsheet and pasted into a Writer document are, by default, embedded objects. Unlike doing this in Microsoft Office, only the relevant data for the chart is embedded. In Microsoft Office copying and pasting a chart also embeds it, but if the Excel workbook was 8 MB in size (not unrealistic for a spreadsheet) then each chart pasted into a Word document would increase the Word document by 8 MB.
Linking of charts does not exist.
Customizing the user interface
Most functions are found in similar places in both programs, but a few are slightly different, and the degree of control varies. Table 6 summarizes where to find the setup choices.
| To do this | In Word | In Writer |
|---|---|---|
| Change measurement system | Tools > Options > General | Tools > Options > OpenOffice Writer > General |
| Turn off Auto completion | Not applicable | Tools > AutoCorrect. In the Word completion tab, deselect Enable word completion. |
| Turn on/off Help Agent | Help > Microsoft Word Help > Options | Tools > Options > OpenOffice > General |
| Set up document window (rulers, status bar, default toolbars, etc) | View > select required items | View > select required items |
| Customize toolbars | Tools > Customize | Tools > Customize |
| Customize menus | Tools > Customize | Tools > Customize |
| Display font names in their font (in toolbar drop-down font list) | Tools > Customize > Options | Tools > Options > OpenOffice > View, select Show preview of fonts |
| Always show full menus (include unavailable and little-used items) | Tools > Customize > Options | Tools > Options > OpenOffice > View, select Show inactive menu items |
| Show/hide ScreenTips (ToolTips) on toolbars | Tools > Customize > Options | Tools > Options > OpenOffice > General |
| Always create backup copy | Tools > Options > Save | Tools > Options > Load/Save > General, select Always create backup copy |
| Autosave every x minutes | Tools > Options > Save | Tools > Options > Load/Save > General, select Save AutoRecovery information every, and choose a time in the Minutes list |
| Show paragraph marks, tabs, etc. | Tools > Options > View | Tools > Options > OpenOffice Writer > Formatting Aids, select required items |
| Change file locations | Tools > Options > File Locations | Tools > Options > OpenOffice > Paths |
| Change user information | Tools > Options > User Information | Tools > Options > OpenOffice > User Data |
| Set up AutoCorrect and AutoFormat options | Tools > AutoCorrect Options | Tools > AutoCorrect > Options, select required items |
Write, edit, and review documents
Most writing, editing, and reviewing techniques in OOoWriter are similar to those in Microsoft Word, but the details often vary.
| To do this | In Word | In Writer |
|---|---|---|
| Jump quickly to other parts of a document | Edit > Go to | Edit > Navigator (or F5), double-click on required heading, figure, table, etc. |
| Choose language for spelling checker | Tools > Language > Set Language | Tools > Options > Language Settings > Language. (Note: OpenOffice.org has no grammar checker.) |
| Ignore some text when checking spelling | Select text; Tools > Language > Set Language > Do not check (or) Format > Style > Modify> Format > Language | Select text; right-click, Character > Font > Language = [None] or the real language of the selected text, if that is foreign. |
| Recheck spelling | Tools > Spelling & Grammar > Recheck Document | Always rechecks |
| Find and replace text, formatting, and styles | Edit > Replace > More; choices as needed | Edit > Find & Replace; details are a bit different |
| Use wildcards in find and replace | Edit > Replace > More > select Use Wildcards checkbox | Edit > Find & Replace, click on the More Options and select Regular expressions; wildcards themselves are different. See the section on Regular expressions in Chapter General Differences in use between Microsoft Office and OpenOffice.org. |
| Choose, create, or edit a custom dictionary | Tools > Options > Spelling & Grammar > Custom Dictionaries | Tools > Options > Language Settings > Writing Aids |
| Create exception (exclude) dictionary | File > New, type words, Save As > text only, file extension .EXC | As for custom dictionary, but after clicking on the New button, select Exception (-) in the New Dictionary dialog |
| Track changes (choose options) | Tools > Options > Track Changes | Tools > Options > OpenOffice Writer > Changes |
| Protect document for editing | Tools > Protect Document | Edit > Changes > Protect Records(Password needs to be at least 5 characters) |
| Mark and track changes | (Word 2000) Tools > Track Changes > Highlight Changes | Edit > Changes > Record |
| Insert comments associated with a change | Highlight text; Insert > Comment | Edit > Changes > Comment |
| Insert notes (comments not associated with a change) | Highlight text; Insert > Comment | Insert > Note |
| Show changes as pop-up text | Options > View > Screentips | Tools > Options > OpenOffice > General |
| Merge documents | Tools > Merge Documents | Edit > Changes > Merge Document |
| Accept or reject changes | View > Toolbars > Reviewing | Edit > Changes > Accept or Reject |
| Change document properties | File > Properties | File > Properties |
| Get a word count | Tools > Word Count | Tools > Word Count |
| Create AutoText entry | Select text; Insert > AutoText > New | Edit > AutoText (or) Control+F3 |
| Insert AutoText | Type shortcut and press F3 | Type shortcut and press F3; or type Name and press Enter. Writer distinguishes between the “name” and the “shortcut” of an autotext. Word does not. |
AutoText in Writer always ends with a paragraph mark. So for a short in-line shortcut, it is better to use AutoCorrect.
Control page layout
This section covers such things as margins, headers, and footers.
Writer and Word have somewhat different notions of page layout.
Word’s notion of page layout
Page layout is a property of the document as a whole. If you change the page layout (for instance, set the document to landscape), it changes for the entire document. You can then arrange for specific sections to have a different layout.
Writer’s notion of page layout
Page layout is a property of the page style (for example, First Page, Index and Default). If you change the page layout for one page style (for instance, set Default to have a header with page numbers), only that style will be affected.
Using page styles gives Writer some very useful features. For instance, you can define the First Page page style so that, after you have typed the first page, the style switches to Index (or any other style you choose). You can then set Index so that it is followed by Default.
Comparison for page layout
| To do this | In Word | In Writer |
|---|---|---|
| Define margins | File > Page Setup > Margins | Format > Page > Page |
| Specify different headers and footers on first, odd, and even pages | File > Page Setup > Layout > Headers and Footers section | Format > Page, select required items Define different page styles for First, Left (even), and Right (odd) pages, using Header and Footer tabs |
| Edit headers and footers | View > Headers and Footers, then you can type or insert fields; you can also double-click in existing header or footer regions | After you have specified Header and Footer areas for a page, they are always active. Single-click to type or insert fields |
| Change from roman to arabic page numbers in the footer of a page | Insert a section break, deselect “Same as Previous” in the second section, define a new footer with page numbers restarting at 1 in Arabic numerals | Insert a manual page break and apply a different page style |
| Use paragraph styles for page layout | Can define paragraph styles with offset from left margin, with heading styles aligned left or right | Can define paragraph styles with offset from left margin, with heading styles aligned left or right |
| Use columns for page layout | Insert continuous sections to switch from single to multiple columns on one page | Format > Page > Columns (or)Insert > Section > Columns (or) Format > Columns |
| Use frames or text boxes for page layout | Frames are used in Word 97 but mostly replaced by text boxes in Word2000 and 2002; can be linked to flow text from one to next, as in a newsletter | Insert > Frame (can link frames to flow text from one to next, as in a newsletter); “text boxes” are fields, not positioning devices |
| Use tables for page layout | Table > Insert > Table (use dialog to format) | Insert > Table (use dialog to format) |
| Put portrait headers on landscape pages | Use rotated text box linked to header | Use rotated text in a frame |
| Set first page number to greater than 1 | Insert > Page Numbers > Format | In first paragraph on first page, Format > Paragraph > Text Flow > Breaks, select Insert and With Page Style, choose the page style, specify the page number |
| View and edit facing pages | File > Print Preview; click Zoom button to enable editing | File > Page Preview; cannot edit when previewing, |
| Reduce page count by 1 | File > PagePreview, click ShrinkToFit button. | See http://homepages.paradise.net.nz/hillview/OOo/ShrinkToFit.sxw. |
Use templates and styles
| To do this | In Word | In Writer |
|---|---|---|
| Find which template is associated with a document | Tools > Templates and Add-ins | File > Properties > General tab. |
| Specify default template | «Normal» template is default | File > Templates > Organize lets you set any template as default |
| Create a new template | File > Save As, set type to Document Template (.DOT) | File > Templates > Save |
| Edit a template | File > Open, choose template | File > Templates > Edit |
| Copy styles between templates | Tools > Templates and Add-ins > Organizer | File > Templates > Organize. There, you can copy styles with drag and drop between templates. |
| Create a new document from a template | File > New (opens a list of templates) | File > New > Templates and Documents |
| Apply a different template to a document | Tools > Templates and Add-ins > Attach, select template, Open | Start a new document based on the different template; copy contents of old document into new document. |
| Apply a style to text | (Word 2000) Select from Style List or Style dialog(XP) Can also use task pane. | Format > Styles and Formatting (or press F11), double-click the style in list; after the second use, paragraph styles appear in Apply Style list on the Formatting toolbar. |
| Change a style definition | (Word 2000) Format > Style > Modify; (XP) can also select in task pane and click Modify | Select a style in the Styles and Formatting window, right-click, and choose Modify. |
| Create a new style | Format > Style > New | Right-click in Styles and Formatting window, then click New. |
| Use outline numbering | Format > Style, select style > Format > Numbering | Tools > Outline Numbering |
| Drop caps | Format >Drop CapOne character only, can not be part of a style. | Format > Paragraph > Drop Caps tabDrop caps can be part of a style. Can be >= 1 char or word. |
Font size
When a style is based on another style, it is possible to set the font to being a percentage of the font size of the original style. In the font size field simply type the number followed by a percentage sign, for example 120%. This way, changes to the underlying style will be better reflected in this style. To change it back to being an absolute font size type the number followed by the characters “pt”, such as 12pt. It is also possible to specify how many points larger or smaller, for example +2pt for 2 points larger, or -2pt for two points smaller.
Space between paragraphs and page breaks before
In Writer, some paragraph properties behave differently to the way they behave in Word. Specifically:
- Space before if at the top of a page is ignored.
- Space between paragraphs: the greatest of space above and space below for the two paragraphs is applied.
- Page break before: if at the top of a page, does not create a blank page.
This makes using styles possible without having to apply direct paragraph formating to fix issues afterwards.
Fields
For a comparison of fields between Writer and Word, see Chapter Sharing Files with Microsoft Office Users.
| To do this | In Word | In Writer |
|---|---|---|
| Insert a field | Insert > Field(or) CTRL + F9 for blank field | Insert > Fields and choose the requested field. |
| Define a number range field | Insert > Field, use SEQ (sequence) | Insert > Fields > Other > Variables tab, then Number range in the Type area |
| Insert a bookmark | Select text; Insert > Bookmark | Select text; Insert > Bookmark |
| Insert a cross-reference to a bookmark | Insert > Cross Reference, choose Bookmark as type | Insert > Cross Reference > Bookmark[1] |
| Insert a cross-reference to a heading | Insert > Cross Reference, choose Heading as type | Either bookmark the heading or use Insert > Cross Reference > References tab > Set Reference to mark the heading, then Insert > Cross Reference > References tab > Insert Reference. |
| Insert a cross-reference to a figure or table | Insert > Cross Reference, choose type | Insert > Cross Reference > References tab > Insert Reference > Figure (or Table) |
| Use conditional content | Use IF or other fields, or styles (all workarounds) | Insert > Fields > Other > Variables (among other ways) |
Work with large or complex documents
Major differences exist in the use of master documents. The table does not attempt to summarize all these differences.
| To do this | In Word | In Writer |
|---|---|---|
| Create a table of contents, list of figures, or an alphabetic index | Insert > Index and Tables | Insert > Indexes and Tables > Indexes and Tables |
| Insert index entries | ALT + SHIFT + X | Insert > Indexes and Tables > Entry |
| Create a bibliographic database | Need to use other package | Tools > Bibliography Database |
| Insert bibliographic references into text | Link to field in database | Insert > Indexes and Tables > Bibliography Entry |
| Insert footnotes and endnotes | Insert > Footnote | Insert > Footnote |
| Insert other files | Insert > File, choose Insert or As Link | Insert > File |
| Cross-reference between documents | Use Includetext fields | Currently have to remember the name of the set reference. Reference will show correctly when in master document. (Or use the OutlineCrossRef3-fr-3 macro available from[1]http://ooomacros.org/ user.php#113812. |
| Use master documents | Some experts do not recommend using Master Documents in Word. | File > Send > Create Master Document; use the Navigator (F5) to insert subdocuments. |
Work with graphics
Most graphics work should be done outside Word or Writer, with the graphic files embedded or linked to the Word or Writer file. However, you can do some simple graphics using the drawing tools in Word or Writer. This table covers the basics.
| To do this | In Word | In Writer |
|---|---|---|
| Create Drawing objects | (Word 2000) View > Toolbars > Drawing; (XP) Insert > Picture > New Drawing | Click Show Draw Functions icon in the Standard toolbar. |
| Combine graphics objects and drawing objects | (Word 2000) Edit > Picture > Reset Picture Boundary; (XP) Use drawing canvas | Place all objects in a frame |
| Insert graphics files into a text document (embed or link) | Insert > Picture > From File, choose Insert or As Link | Insert > Picture > From File |
| Anchor graphics | Format > Picture > Layout > Advanced > Picture Position | Use icons on the Drawing Object Properties or Frame toolbar (these toolbars replace the Formatting toolbar when a drawing object or frame is selected) or right-click and choose from pop-up menu, or click Format > Picture |
| Wrap text around graphics | Format > Picture (or Object) > Layout | Use icons on the Frame toolbar, or right-click and choose from pop-up menu, or click Format > Picture > Wrap |
| Crop graphics | Format > Picture > Crop, (or) click Crop tool on Picture toolbar | Format > Picture > Crop(No tool for dragging crop area) |
| Create captions for graphics | Select graphic; Insert > Reference > Caption | Select graphic; Insert > Caption |
| Annotate graphics | Use drawing objects; group, or place in frame or on drawing canvas (XP) | Place all objects in a frame |
| Insert watermark | Format > Background > Printed Watermark > Picture (or Text) Watermark | Format > Page > Background tab or create drawing object, Wrap > In Background, Anchor > To Page |
Mail Merge
Mail merging is significantly different in Writer to Word. See Chapter Using Mail Merge in the Writer Guide.
Envelopes
Adding an envelope
Insert > Envelope
Removing an envelope
- Place the cursor at the beginning of the envelope page.
- If the Styles and Formatting window is not open, press F11 or use Format > Styles and Formatting to display it.
- Change to the Page Styles option. It is the fourth icon from the left.
- Double-click on Default.
- Remove the remaining elements that make up the envelope.
Page styles
Modify a page style
In Writer all pages have a page style. To modify the page style of the page where the cursor is positioned, use Format > Page.
| As the page style is being changed, all pages with this style will be changed as well. |
Create a style
To create a new page style:
- If the Styles and Formatting window is not currently displayed, press F11 to display it.
- Click Page Styles in the Styles and Formatting window (fourth icon from left).
- Right-click in a free area of the Styles and Formatting window > New.
The Page Style dialog
Click Format > Page. The Page Style window opens.
Organizer tab
Name: Nothing tricky here, simply a name to help the user remember what the settings are for.
Next style: This setting specifies what page style to use at the next page break (manual or automatic) for any page that has this page style. Set it to a different page style when the page style is only for one page (such as the first page of each chapter), otherwise this should be the same as Name to keep the same page style for the following pages.
Page tab
Paper format : Format is the paper size, the other settings have the same names in Word (on the paper size tab of page setup).
Margin : Same as for Word. Each setting represents the distance from the edge of the page, but see “Header and footer tabs” as the location of headers and footers relative to the margins is different.
Layout settings: Page layout is for specifying whether the page style is mirrored (used for left and right pages). There are more options here than in Word, but there is not a different first page option, that is because it is handled by the Next style setting as mentioned above in Organizer tab. Format refers to the format of page numbers. Register true is to make the text line up better at the top of the page (see help for more details).
Background tab
For specifying a background color or graphic (watermark). (An alternative to this with more flexibility is to create a drawing object, then use Arrange > To Background, Anchor > To Page.)
Header and footer tabs
Headers and footers are printed between the margins of the page rather than in the top or bottom margins as they are in Word. Another way of saying this is that for the top of a page the area between the edge of the page and the top margin is always blank, next is the header, and after the header, the main text area for the page.
Height: AutoFit height allows the header or footer to grow and shrink depending on their contents.
Spacing specifies the distance between the header/footer and the main text area on the page. Dynamic spacing allows the header/footer to expand into the area between the header/footer and the main text area.
The left and right margins are indenting from the margins of the page and cannot have negative values.
The More button is for specifying borders and backgrounds for the header/footer area. In some versions of Word this approach was used to create a watermark. Since it is possible to have graphics in the background of the main document, this is not the required way of having a watermark in Writer.
Borders, columns and footnote tabs
These tabs are for specifying the borders (lines around the outside), number and widths of newspaper style columns and defining the area for footnotes (if any) for the page style.
Page breaks and page numbering
Changing the style used for a page and changing the numbering sequence
To insert a page break and change page style or page numbering, method 1:
- Press Control+Enter.
- Cursor will be in the first paragraph of the new page.
- Format > Paragraph > Text Flow tab.
- Breaks will be enabled.
- Select With Page style, specify the page style to use and specify the page number to start from.
To insert a page break and change page style or page numbering, method 2:
- Insert > Manual Break
- By default it will specify Page breaks.
- Choose the page style in the Page style list.
- Select Change page number.
- Enter the new starting page number.
To insert page numbering
- Define a page style with header or footer turned on.
- Position the cursor in the header or footer (use the mouse or the shortcut keys Control+PageUp for Header or Control+PageDown for footer).
- Optionally type: Page <space>.
- Insert > Fields > Page Number.
- Optionally type <space> of <space>, then click Insert > Fields > Page Count.
To insert a field that calculates a different page count (for example, when you have a title page but want to have the remaining pages say page 1 of 2 (instead of page 1 of 3 ):
- Press F2 to display the text formula bar.
- Type =page – 1.
- Press Enter.
| Unfortunately this field does not automatically update, so press F9 to update it before printing. |
Page numbers on portrait and landscape pages in the same place and orientation
- Create a style for landscape pages. Set the margins for the landscape style such that they correspond with the portrait style when rotated (top = left, bottom = right, left = bottom and right = top). For page numbering on left, turn on headers; on right – footers. Select Use dynamic spacing.
- Create a style for the landscape header or footer based on the style for the portrait header or footer. (In the Styles and Formatting window, select the style that is used for the portrait header or footer > right-click > New.) Change the font position to 270°. If the page numbering is on the bottom choose left alignment, for the top choose right.
- Insert the page break and choose the page style just created (see above); do not change the numbering.
- In the relevant header/footer (as per step 1) insert the page number field.
Conditional text
In Word the only way to have conditional text is with the “if” field[2]. The equivalent in Writer is the field “Conditional text”.
To insert a conditional field in Writer: Insert > Fields > Other > Functions > Conditional text or Control+F2 > Functions > Conditional text.
There is also a field “Hidden text” that hides the text when the condition is true.
Working with the relevant fields for conditional text, both in Word and in Writer, means that only small amounts of text can be conditional. However, there are times when having whole paragraphs or sections of text be conditionally hidden is very convenient. Some examples:
A test so that the same document can be used for the test itself and for the model answers.
Technical documents where the same document with variations can be used for similar models of equipment.
Writer provides a field for conditionally hiding paragraphs and the ability to conditionally hide sections. Here is an example to show how this could be done:
- Ensure that hidden text is viewable: Tools > Options > OpenOffice Writer > Formatting Aids, select both “Fields: Hidden text” and “Fields: Hidden paragraphs”.
| Conditionally hidden sections are not visible regardless of these settings if the condition for hiding them is true. |
- At the top of the document: Insert > Fields > Other > Variables.
- Name: DocType. Value: Model Answers.
- At the start of a one paragraph answer: Insert > Fields > Other > Functions > Hidden Paragraph. For the condition type DocType == “Test” (To make this easier to insert repeatedly, create an autocorrect entry).
- For longer answers: Enter the model answer, select it, Insert > Section, select Hide, and enter DocType == “Test” for the condition.
- To print the document for a test, double-click the field at the top of the document created in steps 2 and 3, and change the value to Test. Print as usual.
| The field “Input list” has a name, but this is not a variable, so its value cannot be used in the condition. |
| To keep adding sections, it is easier if the selection does not include the last paragraph. But if the last paragraph is selected, simply move to the end of the document (Control+End ) and then press Alt+Enter. |
Master documents
OOo Help covers the basics of using master documents, or see Work with large or complex documents, or for even more information see Chapter Working with Master Documents in the Writer Guide.
It is possible to insert cross-references across subdocuments but the names of the references must be typed in rather than selected from a list.
Use Insert > Fields > Other > References.
A macro to help insert references to headings, including references across documents that will be subdocuments in a master document, is available in a document called OutlineCrossRef3-fr-3.available from https://sourceforge.net/projects/ooomacros/files/Heading%20Cross%20Referencer/Version%203-fr-3/OutlineCrossRef3-fr-3.zip/download.
| There is no way to have a landscape page in a subdocument remain as a landscape page when included in the master document. The workarounds are to have the landscape page be part of the master document rather than a subdocument or to have the entire subdocument as landscape. |
Cite error: <ref> tags exist, but no <references/> tag was found
Microsoft Word 2007 – Home Tab
| New Look | Home Tab | Insert Tab | Page Layout Tab | References Tab |
| Mailings Tab | Review Tab | View Tab | Acrobat Tab | Misc. Items |
The Home Tab in MS word – Tutorial
The Home Tab is by far the most important Tab in Microsoft Word 2007. The Home Tab contains all the commands that are used most often. These include formatting commands like changing text size, font style, font color, list types, and clipboard functionality like Cut, Copy and Paste. Furthermore, the home tab in Word 2007 includes features like text alignment, line spacing, gallery styles and theme settings. Finally, the Home Tab includes the asrcility to find and replace text.
For this lesson I will be using my resume for practice. Here is a print screen of the Home Tab in Microsoft Word 2007.

The groups on the Home Tab are as follows:
- Clipboard
- Font
- Paragraph
- Styles
- Editing
Let us take a look at these groups one at a time. The first one is the Clipboard. This group includes popular commands like Cut, Copy and Paste. Using the Cut command, you can remove a piece of text from one location and insert it into a new location within the same document. You can also use the Copy command instead of the Cut command, however this will leave the original text in place. Next you can browse to the new location where you would like to insert the cut text. Using the Paste command you can then insert the text at this new spot.
For our example, I am going to move the section on Education all the way down in my resume. You can first select the text using the keyboard or mouse. Next you can click on Cut button to add this to the clipboard.
Here is a screen shot of what I am talking about.
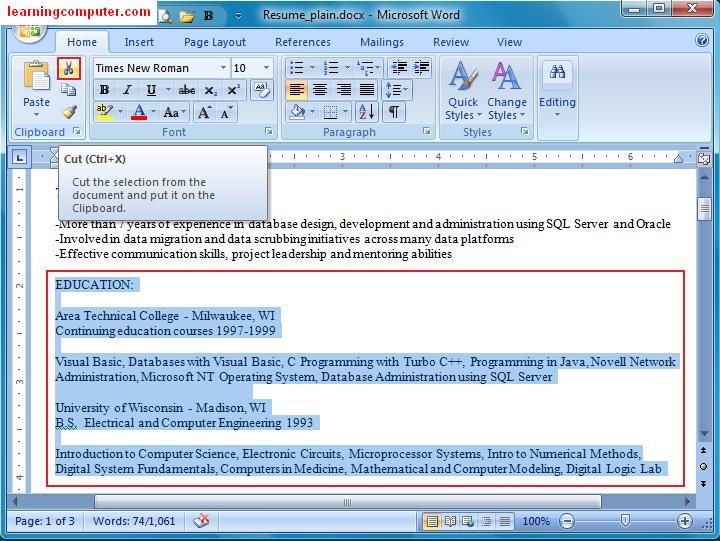
Next I scroll all the way down in my resume. I find a new line and click on the mouse to enable the insertion point. Then, I click on the Paste command under the Clipboard group to insert the section on my Education.
Here is a screen capture of this action:

You will notice that the Education text block has now been inserted into the new area which happens to be on a new page. You can see that we are currently on the second page whereas we were on page one before we did the Cut and Paste operation.
When you need to modify a part of the text in your Microsoft Word document, you can use the Font group under Home Tab. You can choose from options like font size, font type, bold, italicize, underline etc. In addition you can highlight a portion of your document and experiment with different font colors under the Font group in Microsoft Word 2007. Here is a display of the formatting options relating to Font.
Let’s say we would like to change TECHNICAL SUMMARY heading in my resume to bold. You can highlight the specific text and then click on the Bold command as shown in the red square below.

Here is the end result in Bold instead of Normal font setting shown previously.

Notice that the font group also has a dialog box launcher on the bottom-right corner in the Ribbon screen shot below. This gives you even more options related to font and character spacing. These may look familiar to you as they were available in Microsoft Word 2003 and earlier versions.
The next few figures display these options.


I’m going to switch back to the Format Painter option that I skipped over from the clipboard group. This is a handy little feature that will let you copy formatting from one place to another using the mouse. This is what you need to do. First you need to select your text, apply the necessary formatting and then double click on the format painter command. Now you can highlight any text in your document that needs to have the same formatting. Sweet! In the case of my resume, I want to copy formatting from Technical Summary to all the Headings like Software Skillset, Professional Experience, etc.
Here is a screen shot of the needed steps in order.
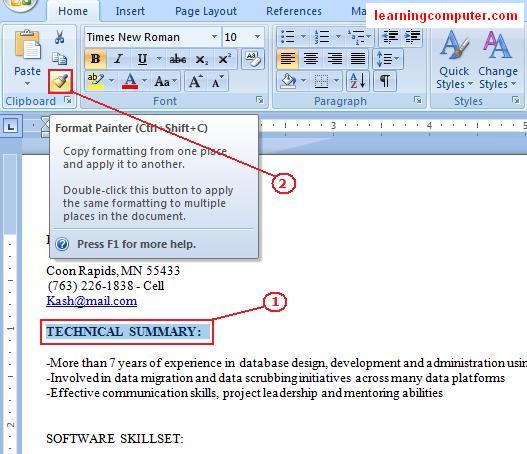
As long as the Format Painter option is enabled, you can simply copy that formatting anywhere in the document. I just applied the formatting from Technical Summary to Software Skillset as shown below.
I also feel that I need to emphasize the Technical Summary portion of my document. I’m going to highlight the specific area and then change the font style to something more eye catching. After I select my text, I can click on font style drop down, and try one of the many available fonts from the list. You will notice as you hover over these font styles, Microsoft word 2007 will give you a live preview of what the text will look like after the selection has been made. I really like the Live Preview feature in Microsoft word 2007, very cool. I think I like the Franklin Gothic Demit font style, so I will choose that one.
This is shown as follows.
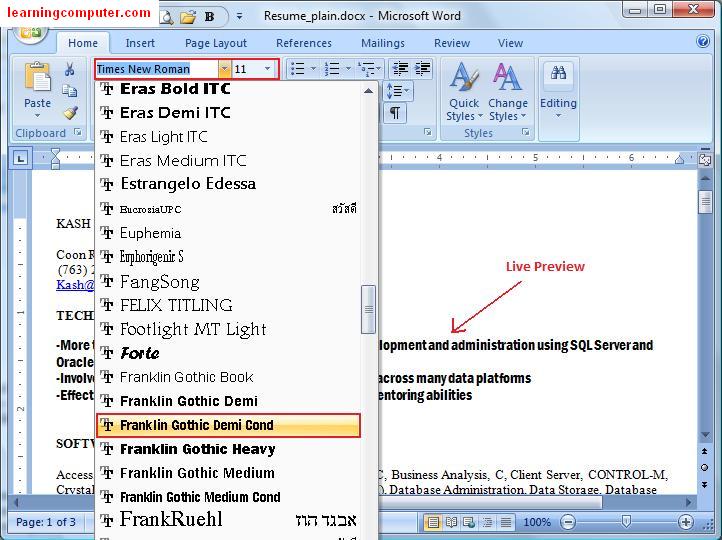
The Headings look good in my resume, however my actual software skills look rather blah. How about a little font color change to spice things up? I can do just that by using the color palette options under the font group. Purple looks good so I will select this choice for my skills section. My resume looks acceptable now so I will go ahead and save this document.

Sometimes you may have made a lot of changes, maybe more than you wanted to, I do that sometimes. At that juncture you may wish to clear all the formatting from your document. You are in luck as Microsoft Word 2007 has just this option for you. It is the Clear Formatting command under the Font group. The keyboard shortcut for this is Ctrl + Spacebar.
Here is what it looks like and the screen capture below.
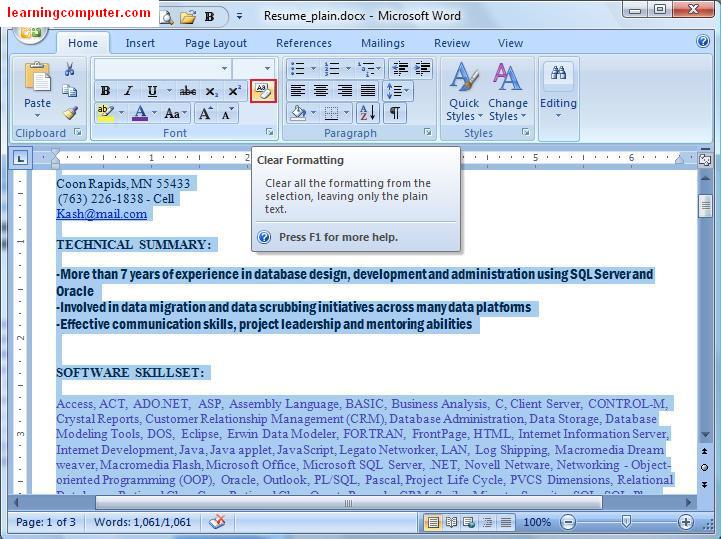
After I used this option, I was able to get back to my original plain resume. It’s good to remember the Clear Formatting option when you need to get back to the way things were originally.

Moving on to the Paragraph Group, here you are able to start a bulleted list, numbered list, multilevel list, increase or decrease indentation, change the text alignment, increase or decrease line spacing… Furthermore you can add features like borders and shading.
Here is a screen shot of this listed below.
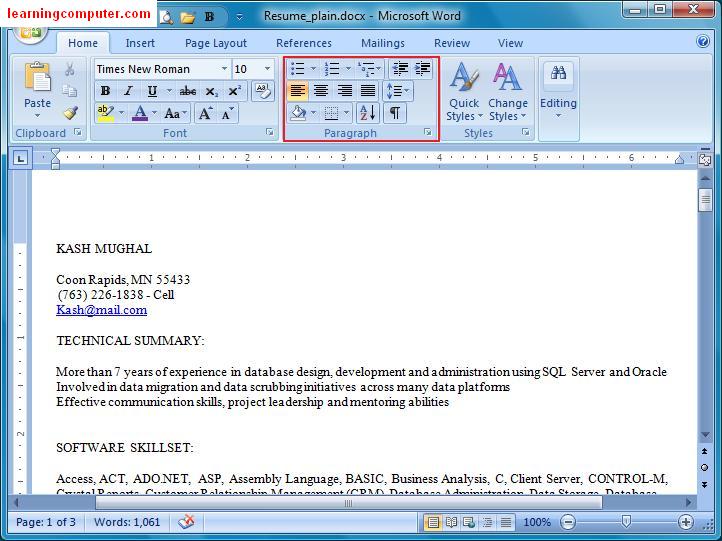
The Paragraph Group in Microsoft Word 2007 has a lot of different options just like the font group. Let us jump right into it and start looking at these features one at a time. After I switched my resume to the old boring format, I am ready to redesign it again. I will be using bullets to highlight the Technical Summary section. In order to do this, I will select the section and then click on Bullets command on the paragraph group.
Here is an example using this feature.

As I scroll down my resume, I would like to align all the employers along the right margin. You can do this by selecting the appropriate text and choosing the align text right command.
I have a screen capture of this right below in red rectangle. Notice that now the employer info. has shifted to the right margin, perfect!
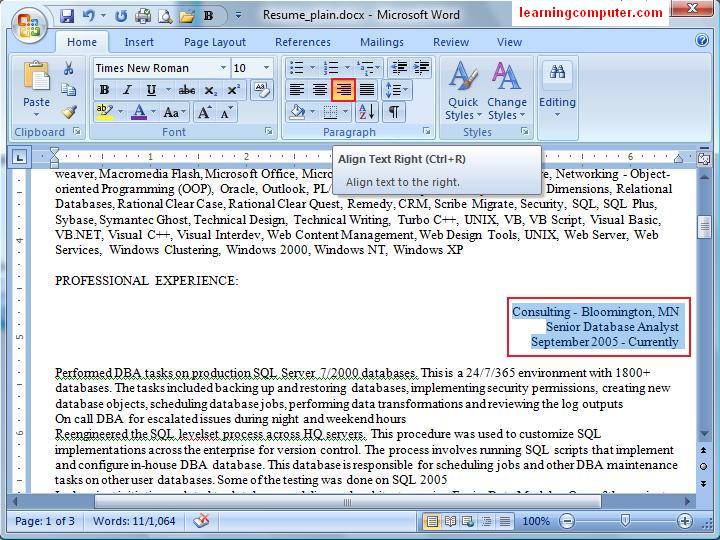
Within my job highlights, all the items are jumbled up, that is definitely not good. I would like to possibly use a numbered list to organize the highlights of my prior job positions. Let’s try this in our next practice area. You can highlight the necessary part in your document, click on the numbered drop down menu of commands as shown below.
In my case I used the one in the red square. After I selected this option, it applied the formatting rather nicely to my resume, shown in the long red rectangle.
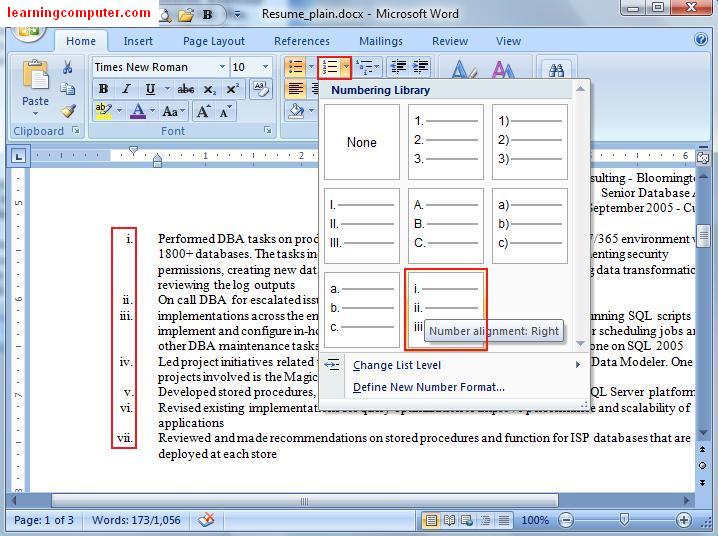
As a final touch to my position highlights at the consulting company in Bloomington Minnesota, I would like to add some more line spacing here. Currently it is using a single spacing which needs to be changed to 1.5 instead. I will highlight the text, click on the line spacing command and then choose 1.5.
This will apply the correct line spacing as follows.
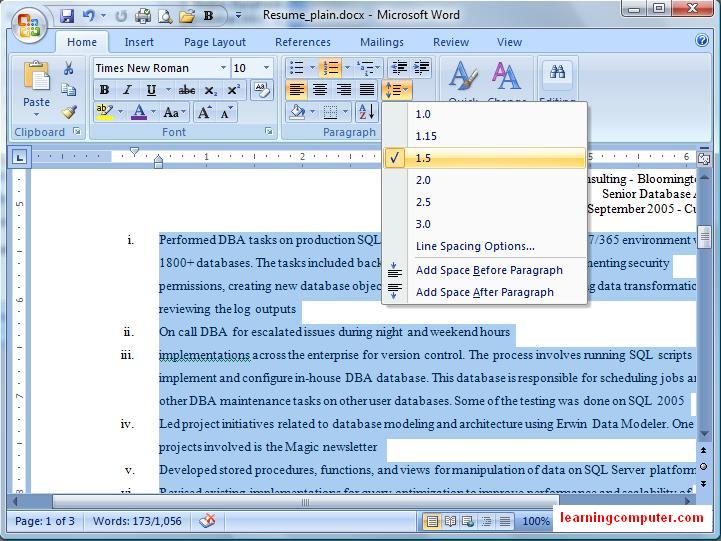
The last feature I want to look at in the paragraph group is the ability to add indentation in a document. A good candidate for this in my resume is the Education section. I will highlight that entire area and then click on increase indent command (red square). When I did that, it moved the text to the right about half an inch.
This is illustrated by the red arrows shown below. Ok, I am done with this resume for now so I will go ahead and save it.

The next group, Styles is going to make the biggest impact in your document layout and design. Microsoft Word 2007 has done an excellent job of creating pre-defined quick text styles that you can easily put to work.
A style is a set of formatting settings, such as font type, size, color, paragraph alignment, spacing and graphic settings. When you use these ready made styles to format your document, you can quickly and easily apply a set of formatting choices consistently throughout your document.
Here is a screen capture of the different styles with a preview of what they look like on top.
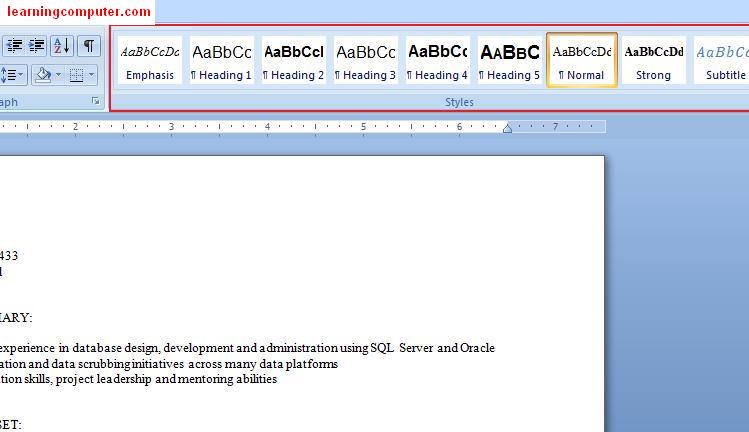
Notice in the document above we are using Normal style. Right next to it you will see some other gallery styles, including Heading 5, Strong, Subtitle etc. In order to work with the styles, you can simply highlight the text and choose one of the many pre-defined styles.
Let’s practice with one of these styles now. We are going to select my contact information in the resume, and choose one of the styles. This is what you need to do to make this happen. First select the text that you would like to change (step 1), then click on quick styles (step 2) and finally choose one of the available styles. Using these steps I was able to change my contact information to Intense Quote, very nice indeed.
Here’s what it looks like on my computer screen.

Another excellent function of this group is the Live Preview mode in Microsoft Word 2007. When you highlight certain text and choose a quick style, Microsoft will apply a temporary formatting to it that will let you review the style before you decide to accept, sort of like “Test drive before you buy”. You can even change the style in your document to a global level by choosing Style Set command under the styles group.
Here is a screen shot of this with the necessary steps in order of action.
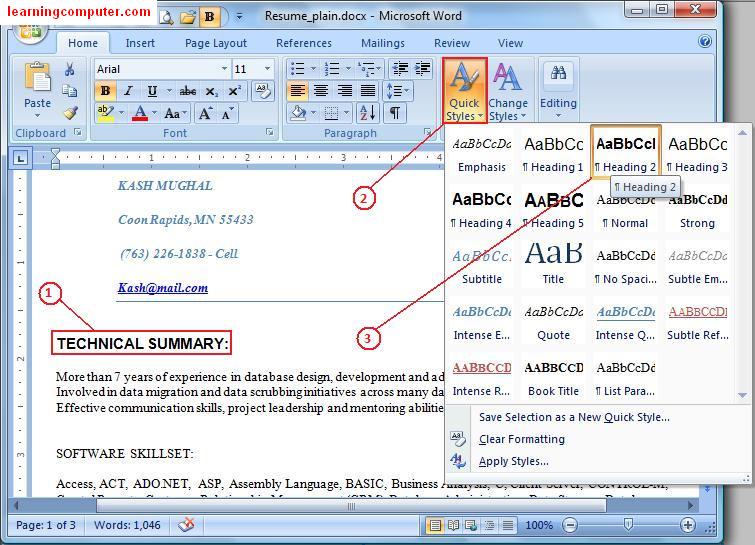
Using the same Quick Styles I’m going to apply the Heading 2 to Software Skillset and Professional Experience also.
These are visible by the red rectangle in the screen capture below.

My resume is looking quite good now as opposed to the plain one that I started with. However I still need to add a little more pizazz to this document. What can we do to achieve this? How about using one of the ready made style sets available from the styles group? When you select one of these style sets, you will notice that not only do the styles on the ribbon change but all styles in your document are updated as well.
Before using the style sets you need to define elements like headings, titles, quotes, and subtitles in your document. We already did that in the previous step so we are good to go. For my resume I will click on change styles, choose style set, and then select “Word 2007” style. Wow! Notice the dramatic change in my document as captured by the screen shot below!
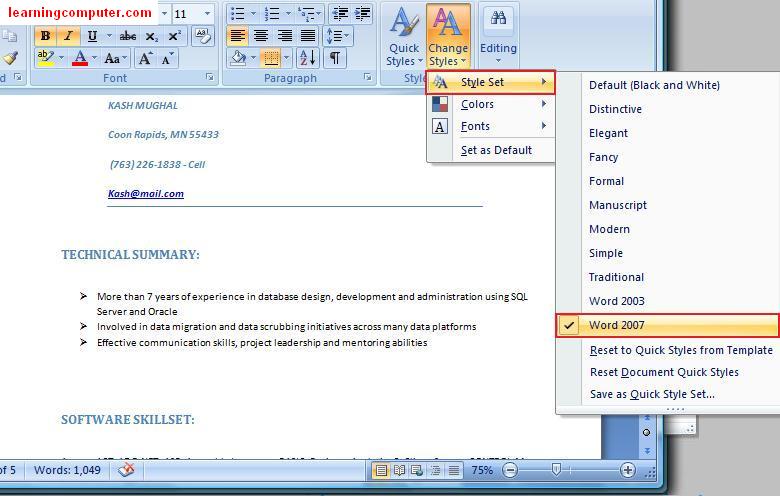
I think I have finally found what I was looking for. My resume looks awesome with selected color scheme, font choices and smooth graphical formatting. Let us go ahead and save this document now.
Here is a preview of the final product, just a little improvement over the original one, don’t you think?

The final option I wanted to talk about is the Editing group. This will help us in finding text, replacing text and selecting document elements. Let’s say you wanted to find a certain text or expression in your document, no problem. I can use the Find command to do just that. You can even change the text easily by using the replace command. In my case I want to replace the word DBA to database administrator in my resume.
I need to select the text first, click on Editing option and then choose Replace. This is shown below in the screen shot.
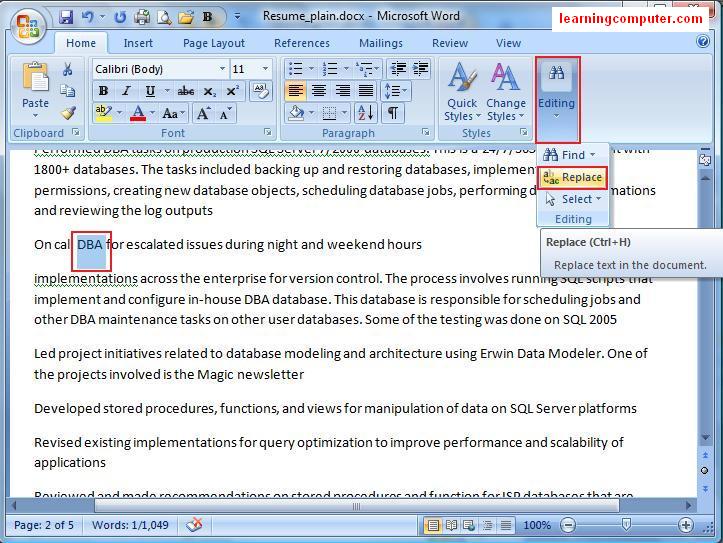
This will invoke the Find and Replace dialog box as shown below. The original word is in Find what textbox, the new word is in the Replace with textbox. As I click Replace, it will switch DBA to database administrator.
I have highlighted the first word that it found as shown below. This looks good so let’s go ahead and click on Replace All command button.
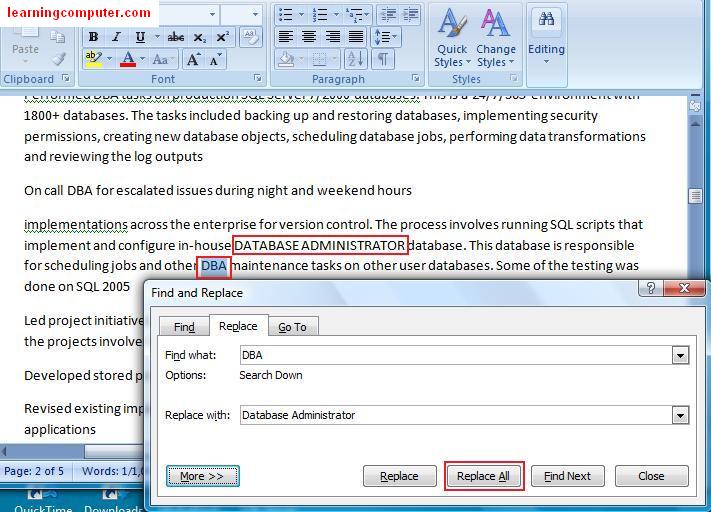
Looks like there were two other instances of this word in my resume so Microsoft Word 2007 was able to make the change with a breeze.
This is visible in the screen capture below. Click Yes and we are finished! Yippee!

Download PC Repair Tool to quickly find & fix Windows errors automatically
Content Controls in Microsoft Word offer a great way to automate your document creation. It also helps in organizing the content in a structured manner. These and many more features make Content controls easy to understand and use. So, let’s see how to add and change content controls in Word.
Content controls mostly find their use in creating templates and forms as they provide flexibility in content placement. Also, depending on your preferences, you can prevent them from being edited or deleted. Here’s how!
- Click File in Word.
- Scroll down to Options.
- Choose Customize Ribbon.
- Select the Developer box.
- Click OK.
- To add a Content control, click Rich Text Content Control box.
- Place the box at appropriate location, select Properties.
- Add General Information.
- Change Locking permissions.
How do you edit Rich Text Content Control?
Before proceeding with the steps to edit or Rich Text Content Control in Word, you’ll need to add the Developer tab to the Ribbon menu in Word.
For this, click the File tab on the Ribbon menu and choose Options.
When the Options window opens, navigate to Customize Ribbon.

Here, select the Developer box and hit the Ok button as shown in the image above.
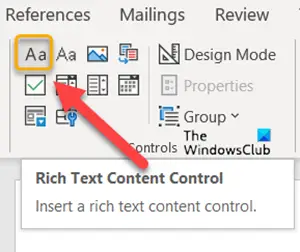
Next, to add a Content control, click Rich Text Content Control box.
Place the box at the appropriate location, to create a template.
Then, select Properties under Controls block.
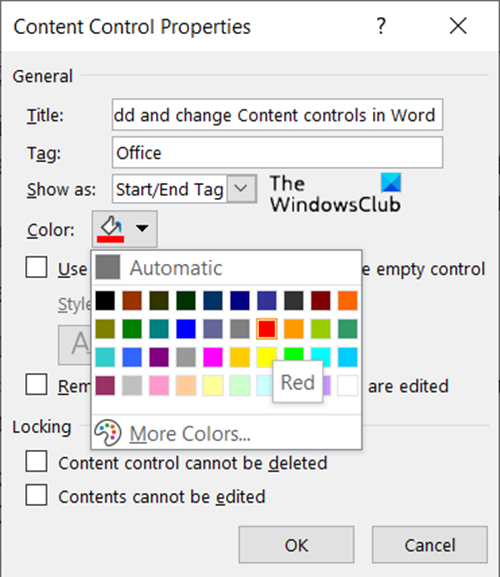
Add description like the title for the box, tags to be used, color for the box, etc.
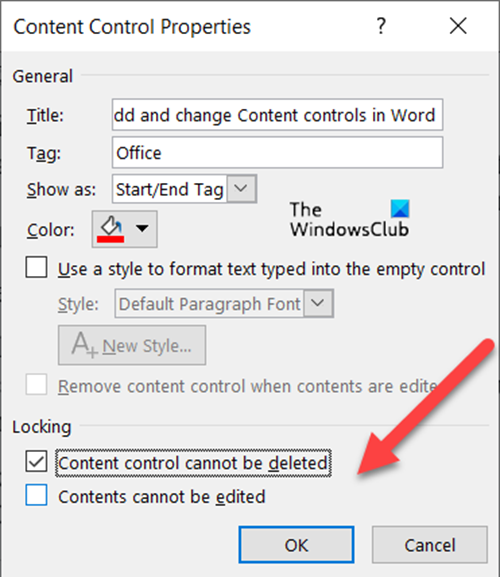
You can also change Content controls by changing its locking permission (editing or deleting them) by checking/un-checking the following boxes.
- Content Controls cannot be deleted.
- Content Controls cannot be edited.
Similarly, you can choose to create a Drop-down List via Content controls.
How do I remove content control in Word?
If you would like to delete or remove Content controls in Word:
- Press Ctrl+A to select the entire document.
- Then, right-click a visible content control.
- Now, in the context menu that appears on your computer screen, click Remove Content Control.
What is a Rich Text Content control?
A block of rich text that can be formatted represents a Rich Text Content control. So, all the custom formatted text like pictures, tables and other such items can be included in this category.
Hope it helps!

A post-graduate in Biotechnology, Hemant switched gears to writing about Microsoft technologies and has been a contributor to TheWindowsClub since then. When he is not working, you can usually find him out traveling to different places or indulging himself in binge-watching.
Какой бы творческой ни была работа за компьютером, в ней всегда присутствует немного монотонности. Мы собрали самые популярные горячие клавиши и лайфхаки основных рабочих программ, которые заметно упростят жизнь.
Важно: комбинации прописаны в Windows-формате. Большинство из них работает и в MacOS — достаточно только заменить Alt на Opt и Shift на ⌘Cmd.
А если хотите не просто упростить жизнь, но и прокачаться в диджитал-маркетинге — SEO, PPC, SMM, арбитраже трафика, веб-аналитике — приходите учиться в CyberMarketing. У нас есть разные обучающие форматы: статьи, вебинары, видеокурсы, интенсивы. Преподают эксперты Promopult, Click.ru и др.
Горячие клавиши Microsoft Word / Google Docs
Самый популярный текстовый редактор припас для своих пользователей 30 «волшебных» сочетаний клавиш и два лайфхака, которые помогут всем, чья жизнь связана с текстом: от секретарши на ресепшене до программистов и бухгалтеров. А чтобы было проще применять и запоминать, мы собрали их в отдельные блоки.
Специальные символы
Далеко не на всех клавиатурах есть продвинутые типографские символы. Но чтобы решить эту проблему, не нужно тратиться на новую клавиатуру. Достаточно запомнить комбинации (работают только с левым Alt и включенным NumLock, если набирать на цифровой клавиатуре):
- Alt + 0151 — длинное тире;
- Alt + 0171 — « открывающие кавычки-елочки;
- Alt + 0187 — » закрывающие кавычки-елочки;
- Alt + 769 — ударение.
Альтернативой этому выступает установка типографской раскладки Бирмана — с ней станет проще поставить кавычки-елочки, длинное тире, знак параграфа и еще много других полезных, часто используемых символов.
Быстрое удаление слов
Порой в творческом порыве слова так и летят. Но как же быстро удалить лишнее, без движений мышкой? Для этого есть следующие сочетания:
- Ctrl + Backspace — удалить слово слева;
- Ctrl + Delete — удалить одно слово справа.
Форматирование текста в Microsoft Word
Для редактирования текста не обязательно использовать мышь или тачпад — все основные команды доступны посредством хоткеев. Изменение стиля текста происходит так:
- Alt + Ctrl + 1 — Заголовок 1 (H1);
- Alt + Ctrl + 2 — Заголовок 2 (H2);
- Alt + Ctrl + 3 — Заголовок 3 (H3).
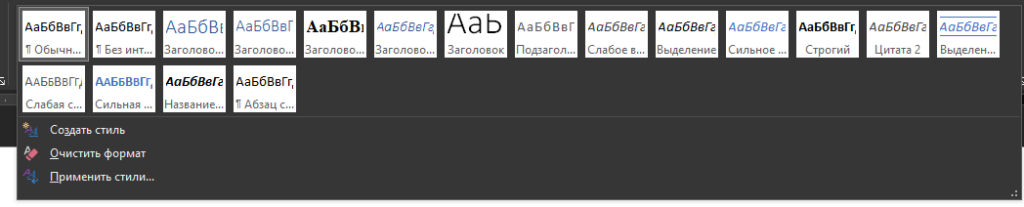 Выбор формата в MS Word
Для работы с абзацами пригодятся вот такие горячие клавиши:
- Ctrl + M — увеличивает отступ абзаца на один уровень;
- Ctrl + Shift + M — уменьшает отступ на уровень;
- Ctrl + T — увеличивает отступ следующей строки;
- Ctrl + Shift + T — уменьшает отступ следующей строки;
- Ctrl + L — выровнять абзац по левому краю;
- Ctrl + R — выровнять абзац по правому краю;
- Ctrl + E — выровнять абзац по центру.
Для быстрой правки регистра рассмотрите эти шорткаты:
- Ctrl + Shift + A — форматирует все выделенные буквы в верхний регистр (делает капсом);
- Ctrl + Shift + K — форматирует в нижний регистр.
«Поиграться со шрифтом» помогут комбинации:
- Ctrl + B — жирный (Bold);
- Ctrl + I — курсив (Italic);
- Ctrl + U — подчеркивание всего выделенного текста (Under);
 В интерфейсе тоже есть подсказки по горячим клавишам
- Ctrl + Shift + W — подчеркивание только слов (пробелы и знаки препинания остаются без подчеркивания);
- Ctrl+Shift+D — слова подчеркиваются двойной линией;
- Ctrl+Shift+! — увеличить размер шрифта;
- Ctrl+Shift+( — уменьшить размер шрифта;
- Ctrl + Shift + C — скопировать форматирование символа выделения (включая особенности шрифта и регистр);
- Ctrl + Shift + V — вставить форматирование на выделенный текст;
- Ctrl + Space — удалить все ручное форматирование символов из выделения, возвращая формат по умолчанию.
Тем, кому нужно постоянно вставлять в документы текущие дату и время, помогут следующие сочетания:
- Shift + Alt + T — вставить в документ время. Если ПК отображает 24-часовую схему, то в тексте будет 19:25. У тех, кто любит 12-часовую систему, та же команда пропишет 7:25.
- Shift + Alt + D — вставка текущей даты в формате «день/месяц/год».
 После применения соответствующих горячих клавиш в Word
Расширенный буфер обмена
Настоящее спасение для тех, кто работает с огромным количеством информации. Вызвать его можно так:
- Откройте меню «Главная».
- Перейдите в блок «Буфер обмена».
- Кликните на иконку расширения.
Дальше текстовый редактор покажет несколько последних объектов из буфера обмена. Выбирайте нужную инфу и вставляйте её в один клик.
Автоматическая расстановка переносов
Сделайте это один раз и забудьте о ручной расстановке переносов во всех своих документах. Для этого следуйте данному алгоритму:
- Зайдите в меню «Макет».
- Выберите блок «Параметры страницы» (первый слева).
- Перейдите в пункт «Расстановка переносов» и кликните «Авто».
Отменяется перенос аналогичным способом, только вместо «Авто» нужно кликнуть «Нет».
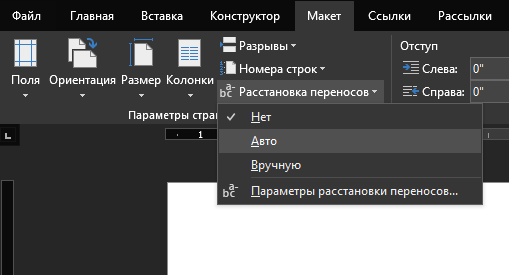 Настройка расстановки переносов в Ворде
Уникальные шоркаты Гугл Документов
В большинстве случаев Google Docs воспринимает те же горячие клавиши, что используются для Office-линейки. Но есть 6 уникальных хоткеев, что упростят работу и отчетность в этом онлайн-редакторе:
- Ctrl + Alt + Shift + H — открыть историю изменений;
- Ctrl + Alt + Shift + I — показать панель анализа данных «Обзор»;
- Ctrl + Alt + X — начать проверку правописания;
- Ctrl + Shift + C — статистика документа (количество букв, слов, страниц);
- Ctrl + Shift + S — запустить голосовой ввод (работает только в Chrome);
- Ctrl + Shift + Y — открыть словарь.
Читайте также: 11 инструментов для конвертации файлов: документов, изображений, фото, видео, аудио
Горячие клавиши Excel / Google Sheets
Работа в Экселе порой подбешивает даже тех, кто обожает работать с таблицами. И это нормально — такое количество действий с функциями держать в голове довольно сложно. Ниже комбинации, которые заметно упростят рабочие будни:
- Shift + Пробел — выделить строку;
- Ctrl + Пробел — выделить столбец;
- PageDown (с выключенным NumLock) — плавно переместиться вниз;
- PageUp — плавно переместиться вверх;
- Ctrl + H — вызов диалога «Найти и заменить»;
- Shift + F3 — вызов «Мастера Функций»;
- Shift + F11 — быстрое добавление чистого листа.
Автоподбор ширины столбцов
Забудьте о постоянной настройке ширины столбцов «методом тыка» — подстраивая, пока не найдете оптимальный вариант. Excel умеет самостоятельно подбирать ширину. Для этого достаточно сделать двойной клик на границе двух столбцов — дальше система сама это настроит.
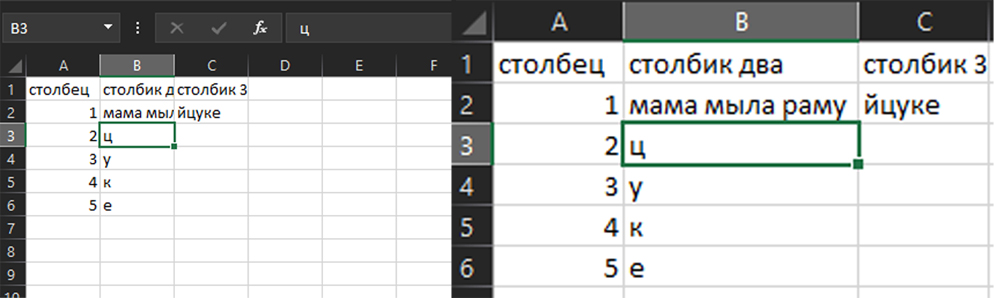 Автоподбор ширины столбцов в Excel
Если нужно за раз проработать сразу несколько столбцов — выделите их и проделайте вышеперечисленное с первым столбцом в группе.
Быстрая диаграмма
Все мы обожаем визуальную подачу контента, но далеко не все постигли мастерство создания красивых графиков в Экселе. В таком случае выручит клавиша F11. Выделите необходимый участок в таблице и зажмите F11 ( в ноутбуках придется использовать комбинацию Fn+F11). И буквально через несколько секунд на новом листе появится диаграмма.
Читайте также: 25 инструментов для анализа и визуализации данных
Перерасчет формул
Не сходится дебет с кредитом или нет ответов в каких-то ячейках? Перепроверьте формулы в документе:
- F9 — сделает перерасчет формул по всей книге;
- Shift + F9 — ограничит перерасчет текущим листом.
Быстрое копирование
Допустим, вам нужно ввести одну и ту же формулу/имя/число до конца столбца. Не тяните его — есть способ попроще. Поставьте указатель мышки к правому нижнему углу, пока вместо него не появится черный крестик. Теперь не тяните его, а просто сделайте двойной щелчок.
Для тех, кому нужно растянуть числовое значение (при составлении списков гостей или контрагентов) — попробуйте растянуть ячейку с зажатым Ctrl. В этом случае, протяните указатель мышки всё к тому же уголку, и когда появится черный крестик, зажмите Ctrl и тяните вниз, пока не получите желаемые результаты.
Преобразование столбца в строку и обратно
Вы прописали длинный столбец важной информации и тут понимаете, что с ним будет удобнее работать, если эта инфа будет указана строчкой. Не тратьте время на переписывание информации и последующую проверку правильности ввода.
Скопируйте обычным способом нужный диапазон. А дальше используйте специальную вставку (Ctrl+Alt+V), в появившемся окошке выберите «Транспонировать» и поставьте рядом с этим значением «птичку». Подтвердите свои намерения нажатием «ОК» и вот вся необходимая информация уже появится в нужном формате.
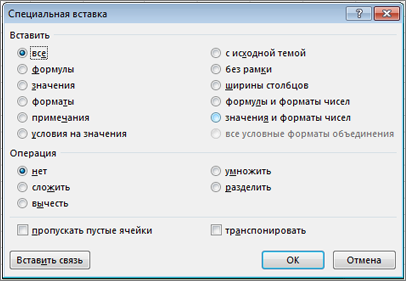 Меню специальной вставки в Excel
Дополнительные шорткаты для Гугл Таблиц
Google Spreadsheets легко считывают большинство сочетаний клавиш Excel и других офисных программ (например, Ctrl + B для установки полужирного форматирования. Правда, и здесь присутствуют уникальные хоткеи, например, для применения различных форматов:
- Ctrl + Shift + 1 — включить десятичный формат;
- Ctrl + Shift + 2 — применить формат времени;
- Ctrl + Shift + 3 — изменить текущий формат на дату;
- Ctrl + Shift + 4 — поменять формат ячейки на «Валюта»;
- Ctrl + Shift + 5 — формат «Проценты»;
- Ctrl + Shift + 6 — включить экспоненциальный формат.
Быстро вставить дату и время в ячейку с «базовым» форматированием смогут шорткаты:
- Ctrl + Shift + ; — текущее время;
- Ctrl + ; — текущая дата;
- Ctrl + Alt + Shift + ; — дата и время.
Для работы с комментариями пригодятся сочетания:
- Ctrl + Alt + M — добавить коммент;
- Ctrl + Alt + Shift + A — открыть список комментариев;
- Зажать Ctrl + Alt, нажать клавишу E, а потом C — открыть коммент;
- Удерживать Ctrl + Alt, после N, затем C — следующий коммент;
- Зажать Ctrl + Alt, потом P, затем C — предыдущий коментарий.
Проанализировать таблицу помогут следующие уникальные сочетания:
- Alt + Shift + X — панель анализа данных;
- Ctrl + Alt + Shift + M — сделать часть неактивной;
- Ctrl + Alt + Shift + H — показать историю изменений документа;
- Ctrl + Alt + Минус (-) — открыть меню удаления.
И еще для работы со строками, столбцами и данными в них пригодятся:
- Ctrl + Alt + = — вставить строки выше;
- Alt + I, затем W (для Хрома) — вставить строки ниже;
- Ctrl + Alt + = — вставить столбцы слева;
- Alt + I, затем O (для Хрома) — вставить столбцы справа;
- Ctrl + Alt + Минус (-) (после выбора строк или столбцов) — удалить строки или столбцы;
- Alt + Shift + стрелка вправо — сгруппировать строки или столбцы;
- Ctrl + ~ — показать все формулы на листе;
- Ctrl + — очистить форматирование;
- Ctrl + Shift + V — вставить только значения, без форматирования.
Читайте также: 20+ продвинутых функций Google Таблиц (Spreadsheets)
Горячие клавиши и лайфхаки Power Point
Завершает подборку фишек офисных программ четыре лайфхака, чтобы заметно упростить работу с Microsoft PowerPoint. С их помощью можно тратить меньше времени на рутину.
Быстрая вставка форматирования
Создать красивую презентацию без предустановленных шаблонов — труд, требующий много усилий. И в том случае, если хочется скопировать форматирование слайда и перенести его на последующие, воспользуйтесь «быстрой вставкой форматирования».
Для этого нужно выбрать необходимые объекты (или весь лист) и нажать комбинацию клавиш Ctrl + Shift + C. Дальше перейдите на новый слайд и вставьте нужное оформление через Ctrl + Shift + V.
Текстовая информация на втором листе останется неизменной, однако шрифт, наклон и другие внешние особенности слайда копируются из прежнего места.
Удобное масштабирование
Неудачное изменение пропорций во время масштабирования картинок в PowerPoint — довольно частая картина. Чтобы избежать этого, достаточно во время изменения размера картинки зажать клавишу Shift. Так вы зафиксируете пропорции и сможете менять иллюстрацию без искажений.
Группировка слайдов по разделам
При создании крупных презентаций легко запутаться в десятках листов. Упростите себе работу — группируйте слайды по смысловым блокам. Делается это так:
- Кликнуть ПКМ по тому слайду, с которого будет начинаться новый раздел.
- В появившемся окне прописать имя нового блока.
- Подтвердить выбор кнопкой «Переименовать».
- Выполнить такие же действия с остальными смысловыми блоками слайдов.
Важно: все листы должны идти друг за другом. Объединить слайды, находящиеся в разных концах презентации, таким способом невозможно.
 Группировка слайдов в PowerPoint
Быстрая навигация в режиме слайдшоу
В больших проектах правки могут приходить в самый последний момент. Иногда этот момент наступает прямо во время презентации, что не дает возможности изменить контент на листах. Здесь на помощь придет быстрая навигация:
- N — перейти на следующий слайд;
- P — вернуться к предыдущему листу;
- B — скрыть текущий слайд черным;
- W — скрыть лист белым цветом.
Сам контент внутри слайда останется нетронутым. Действие «прикрытия» работает только с текущим листом — если в вашей презентации появились несколько слайдов, которые нужно «скрыть за однотонной ширмой», то нажимать B или W придется на каждом из них.
Горячие клавиши Фотошопа
Бывает, приходится иметь дело с Adobe Photoshop, даже если вы не дизайнер. Сегодня и бухгалтеры работают с коллажами, а копирайтерам приходится брать на себя часть работы SMM-щика, например, заниматься визуалом для соцсетей.
Чтобы работать с Photoshop стало легче, мы собрали горячие клавиши, связанные со слоями, кистями, быстрой коррекцией и масштабированием иллюстраций — базовый набор, который желательно знать каждому.
Слои
Как только начинающий фотошопер узнает про работу со слоями, его жизнь заметно упрощается, так как он получает еще больше свободы редактирования. Следующие команды помогут быстрее проводить основные манипуляции с ними:
- Shift + Ctrl + E — объединить видимые;
- Ctrl + E — объединить выделенные (остальные остаются нетронутыми);
- Ctrl + ] — поднять на уровень вверх;
- Ctrl + [ — опустить на уровень вниз;
- Shift + Ctrl + ] — переместить выбранный слой на первую строчку;
- Shift + Ctrl + [ — перенести в самый низ списка.
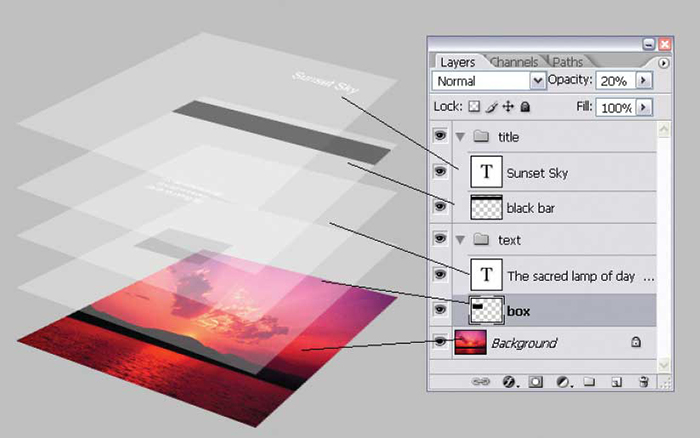 Слои в Adobe Photoshop
Кисти
Эти клавиши уменьшают время на тонкую настройку кисти:
- [ — уменьшить размер;
- ] — увеличить кисть;
- { — сделать жесткость поменьше;
- } — сделать кисть пожестче;
- , — выбрать предыдущую кисть;
- . — взять следующую;
- X — поменять местами нижний и верхний цвета.
С остальными настройками кисти, включая угол наклона, придется работать вручную.
Быстрая коррекция
Иногда с картинкой не нужно проводить особых манипуляций — достаточно подправить ее по мелочи, и все готово к публикации. Вызвать окошки по коррекции изображения помогут следующие горячие клавиши:
- Ctrl + L — открыть «Уровни»;
- Ctrl + M — зайти в «Кривые»;
- Ctrl + B — перейти в «Цветовой баланс». Главное, не нажимать эту комбинацию во время работы с текстом, иначе выделенный фрагмент может стать «жирным»;
- Ctrl + U — открыть «Цветовой тон/Насыщенность»;
- Ctrl + Alt + I — перенестись в «Размер изображения».
Для непосредственной работы с выделенным объектом пригодятся эти сочетания:
- Ctrl + T — включить режим «свободного трансформирования»;
- Shift + Ctrl + Alt + B — открыть окно обесцвечивания;
- Shift + Ctrl + U — обесцветить выбранную область/слой;
- Ctrl + Alt + G — создать/отменить обтравочную маску.
Тем, кто доверяет автонастройкам фотошопа, могут облегчить дизайнерские будни 3 хоткея:
- Shift + Ctrl + L — включить «Автотон»;
- Alt + Shift + Ctrl + L — применить «Автоконтраст»;
- Shift + Cmd + B — запустить автоматическую цветокоррекцию к изображению.
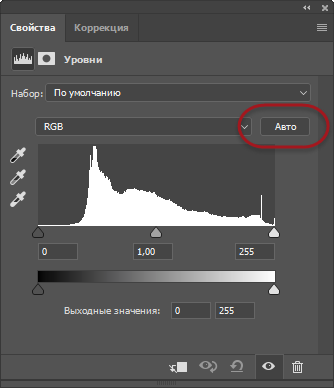 Автонастройка Фотошопа
Масштаб
Эти горячие клавиши быстро подгонят масштаб изображения под нужный размер:
- Ctrl + Alt + 0 — просмотреть в масштабе 100%;
- Ctrl + 0 — подстроить масштаб картинки под размер окна;
- Ctrl + «+» — увеличить на шаг визуальный размер картинки;
- Ctrl + «-» — уменьшить на шаг отображение иллюстрации;
- Alt + прокрутка колеса — плавное изменение масштаба.
Читайте также: 11 инструментов, где можно быстро удалить фон с картинки или фото
Горячие клавиши Google Chrome
Провести целый день в браузере, не открывая других программ — уже обыденность. Данные комбинации клавиш сделают работу в Chrome еще проще.
Навигация по окнам и вкладкам
Работа с десятком открытых окон — привычная картина. Эти хоткеи созданы для быстрого жонглирования любыми вкладками, что порой может спасти карьеру или даже репутацию:
- Ctrl + N — открыть новое окно;
- Ctrl + Shift + N — новое окно в режиме инкогнито;
- Ctrl + T — запустить новую вкладку;
- Ctrl + Клик — открыть ссылку в новой вкладке;
- Ctrl + Shift + T — открыть последнюю закрытую вкладку (неотправленная, но введенная информация сохраняется далеко не всегда. Если закрыли вкладку с анкетой, то, возможно, придется заполнять её снова);
- Alt + F4 — закрыть активное окно (со всеми вкладками);
- Ctrl + W / Ctrl + F4 — закрыть текущую вкладку;
- Alt + Home — открыть домашнюю страницу в этой вкладке;
- Ctrl + (цифра от 1 до 9) — перейти на нужную вкладку (работает только до 10 вкладок: для открытия 3-й нужно использовать комбинацию Ctrl + 3);
- Ctrl + Tab / Ctrl + PgDn — перейти на следующую вкладку;
- Ctrl + Shift + Tab — перейти на предыдущую вкладку;
- Ctrl + F — поиск текста на странице;
- Ctrl + G — предыдущий результат поиска;
- Ctrl + Shift + G — следующий результат поиска (это позволит быстро найти нужный фрагмент в тексте).
Быстрая работа со страницей
Эти комбинации помогут еще быстрее осуществлять работу с контентом на странице, минимизировав использование мышки:
- Ctrl + S — сохранить веб-страницу;
- Ctrl + P — параметры печати текущей веб-страницы;
- Ctrl + F — поиск на странице;
- Ctrl + U — посмотреть исходный код страницы (пригодится, когда нужно сохранить картинку или видео с сайта, которые не позволяют это делать привычным способом);
- Ctrl + D — добавить в закладки;
- Ctrl + Shift + D — добавить все открытые страницы в закладки;
- Ctrl + плюс и Ctrl + минус — изменить масштаба страницы;
- Ctrl + 0 — стандартный масштаб страницы;
- Пробел — прокрутить страницу вниз на 1 экран;
- Shift + пробел — прокрутить страницу вверх на 1 экран;
- Ctrl + Стрелка влево — переместить курсор к прошлому слову в поле текстового ввода;
- Ctrl + Стрелка вправо — переместить курсор к следующему слову;
- Tab — перейти с одного интерактивного элемента к следующему;
- Shift + Tab — перейти на предыдущий интерактивный элемент.
Настройки Chrome
Порой, в поисках нужного пункта меню ненароком ощущаешь себя золотоискателем XIX века: настолько сложно бывает найти нужное действие. Забудьте об этом — все нужные комбинации собраны ниже^
- Alt + F или Alt + E — открыть меню;
- Ctrl + Shift + B — показать/скрыть панель закладок;
- Ctrl + Shift + O — открыть в новой вкладке диспетчер закладок;
- Ctrl + H — показать историю просмотров;
- Ctrl + J — показать «Скачанные файлы»;
- Shift + Esc — открыть внутри-хромовский «Диспетчер задач» (позволяет увидеть, какая вкладка и почему больше всего нагружает систему);
- Shift + Alt + T — выбрать первый элемент на панели инструментов Chrome;
- F10 — выбрать крайний элемент на панели (дальше по ней можно перемещаться стрелками «влево» или «вправо»);
- Ctrl + Shift + J или F12 — открыть инструменты разработчика;
- Ctrl + Shift + Delete — открыть окно «Очистить историю»;
- F1 — открыть Справочный центр Google Chrome в новой вкладке;
- Ctrl + Shift + M — сменить пользователя или перейти в гостевой режим.
Читайте также: Исчерпывающий гид по поисковым операторам Google и Яндекса
Горячие клавиши Safari
Многие хоткеи «яблочного» браузера совпадают с Chrome, так что переход пройдет легко:
- ⌘Cmd + N — открыть новое окно;
- ⌘Cmd + ⇧Shift + N — создать частное окно (режим инкогнито);
- ⌘Cmd + T — открыть новую вкладку;
- Пробел — прокрутить вниз экран;
- Shift + Пробел — прокрутить страницу вверх;
- ⌘Cmd + Shift + [ — перейти к предыдущей вкладке;
- ⌘Cmd + Shift + ] — перейти к следующей вкладке;
- ⌘Cmd + W — закрыть текущую вкладку;
- ⌘Cmd + N — открыть отдельное окно Safari;
- ⌘Cmd + L — перейти к адресной строке;
- ⌘Cmd + Shift + H — открыть домашнюю страницу;
- ⌘Cmd + [ — перейти на страницу назад;
- ⌘Cmd + ] – на страницу вперед;
- ⌘Cmd + кнопка «+» — увеличить масштаб страницы;
- ⌘Cmd + кнопка «-» — уменьшить масштаб;
- ⌘Cmd + F — включить поиска на странице;
- ⌘Cmd + G — перейти к следующему совпадению при поиске;
- ⌘Cmd + Shift + G — прошлое совпадение из поиска;
- ⌘Cmd + P — печать текущей страницы;
- ⌘Cmd + S — сохранить страницу;
- ⌘Cmd Option + U — показать исходный код;
- ⌘Cmd + 1…9 — перейти к одной из первых девяти вкладок;
- ⌘Cmd + R — обновить страницу.
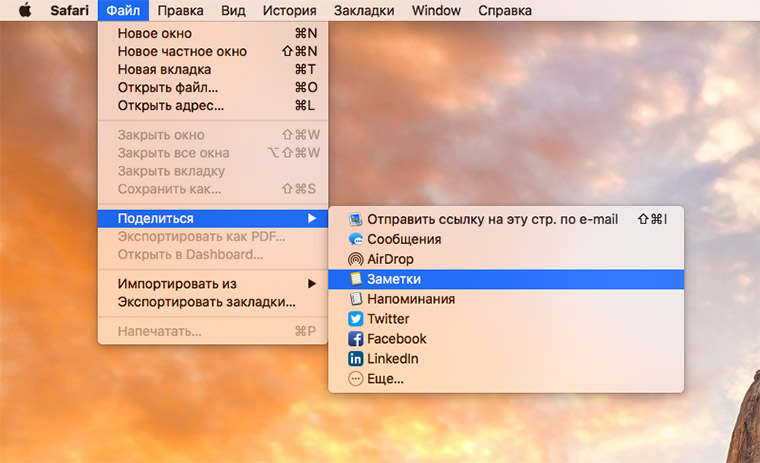 Меню «Файл» в Safari
При этом у Сафари есть уникальные сочетания, которые придется учить «с нуля». Но их не так уж и много, так что процесс запоминания займет буквально несколько рабочих сессий:
- ⌘Cmd + Shift + Стрелка влево — перейти к следующей вкладке;
- ⌘Cmd + Shift + Стрелка вправо — вернуться к предыдущей вкладке;
- ⌘ + Shift + клик по ссылке — открыть ссылку в новом фоновом окне;
- ⌘Cmd + ⇧Shift + B — открыть/закрыть панель закладок;
- ⌘ + Option + W — закрытие всех неактивных вкладок;
- ⌘ + ` — переключение между окнами Safari;
- ⌘ + H — скрытие всех окон Safari;
- ⌘ + ` — переключение между окнами Safari;
- ⌘Cmd + Z — открыть последнюю закрытую вкладку;
- ⌘Cmd + стрелка вверх/вниз — быстрый переход в начало или конец страницы;
- ⌘Cmd + ⇧Shift + L — открыть/закрыть боковое меню;
- ⌘Cmd + Alt + L — показать или скрыть список загрузок.
Хоткеи MacOS
«Яблочную» экосистему называют одной из самых удобных. И это звание полностью заслужено! Мы собрали уникальные сочетания клавиш, что упростят работу всем владельцам техники Apple.
Закрыться от других
Конфиденциальность превыше всего. Эти комбинации клавиш помогут быстро спрятать информацию от лишних глаз:
- ⌘Cmd + Tab — переключиться на другую открытую программу;
- ⌘Cmd + W — закрыть окно;
- ⌘Cmd + Q — закрыть активное приложение;
- ⌘Cmd + W — закрыть активное окно в приложении;
- Control + ⌘Cmd + Q — заблокировать экран.
Быстрые скриншоты
Не нужно заходить в специальное меню — его можно быстро вызвать сочетанием клавиш:
- ⌘Cmd + Shift + 3 — сделать скриншот;
- ⌘Cmd + ⇧Shift + 4 + Пробел — скриншот отдельного окна;
- ⌘Cmd + ⇧Shift + 4 — скриншот отдельной части экрана.
Включить правую кнопку мыши на Magic Mouse
По умолчанию в «Магической Мышке» отсутствует функция ПКМ. Включить её займет меньше минуты:
- Зайдите в «Системные настройки».
- Выберите «Мышь».
- Перейдите к «Выбор и нажатие».
- Поставьте галочку возле «Имитация правой кнопки».
Также в этом же меню можно изменить скорость движения мышки по экрану, подстроив её под себя.
Принудительное закрытие программ
Многим «мигрантам» из Windows не хватает привычной комбинации «Ctrl + Alt + Delete», которая выручала даже при самых крупных глюках системы. В MacOS тоже есть подобное меню, правда вызвать его можно зажав ⌘Cmd + Option (Alt) + Esc.
 Так выглядит меню принудительного завершения ПО в MacOS
Передвинуть задний план
Многим для работы нужно держать на столе сразу несколько открытых программ. При этом далеко не всегда они должны быть «на амбразуре»: в некоторых случаях достаточно видеть происходящее краем глаза (например, процесс рендеринга).
Передвигайте приложения на заднем фоне, не затрагивая активное окно спереди: для этого зажмите ⌘Cmd и левой кнопкой мышки кликните на «фоновую задачу», перетащив её в нужное место.
Пропорциональное изменение сторон окна
Иногда нужно изменить масштаб окна, оставив прежнее соотношение сторон. В этом случае при коррекции размера окошка нужно удерживать комбинацию ⇧Shift + Option (Alt). Тогда его размеры будут меняться пропорционально.
Горячие клавиши и лайфхаки Windows
 Детище Билла Гейтса тоже имеет в своем запаснике целую кучу лайфхаков. Лучшие среди них собраны ниже.
Ночной режим дисплея
Те, кто не любят голубое свечение экрана по вечерам, могут его отключить на любом ноуте с Windows 10 и 11. Для этого нужно сделать следующее:
- Зайти в «Параметры».
- Перейти в пункт «Система».
- Выбрать «Экран».
Дальше достаточно включить тумблер «Ночной свет». При желании, можно задать параметры режима — он может включаться как после заката (тогда системе нужно предоставить доступ к геолокации), так и в какое-то определенное время.
 Настройка ночного света в MS Windows
Удаленная блокировка дисплея
Конфиденциальность — один из ключевых параметров при покупке нового компьютера. И современные ПК на Windows предоставляют динамическую блокировку системы, которая ограничивает доступ к компьютеру, как только вы отходите от него на несколько метров. Алгоритм:
- Привязать свой телефон к ПК через Bluetooth — именно мобилка и будет выступать в роли «ключа».
- Перейти в «Параметры».
- Выбрать «Учетные записи».
- Перейти к «Параметры входа».
- Прокрутить вниз до блока «Динамическая блокировка».
Теперь, когда вы будете отходить от ПК дальше чем на 5-10 метров, система будет на это реагировать.
Скринкаст отдельного приложения

Знали ли вы, что для съемки экрана не нужно загружать специальные программы по типу Bandicam? Всё это доступно в самой системе. Достаточно нажать комбинацию Win+G и перед вами появится панель Xbox. Дальше нужно нажать на значок записи, и приложение начнет фиксировать все происходящее в активном окне.
Читайте также: 7 инструментов для создания скринкастов
Встряска
Наверное, у каждого была ситуация, когда на компе одновременно открыты десятки вкладок, из-за чего крайне сложно сконцентрироваться на главной задаче. Здесь на помощь придет режим «Встряски».
Зажмите левую кнопку мышки и немного встряхните окно. Все, кроме него, автоматически свернется. Чтобы вернуть как было — проделайте это действие еще раз.
Горячие клавиши Windows
Кроме лайфхаков, у Виндовс 10 есть несколько шорткатов, что упростят работу с любой программой:
- Win +Ctrl + D — добавить виртуальный рабочий стол;
- Win +Ctrl + Стрелка вправо — следующий виртуальный десктоп;
- Win +Ctrl + Стрелка влево — предыдущий виртуальный стол;
- Win +Ctrl + F4 — закрыть виртуальный десктоп;
- Win + Tab — журнал активности. Здесь вы увидите окна программ, которые были активными несколько дней или недель назад (вплоть до 30 дней);
- Windows Key + D — свернуть все окна;
- Alt + F4 — закрыть окно, в котором работаете;
- Win+ K — подключить беспроводные устройства отображения и аудиоустройства;
- Win+ P — проецирует вывод информации с ПК на другой экран;
- Windows Key + D — свернуть все окна;
- Alt + F4 — закрыть окно, в котором вы работаете;
- Shift + Delete — безвозвратно удалить объект без перемещения в корзину;
- Windows + стрелка вверх — развернуть окно;
- Windows + стрелка вниз — уменьшить его размер;
- Win + Shift + S — удобный скриншотер, в котором где можно выбрать как целый экран, так и его часть.
Но чтобы зарабатывать больше и развиваться в профессии, мало быть уверенным пользователем ПК. Приходите учиться в CyberMarketing — у нас есть статьи, вебинары, видеокурсы по самым важным направлениям диджитал-маркетинга. Это поисковая оптимизация, контекстная и таргетированная реклама, арбитраж трафика и не только.
Элементы управления содержимым
Элементы управления содержимым — это отдельные элементы управления, которые можно добавлять и настраивать для использования в шаблонах, формах и документах. Например, у многих веб-форм есть элемент управления «раскрывающийся список», который содержит ограниченный набор вариантов. Элементы управления содержимым могут предоставлять инструкции, а также исчезать при вводе пользователями собственного текста.
Подробные сведения об элементах управления содержимым, включая описания и инструкции для всех их типов, см. в статье Создание форм, предназначенных для заполнения или печати в приложении Word.
Элементы управления содержимым находятся на вкладке Разработчик.
Используйте эту вкладку для их добавления и настройки.
Выберите Файл > Параметры > Настроить ленту.
В списке вкладок в разделе Настройка ленты установите флажок Разработчик и нажмите кнопку ОК.
Выполните одно из указанных ниже действий.
Чтобы добавить элемент управления, щелкните то место в документе, куда вы хотите его добавить, и выберите нужный элемент управления на вкладке Конструктор.
Чтобы задать свойства элемента управления или изменить существующий элемент, на вкладке Разработчик в группе Элементы управления нажмите кнопку Свойства.
Нажмите кнопку Microsoft Office кнопки > параметры Word > популярные.
Установите флажок Показывать вкладку Разработчик на ленте, а затем нажмите кнопку OК.
Выполните одно из указанных ниже действий.
Чтобы добавить элемент управления, щелкните то место в документе, куда вы хотите его добавить, и выберите нужный элемент управления на вкладке Конструктор.
Чтобы задать свойства элемента управления или изменить существующий элемент, на вкладке Разработчик в группе Элементы управления нажмите кнопку Свойства.
Подробные сведения об элементах управления содержимым, включая описания и инструкции для всех их типов, см. в статье Создание форм, предназначенных для заполнения или печати в приложении Word.
Как вставить элемент управления содержимым в ворде

Используя шаблон, можно включить элементы управления содержимым и пояснительный текст в приложение Microsoft Office Word 2007, чтобы быстро и без труда создать форму, которую можно отправить пользователям для заполнения с помощью приложения Office Word 2007. В расширенном сценарии любые элементы управления содержимым, добавляемые к форме, также могут быть связаны с данными.
С помощью типового шаблона можно также создать форму. Многие шаблоны доступны на веб-узле Microsoft Office Online.
Примечание. С помощью элементов управления содержимым можно распечатать форму в приложении Office Word 2007, но поля вокруг элементов управления содержимым распечатаны не будут.
Шаг 1: настройка приложения Word для создания форм
- Щелкните значок Кнопка Microsoft Office , а затем выберите пункт Параметры Word.
- Нажмите кнопку Основные.
- Установите флажок Показывать вкладку «Разработчик» на ленте, а затем нажмите кнопку OК.
Шаг 2: открытие шаблона или документа, на основе которого будет создана форма
- Щелкните значок Кнопка Microsoft Office , а затем выберите команду Создать.
- В области Шаблоны, нажмите Мои шаблоны.
- Дважды щелкните Обычный, затем щелкните Шаблон или Документ в области Создание.
- Щелкните значок Кнопка Microsoft Office , а затем выберите команду Сохранить как.
- В диалоговом окне Сохранить как введите имя нового шаблона или документа, а затем нажмите кнопку Сохранить.
Шаг 3: добавление элементов управления содержимым в форму
Создайте форму, создав вначале ее макет, или воспользуйтесь существующей формой как руководством. В форму можно добавить элементы управления содержимым, таблицы и другие графические элементы.
На вкладке Разработчик в группе Элементы управления нажмите кнопку Режим конструктора, а затем щелкните место, куда необходимо вставить элемент управления.
Выполните любое из следующих действий.
Вставка элемента управления текстом, куда пользователи могут вводить текст
На вкладке Разработчик в группе Элементы управления щелкните элемент управления Форматированный текст или или Текст .
Вставка раскрывающегося списка, ограничивающего доступный выбор заданными вариантами
На вкладке Разработчик в группе Элементы управления щелкните элемент управления Раскрывающийся список .
Выделите элемент управления содержимым, а затем на вкладке Разработчик в группе Элементы управления нажмите кнопку Свойства.
Чтобы создать список значений, в группе Свойства раскрывающегося списка нажмите кнопку Добавить.
Введите значение в окне Краткое имя, например Да, Нет или Возможно.
Повторяйте этот шаг до тех пор, пока все значения не окажутся в раскрывающемся списке.
Шаг 4: установка или изменение параметров элементов управления содержимым
У каждого элемента управления содержимым есть параметры, которые можно установить или изменить. Например, в элементе управления «Выбор даты» предлагаются необходимые варианты отображения формата даты.
Щелкните правой кнопкой мыши элемент управления содержимым, который необходимо изменить.
Выберите команду Свойства, а затем измените необходимые свойства.
Шаг 5: добавление в форму пояснительного текста
Пояснительный текст может сделать создаваемую и распространяемую форму более удобной в использовании. Можно изменить пояснительный текст по умолчанию в элементе управления содержимым.
Чтобы настроить текст пояснения по умолчанию для пользователей формы, выполните одно из следующих действий.
На вкладке Разработчик, в группе Элементы управления нажмите Режим конструктора.
Щелкните элемент управления содержимым, где необходимо изменить замещающий пояснительный текст.
Отредактируйте и отформатируйте замещающий текст.
Если необходимо скрыть элемент управления содержимым, когда кто-либо вводит в собственное содержимое данные для замещения пояснений в элементе управления «Форматированный текст» или «Текст», нажмите кнопку Свойства в группе Элементы управления, а затем установите флажок Удалить элемент управления содержимым при редактировании содержимого.
На вкладке Разработчик в группе Элементы управления нажмите кнопку Режим конструктора, чтобы отключить возможность конструирования и сохранить пояснительный текст.
Примечание. Не устанавливайте флажок Содержимое нельзя редактировать, если необходимо, чтобы пользователи формы заменяли пояснительный текст своим собственным.
Как добавить элементы управления содержимым в документы Word
В проектах на уровне документа Word элементы управления содержимым можно добавлять в документ во время разработки или во время выполнения. В проектах надстройки VSTO для Word элементы управления содержимым можно добавлять в любой открытый документ во время выполнения.
Применимо к: Сведения в этом разделе относятся к — проектам уровня документа и добавлению VSTO — в проектах для Word. Дополнительные сведения см. в разделе доступность функций по типам приложений Office и проектов.
В этом разделе описываются следующие задачи.
Дополнительные сведения об элементах управления содержимым см. в разделе элементы управления содержимым.
Добавление элементов управления содержимым во время разработки
Вы можете добавить элементы управления содержимым в документ Word в проекте на уровне документа во время разработки несколькими способами.
Добавьте элемент управления содержимым из вкладки Элементы управления Word****панели элементов.
Добавьте элемент управления содержимым в документ так же, как вы добавляете управляемый элемент управления содержимым в Word.
Перетащите элемент управления в документ из окна Источники данных . Это полезно, если нужно одновременно привязать элемент управления к данным при его создании. Дополнительные сведения см. в статьях как заполнить документы данными из объектов и как заполнять документы данными из базы данных.
Отображаемые на компьютере имена или расположения некоторых элементов пользовательского интерфейса Visual Studio могут отличаться от указанных в следующих инструкциях. Это зависит от имеющегося выпуска Visual Studio и используемых параметров. Дополнительные сведения см. в разделе Персонализация среды IDE.
Добавление элемента управления содержимым в документ с помощью панели элементов
В документе, который размещен в конструкторе Visual Studio , поместите курсор там, где необходимо добавить элемент управления содержимым, или выделите текст, который заменит элемент управления содержимым.
Откройте панель элементов и щелкните вкладку Элементы управления Word .
Добавьте элемент управления одним из следующих способов.
Дважды щелкните элемент управления содержимым в панели элементов.
Щелкните элемент управления содержимым на панели элементов и нажмите клавишу Ввод .
Перетащите элемент управления содержимым из панели элементов в документ. Элемент управления содержимым добавляется в текущее выделение в документе, а не в позиции указателя мыши.
Невозможно добавить GroupContentControl с помощью панели элементов. GroupContentControl можно добавлять только в Word или во время выполнения.
Visual Studio не предоставляет элемент управления содержимым «Флажок» в панели элементов. Чтобы добавить элемент управления содержимым «Флажок» в документ, необходимо создать ContentControl программно. Дополнительные сведения см. в разделе элементы управления содержимым.
Добавление элемента управления содержимым «Флажок» в документ из Word
В документе, который размещен в конструкторе Visual Studio , поместите курсор там, где необходимо добавить элемент управления содержимым, или выделите текст, который заменит элемент управления содержимым.
На ленте перейдите на вкладку Разработчик .
Если вкладка Разработчик не отображается, сделайте ее видимой. Дополнительные сведения см. в разделе инструкции. Отображение вкладки разработчика на ленте.
В группе Элементы управления щелкните значок элемента управления содержимым, который требуется добавить.
Добавление элементов управления содержимым во время выполнения в проекте уровня документа
Элементы управления содержимым можно добавить в документ программным образом во время выполнения с помощью методов свойства Controls класса ThisDocument в проекте. У каждого метода есть три перегрузки, которые можно использовать для добавления элемента управления содержимым следующими способами:
добавление элемента управления в текущее выделение;
добавление элемента управления в указанный диапазон;
добавление элемента управления, основанного на управляемом элементе управления содержимым, в документ.
При закрытии документа динамически созданные элементы управления содержимым не сохраняются в документе. Однако неуправляемый элемент управления содержимым остается в документе. Можно повторно создать элемент управления содержимым, основанный на управляемом элементе управления содержимым, при очередном открытии документа. Дополнительные сведения см. в разделе Добавление элементов управления в документы Office во время выполнения.
Чтобы добавить элемент управления содержимым «Флажок» в документ в проекте Word 2010, необходимо создать объект ContentControl . Дополнительные сведения см. в разделе элементы управления содержимым.
Добавление элемента управления содержимым в текущее выделение
Используйте ControlCollection метод с именем Add (где Control class — это имя класса элемента управления содержимым, который вы хотите добавить, например AddRichTextContentControl ), и у которого есть единственный параметр для имени нового элемента управления.
Следующий пример кода использует метод AddRichTextContentControl , чтобы добавить новый RichTextContentControl в начало документа. Для выполнения этого кода добавьте код в класс ThisDocument в проекте и вызовите метод AddRichTextControlAtSelection обработчика событий ThisDocument_Startup .
Добавление элемента управления в указанный диапазон
Используйте ControlCollection метод с именем Add (где Control class — это имя класса элемента управления содержимым, который вы хотите добавить, например AddRichTextContentControl ), и у которого есть Range параметр.
Следующий пример кода использует метод AddRichTextContentControl , чтобы добавить новый RichTextContentControl в начало документа. Для выполнения этого кода добавьте код в класс ThisDocument в проекте и вызовите метод AddRichTextControlAtRange обработчика событий ThisDocument_Startup .
Добавление элемента управления содержимым, основанного на управляемом элементе управления содержимым
Используйте ControlCollection метод с именем Add (где Control class — это имя класса элемента управления содержимым, который вы хотите добавить, например AddRichTextContentControl ), и у которого есть Microsoft.Office.Interop.Word.ContentControl параметр.
В следующем примере кода метод AddRichTextContentControl используется для создания нового объекта RichTextContentControl для каждого управляемого элемента управления форматированием текста, который есть в документе. Для выполнения этого кода добавьте код в класс ThisDocument в проекте и вызовите метод CreateRichTextControlsFromNativeControls обработчика событий ThisDocument_Startup .
Добавление элементов управления содержимым во время выполнения в проекте надстройки VSTO
Вы можете добавить элементы управления содержимым программным способом в любой открытый документ во время выполнения с помощью надстройки VSTO. Для этого следует создать ведущий элемент Document , основанный на открытом документе, а затем использовать методы свойства Controls этого ведущего элемента. У каждого метода есть три перегрузки, которые можно использовать для добавления элемента управления содержимым следующими способами:
добавление элемента управления в текущее выделение;
добавление элемента управления в указанный диапазон;
добавление элемента управления, основанного на управляемом элементе управления содержимым, в документ.
При закрытии документа динамически созданные элементы управления содержимым не сохраняются в документе. Однако неуправляемый элемент управления содержимым остается в документе. Можно повторно создать элемент управления содержимым, основанный на управляемом элементе управления содержимым, при очередном открытии документа. Дополнительные сведения см. в разделе Сохранение динамических элементов управления в документах Office.
Дополнительные сведения о создании ведущих элементов в проектах надстроек VSTO см. в разделе Расширение документов Word и книг Excel в надстройках VSTO во время выполнения.
Чтобы добавить элемент управления содержимым «Флажок», необходимо создать объект ContentControl . Дополнительные сведения см. в разделе элементы управления содержимым.
Добавление элемента управления содержимым в текущее выделение
Используйте ControlCollection метод с именем Add (где Control class — это имя класса элемента управления содержимым, который вы хотите добавить, например AddRichTextContentControl ), и у которого есть единственный параметр для имени нового элемента управления.
Следующий пример кода использует метод AddRichTextContentControl , чтобы добавить новый RichTextContentControl в начало активного документа. Для выполнения этого кода добавьте код в класс ThisAddIn в проекте и вызовите метод AddRichTextControlAtSelection обработчика событий ThisAddIn_Startup .
Добавление элемента управления в указанный диапазон
Используйте ControlCollection метод с именем Add (где Control class — это имя класса элемента управления содержимым, который вы хотите добавить, например AddRichTextContentControl ), и у которого есть Range параметр.
Следующий пример кода использует метод AddRichTextContentControl , чтобы добавить новый RichTextContentControl в начало активного документа. Для выполнения этого кода добавьте код в класс ThisAddIn в проекте и вызовите метод AddRichTextControlAtRange обработчика событий ThisAddIn_Startup .
Добавление элемента управления содержимым, основанного на управляемом элементе управления содержимым
Используйте ControlCollection метод с именем Add (где Control class — это имя класса элемента управления содержимым, который вы хотите добавить, например AddRichTextContentControl ), и у которого есть Microsoft.Office.Interop.Word.ContentControl параметр.
В следующем примере кода метод AddRichTextContentControl используется для создания нового объекта RichTextContentControl для каждого управляемого элемента управления форматированием текста в документе после его открытия. Для выполнения этого кода добавьте код в класс ThisAddIn в проекте.
Для C# необходимо присоединить обработчик Application_DocumentOpen к событию DocumentOpen .