
UserForm Controls — ComboBox and ListBox
———————————————————-
Contents:
Difference between ListBox and ComboBox
Key Properties of ComboBox and ListBox
Add Items/Data to (Populate) a ListBox or ComboBox
Extract ListBox & ComboBox Items, with VBA
Delete ListBox rows using the RemoveItem Method
———————————————————-
UserForm acts as a container in which you add multiple ActiveX controls, each of which has a specific use and associated properties. By itself, a UserForm will not be of much use unless ActiveX controls are added to it which are the actual user-interactive objects. Using ActiveX Controls on a Worksheet have been illustrated in detail, in the separate section of «Excel VBA: ActiveX Controls, Form Controls & AutoShapes on a Worksheet».
An Excel VBA ListBox or ComboBox is a list of items from which a user can select. They facilitate in accepting data from users and making entries in an Excel worksheet.
Difference between ListBox and ComboBox:
1. The ComboBox is a drop-down list (the user-entered item or the list-selected item is visible in the text area, whereas list values are visible by using the drop-down), while a ListBox shows a certain number of values with or without a scroll bar. In a ComboBox, only one row of items is visible at a given time (without using the drop-down) whereas in a ListBox one or more can be visible at a time.
2. In a ComboBox you can select ony one option from the list, while in a ListBox you can select multiple options from the list.
3. The user can enter his own item (in text area) in a ComboBox if it is not included in the list, which is not possible to do in a ListBox. In this sense, ComboBox is a combination of TextBox and ListBox.
4. CheckBox can be used within ListBox, but not within ComboBox. ListBox allows you to display a check box next to each item in the list, to enable user to select items (this might be easier for the user than using the multiple selection methods). To use CheckBoxes in a ListBox, set ListStyle property (in Properties Window) to fmListStyleOption (vba code: ListBox1.ListStyle = fmListStyleOption). This setting is best used with a multiselect ListBox.
——————————————————————————————————————-
Key Properties of ComboBox and ListBox
Note1: All properties and methods given below are common to both ListBox and ComboBox, unless mentioned otherwise. Also refer «2. UserForm and Controls — Properties.» for properties common to the UserForm and most Controls.
Note 2: In below given examples, vba codes are required to be entered in the Code Module of the UserForm, unless specified otherwise.
AddItem Method:
Adds an item to the list, in a single-column ListBox or ComboBox. Adds a row to the list (ie. an item for each row), in a multi-column ListBox or ComboBox. Syntax: Control.AddItem(Item, Index). Item specifies the item or row to add. Index is an Integer which specifies the position where the new item or row is placed within the list, and if omitted, the item or row is added at the end. The item or row numbers begin with zero, and the first item or row is numbered 0, and so on. The value of Index cannot be greater than the total number of rows (ie. value of ListCount property). AddItem method will not work if ComboBox or ListBox is bound to data, hence RowSource data should be cleared before use. AddItem method can only be used with a macro or vba code. Note: AddItem method adds an item to the first column in a multi-column ListBox or ComboBox, and to add an item further to the first column, use the List or Column property specifying the item’s row and column number. More than one row can also be added at a time to a ListBox or ComboBox by using the List or Column properties (AddItem adds one row at a time). This means that you can copy a two-dimensional array of values to a ListBox or ComboBox, using List or Column properties rather than adding each individual element using the AddItem method. Note: Using the Column property to copy a two-dimensional array of values to a ListBox or ComboBox, transposes the array contents and equates myArray(iRow, iColumn) to ListBox1.Column(iCol, iRow). List property copies an array without transposing it and myArray(iRow, iColumn) equates to ListBox1.List(iRow, iColumn). Refer Image 13 for example.
BoundColumn Property:
Specifies the column from which value is to be stored in a multicolumn ComboBox or ListBox, when a row is selected by the user. First column has a BoundColumn value of 1, second column has a value of 2, and so on. Setting the BoundColumn value to 1 will assign the value from column 1 to the ComboBox or ListBox, and so on. BoundColumn property lets the user to store a different set of values per specified column while TextColumn property displays one set of values, viz. use the Text property to return the value from the first column (specified in the TextColumn property) containing the names and the BoundColumn property can specify another column containing height wherein on selecting a particular person’s name in the ListBox, his height will get returned or stored (refer Image 10). The ColumnWidths property of a column can be set to zero to not display it in the ListBox. Setting the BoundColumn value to 0 assigns the value of the ListIndex property (which is the number of the selected row) as the value of the control (ComboBox or ListBox). This setting is useful if you want to determine the row of the selected item in a ComboBox or ListBox. BoundColumn Property can be set in the Properties window and can also be used with a macro or vba code. Note: Where the ControlSource mentions =Sheet3!D2 (vba code: .ControlSource = «=Sheet3!D2»), the value in the BoundColumn of the selected row will get stored in cell D2, Sheet3.

Example 1: Setting the BoundColumn value to 0 assigns the value of the ListIndex property (which is the number of the selected row) as the value of the control (in a Single Selection ListBox) — refer Image 7
Private Sub UserForm_Initialize()
‘set ListBox properties on initialization of UserForm
With ListBox1
.ColumnHeads = True
.ColumnCount = 2
‘ColumnWidths property of the second column is set to zero to not display it in the ListBox.
.ColumnWidths = «50;0»
.RowSource = «=Sheet3!A2:B6»
.MultiSelect = fmMultiSelectSingle
.BoundColumn = 0
End With
End Sub
Private Sub CommandButton1_Click()
‘BoundColumn value is set as 0 which assigns the value of the ListIndex property (which is the number of the selected row) as the value of the control. Note: MultiSelect Property is set to fmMultiSelectSingle which allows only single selection.
If ListBox1.Value <> «» Then
TextBox1.Value = ListBox1.Value + 2
End If
End Sub
Clear Method:
Removes all items in a ComboBox or ListBox. Syntax: Control.Clear. Clear method will not work if ComboBox or ListBox is bound to data, hence RowSource data should be cleared before use. Clear method can only be used with a macro or vba code.
Column Property:
Refers to a specific column, or column and row combination, in a multiple-column ComboBox or ListBox. Syntax: Control.Column(iColumn, iRow). Column property can only be used with a macro or vba code and is not available at design time. iColumn specifies the column number wherein iColumn = 0 means the first column in the List. iRow specifies the row number wherein iRow = 0 means the first row in the List. Both iColumn and iRow are integer values ranging from 0 to number of columns and rows (respectively) in the list minus 1. Specifying both column and row numbers will refer to a specific item, and specifying only the column number will refer to a specific column in the current row viz. ListBox1.Column(1) refers the second column. You can copy a two-dimensional array of values to a ListBox or ComboBox, using Column (or List) property rather than adding each individual element using the AddItem method. Column property can be used to assign the contents of a ComboBox or ListBox to another control, viz. TextBox (refer Image 8). Note: Using the Column property to copy a two-dimensional array of values to a ListBox or ComboBox, transposes the array contents and equates myArray(iRow, iColumn) to ListBox1.Column(iCol, iRow). List property copies an array without transposing it and myArray(iRow, iColumn) equates to ListBox1.List(iRow, iColumn). Refer Image 13 for example.

Example 2: Load ListBox using AddItem method and List & Column properties; and use Column property to assign the contents of ListBox to TextBox — refer Image 8
Private Sub UserForm_Initialize()
‘set ListBox properties on initialization of UserForm
With ListBox1
.ColumnCount = 3
.ColumnWidths = «50;50;50»
.ColumnHeads = False
.RowSource = «=Sheet2!A2:B6»
.MultiSelect = fmMultiSelectMulti
End With
‘clearing the TextBox if it is not empty
TextBox1 = «»
End Sub
Private Sub CommandButton1_Click()
‘Add items in ListBox using AddItem method to add new rows; use List & Column properties to add items in columns beyond the first column; and use Column property to assign the contents of ListBox to TextBox
‘AddItem method will not work if ListBox is bound to data, hence RowSource is cleared if it had been set
ListBox1.RowSource = «»
‘Create a new row with AddItem
ListBox1.AddItem «banana»
‘add item in second column of this first row, using List property
ListBox1.List(0, 1) = «tuesday»
‘adding items in the 3 columns of the first row — this will become the second row in the end
ListBox1.List(0, 2) = «day 2»
ListBox1.AddItem «orange»
‘add item in second column of this second row, using Column property
ListBox1.Column(1, 1) = «wednesday»
‘adding items in the 3 columns of the second row — this will become the third row in the end
ListBox1.Column(2, 1) = «day 3»
‘Create a new row with AddItem and position as row number 1
ListBox1.AddItem «apple», 0
ListBox1.List(0, 1) = «monday»
‘adding items in the 3 columns and positioning this row as the first row — this will push down the above two rows
ListBox1.List(0, 2) = «day 1»
‘item in column number 3 and row number 2 of ListBox
TextBox1.Value = ListBox1.Column(2, 1)
End Sub
ColumnCount Property:
Specifies the number of columns to be displayed in a ComboBox or ListBox. A ColumnCount value of 0 does not display any column and a setting of -1 displays all columns. ColumnCount property can be set in the Properties window and can also be used with a macro or vba code.
ColumnHeads Property:
A Boolean value (True/False) which determines display of column headings (in a single row) for ComboBox or ListBox. ColumnHeads property can be set in the Properties window and can also be used with a macro or vba code. Column Headings can be displayed only if ColumnHeads is set to True in Properties window (VBA code: ListBox1.ColumnHeads = True) and if you bind the ListBox to a range (ie. set RowSource to a range that includes headings). Note: AddItem method will not work if ListBox or ComboBox is bound to data, hence RowSource property should be cleared for using AddItem.
List Property:
List Property is used in conjunction with the ListCount and ListIndex properties to return items in a ListBox or ComboBox control. Syntax -> Control.List(iRow,iCol). Each item in a list has a row number and a column number, wherein row and column numbers start with zero. iRow specifies the row number wherein iRow = 2 means the third row in the List. iColumn specifies the column number wherein iColumn = 0 means the first column in the List. Omitting to specify the iColumn will retrieve the first column. Specify iColumn only for a multi-column ListBox or ComboBox. List Property can only be used with a macro or vba code and is not available at design time. Note: To copy a two-dimensional array of values to a ListBox or ComboBox, use List or Column properties. To add a one-dimensional array or to add an individual element, use the AddItem method. Items can be removed from a List using the RemoveItem method. List property is available only by using a macro or VBA.

Example 3: Use Selected & List properties to display multiple-selected ListBox items (choose any column to display) in TextBox, and link a worksheet cell with TextBox using ControlSource property — refer Image 9.
Private Sub UserForm_Initialize()
‘set ListBox properties on initialization of UserForm
With ListBox1
.ColumnHeads = True
.ColumnCount = 2
‘ColumnWidths property of the second column is set to zero to not display it in the ListBox.
.ColumnWidths = «50;0»
.RowSource = «=Sheet3!A2:B6»
.MultiSelect = fmMultiSelectMulti
.TextColumn = 1
End With
With TextBox1
.MultiLine = True
‘the text or value in the TextBox will get stored in the worksheet cell — Sheet3!F2
.ControlSource = «=Sheet3!F2»
‘if the cell Sheet3!F2 contains any text, this will not appear in the TextBox on initialization of UserForm
.Value = «»
End With
End Sub
Private Sub CommandButton1_Click()
‘Use Selected & List properties to display multiple-selected ListBox items (choose any column to display) in TextBox, and link a worksheet cell with TextBox using ControlSource property
TextBox1.Value = «»
‘check all items in a ListBox
For n = 0 To ListBox1.ListCount — 1
‘if a ListBox item is selected, it will display in TextBox
If ListBox1.Selected(n) = True Then
If TextBox1.Value = «» Then
‘ListBox1.List(n, 0) or ListBox1.List(n)displays the first column in TextBox, ListBox1.List(n, 1) displays the second column and so on
‘alternate code which displays the second column in TextBox: TextBox1.Value = Range(ListBox1.RowSource).Offset(n, 1).Resize(1, 1).Value
TextBox1.Value = ListBox1.List(n, 1)
Else
‘alternate code which displays the second column in TextBox: TextBox1.Value = TextBox1.Value & vbCrLf & Range(ListBox1.RowSource).Offset(n, 1).Resize(1, 1).Value
TextBox1.Value = TextBox1.Value & vbCrLf & ListBox1.List(n, 1)
End If
End If
Next n
End Sub
ListCount Property:
Determines the total number of rows in a ListBox or ComboBox. This property can only be used with a macro or vba code and is not available at design time. Note: The column headings row is also counted, if ColumnHeads are displayed. The ListCount property can be used with the ListRows property to specify the number of rows to display in a ComboBox.
ListIndex Property:
Determines which item is selected in a ComboBox or ListBox. The first item in a list has a ListIndex value of 0, the second item has a value of 1, and so on. Hence, it is an integer value ranging from 0 to the total number of items in a ComboBox or ListBox minus 1. ListIndex returns -1 when no rows are selected. This property can only be used with a macro or vba code and is not available at design time. Note: In a Multiple Selection enabled ListBox, ListIndex returns the index of the row that has focus, irrespective of whether that row is selected or not. Hence the Selected property of the ListBox (and not the ListIndex property) shoud be used here to return and set a selection. In a Single Selection enabled ListBox (viz. MultiSelect property setting of fmMultiSelectSingle), ListIndex returns the index of the selected item and hence ListIndex property should be used here to return and set a selection.
ListRows Property:
Specifies the maximum number of rows which will display in the list box portion of a ComboBox. The default value is 8. Note: If the actual number of list items exceed this maximum value of the ListRows property, a vertical scroll bar will appear in the list box portion of the ComboBox (and the excess list items can be viewed by scrolling down). The ListCount property can be used with the ListRows property to specify the number of rows to display in a ComboBox. ListRows property can be set in the Properties window and can also be used with a macro or vba code. ListRows Property is valid for ComboBox and not for ListBox.
Example 4: Using the ListCount property with the ListRows property, to set number of rows to display in ComboBox
Private Sub UserForm_Initialize()
‘this macro sets the ListRow value, on initialization of the UserForm
With ComboBox1
If .ListCount > 5 Then
.ListRows = 5
Else
.ListRows = .ListCount
End If
End With
End Sub
MultiSelect Property:
Specifies whether multiple selections are allowed. There are 3 settings: (i) fmMultiSelectSingle (value 0), the default setting, wherein only a single item can be selected; (ii) fmMultiSelectMulti (value 1) which allows multiple selections wherein an item can be selected or deselected by clicking mouse or pressing SPACEBAR; and (iii) fmMultiSelectExtended (value 2) which allows multiple selections, wherein by pressing SHIFT and simultaneously moving the up or down arrows (or pressing SHIFT and clicking mouse) continues selection from the previously selected item to the current selection (ie. a continuous selection); this option also allows to select or deselect an item by pressing CTRL and clicking mouse. MultiSelect property can be set in the Properties window and can also be used with a macro or vba code. Note: MultiSelect Property is valid for ListBox and not for ComboBox. When multiple selections are made (viz. fmMultiSelectMulti or fmMultiSelectExtended), the selected items can be determined only by using the Selected property (Selected property is available by using macro) of the ListBox. The Selected property will have values ranging from 0 to ListCount minus 1 and will be True if the item is selected and False if not selected. The Selected property determines the items you chose, and the List property returns the items.
Example 5: Determining selected item in a Single Selection ListBox, in VBA:
Private Sub CommandButton1_Click()
‘determine and display selected item in a ListBox which allows only a single selection (viz. MultiSelect Property is set to fmMultiSelectSingle)
‘you can also determine selected item in a ListBox which allows only a single selection, by using the Selected Property (as used in a Multiple Selection enabled ListBox)
‘alternatively: If ListBox1.ListIndex >= 0 Then
If ListBox1.Value <> «» Then
MsgBox ListBox1.Value
End If
End Sub
RemoveItem Method:
A specified row is removed from the list in a ComboBox or ListBox. Syntax: Control.RemoveItem(Row_Index). Row_Index is the row number which is specified to be removed, wherein the first row is numbered 0, and so on. RemoveItem method will not work if ComboBox or ListBox is bound to data, hence RowSource data should be cleared before use. RemoveItem method can only be used with a macro or vba code.
RowSource Property:
Specifies the source of a list (which could be a worksheet range in Excel), for a ComboBox or ListBox. RowSource property can be set in the Properties window and can also be used with a macro or vba code. To set RowSource property in Properties window, enter without inverted commas: «=Sheet2!A2:A6» which populates ComboBox or ListBox with values in cells A2:A6 in Sheet2. VBA code for this is: ListBox1.RowSource = «=Sheet2!A2:A6». It is not necessary to use the equal mark in «=Sheet2!A2:A6» while setting the property and ListBox1.RowSource = «Sheet2!A2:A6» will have the same effect.
Selected Property:
Specifies whether an item is selected in a ListBox control. Syntax: Control.Selected(Item_Index). Returns True/False if the item is Selected/NotSelected; Set to True/False to select the item or remove selection [viz. Control.Selected(ItemIndex) = True/False]. Item_Index is an integer value ranging from 0 to number of items in the list minus 1, indicating its relative position in the list, viz. ListBox.Selected(2) = True selects the third item in the list. Selected property is particularly useful when working with multiple selections. Selected Property can only be used with a macro or vba code and is not available at design time. Note1: In a Multiple Selection enabled ListBox, ListIndex returns the index of the row that has focus, irrespective of whether that row is selected or not. Hence the Selected property of the ListBox (and not the ListIndex property) shoud be used here to return and set a selection. In a Single Selection enabled ListBox (viz. MultiSelect property setting of fmMultiSelectSingle), ListIndex returns the index of the selected item and hence ListIndex property should be used here to return and set a selection. Note2: Selected Property is valid for ListBox and not for ComboBox.
Example 6: Determining selected items in a multiple-selection enabled ListBox using Selected & List properties:
Private Sub CommandButton1_Click()
‘display all selected items in a ListBox using the Selected property (valid for a ListBox with MultiSelect Property setting of either single-selection or multiple-selection)
‘check all items in a ListBox
For n = 0 To ListBox1.ListCount — 1
‘if a ListBox item is selected, it will display in MsgBox
If ListBox1.Selected(n) = True Then
‘display a selected item
MsgBox ListBox1.List(n)
End If
Next n
End Sub
Style Property:
Valid for ComboBox only, not for ListBox. This property determines choosing or setting the value of ComboBox. There are 2 settings: (i) fmStyleDropDownCombo (value 0). The user has both options of typing a custom value in the text area or select from the drop-down list. This is the default value.; (ii) fmStyleDropDownList (value 2). The user can only select from the drop-down list, like in ListBox. Style Property can be set in the Properties window and can also be used with a macro or vba code.
TextColumn Property:
Specifies the column of data in a ListBox that supplies data for its Text property — the TextColumn property determines the column whose value the Text property will return whereas the BoundColumn property determines the column whose value the Value property returns. The Text property returns the same as Value property if the TextColumn property is not set. First column has a TextColumn value of 1, second column has a value of 2, and so on. Setting the TextColumn value to -1 indicates that the first column with a ColumnWidths value greater than 0 will be displayed. TextColumn property enables display of one set of values to the user but store a different set of values (per column specified in the BoundColumn property) viz. use the Text property to return the value from the first column (specified in the TextColumn property) containing the names and the BoundColumn property can specify another column containing height wherein on selecting a particular person’s name in the ListBox, his name & height will be returned. The ColumnWidths property of any column can be set to zero to not display it in the ListBox. Setting the TextColumn value to 0 displays the ListIndex value (which is the number of the selected row) in TextColumn Property — this setting is useful if you want to determine the row of the selected item. TextColumn property can be set in the Properties window and can also be used with a macro or vba code. Note: In a ComboBox, when a user selects an item, the column specified in the TextColumn property will be displayed in the ComboBox’s text box portion.

Example 7: Display first column in the List and use the TextColumn & BoundColumn Properties to return values from first & third columns (in a Single Selection ListBox) — refer Image 10
Private Sub UserForm_Initialize()
‘set ListBox properties on initialization of UserForm
With ListBox1
.ColumnHeads = True
.ColumnCount = 3
‘set the ColumnWidths property of second & third columns to zero to not display them in the ListBox
.ColumnWidths = «40;0:0»
.RowSource = «=Sheet2!A2:C6»
.MultiSelect = fmMultiSelectSingle
‘specifies the column of data in a ListBox that supplies data for its Text property
.TextColumn = 1
.BoundColumn = 3
End With
End Sub
Private Sub CommandButton1_Click()
‘TextColumn value is set as 1 and BoundColumn value is set as 3.
‘works only if MultiSelect Property of ListBox is set to fmMultiSelectSingle which allows single selection.
If ListBox1.Value <> «» Then
‘use the ListBox Text property to return the value from the column specified in the TextColumn column, whereas the ListBox Value property returns the value from the column specified in the BoundColumn property
TextBox1.Value = ListBox1.Text & » — » & ListBox1.Value & » cms»
End If
End Sub
———————————————————————————————————————
Add Items/Data to (Populate) a ListBox or ComboBox
1. Setting the RowSource property of a ListBox or ComboBox in a UserForm
VBA code — if the list is static:
Me.ListBox1.RowSource = «Sheet1!A1:B6»
or
Me.ListBox1.RowSource = «=Sheet1!A1:B6»
VBA code — if the list is dynamic:
Me.ListBox1.RowSource = «Sheet1!A1:B» & Sheet1.Cells(Rows.Count, «B»).End(xlUp).Row
Note: You can set the RowSource property of a ListBox or ComboBox in the Properties Window (without using vba code), by entering -> Sheet1!A1:B6

Example 8: Populate ComboBox by setting the RowSource property to a named list — refer Image 11
Private Sub UserForm_Initialize()
‘populate ComboBox by setting the RowSource property to a named list
With ComboBox1
.ColumnCount = 2
.ColumnWidths = «50;50»
.ColumnHeads = True
‘For a named list (viz. “HeightList” in Range A2:B6), the RowSource property can be set to Sheet1!HeightList
.RowSource = «Sheet1!HeightList»
End With
End Sub
2. Populate a ComboBox or ListBox from an Array:
VBA code — populate single column in ListBox:
ListBox1.List = Array(«RowOne», «RowTwo», «RowThree», «RowFour»)
VBA code — populate single column in ComboBox:
ComboBox1.List = Array(«Apples», «Bananas», «Oranges», «Pears»)
VBA code — populate ListBox from array named myArray:
Dim myArray As Variant
myArray = Array(«Adidas», «Nike», «Reebok»)
Me.ListBox1.List = myArray
VBA code — Populate single column ComboBox:
Dim i As Integer
Dim myArray As Variant
myArray = Array(«Adidas», «Nike», «Reebok», «Puma», «Polo»)
For i = LBound(myArray) To UBound(myArray)
Me.ComboBox1.AddItem myArray(i)
Next
Example 9 — Populate a multi-column Listbox directly with Worksheet Range — multiple rows added at one time using the List property:
Private Sub UserForm_Initialize()
‘set ListBox properties on initialization of UserForm
With ListBox1
.ColumnCount = 3
.ColumnWidths = «50;50;50»
.ColumnHeads = False
End With
‘Load Worksheet Range directly to a ListBox
Dim rng As Range
Set rng = Sheet1.Range(«A1:C6»)
Me.ListBox1.List = rng.Cells.Value
End Sub
Example 10 — Populate a multi-column Listbox directly with Worksheet Range — multiple rows added at one time using the List property:
Private Sub UserForm_Initialize()
‘set ListBox properties on initialization of UserForm
With ListBox1
.ColumnCount = 3
.ColumnWidths = «50;50;50»
.ColumnHeads = False
End With
‘Load Worksheet Range directly to a ListBox:
Dim var As Variant
var = Sheet1.Range(«A1:C6»)
Me.ListBox1.List = var
End Sub

Example 11: Load Worksheet Range to a multi-column ListBox, after placing Range data in a 2-dimensional Array — refer Image 12
Option Base 1
——————————————
Private Sub UserForm_Initialize()
‘Load Worksheet Range to a ListBox, after placing data in an Array
Dim rng As Range
Dim cell As Range
Dim totalRows As Integer, totalColumns As Integer
Dim iRow As Integer, iCol As Integer
Dim myArray() As Variant
Set rng = Sheet1.Range(«A1:C6»)
totalRows = Sheet1.Range(«A1:C6»).Rows.Count
totalColumns = Sheet1.Range(«A1:C6»).Columns.Count
‘if Option Base 1 was not set, this line of code should be: ReDim myArray(1 To totalRows, 1 To totalColumns)
ReDim myArray(totalRows, totalColumns)
‘place worksheet range data in an Array:
For Each cell In rng
For iRow = 1 To totalRows
For iCol = 1 To totalColumns
myArray(iRow, iCol) = rng.Cells(iRow, iCol)
Next iCol
Next iRow
Next
‘set ListBox properties and load Array to ListBox
With ListBox1
.ColumnCount = 3
.ColumnWidths = «50;50;50»
.ColumnHeads = False
.List = myArray
End With
End Sub

Example 12: Load a 2-dimensional array to ListBox using the List property (copies an array without transposing it) and Column property (which transposes the contents of the array) — refer Image 13
Private Sub UserForm_Initialize()
‘set ListBox properties on initialization of UserForm
With ListBox1
.ColumnCount = 3
.ColumnWidths = «50;50;50»
.ColumnHeads = False
End With
With ListBox2
.ColumnCount = 3
.ColumnWidths = «50;50;50»
.ColumnHeads = False
End With
End Sub
Private Sub CommandButton1_Click()
‘create a 2-dimensional array and load to ListBox using the List property (copies an array without transposing it) and Column property (which transposes the contents of the array)
‘Declaring the array and its dimensions. The array has been named myArray, of size 3 by 3 (three rows by three columns). Note: When you populate an array with data, the array will start at zero, and if you include Option Base 1 the array will start at 1.
Dim myArray(3, 3)
‘populate column 1 of myArray, with numbers
For n = 0 To 2
myArray(n, 0) = n + 1
Next n
‘populate column 2 of myArray
myArray(0, 1) = «R1C2»
myArray(1, 1) = «R2C2»
myArray(2, 1) = «R3C2»
‘populate column 3 of myArray
myArray(0, 2) = «R1C3»
myArray(1, 2) = «R2C3»
myArray(2, 2) = «R3C3»
‘copy data to ListBox1 (using List property) and ListBox2 (using Column property):
‘copies an array without transposing it
ListBox1.List() = myArray
‘transposes the contents of the array
ListBox2.Column() = myArray
End Sub
3. Populate a ComboBox or ListBox with AddItem method
Example 13: Populate a single-column ListBox from worksheet range
Private Sub UserForm_Initialize()
‘set ListBox properties on initialization of UserForm
With ListBox1
.ColumnCount = 1
.ColumnWidths = «50»
.ColumnHeads = False
‘AddItem method will not work if ListBox is bound to data, hence RowSource is cleared if it had been set
.RowSource = «»
End With
‘populating a single-column ListBox with AddItem method
Dim cell As Range
Dim rng As Range
Set rng = Sheet1.Range(«A1:A6»)
For Each cell In rng.Cells
Me.ListBox1.AddItem cell.Value
Next cell
End Sub
Example 14: Populate a single-column ListBox with values from 1 to 500
Private Sub UserForm_Initialize()
‘set ListBox properties on activation of UserForm
With ListBox1
.ColumnCount = 1
.ColumnWidths = «50»
‘AddItem method will not work if ListBox is bound to data, hence RowSource is cleared if it had been set
.RowSource = «»
End With
‘populate a single-column ListBox with values from 1 to 500, and «N/A»
With ListBox1
.AddItem «N/A»
For i = 1 To 500
.AddItem i
Next i
End With
End Sub

Example 15: Create a new row with AddItem and specify its row number — refer Image 14
Private Sub UserForm_Initialize()
‘set ListBox properties on initialization of UserForm
With ListBox1
.ColumnCount = 1
.ColumnWidths = «50»
.ColumnHeads = False
‘AddItem method will not work if ListBox is bound to data, hence RowSource is cleared if it had been set
.RowSource = «»
End With
‘using AddItem method to populate single-column ListBox:
ListBox1.AddItem «banana»
ListBox1.AddItem «orange»
‘Create a new row with AddItem and position as row number 1 — this will push down the above two rows
ListBox1.AddItem «apple», 0
‘Create a new row with AddItem and position as row number 2 — this will push down the above two rows to no. 3 and 4
ListBox1.AddItem «pears», 1
End Sub

Example 16: Populate a ComboBox with the 12 months in a year — Refer Image 15
Private Sub UserForm_Initialize()
‘set ComboBox properties on initialization of UserForm
With ComboBox1
.ColumnCount = 1
.ColumnWidths = «50»
.ColumnHeads = False
‘AddItem method will not work if ComboBox is bound to data, hence RowSource is cleared if it had been set
.RowSource = «»
End With
‘populates ComboBox with the 12 months in a year
For n = 1 To 12
ComboBox1.AddItem Format(DateSerial(2011, n, 1), «mmmm»)
Next n
End Sub
4. Populate a multi-column ComboBox or ListBox using AddItem method and List & Column properties

Example 17: refer Image 16
Private Sub UserForm_Initialize()
‘set ComboBox properties on initialization of UserForm
With ComboBox1
.ColumnCount = 3
.ColumnWidths = «50;50;50»
.ColumnHeads = False
‘AddItem method will not work if ComboBox is bound to data, hence RowSource is cleared if it had been set
.RowSource = «»
End With
‘Populating a multi-column ListBox using AddItem method and List & Column properties:
‘Create a new row with Additem
ComboBox1.AddItem «banana»
‘add item in second column of this first row, using List property
ComboBox1.List(0, 1) = «tuesday»
‘adding items in the 3 columns of the first row — this will become the second row in the end
ComboBox1.List(0, 2) = «day 2»
ComboBox1.AddItem «orange»
‘add item in second column of this second row, using Column property
ComboBox1.Column(1, 1) = «wednesday»
‘adding items in the 3 columns of the second row — this will become the third row in the end
ComboBox1.Column(2, 1) = «day 3»
‘Create a new row with Additem and position as row number 1
ComboBox1.AddItem «apple», 0
ComboBox1.List(0, 1) = «monday»
‘adding items in the 3 columns and positioning this row as the first row — this will push down the above two rows
ComboBox1.List(0, 2) = «day 1»
End Sub
5. Populate a multi-column ListBox from a worskheet range, using AddItem method and List property

Example 18: refer Image 17
Private Sub UserForm_Initialize()
‘set ListBox properties on initialization of UserForm
With ListBox1
.ColumnCount = 3
.ColumnWidths = «50;50;50»
‘AddItem method will not work if ListBox is bound to data, hence RowSource is cleared if it had been set
.RowSource = «»
End With
End Sub
Private Sub CommandButton1_Click()
‘populate a multi-column ListBox from a worskheet range, using AddItem method and List property
Dim counter As Long
Dim totalRows As Long
‘determine total number of rows in column A
totalRows = Sheet4.Cells(Rows.Count, «A»).End(xlUp).Row
counter = 0
‘ListBox gets populated with all rows in column A:
Do
With Me.ListBox1
counter = counter + 1
‘create a new row with Additem
.AddItem Sheet4.Cells(counter, 1).Value
‘add item in second column of a row
.List(.ListCount — 1, 1) = Sheet4.Cells(counter, 1).Offset(0, 1).Value
‘add item in third column of a row
.List(.ListCount — 1, 2) = Sheet4.Cells(counter, 1).Offset(0, 2).Value
End With
Loop Until counter = totalRows
End Sub
6. Add a new item/row to the list if ComboBox is bound to data in a worksheet.


Example 19: refer Images 18a & 18b
Private Sub UserForm_Initialize()
‘set ComboBox properties on initialization of UserForm
With ComboBox1
.ColumnCount = 3
.ColumnWidths = «50;50;50»
.ColumnHeads = True
.BoundColumn = 1
‘a named-range (name: «cbRange») has been created in Sheet3 of the workbook, using the Name Manager: «=Sheet3!$A$2:$C$6»
.RowSource = «cbRange»
End With
End Sub
Private Sub CommandButton1_Click()
‘add a new item/row to the list if ComboBox is bound to data in a worksheet
Dim colNo As Long
‘determine first column of the named-range «cbRange»
colNo = Range(«cbRange»).Column
‘create a new single-column named-range (name: «cbRangeTemp»), populated with only the first column of the named-range «cbRange».
Range(«cbRange»).Resize(Range(«cbRange»).Rows.Count, 1).Name = «cbRangeTemp»
‘checks if ComboBox1.Value is already existing in column 1 of named-range «cbRange»
If Application.CountIf(Range(«cbRangeTemp»), ComboBox1.Value) = 0 Then
‘resizing the named-range «cbRange», to add another worksheet row at the end, wherein the ComboBox1.Value will get posted:
Range(«cbRange»).Resize(Range(«cbRange»).Rows.Count + 1).Name = «cbRange»
ComboBox1.RowSource = «cbRange»
‘posting columns of the new row with values from ComboBox1, TextBox1 & TextBox2:
Sheet3.Cells(Range(«cbRange»).Rows.Count + 1, colNo) = ComboBox1.Value
Sheet3.Cells(Range(«cbRange»).Rows.Count + 1, colNo).Offset(0, 1) = TextBox1.Text
Sheet3.Cells(Range(«cbRange»).Rows.Count + 1, colNo).Offset(0, 2) = TextBox2.Text
Else
MsgBox «Item already in List»
End If
ComboBox1.Value = «»
TextBox1.Text = «»
TextBox2.Text = «»
End Sub
——————————————————————————————————————————————-
Extract ListBox & ComboBox Items, with VBA
VBA code — Display selected ComboBox item in TextBox:
‘the text area of ComboBox shows the item entered by user of his own choice or that selected from list items, and this item gets displayed in TextBox
TextBox1.Value = ComboBox1.Value
Note: VBA code-> TextBox1.Value = ListBox1.Value, or TextBox1.Text = ListBox1.Value, will work only in case MultiSelect property of ListBox is set to fmMultiSelectSingle, ie. in case of a single-selection enabled ListBox. It will copy the selected item (value in BoundColumn) from the list.
VBA code — Copy selected ComboBox item to a worksheet range:
‘the text area of ComboBox shows the item entered by user of his own choice or that selected from list items, and this item is copied to the worksheet range
Sheet1.Range(«G4»).Value = ComboBox1.Value
Note: VBA code-> Sheet4.Range(«G4»).Value = ListBox1.Value, will work only in case MultiSelect property of ListBox is set to fmMultiSelectSingle, ie. in case of a single-selection enabled ListBox. It will copy the selected item (value in BoundColumn) from the list.
VBA code — Copy ComboBox item determined by its position, to a worksheet range:
‘an existing ComboBox item, determined by its position (row 4, column 1), posted to a worksheet cell
Sheet1.Range(«F2»).Value = ComboBox1.List(3, 0)
Note: VBA code for ListBox -> Sheet1.Range(«F2»).Value = ListBox1.List(3, 0)

Example 20: Extracting ListBox items (of multi-column ListBox) to a worksheet range — refer Image 19
Private Sub UserForm_Initialize()
‘set ListBox properties on initialization of UserForm
With ListBox1
.ColumnCount = 3
.ColumnWidths = «50;50;50»
.ColumnHeads = True
.RowSource = «Sheet2!A2:C6»
.MultiSelect = fmMultiSelectMulti
End With
End Sub
Private Sub CommandButton1_Click()
‘Use Selected & List properties to copy multiple-selected ListBox items (of multi-column ListBox) to a worksheet range
‘check all items/rows in a ListBox
For r = 0 To ListBox1.ListCount — 1
‘if a ListBox row is selected, it will get copied to the worksheet range
If ListBox1.Selected(r) = True Then
‘copying multi-column ListBox rows to corresponding/matching worksheet rows & columns:
For c = 1 To ListBox1.ColumnCount
Sheet1.Cells(r + 1, c).Value = ListBox1.List(r, c — 1)
Next c
End If
Next r
End Sub

Example 21: Extract multiple items in a row from a single-selection enabled & multi-column ListBox, and copy to worksheet range — refer Image 20
Private Sub UserForm_Initialize()
‘set ListBoxBox properties on initialization of UserForm
With ListBox1
.ColumnCount = 3
.ColumnWidths = «50;50;50»
.ColumnHeads = True
.BoundColumn = 1
.MultiSelect = fmMultiSelectSingle
.RowSource = «Sheet3!A2:C6»
End With
End Sub
Private Sub CommandButton1_Click()
‘extract multiple items in a row from a single-selection enabled & multi-column ListBox, and copy to worksheet range
‘ListIndex property is used to return and set a selection in a single-selection ListBox, but not in a multi-selection ListBox
‘ListBox1.Value will work only in case of a single-selection ListBox. It will copy the selected item (value in BoundColumn) from the list.
Dim rng As Range
Set rng = Sheet3.Cells(9, 1)
If ListBox1.Value <> «» Then
rng.Value = ListBox1.Value
rng.Offset(0, 1).Value = ListBox1.List(ListBox1.ListIndex, 1)
rng.Offset(0, 2).Value = ListBox1.List(ListBox1.ListIndex, 2)
End If
End Sub

Example 22: Select or enter name in ComboBox, and lookup its corresponding Grade in a worksheet range — refer Image 21
Private Sub UserForm_Initialize()
‘set comboBox properties on initialization of UserForm
With ComboBox1
.ColumnCount = 1
.ColumnWidths = «50»
.ColumnHeads = True
.RowSource = «Sheet3!A2:B6»
End With
‘disallow manual entry in TextBox
With TextBox1
.Enabled = False
End With
End Sub
Private Sub CommandButton1_Click()
‘select or enter name in ComboBox, and lookup its corresponding Grade in a worksheet range — use ComboBox, TextBox & CheckBox properties and worksheet functions Vlookup and Countif
Dim totalRows As Long
‘determine total number of rows in column B
totalRows = Sheet3.Cells(Rows.Count, «B»).End(xlUp).Row
Me.ComboBox1.ControlTipText = «Select Name»
Me.CommandButton1.ControlTipText = «Click to get Grade»
‘Name selected in ComboBox is posted to TextBox
TextBox1.Text = ComboBox1.Value
‘Grade will be searched only if a name is selected and the CheckBox is selected:
If CheckBox1 = True And TextBox1.Text <> «» Then
‘check if name selected or entered in ComboBox is present in the lookup range:
If Application.CountIf(Sheet3.Range(«A1:A» & totalRows), TextBox1.Text) > 0 Then
‘lookup Grade of selected Name, in the worksheet range
Sheet3.Cells(1, 4).Value = TextBox1.Text & «‘s grade is » & Application.VLookup(TextBox1.Text, Sheet3.Range(«A1:B» & totalRows), 2, False)
Else
MsgBox «Name not found!»
End If
End If
End Sub
——————————————————————————————————————————————-
Delete ListBox rows using the RemoveItem Method


Example 23: Use RemoveItem method to delete a ListBox row. The below code deletes the row from the ListBox and also deletes the row items (or rows) in the worksheet — refer Images 22a and 22b.
Private Sub UserForm_Initialize()
‘set ListBox properties on initialization of UserForm
With ListBox1
.ColumnCount = 3
.ColumnWidths = «50;50;50»
.ColumnHeads = False
.MultiSelect = fmMultiSelectMulti
End With
Dim totalRows As Long
‘determine total number of rows in column A
totalRows = Sheet3.Cells(Rows.Count, «A»).End(xlUp).Row
‘load a dynamic worksheet range to a ListBox
Dim rng As Range
Set rng = Sheet3.Range(«A2:C» & totalRows)
Me.ListBox1.List = rng.Cells.Value
‘removes all items in ListBox
‘ListBox1.Clear
End Sub
Private Sub CommandButton1_Click()
‘use RemoveItem method to delete a ListBox row. The below code deletes the row from the ListBox and also deletes the row items (or rows) in the worksheet
Dim n As Long, i As Long
Dim var As Variant
‘deleting row from ListBox using RemoveItem method:
‘check all items in a ListBox; reverse order (Step -1) is used because rows are being deleted from ListBox.
For n = ListBox1.ListCount — 1 To 0 Step -1
If ListBox1.Selected(n) = True Then
‘item to be deleted is stored in the variable named var
var = ListBox1.List(n, 0)
ListBox1.RemoveItem (n)
‘determine row number in which items are to be deleted; Note: value of variable named var is derived from first column, hence Range(«A:A») is searched in the Match formula.
i = Application.Match(var, Sheet3.Range(«A:A»), 0)
‘delete all 3 columns of the determined row in the worksheet:
Sheet3.Cells(i, 1) = «»
Sheet3.Cells(i, 1).Offset(0, 1) = «»
Sheet3.Cells(i, 1).Offset(0, 2) = «»
‘use this code instead of the preceding 3-lines, to delete the determined row in the worksheet
‘Sheet3.Rows(i).Delete
End If
Next n
End Sub
Example 24: Delete all rows in ListBox, using RemoveItem method
Private Sub UserForm_Initialize()
‘set ListBoxBox properties on initialization of UserForm
With ListBox1
.ColumnCount = 3
.ColumnWidths = «50;50;50»
.BoundColumn = 1
.MultiSelect = fmMultiSelectMulti
‘RemoveItem method will not work if ListBox is bound to data, hence RowSource is cleared if it had been set
ListBox1.RowSource = «»
End With
For n = 2 To 6
With Me.ListBox1
‘create a new row with Additem
.AddItem Sheet3.Cells(n, 1).Value
‘add item in second column of a row
.List(.ListCount — 1, 1) = Sheet3.Cells(n, 1).Offset(0, 1).Value
‘add item in third column of a row
.List(.ListCount — 1, 2) = Sheet3.Cells(n, 1).Offset(0, 2).Value
End With
Next n
End Sub
Private Sub CommandButton1_Click()
‘delete all rows in ListBox, using RemoveItem method
Dim n As Integer
For n = 1 To ListBox1.ListCount
‘Note: «ListBox1.RemoveItem 0» is the same as «ListBox1.RemoveItem (0)»
‘alternate code: ListBox1.RemoveItem 0
ListBox1.RemoveItem ListBox1.ListCount — 1
Next n
End Sub
“I want to think that there is someone with sound judgement at the controls” – Martin Feldstein
The Webinar
If you are a member of the website, click on the image below to view the webinar for this post.
(Note: Website members have access to the full webinar archive.)

Introduction
In the first post on UserForms we looked at the general use of the UserForm.
In this post we are going to look at the individual VBA controls and how to use them. We will cover the most commonly used VBA controls. These are the Checkbox, ComboBox, CommandButton, Label, ListBox and TextBox. For each control, I will cover their most common uses and provide plenty of code examples you can use in your own projects.
The UserForm Controls
We add controls to the UserForms to allow the user to make selections, enter text or click a button. To add a control to a UserForm we do the following
- Go to the Toolbox dialog – if not visible select View->Toolbox.
- Click on the control icon you want to add – the icon will appear selected(pressed in) until you click another one.
- Put the cursor over the UserForm.
- Hold down the left mouse button and drag until the control is the size you want.
- To select or move a control click on the Select Objects icon(very left one) on the toolbox and this will put you in select mode.
The following table shows a list of the common controls
| Control | Description |
|---|---|
| CheckBox | Turn item on/off |
| ComboBox | Allows selection from a list of items |
| CommandButton | Click to perform action |
| Label | Displays text |
| ListBox | Allows selection from a list of items |
| Textbox | Allows text entry |
Properties of the Controls
The screenshot below shows the three important Windows when adding controls to a UserForm. These are
- The Properties Window.
- The Toolbox Dialog.
- The UserForm design Window.

UserForm Windows
If you click on any control or the UserForm itself you will see the properties of the selected item displayed in the Properties window. You can change the name, caption etc. in this Window.
To change the name of the UserForm do the following
- Click on the UserForm in the Project window or click on the UserForm itself.
- Click in the (Name) field of the Properties window.
- Enter the new name in this field.
Adding the Code
You can view the code of the UserForm in the following ways
- Double click on the UserForm.
- Right click on the UserForm itself and select View Code.
- Right click on the UserForm in the Project windows and select View Code.
Common control functions
The following table shows the most commonly used functions that are available to all controls.
| Function | Operation | Example |
|---|---|---|
| Enabled | Enable/Disable control | combobox.Enabled = True textbox.Enabled = False |
| SetFocus | Sets the focus to the control (cannot use with the Label) |
combobox.SetFocus |
| Visible | Show/Hide control | combobox.Visible = True textbox.Visible = False |
' https://excelmacromastery.com/
Private Sub checkboxAddNotes_Click()

    ' Enable texbox when checkbox set to true
    If checkboxAddNotes.Value = True Then
        textboxNotes.Enabled = True
        textboxNotes.SetFocus
    Else
        textboxNotes.Enabled = False
    End If

End Sub
The CheckBox
The CheckBox Cheat Sheet
| Function | Operation | Example |
|---|---|---|
| Caption | Get/Set the text | checkbox.Caption = «Apple» |
| Value | Get the checked state | If checkbox.Value = True Then |
| Value | Set the checked state | checkbox.Value = False |
The CheckBox is a simple control that allows the user set something to on or off. You will often see them used on web pages where you are asked to accept terms and conditions.

Turning the CheckBox on or off
We can turn the CheckBox on or off by setting it to true or false
' Set the check on
CheckBoxTerms.Value = True

' Set the check off
CheckBoxTerms.Value = False
Checkbox Event with example
If we want to create an action when the user clicks on the checkbox then we create a checkbox event. This is simply a sub that runs when the checkbox is clicked.
To create this event simply click on the checkbox in design mode and you will get the following
Private Sub CheckBoxTerms_Click()

End Sub
The following code shows an example of how we use it
' https://excelmacromastery.com/
Private Sub CheckBoxTerms_Click()

    If checkboxTerms.Value = True Then
       buttonOk.Enabled = True
    Else
       buttonOk.Enabled = False
    End If

End Sub
The Label
The Label Cheat Sheet
| Function | Operation | Example |
|---|---|---|
| Text | GetSet the text | textbox1.Text = «Apple» |
The label is the most simple control. Generally speaking, we don’t refer to it in the code. It is used to label the controls or display a short notice.
Setting the Label Text
You can set the text of the Label in the code using the Caption property
LabelAddress.Caption = "Customer Address"
The TextBox
The TextBox Cheat Sheet
| Function | Operation | Example |
|---|---|---|
| Text | Set the text | textbox1.Text = «Apple» |
| Text | Get the text | sFruit = textbox1.Text |
| Value | Set the text | textbox1.Value = «Apple» |
| Value | Get the text | sFruit = textbox1.Value |
Setting the Textbox Text
The textbox is used to allows the user to enter text. We can read or write from a text box as follows
TextBoxNotes.Value = "It was the best of times."

sNotes = TextBoxNotes.Value
The textbox has properties Text and Values. These are the same thing.
From MSDN: For a TextBox, any value you assign to the Text property is also assigned to the Value property.
The problem with the text box is that the user can enter anything. If the user is entering basic text then this is fine. If the text is to be used for a calculation or for looking up something then we need to validate it.
For example, if the user is going to pick a year between 2010 and 2019 we should use a ComboBox/Listbox that only contains valid years. Then we don’t need to validate the format and range of the user’s entry.
Making a TextBox numeric only
The following code prevents the user entering anything other than a number in the textbox
' https://excelmacromastery.com/
Private Sub textboxComments_KeyPress( _
            ByVal KeyAscii As MSForms.ReturnInteger)

    Select Case KeyAscii
        Case Is < vbKey0, Is > vbKey9
            KeyAscii = 0
            Beep
    End Select

End Sub
Using a Date Control
If you the user to select a date you can use the MonthView control. It is one of the additional controls that comes with Visual Basic. It works quite well and looks like the standard date picker you see in most applications.
To add the MonthView control:
- Go the the Visual Basic editor and make sure the Toolbox is visible(View->Toolbox if it’s not visible).
- Select Tools and then Additional Controls from the menu.
- Place a check on Microsoft MonthView Control, Version 6.0.
- The MonthView control will now appear on the Toolbox.
To get the user selection from the MonthView control you can use the DateClick event as the following code shows
' https://excelmacromastery.com/
Private Sub MonthView1_DateClick( _
     ByVal DateClicked As Date)

    ' Store date in textbox
    TextBox1.Value = MonthView1.Value

End Sub
For more information on the MonthView see these links:
Issues adding the MonthView – see top answer on this StackOverflow page
MSDN – Using the MonthView Control
The ComboBox
The ComboBox Cheat Sheet
| Function | Operation | Example |
|---|---|---|
| AddItem | Add an item | listbox.AddItem «Spain» |
| Clear | Remove all Items | combo.Clear |
| List | Add a range of items | combo.List = Range(«A1»).Value |
| ListCount | Get the number of items | cnt = combo.ListCount |
| ListIndex | Get/set selected item | Idx = combo.ListIndex combo.ListIndex = 0 |
| ListRows | Get/set number of items displayed | NoItems = combo.ListRows combo.ListRows = 12 |
| RemoveItem | Remove an item | combo.RemoveItem 1 |
| Value | Get the value of selected Item | Dim sCountry As String sCountry = combo.Value |
The ComboBox is used to allow the user to select an item from a list. It is very similar to the listbox. The main difference is the listbox allows multiple selections.
In most cases we want to do four things with the ComboBoxListBox
- Fill it with data when the Form is loaded
- Preselect an item.
- Retrieve the currently selected item(s).
- Perfom an action when the user selects a different item.
Filling the Combobox with data
We can fill the combobox one item at at a time using the AddItem property.
comboBoxFruit.AddItem "Apple"
comboBoxFruit.AddItem "Pear"
You would normally use AddItem in a loop where you are checking each item before adding it
Dim cell As Range
' Fill items with first letter is A
For Each cell In Sheet1.Range("A1:A50")
    If Left(cell.Value, 1) = "A" Then
        comboBoxFruit.AddItem cell.Value
    End If
Next
Filling the ComboBox from a range
If you want to fill the ComboBox from an entire range you can do it in one line of code
comboBoxFruit.List = Sheet1.Range("A1:A5").Value
Normally when you fill a ComboBox you want to clear the existing contents first
' Clear any existing item
comboBoxFruit.Clear
' Fill the ComboBox
comboBoxFruit.List = Sheet1.Range("A1:A5").Value
Filling the ComboBox – No duplicates
If our range has multiple entries then we want to avoid adding the same item multiple times. We can do this using a Dictionary
' https://excelmacromastery.com/
Sub TestDuplicates()

    ' clear existing values
    comboBoxFruit.Clear

    ' Fill given ComboBox from given range ignoring duplicates
    FillComboNoDuplicates comboBoxFruit, Sheet1.Range("A1:A10")

End Sub

Sub FillComboNoDuplicates(cbo As ComboBox, rg As Range)

    ' Create dictionary
    Dim dict As Object
    Set dict = CreateObject("Scripting.Dictionary")

    Dim cell As Range, sItem As String
    ' Go through each item in range
    For Each cell In rg
        sItem = Trim(cell.Value)
        ' check if item already exists in dictionary
        If dict.Exists(sItem) = False Then
            ' If doesn't exist then add to dictionary and combobox
            dict.Add sItem, 1
            cbo.AddItem sItem
        End If
    Next

    ' Clean up dictonary as we no longer need it
    Set dict = Nothing

End Sub
VBA ComboBox – Full Example 1
The easiest way to show how these work is with an example. Imagine we have a list of countries and their capitals in cells A1:B196.

We want the user to select any country. When they do our UserForm will display the capital of that country. The screenshot below shows and example of this

The first thing we want to do is fill the countries ComboBox when the form loads. We do this using the UserForm_Initialize event which we looked at in the first post on VBA UserForms.
Private Sub UserForm_Initialize()

End Sub
We can use the following code to fill the ComboBox from a range and set the selected item to be the first one. (Note we don’t need to clear the ComboBox here as the Initialize event is only used once – when the UserForm is created.)
' https://excelmacromastery.com/
Private Sub UserForm_Initialize()

    ' Add array to combobox
    ComboBoxCountry.List = Sheet1.Range("A1:A196").Value

    ' Set the first item in combobox
    ComboBoxCountry.ListIndex = 0

End Sub
When the user selects a country we want to display the capital city in the textbox. We use the Change Event of the ComboBox. To create this we simply double-click on the ComboBox and it will be automatically created.
' https://excelmacromastery.com/
Private Sub ComboBoxCountry_Change()

    ' Get the value from the combo box
    Dim sCountry As String
    sCountry = ComboBoxCountry.Value

    ' Get the range
    Dim rg As Range
    Set rg = Sheet1.Range("A1:B196")

    ' Use VLookup to find the capital of the country
    TextBoxCapital.Value = _
        WorksheetFunction.VLookup(sCountry, rg, 2)

End Sub
When the user clicks Ok we write the selected values to the Results worksheet
' https://excelmacromastery.com/
Private Sub buttonOK_Click()

    With shResult

        ' Write the country the was selected
        .Range("A1") = ComboBoxCountry.Value

        ' Write the postion of the selected country
        .Range("A3") = ComboBoxCountry.ListIndex

        ' Write the capital of the country
        .Range("A2") = TextBoxCapital.Value

    End With

    ' Close the form
    Unload Me

End Sub
VBA ComboBox – Full Example 2
A very commmon task to perform is to update a second ComboBox based on the selection of the first.

Imagine we have two ComboBoxes – one contains the name of a country and one has a list of three cities from that country.

When the user selects a country we update the city ComboBox with the cities from that country.
Our data is stored as follows

Anytime the Country ComboBox value is set to a country we update the City ComboBox to contain the three cities from that country. This happens in two places
- When we load the country combo box – the Initialize Event
- When the user selects a country – the Change Event
The code for these is as follows
' https://excelmacromastery.com/
Private Sub UserForm_Initialize()

    ' Add array to combobox
    ComboBoxCountry.List = shCity.Range("A2:A5").Value
    ComboBoxCountry.ListIndex = 0

    ' Fill the city ComboBox
    FillCityCombo ComboBoxCountry.ListIndex

End Sub

Private Sub ComboBoxCountry_Change()
    ' Fill the city ComboBox
    FillCityCombo ComboBoxCountry.ListIndex
End Sub
In both cases we call our FillCityCombo Sub to fill the city ComboBox. It takes one parameter which is the position of the current country selection.
We use the position value to count from the top row of our worksheet range.
' https://excelmacromastery.com/
Sub FillCityCombo(ByVal row As Long)

    ' Get the city range from the given row
    Dim rgCities As Range
    Set rgCities = shCity.Range("B2:D2").Offset(row)

    ' Clear current city list
    ComboBoxCity.Clear

    ' We transpose the range of columns e.g. B2:D2 to rows so
    ' we can add to the ComboBox
    ComboBoxCity.List = _
            WorksheetFunction.Transpose(rgCities)

    ' Set the first city in list
    ComboBoxCity.ListIndex = 0

End Sub
The ListBox
The ListBox is used in almost the same way as the ComboBox. The code in the ComboBox section above will work for the ListBox also.
The ListBox Cheat Sheet
| Function | Operation | Example |
|---|---|---|
| AddItem | Add an item | listbox.AddItem «Spain» |
| Clear | Remove all Items | listbox.Clear |
| ColumnCount | Set the number of visible columns | ComboBox1.ColumnCount = 2 |
| ColumnHeads | Make the column row visible | ComboBox1.ColumnHeads = True |
| List | Range to Listbox ListBox to Range |
Listbox.List = Range(«A1:A4»).Value Range(«A1:A4»).Value = Listbox.List |
| List | Update a column value | Listbox.List(1,2) = «New value» |
| ListCount | Get the number of items | cnt = listbox.ListCount |
| ListIndex | Get/set selected item | Idx = listbox.ListIndex combo.ListIndex = 0 |
| RemoveItem | Remove an item | listbox.Remove 1 |
| RowSource | Add a range of values from a worksheet | ComboBox1.RowSource = Sheet1.Range(«A2:B3»).Address |
| Value | Get the value of selected Item | Dim sCountry As String sCountry = listbox.Value |
We can use the ListBox the same way as we used the ComboBox. The difference is how they are displayed
- The ListBox displays a list of available items to select.
- The ComboBox only displays the selected item. You have to click on the ComboBox to see the other available items.
The other major difference between them is that the ListBox allows multiple selections and the ComboBox doesn’t.

We can get all the selected items in the ListBox by reading through all the items and checking if each one is selected. In the code below we add all the selected items to a Collection.
' USERFROM CODE
' https://excelmacromastery.com/
Private m_CollCountries As Collection

' OK click event
Private Sub buttonOk_Click()
    ' Get the user selections
    Set m_CollCountries = GetSelections
    ' Hide the UserForm
    Hide
End Sub

' Returns the collection of countries
Property Get Countries() As Collection
    Set Countries = m_CollCountries
End Property

' Get the selections from the ListBox
Private Function GetSelections() As Collection

    Dim collCountries As New Collection
    Dim i As Long

    ' Go through each item in the listbox
    For i = 0 To ListBoxCountry.ListCount - 1
        ' Check if item at position i is selected
        If ListBoxCountry.Selected(i) Then
            ' Add item to our collection
            collCountries.Add ListBoxCountry.List(i)
        End If
    Next i

    Set GetSelections = collCountries

End Function
' MAIN PROCEDURE CODE
' https://excelmacromastery.com/
' Sub to display the UserForm
Sub DisplayMultiCountry()

    Dim frm As New UserFormCountryMulti
    frm.Show

    ' Print the collection
    PrintCollection frm.Countries

End Sub

' Sub used to print a collection to the Immediate Window(Ctrl + G)
Public Sub PrintCollection(ByRef coll As Collection)

    Debug.Print "The user selected the following countries:"
    Dim v As Variant
    For Each v In coll
        Debug.Print v
    Next

End Sub
That concludes the two posts on UserForm(see first one here).
I hope you found them of benefit. If you have any questions or queries please feel free to add a comment or email me at Paul@ExcelMacroMastery.com.
What’s Next?
Free VBA Tutorial If you are new to VBA or you want to sharpen your existing VBA skills then why not try out the The Ultimate VBA Tutorial.
Related Training: Get full access to the Excel VBA training webinars and all the tutorials.
(NOTE: Planning to build or manage a VBA Application? Learn how to build 10 Excel VBA applications from scratch.)
Содержание
- VBA-Урок 12.3. Элементы управления (Controls)
- Полоса прокрутки (ScrollBar)
- Выпадающий список и Окно со списком (ComboBox and ListBox)
- Things you can do with a multicolumn ListBox or ComboBox
- См. также
- Поддержка и обратная связь
- Excel VBA Lesson 23: Working with ListBox, ComboBox and Toggle Button
- > [Contents] >
- 23.1 The ListBox
- Example 23.1
- 23.2 ComboBox
- Example 23.2
- 23.3 Toggle Button
- Example 23.3
- VBA Excel. Элемент управления ComboBox (поле со списком)
- Элемент управления ComboBox
- Свойства поля со списком
- Способы заполнения ComboBox
- Articles
- Excel UserForm Controls — ComboBox and ListBox: AddItem Method, BoundColumn, List Property, ListIndex, RowSource, Selected Property, .
VBA-Урок 12.3. Элементы управления (Controls)
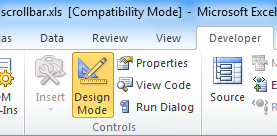
Элементы управления также могут использоваться вне форм. В следующем примере мы используем элементы управления прямо на рабочем листе.
Заметьте, что «Режим дизайнера» («Design mode») должен быть активирован, для того чтобы изменять элемент управления, который расположен на рабочем листе (и так же должен быть деактивирован, для того чтобы использовать этот элемент управления).
Перед рассмотрением этого примера, давайте посмотрим на это:
Сейчас, мы хотим добавить цвет фона ячеек и выбрать её основываясь на позиции ползунка в определенной площади 30 строк на 10 колонок.
Свойства вертикального ползунка для прокрутки экрана.
- Min 1
- Max 30 (30 строк)
- Value : позиция ползунка (в данном случае, между 1 и 30)
Горизонтальный ползунок такой же, за исключением Max : 10.
Далее идет код, который будет запускаться каждый раз, когда идет изменение значения ( Value ) вертикального ползунка:
Этот код запускается когда события Change и Scroll возникают и запустят инструкции в не зависимости от того, по какой части ползунка мы щелкнули.
Далее код для вертикального ползунка:
А тут код для горизонтального ползунка:
Вы можете скачать Excel файл с примером: scrollbar.xls
Выпадающий список и Окно со списком (ComboBox and ListBox)
Это начальная точка нашего следующего примера:
Вы можете скачать Excel файл с примером: userform4.xls
Когда форма запускается, мы хотим, чтобы 4 страны были загружены в выпадающий список (используя AddItem метод):
Когда значение выпадающего списка меняется, мы хотим добавить города выбранной страны, используя цикл, подобен предыдущему.
Для того, чтобы сделать это, нам нужно номер колонки и номер строки.
Свойство ListIndex содержит порядковый номер выбранного элемента в выпадающем списке (в отличие от Value, которое содержит значение элемента списка). Заметьте, что ListIndex начинается с номера 0.
Номер колонки получается из:
Чтобы получить количество строк в выбранной колонке определенной страны, мы можем найти номер последней непустой ячейки:
Используя эту информацию, теперь возможно создать цикл, чтобы добавить города в список:
Примечание: Мы могли бы сократить код, но это бы сделало его менее читабельным:
Город, который мы выберем, будет введен в текстовое поле:
Источник
Things you can do with a multicolumn ListBox or ComboBox
Чтобы управлять шириной столбцов многоколонок ListBox или ComboBox, можно указать ширину (в точках) для всех столбцов в свойстве ColumnWidths . Если для какого-нибудь конкретного столбца задать нулевую ширину, этот столбец станет скрытым и не будет отображаться на экране.
Если вы хотите скрыть от пользователя все столбцы ListBox или ComboBox , кроме одного, можно задать значение ColumnWidths для других столбцов равным нулю и определить отображаемый столбец информации, оставив свойству ColumnWidths значение по умолчанию и используя свойство TextColumn . Когда пользователь выбирает строку, свойству Text элемента управления присваивается значение столбца, определяемого свойством TextColumn . В поле со списком система отображает столбец, назначаемый свойством TextColumn в текстовой части элемента управления.
Аналогичным образом можно указать, какой столбец значений используется для элемента управления, когда пользователь делает выбор, указав номер столбца в свойстве BoundColumn .
См. также
Поддержка и обратная связь
Есть вопросы или отзывы, касающиеся Office VBA или этой статьи? Руководство по другим способам получения поддержки и отправки отзывов см. в статье Поддержка Office VBA и обратная связь.
Источник
Excel VBA Lesson 23: Working with ListBox, ComboBox and Toggle Button
> [Contents] >
We have learned how to work with check boxes, option buttons and text boxes in Excel VBA in the previous lesson. We shall continue to learn how to manipulate other Excel VBA controls in this lesson.
23.1 The ListBox
The function of the ListBox is to present a list of items where the user can click and select the items from the list. To add items to the list, we can use the AddItem method.
To clear all the items in the List Box, you can use the Clear method. The usage of Additem method and the Clear method is illustrated in Example 19.1 and The output is as shown in Figure 23.1
Example 23.1
Private Sub CommandButton1_Click()
For x = 1 To 10
ListBox1.AddItem “Apple”
Next
End Sub
Private Sub CommandButton2_Click()
For x = 1 To 10
ListBox1.Clear
Next
End Sub

Figure 23.1
23.2 ComboBox
The function of the ComboBox is also to present a list of items where the user can click and select the items from the list. However, the user needs to click on the small arrowhead on the right of the combo box to see the items which are presented in a drop-down list. In order to add items to the list, you can also use the AddItem method. The usage involving ComboBox is as shown in Example 19.2 and the output is as shown in Figure 19.2.
Example 23.2
Private Sub CommandButton1_Click()
ComboBox1.Text = “Apple”
For x = 1 To 10
ComboBox1.AddItem “Apple”
Next
End Sub
Private Sub CommandButton2_Click()
ComboBox1.Clear
End Sub

Figure 23.2
23.3 Toggle Button
Toggle button lets the user switches from one action to another alternatively. When the Toggle button is being depressed, the value is true and when it is not depressed, the value is false. By using the If and Else code structure, we can thus switch from one activity to another by pressing the toggle button repeatedly.
Example 23.3
In this example, the user can toggle between apple and orange as well as font colors.
Private Sub ToggleButton1_Click ()
If ToggleButton1.Value = True Then
Cells (1, 1) = “Apple”
Cells (1, 1).Font.Color = vbRed
Else
Cells (1, 1) = “Orange”
Cells (1, 1).Font.Color = vbBlue
End If
End Sub
View the animated image in Figure 23.3Figure 23.3
Источник
VBA Excel. Элемент управления ComboBox (поле со списком)
Элемент управления пользовательской формы ComboBox для выбора и ввода информации в VBA Excel. Свойства поля с раскрывающимся списком, заполнение, извлечение данных, примеры кода.
Элемент управления ComboBox

ComboBox представляет из себя комбинацию двух элементов управления: текстового поля (TextBox) и списка (ListBox), поэтому его еще называют «комбинированным списком» или «полем со списком». Также ComboBox сочетает в себе свойства этих двух элементов управления.
Изначально комбинированный список прорисовывается на форме в виде текстового поля с кнопкой для отображения раскрывающегося списка. Далее по тексту будем использовать слово «поле» в значении текстового поля в составе элемента управления ComboBox, а словосочетание «раскрывающийся список» – в значении списка в составе элемента управления ComboBox.
Поле со списком используется в тех случаях, когда необходимо добавить в форму информацию, которая заранее известна, а ее отдельные позиции можно сгруппировать в список, а также для ручного ввода с клавиатуры или вставки из буфера обмена, если необходимое значение в списке отсутствует.
Элемент управления ComboBox незаменим при больших списках. При списках из нескольких позиций его можно заменить на ListBox, который отображает позиции для выбора сразу после загрузки формы, не требуя дополнительных действий от пользователя.
Свойства поля со списком
| Свойство | Описание |
|---|---|
| AutoSize | Автоподбор размера комбинированного поля. True – размер автоматически подстраивается под длину выбранной или введенной строки. False – размер элемента управления определяется свойствами Width и Height. |
| AutoTab | Включение автоматической табуляции – передачи фокуса следующему элементу управления при достижении максимального числа символов при значениях свойства MaxLenght > 0. True – автоматическая табуляция включена, False – выключена. |
| ColumnCount | Указывает количество столбцов в раскрывающемся списке. Значение по умолчанию = 1. |
| ColumnHeads | Добавляет строку заголовков в раскрывающийся список. True – заголовки столбцов включены, False – заголовки столбцов выключены. Значение по умолчанию = False. |
| ColumnWidths | Ширина столбцов в раскрывающемся списке. Значения для нескольких столбцов указываются в одну строку через точку с запятой (;). |
| ControlSource | Ссылка на ячейку для ее привязки к элементу управления ComboBox. |
| ControlTipText | Текст всплывающей подсказки при наведении курсора на элемент управления. |
| Enabled | Доступ пользователя к полю и раскрывающемуся списку. True – доступ разрешен, False – доступ запрещен*. Значение по умолчанию = True. |
| Font | Шрифт, начертание и размер текста в поле. |
| Height | Высота элемента управления ComboBox. |
| Left | Расстояние от левого края внутренней границы пользовательской формы до левого края комбинированного списка. |
| List | Позволяет заполнить ComboBox данными из одномерного или двухмерного массива, а также обращаться к отдельным элементам раскрывающегося списка по индексам для записи и чтения. |
| ListIndex | Номер выбранной пользователем строки в раскрывающемся списке. Нумерация начинается с нуля. Если ничего не выбрано, ListIndex = -1. |
| ListRows | Количество видимых строк в раскрытом списке. Если общее количество строк больше ListRows, появляется полоса прокрутки. Значение по умолчанию = 8. |
| Locked | Запрет на отображение раскрывающегося списка, ввод и редактирование данных в поле. True – ввод и редактирование запрещены**, False – ввод и редактирование разрешены. Значение по умолчанию = False. |
| MatchRequired | Задает проверку вводимых в поле строк с элементами списка. True – проверка включена (допускается ввод только строк, совпадающих с элементами списка), False – проверка выключена (допускается ввод любых строк). Значение по умолчанию = False. |
| MaxLenght | Максимальная длина строки в поле. Значение по умолчанию = 0, что означает – ограничений нет. |
| RowSource | Источник строк для раскрывающегося списка (адрес диапазона на рабочем листе Excel). |
| TabIndex | Целое число, определяющее позицию элемента управления в очереди на получение фокуса при табуляции. Отсчет начинается с 0. |
| Text | Текстовое содержимое (значение) поля (=Value). |
| TextAlign | Выравнивание текста в поле: 1 (fmTextAlignLeft) – по левому краю, 2 (fmTextAlignCenter) – по центру, 3 (fmTextAlignRight) – по правому краю. |
| Top | Расстояние от верхнего края внутренней границы пользовательской формы до верхнего края комбинированного списка. |
| Value | Текстовое содержимое (значение) поля (=Text). |
| Visible | Видимость поля со списком. True – ComboBox отображается на пользовательской форме, False – ComboBox скрыт. |
| Width | Ширина элемента управления. |
* При Enabled в значении False пользователь не может раскрывать список, а также вводить или редактировать данные в поле.
** Для элемента управления ComboBox действие свойства Locked в значении True аналогично действию свойства Enabled в значении False.
В таблице перечислены только основные, часто используемые свойства поля со списком. Еще больше доступных свойств отображено в окне Properties элемента управления ComboBox, а все методы, события и свойства – в окне Object Browser.
Вызывается Object Browser нажатием клавиши «F2». Слева выберите объект ComboBox, а справа смотрите его методы, события и свойства.
Свойства BackColor, BackStyle, BorderColor, BorderStyle отвечают за внешнее оформление комбинированного списка и его границ. Попробуйте выбирать доступные значения этих свойств в окне Properties, наблюдая за изменениями внешнего вида элемента управления ComboBox на проекте пользовательской формы.
Способы заполнения ComboBox
Используйте метод AddItem для загрузки элементов в поле со списком по одному:
Источник
Articles
Excel UserForm Controls — ComboBox and ListBox: AddItem Method, BoundColumn, List Property, ListIndex, RowSource, Selected Property, .
User Rating: 4 / 5

![]()
UserForm Controls — ComboBox and ListBox
Contents:
UserForm acts as a container in which you add multiple ActiveX controls, each of which has a specific use and associated properties. By itself, a UserForm will not be of much use unless ActiveX controls are added to it which are the actual user-interactive objects. Using ActiveX Controls on a Worksheet have been illustrated in detail, in the separate section of «Excel VBA: ActiveX Controls, Form Controls & AutoShapes on a Worksheet».
An Excel VBA ListBox or ComboBox is a list of items from which a user can select. They facilitate in accepting data from users and making entries in an Excel worksheet.
Difference between ListBox and ComboBox:
1. The ComboBox is a drop-down list (the user-entered item or the list-selected item is visible in the text area, whereas list values are visible by using the drop-down), while a ListBox shows a certain number of values with or without a scroll bar. In a ComboBox, only one row of items is visible at a given time (without using the drop-down) whereas in a ListBox one or more can be visible at a time.
2. In a ComboBox you can select ony one option from the list, while in a ListBox you can select multiple options from the list.
3. The user can enter his own item (in text area) in a ComboBox if it is not included in the list, which is not possible to do in a ListBox. In this sense, ComboBox is a combination of TextBox and ListBox.
4. CheckBox can be used within ListBox, but not within ComboBox. ListBox allows you to display a check box next to each item in the list, to enable user to select items (this might be easier for the user than using the multiple selection methods). To use CheckBoxes in a ListBox, set ListStyle property (in Properties Window) to fmListStyleOption (vba code: ListBox1.ListStyle = fmListStyleOption). This setting is best used with a multiselect ListBox.
Key Properties of ComboBox and ListBox
Note1: All properties and methods given below are common to both ListBox and ComboBox, unless mentioned otherwise. Also refer «2. UserForm and Controls — Properties.» for properties common to the UserForm and most Controls.
Note 2: In below given examples, vba codes are required to be entered in the Code Module of the UserForm, unless specified otherwise.
AddItem Method:
Adds an item to the list, in a single-column ListBox or ComboBox. Adds a row to the list (ie. an item for each row), in a multi-column ListBox or ComboBox. Syntax: Control.AddItem(Item, Index). Item specifies the item or row to add. Index is an Integer which specifies the position where the new item or row is placed within the list, and if omitted, the item or row is added at the end. The item or row numbers begin with zero, and the first item or row is numbered 0, and so on. The value of Index cannot be greater than the total number of rows (ie. value of ListCount property). AddItem method will not work if ComboBox or ListBox is bound to data, hence RowSource data should be cleared before use. AddItem method can only be used with a macro or vba code. Note: AddItem method adds an item to the first column in a multi-column ListBox or ComboBox, and to add an item further to the first column, use the List or Column property specifying the item’s row and column number. More than one row can also be added at a time to a ListBox or ComboBox by using the List or Column properties (AddItem adds one row at a time). This means that you can copy a two-dimensional array of values to a ListBox or ComboBox, using List or Column properties rather than adding each individual element using the AddItem method. Note: Using the Column property to copy a two-dimensional array of values to a ListBox or ComboBox, transposes the array contents and equates myArray(iRow, iColumn) to ListBox1.Column(iCol, iRow). List property copies an array without transposing it and myArray(iRow, iColumn) equates to ListBox1.List(iRow, iColumn). Refer Image 13 for example.
BoundColumn Property:
Specifies the column from which value is to be stored in a multicolumn ComboBox or ListBox, when a row is selected by the user. First column has a BoundColumn value of 1, second column has a value of 2, and so on. Setting the BoundColumn value to 1 will assign the value from column 1 to the ComboBox or ListBox, and so on. BoundColumn property lets the user to store a different set of values per specified column while TextColumn property displays one set of values, viz. use the Text property to return the value from the first column (specified in the TextColumn property) containing the names and the BoundColumn property can specify another column containing height wherein on selecting a particular person’s name in the ListBox, his height will get returned or stored (refer Image 10). The ColumnWidths property of a column can be set to zero to not display it in the ListBox. Setting the BoundColumn value to 0 assigns the value of the ListIndex property (which is the number of the selected row) as the value of the control (ComboBox or ListBox). This setting is useful if you want to determine the row of the selected item in a ComboBox or ListBox. BoundColumn Property can be set in the Properties window and can also be used with a macro or vba code. Note: Where the ControlSource mentions =Sheet3!D2 (vba code: .ControlSource = «=Sheet3!D2» ), the value in the BoundColumn of the selected row will get stored in cell D2, Sheet3.
Example 1: Setting the BoundColumn value to 0 assigns the value of the ListIndex property (which is the number of the selected row) as the value of the control (in a Single Selection ListBox) — refer Image 7
Private Sub UserForm_Initialize()
‘set ListBox properties on initialization of UserForm
‘ColumnWidths property of the second column is set to zero to not display it in the ListBox.
End Sub
Private Sub CommandButton1_Click()
‘BoundColumn value is set as 0 which assigns the value of the ListIndex property (which is the number of the selected row) as the value of the control. Note: MultiSelect Property is set to fmMultiSelectSingle which allows only single selection.
If ListBox1.Value <> «» Then
TextBox1.Value = ListBox1.Value + 2
End Sub
Clear Method:
Removes all items in a ComboBox or ListBox. Syntax: Control.Clear. Clear method will not work if ComboBox or ListBox is bound to data, hence RowSource data should be cleared before use. Clear method can only be used with a macro or vba code.
Column Property:
Refers to a specific column, or column and row combination, in a multiple-column ComboBox or ListBox. Syntax: Control.Column(iColumn, iRow). Column property can only be used with a macro or vba code and is not available at design time. iColumn specifies the column number wherein iColumn = 0 means the first column in the List. iRow specifies the row number wherein iRow = 0 means the first row in the List. Both iColumn and iRow are integer values ranging from 0 to number of columns and rows (respectively) in the list minus 1. Specifying both column and row numbers will refer to a specific item, and specifying only the column number will refer to a specific column in the current row viz. ListBox1.Column(1) refers the second column. You can copy a two-dimensional array of values to a ListBox or ComboBox, using Column (or List) property rather than adding each individual element using the AddItem method. Column property can be used to assign the contents of a ComboBox or ListBox to another control, viz. TextBox (refer Image 8). Note: Using the Column property to copy a two-dimensional array of values to a ListBox or ComboBox, transposes the array contents and equates myArray(iRow, iColumn) to ListBox1.Column(iCol, iRow). List property copies an array without transposing it and myArray(iRow, iColumn) equates to ListBox1.List(iRow, iColumn). Refer Image 13 for example.
Example 2: Load ListBox using AddItem method and List & Column properties; and use Column property to assign the contents of ListBox to TextBox — refer Image 8
Private Sub UserForm_Initialize()
‘set ListBox properties on initialization of UserForm
‘clearing the TextBox if it is not empty
TextBox1 = «»
End Sub
Private Sub CommandButton1_Click()
‘Add items in ListBox using AddItem method to add new rows; use List & Column properties to add items in columns beyond the first column; and use Column property to assign the contents of ListBox to TextBox
‘AddItem method will not work if ListBox is bound to data, hence RowSource is cleared if it had been set
ListBox1.RowSource = «»
‘Create a new row with AddItem
ListBox1.AddItem «banana»
‘add item in second column of this first row, using List property
ListBox1.List(0, 1) = «tuesday»
‘adding items in the 3 columns of the first row — this will become the second row in the end
ListBox1.List(0, 2) = «day 2»
‘add item in second column of this second row, using Column property
ListBox1.Column(1, 1) = «wednesday»
‘adding items in the 3 columns of the second row — this will become the third row in the end
ListBox1.Column(2, 1) = «day 3»
‘Create a new row with AddItem and position as row number 1
ListBox1.AddItem «apple», 0
ListBox1.List(0, 1) = «monday»
‘adding items in the 3 columns and positioning this row as the first row — this will push down the above two rows
ListBox1.List(0, 2) = «day 1»
‘item in column number 3 and row number 2 of ListBox
TextBox1.Value = ListBox1.Column(2, 1)
End Sub
ColumnCount Property:
Specifies the number of columns to be displayed in a ComboBox or ListBox. A ColumnCount value of 0 does not display any column and a setting of -1 displays all columns. ColumnCount property can be set in the Properties window and can also be used with a macro or vba code.
ColumnHeads Property:
A Boolean value (True/False) which determines display of column headings (in a single row) for ComboBox or ListBox. ColumnHeads property can be set in the Properties window and can also be used with a macro or vba code. Column Headings can be displayed only if ColumnHeads is set to True in Properties window (VBA code: ListBox1.ColumnHeads = True) and if you bind the ListBox to a range (ie. set RowSource to a range that includes headings). Note: AddItem method will not work if ListBox or ComboBox is bound to data, hence RowSource property should be cleared for using AddItem.
List Property:
List Property is used in conjunction with the ListCount and ListIndex properties to return items in a ListBox or ComboBox control. Syntax -> Control.List(iRow,iCol). Each item in a list has a row number and a column number, wherein row and column numbers start with zero. iRow specifies the row number wherein iRow = 2 means the third row in the List. iColumn specifies the column number wherein iColumn = 0 means the first column in the List. Omitting to specify the iColumn will retrieve the first column. Specify iColumn only for a multi-column ListBox or ComboBox. List Property can only be used with a macro or vba code and is not available at design time. Note: To copy a two-dimensional array of values to a ListBox or ComboBox, use List or Column properties. To add a one-dimensional array or to add an individual element, use the AddItem method. Items can be removed from a List using the RemoveItem method. List property is available only by using a macro or VBA.
Example 3: Use Selected & List properties to display multiple-selected ListBox items (choose any column to display) in TextBox, and link a worksheet cell with TextBox using ControlSource property — refer Image 9.
Private Sub UserForm_Initialize()
‘set ListBox properties on initialization of UserForm
‘ColumnWidths property of the second column is set to zero to not display it in the ListBox.
‘the text or value in the TextBox will get stored in the worksheet cell — Sheet3!F2
.ControlSource = «=Sheet3!F2»
‘if the cell Sheet3!F2 contains any text, this will not appear in the TextBox on initialization of UserForm
.Value = «»
End Sub
Private Sub CommandButton1_Click()
‘Use Selected & List properties to display multiple-selected ListBox items (choose any column to display) in TextBox, and link a worksheet cell with TextBox using ControlSource property
‘check all items in a ListBox
For n = 0 To ListBox1.ListCount — 1
‘if a ListBox item is selected, it will display in TextBox
If ListBox1.Selected(n) = True Then
If TextBox1.Value = «» Then
‘ListBox1.List(n, 0) or ListBox1.List(n)displays the first column in TextBox, ListBox1.List(n, 1) displays the second column and so on
‘alternate code which displays the second column in TextBox: TextBox1.Value = Range(ListBox1.RowSource).Offset(n, 1).Resize(1, 1).Value
TextBox1.Value = ListBox1.List(n, 1)
‘alternate code which displays the second column in TextBox: TextBox1.Value = TextBox1.Value & vbCrLf & Range(ListBox1.RowSource).Offset(n, 1).Resize(1, 1).Value
TextBox1.Value = TextBox1.Value & vbCrLf & ListBox1.List(n, 1)
End Sub
ListCount Property:
Determines the total number of rows in a ListBox or ComboBox. This property can only be used with a macro or vba code and is not available at design time. Note: The column headings row is also counted, if ColumnHeads are displayed. The ListCount property can be used with the ListRows property to specify the number of rows to display in a ComboBox.
ListIndex Property:
Determines which item is selected in a ComboBox or ListBox. The first item in a list has a ListIndex value of 0, the second item has a value of 1, and so on. Hence, it is an integer value ranging from 0 to the total number of items in a ComboBox or ListBox minus 1. ListIndex returns -1 when no rows are selected. This property can only be used with a macro or vba code and is not available at design time. Note: In a Multiple Selection enabled ListBox, ListIndex returns the index of the row that has focus, irrespective of whether that row is selected or not. Hence the Selected property of the ListBox (and not the ListIndex property) shoud be used here to return and set a selection. In a Single Selection enabled ListBox (viz. MultiSelect property setting of fmMultiSelectSingle), ListIndex returns the index of the selected item and hence ListIndex property should be used here to return and set a selection.
ListRows Property:
Specifies the maximum number of rows which will display in the list box portion of a ComboBox. The default value is 8. Note: If the actual number of list items exceed this maximum value of the ListRows property, a vertical scroll bar will appear in the list box portion of the ComboBox (and the excess list items can be viewed by scrolling down). The ListCount property can be used with the ListRows property to specify the number of rows to display in a ComboBox. ListRows property can be set in the Properties window and can also be used with a macro or vba code. ListRows Property is valid for ComboBox and not for ListBox.
Example 4: Using the ListCount property with the ListRows property, to set number of rows to display in ComboBox
Private Sub UserForm_Initialize()
‘this macro sets the ListRow value, on initialization of the UserForm
If .ListCount > 5 Then
End Sub
MultiSelect Property:
Specifies whether multiple selections are allowed. There are 3 settings: (i) fmMultiSelectSingle (value 0), the default setting, wherein only a single item can be selected; (ii) fmMultiSelectMulti (value 1) which allows multiple selections wherein an item can be selected or deselected by clicking mouse or pressing SPACEBAR; and (iii) fmMultiSelectExtended (value 2) which allows multiple selections, wherein by pressing SHIFT and simultaneously moving the up or down arrows (or pressing SHIFT and clicking mouse) continues selection from the previously selected item to the current selection (ie. a continuous selection); this option also allows to select or deselect an item by pressing CTRL and clicking mouse. MultiSelect property can be set in the Properties window and can also be used with a macro or vba code. Note: MultiSelect Property is valid for ListBox and not for ComboBox. When multiple selections are made (viz. fmMultiSelectMulti or fmMultiSelectExtended), the selected items can be determined only by using the Selected property (Selected property is available by using macro) of the ListBox. The Selected property will have values ranging from 0 to ListCount minus 1 and will be True if the item is selected and False if not selected. The Selected property determines the items you chose, and the List property returns the items.
Example 5: Determining selected item in a Single Selection ListBox, in VBA:
Private Sub CommandButton1_Click()
‘determine and display selected item in a ListBox which allows only a single selection (viz. MultiSelect Property is set to fmMultiSelectSingle)
‘you can also determine selected item in a ListBox which allows only a single selection, by using the Selected Property (as used in a Multiple Selection enabled ListBox)
‘alternatively: If ListBox1.ListIndex >= 0 Then
If ListBox1.Value <> «» Then
End Sub
RemoveItem Method:
A specified row is removed from the list in a ComboBox or ListBox. Syntax: Control.RemoveItem(Row_Index). Row_Index is the row number which is specified to be removed, wherein the first row is numbered 0, and so on. RemoveItem method will not work if ComboBox or ListBox is bound to data, hence RowSource data should be cleared before use. RemoveItem method can only be used with a macro or vba code.
RowSource Property:
Specifies the source of a list (which could be a worksheet range in Excel), for a ComboBox or ListBox. RowSource property can be set in the Properties window and can also be used with a macro or vba code. To set RowSource property in Properties window, enter without inverted commas: «=Sheet2!A2:A6» which populates ComboBox or ListBox with values in cells A2:A6 in Sheet2. VBA code for this is: ListBox1.RowSource = «=Sheet2!A2:A6» . It is not necessary to use the equal mark in «=Sheet2!A2:A6» while setting the property and ListBox1.RowSource = «Sheet2!A2:A6» will have the same effect.
Selected Property:
Specifies whether an item is selected in a ListBox control. Syntax: Control.Selected(Item_Index). Returns True/False if the item is Selected/NotSelected; Set to True/False to select the item or remove selection [viz. Control.Selected(ItemIndex) = True/False]. Item_Index is an integer value ranging from 0 to number of items in the list minus 1, indicating its relative position in the list, viz. ListBox.Selected(2) = True selects the third item in the list. Selected property is particularly useful when working with multiple selections. Selected Property can only be used with a macro or vba code and is not available at design time. Note1: In a Multiple Selection enabled ListBox, ListIndex returns the index of the row that has focus, irrespective of whether that row is selected or not. Hence the Selected property of the ListBox (and not the ListIndex property) shoud be used here to return and set a selection. In a Single Selection enabled ListBox (viz. MultiSelect property setting of fmMultiSelectSingle), ListIndex returns the index of the selected item and hence ListIndex property should be used here to return and set a selection. Note2: Selected Property is valid for ListBox and not for ComboBox.
Example 6: Determining selected items in a multiple-selection enabled ListBox using Selected & List properties:
Private Sub CommandButton1_Click()
‘display all selected items in a ListBox using the Selected property (valid for a ListBox with MultiSelect Property setting of either single-selection or multiple-selection)
‘check all items in a ListBox
For n = 0 To ListBox1.ListCount — 1
‘if a ListBox item is selected, it will display in MsgBox
If ListBox1.Selected(n) = True Then
‘display a selected item
MsgBox ListBox1.List(n)
End Sub
Style Property:
Valid for ComboBox only, not for ListBox. This property determines choosing or setting the value of ComboBox. There are 2 settings: (i) fmStyleDropDownCombo (value 0). The user has both options of typing a custom value in the text area or select from the drop-down list. This is the default value.; (ii) fmStyleDropDownList (value 2). The user can only select from the drop-down list, like in ListBox. Style Property can be set in the Properties window and can also be used with a macro or vba code.
TextColumn Property:
Specifies the column of data in a ListBox that supplies data for its Text property — the TextColumn property determines the column whose value the Text property will return whereas the BoundColumn property determines the column whose value the Value property returns. The Text property returns the same as Value property if the TextColumn property is not set. First column has a TextColumn value of 1, second column has a value of 2, and so on. Setting the TextColumn value to -1 indicates that the first column with a ColumnWidths value greater than 0 will be displayed. TextColumn property enables display of one set of values to the user but store a different set of values (per column specified in the BoundColumn property) viz. use the Text property to return the value from the first column (specified in the TextColumn property) containing the names and the BoundColumn property can specify another column containing height wherein on selecting a particular person’s name in the ListBox, his name & height will be returned. The ColumnWidths property of any column can be set to zero to not display it in the ListBox. Setting the TextColumn value to 0 displays the ListIndex value (which is the number of the selected row) in TextColumn Property — this setting is useful if you want to determine the row of the selected item. TextColumn property can be set in the Properties window and can also be used with a macro or vba code. Note: In a ComboBox, when a user selects an item, the column specified in the TextColumn property will be displayed in the ComboBox’s text box portion.
Example 7: Display first column in the List and use the TextColumn & BoundColumn Properties to return values from first & third columns (in a Single Selection ListBox) — refer Image 10
Private Sub UserForm_Initialize()
‘set ListBox properties on initialization of UserForm
‘set the ColumnWidths property of second & third columns to zero to not display them in the ListBox
‘specifies the column of data in a ListBox that supplies data for its Text property
End Sub
Private Sub CommandButton1_Click()
‘TextColumn value is set as 1 and BoundColumn value is set as 3.
‘works only if MultiSelect Property of ListBox is set to fmMultiSelectSingle which allows single selection.
If ListBox1.Value <> «» Then
‘use the ListBox Text property to return the value from the column specified in the TextColumn column, whereas the ListBox Value property returns the value from the column specified in the BoundColumn property
TextBox1.Value = ListBox1.Text & » — » & ListBox1.Value & » cms»
End Sub
Add Items/Data to (Populate) a ListBox or ComboBox
1. Setting the RowSource property of a ListBox or ComboBox in a UserForm
VBA code — if the list is static:
VBA code — if the list is dynamic:
Me.ListBox1.RowSource = «Sheet1!A1:B» & Sheet1.Cells(Rows.Count, «B»).End(xlUp).Row
Note: You can set the RowSource property of a ListBox or ComboBox in the Properties Window (without using vba code), by entering -> Sheet1!A1:B6
Example 8: Populate ComboBox by setting the RowSource property to a named list — refer Image 11
Private Sub UserForm_Initialize()
‘populate ComboBox by setting the RowSource property to a named list
‘For a named list (viz. “HeightList” in Range A2:B6), the RowSource property can be set to Sheet1!HeightList
End Sub
2. Populate a ComboBox or ListBox from an Array:
VBA code — populate single column in ListBox:
ListBox1.List = Array(«RowOne», «RowTwo», «RowThree», «RowFour»)
VBA code — populate single column in ComboBox:
ComboBox1.List = Array(«Apples», «Bananas», «Oranges», «Pears»)
VBA code — populate ListBox from array named myArray:
Dim myArray As Variant
myArray = Array(«Adidas», «Nike», «Reebok»)
Me.ListBox1.List = myArray
VBA code — Populate single column ComboBox:
Dim i As Integer
Dim myArray As Variant
myArray = Array(«Adidas», «Nike», «Reebok», «Puma», «Polo»)
For i = LBound(myArray) To UBound(myArray)
Example 9 — Populate a multi-column Listbox directly with Worksheet Range — multiple rows added at one time using the List property:
Private Sub UserForm_Initialize()
‘set ListBox properties on initialization of UserForm
‘Load Worksheet Range directly to a ListBox
Dim rng As Range
Set rng = Sheet1.Range( «A1:C6» )
End Sub
Example 10 — Populate a multi-column Listbox directly with Worksheet Range — multiple rows added at one time using the List property:
Private Sub UserForm_Initialize()
‘set ListBox properties on initialization of UserForm
‘Load Worksheet Range directly to a ListBox:
Dim var As Variant
var = Sheet1.Range( «A1:C6» )
End Sub
Example 11: Load Worksheet Range to a multi-column ListBox, after placing Range data in a 2-dimensional Array — refer Image 12
Option Base 1
——————————————
Private Sub UserForm_Initialize()
‘Load Worksheet Range to a ListBox, after placing data in an Array
Dim rng As Range
Dim cell As Range
Dim totalRows As Integer, totalColumns As Integer
Dim iRow As Integer, iCol As Integer
Dim myArray() As Variant
Set rng = Sheet1.Range(«A1:C6»)
totalRows = Sheet1.Range(«A1:C6»).Rows.Count
totalColumns = Sheet1.Range(«A1:C6»).Columns.Count
‘if Option Base 1 was not set, this line of code should be: ReDim myArray(1 To totalRows, 1 To totalColumns)
ReDim myArray(totalRows, totalColumns)
‘place worksheet range data in an Array:
For Each cell In rng
For iRow = 1 To totalRows
For iCol = 1 To totalColumns
myArray(iRow, iCol) = rng.Cells(iRow, iCol)
‘set ListBox properties and load Array to ListBox
End Sub
Example 12: Load a 2-dimensional array to ListBox using the List property (copies an array without transposing it) and Column property (which transposes the contents of the array) — refer Image 13
Private Sub UserForm_Initialize()
‘set ListBox properties on initialization of UserForm
End Sub
Private Sub CommandButton1_Click()
‘create a 2-dimensional array and load to ListBox using the List property (copies an array without transposing it) and Column property (which transposes the contents of the array)
‘Declaring the array and its dimensions. The array has been named myArray, of size 3 by 3 (three rows by three columns). Note: When you populate an array with data, the array will start at zero, and if you include Option Base 1 the array will start at 1.
Dim myArray(3, 3)
‘populate column 1 of myArray, with numbers
myArray(n, 0) = n + 1
‘populate column 2 of myArray
myArray(0, 1) = «R1C2»
myArray(1, 1) = «R2C2»
myArray(2, 1) = «R3C2»
‘populate column 3 of myArray
myArray(0, 2) = «R1C3»
myArray(1, 2) = «R2C3»
myArray(2, 2) = «R3C3»
‘copy data to ListBox1 (using List property) and ListBox2 (using Column property):
‘copies an array without transposing it
ListBox1.List() = myArray
‘transposes the contents of the array
ListBox2.Column() = myArray
End Sub
3. Populate a ComboBox or ListBox with AddItem method
Example 13: Populate a single-column ListBox from worksheet range
Private Sub UserForm_Initialize()
‘set ListBox properties on initialization of UserForm
‘AddItem method will not work if ListBox is bound to data, hence RowSource is cleared if it had been set
‘populating a single-column ListBox with AddItem method
Dim cell As Range
Dim rng As Range
Set rng = Sheet1.Range(«A1:A6»)
For Each cell In rng.Cells
End Sub
Example 14: Populate a single-column ListBox with values from 1 to 500
Private Sub UserForm_Initialize()
‘set ListBox properties on activation of UserForm
‘AddItem method will not work if ListBox is bound to data, hence RowSource is cleared if it had been set
‘populate a single-column ListBox with values from 1 to 500, and «N/A»
With ListBox1
For i = 1 To 500
End Sub
Example 15: Create a new row with AddItem and specify its row number — refer Image 14
Private Sub UserForm_Initialize()
‘set ListBox properties on initialization of UserForm
‘AddItem method will not work if ListBox is bound to data, hence RowSource is cleared if it had been set
‘using AddItem method to populate single-column ListBox:
ListBox1.AddItem «banana»
ListBox1.AddItem «orange»
‘Create a new row with AddItem and position as row number 1 — this will push down the above two rows
ListBox1.AddItem «apple», 0
‘Create a new row with AddItem and position as row number 2 — this will push down the above two rows to no. 3 and 4
ListBox1.AddItem «pears», 1
End Sub
Example 16: Populate a ComboBox with the 12 months in a year — Refer Image 15
Private Sub UserForm_Initialize()
‘set ComboBox properties on initialization of UserForm
‘AddItem method will not work if ComboBox is bound to data, hence RowSource is cleared if it had been set
‘populates ComboBox with the 12 months in a year
ComboBox1.AddItem Format(DateSerial(2011, n, 1), «mmmm»)
End Sub
4. Populate a multi-column ComboBox or ListBox using AddItem method and List & Column properties
Example 17: refer Image 16
Private Sub UserForm_Initialize()
‘set ComboBox properties on initialization of UserForm
‘AddItem method will not work if ComboBox is bound to data, hence RowSource is cleared if it had been set
‘Populating a multi-column ListBox using AddItem method and List & Column properties:
‘Create a new row with Additem
ComboBox1.AddItem «banana»
‘add item in second column of this first row, using List property
ComboBox1.List(0, 1) = «tuesday»
‘adding items in the 3 columns of the first row — this will become the second row in the end
ComboBox1.List(0, 2) = «day 2»
‘add item in second column of this second row, using Column property
ComboBox1.Column(1, 1) = «wednesday»
‘adding items in the 3 columns of the second row — this will become the third row in the end
ComboBox1.Column(2, 1) = «day 3»
‘Create a new row with Additem and position as row number 1
ComboBox1.AddItem «apple», 0
ComboBox1.List(0, 1) = «monday»
‘adding items in the 3 columns and positioning this row as the first row — this will push down the above two rows
ComboBox1.List(0, 2) = «day 1»
End Sub
5. Populate a multi-column ListBox from a worskheet range, using AddItem method and List property
Example 18: refer Image 17
Private Sub UserForm_Initialize()
‘set ListBox properties on initialization of UserForm
‘AddItem method will not work if ListBox is bound to data, hence RowSource is cleared if it had been set
End Sub
Private Sub CommandButton1_Click()
‘populate a multi-column ListBox from a worskheet range, using AddItem method and List property
Dim counter As Long
Dim totalRows As Long
‘determine total number of rows in column A
totalRows = Sheet4.Cells(Rows.Count, «A»).End(xlUp).Row
counter = 0
‘ListBox gets populated with all rows in column A:
Do
counter = counter + 1
‘create a new row with Additem
.AddItem Sheet4.Cells(counter, 1).Value
‘add item in second column of a row
.List(.ListCount — 1, 1) = Sheet4.Cells(counter, 1).Offset(0, 1).Value
‘add item in third column of a row
.List(.ListCount — 1, 2) = Sheet4.Cells(counter, 1).Offset(0, 2).Value
Loop Until counter = totalRows
End Sub
6. Add a new item/row to the list if ComboBox is bound to data in a worksheet.
Example 19: refer Images 18a & 18b
Private Sub UserForm_Initialize()
‘set ComboBox properties on initialization of UserForm
‘a named-range (name: «cbRange») has been created in Sheet3 of the workbook, using the Name Manager: «=Sheet3!$A$2:$C$6»
End Sub
Private Sub CommandButton1_Click()
‘add a new item/row to the list if ComboBox is bound to data in a worksheet
Dim colNo As Long
‘determine first column of the named-range «cbRange»
colNo = Range( «cbRange» ).Column
‘create a new single-column named-range (name: «cbRangeTemp»), populated with only the first column of the named-range «cbRange».
Range(«cbRange»).Resize(Range(«cbRange»).Rows.Count, 1).Name = «cbRangeTemp»
‘checks if ComboBox1.Value is already existing in column 1 of named-range «cbRange»
If Application.CountIf(Range(«cbRangeTemp»), ComboBox1.Value) = 0 Then
‘resizing the named-range «cbRange», to add another worksheet row at the end, wherein the ComboBox1.Value will get posted:
Range(«cbRange»).Resize(Range(«cbRange»).Rows.Count + 1).Name = «cbRange»
‘posting columns of the new row with values from ComboBox1, TextBox1 & TextBox2:
Sheet3.Cells(Range(«cbRange»).Rows.Count + 1, colNo) = ComboBox1.Value
Sheet3.Cells(Range(«cbRange»).Rows.Count + 1, colNo).Offset(0, 1) = TextBox1.Text
Sheet3.Cells(Range(«cbRange»).Rows.Count + 1, colNo).Offset(0, 2) = TextBox2.Text
MsgBox «Item already in List»
ComboBox1.Value = «»
TextBox1.Text = «»
TextBox2.Text = «»
End Sub
Extract ListBox & ComboBox Items, with VBA
VBA code — Display selected ComboBox item in TextBox:
‘the text area of ComboBox shows the item entered by user of his own choice or that selected from list items, and this item gets displayed in TextBox
Note: VBA code-> TextBox1.Value = ListBox1.Value, or TextBox1.Text = ListBox1.Value, will work only in case MultiSelect property of ListBox is set to fmMultiSelectSingle, ie. in case of a single-selection enabled ListBox. It will copy the selected item (value in BoundColumn) from the list.
VBA code — Copy selected ComboBox item to a worksheet range:
‘the text area of ComboBox shows the item entered by user of his own choice or that selected from list items, and this item is copied to the worksheet range
Note: VBA code-> Sheet4.Range(«G4»).Value = ListBox1.Value, will work only in case MultiSelect property of ListBox is set to fmMultiSelectSingle, ie. in case of a single-selection enabled ListBox. It will copy the selected item (value in BoundColumn) from the list.
VBA code — Copy ComboBox item determined by its position, to a worksheet range:
‘an existing ComboBox item, determined by its position (row 4, column 1), posted to a worksheet cell
Sheet1.Range(«F2»).Value = ComboBox1.List(3, 0)
Note: VBA code for ListBox -> Sheet1.Range(«F2»).Value = ListBox1.List(3, 0)
Example 20: Extracting ListBox items (of multi-column ListBox) to a worksheet range — refer Image 19
Private Sub UserForm_Initialize()
‘set ListBox properties on initialization of UserForm
End Sub
Private Sub CommandButton1_Click()
‘Use Selected & List properties to copy multiple-selected ListBox items (of multi-column ListBox) to a worksheet range
‘check all items/rows in a ListBox
For r = 0 To ListBox1.ListCount — 1
‘if a ListBox row is selected, it will get copied to the worksheet range
If ListBox1.Selected(r) = True Then
‘copying multi-column ListBox rows to corresponding/matching worksheet rows & columns:
For c = 1 To ListBox1.ColumnCount
Sheet1.Cells(r + 1, c).Value = ListBox1.List(r, c — 1)
End Sub
Example 21: Extract multiple items in a row from a single-selection enabled & multi-column ListBox, and copy to worksheet range — refer Image 20
Private Sub UserForm_Initialize()
‘set ListBoxBox properties on initialization of UserForm
End Sub
Private Sub CommandButton1_Click()
‘extract multiple items in a row from a single-selection enabled & multi-column ListBox, and copy to worksheet range
‘ListIndex property is used to return and set a selection in a single-selection ListBox, but not in a multi-selection ListBox
‘ListBox1.Value will work only in case of a single-selection ListBox. It will copy the selected item (value in BoundColumn) from the list.
Dim rng As Range
Set rng = Sheet3.Cells(9, 1)
If ListBox1.Value <> «» Then
rng.Offset(0, 1).Value = ListBox1.List(ListBox1.ListIndex, 1)
rng.Offset(0, 2).Value = ListBox1.List(ListBox1.ListIndex, 2)
End Sub
Example 22: Select or enter name in ComboBox, and lookup its corresponding Grade in a worksheet range — refer Image 21
Private Sub UserForm_Initialize()
‘set comboBox properties on initialization of UserForm
‘disallow manual entry in TextBox
End Sub
Private Sub CommandButton1_Click()
‘select or enter name in ComboBox, and lookup its corresponding Grade in a worksheet range — use ComboBox, TextBox & CheckBox properties and worksheet functions Vlookup and Countif
Dim totalRows As Long
‘determine total number of rows in column B
totalRows = Sheet3.Cells(Rows.Count, «B»).End(xlUp).Row
Me.ComboBox1.ControlTipText = «Select Name»
Me.CommandButton1.ControlTipText = «Click to get Grade»
‘Name selected in ComboBox is posted to TextBox
TextBox1.Text = ComboBox1.Value
‘Grade will be searched only if a name is selected and the CheckBox is selected:
If CheckBox1 = True And TextBox1.Text <> «» Then
‘check if name selected or entered in ComboBox is present in the lookup range:
If Application.CountIf(Sheet3.Range(«A1:A» & totalRows), TextBox1.Text) > 0 Then
‘lookup Grade of selected Name, in the worksheet range
Sheet3.Cells(1, 4).Value = TextBox1.Text & «‘s grade is » & Application.VLookup(TextBox1.Text, Sheet3.Range(«A1:B» & totalRows), 2, False)
MsgBox «Name not found!»
End Sub
Delete ListBox rows using the RemoveItem Method
Example 23: Use RemoveItem method to delete a ListBox row. The below code deletes the row from the ListBox and also deletes the row items (or rows) in the worksheet — refer Images 22a and 22b.
Private Sub UserForm_Initialize()
‘set ListBox properties on initialization of UserForm
Dim totalRows As Long
‘determine total number of rows in column A
totalRows = Sheet3.Cells(Rows.Count, «A»).End(xlUp).Row
‘load a dynamic worksheet range to a ListBox
Dim rng As Range
Set rng = Sheet3.Range(«A2:C» & totalRows)
Me.ListBox1.List = rng.Cells.Value
‘removes all items in ListBox
‘ListBox1.Clear
End Sub
Private Sub CommandButton1_Click()
‘use RemoveItem method to delete a ListBox row. The below code deletes the row from the ListBox and also deletes the row items (or rows) in the worksheet
Dim n As Long, i As Long
Dim var As Variant
‘deleting row from ListBox using RemoveItem method:
‘check all items in a ListBox; reverse order (Step -1) is used because rows are being deleted from ListBox.
For n = ListBox1.ListCount — 1 To 0 Step -1
If ListBox1.Selected(n) = True Then
‘item to be deleted is stored in the variable named var
var = ListBox1.List(n, 0)
ListBox1.RemoveItem (n)
‘determine row number in which items are to be deleted; Note: value of variable named var is derived from first column, hence Range(«A:A») is searched in the Match formula.
i = Application.Match(var, Sheet3.Range(«A:A»), 0)
‘delete all 3 columns of the determined row in the worksheet:
Sheet3.Cells(i, 1) = «»
Sheet3.Cells(i, 1).Offset(0, 1) = «»
Sheet3.Cells(i, 1).Offset(0, 2) = «»
‘use this code instead of the preceding 3-lines, to delete the determined row in the worksheet
‘Sheet3.Rows(i).Delete
End Sub
Example 24: Delete all rows in ListBox, using RemoveItem method
Private Sub UserForm_Initialize()
‘set ListBoxBox properties on initialization of UserForm
‘RemoveItem method will not work if ListBox is bound to data, hence RowSource is cleared if it had been set
‘create a new row with Additem
.AddItem Sheet3.Cells(n, 1).Value
‘add item in second column of a row
.List(.ListCount — 1, 1) = Sheet3.Cells(n, 1).Offset(0, 1).Value
‘add item in third column of a row
.List(.ListCount — 1, 2) = Sheet3.Cells(n, 1).Offset(0, 2).Value
End Sub
Private Sub CommandButton1_Click()
‘delete all rows in ListBox, using RemoveItem method
Dim n As Integer
For n = 1 To ListBox1.ListCount
‘Note: «ListBox1.RemoveItem 0» is the same as «ListBox1.RemoveItem (0)»
Источник
The UserForms in VBA are used to take input from the user and sometimes to display outputs and messages. Learn about the basics of userform here.
The userforms can have multiple and different components for the inputs. These components are called Controls of UserForm.
There are several types of userform controls, each having different properties and used for different reasons. It is useful to know how and when to use each type of the userform control.
In this article, we will learn how to use UserForm Control in Excel VBA.
Types of The UserForms Controls
There are too many userform controls in VBA. If we cover themIn this article, we will focus on the major form controls only.
1: Labels
2: TextBox
3: ComboBox
4: ListBox
5: CheckBox
6: OptionButton
7: ToggleButton
8: CommandButton
9: Frames
Let’s have a look at all of these controls.
Labels:
The labels are used to simply show text labels. Like a label for an input area, a warning, a direction, etc.

To add a label to userform, simply select the Label option (A icon) from ToolBox. The cursor will turn into a plus sign. Drag to the area where you want to put the labels.
TextBox:
A text box is a basic open end input option from the user. The user can simply type in the inputs he wants to give. Basic scenario is Name inputs.

If you want to show some message when mouse hovers over the textbox, write it in ControlTipText in the property window.

ComboBox:
The comboxes are used to show a list of items when clicked. The user can select any of the displayed items from that list easily or type the input by themselves.
We use ComboBox in Excel VBA when we have an optional list for the user to select from. Users can select from the list or type their answer manually.

Select the combobox from the toolbox and drag on the form. It will insert a combo box immediately on the form. The combox’s default name will be Combobox1, 2, 3, etc. You can change it from the property box.

How to Insert Items in ComboBox?
So now you have added the combobox to our form. But when we load the userform it shows nothing in the combo box. This is because we have not added any items to the combobox yet.
In this example, I want to add items to the combobox when the userform initializes (loads). So, we will use the userform even «Initialize».
Right click on the userform (not on any component) to select the whole userform. Select view code.
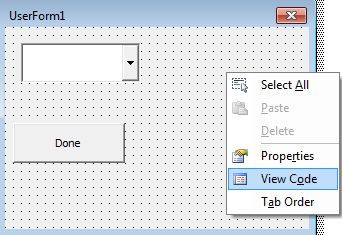
From events
, select initialize.

Now use the property AddItem of ComboBox Class and add as many items you want.
Private Sub UserForm_Initialize()
 ComboBox1.AddItem "2016"
 ComboBox1.AddItem "2017"
 ComboBox1.AddItem "2018"
 ComboBox1.AddItem "2019"
 ComboBox1.AddItem "2020"
End Sub
Since we are adding the items in UserForm_Initialize() event, all items will be added to the combobox when the user form loads.

Retrieving the selected item from the ComboBox
To use the selected item from the combobox we simply use the Value Property of ComboBox.
Private Sub CommandButton1_Click()
 MsgBox ComboBox1.Value
End Sub
Here we are showing the value we have chosen when the user clicks on the command button (we will get to the command button click event below).

Listbox
A ListBox is used when we want the user to select from a defined list. Sounds similar to ComboBox? Yes, a listbox is very much similar to the ComboBox except that the user can not type their answer in the listbox. They have to select from the available options only.
To insert a listbox in the form, select it from the tool box and drog on the form area.
The default name of the listbox will be genetically listbox1, 2, 3, etc. You can change it from the property box.

Just like the ComboBox, the VBA listbox is initially blank. To initialize it, we simply use the add property of the listbox class.
How to add items to the listbox?
As we added the items to the list of combobox in the initialize events of the form, we will add the items of listbox in the same event. Just edit the above initialize event to add items when the userform loads.
Private Sub UserForm_Initialize()
ComboBox1.AddItem "2016"
ComboBox1.AddItem "2017"
ComboBox1.AddItem "2018"
ComboBox1.AddItem "2019"
ComboBox1.AddItem "2020"
'Adding Item to List
ListBox1.AddItem "Jan"
ListBox1.AddItem "Feb"
ListBox1.AddItem "Mar"
ListBox1.AddItem "Apr"
ListBox1.AddItem "May"
ListBox1.AddItem "Jun"
ListBox1.AddItem "Jul"
ListBox1.AddItem "Aug"
ListBox1.AddItem "Sep"
ListBox1.AddItem "Oct"
ListBox1.AddItem "Nov"
ListBox1.AddItem "Dec"
End Sub
The above code will add names of the months to the listbox as soon as we load the form.

Retrieving selected item from the ListBox
To retrieve the item user has selected in the ListBox we use the Value property of the listbox object.
Here we add the month selected by the user to the input given in combobox.
Private Sub CommandButton1_Click()
 MsgBox ComboBox1.Value & "-" & ListBox1.Value
End Sub

When we hit the command button, we get the selected items shown to us in the msgbox.

CheckBox VBA Control
The CheckBoxes are the binary controls that can be set to True or False. You can have multiple checkboxes and select more than one checkboxes at one time. This is basically used when a user needs to be able to select more than one option. Like multiple choice questions.
To add checkboxes to the userform, just select it from the tool box and drag on the VBA userform area.

When you add the checkboxes to the userform, the default name of the checkboxes are like checkbox1, checkbox2, etc. You can change the name of the checkboxes from the property box.
How to use the checkboxes on userform?
As soon as you add the checkboxes, they get clickable. Users can check or uncheck them. But, how do we know which checkbox is selected and which is not?
As I said, the checkboxes are boolean. So, if a checkbox is selected, it’s value is True, otherwise its value is False.
The code below checks which checkboxes are selected and shows it in the Message box.
Private Sub CommandButton1_Click()
 Dim msg As String

 If CheckBox1.Value = True Then
  msg = msg & "CheckBox1 is selected"
 End If
 If CheckBox2.Value = True Then
  msg = msg & vbCrLf & "CheckBox2 is selected"
 End If
 MsgBox msg
End Sub
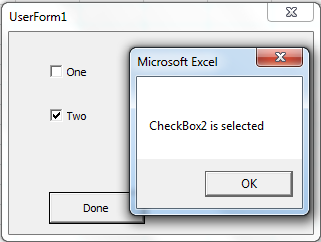
If you want the user to be able to select only one option on the userform then use radio buttons.
OptionButton VBA Control
The radio/option buttons are used in the VBA userform when we want the user to select only one option from the available options. Like when forms ask gender, prefered language, age group, etc.
The radio button can be easily added to the userform by selecting it from tools and dragging on the form area. Drag and drop radio buttons multiple times for multiple radio buttons.

How to get selection of the radio/Option button?
The radio buttons are Binary. Their value can either be True or False. The selected radio button will be set to True and all others will turn to false. Only one radio button at a time will be true in a group.
The code below simply checks which radio button is selected and shows the message accordingly.
Private Sub CommandButton1_Click()

Dim gender As String

If OptionButton1.Value = True Then
 gender = "Male"
ElseIf OptionButton2.Value = True Then
 gender = "female"
Else
 gender = "other"
End If

MsgBox gender

End Sub

Note that only one option button can be selected on the user form in the above example. But what if you want to have multiple groups of option buttons. In that case, we use frames. And that brings us to…
Frames in VBA UserForm
The frames are used to group to userform objects, like checkboxes and option buttons.
To use frames, first drag and drop that frame on the form area and then drop the other objects in that frame.

You can change the name of the frame from the caption in the property box.

All events are available for frames too as other userform objects. But preferably we just use them to group objects. You can set onclick events on fram to load some basic information for the objects in it, when it is clicked.
Toggle Buttons in VBA UserForm
The toggle buttons are also binary objects that can be set to on and off. You can use the toggle buttons to toggle something on and off.
To add a toggle button to the userform, simply select it from the tools and drag on the form area.

The below code is set on the onclick event of the toggle button. It changes the color of cell A1 to blue when the toggle button is pressed and resets it when toggle button is depressed.
Private Sub ToggleButton1_Click()
If ToggleButton1.Value Then
 Range("A1").Interior.ColorIndex = 32
Else
 Range("A1").Interior.ColorIndex = xlColorIndexNone
End If

End Sub
Command Buttons in VBA UserForm
These are the buttons that we use to execute the main VBA code like validations, calculations, form submissions, etc.
In the above examples, I have used the command button to submit the form. You can have as many command buttons on the userform as you want.

To execute codes when the button is clicked, just double click on the button. It will open the CommandButton_Click event. Write code here to execute on click of the command button.

The below code will run when you click the done command button and it will also close the userform.
Private Sub CommandButton1_Click()

Dim gender As String


If OptionButton1.Value = True Then

gender = "Male"

ElseIf OptionButton2.Value = True Then

gender = "female"

Else

gender = "other"

End If

MsgBox gender


Unload UserForm1 'closes userform

End Sub
So yeah guys, these are the basic userform controls in VBA. I hope it was helpful. If you have any doubts regarding the userform controls and userform events, write it down in the comments section below.
Related Articles
Getting Started With Excel VBA UserForms | The Excel UserForms are useful for getting information from the user. Here is how you should start with VBA userforms
Change the value/content of several UserForm-controls using VBA in Excel |
To change the content of the userform controls use this simple VBA snippet.
Prevent a userform from closing when the user clicks the x-button by using VBA in Excel | To prevent the userform from closing when the user clicks on the x button of the form we use UserForm_QueryClose event.
Popular Articles:
50 Excel Shortcuts to Increase Your Productivity | Get faster at your task. These 50 shortcuts will make you work even faster on Excel.
The VLOOKUP Function in Excel | This is one of the most used and popular functions of excel that is used to lookup value from different ranges and sheets.
COUNTIF in Excel 2016 | Count values with conditions using this amazing function. You don’t need to filter your data to count specific value. Countif function is essential to prepare your dashboard.
How to Use SUMIF Function in Excel | This is another dashboard essential function. This helps you sum up values on specific conditions.
Элемент управления пользовательской формы ComboBox для выбора и ввода информации в VBA Excel. Свойства поля с раскрывающимся списком, заполнение, извлечение данных, примеры кода.
UserForm.ComboBox – это элемент управления пользовательской формы, предназначенный для передачи в код VBA информации, выбранной пользователем из раскрывающегося списка или введенной с клавиатуры.
ComboBox представляет из себя комбинацию двух элементов управления: текстового поля (TextBox) и списка (ListBox), поэтому его еще называют «комбинированным списком» или «полем со списком». Также ComboBox сочетает в себе свойства этих двух элементов управления.
Изначально комбинированный список прорисовывается на форме в виде текстового поля с кнопкой для отображения раскрывающегося списка. Далее по тексту будем использовать слово «поле» в значении текстового поля в составе элемента управления ComboBox, а словосочетание «раскрывающийся список» – в значении списка в составе элемента управления ComboBox.
Поле со списком используется в тех случаях, когда необходимо добавить в форму информацию, которая заранее известна, а ее отдельные позиции можно сгруппировать в список, а также для ручного ввода с клавиатуры или вставки из буфера обмена, если необходимое значение в списке отсутствует.
Элемент управления ComboBox незаменим при больших списках. При списках из нескольких позиций его можно заменить на ListBox, который отображает позиции для выбора сразу после загрузки формы, не требуя дополнительных действий от пользователя.
Свойства поля со списком
| Свойство | Описание |
|---|---|
| AutoSize | Автоподбор размера комбинированного поля. True – размер автоматически подстраивается под длину выбранной или введенной строки. False – размер элемента управления определяется свойствами Width и Height. |
| AutoTab | Включение автоматической табуляции – передачи фокуса следующему элементу управления при достижении максимального числа символов при значениях свойства MaxLenght > 0. True – автоматическая табуляция включена, False – выключена. |
| ColumnCount | Указывает количество столбцов в раскрывающемся списке. Значение по умолчанию = 1. |
| ColumnHeads | Добавляет строку заголовков в раскрывающийся список. True – заголовки столбцов включены, False – заголовки столбцов выключены. Значение по умолчанию = False. |
| ColumnWidths | Ширина столбцов в раскрывающемся списке. Значения для нескольких столбцов указываются в одну строку через точку с запятой (;). |
| ControlSource | Ссылка на ячейку для ее привязки к элементу управления ComboBox. |
| ControlTipText | Текст всплывающей подсказки при наведении курсора на элемент управления. |
| Enabled | Доступ пользователя к полю и раскрывающемуся списку. True – доступ разрешен, False – доступ запрещен*. Значение по умолчанию = True. |
| Font | Шрифт, начертание и размер текста в поле. |
| Height | Высота элемента управления ComboBox. |
| Left | Расстояние от левого края внутренней границы пользовательской формы до левого края комбинированного списка. |
| List | Позволяет заполнить ComboBox данными из одномерного или двухмерного массива, а также обращаться к отдельным элементам раскрывающегося списка по индексам для записи и чтения. |
| ListIndex | Номер выбранной пользователем строки в раскрывающемся списке. Нумерация начинается с нуля. Если ничего не выбрано, ListIndex = -1. |
| ListRows | Количество видимых строк в раскрытом списке. Если общее количество строк больше ListRows, появляется полоса прокрутки. Значение по умолчанию = 8. |
| Locked | Запрет на отображение раскрывающегося списка, ввод и редактирование данных в поле. True – ввод и редактирование запрещены**, False – ввод и редактирование разрешены. Значение по умолчанию = False. |
| MatchRequired | Задает проверку вводимых в поле строк с элементами списка. True – проверка включена (допускается ввод только строк, совпадающих с элементами списка), False – проверка выключена (допускается ввод любых строк). Значение по умолчанию = False. |
| MaxLenght | Максимальная длина строки в поле. Значение по умолчанию = 0, что означает – ограничений нет. |
| RowSource | Источник строк для раскрывающегося списка (адрес диапазона на рабочем листе Excel). |
| TabIndex | Целое число, определяющее позицию элемента управления в очереди на получение фокуса при табуляции. Отсчет начинается с 0. |
| Text | Текстовое содержимое (значение) поля (=Value). |
| TextAlign | Выравнивание текста в поле: 1 (fmTextAlignLeft) – по левому краю, 2 (fmTextAlignCenter) – по центру, 3 (fmTextAlignRight) – по правому краю. |
| Top | Расстояние от верхнего края внутренней границы пользовательской формы до верхнего края комбинированного списка. |
| Value | Текстовое содержимое (значение) поля (=Text). |
| Visible | Видимость поля со списком. True – ComboBox отображается на пользовательской форме, False – ComboBox скрыт. |
| Width | Ширина элемента управления. |
* При Enabled в значении False пользователь не может раскрывать список, а также вводить или редактировать данные в поле.
** Для элемента управления ComboBox действие свойства Locked в значении True аналогично действию свойства Enabled в значении False.
В таблице перечислены только основные, часто используемые свойства поля со списком. Еще больше доступных свойств отображено в окне Properties элемента управления ComboBox, а все методы, события и свойства – в окне Object Browser.
Вызывается Object Browser нажатием клавиши «F2». Слева выберите объект ComboBox, а справа смотрите его методы, события и свойства.
Свойства BackColor, BackStyle, BorderColor, BorderStyle отвечают за внешнее оформление комбинированного списка и его границ. Попробуйте выбирать доступные значения этих свойств в окне Properties, наблюдая за изменениями внешнего вида элемента управления ComboBox на проекте пользовательской формы.
Способы заполнения ComboBox
Используйте метод AddItem для загрузки элементов в поле со списком по одному:
|
With UserForm1.ComboBox1 .AddItem «Элемент 1» .AddItem «Элемент 2» .AddItem «Элемент 3» End With |
Используйте свойство List, чтобы скопировать одномерный массив значений в элемент управления ComboBox:
|
UserForm1.ComboBox1.List = Array(«Строка 1», _ «Строка 2», «Строка 3», «Строка 4», «Строка 5») |
Вместо функции Array можно использовать переменные одномерных и двухмерных массивов. При загрузке значений из двухмерного массива, требуется предварительно указать количество столбцов в комбинированном списке.
Используйте свойство RowSource, чтобы загрузить в ComboBox значения из диапазона ячеек рабочего листа:
|
UserForm1.ComboBox1.RowSource = «Лист5!B1:B15» |
При загрузке данных из диапазона, содержащего более одного столбца, требуется предварительно указать количество столбцов в комбинированном списке:
|
With UserForm1.ComboBox1 ‘Указываем количество столбцов .ColumnCount = 5 .RowSource = «‘Таблица с данными’!A1:E20» End With |
В качестве имени листа используется имя ярлыка. Если имя листа содержит пробелы, оно заключается в одинарные кавычки.
Подробнее о заполнении элемента управления ComboBox вы можете ознакомиться в отдельной статье с наглядными примерами. И еще более подробно – в статье о заполнении ListBox, так как ListBox заполняется теми же способами, что и ComboBox.
Привязка поля со списком к ячейке
Чтобы привязать комбинированный список к ячейке на рабочем листе Excel, необходимо свойству ControlSource присвоить адрес ячейки. Это можно сделать непосредственно в окне Properties элемента управления ComboBox или в коде VBA:
UserForm1.ComboBox1.ControlSource = "Лист1!B2"
Имя листа для составного адреса ячейки берется из названия ярлыка. Если имя листа содержит пробелы, оно заключается в одинарные кавычки. При указании адреса без имени листа, ComboBox привязывается к ячейке на активном листе.
В результате привязки образуется взаимосвязь между свойством Value комбинированного списка и значением ячейки. Все изменения в поле ComboBox дублируются в привязанной ячейке и наоборот, изменения в ячейке приводят к изменению текста в поле.
Чтобы протестировать результаты привязки ячейки к полю со списком ComboBox1, разместите на пользовательской форме UserForm1 еще какой-нибудь элемент управления и запустите следующий код VBA Excel:
|
Sub Test() With UserForm1.ComboBox1 ‘Заполняем список ComboBox1 данными .List = Array(«Красный», «Оранжевый», «Желтый», _ «Зеленый», «Голубой», «Синий», «Фиолетовый») ‘Привязываем ComboBox1 к ячейке «A1» .ControlSource = «A1» ‘Открываем форму в немодальном окне End With UserForm1.Show 0 End Sub |
В результате работы кода пользовательская форма откроется в немодальном окне со значением в поле, скопированном из ячейки «A1» активного листа. Немодальное окно формы позволит редактировать ячейку «A1», не закрывая форму.
Меняйте значение ячейки «A1», нажимайте клавишу «Tab» или «Enter», поле комбинированного списка примет значение ячейки. Меняйте значение поля ComboBox1 с помощью клавиатуры или выбирайте из раскрывающегося списка, нажимайте клавишу «Tab» или «Enter», ячейка «A1» примет значение поля со списком.
Дополнительный элемент управления на форме нужен для передачи ему фокуса нажатием клавиши «Tab» или «Enter», чтобы завершить ввод значения в поле ComboBox1. Иначе новое значение поля будет передано в ячейку «A1» только при закрытии формы.
Значение ComboBox по умолчанию
В раскрывающийся список элемента управления ComboBox1 загружены названия семи основных цветов:
|
Private Sub UserForm_Initialize() With Me.ComboBox1 .List = Array(«Красный», «Оранжевый», «Желтый», _ «Зеленый», «Голубой», «Синий», «Фиолетовый») ‘Сюда добавляем код вставки значения по умолчанию End With End Sub |
Есть несколько вариантов сделать так, чтобы при открытии пользовательской формы в поле ComboBox1 было отображено значение по умолчанию. Код следует вставлять перед строкой «End With».
|
‘Вариант 1 (произвольная строка) .Value = «Моя строка по умолчанию» ‘или .Value = «Синий» ‘Вариант 2 (произвольная строка) .ControlSource = «A1» Range(«A1») = «Моя строка по умолчанию» ‘или .ControlSource = «A1» Range(«A1») = «Желтый» ‘Вариант 3 (строка из списка) .ListIndex = 0 ‘Красный ‘или .ListIndex = 3 ‘Зеленый |
Кроме значения по умолчанию, в свойства комбинированного списка можно добавить текст всплывающей подсказки, который будет отображаться при наведении на ComboBox курсора:
UserForm1.ComboBox1.ControlTipText = "Выберите значение из списка"
Извлечение информации из ComboBox
Первоначально элемент управления ComboBox открывается с пустым полем или значением по умолчанию. Свойства Value и Text в этом случае возвращают пустую строку или текст по умолчанию.
Если пользователь выбрал новое значение из раскрывающегося списка или ввел его с клавиатуры, оно перезапишет значения свойств Value и Text. Из этих свойств мы с помощью кода VBA Excel извлекаем информацию, выбранную или введенную пользователем:
|
Dim myTxt As String myTxt = UserForm1.ComboBox1.Value ‘или myTxt = UserForm1.ComboBox1.Text |
Вторую строку кода можно записать myTxt = UserForm1.ComboBox1, так как Value является свойством поля со списком по умолчанию.
Если вас интересует, как извлечь значение из многостолбцового раскрывающегося списка, смотрите об этом в статье с описанием элемента управления ListBox. Извлечение данных из комбинированного поля аналогично извлечению данных из ListBox. Знакомясь со статьей, следует учесть, что у ComboBox отсутствует многострочный выбор.
Иногда перед загрузкой в ComboBox требуется отобрать уникальные элементы из имеющегося списка. Смотрите, как это сделать с помощью объектов Collection и Dictionary.