
In this article, we are glad to present you with 4 quick and easy to follow methods to merge two tables in your Word document.
From time to time, we would have to deal with tables in our documents. For example, when there are 2 tables which holding the same type of data, we can consider merging them. 
In that event, we offer you 4 working solutions to achieve such effect as below:
Method 1: The Drag Way
It’s not rocket science to join 2 tables. Obviously, the easiest way is to drag way.
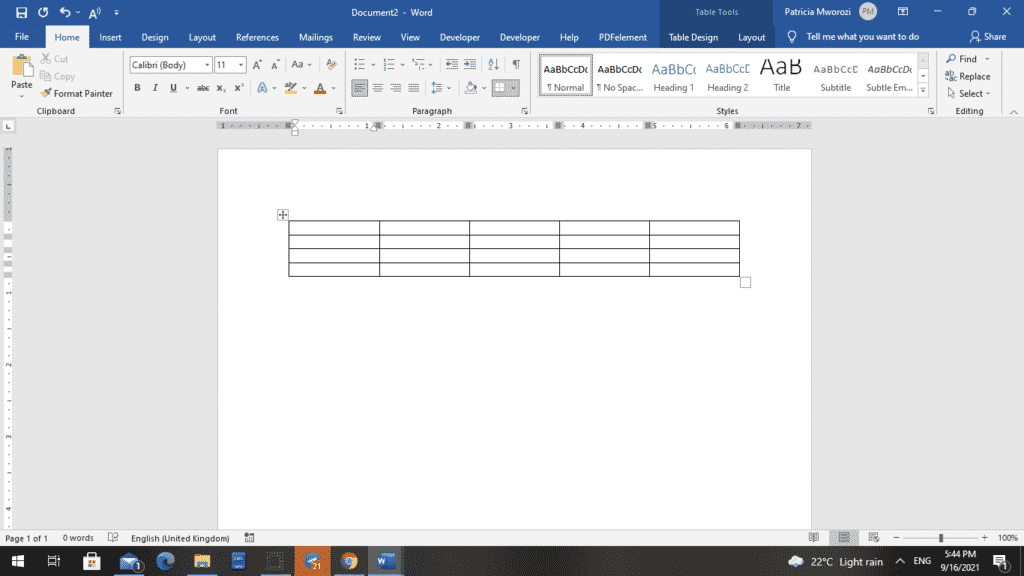
- Click on the cross sign on the upper-left corner to select a table.
- Then drag it to the place near another table.
- Finally, release mouse and drop the table there.
You can check this video:
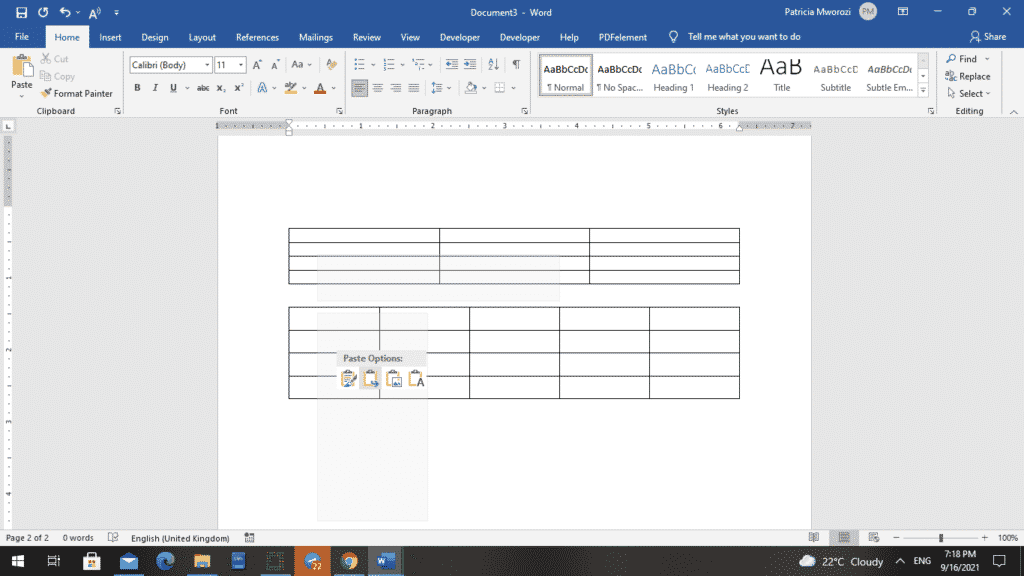
Method 2: Use “Merge Table” Option
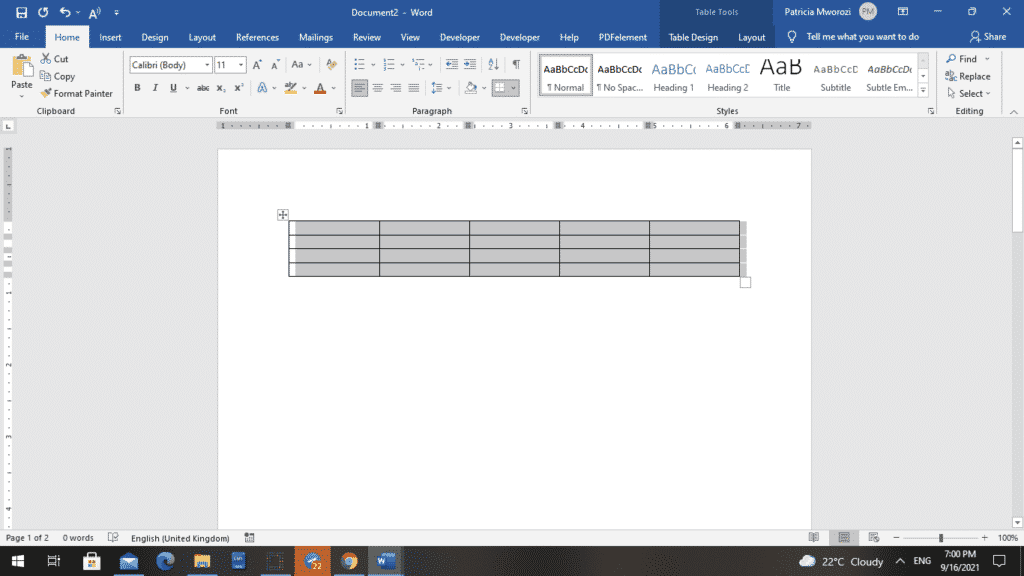
- Firstly, click on the cross sign to select the first table.
- Then press “Ctrl+ X” to cut the table.
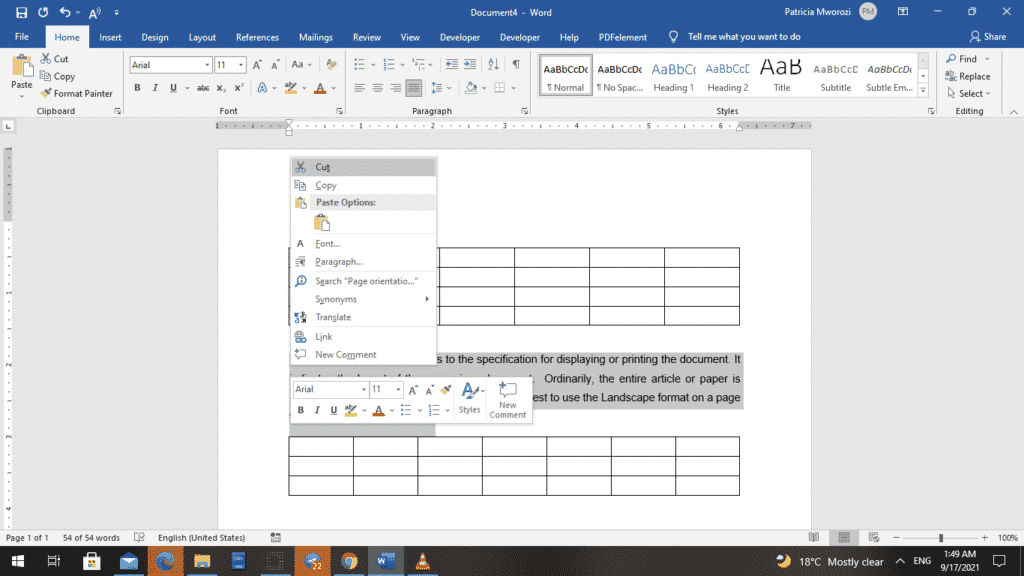
- Next place cursor at the start of the line right below the second table.
- And right click.
- Lastly, on the contextual menu, choose “Merge Table”.


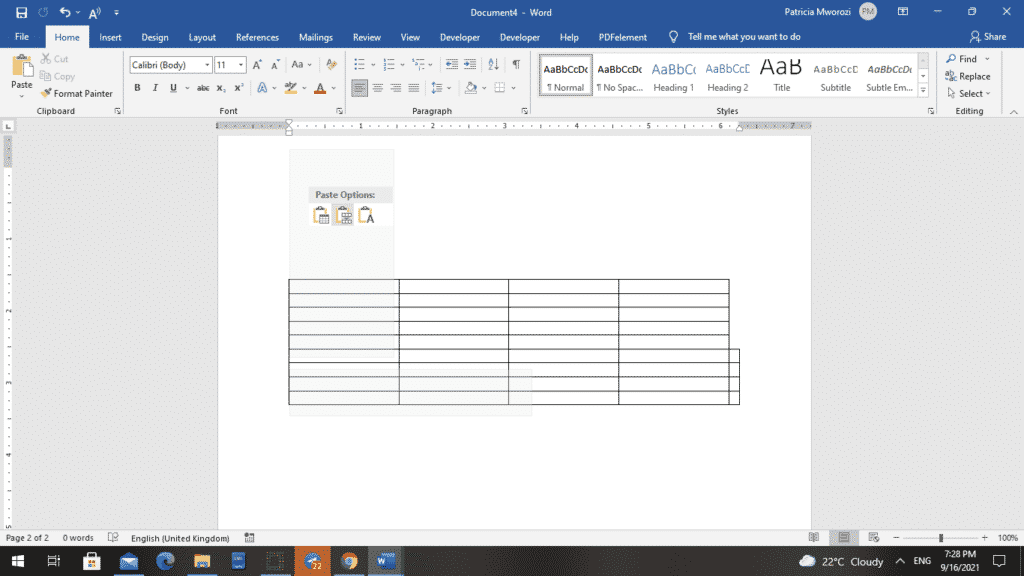
Method 3: Use “Delete”
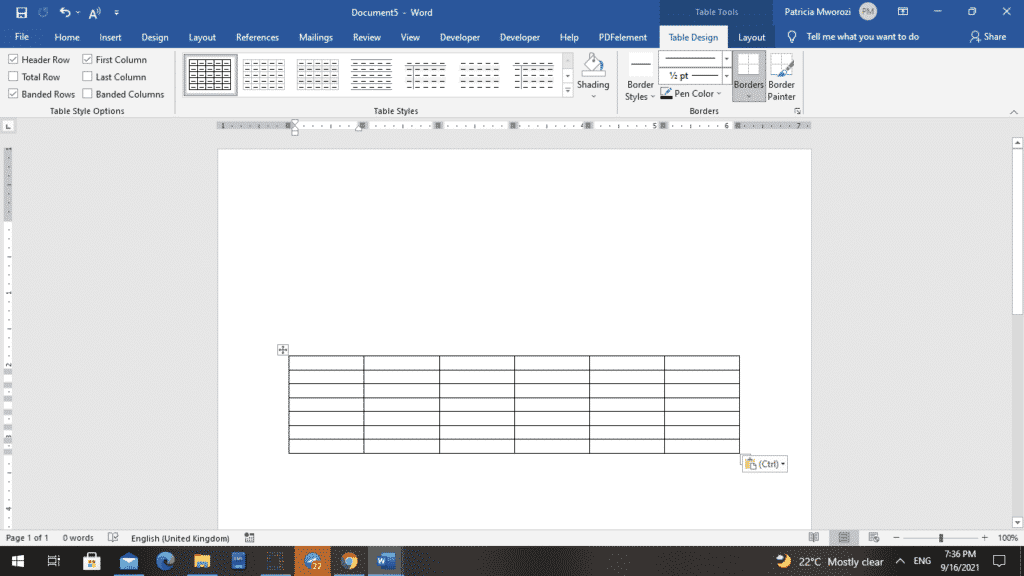
- First off, if there are no texts or just unnecessary contents between two target tables, select the texts or spaces.
- Secondly, press “Delete” to get rid of them until tables stick together.
However, if the contents are necessary, you can choose to paste them to somewhere else before pressing “Delete”.
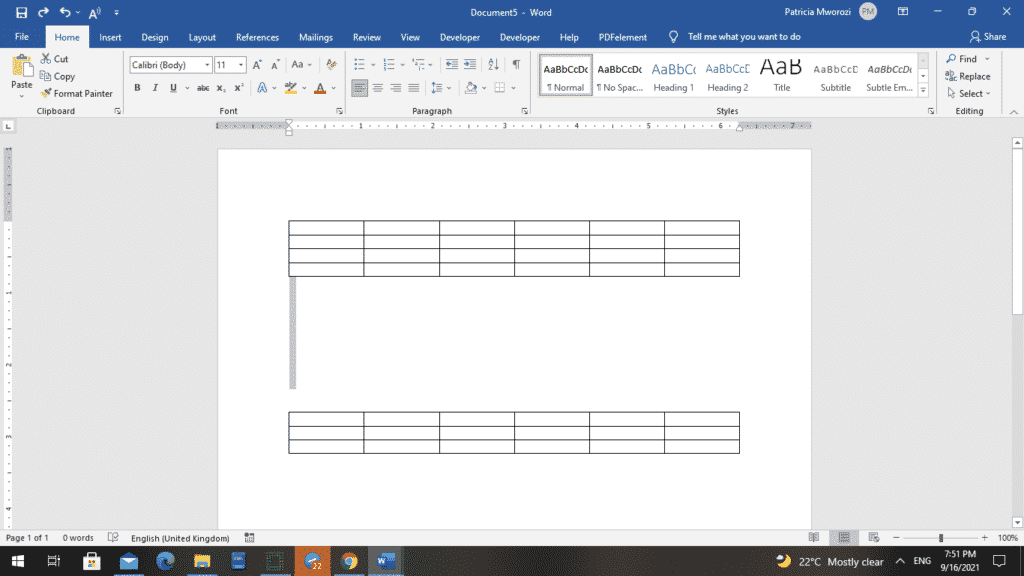
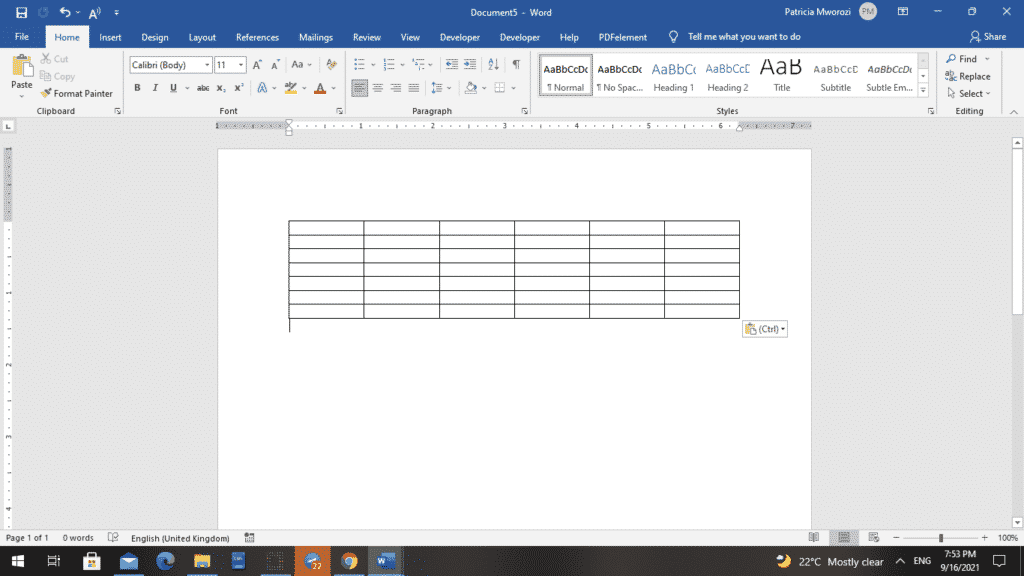
Method 4: Use Shortcuts
On one hand, if you need to combine a table with the one above it, you should select it and press “Alt+ Shift+ Up arrow”. On the other hand, if you need to merge a table with the one below it, you select it and press “Alt+ Shift+ Down arrow”.
You can check this demonstration:
Comparison of 4 Methods
| Methods | Advantages | Disadvantages |
| Method 1: The Drag Way | The quickest way | 1. Need to delete table caption afterwards
2. Requiring precise operation or you may get a nest table |
| Method 2: Use “Merge Table” Option | Can avoid nasty result, such as getting nest table | 1. Need to delete table caption afterwards
2. The cursor must be placed at the start of the line or there is no “Merge Table” option. |
| Method 3: Use “Delete” | 1. No need to delete table caption afterwards
2. Can avoid nasty result, such as getting nest table |
1. You may have to press “Delete” more than once.
2. Sometimes you have to paste contents between tables to somewhere else first. |
| Method 4: Use Shortcuts | 1. No need to paste contents between tables to somewhere else first
2. Can avoid nasty result, such as getting nest table |
1. Need to delete table caption afterwards
2. You have to hold down “Alt+ Shift” and press up or down arrow repeatedly. |
Handle Impaired Word Files
There will always be problems bothering us while using Word. And the most severe one should be the collapse of the software. More often than not, the consequence is overwhelming, because we are not just facing a Word stopping work but also loss of valuable files. Therefore, we recommend you a tool which can recover corrupt Word document.
Author Introduction:
Vera Chen is a data recovery expert in DataNumen, Inc., which is the world leader in data recovery technologies, including Excel xlsx corruption recovery tool and pdf repair software products. For more information visit www.datanumen.com
A document may contain multiple tables with similar content, but the tables are scattered all over the document. Perhaps this was the first draft, and now you find it more suitable to merge the tables. MS Word has a few hacks and methods that allow you to quickly combine these tables for a more organized document or paper.
Below are four methods you can use to merge tables in MS Word.
Method 1: Dragging
- Open the page that contains the table.
- In the upper left corner of your table is a cross.
- Click the cross to select the table.
- Drag the table to the position where you would like it to be. This can be before or after your other table.
- Release the clicker or mouse to drop the table in its new position.
Method 2: Merge feature
- Open the page that contains the table.
- In the upper left corner of your table is a cross.

- Click the cross to select the table.

- Next, we are going to cut the table. To do this, press CTRL + X.
- When you decide on where to place this table, place the cursor at that position.
In this example, we are going to place the cursor right below the second table.
- After placing the cursor at the new position, right-click.
- A contextual menu will appear.
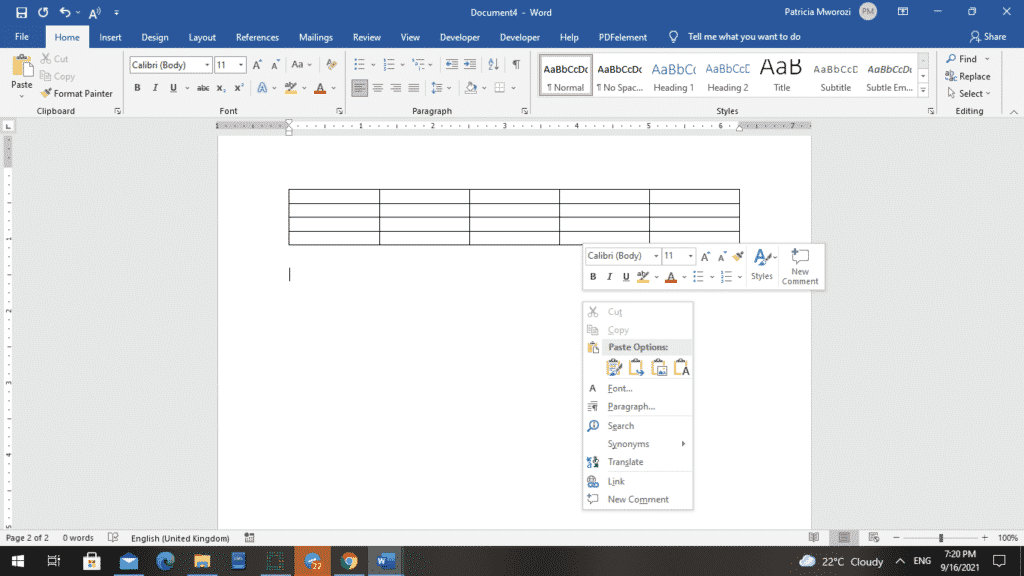
- From the menu, select ‘Merge Table.’
- The two tables will now merge.
Method 3: Deletion
This is a pretty easy one. However, it only applies to situations where the content between the two tables is unnecessary or can be placed in another part of the document without disrupting the flow or theme or topic.
- Select all the content or space between the two documents.
- Press ‘backspace’ or ‘delete’ on your keyboard.
- Now, the two tables can be merged.

- To completely eliminate the space, drag the cross on one table to touch the end or beginning of the other table.
- Alternatively, you can right-click the selected content.
- A contextual menu will appear.
- From the list, click ‘cut.’
- Place the cursor at the new position where you would like to place the cut text.
- Right-click and paste it.
- Now, the tables appear one after the other.
- To completely eliminate the space, drag the cross on one table to touch the end or beginning of the other table.
- Your tables are together, and the text is not erased from the document. Instead, it is placed in a different section of the document.
Method 4: Using shortcuts
As the method suggests, this is a quick method.
Merging a table with the one above it
- Select the table.
- Press Alt + Shift + the ‘Up’ arrow on your keyboard.
Merging a table with the one below it
- Select the table.
- Press Alt + Shift + the Down’ arrow on your keyboard.
Are you looking for a collaborative tool that lets you collaborate on documents with colleagues virtually, and merge documents?
Simul Docs is the solution for you. Simul Docs allows many users to centralise all their edits under one location and work on documents simultaneously.
The first step is downloading Simul.
With Simul Docs, even your initial thoughts can be documented at the same time. After writing your first draft in Microsoft Word, upload it to Simul Docs. This will automatically make it the first version. Now, another colleague can open it and make their edits. This will create another version different from the first. Every time another person opens a version and makes edits, a new version is created, with the latest changes. The best part is, even if you forget to turn on tracked changes, they are automatically documented!
Because it is a collaboration, Simul allows you to add comments that other users can read and act upon.
If another co-worker is supposed to include their input, but they do not have Simul Docs. All you have to do is download the document or forward it by email. Alternatively, you can upload it to any storage software like one drive, and once their changes have been made, they can forward it to you once again, and you can open it in Simul Docs.
Once all the necessary edits have been made, you can save the final version containing all the modifications with one click.
Communication and collaboration will be so smooth, you will feel like you are in the conference room seated next to your colleagues.
Visit simuldocs.com and simplify group edits today.
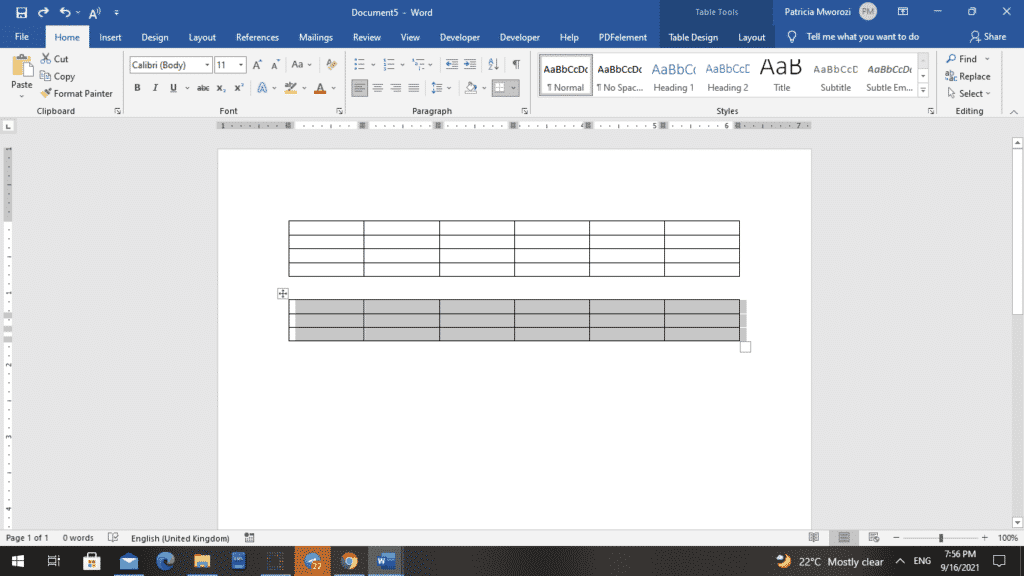
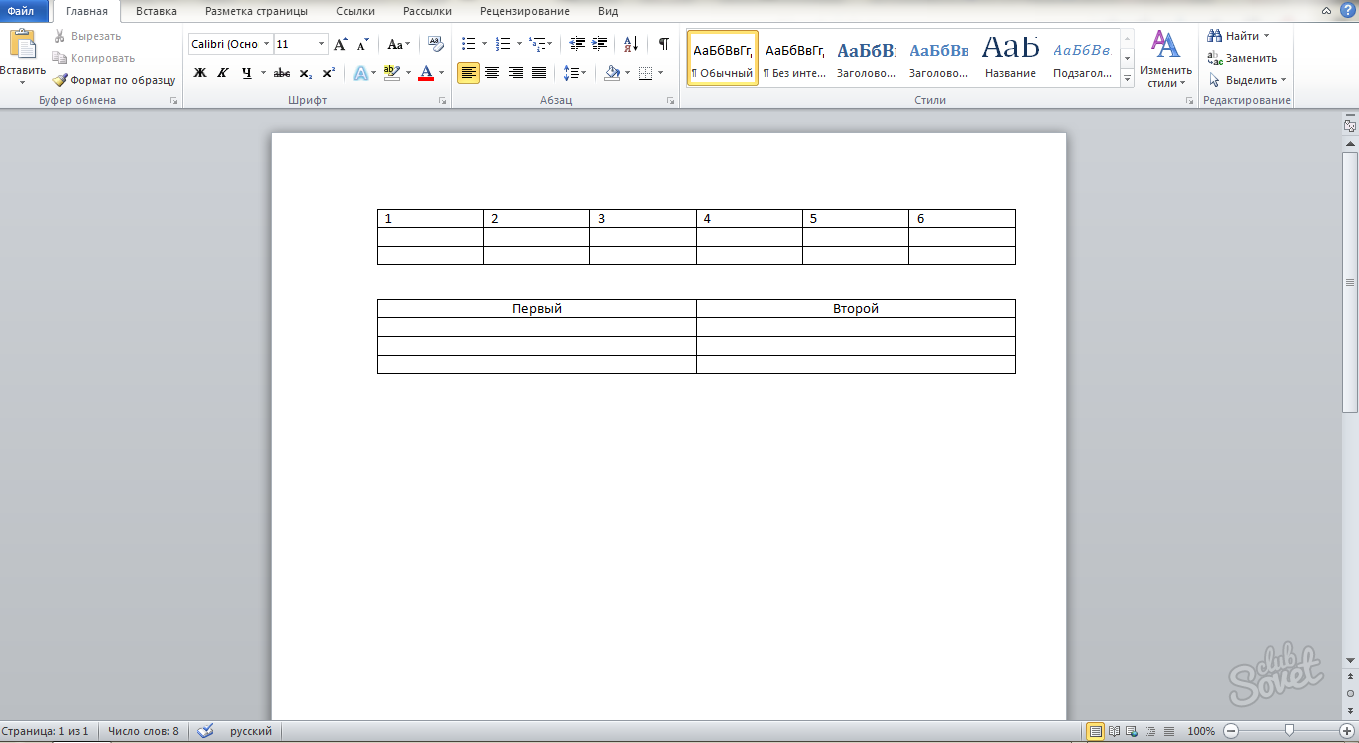
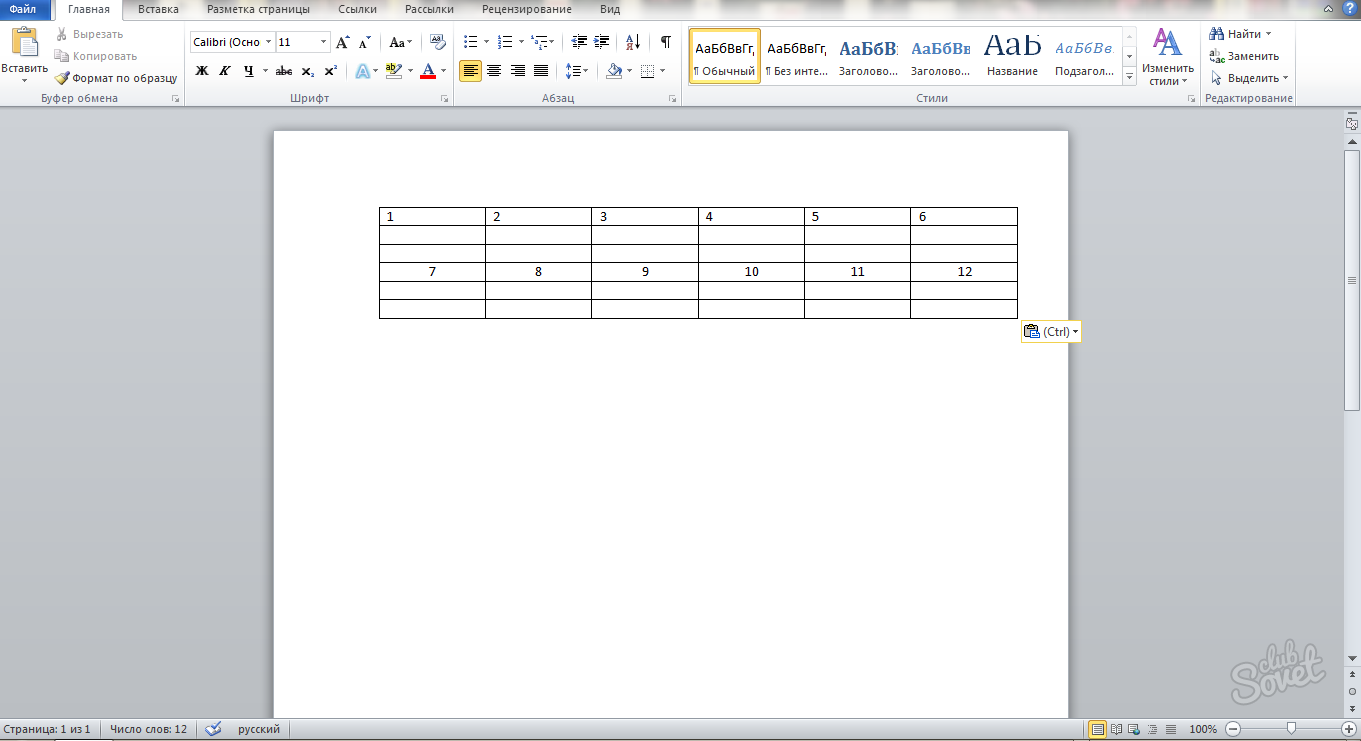
In Word, if you have two or more tables needed to be merged into one single table as below screenshot shown, how can you quickly handle it?
Combine multiple tables into one by dragging
Combine multiple tables into one by Merge table command
Combine multiple tables into one by Shortcuts
Combine multiple tables into one by dragging
You can drag the table to join with another one.
1. Click at anywhere of the table you want to drag, then the cross sign will be appeared.
2. Then click on this cross sign to select the whole table, and drag it to place near the table you want to join to.
3. Release the cursor, now the table has been joined to the above one.
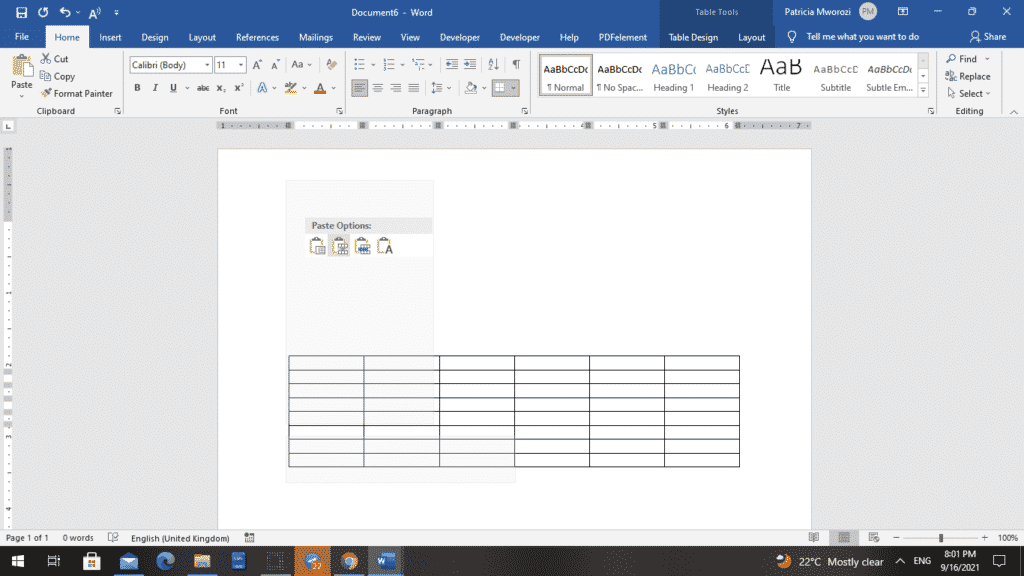
Combine multiple tables into one by Merge table command
Also, you can use the Merge table command in context menu to merge two tables.
1. Click at anywhere of the table you want to drag, then the cross sign will be appeared, then select the cross sign to select the whole table.
2. Press Ctrl + X to cut the table, then put the cursor at the place of the table you want to insert the cut table, right click to select Merge table from the context menu.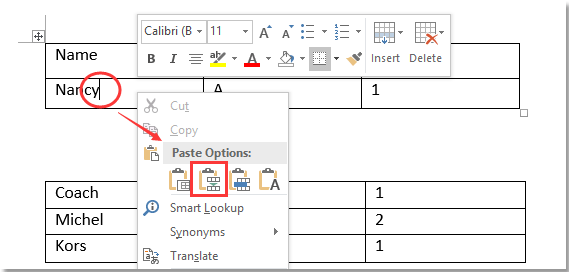
Now the cut table has been inserted into the table you want.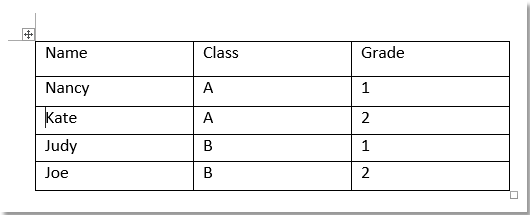
Combine multiple tables into one by Shortcuts
The Shortcuts can combine tables too.
Shift + Alt + Up arrow to combine with above table
1. Click on the table you want to drag, then the cross sign will be appeared, then click the cross sign to select the whole table.
2. Press Shift + Alt + Up arrow until the selected table is joined to above one.
Shift + Alt + Down arrow to combine with below table
1. Click at anywhere of the table you want to drag, then the cross sign will be appeared, then click the cross sign to select the whole table.
2. Press Shift + Alt + Down arrow until the table is joined to below one.
Tabbed browsing & editing multiple Word documents/Excel workbooks as Firefox, Chrome, Internet Explore 10! |
|
You may be familiar to view multiple webpages in Firefox/Chrome/IE, and switch between them by clicking corresponding tabs easily. Here, Office Tab supports similar processing, which allow you to browse multiple Word documents or Excel workbooks in one Word window or Excel window, and easily switch between them by clicking their tabs. |
 |
Recommended Word Productivity Tools


Kutools For Word — More Than 100 Advanced Features For Word, Save Your 50% Time
- Complicated and repeated operations can be done one-time processing in seconds.
- Insert multiple images across folders into Word document at once.
- Merge and combine multiple Word files across folders into one with your desired order.
- Split the current document into separate documents according to heading, section break or other criteria.
- Convert files between Doc and Docx, Docx and PDF, collection of tools for common conversions and selection, and so on…
Comments (0)
No ratings yet. Be the first to rate!
I would like to merge 2 tables together in Microsoft Word. I have attempted to do the usual drag and drop, but I’m out of luck!
I don’t know if my mouse is the problem, but even if I use the touch pad I can reproduce this issue.
![]()
asked Feb 3, 2011 at 15:12
![]()
Wern AnchetaWern Ancheta
6,44226 gold badges105 silver badges147 bronze badges
From allexperts.com:
There are a few things you can check
on:
Make sure that the second table doesn’t have any rows marked as
heading rows.Make sure that neither table is wrapped (wrapping should be set to
None on the Table tab of Table
Properties).Make sure that neither table (even if they appear identical) is nested in
one large cell of a containing table
(this sometimes happens with material
pasted from the Web).That said, I can tell you that I once
had two tables—which I had created
myself, so I know there was nothing
unusual about them—that just refused
to merge, for no apparent reason. It’s
possible that the table structures
were somehow damaged, and if I’d been
doing this in Word 2003, perhaps using
Open and Repair would have fixed the
problem. As it was, it wasn’t vital
that the tables be actually part of
the same table, so I shrugged and
moved on.If you encounter such a situation, you
have really only two recourses (if
Open and Repair doesn’t help):
Add rows to the first table and copy/paste the content of the second
table into them.Convert both tables to text, then convert all the text back to a single
table.Sorry I can’t be more definitive, but
this is a mystery to me, too!Suzanne S. Barnhill
Microsoft MVP (Word) 1998-2006
answered Feb 3, 2011 at 15:25
![]()
3
Quite often you’ll find that you have two tables in a Word document and you want to join the two together to make just one table. The solution is simple but way from obvious.
To do this, first select over all the cells in one of the two tables. If the table is underneath the one you want to join it up to, then press Alt + Shift + ↑ to move the table up the document so that it joins the bottom of the table before it. Keep pressing the key until the top row that you have selected joins the bottom border of the one above.
If you have selected the topmost table, then press Alt + Shift + ↓ until the top table locks onto the table below.
You can also drag one table up or down until it joins but this method is very slick. It also works on a single row so you can take one row from one table and move only it to join up with another table or to become a table all of its own. Experiment with this key combination – I’m sure you will love it.
Once you’ve done this, the tables will be joined to make one single table. If desired, you can then adjust the positioning of the columns so that the columns match between the two tables – this isn’t required but you may want to do it if the columns are supposed to be the same throughout.
![]()
James Mertz
26.1k41 gold badges109 silver badges163 bronze badges
answered Jul 13, 2012 at 9:46
![]()
2
Similar situation I had was resolved by adding a blank row to the bottom of the upper table and a blank row to top of the lower table. Neither of these two new rows should have columns and both tables should be the identical width. Then, by removing any returns (blank lines) between the two tables, they should automatically join. Afterward, you can remove any unwanted rows.
answered May 9, 2012 at 16:05
![]()
John BJohn B
511 silver badge1 bronze badge
I just had a situation where my table was breaking with the cells before the bottom of the page and leaving a blank spot at the bottom of ONE PAGE in just ONE SECTION of a 30-PAGE TABLE. I did all of the checking/unchecking that is mentioned here and at other advice boards, but to no avail.
After about an hour of beating my head against a wall I calmed down and just methodically went though every option available relating to the table and noticed that in the cell that should have been broken into the bottom of one page and the top of the next (but was instead getting moved to the next page in its entirety) had a specified height (Table Properties/Row tab). I removed it and instantly the table started breaking with the page as I had been after.
So, all that is to say — another option you should check if you’re encountering a situation where one cell of an otherwise-compliant table won’t break where it is supposed to — see if there’s a specified height to the cell in the Row tab under Table Properties.
Good luck!
answered Nov 2, 2012 at 10:43
![]()
Check the row height.
For Windows 10
- Under Tables — Layout
- Go to Cell Sizes
- Click on Row
- Uncheck Specify Height and in «Row Height is …» put at least
- Under Options, check «Allow row to break across pages».
![]()
random♦
14.5k9 gold badges53 silver badges58 bronze badges
answered Dec 23, 2012 at 17:02
![]()
I found if I individually converted all the tables to text, separated by tabs using:
Table Tools / Layout/ Convert
to text then selected all the text and converted to tables using:
Insert / Table ↓ / Convert Text to table
that it worked for me.
![]()
James Mertz
26.1k41 gold badges109 silver badges163 bronze badges
answered Jul 19, 2012 at 13:38
![]()
When nothing else works, try the following solution (works in Word 2010):
- Reveal hidden formatting characters (try
Ctrl-Shift-8orAlt,H,8). - Select the lower table’s contents (try
Alt,J,L,K,T). - Click the selected text; drag it up beneath the upper table’s final, external paragraph mark; and release the mouse button.
answered Jan 23, 2014 at 20:19
![]()
nikodaemusnikodaemus
2,7033 gold badges22 silver badges23 bronze badges
If you have two or more tables that you need to merge in MS Word, simply put the cursor in the blank space between them and press the Delete Key until the lower table comes up and it’ll merge with the one on top. It worked for me with two identical tables.
answered Feb 27, 2014 at 16:24
![]()
1
Press Ctrl + Shift + 8. This will show all the non-printing characters in the word document. Delete the paragraph symbol ¶ between the two tables which you want to combine. The two tables will be combined.
answered May 12, 2015 at 9:53
![]()
I’ve been fighting with table styles all day then came across this problem. I had to clear formatting of both tables, then I deleted the paragraph between the tables and they merged perfectly.
answered Mar 28, 2017 at 19:07
![]()
-
Click on the cross-in-square at the left upper corner of the top table.
If both tables are highlighted, it is likely that the lower table is nested in the upper table.
- Click on the same square for the lower table.
- If only the lower table is highlighted, cut it (Ctrl—X) and paste it in the non-table space below the upper table.
- Then proceed with the table merge strategies described by others.
- Once they are merged, click and drag column boundaries of one table to match the other.
![]()
answered May 15, 2017 at 20:03
![]()
0
Click the button with a symbol ¶ (mirrored black P) which shows all non-printing characters (result of various formatting). Little blue marks will appear in the text.
Find one between two tables that prevents them from joining. Put your cursor next to it and press Delete. It will go away, and the tables would stick together.
![]()
answered Jun 25, 2013 at 20:46
![]()
1
As was suggested by a proficient user whose advice I found, I used the search and find using the caret p or ^p (and the caret is shift 6) to find the paragraph break between the sections.
Well, first I had to figure out how to show the search and find pane, which was under view, search. THen I had to figure out how to make the caret symbol, and finally figured that out.
Then I figured out you have to keep hitting «next» until it highlights the offending paragraph symbol.
Then, after trying a thousand other things that did not work, on the thousand and first try, I went to the edit menu again, and hit «cut»
and paragraph symbol that i did not want (that was giving me the blank space) was gone! Just like that!!!!!
answered Sep 7, 2013 at 23:10
![]()
It’s quite simple: insert empty row bellow first table, cut second table, right mouse click on added row then select paste option «merge tables»
answered Sep 18, 2015 at 9:15
![]()
If all the other suggestions have failed try this :
If you remove everything between the two tables that you want to merge you will likely find that you can move your cursor between the tables and it appears that there is a blank line in between them.
I’m sure you’ve tried hitting backspace expecting the lower table to move up and join the one above, but it seems that the blank line just will not let itself be removed.
Instead — try the DELETE key ! This has worked for me a number of times. The blank line in between dissapears and the tables sit next to each other and appear as one.
answered Aug 18, 2016 at 16:53
![]()
I went to hell and back with this problem.
I tried everything listed here above, and on many other forums and sites, but nothing worked.
I was trying to combine two IDENTICAL tables, each copied from a separate documents, to no avail. The tables look merged, but there is always a thicker line between them and each table would still be separate.
How I fixed it in the end was quite amusing yet incredibly unsatisfying:
- Make sure you try everything mentioned before (wrapping, style, size…).
- Leave the two tables apart.
- Save the document.
- Exit the document.
- Open the document.
- Delete the space between the two tables.
- The tables merged.
Whatever was messed up with Word needed only a restart of the document to get fixed.
![]()
karel
13.3k26 gold badges44 silver badges52 bronze badges
answered Apr 5, 2017 at 6:32
![]()
In Office 2007, select the space just below or above table depending on where the other table to be inserted and right click. You should find an option «Paste by Appending Table». Just click on it ….voila !!
answered Jul 30, 2017 at 7:05
![]()
After trying all of these I finally had a brainwave. Added, I am working on office for mac, so it might be a bit different, but try this (I love how simple this ended up being!):
Drag Select the last row of the first table you want to merge together with the first row of the table underneath, go to the Edit tab and select Merge table.
hahaha… so easy, but not really intuitive. Should this be under the table tab, Microsoft? (maybe I’m missing something?).
answered Sep 3, 2017 at 9:09
![]()
The merging of table can be done using text wrapping properties.
- For that, select first table.
- Go to properties—> In table properties, select text wrapping as none and then click OK.
- Now select second table. do the same thing as mentioned in point No.2
- If there is any gap between the 2 tables, place the cursor in the gap and press delete button or if you cannot place the cursor in between, place the cursor in the last row/ cell in the first table and press delete button.
And now the 2 tables become combined.
answered Nov 13, 2017 at 5:14
![]()
select last row of upper table and first row of below table, then go to layout option nd click on distribute rows
answered Mar 10, 2018 at 8:01
![]()
Save the document as an older version of Word, i.e. Word 97-2003. This will allow you to merge the two tables simply by deleting the ^p (paragraph/return) symbol.
This worked for me after trying everything above without success.
You can convert the document back to your current version of Word by ‘Save As’.
answered Jun 13, 2018 at 17:38
![]()
I have been using tables for many years, and this has been comparatively trouble-free.
However, just recently I discovered that one of my files could not be put into alphabetical order. At first I was puzzled and, thinking that I had made some kind of mistake, tried several times to fix the problem, but to no avail.
Then I tried selecting the table and, upon scrolling down, I discovered that the whole table had not been selected. The shading stopped at a line which was thicker than the boundaries between the other rows, as mentioned before on this list.
In this way I discovered that what I thought was one table consisted in fact of three tables, each with its little box with the cross marking the beginning of that table, but with no space between them.
I then noticed that the 2nd table had only two rows!
This apparent anomaly attracted my attention. Could these two rows have been imported from another file, perhaps a file composed in a different version of Word?
With this in mind, I went to the last row of the 1st table and inserted two new rows below it (by pressing ‘return’ and then F4 to repeat the action).
I then selected the two rows of the 2nd table, picked them up using Ctrl + x, and then selecting the two new empty rows, dropped what I had picked up into them.
This left two empty rows which I then deleted.
By using ‘select table’ I found that I now had one table, which I could now put int alphabetical order!
answered Jul 8, 2018 at 15:33
![]()
Inert a blank row at the bottom of the upper table. Define all cells of the bottom table. Place your cursor at the top-left corner of the upper-left defined cell of the bottom table. Press the left mouse button and, holding it down, slide it up into the left inserted cell at the bottom of the upper table. Boom.
answered Sep 27, 2018 at 21:37
![]()
For me (using Word for Mac),
Whilst in Print Layout View (either checked in View Menu equivalent icon in View Ribbon icon selected)
I used the following icon first
(Found on the Home ribbon)

For me I was then able to delete a page break:

But still had a symbol like the menu bar icon in the text between the two tables.

I just drag-clicked over the control character to select it, then used the Cut keyboard shortcut Cmd-X.
Voila!
answered Nov 17, 2019 at 19:41
![]()
JGFMKJGFMK
1215 bronze badges
Содержание
- Word 2007 и выше
- Word | Разорвать и соединить таблицу
- Разрыв и соединение таблиц в Word 2003 — 2013 (до 2100 года)
- Как разорвать таблицу в Ворд
- Как соединить таблицы в Ворд
- Объединение двух таблиц с помощью функции ВПР
- 1 Как объединить таблицы в Ворде: способ первый
- 2 Как объединить таблицы в Ворде: способ второй
- Объединяем две таблицы вертикально
- Удаляем шапку второй таблицы
- Краткое описание возможных способов
- Универсальное решение
- Заключение
Word 2007 и выше
В более старших версиях Word предыдущая функция объединения таблиц никуда не делась. Вы всё также можете объединить таблицы, как говорилось ранее.
Однако существует ещё один интересный метод, который можно назвать универсальным.
Итак, для начала необходимо выделить вторую таблицу и поместить её в буфер обмена. Нажав комбинацию клавиш Ctrl+X. Затем устанавливаем курсор мыши на следующее поле после первой таблицы и вставляем скопированную первую таблицу.
Это работает и всегда будет работать.
Это проверено на Word 2003, Word 2007, Word 2010 и Word 2013.
Это будет работать в любых версиях Word до самого 2100 года,
потому что принцип разрыва и соединения таблиц в Word,
также стабилен и безупречен, как и сам Word
Разрыв и соединение таблиц в Word 2003 — 2013 (до 2100 года)
Таблицы в Word разделяются и соединяются достаточно легко и просто – путём обычной установки курсора в нужное место страницы да нажатием клавиш «ENTER» и «DELETE». При условии, конечно, что соединяемые таблицы абсолютно идентичны по количеству и ширине столбцов, а сам вордовский файл – не повреждён.
- Непечатные знаки
- Разрыв страницы
- Как таблицу в Word разорвать
- Как таблицы в Word соединить
- Соединение таблиц Ворд копированием
- Отказ работы файла Word
Как разорвать таблицу в Ворд
(рвём таблицу в Ворд, как Тузик – грелку)
Разорвать таблицу в Ворд – это самое простое, что можно с ней сделать.
Разорвать таблицу в Word очень легко – у нас всё, что порвать – это очень легко.
Чтобы разорвать таблицу в Ворде, нужно установить курсор в требуемую ячейку строки таблицы и вставить «разрыв страницы». После этого, та́ часть таблицы, которая окажется ниже установленного курсора – будет оторвана и помещена в начало новой страницы.
Как вставить «разрыв страницы»
Во всех версиях Ворд-а, «разрыв страницы» вставляется одинаково:
– нужно открывать вкладку «Вставка» в Главном меню и искать «Разрыв страницы»
Вот несколько вариантов пути для поиска:
– Главное (верхнее) меню => Вставка => Страницы => «Разрыв страницы»
– Главное (верхнее) меню => Вставить => «Разрыв страницы»
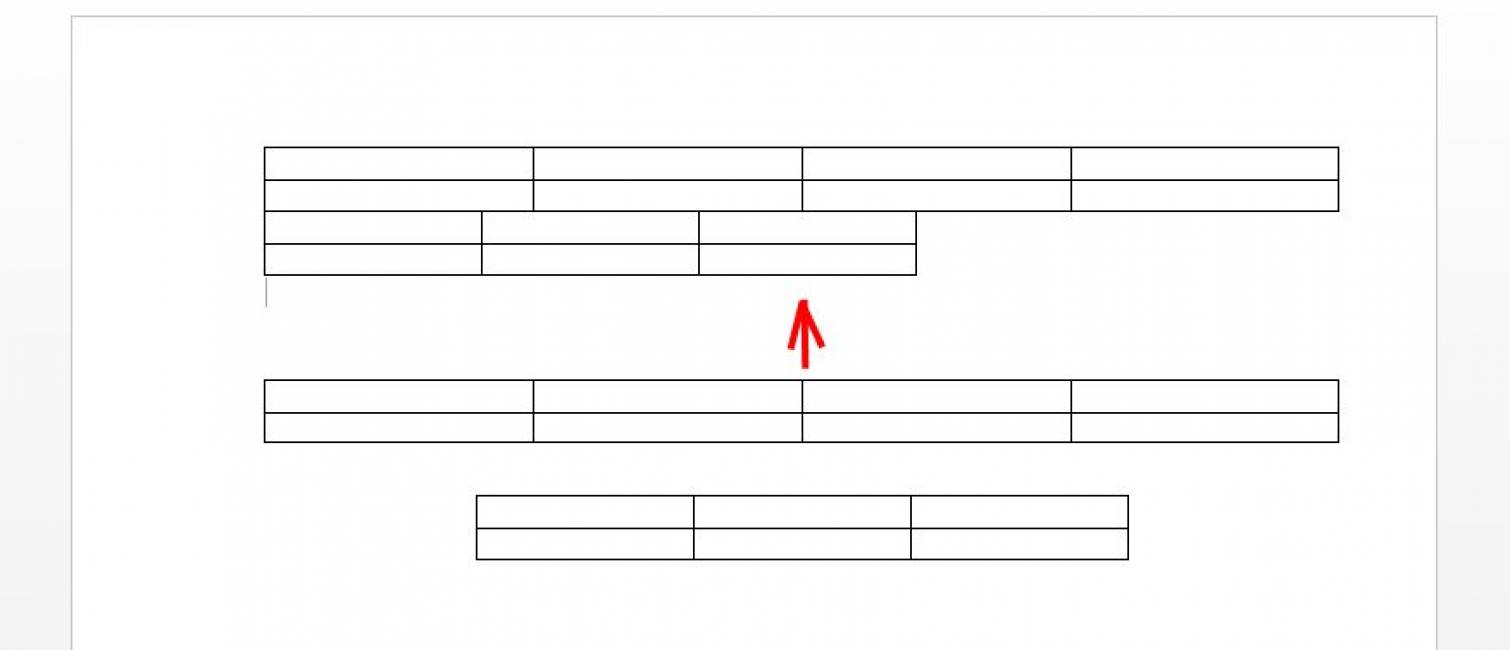
После вставки в строку таблицы «Разрыва страницы», любая таблица Word будет разделена на две части, вторая из которых будет отображаться и начинаться уже на новой странице. Тут, с ходу, предвидится вопрос – оторванная часть таблицы находится с начала нового листа, а нужно – чтобы между разорванными таблицами была всего одна строка.
Как сделать только одну строку между разорванными таблицами
Для этого нужно, удалить знак «Разрыв страницы» и вставить (или оставить) вместо него знак «Абзац». В любом случае, нужно включать непечатные знаки и смотреть, что там находится между таблицами. Лишнее – удалять, нужное – оставлять. Это может выглядеть, примерно так:
- включаем отображение непечатных знаков
- находим между таблицами знак «Разрыв страницы»
- если отсутствует знак «Абзац» – вставляем его
- удаляем знак «Разрыв страницы»
Теперь две таблицы разделяет только знак абзаца
и между таблицами – только одна строка.
Мануально, (руками) это делается очень легко и быстро, «на автопилоте» – сразу под первой частью разорванной таблицы нужно установить курсор и нажать, поочерёдно клавиши «ENTER» и «DELETE» – вторая часть разорванной таблицы сразу «подпрыгнет» вверх и между таблицами установится промежуток, равный высоте одной строки.
Как соединить таблицы в Ворд
Действия по соединению таблиц в Ворд весьма логичны и понятны –
нужно всего лишь удалить все знаки между соединяемыми таблицами.
Таблицы соединятся автоматически.
Для этого, включаем непечатные знаки и удаляем между своих таблиц всё, что только там найдём. Во время этой процедуры, пользователя могут поджидать два неприятных сюрприза, или как нынче модно говорить – «обломы».
Облом первый
Таблицы соединятся с заметным визуальным различием по линии соединения, т.е. слияния таблиц не произойдёт, а они, как бы прижмутся друг к другу, но всё равно, между ними будет видна линия размежевания. В месте контакта может наблюдаться двойная линия или другие визуальные дефекты.
 Визуальные дефекты после слияния двух неоднородных таблиц в Word
Важное условие для полного слияния таблиц в Ворд – это абсолютная идентичность (полное совпадение) форматирования её столбцов. При этом, решающую роль может сыграть не только количество и точная ширина столбцов в соединяемых таблицах, но и такие факторы, как соответствие шрифта, оформление и выравнивание в ячейках, ширина линий и т.д. В противном случае объединения и слияния двух таблиц в одну не произойдёт. Если таблицы, хоть немного разнятся, то тогда нижняя таблица просто прижимается к верхней таблице. Как на картинке, вверху
При этом, нужно понимать, что определить «на глаз» идентичность таблиц крайне сложно и, практически – не возможно. Потому как, программа Word, равно как и все остальные визуальные текстово-графические редакторы, производит измерения объектов в пикселях и процентах, малые колебания которых «на глазок» совершенно незаметно.
Облом второй (из непознанного)
Иногда, и довольно часто – знаки между соединяемыми таблицами, упорно не желают удаляться, они становятся, как бы «неудаляемыми». Единственные внятные советы попытки, как удалить в этом случае знаки «Абзац» или «Разрыв страницы» мне дали на одном из форумов.
Совет первый – при удалении знаков между таблицами, выделять не только сами знаки между ними, но и по одной строке из каждой таблицы, соответственно – последнюю и первую. Одновременный захват строк двух соединяемых таблиц создаёт область выделения, гарантировано перекрывающую абсолютно все удаляемые элементы между таблицами. Чтобы не испортить содержание таблиц, захватываемые строки в каждой таблице нужно, сначала создать, а потом, после соединения – удалить. Понятно, что это хлопотно, но это же – «вынужденная посадка». Так сказать, для тяжёлых случаев.
 Захват последней и первой строк соединяемых таблиц
Совет второй – удаляемые знаки нужно не удалять, а попытаться заменить их на пробел или на «пустое место». Алгоритм замены, примерно такой:
- выделить требуемый знак
- дальше – в меню Правка-Заменить (или нажать Ctrl+H)
- нажать кнопку «Больше»
- поставить курсор в поле «Найти»
- нажать кнопку «Специальный»
- выбрать требуемый пункт «Знак абзаца» или «Разрыв страницы»
- нажать на «Заменить»
И первый, и второй обломы с успехом «лечатся» простым копированием содержимого одной присоединяемой таблицы в другую. Конечно, при больших объёмах текста – это не наш метод, но, как говорится – хоть какой-то да выход.
Объединение двух таблиц с помощью функции ВПР
В приведенном ниже примере вы увидите две таблицы с именами, которые ранее использовались для новых имен: «синий» и «оранжевый». В таблице синей каждая строка является элементом строки для заказа. Таким образом, номер заказа 20050 состоит из двух элементов, код заказа 20051 — один товар, код заказа 20052 состоит из трех элементов и т. д. Мы хотим объединить столбцы «код продажи» и «регион» с таблицей «Синяя», исходя из совпадающих значений в столбцах «код заказа» в таблице «оранжевый».

Значения идентификатора заказа повторяются в таблице Blue, но значения ИДЕНТИФИКАТОРов Order в таблице оранжевый являются уникальными. Если бы пришлось просто копировать и вставлять данные из оранжевой таблицы, то значения ИДЕНТИФИКАТОРов продаж и областей для второй позиции строки 20050 будут отключены на одну строку, что приведет к изменению значений в новых столбцах в таблице Blue.
Ниже приведены данные для синей таблицы, которые можно скопировать в пустой лист. После того как вы вставьте его на лист, нажмите клавиши CTRL + T, чтобы преобразовать его в таблицу, а затем переименуйте таблицу Excel синим цветом.
|
Номер заказа |
Дата продажи |
Код продукта |
|---|---|---|
|
20050 |
02.02.2014 |
C6077B |
|
20050 |
02.02.2014 |
C9250LB |
|
20051 |
02.02.2014 |
M115A |
|
20052 |
03.02.2014 |
A760G |
|
20052 |
03.02.2014 |
E3331 |
|
20052 |
03.02.2014 |
SP1447 |
|
20053 |
03.02.2014 |
L88M |
|
20054 |
04.02.2014 |
S1018MM |
|
20055 |
05.02.2014 |
C6077B |
|
20056 |
06.02.2014 |
E3331 |
|
20056 |
06.02.2014 |
D534X |
Ниже приведены данные для оранжевой таблицы. Скопируйте его на тот же самый лист. После того как вы вставьте его на лист, нажмите клавиши CTRL + T, чтобы преобразовать его в таблицу, а затем переименуйте таблицу оранжевый.
|
Номер заказа |
Код продажи |
Регион |
|---|---|---|
|
20050 |
447 |
Запад |
|
20051 |
398 |
Юг |
|
20052 |
1006 |
Север |
|
20053 |
447 |
Запад |
|
20054 |
885 |
Восточный |
|
20055 |
398 |
Юг |
|
20056 |
644 |
Восточный |
|
20057 |
1270 |
Восток |
|
20058 |
885 |
Восточный |
Необходимо убедиться, что значения ИДЕНТИФИКАТОРов продажи и регионов для каждого заказа будут правильно выравниваться с каждой из элементов каждой уникальной позиции заказа. Для этого вставьте заголовки таблицы ИДЕНТИФИКАТОРы продаж и область в ячейки справа от синей таблицы и используйте формулы ВПР, чтобы получить правильные значения из столбцов «идентификатор продажи» и «регион» в таблице «оранжевый».
Вот как это сделать:
-
Скопируйте код и регион для заголовков в таблице «оранжевый» (только для этих двух ячеек).
-
Вставьте в ячейку заголовки, расположенные справа от заголовка «код товара» синей таблицы.
Теперь таблица «Синяя» содержит пять столбцов, включая новые — «Код продажи» и «Регион».
-
В таблице «Синяя», в первой ячейке столбца «Код продажи» начните вводить такую формулу:
=ВПР(
-
В таблице «Синяя» выберите первую ячейку столбца «Номер заказа» — 20050.
Частично заполненная формула выглядит следующим образом:

Выражение [@[Номер заказа]] означает, что нужно взять значение в этой же строке из столбца «Номер заказа».
Введите точку с запятой и выделите всю таблицу «Оранжевая» с помощью мыши. В формулу будет добавлен аргумент Оранжевая[#Все].
-
Введите точку с запятой, число 2, еще раз точку с запятой, а потом 0, вот так: ;2;0
-
Нажмите клавишу ВВОД, и законченная формула примет такой вид:
Выражение Оранжевая[#Все] означает, что нужно просматривать все ячейки в таблице «Оранжевая». Число 2 означает, что нужно взять значение из второго столбца, а 0 — что возвращать значение следует только в случае точного совпадения.
Обратите внимание: Excel заполняет ячейки вниз по этому столбцу, используя формулу ВПР.
-
Вернитесь к шагу 3, но в этот раз начните вводить такую же формулу в первой ячейке столбца «Регион».
-
На шаге 6 вместо 2 введите число 3, и законченная формула примет такой вид:
Между этими двумя формулами есть только одно различие: первая получает значения из столбца 2 таблицы «Оранжевая», а вторая — из столбца 3.
Теперь все ячейки новых столбцов в таблице «Синяя» заполнены значениями. В них содержатся формулы ВПР, но отображаются значения. Возможно, вы захотите заменить формулы ВПР в этих ячейках фактическими значениями.
-
Выделите все ячейки значений в столбце «Код продажи» и нажмите клавиши CTRL+C, чтобы скопировать их.
-
На вкладке Главная щелкните стрелку под кнопкой Вставить.
-
В коллекции параметров вставки нажмите кнопку Значения.
-
Выделите все ячейки значений в столбце «Регион», скопируйте их и повторите шаги 10 и 11.
Теперь формулы ВПР в двух столбцах заменены значениями.


1 Как объединить таблицы в Ворде: способ первый
- Он отлично подойдет, если у вас разная ширина таблиц и различное количество колонок в них. Конечно же, лучше всего предварительно подогнать их под одну ширину, чтобы таблица выглядела эстетичнее. Сделать это можно курсором, просто растянув или сузив границы таблиц.
- Если вы не подгоните ширину таблиц друг под друга, то вторая таблица прилипнет к первой по левому краю, то есть, останется другого размера.
- Выделите нижнюю таблицу полностью. Для этого можно использовать инструмент с черной стрелочкой, который появляется сам, когда вы наводите мышкой на таблицу.
- Как только выделение будет сделано, обратите внимание на левый верхний угол таблицы – там будет находиться небольшой квадрат.
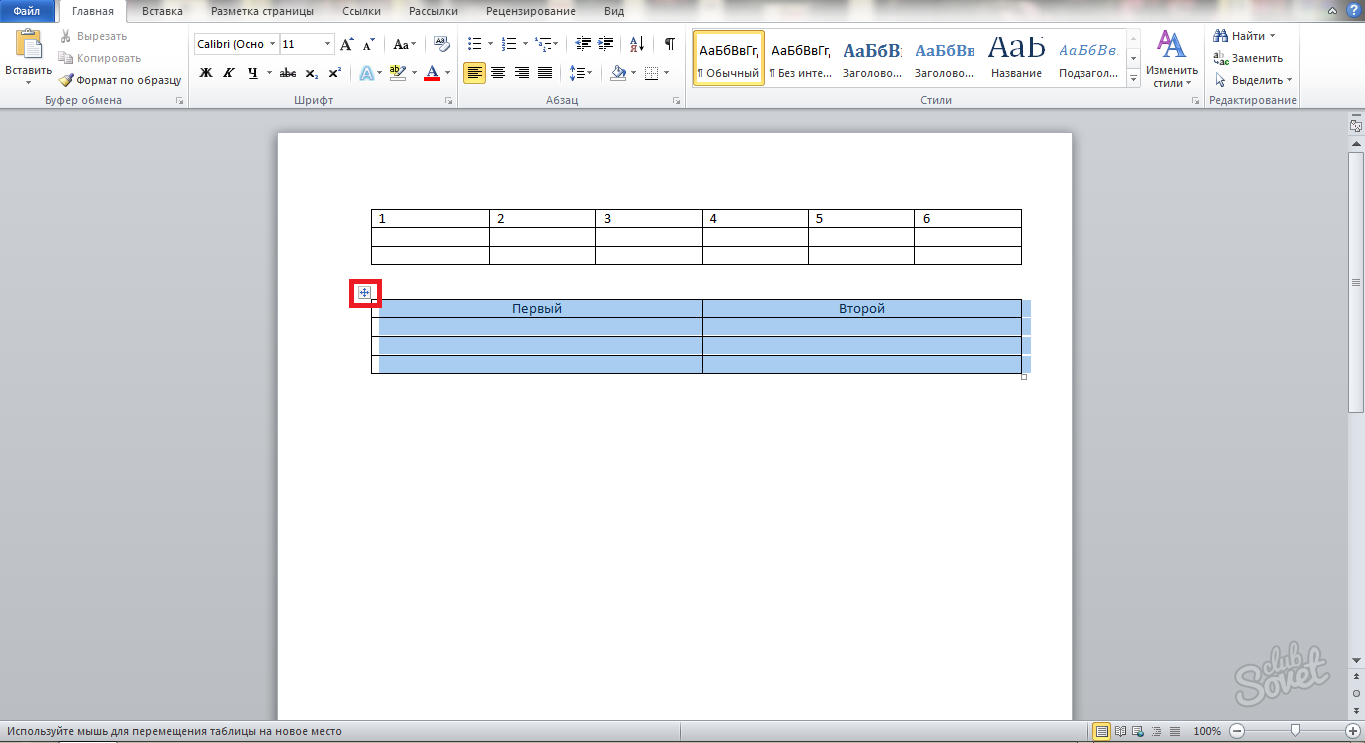
- Аккуратно возьмите эту иконку мышкой, зажав левую ее кнопку, и начните перемещать. Вы увидите, что следом за ней перемещается вся таблица, которую вы выделили. Приблизьте таблицы вплотную и приклейте их друг к другу, просто отпустив курсор мыши.
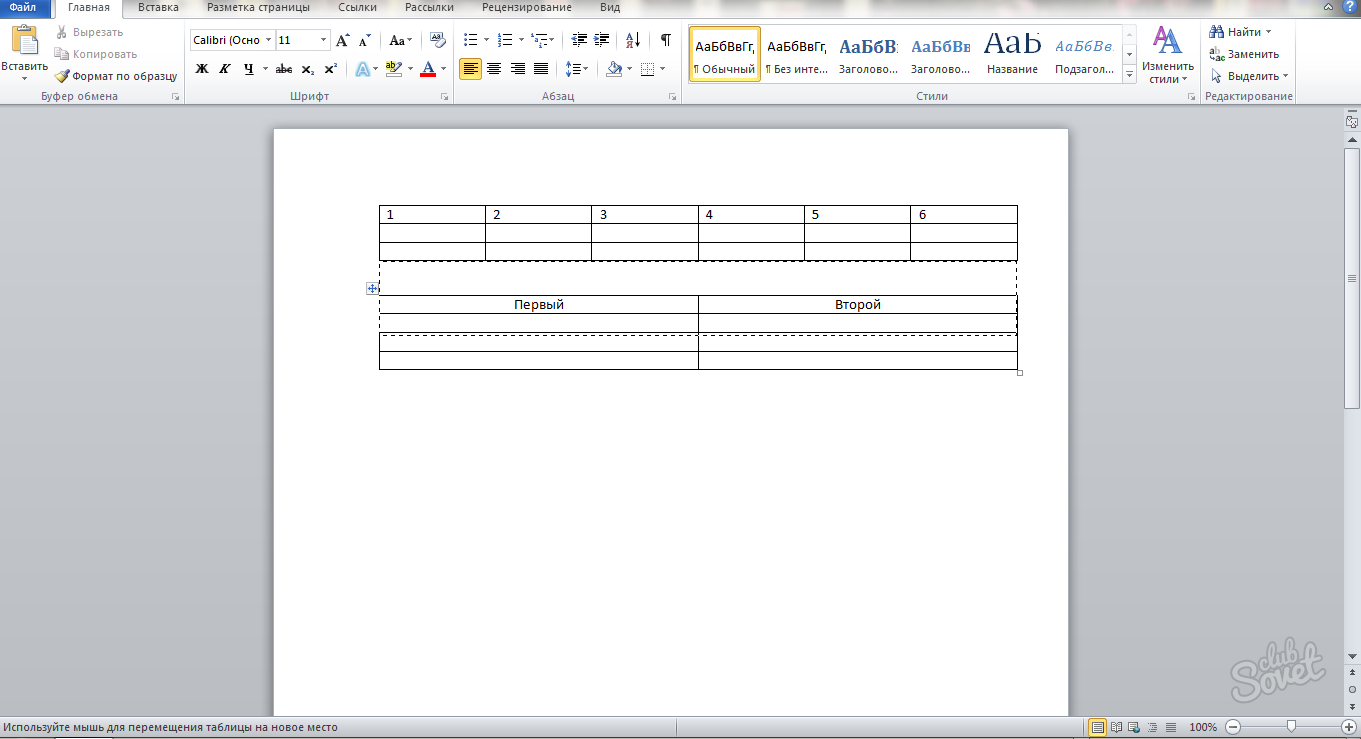
- Как видите, таблицы слились в одну, сохранив при этом свое форматирование. Таким способом можно соединять любые таблицы любых размеров. Между ними останется чуть более жирная граница, чем между другими ее частями, но это легко исправить, просто удалив одну из них.
- Если данный способ вам не подошел, и вы хотите слить таблицы иначе, попробуйте второй шаг данной статьи.
2 Как объединить таблицы в Ворде: способ второй
- Этот вариант лучше использовать, если у вас одинаковое количество столбцов в таблице. Тогда они объединятся плавно и четко, не оставляя между собой границ.
- Выделите вторую таблицу полностью уже известным вам способом. Просто потяните черной стрелкой по всей диагонали таблицы.
- На своей клавиатуре зажмите одновременно комбинацию CTRL + X на английской раскладке либо CTRL + Ч на русской.
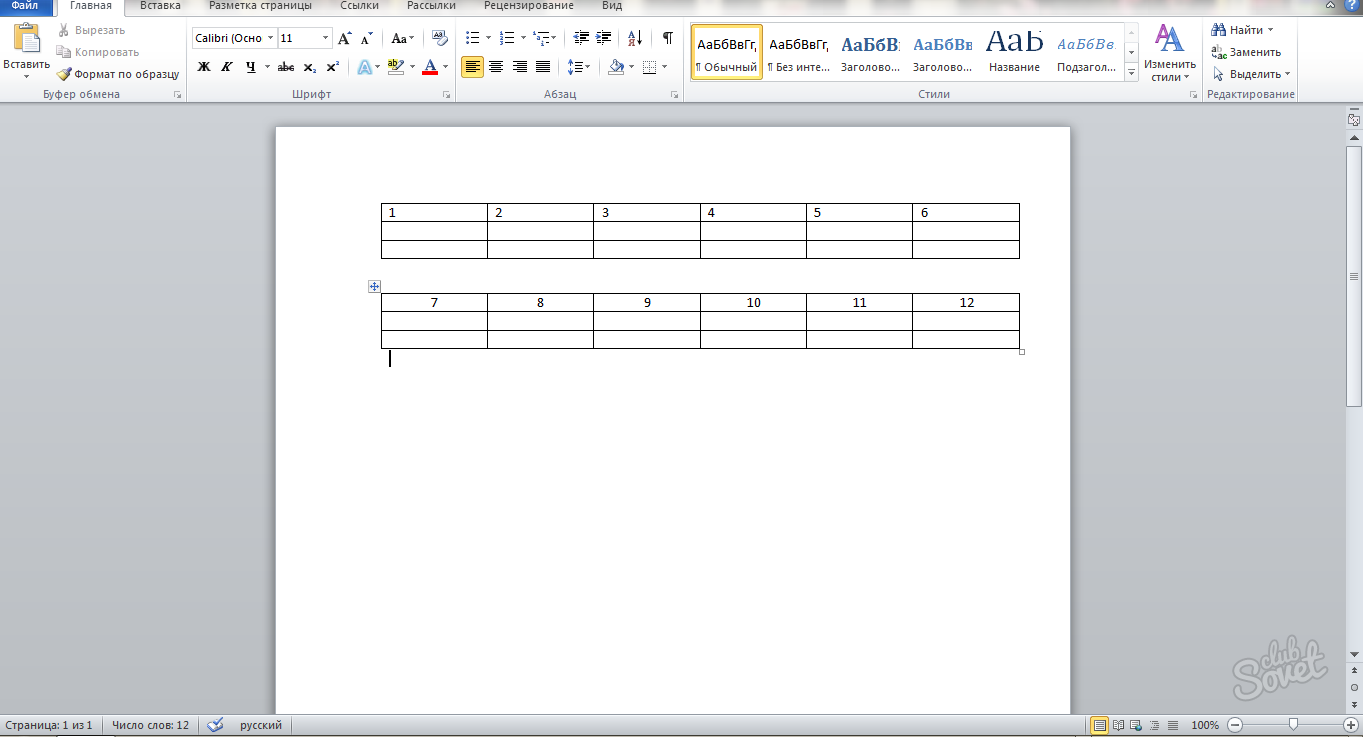
- Так вы вырежете полностью таблицу из документа. Она удалится со страницы и окажется в вашем буфере обмена.
Поставьте курсор мышки прямо под первой таблицей так, чтобы он располагался сразу на следующей строке после таблицы.
- Зажмите на клавиатуре сочетание клавиш CTRL + V, если она на английской раскладке и CTRL + М, если на русской.
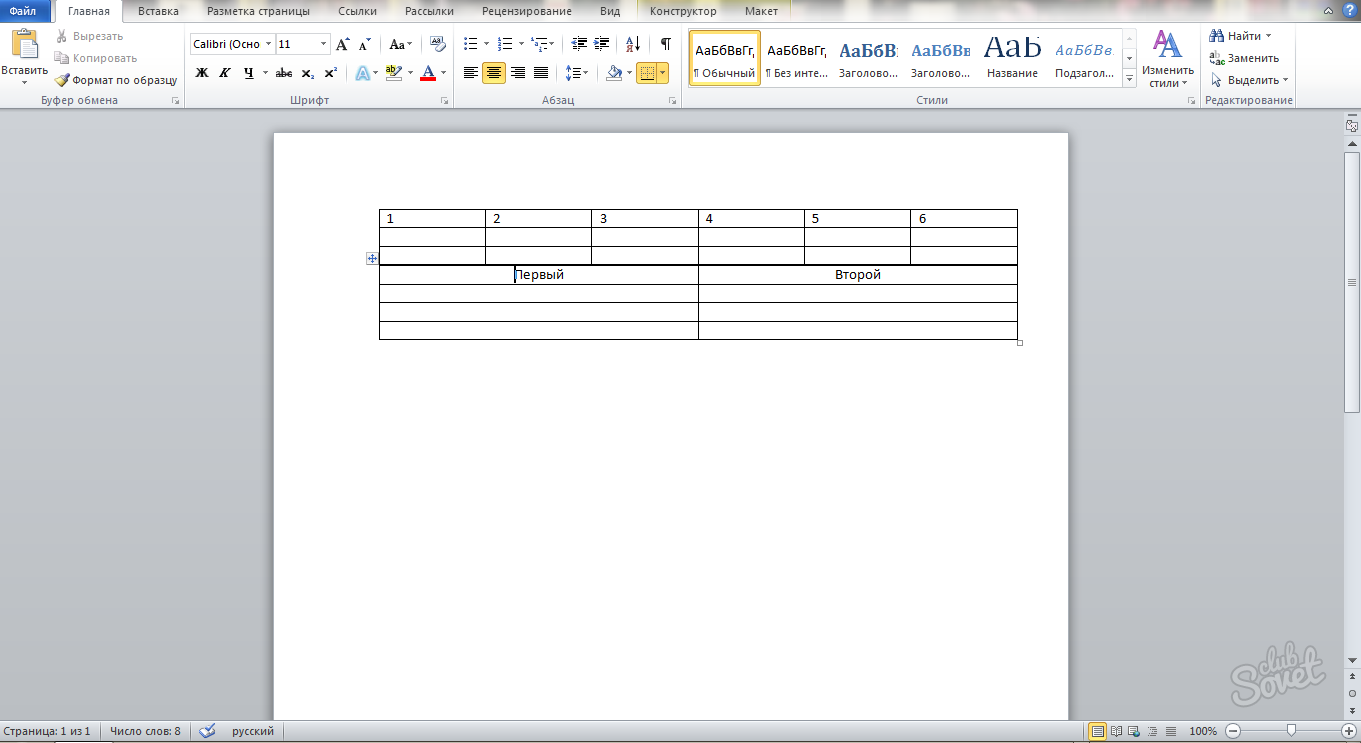
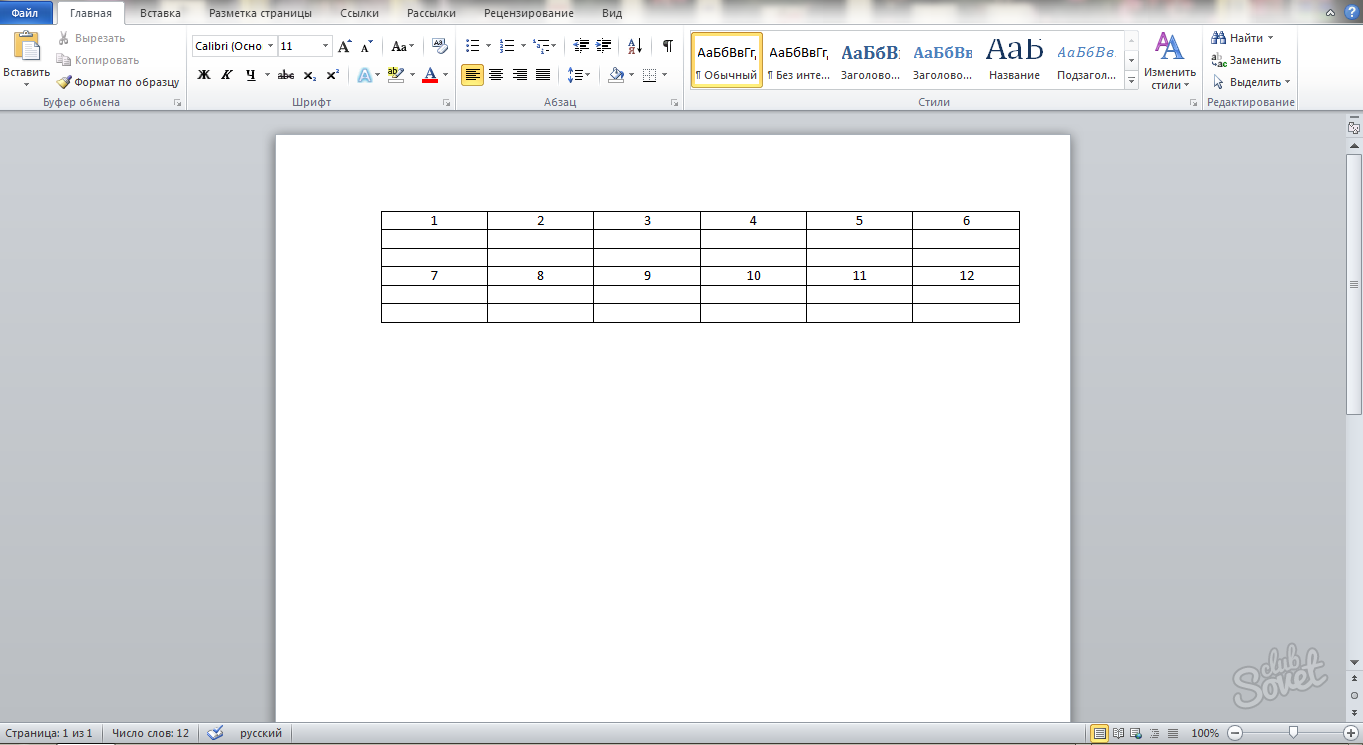
- Посмотрите на результат: обе таблицы ровно объединятся, при этом сохраняя форматирование. Между ними нет лишних границ, а стороны автоматически выровняются.
- Теперь форматируйте элементы внутри ячеек, чтобы таблица стала выглядеть более эстетично. Выделите ее полностью и нажмите по выделению правой кнопкой мыши. В выпадающем списке выберите строку “Выравнивание ячеек”, а затем выберите любой тип выравнивания, например, посередине.
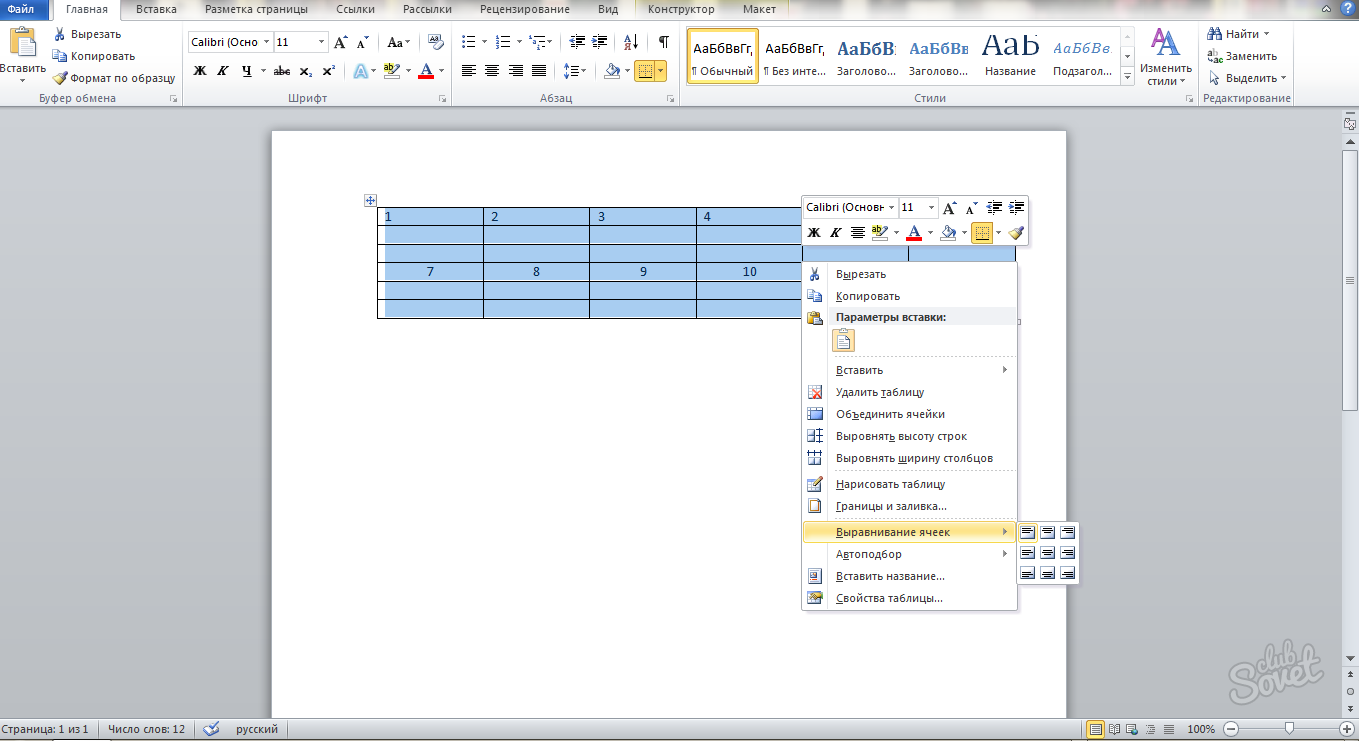
- Текст встанет на свое место, и все элементы примут одинаковый вид.
- Используйте любой из данных способов, чтобы объединять любые таблицы в программе Microsoft Office Word. Не забывайте, что некоторые таблицы лучше предварительно выровнять вручную и подогнать по ширине. Тогда соединение пройдет быстрее.
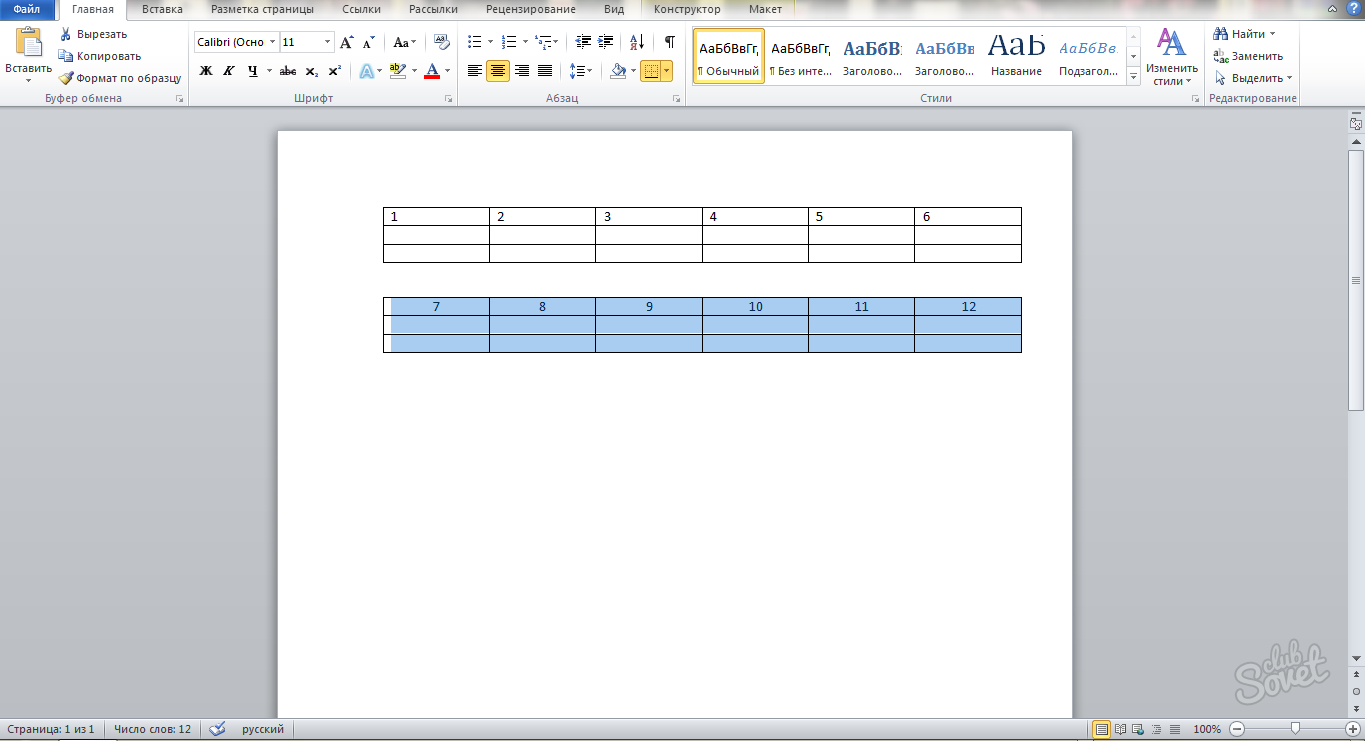
Объединяем две таблицы вертикально
Объединяем две таблицы вертикально
Объединяем две (или несколько) похожие таблицы.
- Выделите вторую таблицу, кликнув на крестик в левом верхнем углу этой таблицы, который появляется при приближении курсора
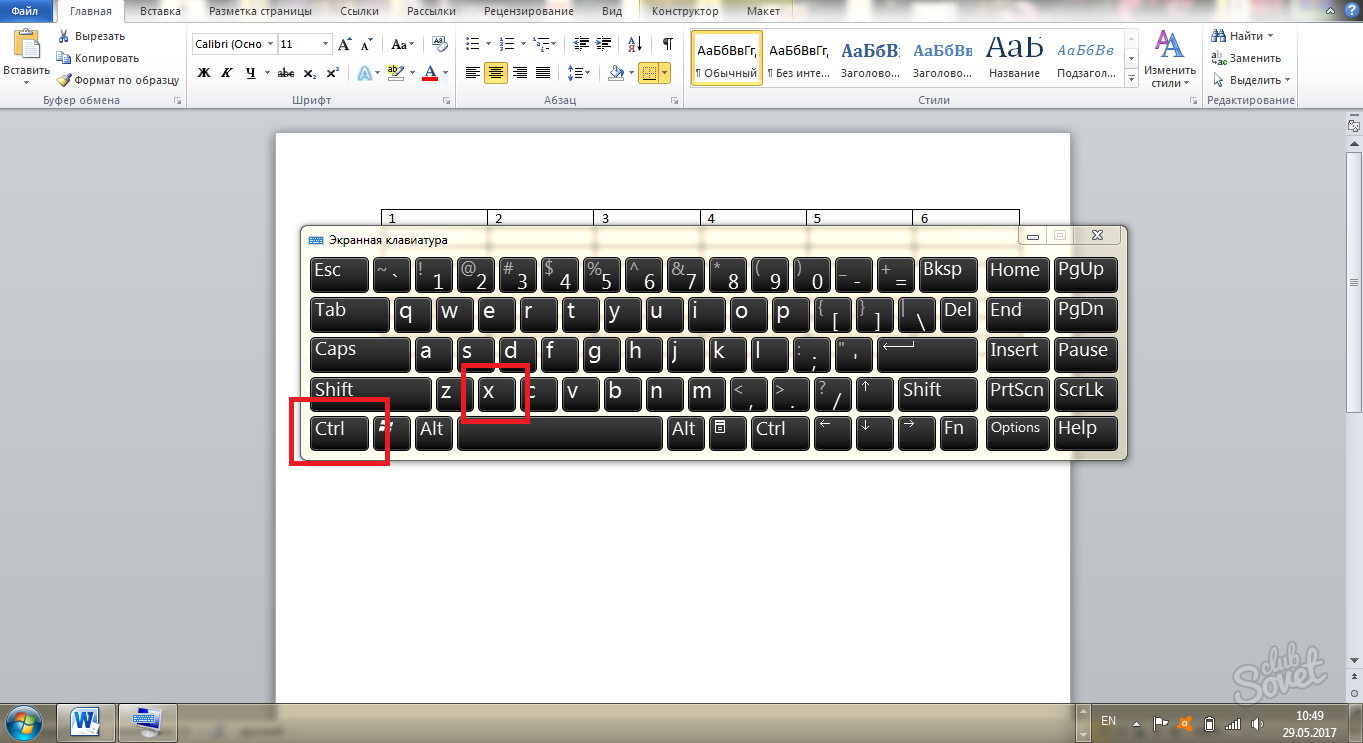
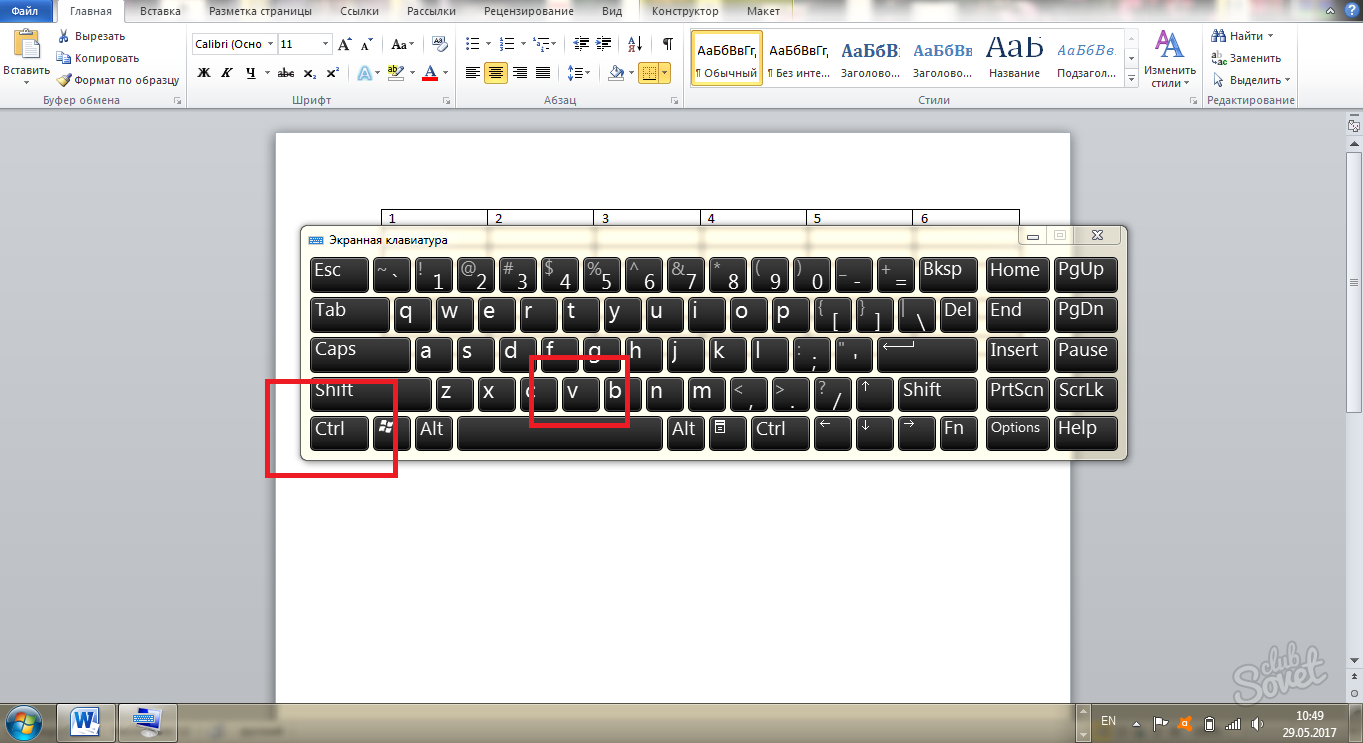
- Вырезаем эту таблицу. Для этого нажимаем на клавиатуре одновременно клавиши Ctrl + X или жмем на панели инструментов в блоке «Буфер обмена» кнопку «Вырезать».
- Устанавливаем курсор слева внизу под первой колонкой первой таблицы.
- Нажимаем либо клавиши на клавиатуре Ctrl + V или нажимаем кнопку «Вставить» на панели инструментов в блоке «Буфер обмена».
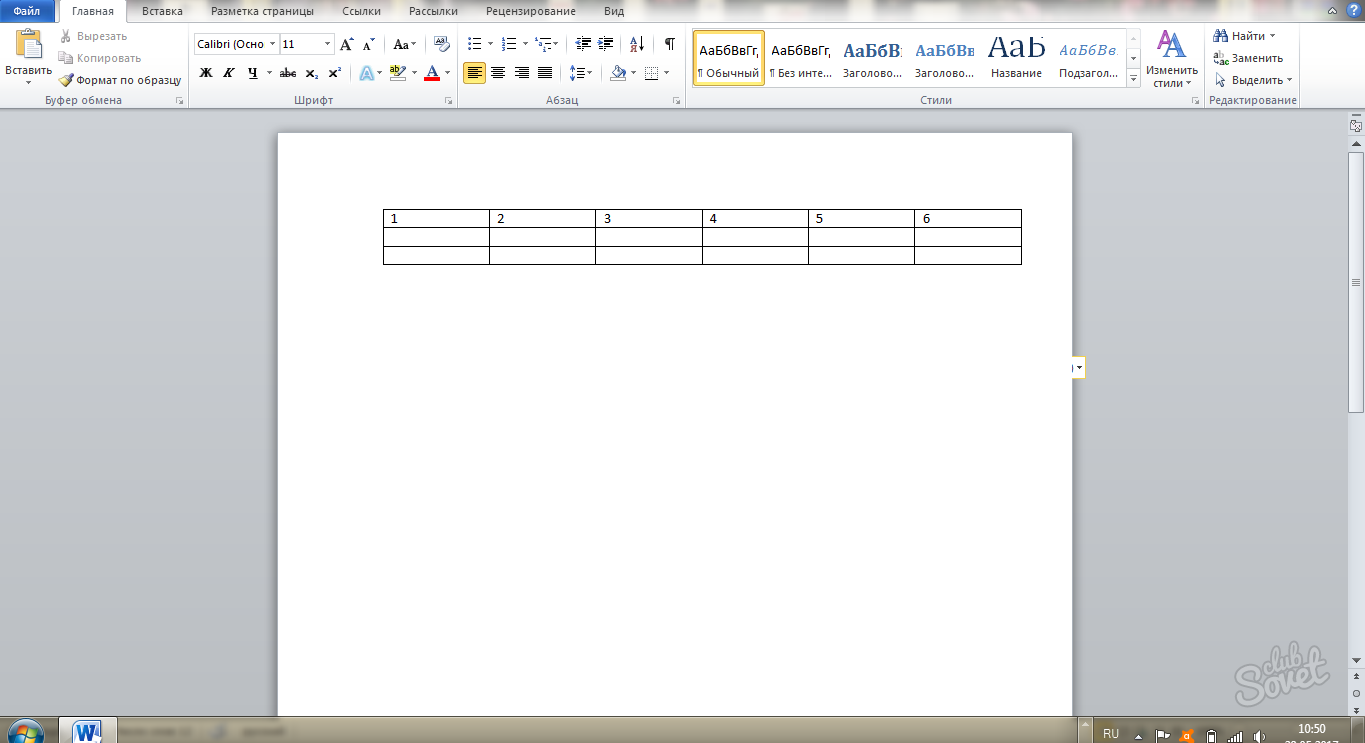
Вторая таблица вставится, как продолжение первой, но со своей шапкой. Строку с шапкой второй таблицы можно удалить.
Удаляем шапку второй таблицы
Удаляем шапку второй таблицы
Для этого эту строку необходимо выделить, кликнуть правой кнопкой мыши по выделенному, и выбрать в выпадающем меню пункт «Удалить ячейки», а потом установить переключатель на «Удалить всю строку», и нажать кнопку «ОК».
Краткое описание возможных способов
 Мы предоставим список всех вариантов объединения для всех существующих версий Word. Вам не придется разбираться, какая у вас стоит версия, и искать решение для нее. Нужно будет просто бегло попробовать способы по готовому списку, пока не найдете подходящий.
Вот какие техники слияния таблиц существуют:
1 С помощью удаления всех символов между таблицами. 2 С помощью копирования и вставки второй таблицы в последнюю строку первой (Ctrl+C и Ctrl+V). 3 С помощью копирования и вставки второй в первую через опцию вставить как новые строки. 4 Горизонтальное соединение
Разберем их все по порядку, с подробными инструкциями и скриншотами.
Универсальное решение
Как показывает практика, в текстовом редакторе есть один наиболее удобный метод, позволяющий быстро объединить таблицы, которые в силу своих особенностей, имеют одинаковое количество столбцов с разной шириной. Итак, для того, чтобы воспользоваться уникальным способом и выровнять ширину столбцов в нескольких впоследствии объединяемых таблицах, придётся предварительно выделить вторую таблицу, одновременно зажать кнопки Ctrl+X. Это действие способствует помещению вырезанных данных в буфер обмена. Затем нужно поставить курсор с ту строчку, которая расположена следом за первой таблицей. Одновременное нажатие на кнопки Ctrl+V позволит обратно вставить скопированные данные в ту область, где на данный момент расположен курсор.

Выделите вторую таблицу, которую хотите объединить с первой, и нажмите Вырезать
На первый взгляд этот способ может показаться более сложным, нежели первый, однако, после того, как работа будет сделана, пользователь сам сможет оценить удобство и простоту этого метода, не требующего ни времени, ни трудозатрат. Стоит отметить, что воспользоваться подобного рода манипуляцией можно даже тогда, когда таблицы обладают весьма большим форматированием.

…и нажмите Вставить
Заключение
На самом деле текстовый редактор Microsoft Word готов во всём способствовать тем, кто им пользуется. Достаточно знать всего лишь некоторые специфические комбинации клавиш или определённые команды и юзер сможет очень быстро объединить таблицу или сделать в ней требуемый разрыв.
Источники
- https://linchakin.com/posts/how-to-combine-tables-in-word/
- http://tehnopost.info/computer/apps/40-razorvat-tablicu-soedinit-tablicu-v-vord.html
- https://support.office.com/ru-ru/article/%D0%9E%D0%B1%D1%8A%D0%B5%D0%B4%D0%B8%D0%BD%D0%B5%D0%BD%D0%B8%D0%B5-%D0%B4%D0%B2%D1%83%D1%85-%D0%B8%D0%BB%D0%B8-%D0%BD%D0%B5%D1%81%D0%BA%D0%BE%D0%BB%D1%8C%D0%BA%D0%B8%D1%85-%D1%82%D0%B0%D0%B1%D0%BB%D0%B8%D1%86-c80a9fce-c1ab-4425-bb96-497dd906d656
- https://sovetclub.ru/kak-obedinit-tablicy-v-vorde
- https://moydrygpk.ru/word/kak-obedinit-tablicy-v-vorde.html
- https://geekhacker.ru/kak-obedinit-tablitsy-v-word/
- https://nastroyvse.ru/programs/review/obedinit-i-razdelit-tablicy-v-word.html