Word 2013
You can format your document in a newspaper-style column layout by adding columns. On the Page Layout tab, click Columns, then click the layout you want.
-
To apply columns to only part of your document, with your cursor, select the text that you want to format.
-
On the Page Layout tab, click Columns, then click More Columns.
-
Click Selected text from the Apply to box.
Word 2016
You can format your document in a newspaper-style column layout by adding columns. On the Layout tab, click Columns, then click the layout you want.
-
To apply columns to only part of your document, with your cursor, select the text that you want to format.
-
On the Layout tab, click Columns, then click More Columns.
-
Click Selected text from the Apply to box.
Need more help?
Typically, Word documents like books, reports, and letters have paragraphs that occupy the whole page width. In articles, newsletters, flyers, and brochures, all or only parts of the text may be arranged in two or more columns:

You don’t need to create tables to structure text into columns. Tables are useful for displaying translated versions of the legal document side-by-side, but table cells break the text flow and are not recommended for multi-column layouts. It is more convenient to use columns for text formatting in most other cases. Word also allows you to adjust your columns by adding column breaks.
Format text in columns
To format a text into columns, do the following:
1. Do one of the following:
- To use the same number of columns for an entire document, click anywhere in the document (empty or with content).
If you choose to format text in columns, Word fills the first column with text on the page and then moves to the beginning of the next column. When all columns on one page are filled, the text moves to the next page.
- To format only a part of the document, select the paragraphs that you want to wrap in columns.
If you select a part of the text and wrap it in columns, Word inserts section breaks at the beginning and end of the selected text to delineate the area where the column layout is applied:
See more about breaks and how to display them.
To manually specify where the text in each column should end, you can use a column break.
2. On the Layout tab, in the Page Setup group, click the Columns button:

3. In the Columns dropdown list, select one of the options:
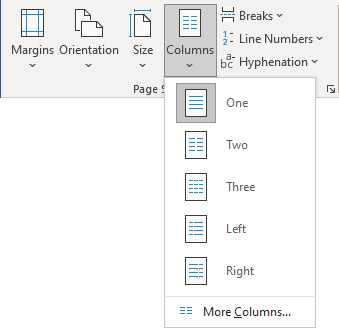
- One (used by default),
- Two, Three to create two or three columns of equal width,
- Left, Right to create two columns of unequal width,
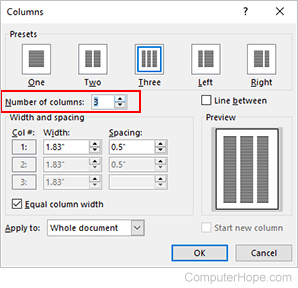
- More Columns… to specify more options in the Columns dialog box:
- In the Presets section, you can choose the same options as in the Columns dropdown list – One, Two, Three, Left, or Right.
- If you need more columns, type or select the number of columns you need in the Number of columns field. The maximum number of columns may vary depending on the font, font size, margins, etc. E.g., 13.
- The Line between checkbox inserts a vertical line between columns. This line clearly defines column borders, especially if you want to fit as much content on the page as possible (very handy for cheat sheets).
See more options below.
Format columns
I. It is recommended to justify the paragraphs in columns to give the page a clean and organized appearance. To justify the column text, select it and do one of the following:
- On the Home tab, in the Paragraph group, click the Justify button:
- Press Ctrl+J.
II. To change the width of columns or the space between them, do the following:
1. Click anywhere in the columnar text.
2. Do one of the following:
- On the Layout tab, in the Page Layout group, click the Columns button, then choose More Columns…
In the Columns dialog box, in the Width and spacing section:
In the Width box for any columns, enter or select a new width.
The Width measurements for the other columns change to match, and the width of all the columns changes.
See how the columns will be displayed in the Preview section.
- On the horizontal ruler, drag the margins to change the width of the columns:
III. To reduce white space on text lines, you can set up Word to hyphenate the text and break long words into syllables. See how to hyphenate automatically and manually for more details.
Remove columns
To remove column layout for the selected text or entire document, do the following:
1. Click anywhere in the columnar text.
2. On the Layout tab, in the Page Layout group, click the Columns button, then choose One.
Insert a column break
In the Word document, you can manually break columns. When you break a column, the text after the break moves to the top of the next column:

You can display column breaks as regular nonprintable symbols. Word displays them as .
To insert a column break, position the cursor at the beginning of the line you want to start in the new column, and then do any of the following:
- On the Layout tab, in the Page Setup group, click the Breaks button, and then click Column to insert a column break:
- Press Ctrl+Shift+Enter.
The column break is inserted, and the cursor moves to the beginning of the next column.
Remove a column break
To remove a column break, click at the left end of the break or select the break and press the Delete key.
Updated: 01/18/2023 by
Columns are a great organizational tool. In a document, they can divide a page to present specific content in an orderly fashion. Microsoft Word accommodates 1 to 13 columns on one page. The following sections show you how to create, add, and delete columns in Word documents.
Creating columns
- Open the Word document where you want to add columns.
- In the Ribbon, click the Layout tab.
- In the Page Setup section, click the down arrow under Columns, then select More Columns.
- For Number of columns, you can type in a number or use the up and down arrows to select a number. If the Equal column width option is checked, Word automatically sets the columns to be evenly spaced.
- Click OK to add the columns to the Word document.
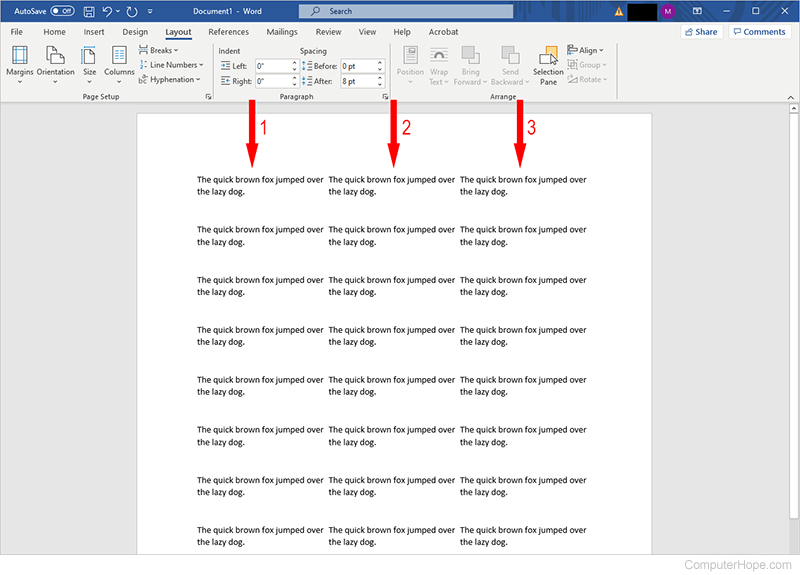
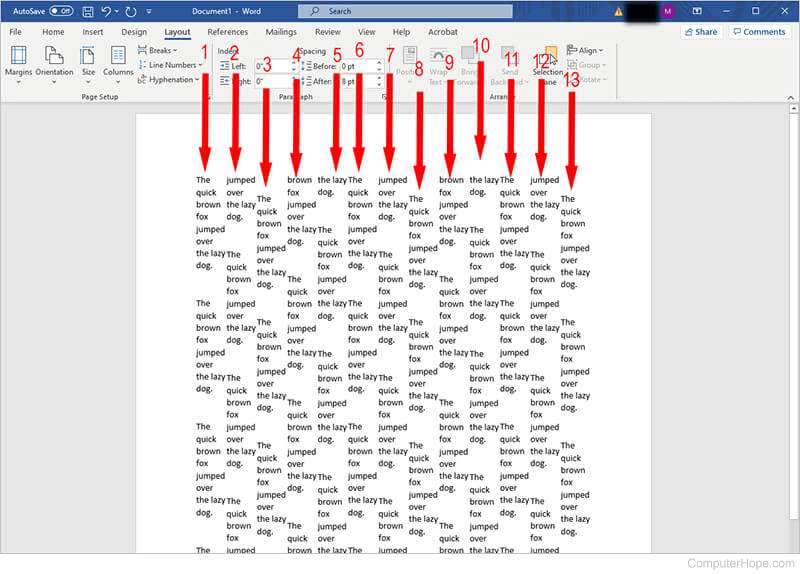
- In Image 1 below, you can see how the text «The quick brown fox jumped over the lazy dog» looks with three columns. In Image 2 below, you can see what the same text looks like with the maximum 13 columns.
Image 1
Image 2
Inserting column breaks
After creating a document with multiple columns, it may be necessary to enter column breaks into the text to move text to the next available column.
To insert a column break, move your cursor to where you want to insert the break and press Ctrl+Shift+Enter shortcut key. Alternatively, you can go to the Layout tab on the Ribbon, click Breaks, and then select Column.
Removing columns
If you need to delete columns in a Word document, follow the steps below.
- Open the Word document where you need to remove columns.
- In the Ribbon, click the Layout tab.
- In the Page Setup section, click the down arrow under Columns, then select More Columns.
- For Number of columns, you can type in a number or use the up and down arrows to select a number. The number entered or selected must be less than the current number of columns, if you want to remove columns.
- Click OK to remove the columns in the Word document.
Tip
If you don’t want the document to have any columns, click Layout, Columns, and select One.
I’ll admit it — I’m not a big fan of adding columns in Microsoft Word. Not that there’s anything wrong with columns, per se. Columns work fine (until they don’t). But in a legal office environment, I usually format blocks of information with tables because they’re a bit easier to control.
That said, I have seen lots of legal professionals insert multiple columns in Microsoft Word to format things like service lists in Certificates of Service. Hey, to each her [his] own.
So if you want to format text with columns in Microsoft Word documents, here’s what you need to know:
Inserting columns: the basic primer
Everything starts from the Layout tab (known as Page Layout in versions 2007-2010) on the Ribbon:
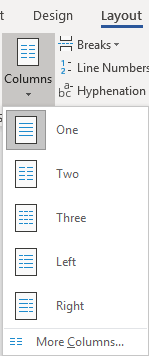
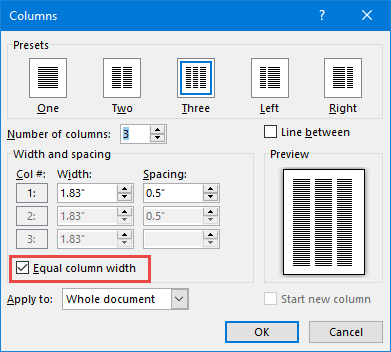
Click on More Columns, and you’re taken to a dialog box that allows you to set up your columns exactly the way you want them.
The default is one column — just a regular document. You can use one of the presets (the two-column layout is useful for the service list application I mentioned above). Or you can customize it within an inch of its life. Width? Space between columns 1 and 2, or 2 and 3, or …? How about a line between them (like a newsletter would have)? You decide!
(If you don’t want your columns to all be the same width, be sure to uncheck the “Equal column width” checkbox at the bottom of the dialog box. Then, you’ll be able to customize the width of each column separately.)
Navigating between columns
Once you’ve set up your columns, you come to the tricky part. This is part of the reason I usually opt for tables rather than columns. If you use tables, moving between the cells is easy — just use the Tab key. To insert a column, however, you need to know a few tricks.
Say you’re typing in the first column of your document and you want to end that column there and start typing in the second column. To do that, you have to insert a column break. You can insert a column break in one of two ways:
- Press CTRL-SHIFT-ENTER simultaneously; or
- Go to the Layout tab, click Breaks, and choose Column
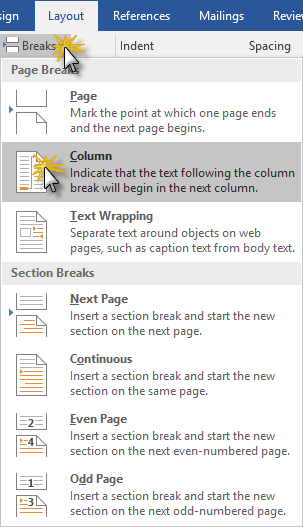
Personally, I’d go with Option 1 (assuming I remember the key combination in the heat of the moment).
Once you’ve inserted a column break, your cursor is in the next column, ready for you to type. When you insert a column break in your last column (the one farthest to the right), the cursor will go to the first column on the next page.
Viewing column boundaries
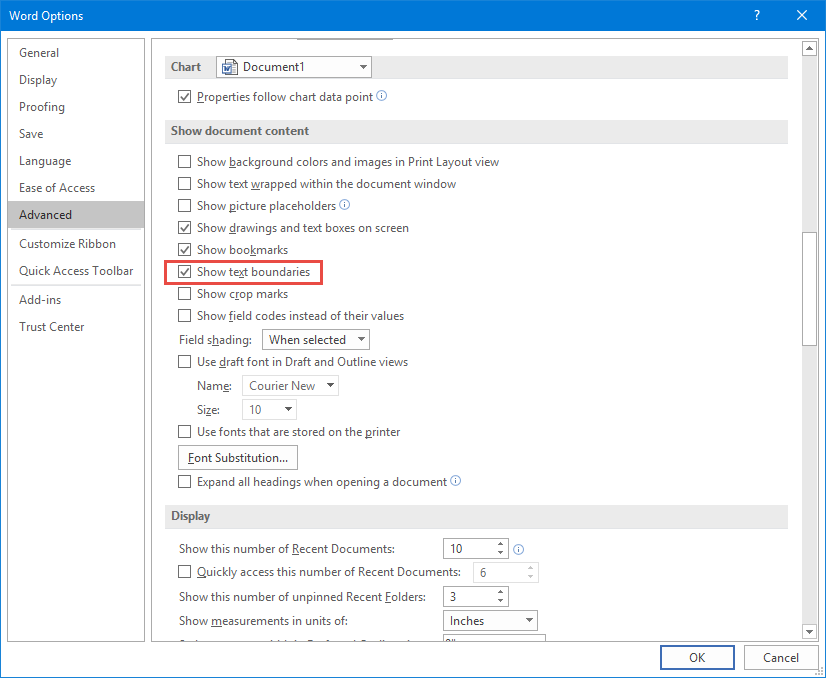
To me, it’s tough to work with columns (or tables, for that matter) if I can’t really see them. To turn on the column boundaries so you can see your columns laid out on the page, go to the File tab (or click the Office button in version 2007) and click Options, then go to Advanced and check the box next to Show text boundaries:
When columns are only part of your document
But what if only part of your document consists of multiple columns?
If you go back to the Columns dialog box (via Layout > Columns > More Columns), you’ll notice a drop-down at the bottom of the box:
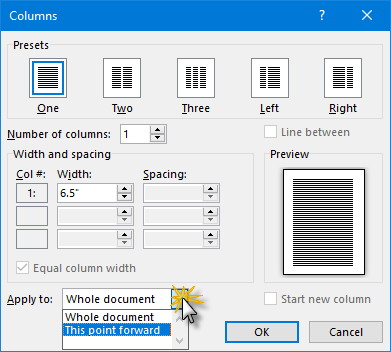
If you choose This Point Forward, that will allow you to insert columns at the point your cursor is sitting in. Once you’ve inserted your columnar data, then go back to the Format Columns dialog box and choose the One Column format (being careful to once again choose This Point Forward in that bottom drop-down), and your document will return to the single-column format without disturbing the multi-column insertion you’ve just worked so hard on.
But what if you want to insert a two- or three- (or more-) column block of text into the middle of a one-column, normal document?
You may want to use a slightly different procedure, depending on whether you’re creating a brand-new document or you’re inserting a multi-column layout into the middle of an existing single-column document. You’re using the same dialog box, but if you’re editing an existing document and placing a multi-column layout in the middle, you’ll need to take a couple of extra precautions to ensure you don’t inadvertently create a formatting nightmare.
Inserting multi-columns into a new document
Let’s say you’re typing along in a brand-new document and decide that the next bit of text needs to be in two (or more) columns. There’s no text after the point where your cursor is right now, so you can switch back to single-column format once you get done inserting the multi-column section.
If you go back to the Columns dialog box (via Layout > Columns > More Columns), you’ll notice a drop-down at the bottom of the box:

If you choose This Point Forward, that will allow you to insert columns at the point your cursor is sitting in. Once you’ve inserted your columnar data, then go back to the Format Columns dialog box and choose the One Column format (being careful to once again choose This Point Forward in that bottom drop-down), and your document will return to the single-column format without disturbing the multi-column insertion you’ve just worked so hard on.
Inserting columns into the middle of an existing document
If you’re editing an existing document and you want to insert a multi-column layout somewhere in the middle of text you’ve already got typed, the “this point forward” method may result in a temporary and fixable but still infuriating mess.
Here’s how to avoid it: Insert section breaks before and after the point at which you want to insert your columns:
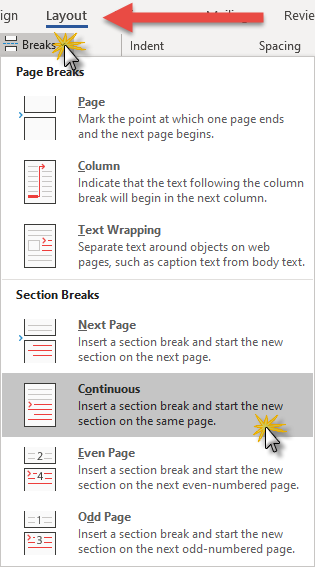
… then in Apply to:, choose This section instead:
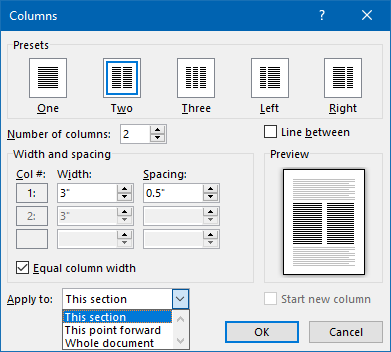
Here’s a video demonstration:
Video: Inserting a column into the middle of an existing document (without creating a mess)
How do you see yourself using columns in your documents?
Several times you have observed that some articles or text documents divided into columns on the same page which looks nice, and if you want to apply the same settings on your Microsoft Word 2007 or Word 2010 document then how you can do that?
So, here is the method to create columns in Word 2007 / 2010 document. Just continue reading below to know the complete process to create columns in Word.
How to create columns in Word 2010 or 2007
Step 1
Open an existing Word document or create a new document in Microsoft Word 2010 or 2007
Step 2
Just type your text in that file whatever you want. Now there are two options either you want to apply columns to whole document or to a specific portion of document.
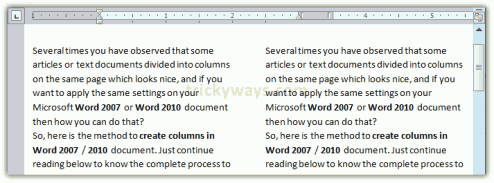
Create two columns whole Word document.
Click on “Page Layout” tab > “Columns” and select the number of columns according to your requirement
Output: 2 columns in word.
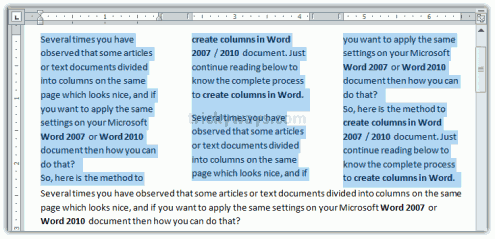
Create columns on one page or portion of text in word document
Select the text of one page or specific portion that you want to convert to columns and click on “Page Layout” tab > “Columns” and select the number of columns as show below in screen shot.
Output: 3 Columns of specific text of word document
See also:
how to adjust width, Spacing and put line between columns in Word


