
If you find yourself needing to expand or reduce Excel’s row widths and column heights, there are several ways to adjust them. The table below shows the minimum, maximum and default sizes for each based on a point scale.
|
Type |
Min |
Max |
Default |
|---|---|---|---|
|
Column |
0 (hidden) |
255 |
8.43 |
|
Row |
0 (hidden) |
409 |
15.00 |
Notes:
-
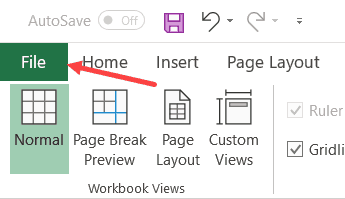
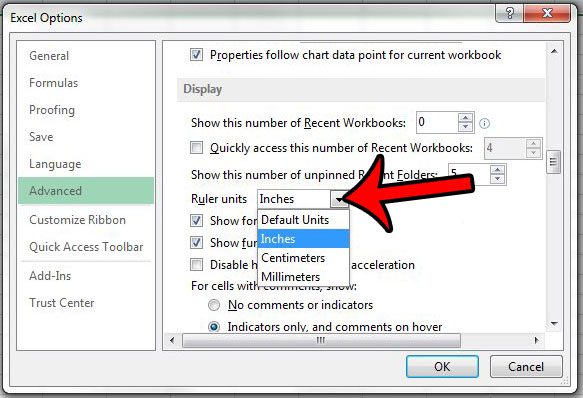
If you are working in Page Layout view (View tab, Workbook Views group, Page Layout button), you can specify a column width or row height in inches, centimeters and millimeters. The measurement unit is in inches by default. Go to File > Options > Advanced > Display > select an option from the Ruler Units list. If you switch to Normal view, then column widths and row heights will be displayed in points.
-
Individual rows and columns can only have one setting. For example, a single column can have a 25 point width, but it can’t be 25 points wide for one row, and 10 points for another.

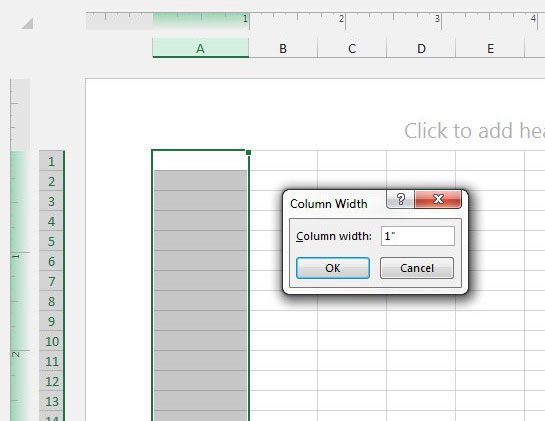
Set a column to a specific width
-
Select the column or columns that you want to change.
-
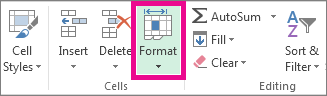
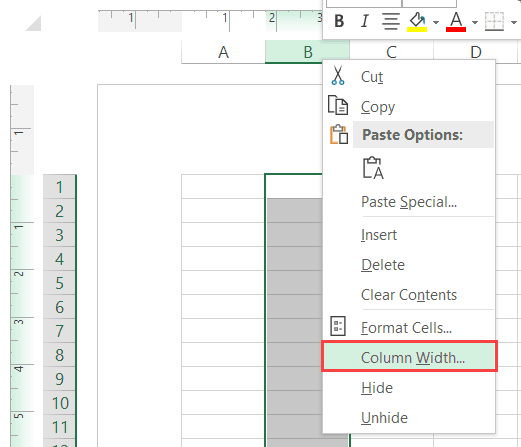
On the Home tab, in the Cells group, click Format.

-
Under Cell Size, click Column Width.
-
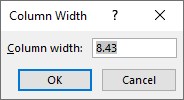
In the Column width box, type the value that you want.
-
Click OK.
Tip: To quickly set the width of a single column, right-click the selected column, click Column Width, type the value that you want, and then click OK.
-
Select the column or columns that you want to change.
-
On the Home tab, in the Cells group, click Format.
-
Under Cell Size, click AutoFit Column Width.
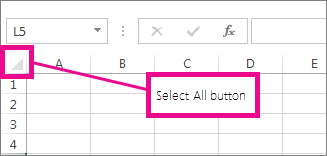
Note: To quickly autofit all columns on the worksheet, click the Select All button, and then double-click any boundary between two column headings.
-
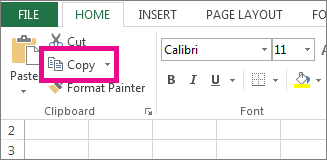
Select a cell in the column that has the width that you want to use.
-
Press Ctrl+C, or on the Home tab, in the Clipboard group, click Copy.
-
Right-click a cell in the target column, point to Paste Special, and then click the Keep Source Columns Widths
button.
 button.
The value for the default column width indicates the average number of characters of the standard font that fit in a cell. You can specify a different number for the default column width for a worksheet or workbook.
-
Do one of the following:
-
To change the default column width for a worksheet, click its sheet tab.
-
To change the default column width for the entire workbook, right-click a sheet tab, and then click Select All Sheets on the shortcut menu.
-
-
On the Home tab, in the Cells group, click Format.
-
Under Cell Size, click Default Width.
-
In the Standard column width box, type a new measurement, and then click OK.

Do one of the following:
-
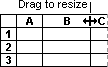
To change the width of one column, drag the boundary on the right side of the column heading until the column is the width that you want.
-
To change the width of multiple columns, select the columns that you want to change, and then drag a boundary to the right of a selected column heading.
-
To change the width of columns to fit the contents, select the column or columns that you want to change, and then double-click the boundary to the right of a selected column heading.
-
To change the width of all columns on the worksheet, click the Select All button, and then drag the boundary of any column heading.
-
Select the row or rows that you want to change.
-
On the Home tab, in the Cells group, click Format.
-
Under Cell Size, click Row Height.
-
In the Row height box, type the value that you want, and then click OK.
-
Select the row or rows that you want to change.
-
On the Home tab, in the Cells group, click Format.
-
Under Cell Size, click AutoFit Row Height.
Tip: To quickly autofit all rows on the worksheet, click the Select All button, and then double-click the boundary below one of the row headings.
Do one of the following:
-
To change the row height of one row, drag the boundary below the row heading until the row is the height that you want.
-
To change the row height of multiple rows, select the rows that you want to change, and then drag the boundary below one of the selected row headings.
-
To change the row height for all rows on the worksheet, click the Select All button, and then drag the boundary below any row heading.
-
To change the row height to fit the contents, double-click the boundary below the row heading.
Top of Page
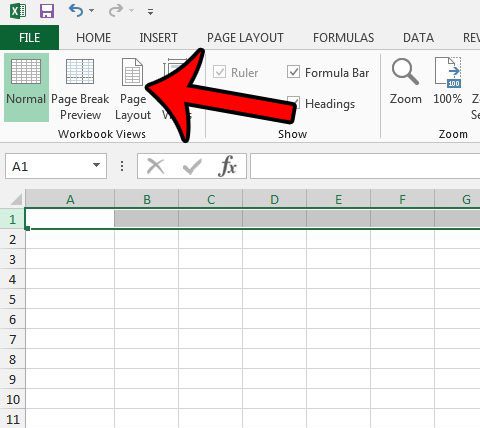
If you prefer to work with column widths and row heights in inches, you should work in Page Layout view (View tab, Workbook Views group, Page Layout button). In Page Layout view, you can specify a column width or row height in inches. In this view, inches are the measurement unit by default, but you can change the measurement unit to centimeters or millimeters.
-
In Excel 2007, click the Microsoft Office Button
> Excel Options> Advanced. -
In Excel 2010, go to File > Options > Advanced.
 > Excel Options> Advanced.
Set a column to a specific width
-
Select the column or columns that you want to change.
-
On the Home tab, in the Cells group, click Format.
-
Under Cell Size, click Column Width.
-
In the Column width box, type the value that you want.

-
Select the column or columns that you want to change.
-
On the Home tab, in the Cells group, click Format.
-
Under Cell Size, click AutoFit Column Width.
Tip To quickly autofit all columns on the worksheet, click the Select All button and then double-click any boundary between two column headings.

-
Select a cell in the column that has the width that you want to use.
-
On the Home tab, in the Clipboard group, click Copy, and then select the target column.
-
On the Home tab, in the Clipboard group, click the arrow below Paste, and then click Paste Special.
-
Under Paste, select Column widths.

The value for the default column width indicates the average number of characters of the standard font that fit in a cell. You can specify a different number for the default column width for a worksheet or workbook.
-
Do one of the following:
-
To change the default column width for a worksheet, click its sheet tab.
-
To change the default column width for the entire workbook, right-click a sheet tab, and then click Select All Sheets on the shortcut menu.
-
-
On the Home tab, in the Cells group, click Format.
-
Under Cell Size, click Default Width.
-
In the Default column width box, type a new measurement.

Tip If you want to define the default column width for all new workbooks and worksheets, you can create a workbook template or a worksheet template, and then base new workbooks or worksheets on those templates. For more information, see Save a workbook or worksheet as a template.
Do one of the following:
-
To change the width of one column, drag the boundary on the right side of the column heading until the column is the width that you want.
-
To change the width of multiple columns, select the columns that you want to change, and then drag a boundary to the right of a selected column heading.
-
To change the width of columns to fit the contents, select the column or columns that you want to change, and then double-click the boundary to the right of a selected column heading.
-
To change the width of all columns on the worksheet, click the Select All button, and then drag the boundary of any column heading.
-
Select the row or rows that you want to change.
-
On the Home tab, in the Cells group, click Format.
-
Under Cell Size, click Row Height.
-
In the Row height box, type the value that you want.
-
Select the row or rows that you want to change.
-
On the Home tab, in the Cells group, click Format.
-
Under Cell Size, click AutoFit Row Height.
Tip To quickly autofit all rows on the worksheet, click the Select All button and then double-click the boundary below one of the row headings.
Do one of the following:
-
To change the row height of one row, drag the boundary below the row heading until the row is the height that you want.
-
To change the row height of multiple rows, select the rows that you want to change, and then drag the boundary below one of the selected row headings.
-
To change the row height for all rows on the worksheet, click the Select All button, and then drag the boundary below any row heading.
-
To change the row height to fit the contents, double-click the boundary below the row heading.
Top of Page
See Also
Change the column width or row height (PC)
Change the column width or row height (Mac)
Change the column width or row height (web)
How to avoid broken formulas
Change the column width or row height in Excel
You can manually adjust the column width or row height or automatically resize columns and rows to fit the data.

Note: The boundary is the line between cells, columns, and rows. If a column is too narrow to display the data, you will see ### in the cell.
Resize rows
-
Select a row or a range of rows.
-
On the Home tab, select Format > Row Width (or Row Height).
-
Type the row width and select OK.
Resize columns
-
Select a column or a range of columns.
-
On the Home tab, select Format > Column Width (or Column Height).
-
Type the column width and select OK.
Automatically resize all columns and rows to fit the data
-
Select the Select All button
at the top of the worksheet, to select all columns and rows. -
Double-click a boundary. All columns or rows resize to fit the data.
 at the top of the worksheet, to select all columns and rows.
Need more help?
You can always ask an expert in the Excel Tech Community or get support in the Answers community.
See Also
Insert or delete cells, rows, and columns
Need more help?
The standard column width corresponds to the average number of digits which can be contained in a cell according to the font selected. Assuming that the font is the default (Arial 10) the default column width is 8.43 (64 pixels). This represents the number of zeros that can be displayed in the column.
Contents
- 1 What is the column width unit in Excel?
- 2 What is the width of a column?
- 3 How do I set column width in Excel?
- 4 What is the default width of column?
- 5 Why is Excel height and width different?
- 6 Where is the column width dialog box in Excel?
- 7 What is the size of column?
- 8 What is fixed width in Excel?
- 9 How do you adjust column widths to show labels?
- 10 How do you find the width in Excel?
- 11 How do you unlock column width in Excel?
- 12 Why are column width and row height different?
- 13 How do I size all columns in Excel?
- 14 How do I increase bar width in Excel?
- 15 How do I change column width to CM in Excel?
- 16 How do I make 1 inch in Excel?
- 17 How do I choose a column size?
- 18 What is the thickness of column?
- 19 What is the maximum height of column?
- 20 What is fixed width?
The column width is measured in characters, i.e. the default column width fits 8.43 characters. Not bold, italic, big or small characters: this measure is based on the default font used in the workbook (press CTRL+1 to open the Format Cells dialog then click the Font tab).
What is the width of a column?
The pixel width is stored internally in Excel for positioning data on the screen. The number that you see in the Column Width dialog box is the pixel width retranslated into character units (based on the Normal font) for display. A column width of 8.43 means that 8.43 of the default font’s characters fit into a cell.
How do I set column width in Excel?
Resize columns
- Select a column or a range of columns.
- On the Home tab, in the Cells group, select Format > Column Width.
- Type the column width and select OK.
What is the default width of column?
8.43
The default size of an Excel column is 8.43, which correlates to 64 pixels.
Why is Excel height and width different?
You may wonder why Excel frequently overrides your choice of column width, such as by changing 8.5 to 8.43. Microsoft looks at the number of pixels that correspond to your choice of column width—and rounds your choice so that it converts into a whole number of pixels. Row height is always measured in points, however.
Where is the column width dialog box in Excel?
Click the Format command on the Home tab. The format drop-down menu appears. Select Column Width. The Column Width dialog box appears.
What is the size of column?
Standard size of an RCC column should not be less than 9”x 9” (225mm x 225mm) with 4 bars of 12mm Fe500 Steel with m20 grade of concrete and stirrups of [email protected]″C/C. I will recommended 9″ × 12″ (230mm × 300mm) standard size of RCC column for ground floor residential building.
What is fixed width in Excel?
Fixed-width text describes text where each group is a set number of characters. You can draw a line down all the records to separate all the groups, as shown in Figure 3.9. If your text doesn’t look like it’s fixed width, try changing the font to a fixed-width font, such as Courier.
How do you adjust column widths to show labels?
To quickly set the column width to display everything, double-click the column separator. To shrink the contents of a cell so that they fit in the current column width: In Excel 2016 for Mac, on the Home tab, click the Format button, click Format Cells, and then select Shrink to Fit.
How do you find the width in Excel?
Select the entire column and right click and you can see a option called Column width . Click on Column width and you can see the width of a column in a new window.
How do you unlock column width in Excel?
Select and right click the cells you need to unlock, then click Format Cells. In the Format Cells dialog box, uncheck the Locked box on the Protection tab, then click the OK button.
Why are column width and row height different?
The units of measurement are different for rows versus columns, by the way. Column width is measured in characters of the default font size. Row height is measured in points. A point is 1/72 of an inch.
How do I size all columns in Excel?
Select one or more columns that you wish to resize. To select all columns, press Ctrl + A or click the Select All button. On the Home tab, in the Cells group, click Format > Column Width. In the Column width box, type the desired number, and click OK.
How do I increase bar width in Excel?
Click on any bar in the Bar Chart and right click on it, then select Format Data Series from the right-clicking menu. See screenshot: 2. In the popping up Format Data Series pane, move the Zoom bar of the Gap Width to the left side until the bar width meets your needs under the Series Options section.
How do I change column width to CM in Excel?
Set the column width to centimeters
Click View tab, in Workbook Views group, click Page Layout button. To change the column width, do one of the following: Right click the column header, choose Column Width, in the Column width box, type the value that you want.
How do I make 1 inch in Excel?
Below are the steps to do this:
- Click the View tab.
- In the Workbook Views group, click on the ‘Page Layout’ option.
- Right-Click on the column header (on the column for which you want to change the width and set in inches)
- Click on Column Width option.
- Specify the width in inches.
- Click OK.
How do I choose a column size?
Column size depends on various factors like number of floors, span between two column, is it short or slender, For 5m span 1 storey/single floor/ground floor/G+0 residential building, it could be 230×230, for G+1 it could be 230x 300mm, for G+2 it could be 300x 300mm,for G+3 it could be 300x 380mm and for G+4 it could
What is the thickness of column?
6. Minimum Thickness of Other Concrete Members
| Structural Element | Thickness, mm |
|---|---|
| Chajja | 100mm |
| Cable / pipe trench walls and base slab | 125mm |
| Precast trench cover | 125mm |
| Insert plate | 12mm |
What is the maximum height of column?
The maximum height of a column is 24 m. Columns height from 20 m to 24 m can be manufactured as one piece (uncut), and composite. Fire resistance of precast concrete columns – R150 (according to the DBN V.
What is fixed width?
Fixed-width is a file format where data is arranged in columns, but instead of those columns being delimited by a certain character (as they are in CSV) every row is the exact same length. The application reading the file must know how long each column is.
I was recently asked if there is a wat to set column width in inches in Excel. This was for a template this person was creating where they wanted the Excel cells to of a specific size (in inches)
This may not be a regular day-to-day problem, but it’s something that can definitely make your head spin.
Now before you go into doing crazy calculations, let me tell you that there is a simple way to quickly set the row and column width to inches
(or centimeters).
It’s just hidden away and you need to know the exact steps to do this (which I will give in this tutorial)
By default, Excel has a default row height and column width in points (which is not in inches or centimeters).
Below are the steps to make sure Excel uses inches as the unit to measure column width and row height:
- Click the File tab

- Click on Options

- In the Excel Options dialog box, click on Advanced in the left pane

- Scroll down and come to the Display section.

- Click on the ‘Ruler Units’ drop-down and select ‘Inches’

- Click OK


The above steps have set inches as a way for you to change and measure row height and column width.
But you can’t just go now and change the row height or column width.
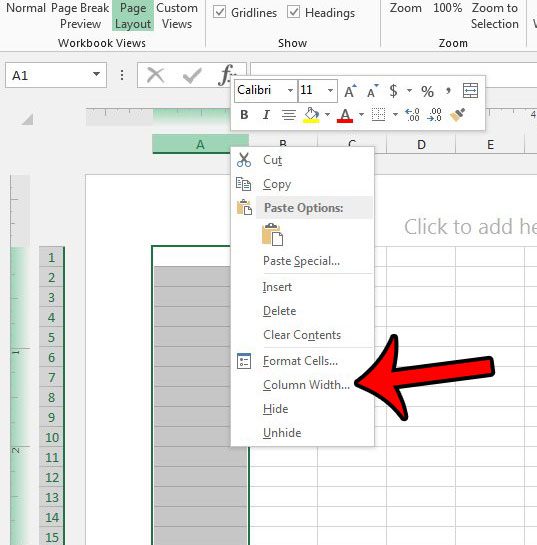
If you right-click on any column header and then click on the Column width option, you will see that it still uses the default unit to show column width (and the same happens with row height).
Then how can you set column width in Inches?
Below are the steps to do this:
- Click the View tab

- In the Workbook Views group, click on the ‘Page Layout’ option.

- Right-Click on the column header (on the column for which you want to change the width and set in inches)
- Click on Column Width option

- Specify the width in inches

- Click OK.


The above steps would set the column width in inches. You can follow the same steps to set the row height in inches as well.
Once done, click on the View tab and then click on Normal to get the regular worksheet view.
In case you want to set the column width in centimeters, you can do that as well. Just change the display setting to centimeter (in the Excel Options dialog box) and then use the above steps.
Note: While Excel tries to make the column width you specified, in some cases, you may find that the width is not exactly what you specified, but still very close to it. For example, if you specify 4 centimeters, it may give you 3.98 centimeters. This is something you can’t get around.
You may also like the following Excel tutorials:
- How to Remove Dashes (-) in Excel?
- How to Compare Two Columns in Excel (using VLOOKUP & IF)
- How to Hide Columns Based on Cell Value in Excel
- How to Paste in a Filtered Column Skipping the Hidden Cells
- How to Split One Column into Multiple Columns in Excel
- What does Pound/Hash Symbol (####) Mean in Excel?
- How to Show Ruler in Excel? (Ruler Grayed Out)
- How to Copy Row Height in Excel
- Autofit Column Width in Excel (Shortcut)
Adjusting the column width is one of the important activities while working with Excel. It is one of the important activities performed by a user while preparing the reports, creating dashboards, developing summary tables, and using worksheets to do calculations on data. Microsoft Excel facilitates a set of options for changing the width of the column. However, columns in Excel worksheets cannot automatically adjust the width based on the data.
- A column in Excel has a default width of 8.43 characters, less than one inch. Excel presents different ways, including dragging through a mouse, using the shortcut menus on the ribbon, and double-clicking on the right side edge of the column heading.
- The present article discusses the various effective ways to adjust the width of columns manually by covering the following topics.
Table of contents
- Column Width in Excel
- Explanation
- How to Adjust Column Width in Excel?
- Examples
- Example#1 – Adjusting the Excel Column Width by Using the Mouse
- Example#2 – Setting the Width of the Column to a Certain Number
- Example#3 – Use of Autofit to Adjust the Column Width in Excel
- Example#4 – Setting the Default Width for Columns in Excel
- Things to Remember
- Recommended Articles
Explanation
- In an Excel worksheet, a user can set the width of a column in the range from 0 to 255, and one character width is equal to one unit. For a new Excel sheet, the column width equals 8.43 characters, equal 64 pixels. It will hide a column if its width is equal to zero.
- When a user inputs data into the columns of the excel sheet, they do not automatically adjust the size of the column. If the value presented in a cell is big to fit with the default width of the column, it overlaps with the next cells by crossing the border of the cell.
- The text string cell overlaps the cell border, whereas the numeric string displays in #####. Therefore, we need to apply various commands to adjust the column width to avoid these problems.
In Excel, a different type of command is available to format the width of a column. These include column width, AutoFit column width, and default width.
- Column width: This command sets the width of the column to a certain number of characters.
- Autofit column width: This command helps fit the content to the widest column width.
- Default width: Adjusts column width to the default widthTo autofit the column width to the entire column in Excel, select the entire column and drag the column according to the data. read more.
How to Adjust Column Width in Excel?
- Presenting the data in a readable format adjusting the column width.
- Matching the width of a column in excel to another column.
- Unhide data that is not visible to the readers.
- Setting the specific width to a column to fit with the content produced.
- Application of proper formatting to the cells and their data.
- Precisely controlling the column width by changing the different fonts and their size.
Examples
Below are examples of Excel column width.
You can download this Column Width Excel Template here – Column Width Excel Template
Example#1 – Adjusting the Excel Column Width by Using the Mouse
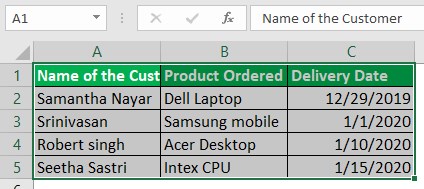
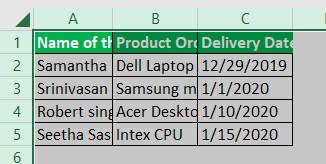
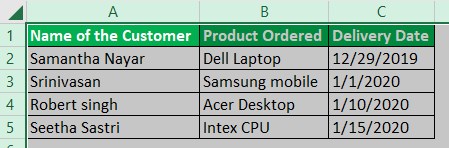
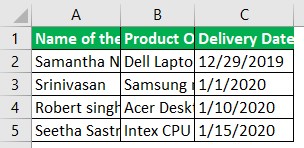
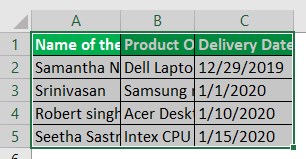
This example illustrates the adjustment of the column width for the following data.
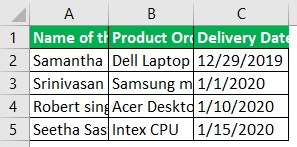
As shown in the figure, data in two columns is not readable. Therefore, we must follow the following steps.
Step1: To adjust the width of only one column, we must drag the border of the column to the right side until the required column width is reached.
Step2: Next, drag the column B width until the desired width is reached.
Step3: Next, we need to drag the column C width until the desired width is reached.
We can adjust the width of all columns by selecting the three columns.
Step4: After that, we must select three columns by pressing “CTRL+A” or clicking the ‘All Button’ and drag on any column header shown in the screenshot.
Consequently, it may show the result as follows:
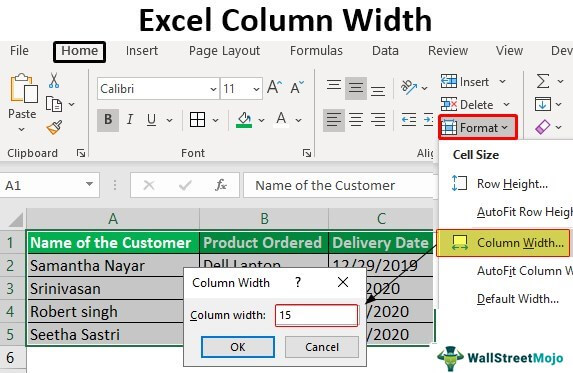
Example#2 – Setting the Width of the Column to a Certain Number
The following data is considered for this example.
We must follow the steps to set the width of a certain number of columns in Excel:
- We must first select the single or more columns to adjust the width.

- Then, go to the “Format” option under the “Home” tab and click on “Format.”

- Next, select the “Column width” from the list of options. It opens the “Column width” dialog box.

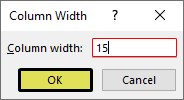
- Enter the desired value in the column width box (for example, 15) and click “OK.”
- The result is obtained as follows:

This method results in the same width for the columns selected.
Example#3 – Use of AutoFit to Adjust the Column Width in Excel
This example illustrates the procedure to AutoFit the width of all columns to contents. The following data is considered for this example.
Step1: To AutoFit the single column, first, we need to double-click on the right border of the column.
Step2: To apply the AutoFit to two columns, double-click on the boundary presented by selecting the two columns.
Step3: To apply the AutoFit to all columns, select the columns by pressing “CTRL+A” or selecting the all button.
Step4: Go to the “Format” option under the “Home” tab and click on “Format.”

Step5: Select the “AutoFit Column Width” from a list of options as shown in the screenshot.
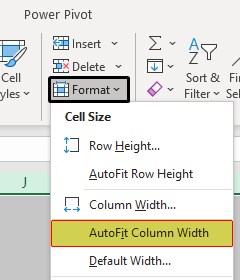
It AutoFits the width of all columns, as shown in the screenshot.
Example#4 – Setting the Default Width for Columns in Excel
This example illustrates how to change the default column width for a worksheet or complete worksheets in a workbook. The following data is considered for this example.
Step1: First, we must select the single or more worksheets to adjust the default width. For this example, we are considering only one worksheet.
Step2: Go to the “Format” option under the “Home” tab and click on “Format.”
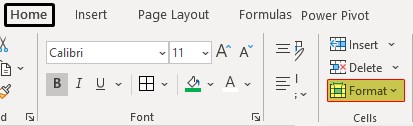
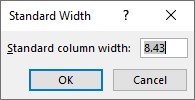
Step3: We need to select the “Default Width” from a list of options, as shown in the screenshot.

It opens the “Standard column width” dialog box.
Step4: After that, we must enter the desired width into the “Standard column width” box as 20.
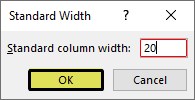
Then, the result is obtained as follows:
Things to Remember
- “AutoFit” of column width does not affect width if the width of the column is sufficient for the content.
- When a user wants to modify the default width of an Excel file, save the empty workbook as a template in Excel.
Recommended Articles
This article is a guide to Excel Column Width. Here, we learn how to adjust the column width in Excel by using the mouse and AutoFit to adjust the column width, along with examples and a downloadable Excel template. You may learn more about Excel from the following articles: –
- Column Total in Excel
- How to Add Columns in Excel?
- Move Columns in Excel
- How to Track Changes in Excel?

By default, when you create a new workbook in Excel, the row height and column width is always the same for all cells. However, you can easily change the height and width for one or more rows and columns.
For new Excel workbooks, the default row height for all the rows is 15, with the default font of Calibri and default font size of 11 points. The default column width for all the columns is 8.38. The default row height for each row depends on the largest font and font size chosen in any of the cells in that row (you can assign different fonts and font sizes for different cells). However, you can choose a specific height for any of the rows as well as a specific column width for any of the columns. The height can be different for different rows and the width different for different columns.
If you want to adjust one row, you can move the cursor over the bottom border of the row heading until it turns into a bar with a double arrow. Then, click on the border and drag it up or down to change the height of the row above the border. As you drag the cursor, the changing height displays in a popup.

You can do the same thing to change the width of a column: drag the double-arrow cursor to the left or right on the right border of the column. The width of the column to the left of the border changes width. The width of other columns are not affected.
RELATED: How to Show and Hide Row and Column Headers in Excel
You can be more exact when specifying the height of one or more rows by entering a specific number for the height. To do this, move your mouse over a row heading until it turns into a right arrow. Then, click on the row heading to select the entire row. If you don’t see the row headings, they might be hidden.
To select more than one row, click on the first row heading you want to select and drag up or down to select contiguous rows. If the rows you want to select are not contiguous, click the first row heading and then press Ctrl and click on the headings for the other rows you want to select, just like you do to select multiple files in File (or Windows) Explorer.
Either right-click on any selected row or press Shift+F10 on your keyboard. Select “Row Height” from the popup menu.
Enter a new value for the row height for the selected rows on the Row Height dialog box and click “OK”.
NOTE: You should note what the default, or original, values for row height and column width are before changing them, in case you want to revert back to those values.
You can specify an exact width for one or more columns the same way. Select the columns using the column headings, just like you did for the rows, but drag left or right to select multiple contiguous rows. Then, press Shift+F10 and select “Column Width” from the popup menu.
Enter an exact width for the selected columns on the Column Width dialog box and click “OK”.
Here’s what our worksheet looks like with the height of the first three rows and the width of the first three columns changed.
You can change the row height back to the default height, but it many not necessarily be the standard default height. The current default height will be one that fits the largest font and font size used in that row. In other words, the row height of the selected row will be changed to automatically fit the contents of that row.
To automatically fit the row height, select the rows you want to resize to their default height, make sure the Home tab is active, click “Format” in the Cells section, and then select “AutoFit Row Height” from the Cell Size drop-down menu.
To automatically fit one row, you can move the mouse over the bottom border of the desired row heading until it turns into a bar with a double (up and down) arrow, just like when you dragged the border to change the row height. This time, double-click on the border. The row height changes to fit the largest font and font size used in that row.
There is also an option to autofit the width of selected columns, but it works slightly differently. The AutoFit Row Height options automatically changes the row height to fit the largest font and font size whether or not there is any content in any cells in that row.
When you select one or more columns and then select “AutoFit Column Width” from the “Cell Size” menu in the Cells section of the Home tab, a selected column will only change size if there is content in any cell in that column. Otherwise, if all the cells in the column are empty, the size of that column will not be affected.
You can also automatically change the width of a column to fit the widest contents in that column by moving the mouse over the border on the desired column heading until it turns into a bar with an double (left and right) arrow, just like when you dragged the border to change the column width. This time, double-click on the border. The column width changes to fit the widest cell contents in that column. This also only works on columns that are not completely empty.
Because the default row height is affected by the font and font size assigned to the cells in each row, you cannot specify a value for the default row height. However, the default column width for all the columns in the current worksheet can be changed. To specify a different column width for all the columns in the current worksheet, make sure the Home tab is active, click “Format” in the Cells section, and then select “Default Width” from the Cell Size drop-down menu.
Enter a value for the Standard column width on the Standard width dialog box and click “OK”. The width of all the columns on the current worksheet change to the specified width, no matter how wide the contents are in any of the cells.
RELATED: How to Hide Cells, Rows, and Columns in Excel
You can also convert rows into columns and columns into rows, delete blank rows and columns, hide rows and columns, freeze rows and columns, and print the row and column headings in Excel.
READ NEXT
- › How to Shrink Text to Fit a Cell in Microsoft Excel
- › How to Insert a Picture in Microsoft Excel
- › How to Use the IMAGE Function in Microsoft Excel
- › How to Shrink or Expand Cells to Fit Text in Microsoft Excel
- › How to Resize All Columns and Rows in Microsoft Excel
- › How to AutoFit in Microsoft Excel
- › How to Set Row Height and Column Width in Excel Using the Keyboard
- › Google Chrome Is Getting Faster
This post will guide you how to set cell sizes in cm by default. How do I set row height in cm in Excel. How to set column width in cm in Excel. How do I set column width or row height to inches or millimeters in Excel 2013/2016.
If you want to change the row height or column width to centimeters by default. you will need to change the default unit of measurement from inches to centimeters:
Step1: click FILE tab, click Options menu from the popup menu list. And the Excel Options window will open.
Step2: click Advanced tab in the left section of Excel Options window, move to the Display section in the right of window.
Step3: set the Rule units as Centimeters under Display section. Click Ok button to confirm the setting.
Step4: go to VIEW tab, click Page Layout command under Workbook Views group.
Step5: select one column or row and right click on it, select Column Width from the popup menu list. The Column Width dialog will open.
The Column width has been changed to centimeters in your current workbook.
The cell sizes will now be displayed and measured in centimeters.
2. Set Cell Size in Inches or Millimeters
If you want to set the Column width or Row Height to inches or millimeters, just following the above steps, and set Rule units to the Inches or Millimeters value under Display section.
3. Video: Set Cell Size in Cm (centimeters)
This video provides step-by-step instructions on how to set cell sizes in centimeters by default in Excel.
If you’ve ever tried to adjust the width of your columns for printing then you have probably found it to be a little frustrating. This is particularly noticeable when you need things to be a precise size.
Luckily there is a way for you to learn how to set Excel column width in inches, which can make things much easier if you need specific physical dimensions for your data columns.
How to Do Cell Sizes in Inches in Excel 2013
- Open your spreadsheet.
- Click the View tab.
- Select the Page Layout button.
- Select an entire column.
- Right-click it and choose Column Width.
- Enter the desired width in inches, then click OK.
Our guide continues below with additional information on how to set Excel column width in inches, including pictures of these steps.
There are a couple different ways to change the size of a cell in Microsoft Excel, but the most common methods will require you to set your column width or row height using a unit of measure call that can be difficult to evaluate.
Microsoft Word has similar tools for when you would like to switch between inches and centimeters for your margins.
This unit of measure in Excel is for the the number of characters that will be displayed in the cell. This may not be very helpful, however, if you need to set specific cell sizes in your workbook. Fortunately you can make a quick adjustment that will allow you to set your cell sizes in inches instead of the default unit that is used in Excel’s Normal view.
Our guide below will show you the steps to take so that Excel 2013 will let you enter values in inches instead of characters so that you can more easily set your cell sizes with a unit of measurement that is more familiar.
Our autofit all columns Excel tutorial gives you a fast alternative to sizing columns when you just want them to be as wide as your data.
Setting Column Width and Row Height in Inches in Excel 2013 (Guide with Pictures)
The steps in this article will assume that your Excel version is currently using the local unit of measurement that is preferred in your country.
If not, then you can change the unit of measurement in Excel 2013 by clicking the File tab at the top-left of the window, clicking the Options button in the left column, Clicking the Advanced tab, then scrolling down and changing the Ruler Units setting in the Display section to your preferred unit of measurement.
Once the unit of measurement is correct, then you can follow these steps below to learn how to set cell sizes in inches instead of the default “characters” setting that it uses otherwise.
Step 1: Open your workbook in Excel 2013.
Step 2: Click the View tab at the top of the window.

Step 3: Click the Page Layout button in the Workbook Views section of the ribbon.
Step 4: Click the column letter or row number that you wish to set in inches, then click either Column Width or Row Height.
Step 5: Enter the inch value that you would like to use for the column width or row height, then click the OK button.
Now that you know how to make Excel column width in inches instead of their default option you will be able to more easily size your data for when you need to print it.
If your Excel worksheet is not printing well, then you will probably need to change some settings. This article – https://www.solveyourtech.com/three-ways-to-fit-to-one-page-in-excel-2013/ – will show you three different ways that you can quickly adjust your worksheet to print the entire document on one page.
Additional Sources

Matthew Burleigh has been writing tech tutorials since 2008. His writing has appeared on dozens of different websites and been read over 50 million times.
After receiving his Bachelor’s and Master’s degrees in Computer Science he spent several years working in IT management for small businesses. However, he now works full time writing content online and creating websites.
His main writing topics include iPhones, Microsoft Office, Google Apps, Android, and Photoshop, but he has also written about many other tech topics as well.
Read his full bio here.
Download PC Repair Tool to quickly find & fix Windows errors automatically
The height of rows and the width of columns in Excel are usually automatic, but you can change the row’s height and column width manually. The row height in spreadsheets increases and decreases according to the data’s size entered into the rows; Excel will automatically increase and decrease the rows. Setting the rows’ height is used for specific reasons, such as a cell with an orientation text.
In this tutorial, we will explain how to:
- Change the height of a row.
- Change the width of a column.
What are Rows and Columns in Excel?
- Rows: On the excel Spreadsheet, rows run horizontally. The rows are identified by row numbers which run vertically on the left side of the spreadsheet.
- Columns: On the Excel spreadsheet, columns run vertically and are identified by alphabetical column headers that run horizontally on the spreadsheet’s top.
1] Change the Height of a row
There are two options to change the height of a row.
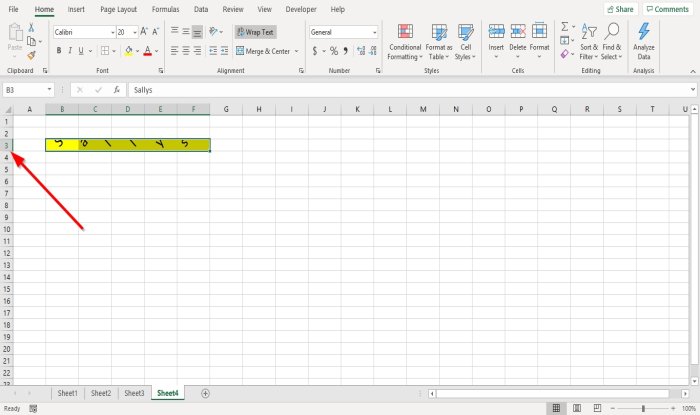
Option one is to go to where row number three is, place the cursor on the bottom border of the number three-row, hold and drag the cursor down.
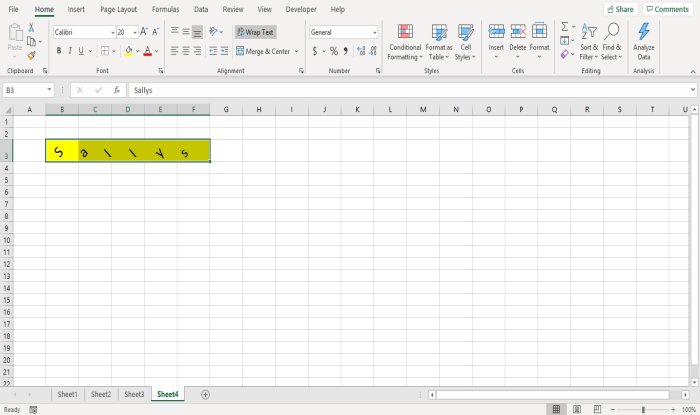
You will see the result.
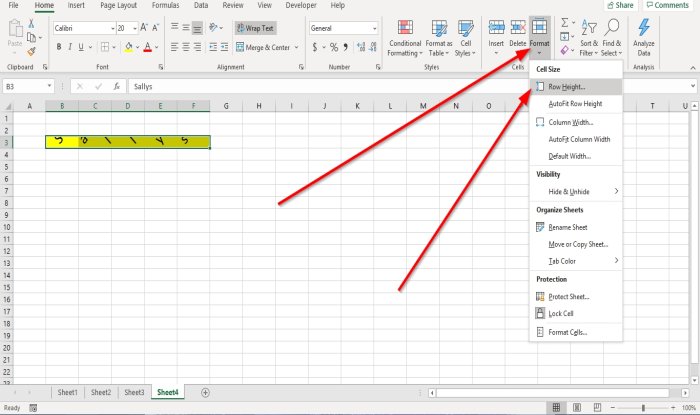
Option two is to click row three.
Then go to the Home tab in the Cells group and click Format.
In the drop-down list, select Row Height

A Row Height dialog box will appear.
Inside the dialog box, place the number of height you want the row to be, then click OK.
2] Change the Width of a column
There are two methods to change the width of the column.
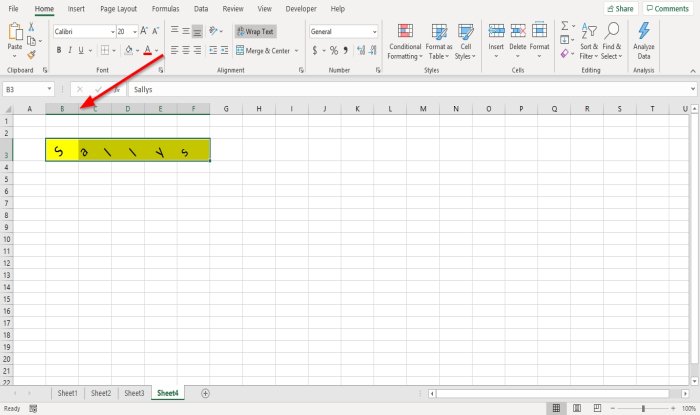
Method one is to go to the right border of column B.
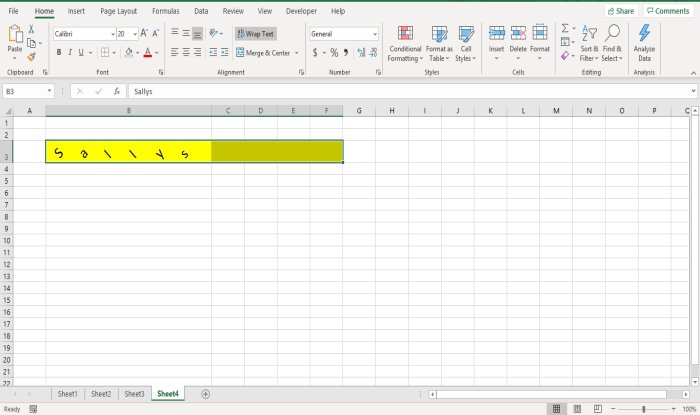
Drag the right border of column B, and you will notice that the column width gets wider.

Method two is to click column B.
Then go to the Home tab in the Cells group and click Format.
In the drop-down list, select Column Width.
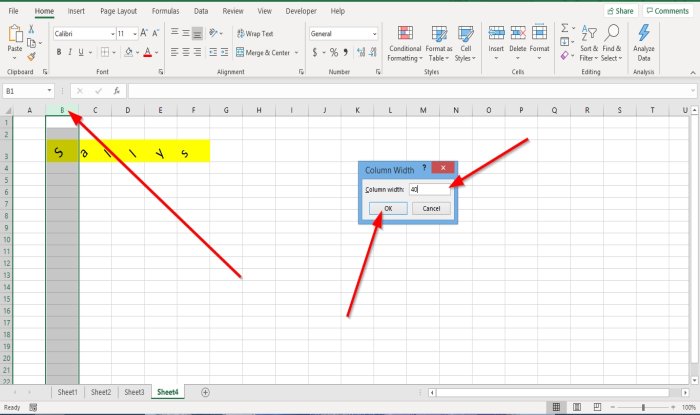
A Column Width dialog box will appear; enter the width number you want the column to be and click OK.
I hope this helps; if you have questions, please comment below.
Read next: How to add or remove Borders to Cells in Microsoft Excel.

Shantel has studied Data Operations, Records Management, and Computer Information Systems. She is quite proficient in using Office software. Her goal is to become a Database Administrator or a System Administrator.