
Lesson 12: Working with Columns
/en/word2010/adding-breaks/content/
Introduction
Columns are used in many types of documents, but they are most commonly used in newspapers, magazines, academic journals, and newsletters. In this lesson, you will learn how to insert columns into a document and create column breaks.
Inserting columns
Columns and column breaks can improve your document’s organization and increase its readability. They also allow you to utilize all of the available space on the page.
Optional: You can download this example for extra practice.
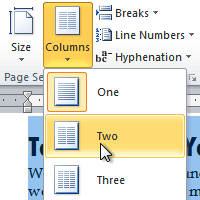
To add columns to a document:
- Select the text you want to format.
- Click the Page Layout tab.
- Click the Columns command. A drop-down menu will appear.
 Adding columns
 - Select the number of columns you want to insert. The text will then format into columns.
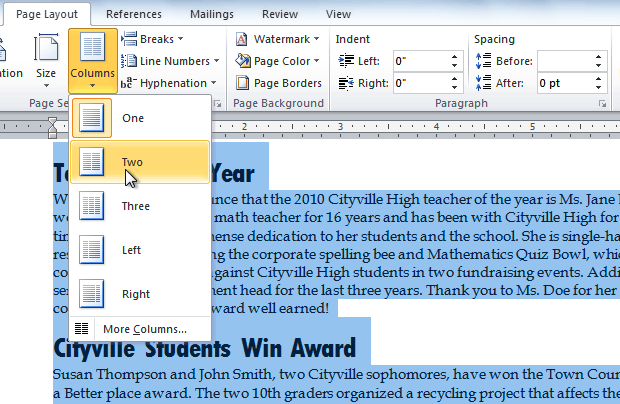
If you want to remove the columns, click the Columns command and select One for the number of columns.
Adding column breaks
Once you’ve created columns, the text will automatically flow from one column to the next. Sometimes, though, you might want to control exactly where each column begins. You can do this by creating column breaks.
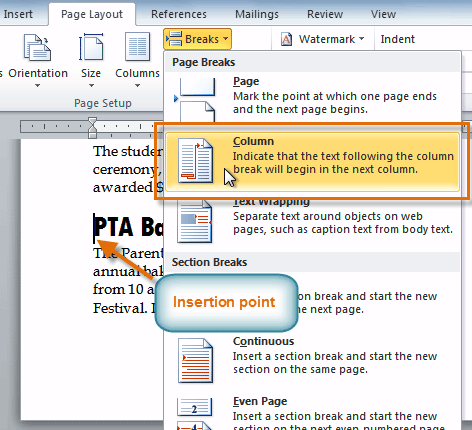
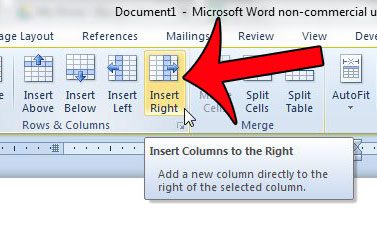
To add column breaks:
- Place the insertion point where you want to add the break.
- Click the Page Layout tab.
- Click the Breaks command in the Page Setup group. A drop-down menu will appear.
- Select Column from the list of break types.
 Adding a column break
 - The text will shift to reflect the column break.
Columns after adding a column break

Challenge!
- Open an existing Word document. If you want, you can use this example.
- Select the text you want to format into columns.
- Format the selected text into two columns.
- Add a column break.
/en/word2010/working-with-hyperlinks/content/
Word for Microsoft 365 Word 2021 Word 2019 Word 2016 Word 2013 Word 2010 Word 2007 More…Less
In this article
-
Add a cell
-
Add a row above or below
-
Add a column to the left or right
-
About the Table Tools contextual tabs
Add a cell
-
Click in a cell that is to the right of or above where you want to insert a cell.
-
Under Table Tools, click the Layout tab.
-
Click the arrow at the bottom, right-hand corner of the Rows & Columns section.
-
Click one of the following options.
Click
To
Shift cells right
Insert a cell and move all other cells in that row to the right.
Note: Word does not insert a new column. This may result in a row that has more cells than the other rows.
Shift cells down
Insert a cell and move the existing cells down one row. A new row is added at the bottom of the table.
Insert entire row
Insert a row above the cell that you clicked in.
Insert entire column
Insert a column to the left of the cell that you clicked in.
Top of Page
Add a row above or below
-
Click in a cell above or below where you want to add a row.
-
Under Table Tools, on the Layout tab, do one of the following:
-
To add a row above the cell, click Insert Above in the Rows and Columns group.
-
To add a row below the cell, click Insert Below in the Rows and Columns group.
-
Tip: To insert more than one row (or column) at the same time, select as many rows or columns as you want to add before you click the insert control. For example, to insert two rows above a row, first select two rows in your table and then click Insert Above.
Top of Page
Add a column to the left or right
-
Click in a cell to the left or right of where you want to add a column.
-
Under Table Tools, on the Layout tab, do one of the following:
-
To add a column to the left of the cell, click Insert Left in the Rows and Columns group.
-
To add a column to the right of the cell, click Insert Right in the Rows and Columns group.
-
Top of Page
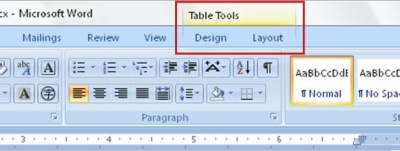
About the Table Tools contextual tabs
You will need to know where the Design and LayoutTable Tools contextual tabs are when working on the design and structural layout of a table. The Design and Layout tabs are only visible after you have clicked inside of a table, and appear at the top of the screen on the ribbon.
Top of Page
See Also
Delete a row, column, or cell from a table
Add columns and rows to a table
Keyboard shortcuts for Microsoft Word on Windows
Need more help?
Want more options?
Explore subscription benefits, browse training courses, learn how to secure your device, and more.
Communities help you ask and answer questions, give feedback, and hear from experts with rich knowledge.
Documents that we create in applications like Google Docs or Microsoft Word are rarely perfect in the first draft. Most documents need a lot of editing or revisions before they are acceptable. This applies to more than just the content that you type in paragraphs. It can go for other documents objects as well, such as images or tables
Tables are an effective way to display certain types of data, and Microsoft Word 2010 makes it easy to create and edit tables. If you find after creating your table that it doesn’t have enough room for all of the information that you want to include, then you may be looking for a way to add additional cells to the table.
One good way to do this is by adding a new column to the table. Word 2010 makes it possible to insert a new column at any point inside your existing table, ensuring that you will not need to delete and re-create an entirely new table. You can follow our instructions below to add a column to a table that you have already created in your document.
How to Insert a Column Into a Table in Word 2010
- Open the document.
- Click in a cell next to where you want the new column.
- Select the Table Tools Layout tab.
- Click Insert Right or Insert Left.
Our tutorial continues below with additional information on adding columns in Word 2010, including pictures of these steps.
How to Add Column to Table in Word 2010 (Guide with Pictures)
This article was written for users of Microsoft Word 2010. However, these steps will be very similar in other versions of Word as well.
Step 1: Open the document in Word 2010 that contains the table that you want to modify.
Step 2: Click inside a table cell in the column to the left of where you want to insert the new column.

Step 3: Click the Layout tab under Table Tools at the top of the window.

Step 4: Click the Insert Right button to insert a column to the right of the column that you selected in Step 2. If you would instead prefer to insert a column to the left of this column, then click the Insert Left button.
Note that these buttons are located in the Rows & Columns group in the ribbon.
Our guide continues below with additional discussion on how to add columns to a table in Word 2010.
More Information on How to Add Table Columns in Word 2010
If your table is already taking up the full width of the page, then Word will adjust the widths of the existing columns to accommodate the addition of the new column.
You will notice that there are also buttons in the Rows and Columns group that let you add new rows to the table, too. You can do this by clicking either the Insert Above button or the Insert Below button.
If you need to add a table to your document then you can select the Insert tab at the top of the window, then click the Table button and specify the number of rows and columns that you would like in the table. Note that if you can’t add a large enough table using the cell icons then you can click the Insert Table button and specify the number of rows and columns that way as well.
If you add too many columns or rows to your table then you can select one of the cells in the row or column you wish to remove, then click the Delete button and choose to Delete Columns or Delete Rows. There are also options to delete individual cells or delete the entire table.
Is your table not entirely contained on the page? This can happen if you copy and paste a table from a different document, or from a different program. This article will show you how to make your Word tables fit on the page.
Can I Make a Microsoft Word Document With More Than One Column?
While the bulk of our article has discussed adding table columns in Microsoft Word, you may be interested in adding two columns or multiple columns to your document instead. This is common when creating newspaper articles or newsletters.
You can add a new column to a document by selecting the Page Layout tab at the top of the window, then clicking the Columns button and choosing the number of columns that you want in the document. You could alternatively elect to click the More Columns button, which opens the Columns dialog box. There you will be able to specify the number of columns in the document. You can also specify different widths and spacing for all the columns in the document, or you can simply have them all be of equal column width.
Can I Add a Column Break or Remove Column Breaks in Word 2010?
When you are adding columns to a document in Microsoft Word 2010, rather than adding columns to a table, you may find yourself using column breaks. Much like page breaks, a column break tells Word that you want the next part of the document to begin in the next column.
The first thing you will need to do is make sure that your cursor is at the point in the document where you wish to add the column break. You can then add a column break by selecting the Page Layout tab at the top of the window, then click the Breaks button in the Page Setup group in the ribbon. There you will find the Column Break button. Selecting that option will insert a column break at that point in the document.
If you want to remove a column break then you will need to select the Home tab at the top of the window and display formatting marks by clicking the Show/Hide button in the Paragraph group of the ribbon.
Additional Sources

Matthew Burleigh has been writing tech tutorials since 2008. His writing has appeared on dozens of different websites and been read over 50 million times.
After receiving his Bachelor’s and Master’s degrees in Computer Science he spent several years working in IT management for small businesses. However, he now works full time writing content online and creating websites.
His main writing topics include iPhones, Microsoft Office, Google Apps, Android, and Photoshop, but he has also written about many other tech topics as well.
Read his full bio here.
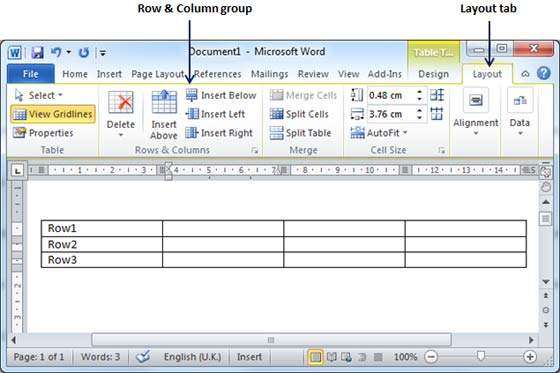
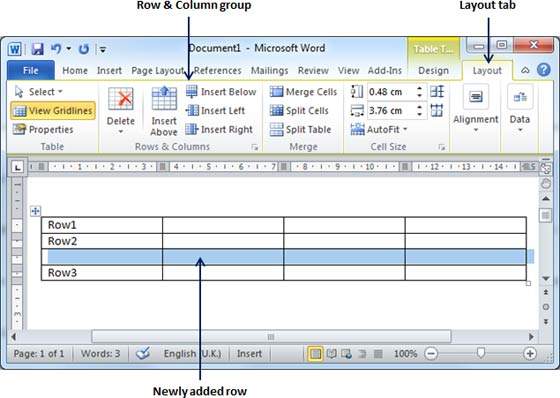
In this chapter, we will discuss how to work with rows and columns in Word 2010. As discussed in the previous chapter, a table is a structure of vertical columns and horizontal rows with a cell at every intersection. A Word table can contain as many as 63 columns but the number of rows is unlimited. This chapter will teach you how to add and delete rows and columns in a table.
Add a Row
Following are the simple steps to add rows in a table of a word document.
Step 1 − Click a row where you want to add an additional row and then click the Layout tab; it will show the following screen.
Step 2 − Now use the Row & Column group of buttons to add any row below or above to the selected row. If you click the Insert Below button, it will add a row just below the selected row as follows.
If you click the Insert Above button, it will add a row just above the selected row.
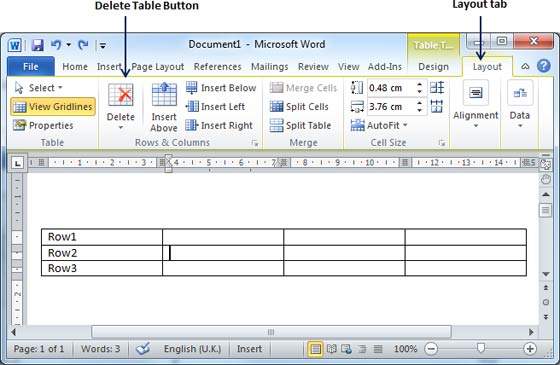
Delete a Row
The following steps will help you delete rows from a table of a Word document.
Step 1 − Click a row which you want to delete from the table and then click the Layout tab; it will show the following screen.
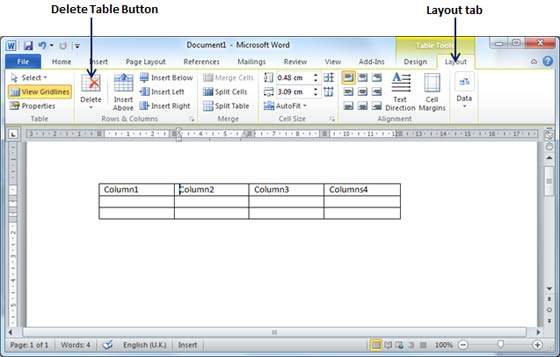
Step 2 − Click the Layout tab, and then click the Delete Rows option under the Delete Table Button to delete the selected row.
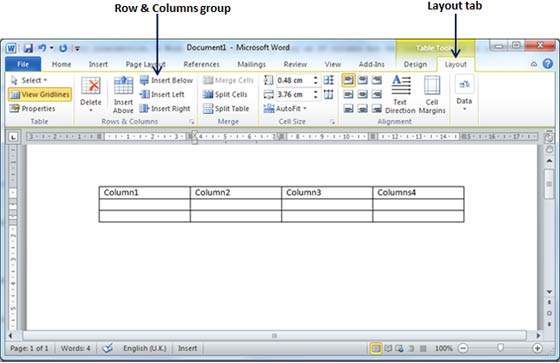
Add a Column
The following steps will help you add columns in a table of a Word document.
Step 1 − Click a column where you want to add an additional column and then click the Layout tab; it will show the following screen.
Step 2 − Now use the Row & Column group of buttons to add any column to the left or right of the selected column. If you click the Insert Left button, it will add a column just left to the selected column as follows.
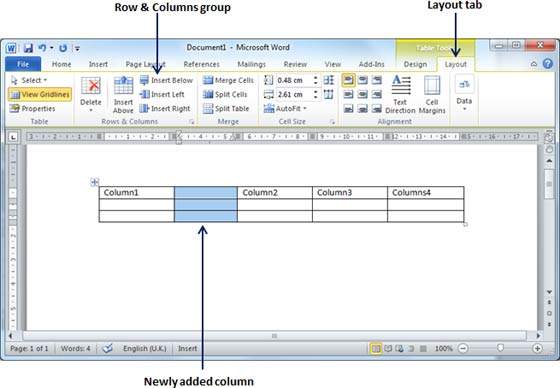
If you click the Insert Right button, it will add a column just next to the selected column.
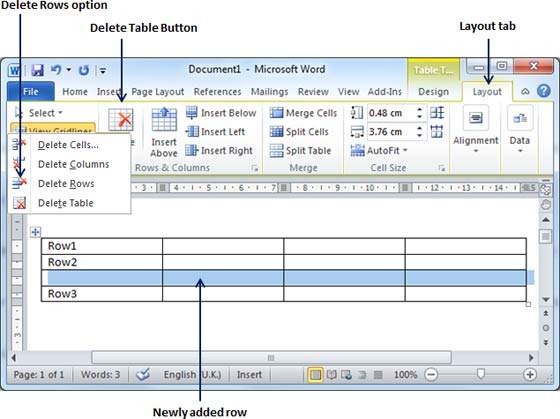
Delete a Column
Following are the simple steps to delete columns from a table of a word document.
Step 1 − Click a column which you want to delete from the table and then click the Layout tab; it will show the following screen.
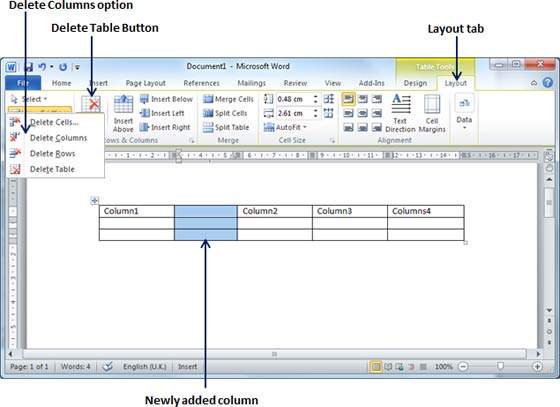
Step 2 − Click the Layout tab, and click the Delete Column option under the Delete Table Button to delete the selected column.
Several times you have observed that some articles or text documents divided into columns on the same page which looks nice, and if you want to apply the same settings on your Microsoft Word 2007 or Word 2010 document then how you can do that?
So, here is the method to create columns in Word 2007 / 2010 document. Just continue reading below to know the complete process to create columns in Word.
How to create columns in Word 2010 or 2007
Step 1
Open an existing Word document or create a new document in Microsoft Word 2010 or 2007
Step 2
Just type your text in that file whatever you want. Now there are two options either you want to apply columns to whole document or to a specific portion of document.
Create two columns whole Word document.
Click on “Page Layout” tab > “Columns” and select the number of columns according to your requirement

Output: 2 columns in word.

Create columns on one page or portion of text in word document
Select the text of one page or specific portion that you want to convert to columns and click on “Page Layout” tab > “Columns” and select the number of columns as show below in screen shot.

Output: 3 Columns of specific text of word document
")
See also:
how to adjust width, Spacing and put line between columns in Word
- Remove From My Forums
-
Вопрос
-
Hi everyone,
I was inserting multiple rows in my document, and I started to think using same ways to get columns as well.
Now I have 2 questions:
Q1: Can we use «Tab» or other key, if any, to insert columns?
By pressing «Tab», I can add new rows to table. So is there some similar way to add columns by hitting keys?
Q2: Can we use «Insert Table» command to add columns to table?
If I insert a table right below an existing one, the two will merge themselves into one. However, when I apply the way to add columns, the «Insert Table» command just grayed out. I can add a new table next to the existing one, but I have trouble
merging them.Any thoughts will be appreciated.
Regards,
VC
Ответы
-
Hi,
Generally, the fastest way to add a column to an exiting table in Word is to put the cursor just to select a column and right-click it, select Insert > Insert Columns in the right or left.
There is no specific shortcuts to quickly insert a column. Maybe you can try to press the following keys to insert a column:
Select the table, press Alt + J + L +R.
Regards,
Winnie Liang
Please remember to
mark the replies as answers if they help.
If you have feedback for TechNet Subscriber Support, contact
tnmff@microsoft.com.-
Предложено в качестве ответа
27 февраля 2017 г. 2:47
-
Помечено в качестве ответа
CNL777
27 февраля 2017 г. 3:19
-
Предложено в качестве ответа
How to add columns, delete columns, add rows, delete rows in Word 2007, 2010, 2013, 2016. The following article helps you perform the operation of inserting columns, rows or simply deleting redundant columns and rows in Data tables in extremely simple ways.
The following article helps you perform the operation of inserting columns, rows or simply deleting redundant columns and rows in the data table in extremely simple ways.

1. Insert more columns and lines in Word
Insert column in Word
Method 1
– In case of inserting one column to the left or right of the selected column:
To insert a column in the data table, you just need to select the column next to the column to be inserted -> right-click and select Insert -> case insert the column to the left of the selected column -> select Inser Columns to the Left, vice versa If inserting on the right select Insert Columns to the Right:

As a result, you can insert the column to the right of the selected column:

– In case you want to insert more columns than 1 column, you just need to select the correct number of columns with the number of columns to be inserted and perform the same operation as inserting 1 column. For example, here insert two columns to the right -> highlight 2 columns next to the column to be inserted -> Insert -> Insert Columns to the Right:

Method 2
In addition, Word 2010 and later support you how to insert columns in the table quickly by moving the line between the two columns you want to create new columns -> when the mouse pointer turns the plus sign -> perform clicking the plus sign So you have created a new column:

In case you want to create 2 or more columns at the same time, you select the number of columns next to the column to create -> click the plus sign.
Method 3
Alternatively, just go to the Layout tab -> click Insert Left or Insert Right (depending on where you want the column to be inserted) to insert the column into the table:

Insert lines in Word
Method 1
Similar to how to insert a column, you select the column position to insert -> right-click and select Insert -> Insert Rows Above (insert the line above the selected row) or Insert Rows Below (insert the line below the selected row):

The result you have inserted the row into the table:

If you want to insert more than one line at the same time, just insert another line only when blackening the number of columns, blacken the number of columns exactly by the number of columns to create:

Method 2
With the fast line insertion that new versions support, you only need to select the number of lines to insert and the position of the line to insert -> tick the plus symbol:

Method 3
In addition to inserting rows in a table, you select the position and number of rows to insert -> into the layout tab -> choose Insert Above or Insert Below depending on the position of the row to insert:

Delete columns in Word
Method 1:
To delete columns in the table, just select the columns to be deleted -> right-click and select Delete Columns:

Method 2
Also to delete the column you just need to select the column to delete -> go to the Layout tab -> Delete Columns:

Delete rows in Word
Method 1
Similar to deleting columns, you only need to select the rows to delete -> right-click and select Delete Rows:

Method 2
In addition, you only need to select the number of columns to delete -> go to the Layout tab -> Delete -> Delete Rows:

Above are some ways for you to quickly insert columns and rows in Word 2016. In other versions, you can do the same thing. Good luck!
Adding a column to a table in Microsoft Word used to be a pain. But adding a column to a table in Word 2010 is easy. In the example below we will add a column to the right of our table, so we go from a two-column table to a three-column table. But you can easily use the same instruction to add a new column to the left of an existing column (just switch your choice in step 3 below). Here are the steps:
1. Place you cursor in a field in the column of the table where you want to add a column to the left or right. In the two column table below, you’d put your cursor in right next to the “?” in the header column (left-click as if you were going to add some more text after the “?”). You could also simply put the cursor in the white space in the cell underneath this header cell (again as if you were going to add text).

2. From this cursor position, right click to see the context-sensitive menu and left click or hover your cursor over the “Insert” option on this menu. You will see a list of table-related choices appear.

3. Now place your cursor over the function you want (in this case it will be “Insert Column to the right”) and left-click. You should now see your new column appear to the right. Note that if you wanted to add a new column to the left you could have simply clicked the left option above.
