
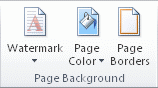
To add some extra visual interest to your document, add a background color using the Page Color button. You can also add a watermark.
Add or change the background color
-
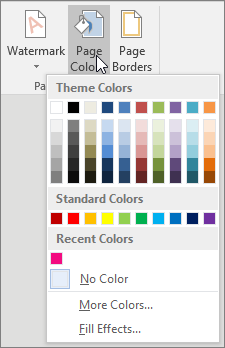
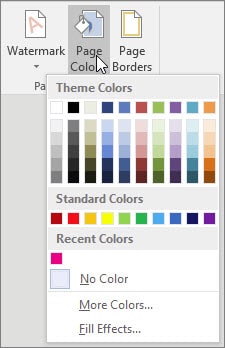
Go to Design > Page Color.
-
Choose the color you want under Theme Colors or Standard Colors.

-
If you don’t see the color you want, select More Colors, and then choose a color from the Colors box.
-
To add a gradient, texture, pattern, or picture, select Fill Effects, and then go to Gradient, Texture, Pattern, or Picture and select an option.
-
Patterns and textures are repeated (or “tiled”) to fill the entire page. If you save your document as a webpage, the textures are saved as JPEG files, and the patterns and gradients are saved as PNG files.
Remove the background color
-
Go to Design > Page Color.
-
Select No Color.
Important:
Office 2010 is no longer supported. Upgrade to Microsoft 365 to work anywhere from any device and continue to receive support.
Upgrade now
You can use gradients, patterns, pictures, solid colors, or textures for backgrounds. Gradients, patterns, pictures, and textures are tiled or repeated to fill the page. If you save a document as a webpage, the pictures, textures, and gradients are saved as JPEG files and the patterns are saved as GIF files.
Add or change the background color
-
Go to Page Layout > Page Color.
-
Do any of the following:
-
Select a from Theme Colors or Standard Colors.
-
Select More Colors and then choose a color.
-
Select Fill Effects to add special effects, such as gradients, patterns, or textures.
Note: Select the color that you want before you apply a gradient or pattern.
-
Remove a background
-
Go to Page Layout > Page Color.
-
Select No Color.
Change the background color
-
Go to Design > Page Color.
-
Choose the color you want. If you don’t see the color you want, select More Colors and then pick a color from any of the options in the Color box.
Tips:
-
To pick a color from a file, select the picture image, click the gear icon, and select New from File.
-
-

Remove the background color
-
Go to Design > Page Color
-
Select No Color.
To add some extra visual interest to your document, add a background color using the Page Color button. You can also add a watermark.
Add or change the background color
-
Go to Design > Page Color.
-
Choose the color you want under Theme Colors or Standard Colors.
-
If you don’t see the color you want, select More Colors, and then choose a color from the Colors box.
-
To add a gradient, texture, pattern, or picture, select Fill Effects, and then go to Gradient, Texture, Pattern, or Picture and select an option.
-
Patterns and textures are repeated (or “tiled”) to fill the entire page. If you save your document as a webpage, the textures are saved as JPEG files, and the patterns and gradients are saved as PNG files.
Remove the background color
-
Go to Design > Page Color.
-
Select No Color.
Important:
Office 2010 is no longer supported. Upgrade to Microsoft 365 to work anywhere from any device and continue to receive support.
Upgrade now
You can use gradients, patterns, pictures, solid colors, or textures for backgrounds. Gradients, patterns, pictures, and textures are tiled or repeated to fill the page. If you save a document as a webpage, the pictures, textures, and gradients are saved as JPEG files and the patterns are saved as GIF files.
Add or change the background color
-
Go to Page Layout > Page Color.
-
Do any of the following:
-
Select a from Theme Colors or Standard Colors.
-
Select More Colors and then choose a color.
-
Select Fill Effects to add special effects, such as gradients, patterns, or textures.
Note: Select the color that you want before you apply a gradient or pattern.
-
Remove a background
-
Go to Page Layout > Page Color.
-
Select No Color.
Change the background color
-
Go to Design > Page Color.
-
Choose the color you want. If you don’t see the color you want, select More Colors and then pick a color from any of the options in the Color box.
Tips:
-
To pick a color from a file, select the picture image, click the gear icon, and select New from File.
-
-
Remove the background color
-
Go to Design > Page Color
-
Select No Color.

Now, you have two basic options to add color to your Word documents.
2 Methods to Change Background Color in Microsoft Word
- Using the Default Standard or Theme Colors.
- Using a Custom Color You can Choose from a Spectrum.
This guide walks you through both these methods. It also covers using gradients, textures, patterns, and pictures as backgrounds.
Method 1: Using the Default Standard or Theme Colors.
If you don’t have a particular color in mind, you can conveniently choose from two sets of colors provided in MS Word. These are the Standard Colors and the Theme Colors.
Here’s how they work.
Step 1: Open up your MS Word file.
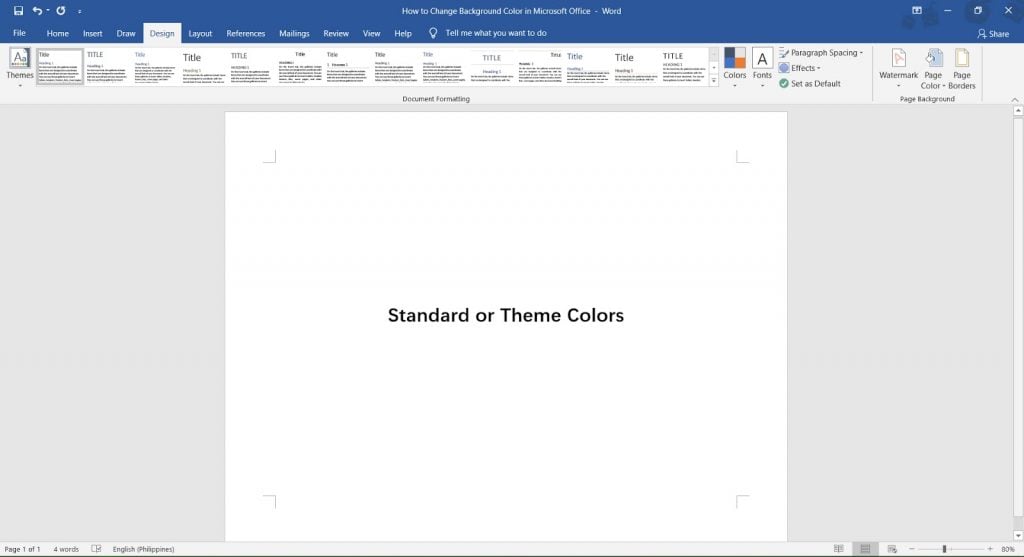
Step 2: Go to the Design Tab.
Go ahead and click on the Design tab. The design options should now appear.
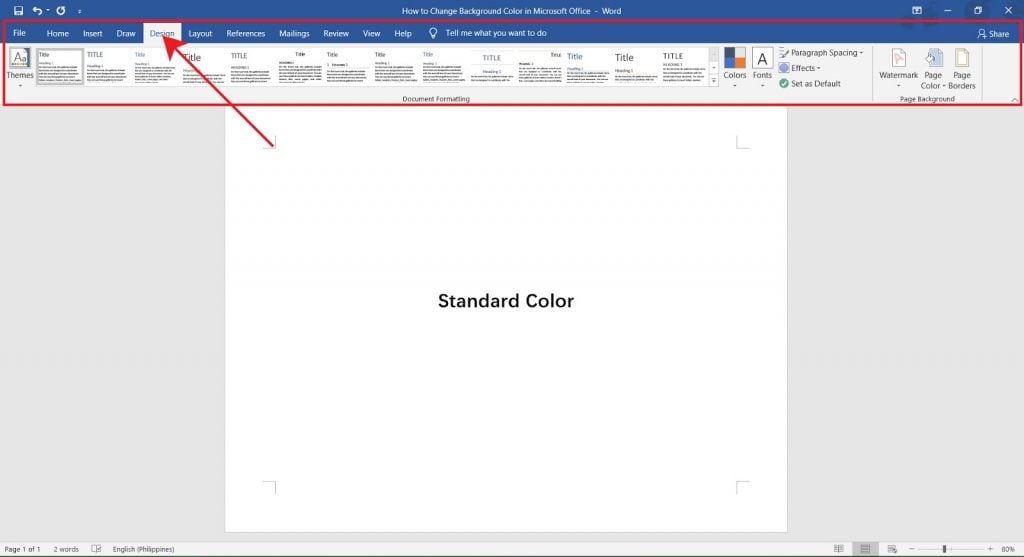
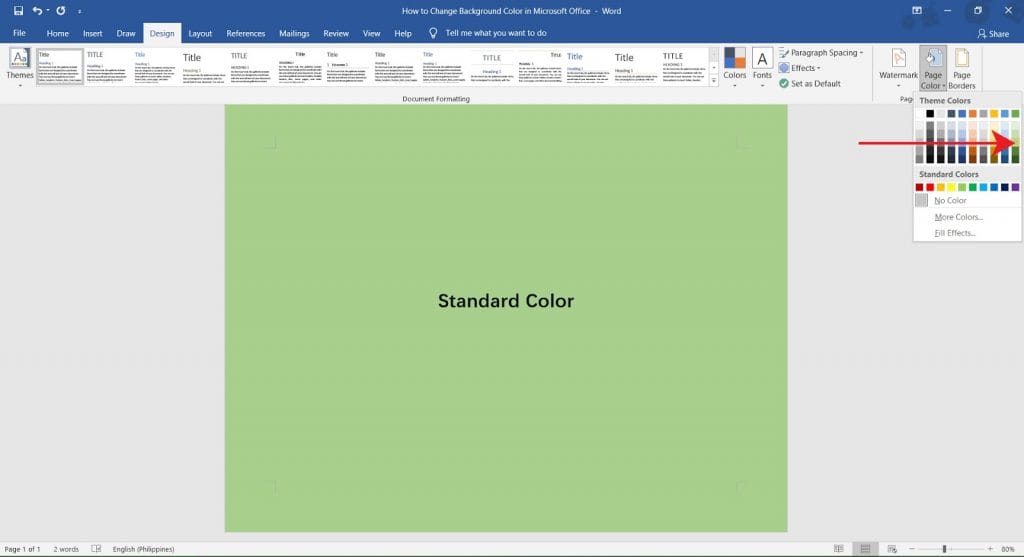
Step 3: Open the Page Color Menu.
Now that you’re on the Design tab, turn your attention to the right side of your screen. Tap on Page Color. That will open a drop-down menu of options you can choose from.

The grid of colors are Theme Colors.
These change as the document theme changes. The row of colors below the grid are Standard Colors.
You can find more standard colors if you click on More Colors.
Go ahead and pick a color.
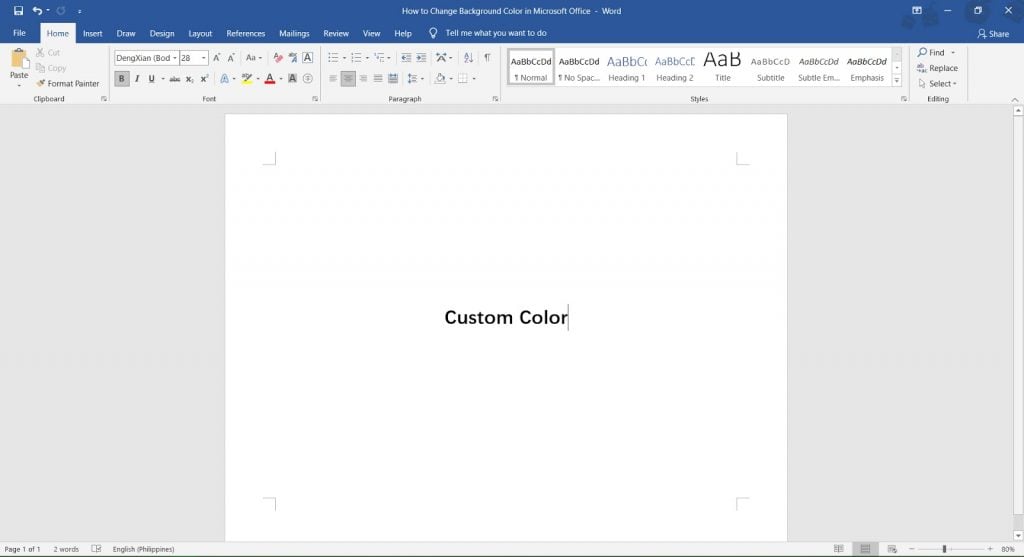
Method 2: Using a Custom Color You can Choose from a Spectrum.
You now know how to change the background color of your Word file. But what if none of the standard colors are to your liking? That’s perfectly alright. With this method, you have free reign to choose your background color from a spectrum.
Here’s how you can change your background to a custom color.
Step 1: Open up your MS Word file.
Step 2: Go to the Design Tab.
Go ahead and click on the Design tab. The design options should now appear.
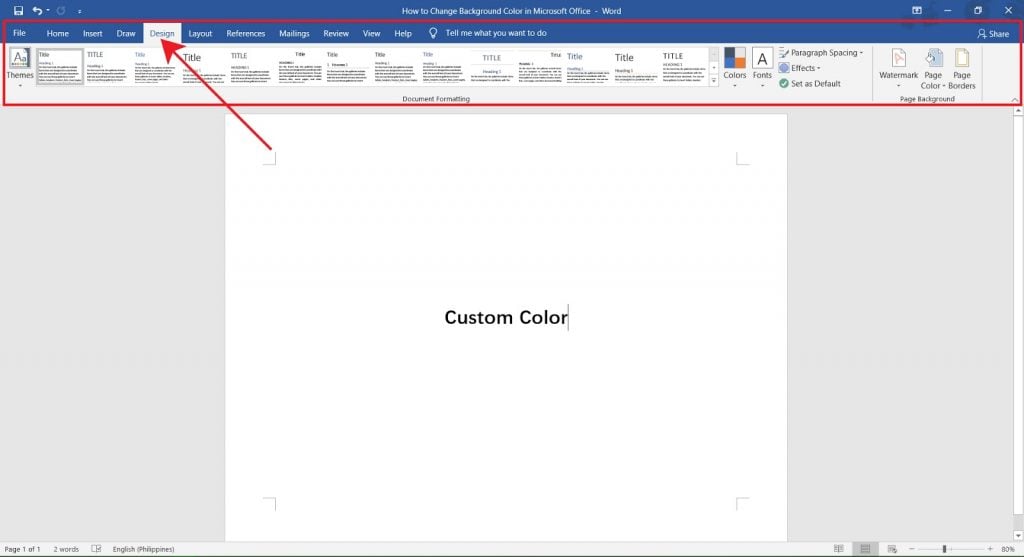
Step 3: Open the Page Color Menu.
Now that you’re on the Design tab, turn your attention to the right side of your screen. Tap on Page Color. That will open a drop-down menu of options you can choose from. Click on More Colors.
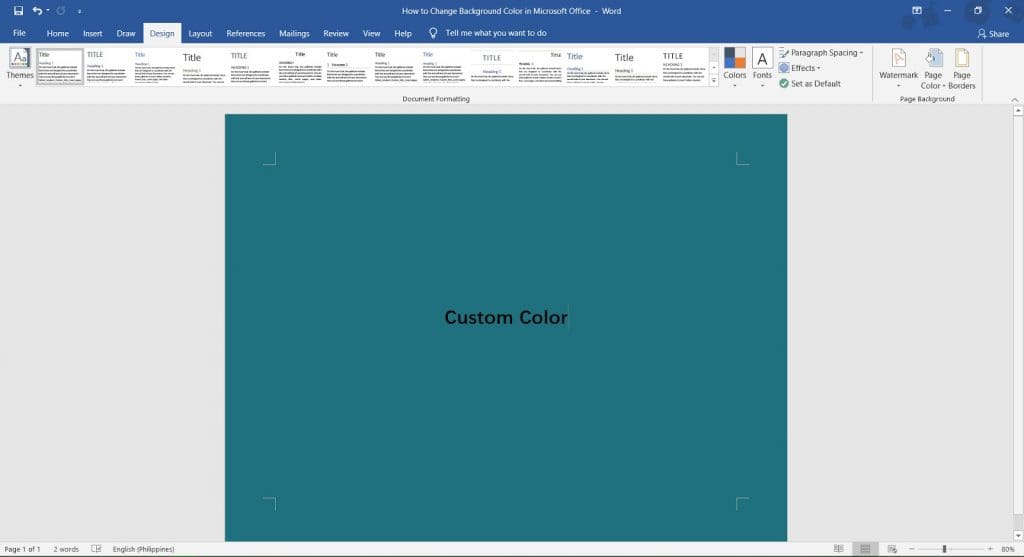
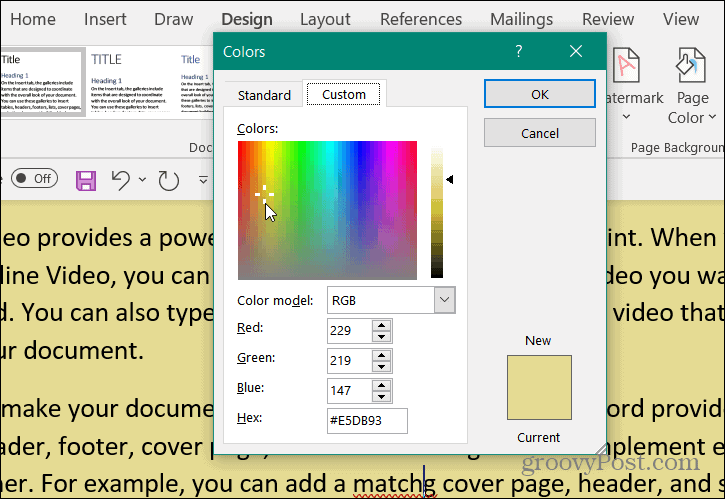
Step 4: Choose a Custom Color
In the More Colors window, there are two tabs. Click on the Custom tab. You should be able to see a box of colors, and a bar to its right. Click and drag inside the box to get your desired hue and saturation. Now look to the bar. Moving the slider up and down adjusts the brightness of your color.
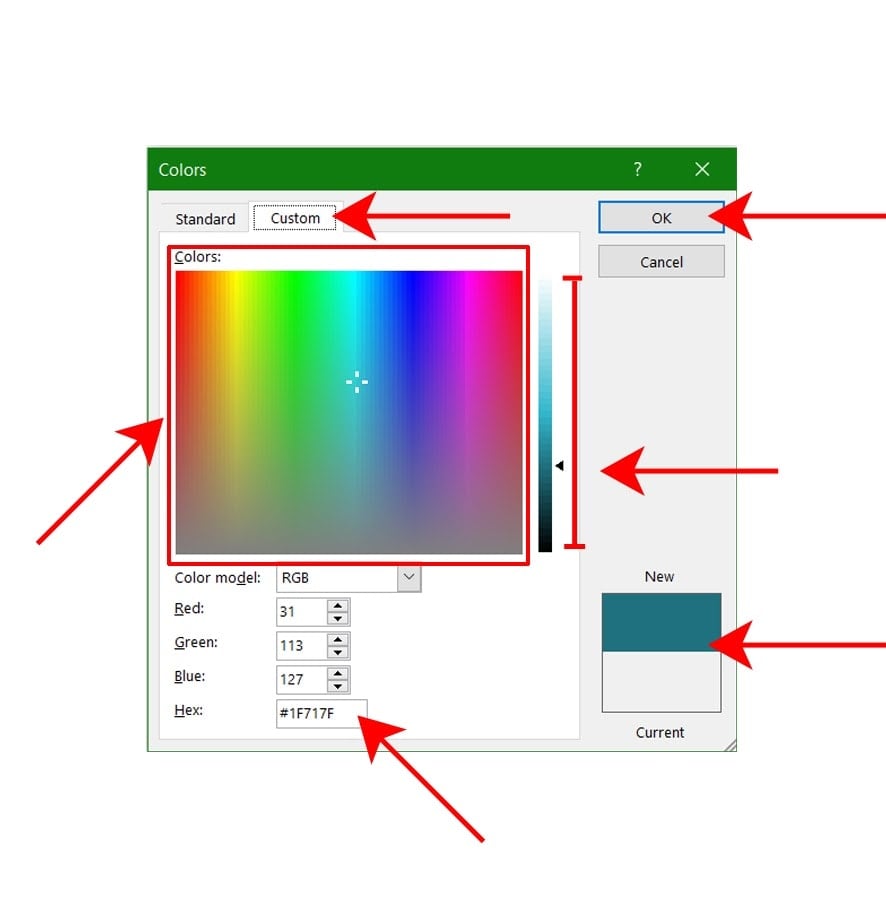
Also, notice that box on the bottom labeled Hex. Hex is a system of codes that represent colors in the RGB format. One code represents one color. This allows you to easily replicate any custom color you have used before. All you have to do is type in the color code into the box. In this illustration, the Hex code is #1F717F.
Once you’re satisfied with the color you’ve chosen, click OK to apply it to your background.
Other Backgrounds
Aside from solid colors, MS Word also has other options you can use to change your background. You can put a gradient, texture, pattern or picture as the background of your document.
To get started on any of these other backgrounds, first go to your Design tab. Open the Page Color menu and click on Fill Effects.

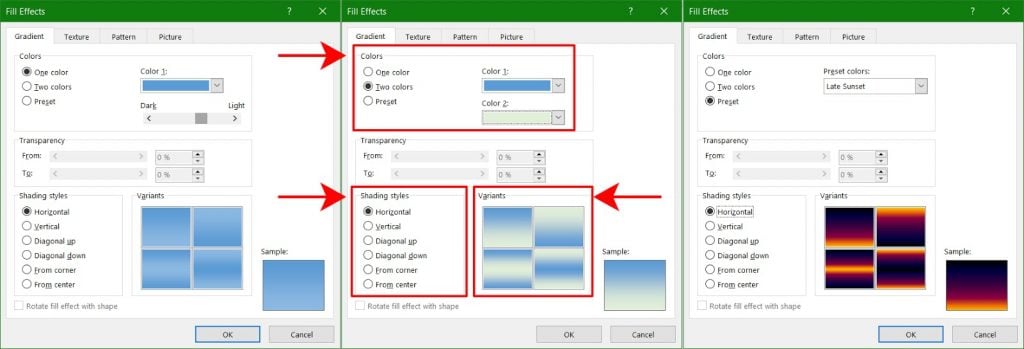
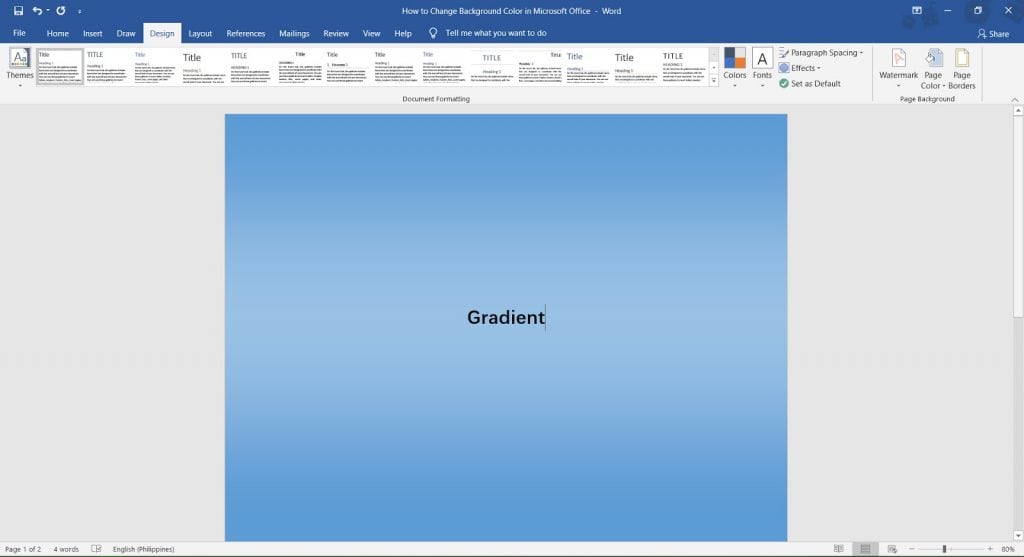
Gradient Background
A gradient is a gradual and smooth blending from one color to another. For MS Word, you can make a gradient out of any two colors.
Start with opening up the Fill Effects window, and click on the Gradient tab.
To get your gradient, there are two settings you need to configure. These are the Colors and Shading Styles. Let’s go through each of them.
For your Colors, you can choose between One Color, Two Colors, or a Preset combination of colors. A gradient blends at least two colors. If you choose One Color, your color will blend with its own brightness.
To make it darker, move the slider to the left. Inversely, move the slider to the right to make it lighter.
Shading Style changes the direction your colors blend. Your options are Horizontal, Vertical, Diagonal Up, Diagonal Down, From Corner or From Center.
Find the one that works best for you.
Variants are four combinations made from your choice of colors and shading style. Go ahead and select your gradient.
The small sample box allows you to verify your choice before you apply it to your background.
Textured Background
This option allows you to have a texture as the background of your document. This allows for more complex colors and shapes. There are default options you can choose from, but you also have the option to upload an image of the texture you want to use.
First, bring up the Fill Effects window, then go on the Texture tab.
Select a texture you prefer from the given choices. If none of them work for you, click on Other Textures to upload your own preferred texture.
Be mindful of the image size. Images that are too large won’t be uploaded.
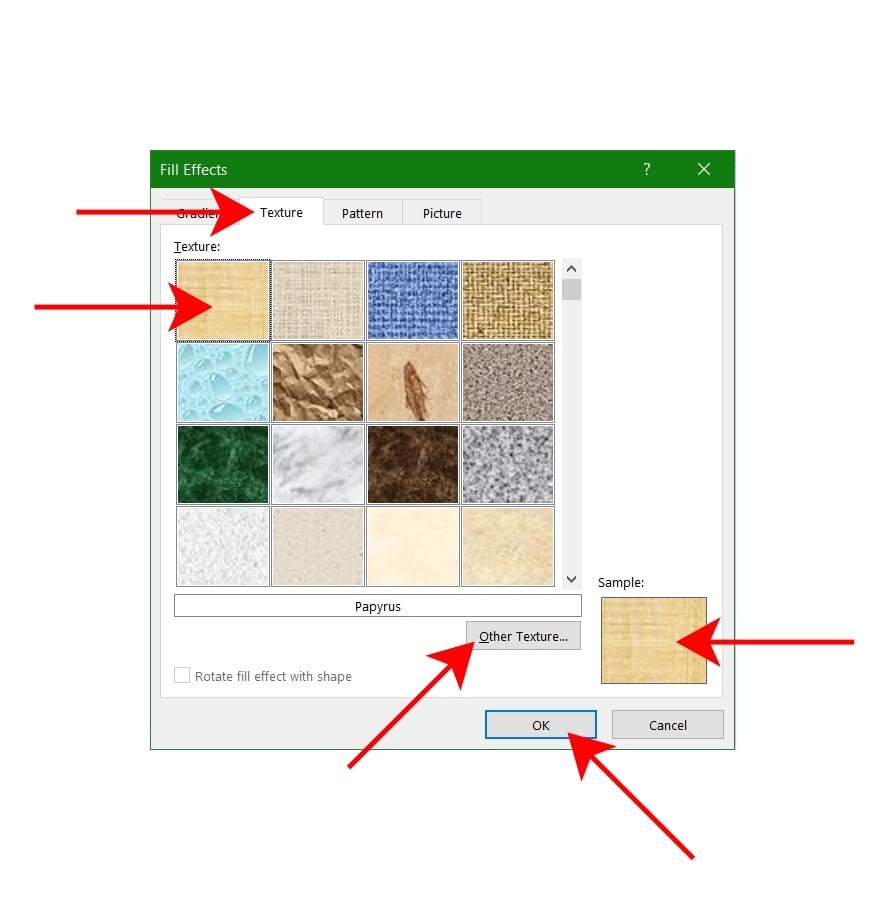
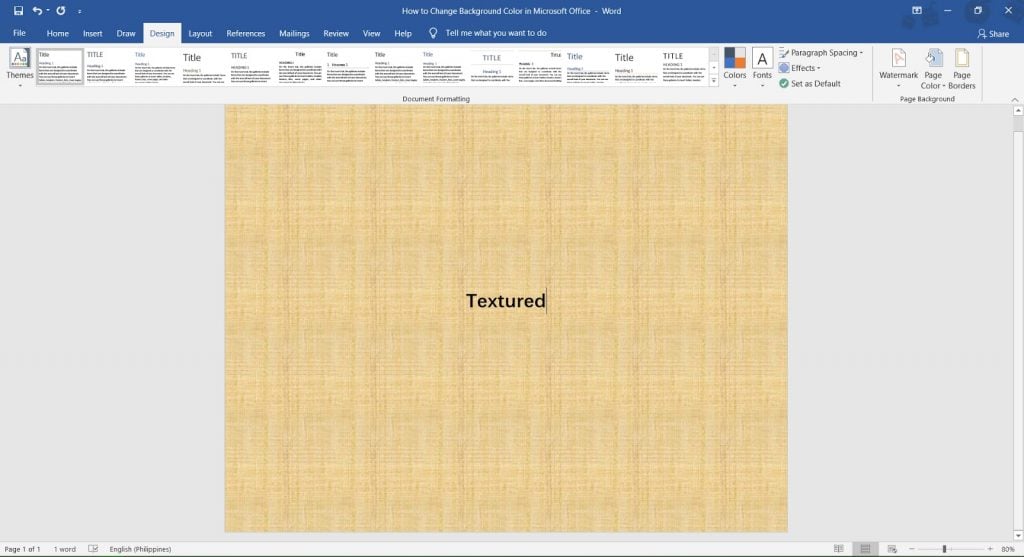
You’ve successfully applied a texture to your background!
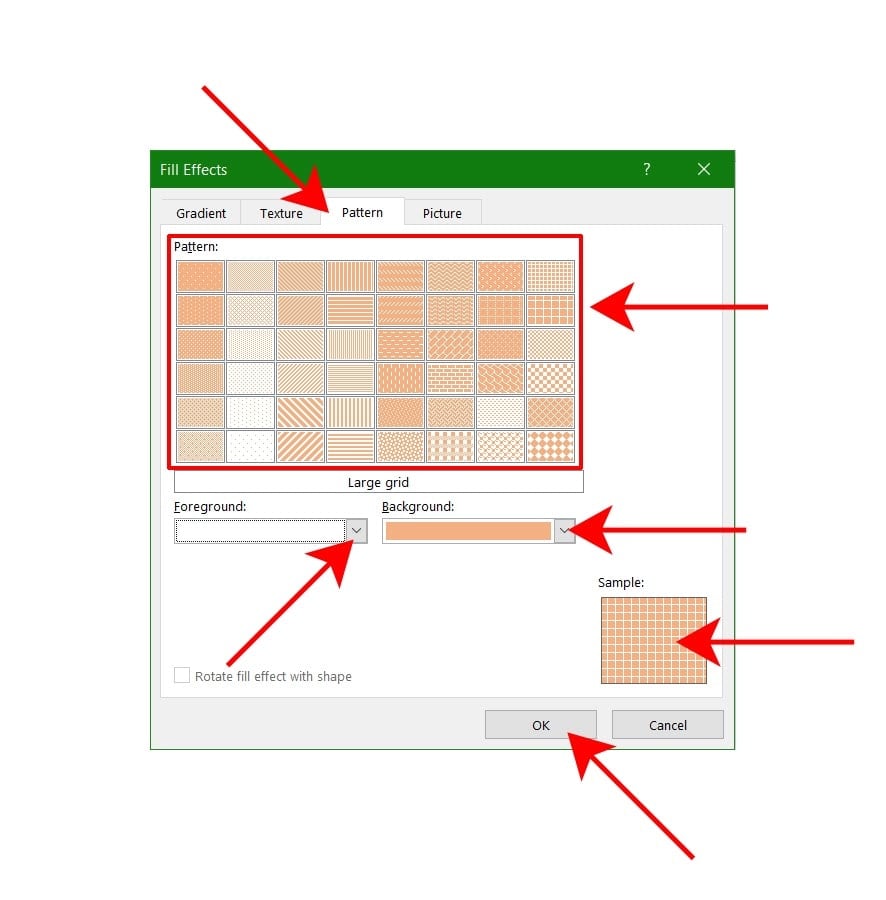
Patterned Background
Sometimes, a good patterned background is all you need. Thankfully, MS Word gives you a lot to choose from! Let’s open up the Fill Effects window to get started, then go to the Pattern tab.
To make your pattern, you need to configure three settings. The Pattern refers to the repetitive design itself.
The Foreground changes the color of the design. The Background is the color behind the design. Fool around with these three settings and see the changes in real-time on the Sample box on the bottom right.
Once you’re satisfied with your pattern, click OK to apply it to your background.

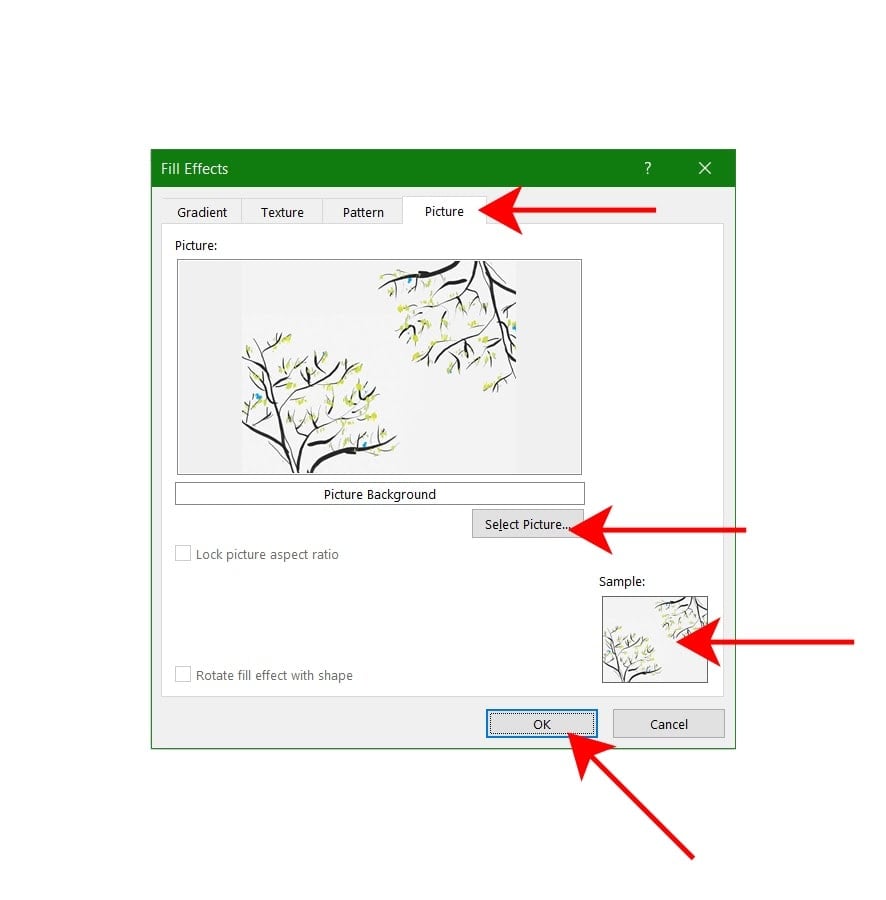
Picture Background
You can use any picture as a background for your document, however, the options to manipulate the picture are limited. You have to make sure that the picture you upload is the same size as your document page to have the right fit.
If your document is in letter size (8.5” x 11”), then make sure that the picture you upload is also in letter size.
Let’s get to it. Open up the Fill Effects window, and click on Picture. Click on Select Picture to browse your device. Upload the picture you want to use and verify that it’s the correct picture. If everything is set, click OK to apply the picture to your background.

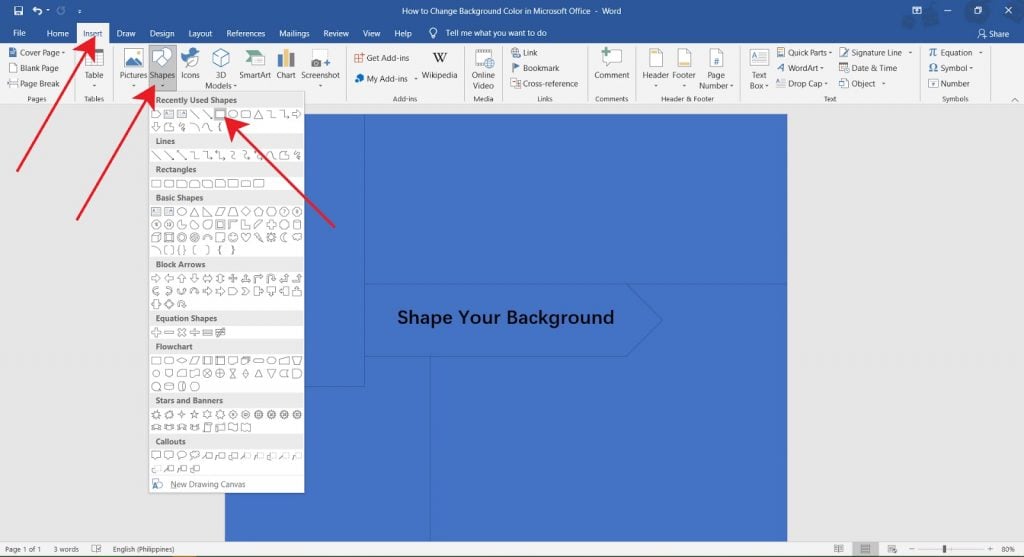
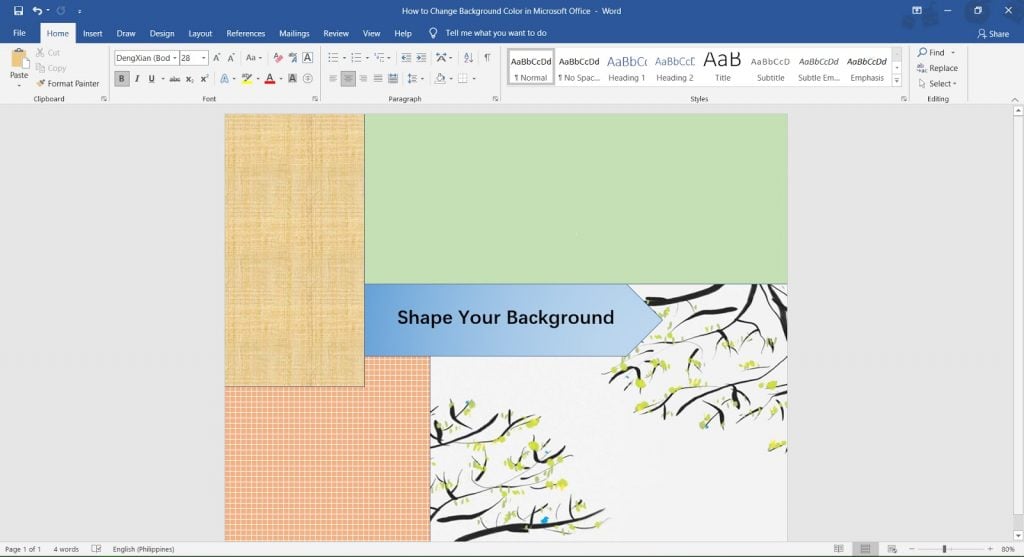
Shape your Background
All the methods explored in this guide, so far, all apply directly to the entire document. Do you want to be able to control where you put a pattern, texture, color or picture? Do you want to have the flexibility to give every page a different background? If you do, then this is the guide for you.
Shape your background by inserting shapes onto your page. Everything covered above can be applied to individual shapes. Let us show you how.
Add your Shapes and Lay them Out on the Page
The first thing you want to do is insert all the shapes you’ll need. To do that, go to the Insert tab on the Ribbon. Once that’s open, click on Shapes, and choose the shape you want to use.
To make a shape, click and drag your mouse. It doesn’t have to be perfect on the first go. You can change the dimensions of your shape anytime.
Also, don’t fret if you already have texts on the page that are being covered by the shapes. We will address that next.
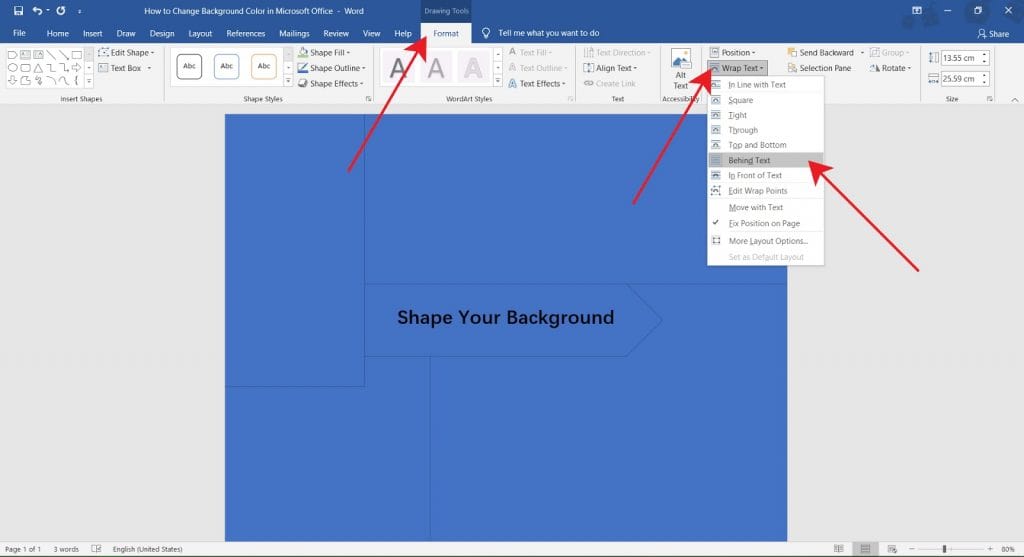
Wrap Text
This is an important step. Doing this will ensure that the shapes stay in their place behind the text. Take note that you do this step for every shape on your page.
Start by selecting a shape. Once you do, a new tab appears on the Ribbon. Click on Drawing Tools Format. Look for Wrap Text and click on it to open the drop-down menu. Select Behind Text. This moves the shape behind any texts on your page. It also keeps them in place regardless of what else you type.
Repeat this step for every shape on the page.
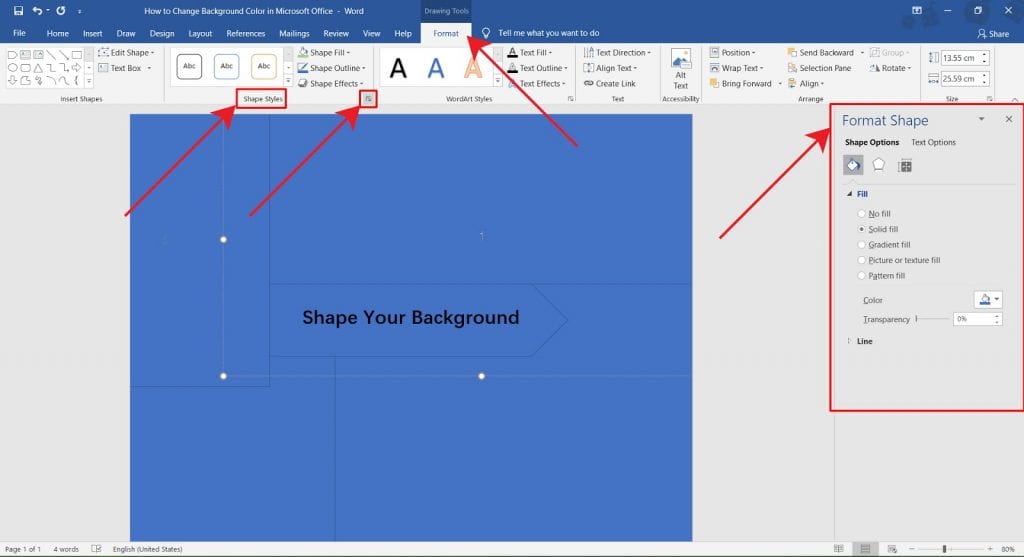
Decorate your Shapes
This is where you apply everything you’ve learned thus far, Solid Colors, Gradients, Textures, Patterns and Pictures. There are minor changes, but the steps are mostly the same.
Start by selecting a shape. Go to the Drawing Tools Format. Look for the portion of the ribbon that’s labeled Shape Styles. There should be a small symbol on the lower right corner that looks like two ends of an arrow. Click it to open the Format Shapes menu. Once you have that opened, you can decorate any shape as you please.
Remove the Background Color
If, after trying all these backgrounds, you decide to go back to the default, white, background color. Don’t worry. This is, by far, the easiest guide here, and you’ll have that clean background again in no time!
First, go to your Design tab. Click on Page Color to open up the colors menu, and click on No Color.
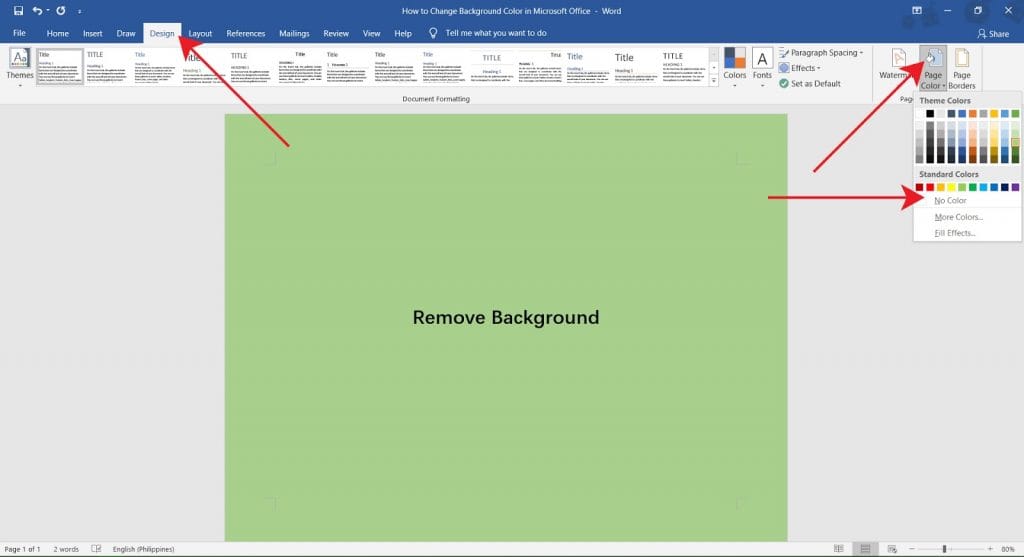
And you’re done! You’ve successfully removed all designs from your background and are back to your default white!
Conclusion
You have finally arrived at the end of this guide. We hope that we’ve helped you learn how to add some color and design to your MS Word document.
We hope you found this article helpful!

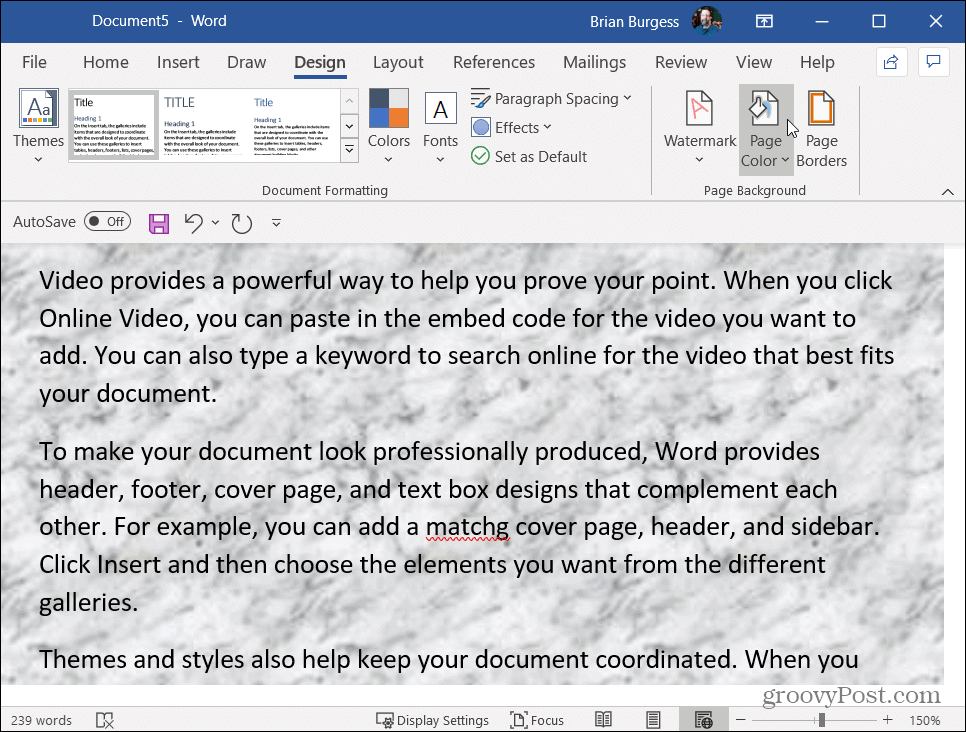
Adding a background color to your Word documents is a good way to attract a reader’s attention. Here’s how to add background colors and pictures.
Adding a background color or picture to your Microsoft Word documents is a good way to attract the reader’s attention. There are several reasons why you would want to do it. Maybe you are creating a flyer or brochure and want to tweak the background color or even add a photo. Here’s how to set the document’s background color or image in a Word document.
Open any document that you want to add a background color to. Then at the top click the Design tab.
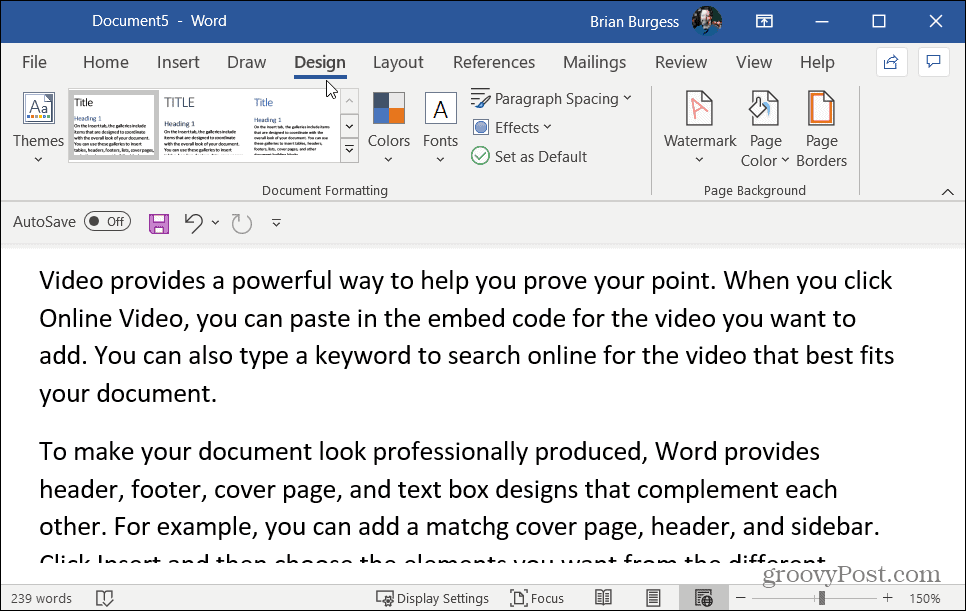
Next, head over to the “Page Background” section on the ribbon right and click on Page Color.

Related: How to Import and Export Microsoft Office Ribbon Settings
That will open a dropdown menu of different colors you can choose from. Select the color you want to use from the dropdown menu. You can just hover your mouse over each color to get a preview of what it will look like. It will only permanently change the color if you actually select it.

If you need more choices click on More Colors from the menu. That opens up a graph where you can really nail down the specific color you are looking for.
If you want, you can even add different effects to the background color like gradient, textures, patterns, or even any picture from your computer. Just click the Page Color button and click on Fill Effects at the bottom.
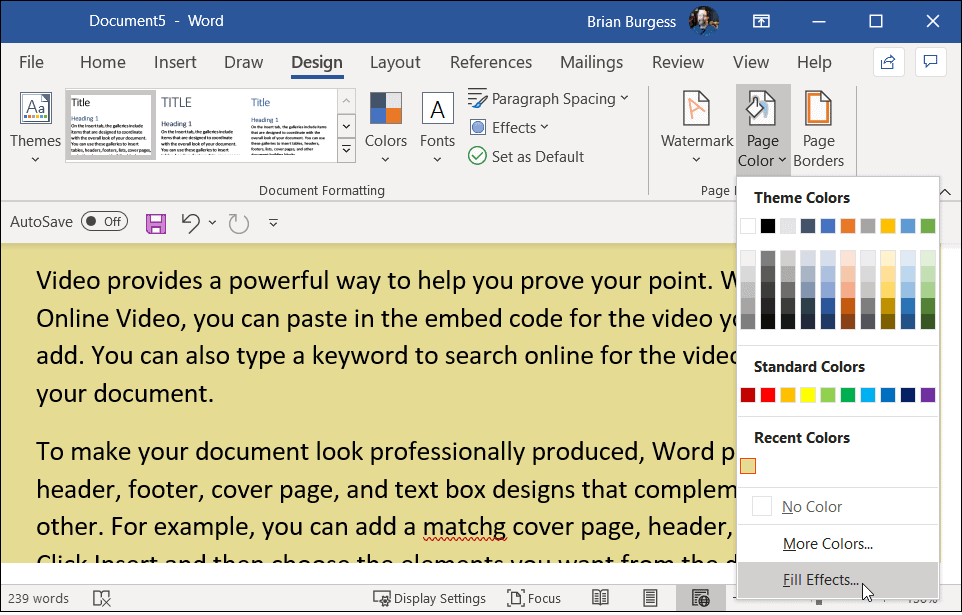
That opens another screen where you have several options including Gradient, Texture, Pattern, and Picture tabs. Select the type of effect you want to add and click OK.

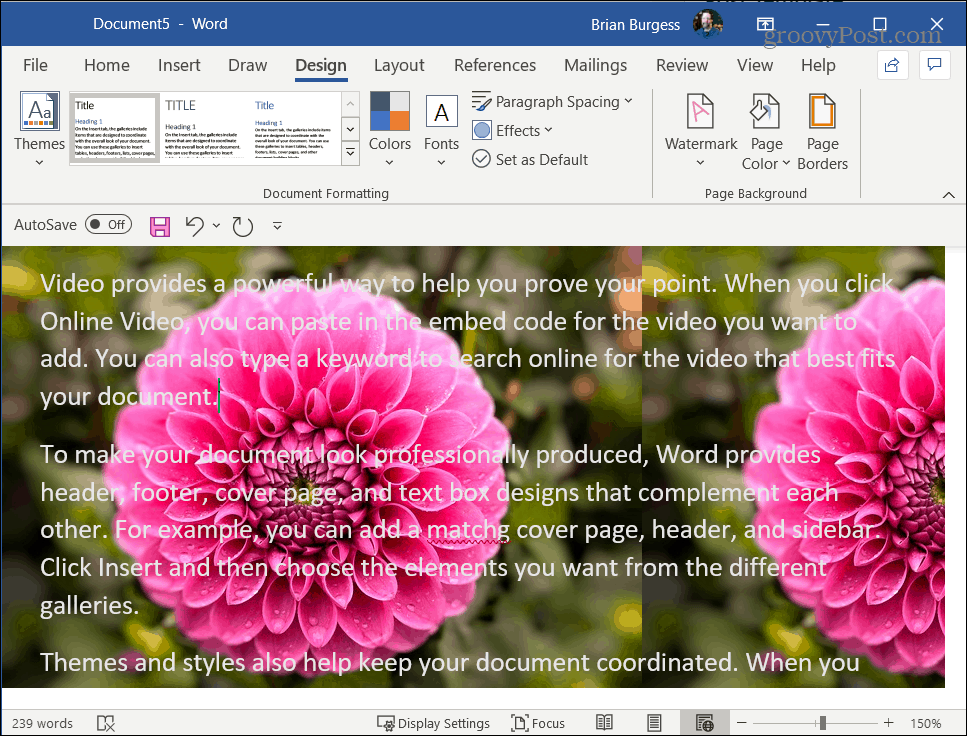
Here is a basic example of what you can do by adding background color and fill effects. There are several options to choose from here. Experiment and find the right document background that you’re looking for.
Add a Picture as a Background in Word
If you want to add a picture you can start by clicking the Picture tab and click the Select Picture button.

Then Word gives you the option to choose a picture from your PC, OneDrive, or even search Bing for an image.

Search Bing for a Picture
If you don’t have an image for the background of your document, a cool feature is searching Bing for one. Just type in what you are looking for in the Bing Image Search field and hit Enter. That opens image results and by default, it chooses those images that are licensed under Creative Commons.

Then insert the photo and see if it fits the look that you’re looking for in your document. Here is an example of adding a picture of flowers I found through a Bing search.
Related: What is Creative Commons and How Do I Use It?
Note that the process is similar if you are using an older version of Office, too. And for more about what you can do with Word check out how to create and print envelopes or how to split or merge table cells in W0rd.
![]()
It should come as no surprise that Microsoft Word has a literal myriad of features to offer to its users, being the most popular and arguably the best word processor out there for computers and all. Microsoft Word users can customize a boat load of different things – from changing text to adding and formatting graphical elements all the way to changing the color of a document’s background. Yes, that’s right – if you’re typing up a document on Microsoft Word, you even gave autonomy over the color of the document’s background. While documents created for professional purposes almost never require custom backgrounds or even custom background colors, customized background colors have tons of different other uses and often come in handy.
Changing the color of a Word document’s background is possible in all versions of Microsoft Word, and also works basically the same (although a tad bit of variation does exist in the process depending on what version of Word you’re using) in all versions of the word processor. In addition, like most other customization features and functionalities Microsoft Word has to offer, changing the background color in Word is a pretty simple procedure.
If you would like to change the background color of a Word document, here’s how you can do so:
- Open the document you want to change the background color of.
- If you’re using Word 2007 or Word 2010, navigate to the Page Layout tab in Word’s toolbar. On the other hand, if you’re using Word 2013 or an even newer version of Word, navigate to the Design tab in Word’s toolbar.

- Click on Page Color in the Page Background section.

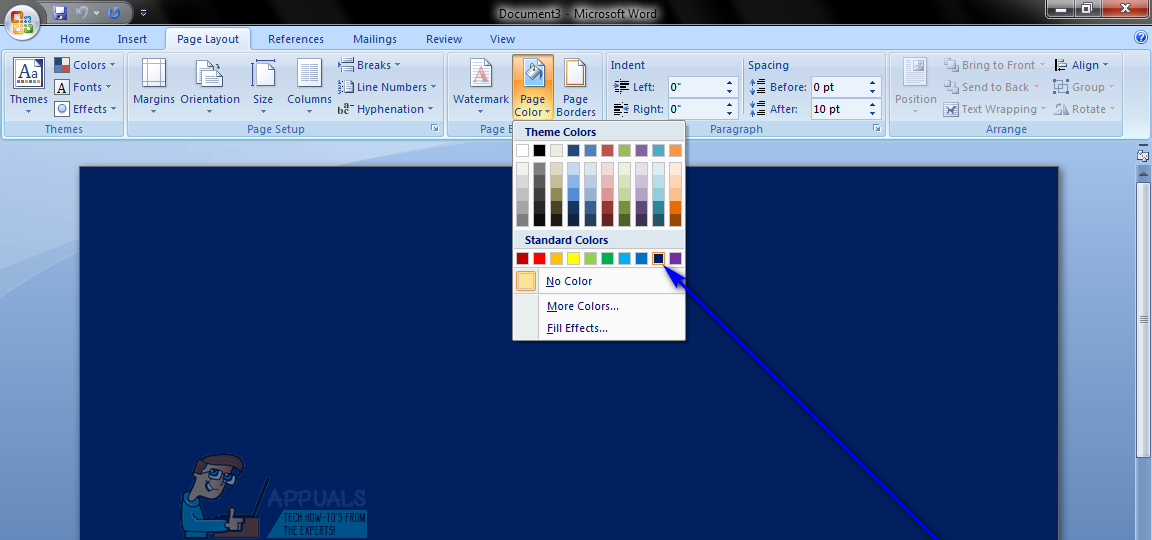
- Locate and click on the color you want the color of the document’s background changed to. You can choose from a specific set of Standard Colors, or a set of Theme Colors that vary from user to user depending on what Theme they are using. You can view and/or change your Theme by clicking on Themes in the Themes section of the same Page Layout or Design tab the Page Color button is located in. Once you click on the color you desire, the background color of the document in question will be changed to it.
 Note: If none of the colors you see in the palettes meet your preferences or interest you, you can create your own create your own color by clicking on More Colors…. You can use the tools in both the Standard and Custom tabs of the Colors window to come up with a color that perfectly fulfills your requirements. Once you come across such a color, click on OK.

 Note: If none of the colors you see in the palettes meet your preferences or interest you, you can create your own create your own color by clicking on More Colors…. You can use the tools in both the Standard and Custom tabs of the Colors window to come up with a color that perfectly fulfills your requirements. Once you come across such a color, click on OK.
It should be noted that there’s a lot more that you can do to a Word document’s background than just format it with one specific color. You can also add a gradient, texture, pattern or an entire custom image to the background of a Word document. To do so, simply click on Page Color > Fill Effects…, navigate to the tab of whatever fill effect you want to use and configure and apply the desired effect. You can reset the background color of a Word document back to default by simply clicking on Page Color > No Color.

Kevin Arrows
Kevin Arrows is a highly experienced and knowledgeable technology specialist with over a decade of industry experience. He holds a Microsoft Certified Technology Specialist (MCTS) certification and has a deep passion for staying up-to-date on the latest tech developments. Kevin has written extensively on a wide range of tech-related topics, showcasing his expertise and knowledge in areas such as software development, cybersecurity, and cloud computing. His contributions to the tech field have been widely recognized and respected by his peers, and he is highly regarded for his ability to explain complex technical concepts in a clear and concise manner.
Back to top button
Color fill a table to add emphasis
Updated on October 11, 2022
What to Know
- New table: Create a table, go to Table Design, and select a border style, size, and color. Select Border Painter to color cells.
- Existing table: Right-click the cells, select Borders and Shading > Shading > Fill, and choose a color. Select Apply to > Cell or Table.
- Or, go to the Design tab, select Page Borders > Shading > Fill, and choose a color. Select Apply to > Cell or Table.
This article explains how to apply a background color to an entire table or to specific portions while working on a table in Microsoft Word, adding emphasis or making a complex table easier to read. Instructions cover Microsoft Word for Microsoft 365, Word 2019, Word 2016, Word 2013, and Word 2010.
Want to Change the Display Color of a Whole Word Document? This Will Help
Add a Table With Shading
To create a new table and color it before entering data into it:
-
On the ribbon, go to the Insert tab and select the Table drop-down arrow.
-
Drag the cursor across the grid to choose how many rows and columns you want in the table.
-
On the Table Design tab, select a border style, size, and color.
-
Select the Borders drop-down arrow and choose the borders you want to apply. Or, select Border Painter to draw on the table to indicate which cells should be colored.
Add Color to a Table With Borders and Shading
To format an existing table with a background color:
-
Highlight the cells you want to tint with a background color. Use the Ctrl key to select non-contiguous cells.
-
Right-click one of the selected cells.
-
Select Borders and Shading.
-
Select the Shading tab.
-
Select the Fill drop-down arrow to open the color chart, then choose a background color.
-
Select the Style drop-down arrow, then choose a tint percentage or a pattern in the chosen color.
-
Select the Apply to drop-down arrow, then choose Cell to apply the chosen color only to the highlighted cells. Or, choose Table to fill the entire table with the background color.
-
Select OK.
Add Color With Page Borders Design Tab
To use the Design tab to add any color to a table:
-
Highlight the table cells to which you want to apply the background color.
-
Select the Design tab.
-
In the Page Background group, select Page Borders.
-
Select the Shading tab.
-
Select the Fill drop-down arrow, then choose a color from the color chart.
-
Select the Style drop-down arrow, then choose a percentage of tint or a pattern.
-
Select the Apply to drop-down arrow and choose Cell to add the background tint to the selected cells. Or, choose Table to fill the entire table with the background color.
FAQ
-
How to I change the color of a table’s lines in Word?
Select the cell, cells, or entire table you want to edit. Next, right-click to bring up the table design menu and select the Borders button (it looks like a 2×2 grid), followed by Borders and Shading > Colors. Choose the color and other style options you want, then select OK to save.
-
How do I tell a table in Word to alternate row colors?
To manually adjust the color of every other row one at a time, choose all of the cells in a given row, then right-click one of those cells and select Borders and Shading > Shading > Fill and choose the color you want. Or select the entire table, then select Home > Format as Table, then choose a style with alternating row colors.
Thanks for letting us know!
Get the Latest Tech News Delivered Every Day
Subscribe
In this article, we plan to provide you 8 ways to set different background colors for header, footer, and main document in Word.
By default, to set a page color will make all parts of the document in the same background color, including the header, footer and main document. What if we want to set different background colors for these 3 parts?
To achieve so, we will have to deploy some workarounds, such as follows:
Method 1: Insert a Shape into Header or Footer
Let’s take the example of header first.
- Double click on header to enter its editing mode.
- Then click “Insert” and click “Shapes”.
- Next choose “Rectangle” on the drop-down menu.

- Wait until your cursor turns into a plus sign. Then drag it to draw a rectangle as large as the header area.
- Now right click on the shape. And choose “Format Shape” to open the same name box.
- Then click “Fill” and choose a fill color.
- Next click “Line Color” and select “No line”. Close the box.

- Right click on the shape again and choose “Wrap Text” this time.
- Click “Behind Text” on the submenu.

- Lastly, double click on main document to exit header.


The step to format footer is very much the same.
Here is the possible result:
Method 2: Insert a Text Box into Header or Footer
Similarly, we will describe how to do it in header as a demonstration.
- Firstly, double click on header to enter editing mode.
- Next click “Insert”, “Text Box” and “Draw Text Box” in consecutive.

- See your cursor turns into a plus sign. And click to draw a text box as large as the header area.
- Repeat step 5 to 10 in method 1 to format the text box and set background color for header.

Method 3: Insert a Picture into Header or Footer
- First of all, double click on header to enter editing mode.
- Then insert a picture into header by clicking “Insert” tab then the “Picture”.

- Choose a picture from your folder.
- Next right click on the picture and click “Wrap Text”.
- Choose “Behind Text”.
- Then adjust the picture size to fill the header area.

See the effect:
Method 4: Insert a Table into Footer
We can employ this method to just footer.
- Firstly double click on footer to enter the editing mode.
- Next click “Insert” and “Table” to insert a 1×1 table.
- Then select the table and right click.
- Choose “Table Properties”.
- In the box open, click “Table” tab then click the “Borders and Shading”.
- In the second box, click “Borders” and choose “None”.
- Then click “Shading” and choose a fill color.
- Click “OK” in the second box.
- Now back to the first box and click “Around” for text wrapping.
- Click “OK”.

- Finally, enlarge the table and fill the footer area.

Method 5: Insert a Shape into the Main Document
- To begin with, click “Page Layout”, then click “Page Color” and choose a color as the background color.

- Next enter header mode.
- Insert a shape following step 2 and 3 in method 1.
- Then enlarge the shape size to cover the main document area.
- Repeat step 5 to 9 in method.
- At last, click “Close Header and Footer”.


Method 6: Insert a Text Box into the Main Document
- Repeat step 1 in method 5 to format the background color for the entire document.
- Next enter header. And insert a text box as large as the main document part.
- Repeat step 5 to 9 in method 1.
- Exit header by clicking “Close Header and Footer”.
Method 7: Insert a Picture into the Main Document
- Similarly, repeat step 1 in method 5 to format the background color for the entire document.
- Next enter header and insert a picture to cover the main document.
- Then set the picture wrapping style as “Behind Text”.
- lastly exit the header.
Method 8: Insert a Table into the Main Document
If you decide to use this method, you have to format the document before enter any content.
- Likely, format the background color for the entire document.
- Insert a table to cover the main document part. And use step 3 to 10 in method 4 to set the table properties.
- Lastly, exit the header mode.
Solve Word Problems
We can realize many achievements in Word. But there is no guarantee for perfect performance all the time. Sooner or later, we are likely to run into some hard issues. If so, we need to utilize a doc fix tool to address such issues.
Author Introduction:
Vera Chen is a data recovery expert in DataNumen, Inc., which is the world leader in data recovery technologies, including fix Excel and pdf repair software products. For more information visit www.datanumen.com
You are here: Home / Software / How To Add And Remove Background Color In Microsoft Word?
Microsoft Word is one of the most popular text editors, with support for a variety of formats and features that make it one of the best productivity applications for computers. Most users prefer Microsoft Word for their text editing, and rightly so with the host of other features, it provides like adding images and other multimedia and personalizing the text.
You can add a background color to the document as well, to make the document aesthetically pleasing, or if you are trying to emphasize the message with colors. This can come in very handy in all sorts of situations, and you can also remove the background if the situation calls for it.
On the latest versions of Microsoft Word, you can add visual elements like background elements like watermarks and background colors from the Design tab.
To remove the white background in Word and add background color, follow these steps:
- Open Microsoft Word on your Windows device.
- Go to the Design tab from the taskbar at the top.
- Click on the Page color option.
- Choose the color you want under Theme Colors or Standard Colors.
- If you do not see the color you want, select More Colors, and then choose a color from the Colors
- To add a gradient, texture, pattern, or picture, select Fill Effects, and then go to Gradient, Texture, Pattern, or Picture and select an option from the list provided.
How To Remove Background Color In Word?
To remove background color in Word, you need to do that from the same options.
- Open Microsoft Word on your Windows device.
- Go to the Design tab from the taskbar at the top.
- Click on the Page color
- Choose the No Color option from the drop-down menu.
Picture Editing In Microsoft Word; How To Remove Background From Images?
In Microsoft Word, when you insert images into your document, you may choose to keep only certain parts of the image that you insert. You don’t need to be an expert in image editing for this, as Microsoft Word lets you remove certain objects from the background of the image you just added.
Here, I shall mention the simple steps that you can follow to remove backgrounds in images in Microsoft Word.
- Open the Microsoft Word document on your device.
- Add the image that you wish to add to the document.
- Click on the image to select it. Upon selecting, you should see a new Format tab added to the taskbar ribbon at the top. Switch to that tab.
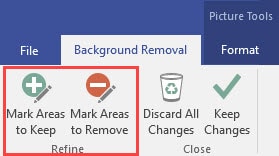
- Click on the Remove background button at the very left of the ribbon. Microsoft Word will detect the background automatically and highlight it in magenta color. Everything colored magenta will get removed from the image.

- Word is not sophisticated enough like other dedicated photo editing apps, but it still does a decent job of detecting the background. However, you can make changes to the areas marked as background. You should now see a new “Background Removal” tab on the Ribbon with a few options: Mark Areas to Keep, Mark Areas to Remove, Discard All Changes, and Keep Changes.
- Use the ‘Mark Areas to Keep’ and ‘Mark Areas to Remove’ tools to select the background accurately.
- Click outside the image at any time to check your work. When you are satisfied with your image, click the “Keep Changes” button on the “Background Removal” tab to finalize your changes.
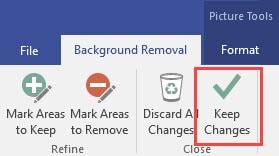
- You should now have a clean, background-free image.
Wrapping Up
So there you have it. Now you know how to remove background color in Word using the steps provided above. Comment below if you found this useful, and to discuss further the same. Also, read how to bring dark mode in Microsoft Office applications.
You can dress up pages in a document with page borders and background settings. You can line the margins of your pages with borders to give them finished edges or to make certain pages stand out, and you can even create your own page designs using colors and watermarks.
Add a Watermark
A watermark is a faint message or image that indicates a document should be specially treated. It does not obscure text on the page.
- Click the Design tab.
- Click the Watermark button.
- Select a watermark.

You can choose a built-in watermark from a category such as Confidential, Disclaimers, or Urgent, or you can create a custom watermark.

It’s applied to every page in the document, set behind the text.
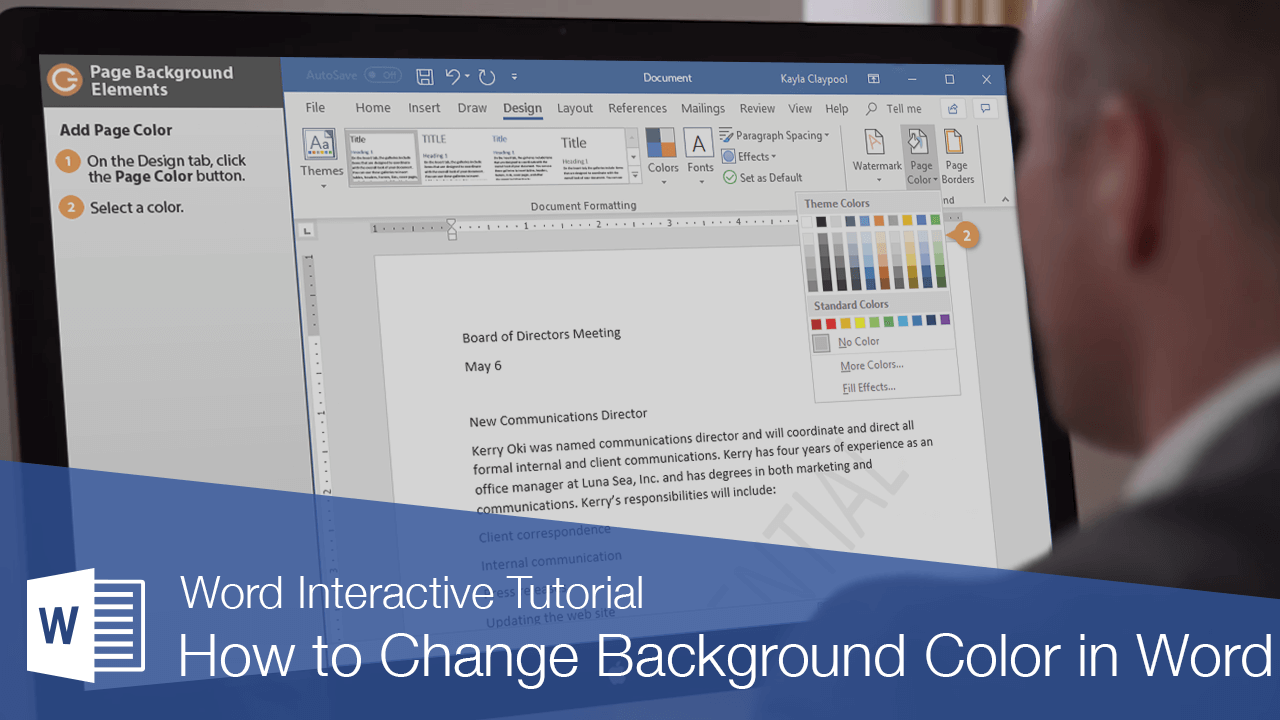
Add Page Color
You can also add a background color to your document. This color will only appear in digital copies of the document—Word will not print the page color.
- On the Design tab, click the Page Color button.
- Select a color.
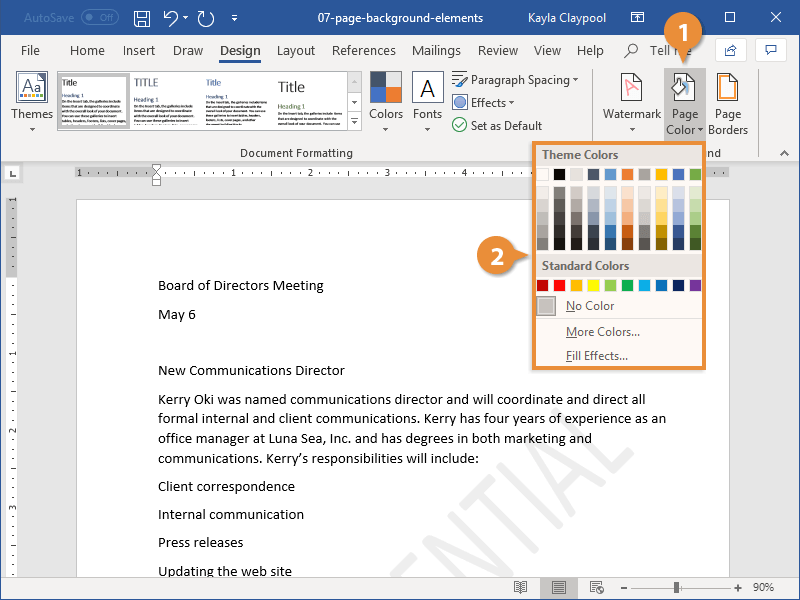
Page color won’t be printed; it will only appear when viewed digitally—as a Word document, PDF, or web page.
Add Page Borders
Finally, you can add page borders along the margins to give it a finished look.
- On the Design tab, click the Page Borders button.
- Select a border style from the Style list.
- Select a border color.
- Select a border width.
- Choose which sides of the page will have a border by clicking the top, bottom, and/or sides of the preview.
- Choose which sections of the document will have the border.
- Click OK.
Using the Borders and Shading dialog box, customize how you want the border to look.
You can choose from a variety of solid lines, dotted and dashed lines, and patterns.
You can choose the whole document, just this section, just the first page in this section, or every page in the section but the first page.

The border is added to the selected pages.

FREE Quick Reference
Click to Download
Free to distribute with our compliments; we hope you will consider our paid training.