
Document themes make it easy to coordinate colors, fonts, and graphic formatting effects across your Word, Excel, and PowerPoint documents and update them quickly. This video show you how-to change the entire theme, read below to just customize theme fonts, colors, or effects.

I want to
-
Choose a standard color theme
-
Create my own color theme
-
Change theme fonts
-
Change theme effects
-
Switch or remove a theme
-
Save a custom theme for reuse
-
Make my changes the new default theme
-
Learn more about themes
Choose a standard color theme
-
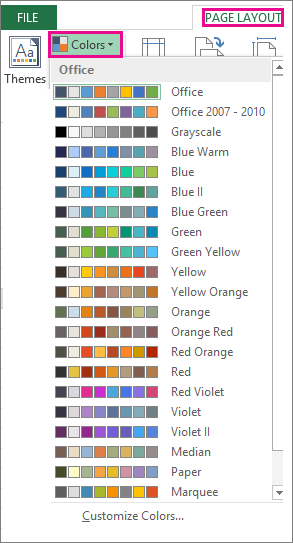
On the Page Layout tab in Excel or the Design tab in Word, click Colors, and pick the color set you want.
Excel

Word
Tip: The first group of colors are the colors in the current theme.
Create my own color theme
-
On the Page Layout tab in Excel or the Design tab in Word, click Colors, and then click Customize Colors.
-
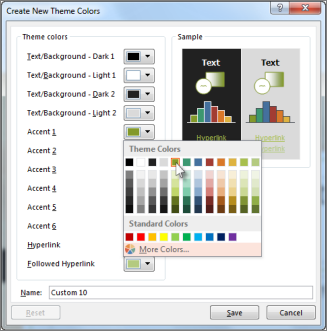
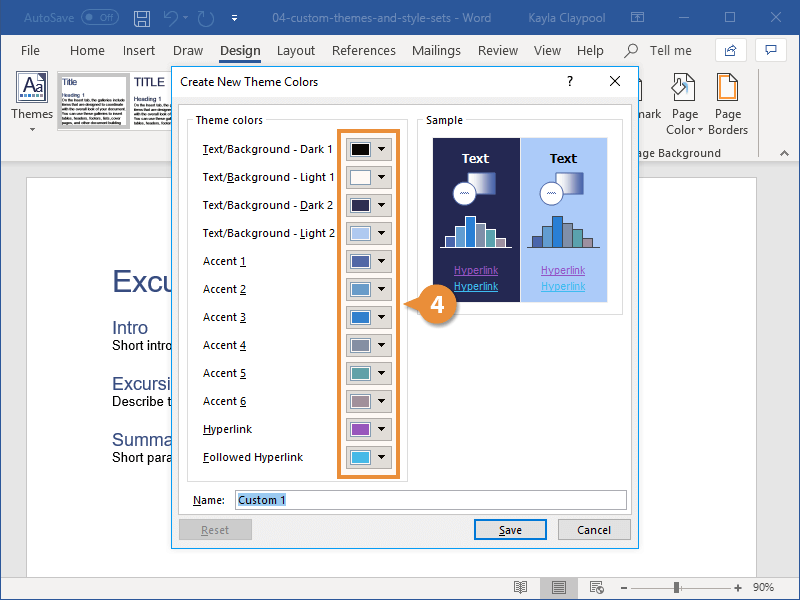
Click the button next to the theme color you want to change (for example, Accent 1 or Hyperlink), and then pick a color under Theme Colors.
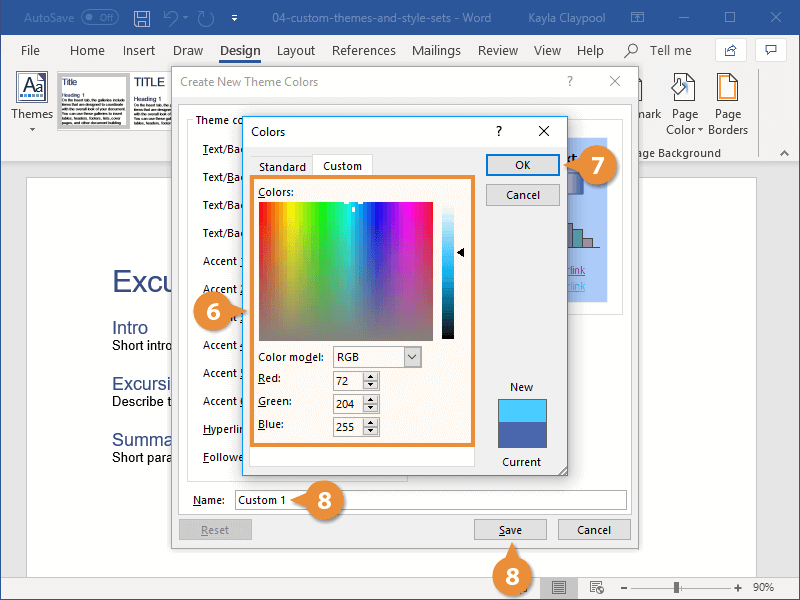
To create your own color, click More Colors, and then pick a color on the Standard tab, or enter numbers or select a color on the Custom tab.
-
In the Sample pane, preview the changes that you made.
-
Repeat this for all the colors you want to change.
-
In the Name box, type a name for the new theme colors, and click Save.
Tip: To return to the original theme colors, click Reset before you click Save.
Change theme fonts
-
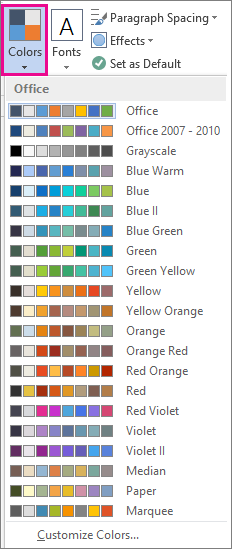
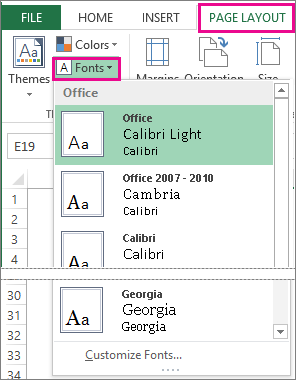
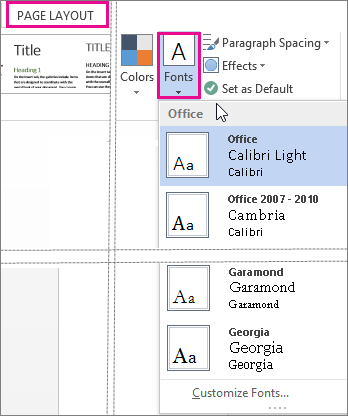
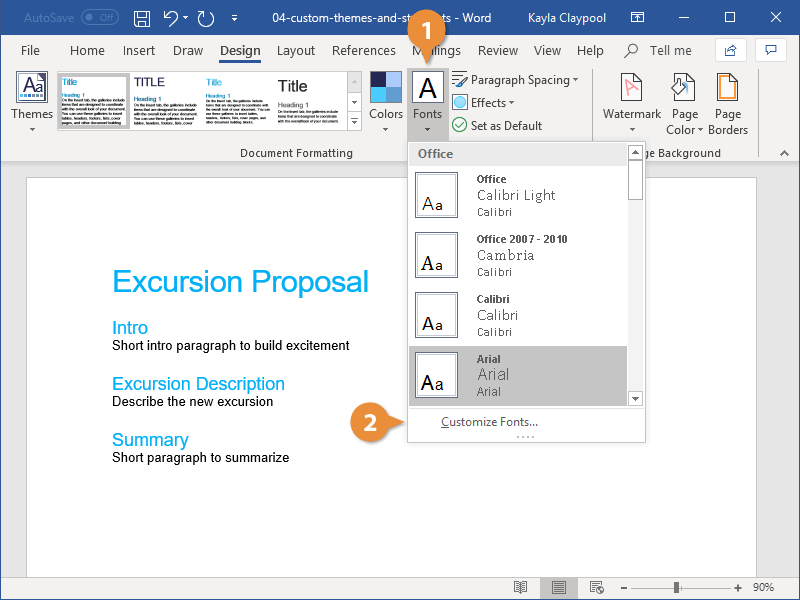
On the Page Layout tab in Excel or the Design tab in Word, click Fonts, and pick the font set you want.
Excel
Word
Tip: The top fonts are the fonts in the current theme.
-
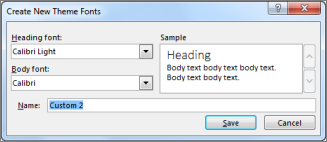
To create your own set of fonts, click Customize Fonts.
-
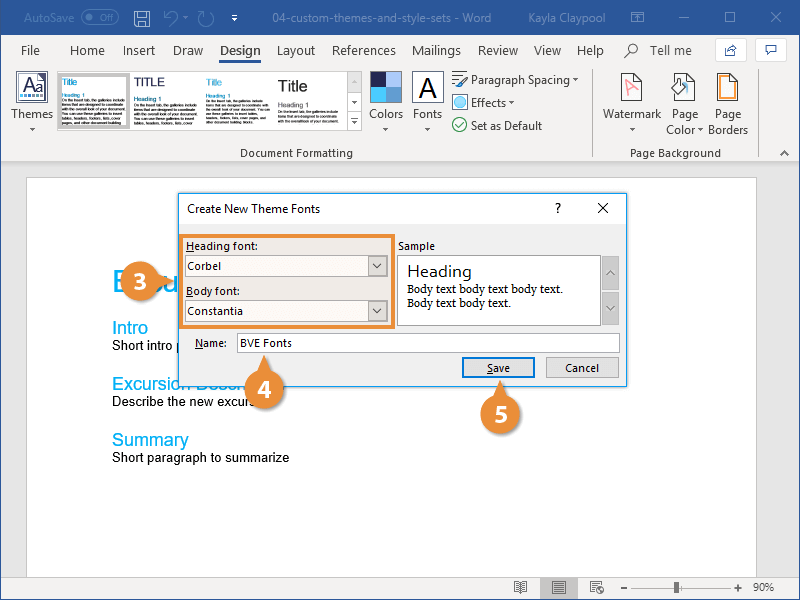
In the Create New Theme Fonts box, under the Heading font and Body font boxes, pick the fonts you want.
-
In the Name box, enter a name, and click Save.
Change theme effects
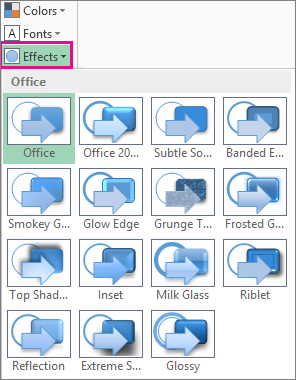
Theme effects include shadows, reflections, lines, fills, and more. While you cannot create your own set of theme effects, you can choose a set of effects that work for your document.
-
On the Page Layout tab in Excel or the Design tab in Word, click Effects.
. -
Select the set of effects that you want to use.
 .
.
Switch or remove a theme
-
To change themes, simply pick a different theme from the Themes menu. To return to the default theme, choose the Office theme.
-
To remove theme formatting from just a portion of your document, select the portion you want to change and change any formatting you like, such as font style, font size, color, etc.
Save a custom theme for reuse
Once you’ve made changes to your theme, you can save it to use again. Or you can make it the default for new documents.
-
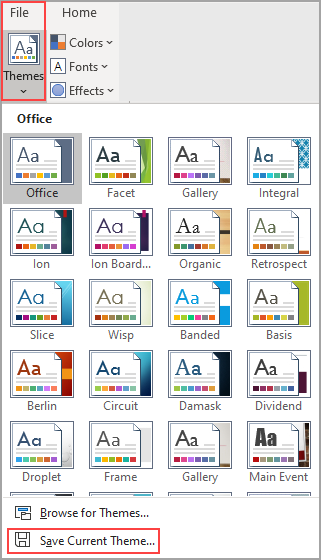
On the Page Layout tab in Excel or the Design tab in Word, click Themes > Save Current Theme.
-
In the File name box, enter a name for the theme, and click Save.
Note: The theme is saved as a .thmx file in the Document Themes folder on your local drive and is automatically added to the list of custom themes that appear when you click Themes.
Make my changes the new default theme
After saving your theme, you can set it so it’s used for all new documents.
Excel
Apply your custom theme to a blank workbook and then save it as a template named Book.xltx.
Word
-
On the Design tab, click Set as Default.
More about themes
A document theme is a unique set of colors, fonts, and effects. Themes are shared across Office programs so that all your Office documents can have the same, uniform look.
You can also change the Office theme. The Office theme is the color scheme for your entire Office program, while document themes are more specific (they show up in individual Word documents or Excel spreadsheets).

In addition, you can add a pattern to your Office program, by changing the Office Background.
See Also
-
Change the font size in Word, Excel or PowerPoint
-
Change the line spacing in Word
-
Insert subscript or superscript text in Word
-
Add or remove a sheet background in Excel
-
Create your own theme in PowerPoint
-
Customize and save a theme in Word 2016 for Mac

Now, you have two basic options to add color to your Word documents.
2 Methods to Change Background Color in Microsoft Word
- Using the Default Standard or Theme Colors.
- Using a Custom Color You can Choose from a Spectrum.
This guide walks you through both these methods. It also covers using gradients, textures, patterns, and pictures as backgrounds.
Method 1: Using the Default Standard or Theme Colors.
If you don’t have a particular color in mind, you can conveniently choose from two sets of colors provided in MS Word. These are the Standard Colors and the Theme Colors.
Here’s how they work.
Step 1: Open up your MS Word file.
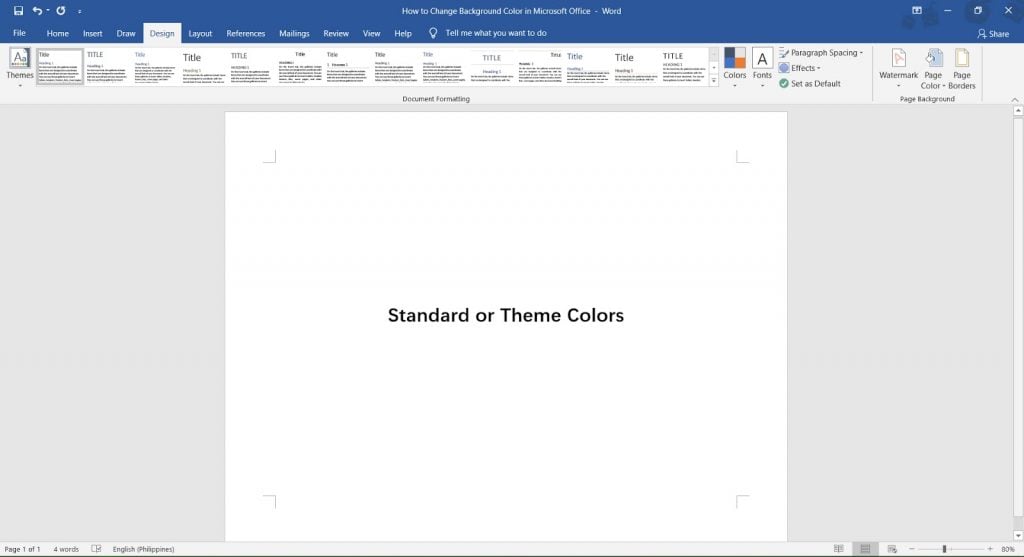
Step 2: Go to the Design Tab.
Go ahead and click on the Design tab. The design options should now appear.
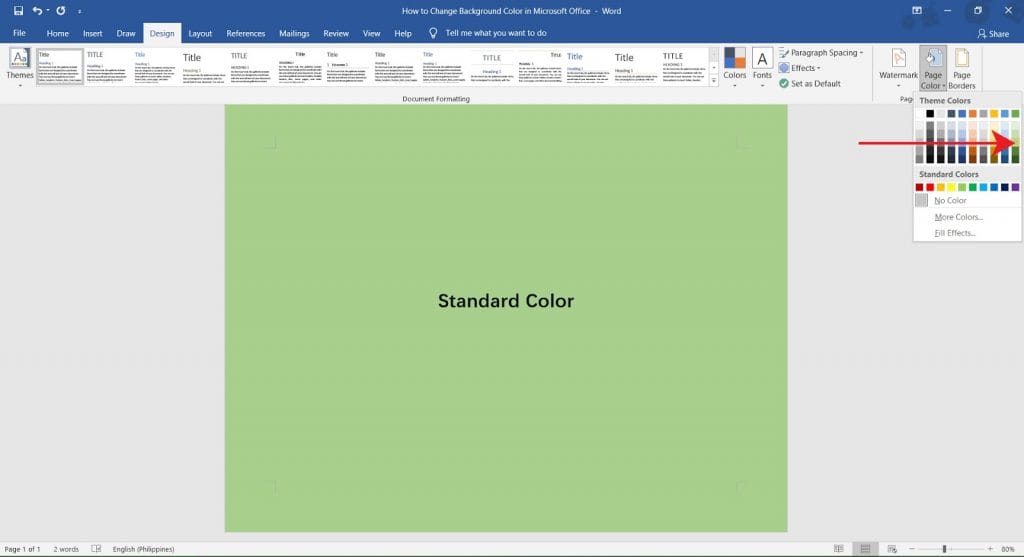
Step 3: Open the Page Color Menu.
Now that you’re on the Design tab, turn your attention to the right side of your screen. Tap on Page Color. That will open a drop-down menu of options you can choose from.

The grid of colors are Theme Colors.
These change as the document theme changes. The row of colors below the grid are Standard Colors.
You can find more standard colors if you click on More Colors.
Go ahead and pick a color.
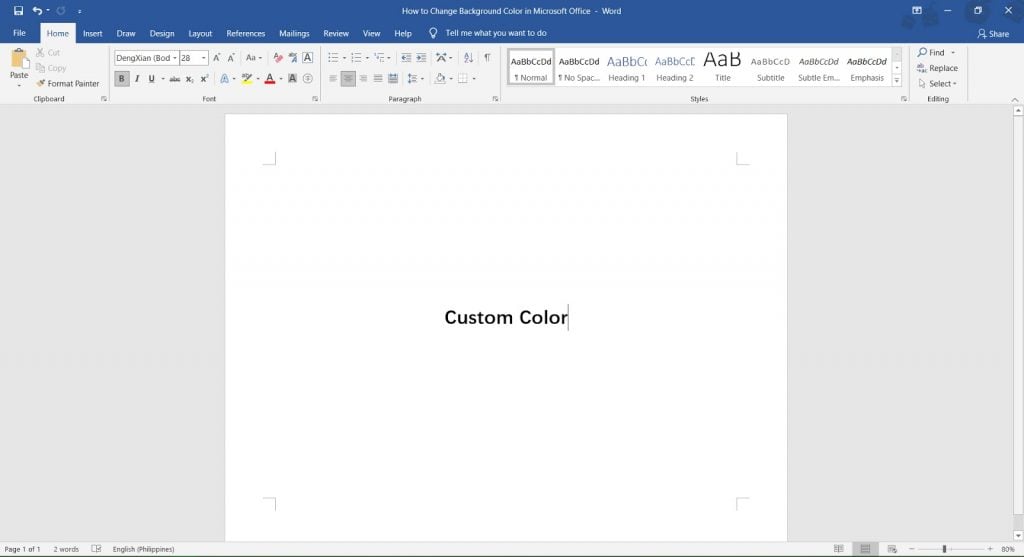
Method 2: Using a Custom Color You can Choose from a Spectrum.
You now know how to change the background color of your Word file. But what if none of the standard colors are to your liking? That’s perfectly alright. With this method, you have free reign to choose your background color from a spectrum.
Here’s how you can change your background to a custom color.
Step 1: Open up your MS Word file.
Step 2: Go to the Design Tab.
Go ahead and click on the Design tab. The design options should now appear.
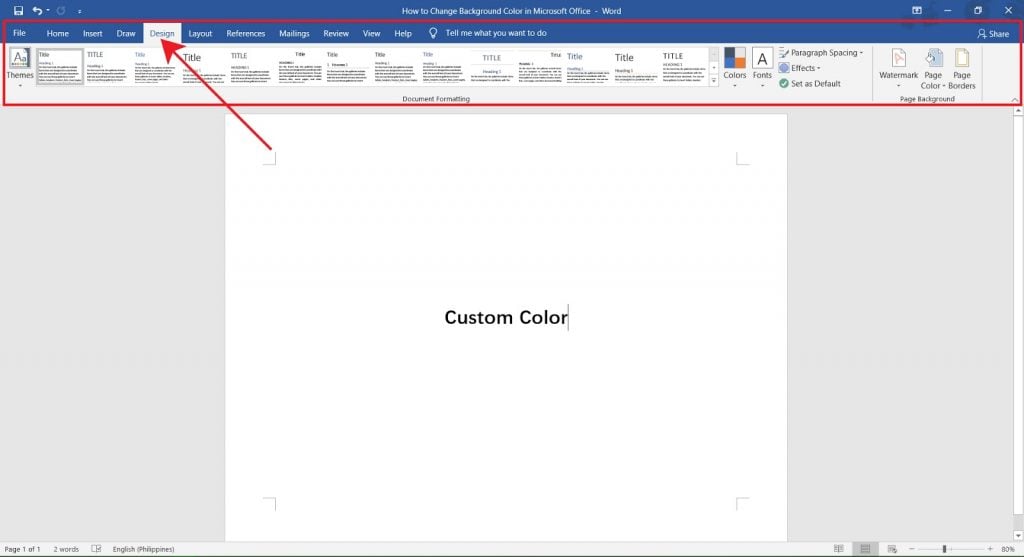
Step 3: Open the Page Color Menu.
Now that you’re on the Design tab, turn your attention to the right side of your screen. Tap on Page Color. That will open a drop-down menu of options you can choose from. Click on More Colors.
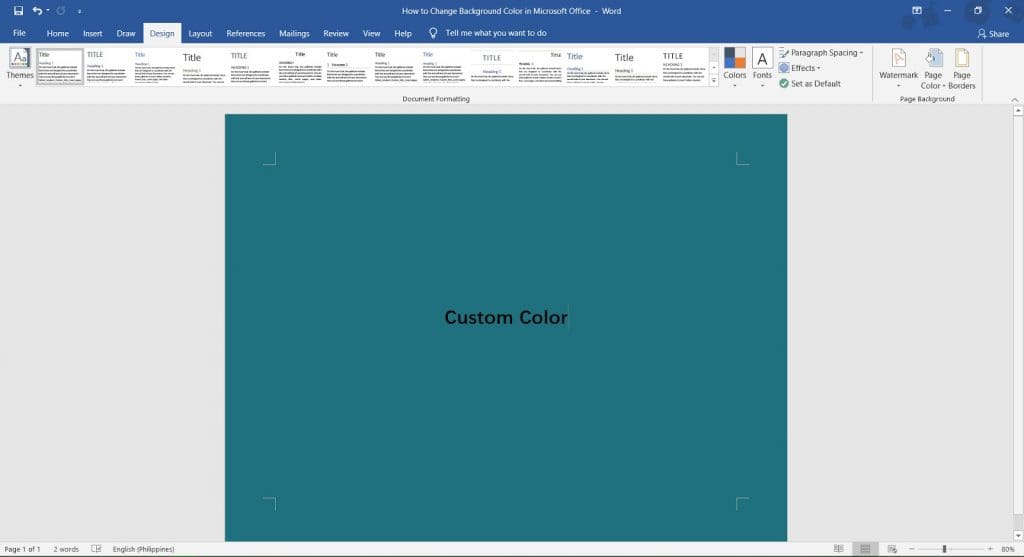
Step 4: Choose a Custom Color
In the More Colors window, there are two tabs. Click on the Custom tab. You should be able to see a box of colors, and a bar to its right. Click and drag inside the box to get your desired hue and saturation. Now look to the bar. Moving the slider up and down adjusts the brightness of your color.
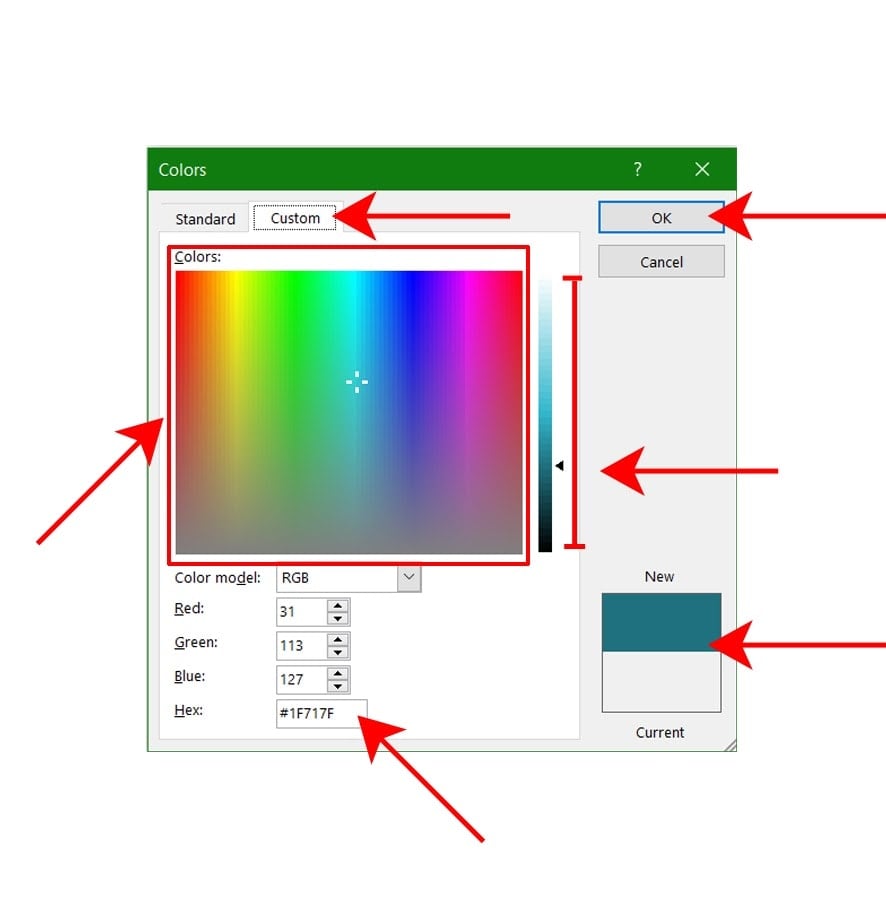
Also, notice that box on the bottom labeled Hex. Hex is a system of codes that represent colors in the RGB format. One code represents one color. This allows you to easily replicate any custom color you have used before. All you have to do is type in the color code into the box. In this illustration, the Hex code is #1F717F.
Once you’re satisfied with the color you’ve chosen, click OK to apply it to your background.
Other Backgrounds
Aside from solid colors, MS Word also has other options you can use to change your background. You can put a gradient, texture, pattern or picture as the background of your document.
To get started on any of these other backgrounds, first go to your Design tab. Open the Page Color menu and click on Fill Effects.

Gradient Background
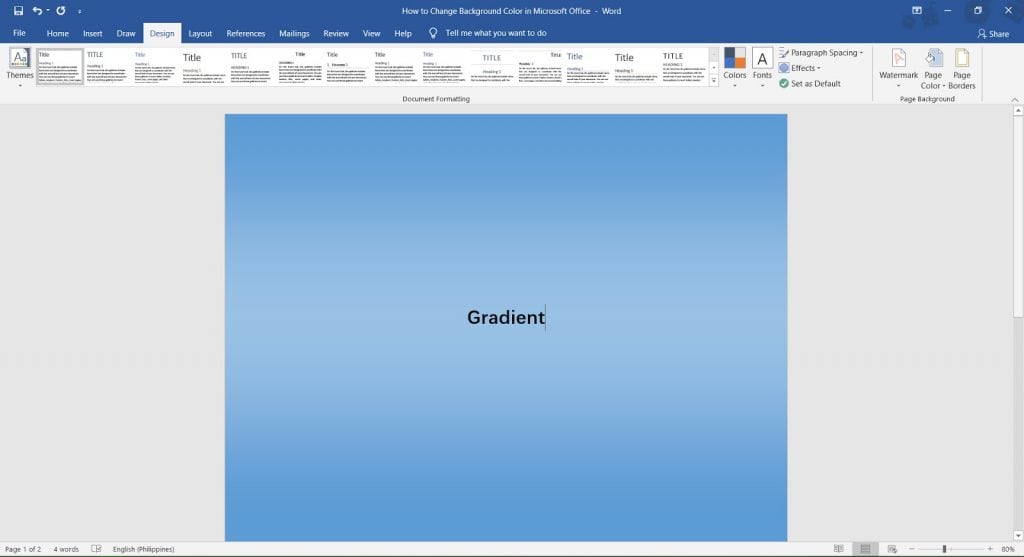
A gradient is a gradual and smooth blending from one color to another. For MS Word, you can make a gradient out of any two colors.
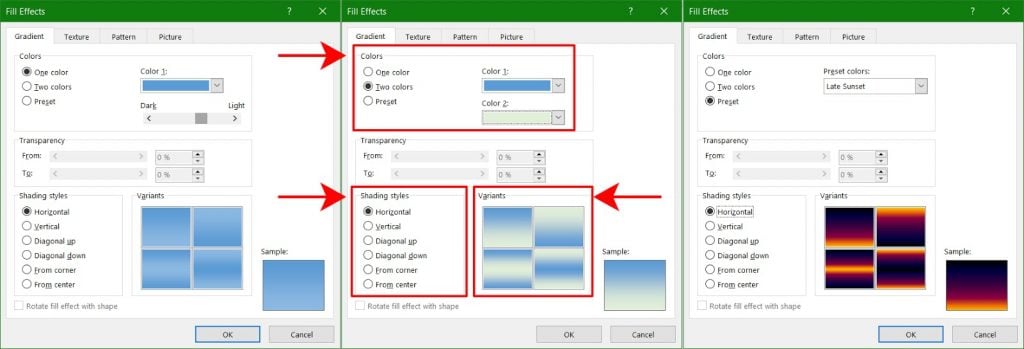
Start with opening up the Fill Effects window, and click on the Gradient tab.
To get your gradient, there are two settings you need to configure. These are the Colors and Shading Styles. Let’s go through each of them.
For your Colors, you can choose between One Color, Two Colors, or a Preset combination of colors. A gradient blends at least two colors. If you choose One Color, your color will blend with its own brightness.
To make it darker, move the slider to the left. Inversely, move the slider to the right to make it lighter.
Shading Style changes the direction your colors blend. Your options are Horizontal, Vertical, Diagonal Up, Diagonal Down, From Corner or From Center.
Find the one that works best for you.
Variants are four combinations made from your choice of colors and shading style. Go ahead and select your gradient.
The small sample box allows you to verify your choice before you apply it to your background.
Textured Background
This option allows you to have a texture as the background of your document. This allows for more complex colors and shapes. There are default options you can choose from, but you also have the option to upload an image of the texture you want to use.
First, bring up the Fill Effects window, then go on the Texture tab.
Select a texture you prefer from the given choices. If none of them work for you, click on Other Textures to upload your own preferred texture.
Be mindful of the image size. Images that are too large won’t be uploaded.
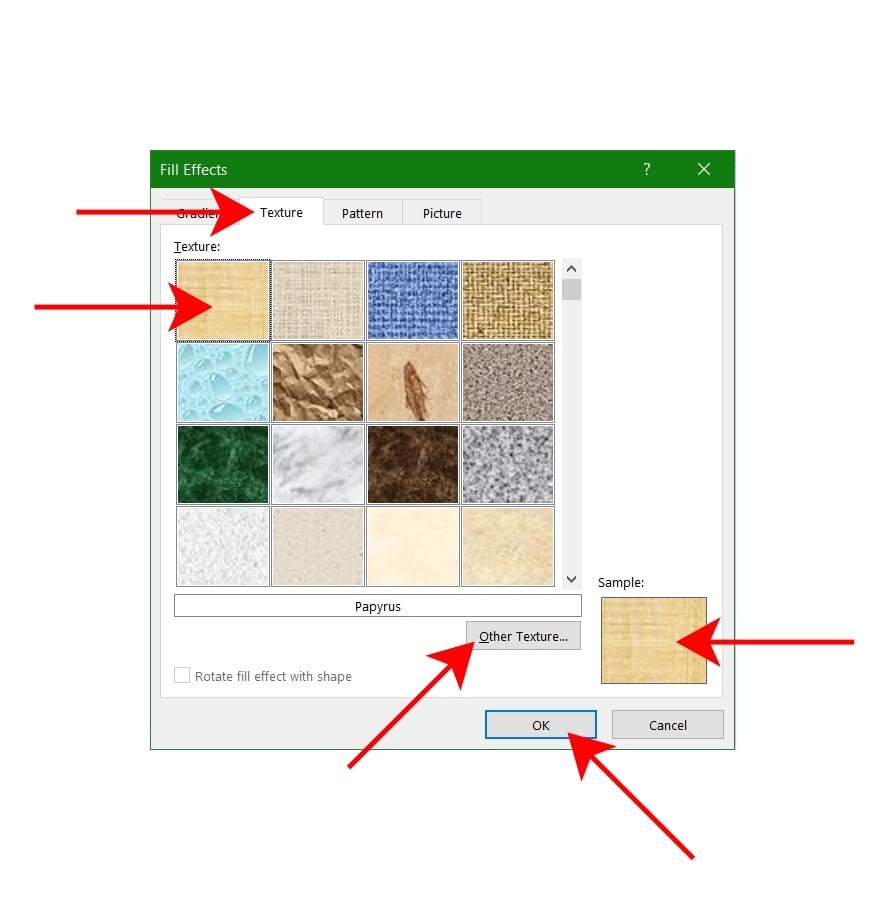
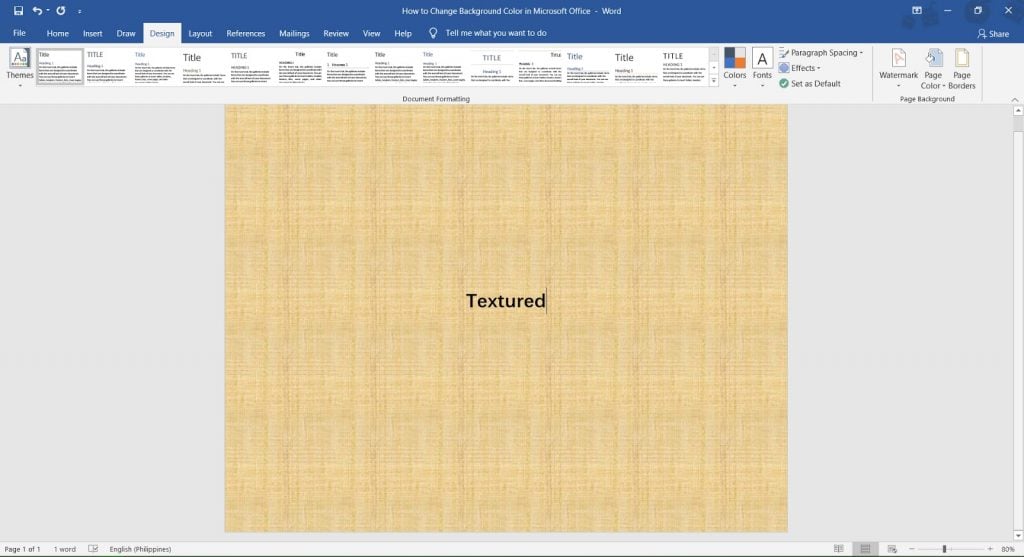
You’ve successfully applied a texture to your background!
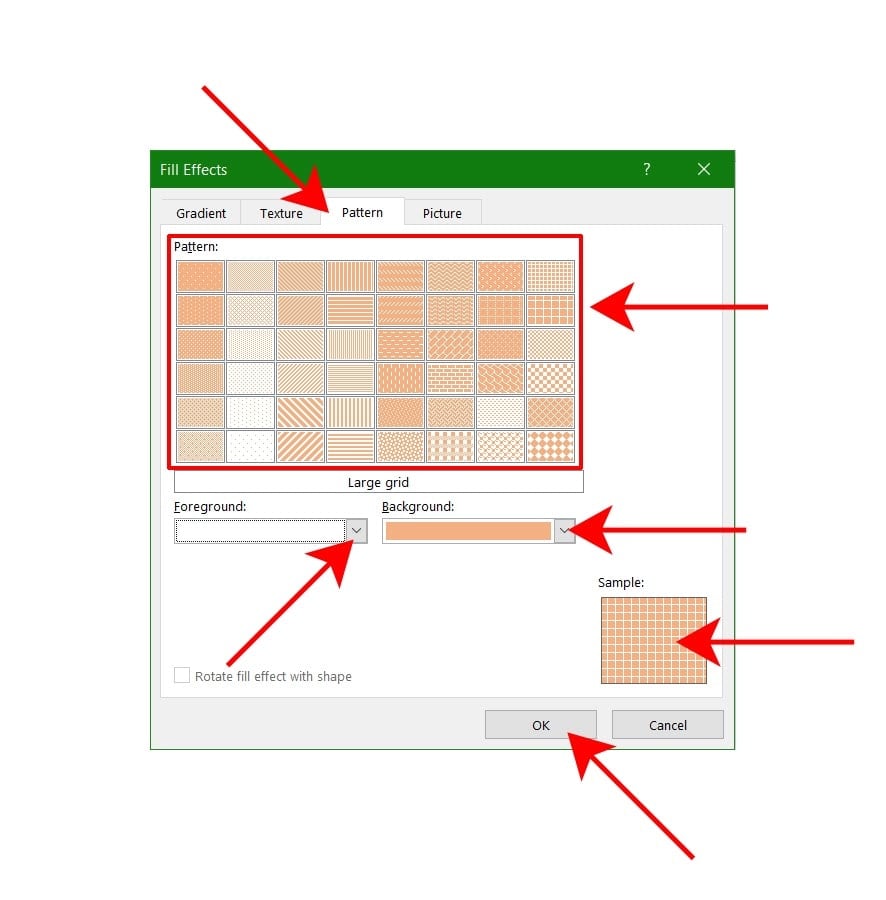
Patterned Background
Sometimes, a good patterned background is all you need. Thankfully, MS Word gives you a lot to choose from! Let’s open up the Fill Effects window to get started, then go to the Pattern tab.
To make your pattern, you need to configure three settings. The Pattern refers to the repetitive design itself.
The Foreground changes the color of the design. The Background is the color behind the design. Fool around with these three settings and see the changes in real-time on the Sample box on the bottom right.
Once you’re satisfied with your pattern, click OK to apply it to your background.

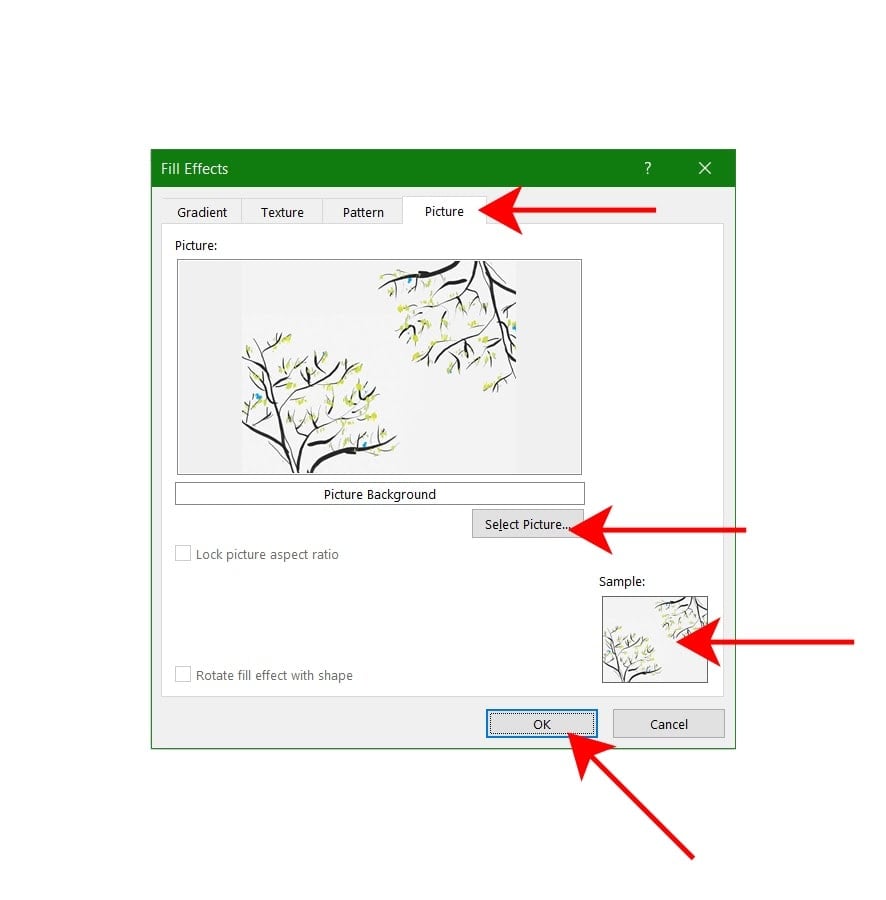
Picture Background
You can use any picture as a background for your document, however, the options to manipulate the picture are limited. You have to make sure that the picture you upload is the same size as your document page to have the right fit.
If your document is in letter size (8.5” x 11”), then make sure that the picture you upload is also in letter size.
Let’s get to it. Open up the Fill Effects window, and click on Picture. Click on Select Picture to browse your device. Upload the picture you want to use and verify that it’s the correct picture. If everything is set, click OK to apply the picture to your background.

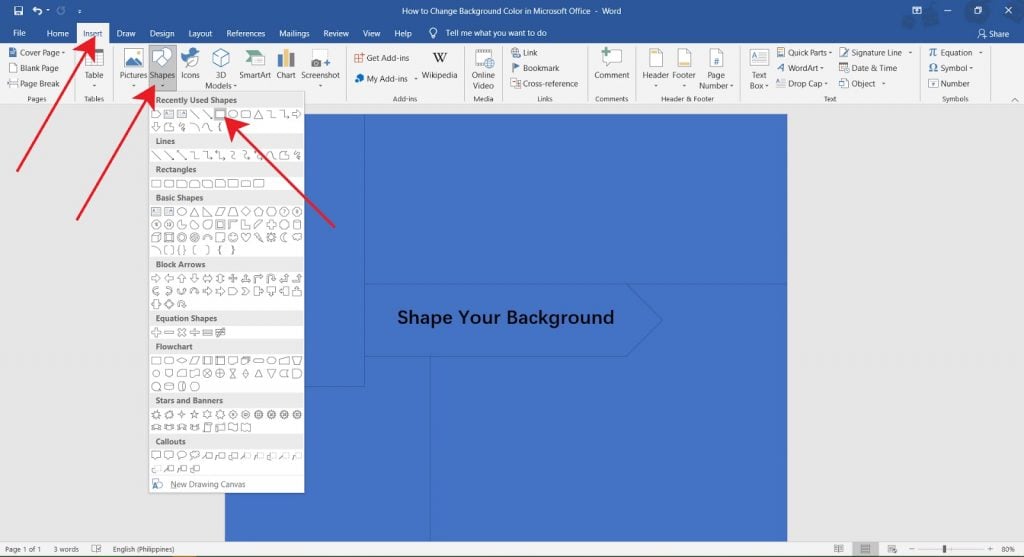
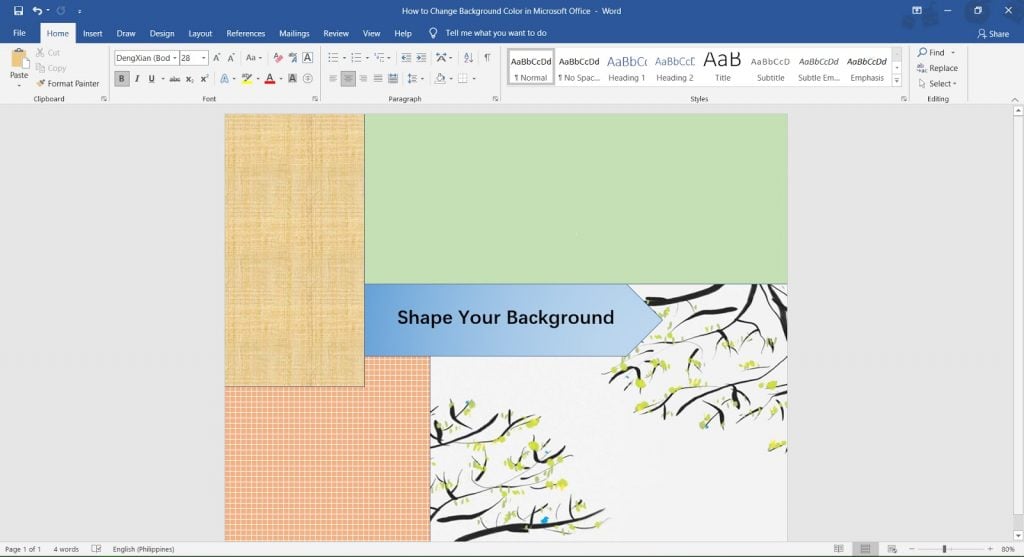
Shape your Background
All the methods explored in this guide, so far, all apply directly to the entire document. Do you want to be able to control where you put a pattern, texture, color or picture? Do you want to have the flexibility to give every page a different background? If you do, then this is the guide for you.
Shape your background by inserting shapes onto your page. Everything covered above can be applied to individual shapes. Let us show you how.
Add your Shapes and Lay them Out on the Page
The first thing you want to do is insert all the shapes you’ll need. To do that, go to the Insert tab on the Ribbon. Once that’s open, click on Shapes, and choose the shape you want to use.
To make a shape, click and drag your mouse. It doesn’t have to be perfect on the first go. You can change the dimensions of your shape anytime.
Also, don’t fret if you already have texts on the page that are being covered by the shapes. We will address that next.
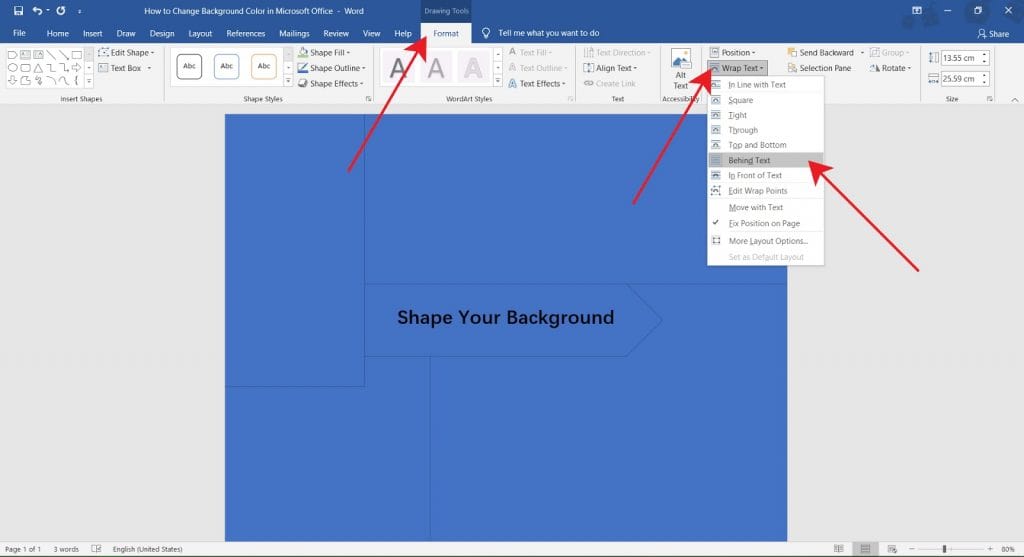
Wrap Text
This is an important step. Doing this will ensure that the shapes stay in their place behind the text. Take note that you do this step for every shape on your page.
Start by selecting a shape. Once you do, a new tab appears on the Ribbon. Click on Drawing Tools Format. Look for Wrap Text and click on it to open the drop-down menu. Select Behind Text. This moves the shape behind any texts on your page. It also keeps them in place regardless of what else you type.
Repeat this step for every shape on the page.
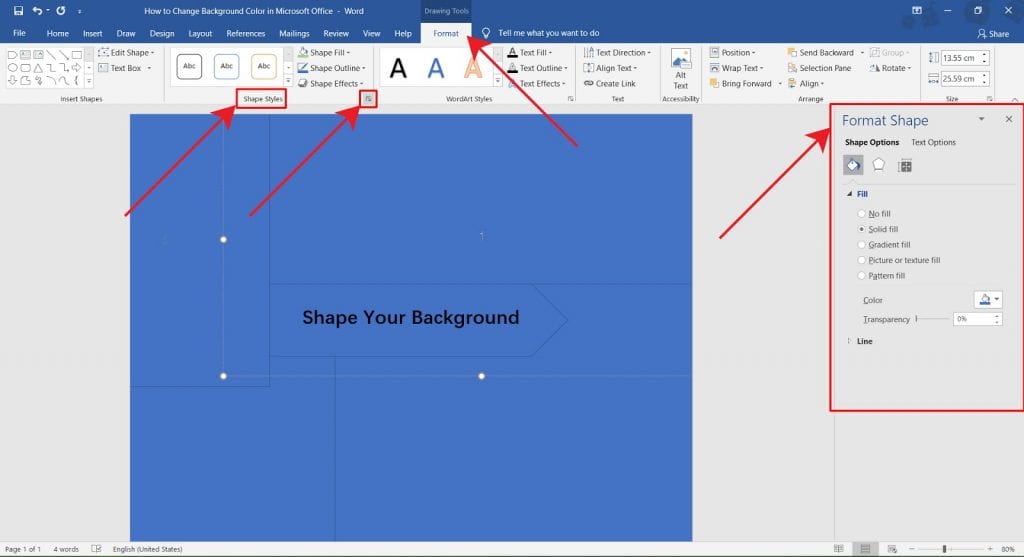
Decorate your Shapes
This is where you apply everything you’ve learned thus far, Solid Colors, Gradients, Textures, Patterns and Pictures. There are minor changes, but the steps are mostly the same.
Start by selecting a shape. Go to the Drawing Tools Format. Look for the portion of the ribbon that’s labeled Shape Styles. There should be a small symbol on the lower right corner that looks like two ends of an arrow. Click it to open the Format Shapes menu. Once you have that opened, you can decorate any shape as you please.
Remove the Background Color
If, after trying all these backgrounds, you decide to go back to the default, white, background color. Don’t worry. This is, by far, the easiest guide here, and you’ll have that clean background again in no time!
First, go to your Design tab. Click on Page Color to open up the colors menu, and click on No Color.
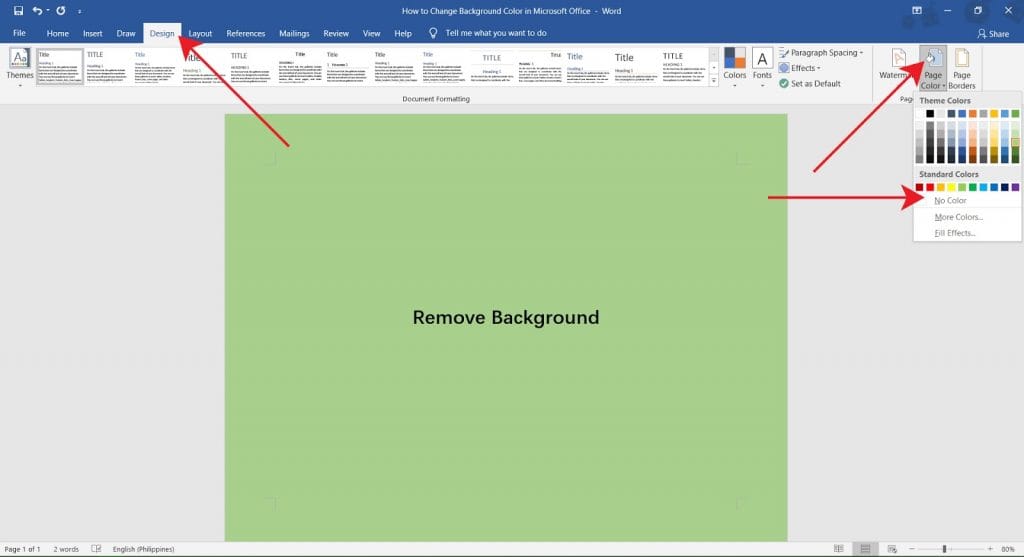
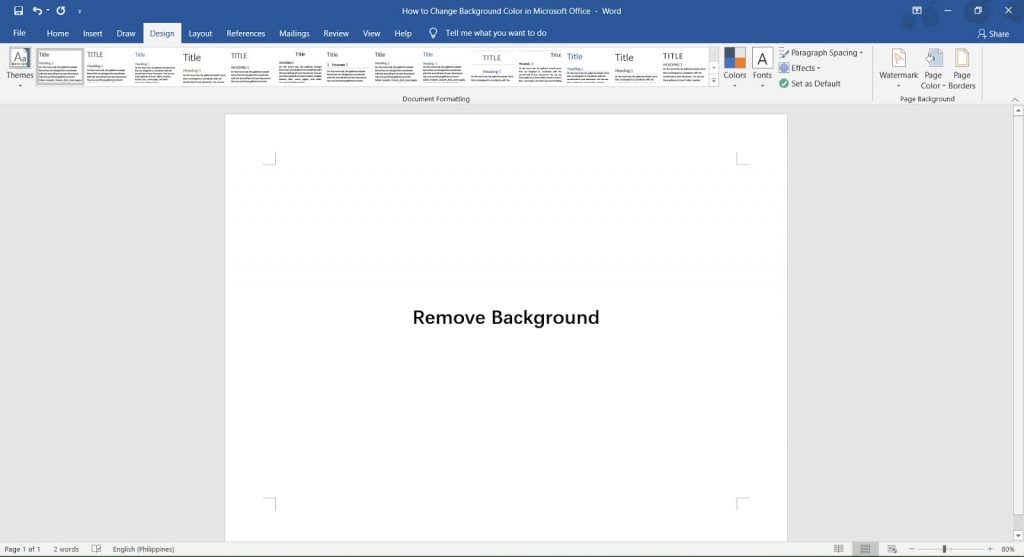
And you’re done! You’ve successfully removed all designs from your background and are back to your default white!
Conclusion
You have finally arrived at the end of this guide. We hope that we’ve helped you learn how to add some color and design to your MS Word document.
We hope you found this article helpful!
Change the Display Color in Word
Use color to add interest to your Word document
Updated on December 13, 2020
Many Word documents are viewed digitally rather than printed, so there’s no reason to be shy about adding color. Here are some of the color changes you can make in Word.
Instructions in this article apply to Word for Microsoft 365, Word 2019, Word 2016, Word 2013, and Word 2010.
Change the Background Color of a Word Document
The background of a Word document can be virtually any color, whether based on the document theme or from an expanded color wheel.
-
Open the Word document in which you want to change the background color.
-
Go to the Design tab.
In Word 2010, go to Page Layout > Page Color.
Lifewire
-
Select Page Color to display a list of color options available as background tints.
Lifewire
-
Select the color you want from Standard Colors or Theme Colors.
Lifewire
-
To add a custom color, select More Colors.
Lifewire
-
Select a color from the wheel and choose OK.
Lifewire
-
To remove a page color, select Page Color and choose No Color.
Lifewire
The document background isn’t limited to solid colors. Add a pattern, texture or image as a background. To do this, select Fill Effects and select Gradient, Texture, Pattern or Picture. When you are in the correct section, select the options you want to apply.
Change the Text Color in Microsoft Word
Using colorful text in a document is an easy way to draw attention to parts of the document. Change all or part of the text to colors other than black.
-
Select the text you want to work with.
-
Go to the Home tab.
Lifewire
-
Select the Font Color drop-down arrow to open the Font Color menu.
Lifewire
-
Hover over the colors to see a preview of the color on the selected text.
-
To see additional colors, chose More Colors.
Lifewire
-
In the Colors dialog box, choose the color you want to apply to the selected text.
Lifewire
-
Select OK.
Highlight Text in Color
Another way to emphasize important information in your document is to highlight it.
-
Select the text you want to highlight.
-
Go to the Home tab and select the Text Highlight Color drop-down arrow to display the Highlight Color menu.
Lifewire
-
Select any color in the menu to apply the highlighting effect to the selected text.
Lifewire
-
Select No Color to remove the highlighting.
Lifewire
If you have a great deal of text to highlight, change the cursor into a highlighter. Go to the Home tab, select the Text Highlight Color drop-down arrow, choose a color, then drag over the lines of text you want to highlight.
Apply a Standard Color Theme
Microsoft Word ships with several standard Color Themes you can choose for your document. To see them, go to the Design tab and select Colors. The color palette in the upper-left corner shows the color theme currently in use, but you can select from any of the options displayed in the window for your document.
Apply a Custom Color Theme
Create a custom color theme if you want exciting warm colors, friendly neutrals, or calming cool colors.
-
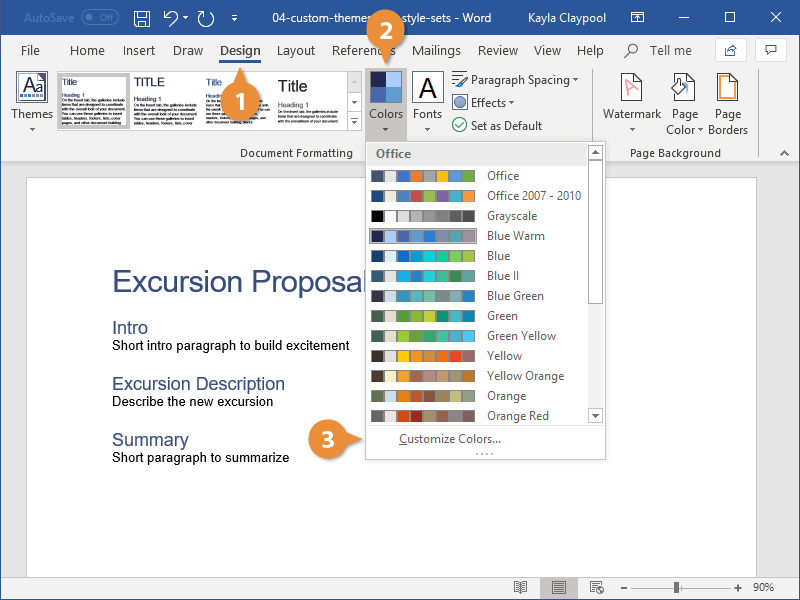
Go to the Design tab and select Colors, then select Customize Colors.
-
Select the arrow next to any of the colors in the current theme to display a Theme Colors palette where you can select and change colors to customize the theme.
Lifewire
-
In the Name text box, enter a descriptive name for the theme.
Lifewire
-
Select Save.
Word Document Background Printing Considerations
Microsoft Word no longer sets a background color solely for display (one that you see on screen but that doesn’t print). In early versions of Word, you could set the background to blue and the text to white, purely for display, but when the time came to print the document, the text printed as usual without a background tint.
The reasoning for including this option was that the white text on a blue background was easier on the eyes while you worked. However, this option has not been available since Word 2003.
More recent versions of Word have options for changing the colors of background and text, but those colors print out as part of the document.
Thanks for letting us know!
Get the Latest Tech News Delivered Every Day
Subscribe
TheTechieSenior.com is reader supported. We may earn a commission if you buy through links on this site. As an Amazon Associate, we earn from qualifying purchases. Learn more here.
If your chosen communication method is through written documents, changing text color is probably the easiest way to have a word or section stand out. I’ll show you how to change text color in Microsoft Word.
Table of Contents
Change text color in Microsoft Word
As with most formatting features in MS Word, you can either change a setting prior to typing your text or you can type it and change the color, size, font, etc. later.

Let’s say you’ve already typed your document and you want to change the color of a single word from the default black to red. Click your mouse just before the first letter of the word or words that you wish the alter the color, then drag your mouse or your finger on a trackpad across until your target text is selected. Once you’ve selected the text, use one of the following methods to change the color.
You can use any of these methods to change your font color for an entire document. If you haven’t typed anything into your document yet, you’d simply use one of the methods given below to change the text color at the beginning of the document.
If your document is fully typed and you decide to change the text color, say from black to dark grey, just select the entire text before you use the methods given below.
Hint: Click anywhere in the document with your mouse. Then, Control + A on Windows computers or Command + A on Mac computers will select the text of the entire document.
Method one – change text color in Word
Leave your text selected and select the Home tab in the ribbon.
- The second section from the left is the text section. Look for a capital A icon with a colored underline. Click that A icon to change your text to the color of the underline under that icon.
- If you want a different color, click the small arrow just on the right of that A icon. An options panel will open where you can select from a number of colors.
- If you don’t see the color you’re looking for, click More Colors… to open a color wheel that will allow you to choose from many more colors.
Method two – change text color in Word
Leave your text selected.
- Right-click on the text and choose “Font….”
- Be sure the Font tab is selected, then in the second section down (Font and Underline), click in the drop-down box below Font Color….
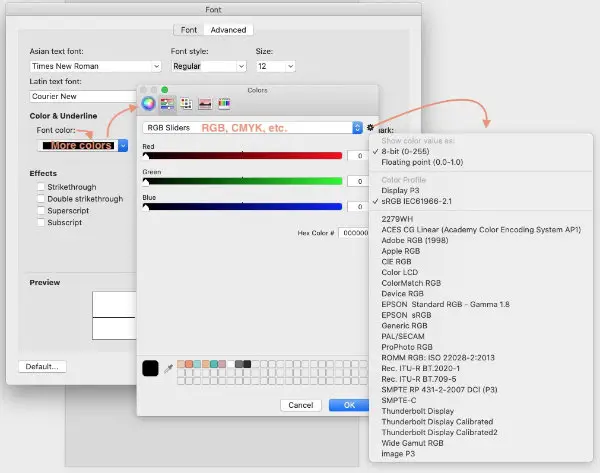
In Microsoft Word for Mac, you could possibly have a huge assortment of font colors available to you. The exact number depends on whether you have other software such as graphic design or photo editing software on your computer that might install additional colors.
When you open the Font panel from the right-click menu, then open the Font color drop-down box, you will see an assortment of color pickers – wheels, etc.. Any of those may present your with more colors to select from.
In the panel that you see when you click the font color drop-down box, there is another drop-down at the top that lets you choose the type of sliders that you want to use. You can RGB, CMYK and more.
To the right of that option, there is a tiny gear icon. If you click on that gear icon, you will see a long list of color profiles to select from. In most cases, writers will not need to change those, but they are available if needed.
Set your font color before typing text in Microsoft Word
You can also set the font color prior to typing the words in MS Word. To do that, just follow the previous instructions except that you will not select your text before you choose the color. Instead, when you come to the place in your document where you want the different colored word, stop just prior to the different colored word. Use the instructions above to set the font color. The menu/ribbon and right-click options will work.
When you’re ready to return to black or whatever your basic document text color is, follow the instructions again and choose black. Continue typing. You should see your colored word in line with your black text.
Personally, if I know ahead of time that I want one or more upcoming words to be a different color, I find it easier to just do it as I type than to return and change it later.
You’ll find more of our tips for styling your text in Microsoft Word here.
You can learn more about styling text in the Microsoft Style Guide.

By default, Microsoft Word uses white as the default page color for all documents. If you’d like to use a custom color for your page, you can change page colors in Word. We’ll show you how.
In Word, you can use any color as the background color for your pages. You can even get Word to print this background color (which it does not by default) by configuring an option in the app. We’ll show you how to do both of those.
Start by opening your document with Microsoft Word. On the Word window, at the top, click the “Design” tab.

In the “Design” tab, from the “Page Background” section, select the “Page Color” option.
You will see various colors you can use for your page. Hover your cursor over a color to see its preview on your page. Then click a color to apply it to your page.
Tip: If you don’t see a color you want, click “More Colors” to see all colors you can use in your document. You may need a specific hex code.
And that’s it. Play around with various colors until you find the one that perfectly suits your document. You may also want to adjust the margins for your page.
Make Microsoft Word Print the Page Color
By default, Word doesn’t print your page’s background color. To make it do so, you will have to change a Word settings option.
To do that, in Word’s top-left corner, click “File.”
From the sidebar to the left, select More > Options.
A “Word Options” window will open. Here, in the left sidebar, click “Display.”
On the right pane, in the “Printing Options” section, enable the “Print Background Colors and Images” option. Then click “OK” at the bottom.
From now on, Word will print your chosen page color when you print your document.
And that’s how you make your documents aesthetically pleasing by using various page colors!
RELATED: How to Change the Page Color in Google Docs
READ NEXT
- › How to Remove Borders in Microsoft Word
- › How to Turn Off Dark Mode in Microsoft Word
- › BLUETTI Slashed Hundreds off Its Best Power Stations for Easter Sale
- › How to Adjust and Change Discord Fonts
- › Expand Your Tech Career Skills With Courses From Udemy
- › The New NVIDIA GeForce RTX 4070 Is Like an RTX 3080 for $599
- › Google Chrome Is Getting Faster
- › This New Google TV Streaming Device Costs Just $20
How-To Geek is where you turn when you want experts to explain technology. Since we launched in 2006, our articles have been read billions of times. Want to know more?
Sometimes it’s the little things that
make a difference in life. Things like changing the color palette in Word,
PowerPoint or Excel. I know it sounds like a small thing, but it really does
make a difference.
Today, I’m sharing a little trick to
do that I use all of the time that I find very few people know about.
When I was recording the tutorials,
my husband (a software engineer) was in the other room. When I finished he said,
“I never knew that.” I felt like a million bucks.
So, let’s get started!
The Secret
Microsoft Office offers a basic
color palette, but it also allows that palette to be changed. Just because it’s
more fun, they made it different in every application, so the process that works
for Word doesn’t work for PowerPoint, and PowerPoint’s process doesn’t work for
Excel. Super fun!
I’m going to show you how to do it
in each of these three applications.
I’ve uploaded the full tutorial video in YouTube, which you can watch here:
I’ve also got the steps listed (with
some screenshots) for each application below.
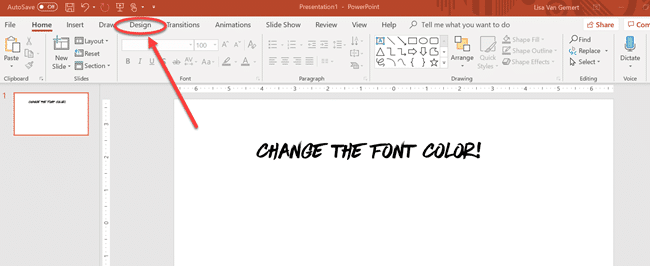
Changing the Color Palette in Word
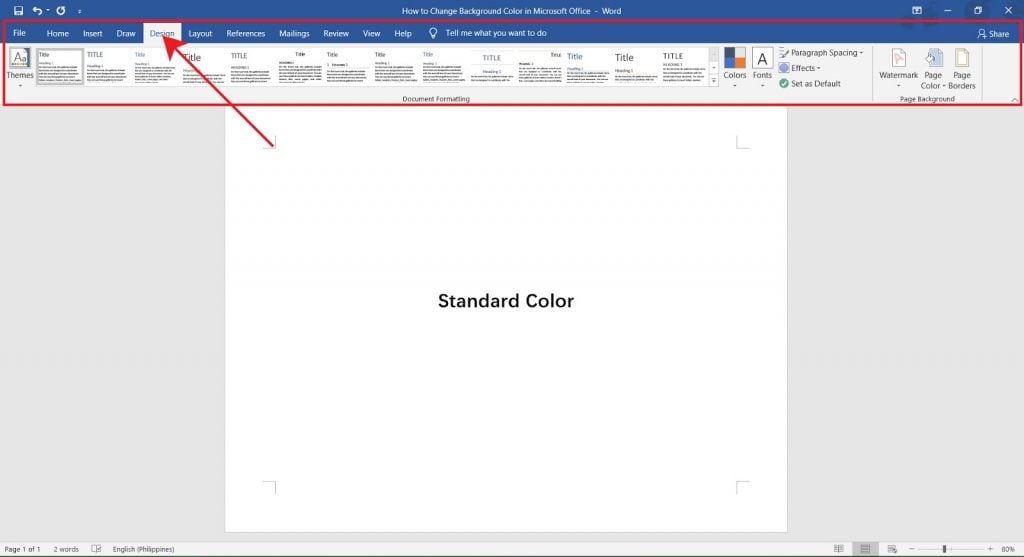
First, click on the “Design” tab.
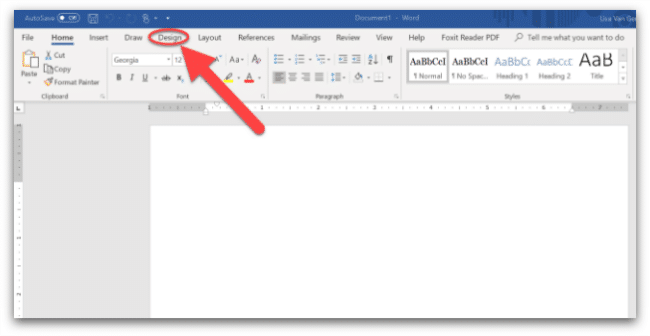
Next, click the drop-down arrow under the “Colors” box.
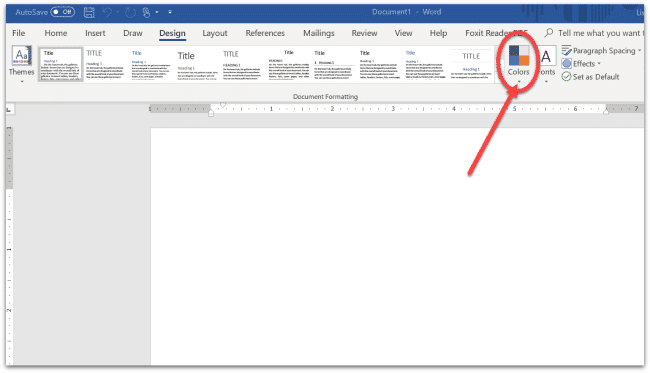
Next, you’ll choose the color palette you like. Once you’ve done that, when you go back to the “Home” tab, your new palette will appear as the choices for the fonts and shapes and all other color goodness.
Changing the Color Palette in Excel
Interestingly, I think it’s easiest in Excel.
The first step is to choose the “Page Layout” tab.
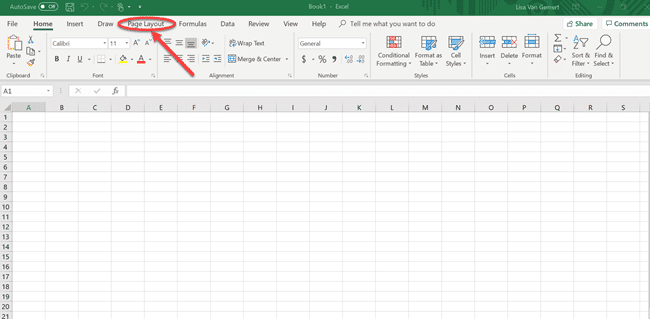
Next, choose the “Colors” box, just like in Word.
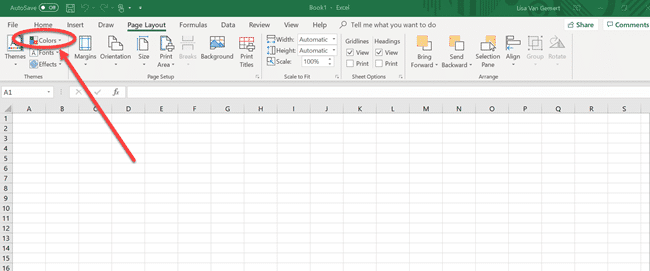
Lastly, choose the palette you want and go back to the home tab to use your new color palette.
Changing the Color Palette in PowerPoint
PowerPoint to me is the least intuitive of all, so I saved it for last.
First, choose the “Design” tab.
Then, choose the “Variants” section. Click on the drop-down menu there, and choose your palette choice.
When you return to the “Home” tab, your color choices will be there!
Wrapping Up
I hope that this has helped you learn a cool hack to make your documents and projects look like you want them to. I’d really recommend watching the video, as it is more comprehensive.
If you have other things you’d like to know how to do, please let me know! I want the tutorials I do to be useful to you!
You May Also Like:
- PowerPoint Tips for Teachers: Font Fun and Image Tips (video)
- Creating Printables in PowerPoint (video)
- Using Jeopardy Labs for Preassessment
Best Wishes!

In today’s article, you’ll learn the step by step process to change or add a page or background color in Microsoft Word.
Whether you want to color only one page, half a page, or all the pages with different colors, this guide will teach you how exactly to do it.
You’ll also learn the setting that will allow you to print the page color in Word.
Without any further ado, let’s get started.
Adding and changing background colors is done mostly by designers. Even though Microsoft Word isn’t a graphic design software, there are several reasons why you may want to change the background color of a page.
Note: Microsoft Word doesn’t print the pages’ background color by default. You’ll have to instruct Word to do so through some settings. In a jiffy, I’ll show you how to print pages with the background color in Word.
To change page color in Word, go to the Design tab (or Page Layout for Word 2010) and click Page Color in the Page Background group. From the palette of colors that appears, click to choose the color you wish to add to the pages. If you can’t find the color you want, click on More Colors.
You can also change different page colors for each page, or for only one page. However, this task can’t be achieved with the Page Color tool. I’ll soon show you how to make this happen.
Note that these steps will teach you how to add color to all the pages in your Word document. Adding color to one page or different colors for different pages will come later in this article.
For more details on this one, obey the following step by step instructions with pictures.
- Go to the Design tab (for Word 2013, 2016 and 2019 or Office 365).
If you are on Word 2010 or earlier, you won’t see the Design tab. Instead, you should go to the Page Layout tab.

- In the Page Background group, click on Page Color.

- The Color Palette will appear with lots of colors. Select the color you wish to apply to the pages.

As soon as you select the desired color, all the pages in the document will change to the color you choose.

Using Standard Colors & More Colors
Looking at the Page Color palette, there are two categories of colors. The Theme Colors category and the Standard Colors category.
- Use the colors under Theme Colors if you want your page background color to vary when you change the document theme.
- Use the colors under the Standard Colors group if you don’t want your page background to change when you change themes.
- Use the More Colors option if you don’t find the color you want in the Standard Colors category. This will display the Colors dialog box with more different colors for you to choose from.
Changing Page Color on Mac OS
For mac users, if you want to change the page color in Word, go to the Design tab and click on the Page Color button, then select the color you wish to apply to the pages. Click on the More Colors button if you don’t find the color that will fit the pages.
The steps for this task are the same for both the Mac and Windows version of Microsoft Word.
How to remove Page Background Color in Word
You can also remove the page’s background color is you don’t need it anymore.
To remove background color in Word, go to the Design tab (or Page Layout for Word 2010), in the Page Background group, select the Page Color drop-down button. Then click No Color. This will remove the pages’ background-color leaving the default blank page color.

For a more step by step guide on this task, obey the following instructions with screenshots.
- Go to the Design tab (For Word 2013 and later) or Page Layout tab for Word 2010.
- In the Page Background category, select the Page Color drop-down button.
- Near the bottom of the drop-down, select No Color.
This will remove the background color of the page leaving the default blank background color.
How to print background color in Word
Depending on the color you choose as your background, printing a background in Microsoft Word can waste so much ink or create a mess. Just to let you know.
Word doesn’t print page background colors by default. If you want it to print, you need to enable the Print background colors and images checkbox.
To print page background color in Word, go to File > Options. In the Display category, select the Print background colors and images check box, then click the OK button to apply the changes. Now press Ctrl+P on your keyboard to print the document with the background.

Different colors for different pages
Officially, there’s no feature in Microsoft Word yet that allows you to apply different background colors to different pages. However, you can make it happen the hard way.
To change page color for one page or different colors for different pages in Word, insert a rectangular shape and resize it to the same height and width of the page, position the shape to fill the page, and then fill it with the color that you want. Right-click on the shape and change the Wrap Text setting to Behind Text.
For a more detailed steps, obey the following instructions:
Step 1: Set the view option to Multiple Pages
Multiple pages allow you to view more than one page on the screen at the same time. This way, you can simultaneously view and work with as many pages as you want.
To view multiple pages at the same time in Word:
- Go to the View tab.
- In the Zoom group, click on the Multiple Pages button.
As soon as you hit on this button, you’ll see the pages resize and display multiple pages on your screen.
If you still want to view even more pages, reduce the zoom percentage by using the zoom control on the bottom right corner of Microsoft Word.
Step 2: Insert a rectangle shape
To insert a shape in Word:
- Go to the Insert tab.
- In the Illustration group, click on the Shapes drop-down.
- Under the Rectangles category, click to select the rectangle shape.

- Go to the page that will have a different background color and draw the rectangle shape on it.
- Resize the shape to fill the entire page.
Step 3: Fill the shape with the color you want.
To fill a shape with a color:
- Click to select the shape.
- The Drawing Tools > Format tab will appear. In the Shape Styles group, select the Shape Fill drop-down and select the color you wish to apply to the page.

As soon as you select the color, it’ll fill the entire shape.
Step 4: Make the colored shape the background of the page
After you apply all the above steps, you might have noticed that the shape appears to cover all the content on the page. This is not what you want.
The ideal way is to send the shape behind the text. To do so:
- Right-click on the shape.
- Go to Wrap Text > Behind Text.

This setting will send the shape behind the text on the page.
You’ll now see the shape as the background color of the page.
Do this to all the pages whose background color you want to be different.
If you want to make different background colors for more than one page in your Word document, just copy and paste the rectangle shape and position it to fit the other pages, then fill them with the colors of your choice.
Color half a page in Word
You may also want to color half a page in Word.
This need often arise when you want to design something like a flyer or brochure in Microsoft Word.
As there is no page design feature that can allow you this option, you can creatively use the shapes method to layout and design a single page with different colors.
To add color to half a page in Word, insert a rectangular shape using the Insert tab. Then resize the shape to fill half of the page. Now change the color of the shape and also make sure you use Wrap Text > Behind Text to make the text appear on top.
Conclusion
It’s very easy to apply any color to all the pages in your Word document.
However, adding or change the color of some pages (or a single page) is a piece of work. The easiest way is to use the shape method. Its disadvantage is that it requires more work on your part.
For any question or suggestion, please let me know in the comment section below.
Microsoft Word uses the default template whenever you open a new blank document. It is called normal.dotm and has predefined settings for font size, font family, themes, paragraph spacing, etc. The documents generally use Office theme with predefined set of styles. If you are not happy with these default settings in Word, you can customize the theme in Microsoft Word to make things as per your convenience.
Default Theme Settings in Word
A theme in Word document has three components:
- Fonts – size and family
- Styles – colors, spacing, etc., for each element like list, heading, paragraph, etc.
- Effects – bold, italic and other effects for elements
A theme can have custom values for all these components or use only few of them. For example, you will always see the document opens with white background in most of the Word themes though it is possible to have a different page color. In addition, you may also always see the font size of paragraph as 11 pixels and paragraph spacing as single. This may be annoying and you want to customize these settings as per your need.
Customizing Theme in Microsoft Word
The blank document in Word for Windows uses the font size as 11 pixels and family as Calibri. On Mac, you can see the default font size as 12 pixels. As mentioned, the blank Word document uses the Office theme as a default theme. There are two ways to change your default theme settings in Word:
- One is to choose from one of the predefined themes that come with your Word installation package. You can also create your own theme and use for future documents.
- Other is to customize each component of the default normal.dotm template so that you can use on all your documents. For example, you can manually change the default font size in the template to 14 px or 16 px instead of 11 px.
In both cases, the objective is to have a uniform setup for all your documents and keep things convenient for your working.
Choose Default Themes
This is an easy and recommended way without changing any other settings in Word.
- Go to “Design” tab in the ribbon and click on “Themes” option.
- You will see a list of pre-defined themes and select the one you want to apply on your current document.
- You can hover over the theme to see the live preview before selecting a specific theme.
- You will notice the style in your document like heading color, font size, font family are changed as per the theme you have selected.

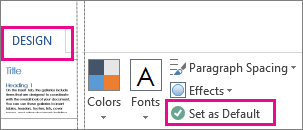
- Word will apply the selected theme only on the current document. If you want to use the theme for all your future documents as a base template, then click on “Set as Default” option.

- You will see a prompt informing you that Word will apply font, colors, effects and paragraph spacing of the current theme on all new blank documents. Click “OK” to confirm the prompt and apply the changes.

Customize Blank Template
If you do not like to use any of the existing themes, then it is possible to customize the appearance of the blank template and set as your default.
- Choose the style set for heading and text elements under “Design” tab’s “Document Formatting” group.
- Select base theme colors, fonts, effects and paragraph spacing by clicking on the respective dropdowns.
- It is also possible to apply page background color and borders for your document.
- If the existing colors and fonts are not enough, you can always upload third-party items.
- Additionally, you can go to “Home” tab and apply new “Styles” for your heading and body text. If required, you can change the font family and size from here and define new styles for each element using styles editor.
- When you are done, go back to “Design” tab and click on “Themes” dropdown.
- Select “Save Current Theme…” option.
- Provide a name for your theme and save it for future use. In this case, you need to manually select the theme every time when you want to use it in your document.
- If you want to use the customized theme as your template, then click on “Set as Default” and confirm the prompt to apply your changes.
Next time onwards, your blank document will always open with the customized theme. You do not need to increase the font size or change the font family every time when you open Word.
Change Office Theme
Themes are available across all Office apps like Excel and PowerPoint. It means, you can save a theme in Word and open in Excel or PowerPoint. However, styles are only applicable for Word or in your current document. For example, the custom theme we have saved in Word with the name as “WebNots” can be seen in PowerPoint as shown below.

It is also possible to change theme of your entire Office applications like Word, PowerPoint, Outlook and Excel in Windows version.
- Open any Office apps like Word or Excel.
- Go to “File > Options” menu and go to “General” tab.
- Select your preferred theme from “Office Theme” dropdown.

The selected theme will be applied to all Office applications like Word, Outlook, Excel, PowerPoint, etc. You can choose the black theme to apply dark mode in Office apps or force to use system settings. However, these Office themes will not have impact on font size, family and other paramters. It will only affect the appearnce of the app by using the selected color.
Download PC Repair Tool to quickly find & fix Windows errors automatically
Colors make things look beautiful. Do you know that you can add colors to your boring white and blue documents too? By adding the colors, theme, and fonts, you can customize your document and make it look modern and more personalized. Windows comes with some pre-defined themes for Microsoft Word, Excel, and PowerPoint, but you can always create your own customized themes and save it on your PC.
Change document theme colors in Word or Excel
You can select or create a uniform theme for all your documents like a Word document, Excel sheet, and PowerPoint presentation. In this post, we will learn how to-
- Change the look of your document
- Customize a document theme
- Customize the document fonts
- Save a document theme
1] Change the look of your document
Apply a theme

MS Word has its default theme set, but you can change it anytime. There is a set of pre-defined themes where you can select your preferred theme and apply the changes.
The templates are shown on the menu ribbon.
If you don’t like any of the pre-defined themes, you can customize the given themes and save it as your own theme on your PC.
2] Customize the theme
Select any predefined theme, and change the colors, fonts, and effects from the main Toolbar.
Select the colors, fonts, and effects of your choice, and save the theme as your own theme. You can name it anything at your convenience.
To change the colors, click on Colors from the Ribbon and Customize Colors. A new pop-up will open, and here you can change the font color, accent, hyperlink, followed hyperlink, and text background.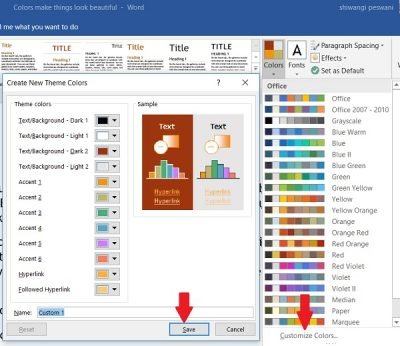
To change the fonts, click on Fonts on the Ribbon and click on Customize Fonts. Here you can change the Heading fonts and the body fonts. Select as per your choice and click on Save.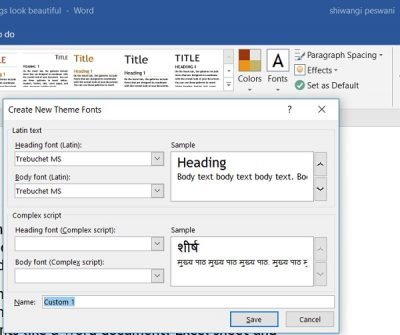
To change the effects, click on Effects on the Ribbon and click on Customize Effects. Select the preferred one and you are done.
Furthermore, you can also change the Page Color, Page Border and Watermark from the Ribbon itself.
Create as many themes with different color choices as you want and you can then try them on your documents.
All your custom document themes are saved in the Document Themes folder and are automatically added to the list of custom themes. You can use those themes whenever you want.

Shiwangi loves to dabble with and write about computers. Creating a System Restore Point first before installing new software, and being careful about any third-party offers while installing freeware is recommended.
In addition to using existing themes and style sets, you can make your own. You can create new themes and style sets from scratch or tweak existing ones. By using custom styles and themes, you can easily control exactly how your document looks.
Create Custom Color Sets
You can create your own color set to give your document a fresh, unique look or comply with your organization’s brand standards.
- Click the Design tab.
- Click the Colors button.
This menu shows previews of all the existing color sets, but you can also create your own.
- Select Customize Colors.

In this dialog box, you can set the text, background, and accent colors.
- Click a color’s button.
- Select More Colors.
Here, you can choose a color from the color picker or enter the exact color value in the text fields.
- Specify a color.
- Click OK.
The color is changed. Continue changing the other colors in the set the same way.
- When you’ve finished setting colors, give the color set a name and click Save.
You can switch the colors with another from the current theme or a variant of one of those colors.
If you’d prefer to create a new color set entirely, rather than shuffling existing theme colors around, you can.

The new color set is saved and automatically applied.
Create Custom Font Sets
You can also create custom font sets to use in custom themes.
- Click the Fonts button on the Design tab.
This menu lists all the font sets available, but you can also create your own.
- Select Customize Fonts.
In this dialog box, you can select new Heading and Body fonts. A preview, showing the two current fonts, also appears.
- Customize the Heading and Body fonts.
Once you’ve selected two fonts that look good in the preview, you’re ready to save the font set.
- Give the font set a name and click Save.
The font set is saved and automatically applied.
Create Custom Themes
When you have a color set and font set combination that you like, you can save it as a theme to use in other documents.
- Apply the theme colors, fonts, and effects you want to use in new documents, then click the Design tab.
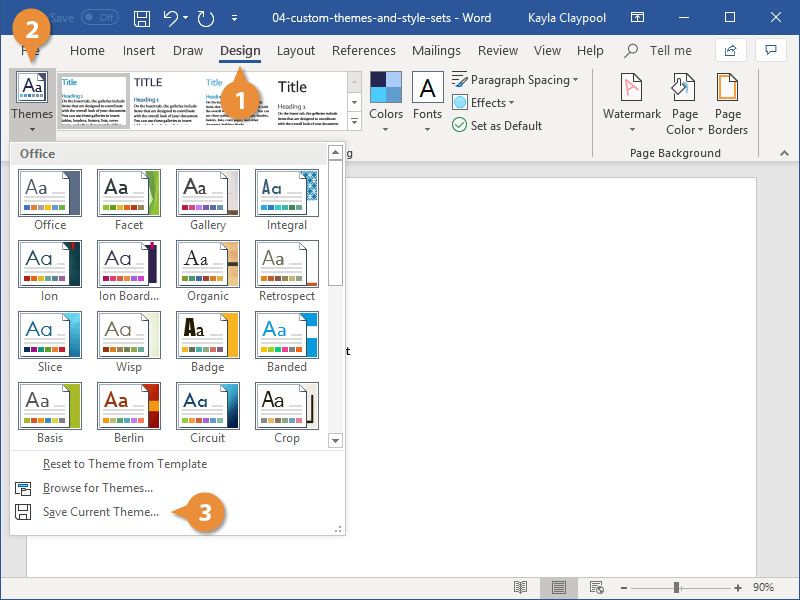
- Click the Themes button.
- Select Save Current Theme button.
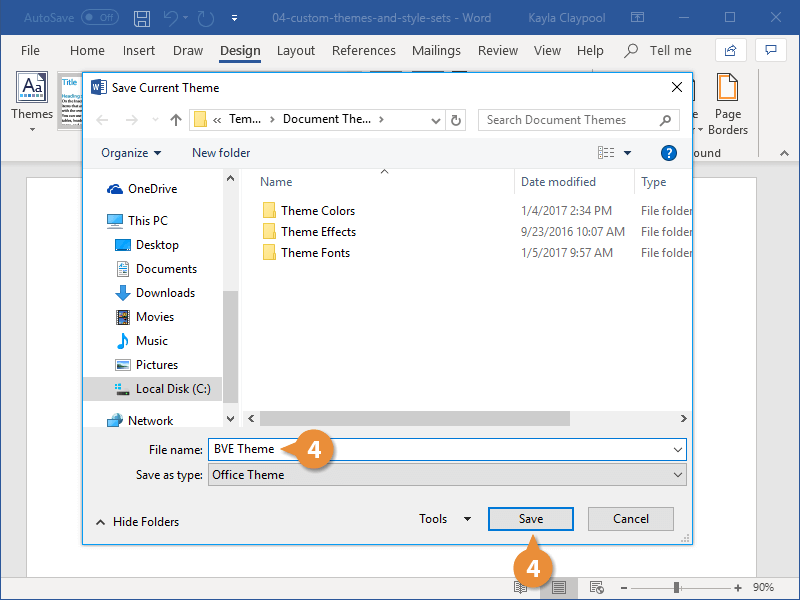
- Type a name for your theme and click Save.
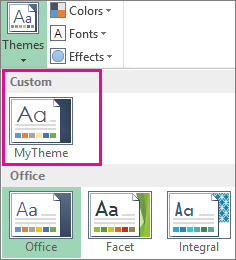
Your theme is saved and will be found in a special Custom group in the Themes menu.
Custom themes you’ve saved will be available for use in all your documents. You can even share the theme file with others so they can also use your new theme.
Create Custom Style Sets
If you’ve customized the basic styles in a document, you can create a custom style set.
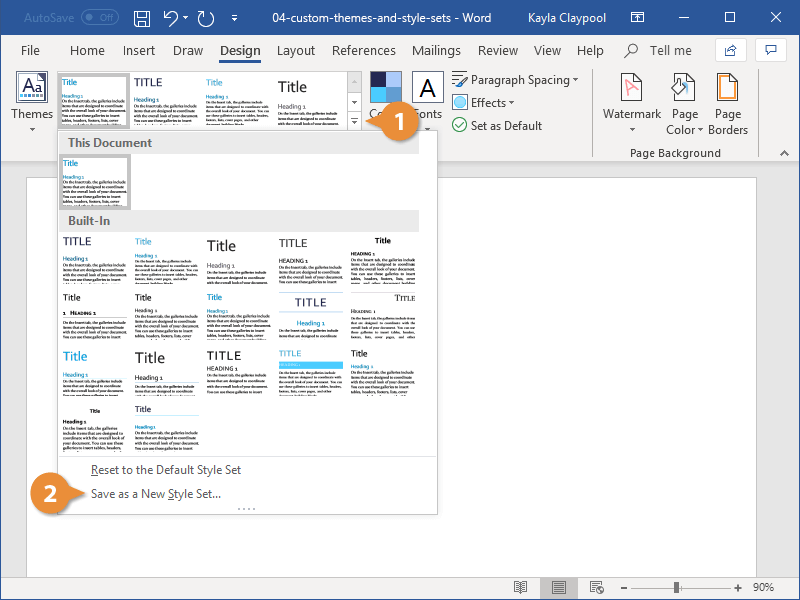
- Click the Style Set gallery menu button on the Design tab.
You can select an existing style set here or save your custom style set currently in use.
- Select Save as a New Style Set.
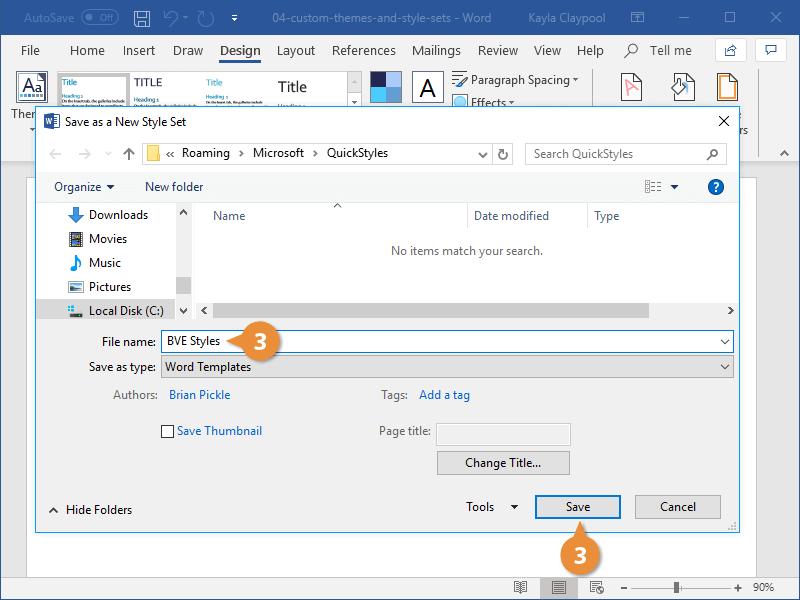
- Give the style set a name and click Save.
The style set is saved. Just like with themes, a new Custom group will appear in the Styles gallery, above the built-in style sets.

FREE Quick Reference
Click to Download
Free to distribute with our compliments; we hope you will consider our paid training.