
Word for Microsoft 365 Word 2021 Word 2019 Word 2016 Word 2013 More…Less
The Office Clipboard stores text and graphics that you copy or cut from anywhere, and it lets you paste the stored items into any other Office file. Here’s how it works in Word 2013 or 2016.
Cut and paste items from the Clipboard
-
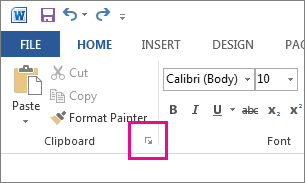
If you’re not already there, click Home, then click the launcher in the lower-right corner of the Clipboard group.

-
Select the text or graphics you want to copy, and press Ctrl+C.
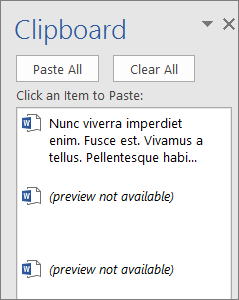
Each selection appears in the Clipboard, with the latest at the top.
-
Optionally, repeat step 2 until you’ve copied all the items you want to use.
Tip: After you open the Clipboard, it stores content that you copy or cut from anywhere. The same thing happens when you set the Clipboard to store content but remain closed, as long as you have an Office program running. For more about that, see Set options for the Clipboard below.
-
In your document, click where you want to paste the item.
-
Do one of the following in the Clipboard:
-
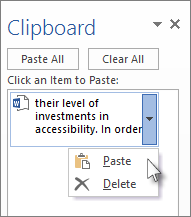
Click the down arrow next to the item you want to paste, and click Paste.
-
To paste everything in the Clipboard to the selected area in your document, click Paste All.
-
Other things you can do with the Clipboard
-
Delete items from the Clipboard
-
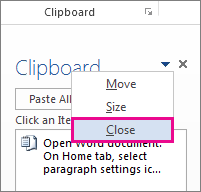
Close the Clipboard
-
Set options for the Clipboard
Delete items from the Clipboard
Do any of the following:
-
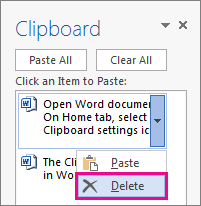
Click the arrow on the right side of the item, and click Delete.
-
Right-click the item you want to delete, and click Delete.
-
Click Clear All to clear everything out of the Clipboard.
Close the Clipboard
Click the X in the upper-right corner of the Clipboard pane.
Set options for the Clipboard
The options control a variety of Clipboard functions, such as when the Clipboard appears.
With the Clipboard open, click Options at the bottom of the pane.
Here’s what each option does:
|
Option |
Description |
|---|---|
|
Show Office Clipboard Automatically |
Displays the Office Clipboard when you copy more than one item. |
|
Show Office Clipboard When CTRL+C Pressed Twice |
Displays the Office Clipboard when you press Ctrl+C twice. |
|
Collect Without Showing Office Clipboard |
Automatically copies items to the Office Clipboard without displaying the Clipboard task pane. When you select this option, the Clipboard will store content copied or cut from anywhere. |
|
Show Office Clipboard Icon on Taskbar |
Displays the Clipboard icon in the notification area of your Windows taskbar when the Clipboard is active. This option is on by default. |
|
Show Status Near Taskbar When Copying |
Shows the number of items you’ve collected in the bottom-right corner of the Word window. This option is on by default. |
Need more help?
Want more options?
Explore subscription benefits, browse training courses, learn how to secure your device, and more.
Communities help you ask and answer questions, give feedback, and hear from experts with rich knowledge.
The Office Clipboard allows you to copy up to 24 items from Office documents or other programs and paste them into another Office document. For example, you can copy text from an email message, data from a workbook or datasheet, and a graphic from a presentation, and then paste them all into a document. By using the Office Clipboard, you can arrange the copied items the way that you want in the document.
You’re not limited to only pasting the last item you copied or cut when you use the Clipboard task pane. The Clipboard task pane holds many of the last images and text you copied or cut.
Note: You can still do simple cut, copy, and paste the way you’re used to, either by using the buttons on the ribbon or the keyboard shortcuts CTRL+X (Cut), CTRL+C (Copy), or CTRL+V (Paste).
Open the Office Clipboard task pane
To open the Clipboard task pane, click Home, and then click the Clipboard dialog box launcher. Double-click the image or text you want to paste.
Note: To open the Clipboard task pane in Outlook, in an open message, click the Message tab, and then click the Clipboard dialog box launcher in the Clipboard group.
Copy and paste multiple items using the Office Clipboard
-
Open the file that you want to copy items from.
-
Select the first item that you want to copy, and press CTRL+C.
-
Continue copying items from the same or other files until you have collected all of the items that you want. The Office Clipboard can hold up to 24 items. If you copy a twenty-fifth item, the first item on the Office Clipboard is deleted.
As items are added to the Office Clipboard, an entry is displayed in the Clipboard task pane. The newest entry is always added to the top. Each entry includes an icon representing the source Office program and a portion of copied text or a thumbnail of a copied graphic.
-
Click where you want the items to be pasted. You can paste collected items into any Office program.
-
Do one of the following:
-
To paste items one at a time, in the Clipboard task pane, double-click each item that you want to paste.
-
To paste all the items that you copied, in the Clipboard task pane, click Paste All.
-
Delete items from the Office Clipboard
You can delete items from the Office Clipboard individually or all at the same time.
In the Clipboard task pane, do one of the following:
-
To clear one item, click the arrow next to the item that you want to delete, and then click Delete.
-
To clear all items, click Clear All.
Control how the Office clipboard is displayed
To control how the Office Clipboard is displayed, click Options at the bottom of the task pane.

|
Option |
Description |
|---|---|
|
Show Office Clipboard Automatically |
Automatically displays the Office Clipboard when copying items. |
|
Show Office Clipboard When CTRL+C Pressed Twice |
Automatically displays the Office Clipboard when you press CTRL+C twice. |
|
Collect Without Showing Office Clipboard |
Automatically copies items to the Office Clipboard without displaying the Clipboard task pane. |
|
Show Office Clipboard Icon on Taskbar |
Displays the Office Clipboard icon in the status area of the system taskbar when the Office Clipboard is active. This option is turned on by default. |
|
Show Status Near Taskbar When Copying |
Displays the collected item message when copying items to the Office Clipboard. This option is turned on by default. |
The Clipboard is a holding place on your computer where you can temporarily store data (text, pictures, and so on). When you copy something, your selection is held on the Clipboard, where it remains until you copy something else or shut down your computer. This means that you can paste the same data multiple times and in different applications. The Clipboard holds only the last selection that you copied.
On the Mac, you cannot view or clear the Clipboard.
-
Select the data that you want to copy.
-
On the Standard toolbar, click Copy
. -
Click the location where you want to paste the data.
-
On the Standard toolbar, click Paste
.The Paste Options button
that appears in your document is temporary. You can click it to change the formatting of the pasted item. To dismiss it, click anywhere else in the document, press ESC , or begin typing.Tips:
-
The keyboard shortcut for Copy is
+ C , and for Paste it’s + V . -
To save and reuse text and graphics, even if you turn off your computer, you can use the Scrapbook.
-
 .
. .
. + C , and for Paste it’s
  We recently covered the basics of cutting, copying, and pasting in Microsoft Word. Today, we’re going to expand on that topic by looking at how to use the Clipboard in Microsoft Word.
Specifically, we will copy, paste, and delete content in the Clipboard. Plus, we will customize the options and turn off the Clipboard.
Quick Links:
- How to Copy Content into the Clipboard
- How to Paste Content from the Clipboard
- How to Delete Content in the Clipboard
- How to Customize the Clipboard Options
- How to Turn Off the Clipboard
First, let’s answer an important question…
What Is the Difference between Basic Copying and Pasting and Using the Clipboard?
Your PC has two clipboards: the Windows Clipboard and the Office Clipboard.
The basic copy and paste methods use the Windows Clipboard, which lets you copy one piece of content at a time—as soon as you copy a new piece of content, the old piece is deleted.
In contrast, the Office Clipboard in Microsoft Word is divided into slots where you can copy up to twenty-four different pieces of content and then paste them individually or all at once.
It’s important to note that the content in the top slot in the Office Clipboard is the same as the content in the Windows Clipboard.

For simplicity, all references to the “Clipboard” in the steps below refer to the Office Clipboard, not the Windows Clipboard.
Pro Tip: The Office Clipboard is accessible to all your Office apps. So, if you copy content to the Clipboard in Word and then open the Clipboard in PowerPoint, you will have access to the same copied content in each of the twenty-four slots.
This tutorial is also available as a YouTube video showing all the steps in real time.
Watch more than 100 other writing-related software tutorials on my YouTube channel.
The images below are from Word for Microsoft 365. These steps also apply to Word 2019, Word 2016, and Word 2013. These steps don’t apply to Word for Mac or Word for the Web.
How to Copy Content into the Clipboard
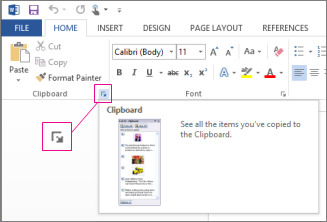
- Select the Home tab in the ribbon.

- Select the dialog box launcher in the Clipboard group.

The Clipboard pane will open on the left side of your screen.

- Select the content you want to copy and then use the Copy button in the ribbon or press Ctrl + C on your keyboard. You can copy text, images, tables, figures, or even embedded videos.

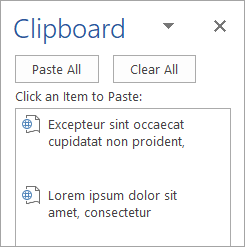
The content you copied will appear in the Clipboard.

- Continue to copy content as necessary. Each time you copy new content, it will be placed in the top slot in the Clipboard.

How to Paste Content from the Clipboard
- Place your cursor where you want to paste the content.
- Select an individual item in the Clipboard. Alternatively, hover over it to select the menu arrow and then select Paste from the drop-down menu.

- (Alternative Step) Select the Paste All button to paste all the content. The content will be inserted in the order you copied it, so the top item in the Clipboard will be the last item pasted into your document.

- (Optional) Select the Paste Options button that appears after you paste your content.

- Select an option from the shortcut menu. These options primarily apply to text rather than images or other visuals.
A. Keep Source Formatting maintains the formatting (e.g., font, size, color, etc.) of the pasted text.
B. Merge Formatting changes the formatting of the pasted text to match the formatting of the new location without removing existing emphasis formatting (i.e., boldness, italics, or underlining) from the pasted text.
C. Use Destination Style maintains the current style type but matches it to the equivalent style type in the new location. So, if you copy text with a default Heading 3 style and then paste it into document with a custom Heading 3 style, the pasted text will still be a Heading 3, but will take on the new custom style.
You may notice that when the Clipboard is turned off, Paste as Picture appears instead of Use Destination Style in the Paste Options menu in Word for Microsoft 365.
D. Keep Text Only removes the formatting of the pasted text and adds the formatting of the new location.
Please see “What Is the Difference between Merge Formatting and Keep Text Only?” for more information about these options.

Your pasted text should change formatting according to your selection.
Important Note: You must use the Paste Options button immediately after pasting your text because it will disappear when you perform another action such as typing or pressing the Enter key.
How to Delete Content in the Clipboard
- To delete all the content from the clipboard, select the Clear All button.

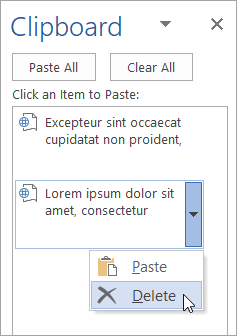
- To delete individual items, hover your cursor over the content, select the menu arrow, and then select Delete from the drop-down menu.

How to Customize the Clipboard Options
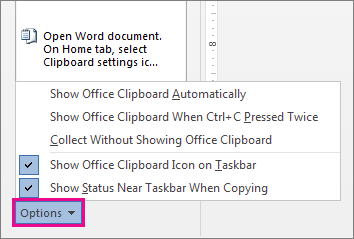
- Select the Options button at the bottom of the Clipboard.

- Check or uncheck options in the menu:
-
- Show Office Clipboard Automatically opens the Clipboard every time you copy content.
- Show Office Clipboard When Ctrl + C Pressed Twice opens the Clipboard when you press Ctrl + C on your keyboard twice.
- Collect Without Showing Office Clipboard lets you copy content into the Clipboard without opening it. (However, you can still open it by pressing the dialog box launcher in the Clipboard group, as shown in figure 3.)
- Show Office Clipboard Icon on Taskbar places the Clipboard icon (a tiny clipboard) in the Taskbar at the bottom of your screen. The icon may be placed in the Hidden Icons menu accessible through the up arrow near the Wi-Fi, sound, and battery icons.
- Show Status Near Taskbar When Copying reveals a small message in the bottom right-hand corner of your screen when you copy new content. The message will tell you the number of slots that have been filled (e.g., 3 of 24).

How to Turn Off the Clipboard
The Clipboard will turn off when you close all your Office apps (e.g., Word, Excel, PowerPoint).
However, you may want to turn it off before closing your apps. Unfortunately, the close button (X) doesn’t turn off the Clipboard; it just closes the Clipboard pane. The Clipboard will continue to collect copied content even when the pane is closed.
To turn off the Clipboard and return to the basic copying and pasting method, use the icon in the Taskbar.
- Right-click the Clipboard icon in the Taskbar. (Friendly reminder: it may be stored in the Hidden Icons menu behind the up arrow.)
![]()
- Select Stop Collecting from the menu.
![]()
The Clipboard icon should be removed from your Taskbar after a few moments.
Related Resources
How to Cut, Copy, and Paste in Word for Mac
Three Ways to Insert Tables in Microsoft Word
How to Create and Customize Charts in Microsoft Word
Access, Excel, PowerPoint and Word
- Open Microsoft Access, Excel, PowerPoint or Word and click the “Home” tab on the command ribbon.
- Click the “Dialog Box Launcher” button in the Clipboard group to open the Clipboard pane.
Contents
- 1 How do I view the Clipboard in Word?
- 2 How do I open Clipboard items?
- 3 Where is the Clipboard on Word 2020?
- 4 How do I open clipboard in Windows 10?
- 5 How do I access the clipboard in Windows 10?
- 6 Why clipboard is not working?
- 7 How do you snip on Windows?
- 8 How do I copy from clipboard in Windows 10?
- 9 Where do I find items saved to Clipboard?
- 10 How do I open the Clipboard in Word 2010?
- 11 What is Window clipboard?
- 12 What is the shortcut for clipboard?
- 13 Where is Microsoft clipboard?
- 14 How do I copy to clipboard in Windows?
- 15 Why can’t I copy and paste on Microsoft Word?
- 16 How do I enable copy and paste in Word?
- 17 How do I take a screenshot on Microsoft?
- 18 How do you take a screenshot of a specific area on a PC?
- 19 How do you move things from your clipboard?
- 20 How do I recover clipboard history?
How do I view the Clipboard in Word?
Click the Home tab. In the Clipboard group, click the dialog box launcher. You see the Clipboard task pane, along with all text cut or copied since you’ve started the Word program, similar to what’s shown here.
How do I open Clipboard items?
To get to your clipboard history at any time, press Windows logo key + V. You can also paste and pin frequently used items by choosing an individual item from your clipboard menu.
Where is the Clipboard on Word 2020?
The summary is simple. From the Home tab, click the launcher in the lower-right corner of the Clipboard group. Now you can save up to 24 different items to your clipboard with a list of them on the left side of Word documents.
How do I open clipboard in Windows 10?
How to turn on and use clipboard history on a Windows 10 computer
- The clipboard history is a feature in Windows 10 that holds the most recent 25 items you’ve copied or cut.
- Press Windows + V to open the clipboard history, then click any item to paste it into the current program.
How do I access the clipboard in Windows 10?
Open Windows 10 Clipboard
Press Win key+V. The Clipboard history panel appears with each item you cut or copied, starting with the last one.
Why clipboard is not working?
1] Make sure Clipboard History is Enabled
The first thing you should try to fix this issue is to check if the Clipboard History is enabled in the Settings. Simply enable the Clipboard History from the Settings app and then check if the clipboard history shows up on clicking Windows + V hotkey.
How do you snip on Windows?
Capture a snip of a menu
Press Ctrl + PrtScn keys. The entire screen changes to gray including the open menu. Select Mode, or in earlier versions of Windows, select the arrow next to the New button. Select the kind of snip you want, and then select the area of the screen capture that you want to capture.
How do I copy from clipboard in Windows 10?
Press the Windows key + V and click Turn on. Select the text or image you want to copy, then bring up the Clipboard using the shortcut. Click on the text you want to copy from the Clipboard, then paste it to your destination file or program. Select what you want to copy and press Ctrl + C on your keyboard.
Where do I find items saved to Clipboard?
Look for a clipboard icon in the top toolbar. This will open the clipboard, and you’ll see the recently copied item at the front of the list. Simply tap any of the options in the clipboard to paste it into the text field. Android does not save items to the clipboard forever.
How do I open the Clipboard in Word 2010?
1Click the dialog box launcher in the lower-right corner of the Clipboard group on the Home tab, right next to the word Clipboard. The Clipboard pane then appears in the writing area of the Word window.
What is Window clipboard?
The Windows clipboard is a storage area for items the have been cut or copied. Whenever you cut or copy something, it is automatically placed in the clipboard for you.There are three clipboard functions that can be performed in virtually all Windows applications: cut, copy and paste.
What is the shortcut for clipboard?
Press “Ctrl-C” twice to display the Clipboard pane.
Where is Microsoft clipboard?
To open the Office clipboard and access the items you copied or cut, make sure the Home tab is active, and then click the “Clipboard” button in the lower-right corner of the Clipboard section. By default, the Clipboard pane is anchored to the left side of the Office program window.
How do I copy to clipboard in Windows?
Copy to clipboard: Highlight the text or image and press Ctrl+C or right-click the text or image and select Copy in the pop-up menu. Paste from clipboard: Press Ctrl+V to paste the last copied item.
Why can’t I copy and paste on Microsoft Word?
Go to File > Options > Advanced. Under Cut, copy and paste, ensure the Show Paste Options button when content is pasted option is checked.
How do I enable copy and paste in Word?
Follow these steps to turn it on.
- Go to File > Options > Advanced.
- In the Cut, copy, and paste section, select Show Paste Options button when content is pasted.
- Select OK.
How do I take a screenshot on Microsoft?
Screenshots on an Android phone
There are two ways to take a screenshot of your Android screen (assuming you have Android 9 or 10): Press and hold your power button. You’ll get a pop-out window on the right side of your screen with icons that let you power off, restart, call an emergency number, or take a screenshot.
How do you take a screenshot of a specific area on a PC?
Press “Windows + Shift + S”. Your screen will appear grayed out and your mouse cursor will change. Click and drag on your screen to select the part of your screen you want to capture. A screenshot of the screen region you selected will be copied to your clipboard.
How do you move things from your clipboard?
How to Retrieve Items on Your Clipboard for Android
- Launch the target application that you want to transfer the contents of the clipboard to. Select the appropriate text field.
- Press and hold down the text area until a dialog box appears.
- Press “Paste” to retieve the data from your clipboard.
How do I recover clipboard history?
1. Using Google Keyboard (Gboard)
- Step 1: While typing with Gboard, tap the clipboard icon next to the Google logo.
- Step 2: To recover a particular text/clip from the clipboard, simply tap on it to paste in the text box.
- Caveat: By default, clips/texts in the Gboard clipboard manager are deleted after an hour.
В статье «Что такое буфер обмена?» я рассказал что такое буфер обмена и для чего он применяется. В данной статье я покажу как им пользоваться.
Итак, еще раз – буфер обмена – это объем компьютерной
памяти, куда вы копируете информацию и, по мере необходимости, вставляете ее в
нужные места в документе.
Возможности буфера
обмена
Для того, чтобы понять, как работает буфер обмена нужно
открыть текстовый документ и скопировать в буфер обмена часть текста.
Кстати, сделать это вы можете несколькими способами: как копировать в Word.
Скопированную информацию вы можете вставлять много раз.
Буфер обмена, который вы используйте един для практически
всех программ на вашем компьютере, то есть скопированный текст вы можете без
проблем вставить в любой другой программный продукт Microsoft (Exel, Visio) или в другие программы, которые не относятся к Microsoft Office (например, в Paint).
Буфер обмена может вмещать в себя 24 фрагмента, то есть тут
не важен вид информации и ее объем – сохранить в буфере обмена вы можете до 24 фрагментов:
одно копирование – один фрагмент.
Давайте воспользуемся этим.
- Перейдите во вкладку «Главная» — «Буфер обмена» — кнопка группы «Буфер обмена».

Откроется
диалоговое окно Буфера обмена.
- Выберите команду «Параметры» и установите галочки согласно иллюстрации:

«Собирать данные без отображения буфера обмена Office»
Теперь данные в
количестве 24 фрагмента будут собираться в буфере обмена вне зависимости от
того, открыто ли окно Буфера обмена или нет.
В случае, если
вы скопируете больше, чем 24 элемента, то перезаписываться на новые будут
первые элементы, которые вы копировали.

Кстати, если вы
будете копировать информацию в других неофисных программах, то все равно эта
информация будет попадать в данный буфер обмена до 24 элементов, тогда как в
программе, в которой вы работаете в настоящий момент был бы доступен только
последний скопированный элемент.
После того, как
вы включите функцию «Собирать данные без отображения буфера обмена Office» на панели задач Windows появится
значок буфера обмена.

При копировании
очередного элемента на панели задач будет всплывать диалоговое окно:

Иногда
случается, что объект невозможно поместить в буфер обмена и тогда появляется
следующее окно:

Итак, если вы
настроили буфер обмена на размещение 24 элементов, то при закрытии программы
заново вам его настраивать не нужно, так как программа сохранит ваши настройки.
Вставка элементов из буфера обмена
Итак, вы
работаете с текстом, несколько раз копировали различные элементы и вставляли их
и вам понадобилось вставить один из элементов, который вы достаточно давно
отправляли в буфер обмена. Что делать?
Нужно зайти в
окно буфера обмена и выбрать нужный вам элемент из списка.

Обратите
внимание: в выпадающем окне появляется две операции – вставить и удалить, то
есть вы можете не только вставить элемент, но и удалить его из памяти Буфера
обмена, если он вам больше не понадобится.
Информация, которую вы скопировали хранится в памяти Буфера обмена до тех пор, пока вы не перезагрузите или выключите компьютер.
Специальная вставка Буфера обмена
Когда вы
копируете информацию из одного документа в другой появляется проблема –
появление новых стилей или изменение старых, заданных в конечном документе, так
как вместе с текстом мы копируем не только содержание, но и характеристики
абзаца первого документа.
Чтобы такого не
происходило нам помогает Специальная
вставка буфера обмена.
Чтобы понять для чего нужна каждая из вставок скопируйте любую часть текста из одного документа и в другом документе кликните, куда хотите вставить текст, перейдите в «Главная» — «Буфер обмена» — «Вставить» и увидите различные «Параметры вставки».

У вас появляется
четыре кнопки в параметрах вставки. Разберем каждую из них.
- «Использовать конечную тему (И)» — в данном случае вы вставите текст со всеми стилями первого документа – этого делать не стоит.
- «Сохранить исходное форматирование (И)» — сохраняет оформление скопированного текста, но не добавляет новых стилей в набор стилей в ваш новый документ.
- «Объединить форматирование (О)» — объединяет стили первого и второго документа, что может не очень хорошо сказаться на оформлении документа целиком. Тут есть риск получить в список стилей Встроенный стиль.
- «Сохранить только текст (С)» — позволяет вставить в документ только текст, однако, если у вас в скопированной информации были какие-то нумерованные списки, то такая вставка превратит их в обычный текст.
Я бы отдал
предпочтение последнему варианту вставки, так как в данном случае не появляются
новые стили и оформление документа не страдает.
Что же касается превращения в текст нумерованных стилей, то их всегда можно поправить различными командами, например командой «Заменить».