You can make a checklist in Word using different ways. One of the simplest way is to write each item of a checklist on a separate line and add bullets with check/unchecked symbol. This method works great if the targeted checklist needs to be filled by hand.
However, if you want a checklist which is filled/updated digitally, the method discussed above is difficult as checked/un-checked sign needs to be manually inserted. In such case, Microsoft Word provides a second way to create digital checklist, where the state of each checkbox can be changed just by clicking it.
The following section describes the way to get clickable checkbox in Word.
Step 1: Place the cursor to the location where you want a clickable checkbox.
Step 2: Navigate to Developer tab in Word. It is not active by default. To make it visible, follow:
- On the File tab, go to Options → Customize Ribbon.
- Under Customize the Ribbon choose Main Tabs from drop-down, check the box against Developer.
This enables the developer tab in Word and you should see it in Ms Word Ribbons as Developer.
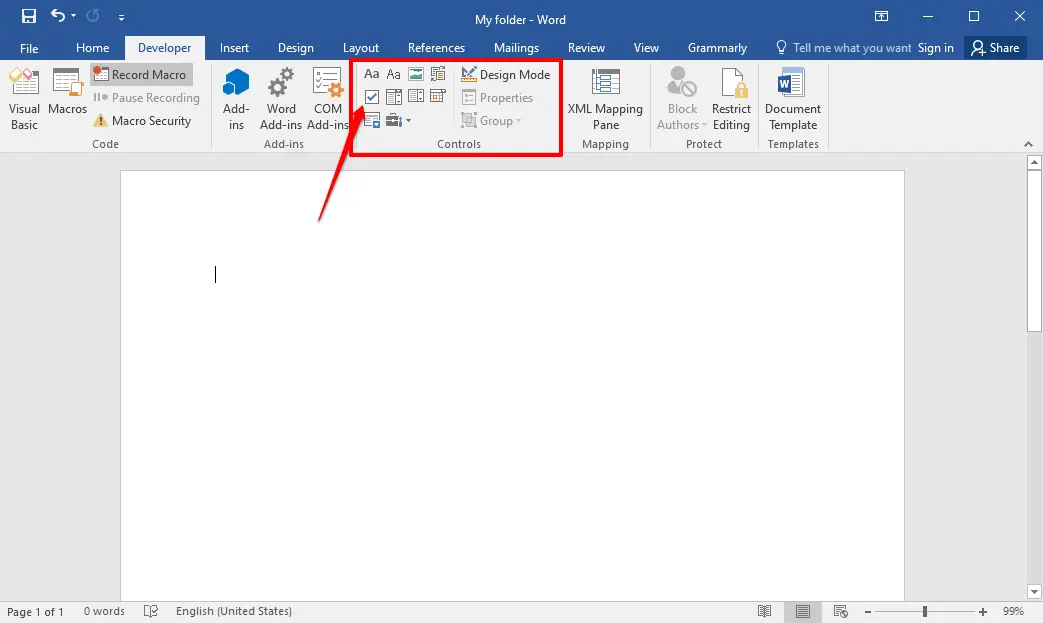
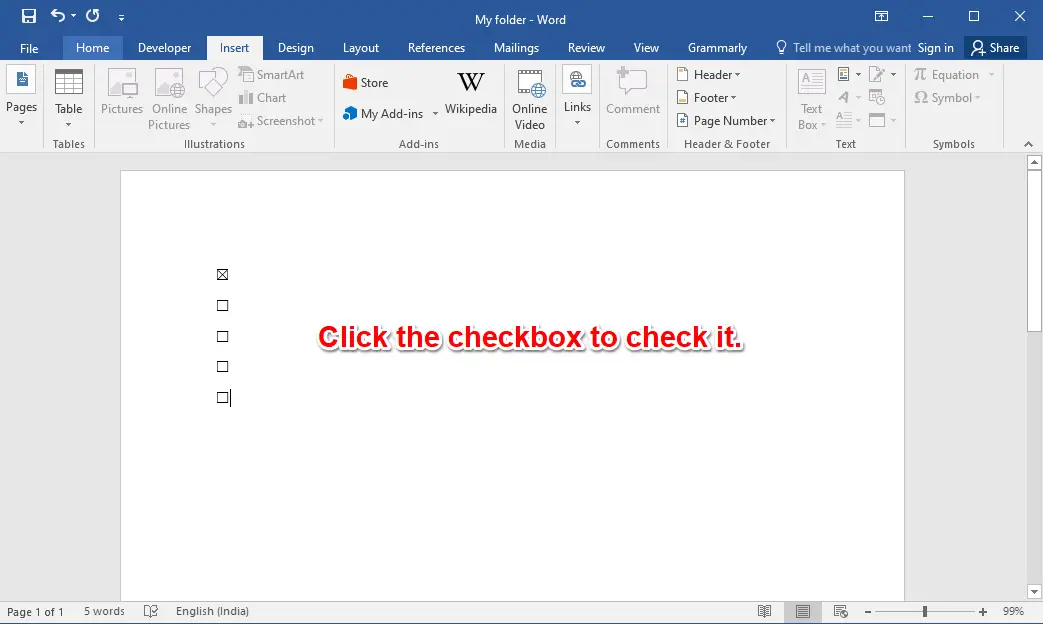
Step 3: On the Developer tab, in Controls group, click ☑ icon (Check Box Content Control) to insert ☐, which is a clickable checkbox.

Clickable checkbox
By default, clickable checkbox appears like an empty box (☐). It denotes un-checked state of the box which changes to ☑, a checked state on click.
You can change appearance of checked and unchecked state as per our need.
Changing Checked and Uncheck Appearance
Steps to change the default appearance of checked (☑) and unchecked (☐) state of clickable checkbox:
- Select the clickable checkbox.
- On Developer tab, in Controls group click, Properties to open Content Control Properties.
- In the Check Box Properties section, click Change against Checked Symbol &/or Unchecked symbol to change its appearance.
- Select the appropriate symbol for checked or unchecked state and click ok to assign it.

Inserting clickable checkboxes in MS Office Word 2016 can help you create interactive forms, to-do lists, and surveys that can be easily checked off or marked as complete. By using checkboxes, you can make it easy for the reader to provide a response or indicate a preference without having to type out a lengthy answer. In this guide, we’ll show you how to insert clickable checkboxes in MS Office Word 2016.
First, we’ll discuss the benefits of using clickable checkboxes in your documents. Using checkboxes can help simplify the process of providing feedback, filling out surveys, and completing tasks. They can also help improve the accuracy and completeness of your data by ensuring that respondents provide a clear response. We’ll then provide step-by-step instructions on how to insert clickable checkboxes in MS Office Word 2016, so that you can easily create interactive documents and forms. Whether you’re creating a to-do list or a survey, clickable checkboxes can help make your documents more engaging and user-friendly.
How to Insert Clickable Checkbox in Office Word 2016?
Follow these steps to insert clickable checkbox in Office Word 2016:-
Step 1. Open up Microsoft Office Word 2016.
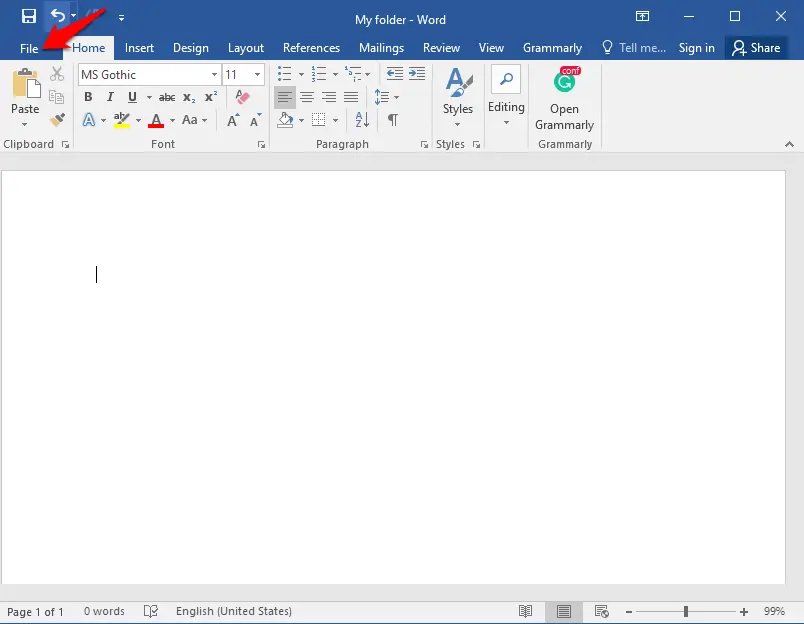
Step 2. Click the File option in the upper left corner.
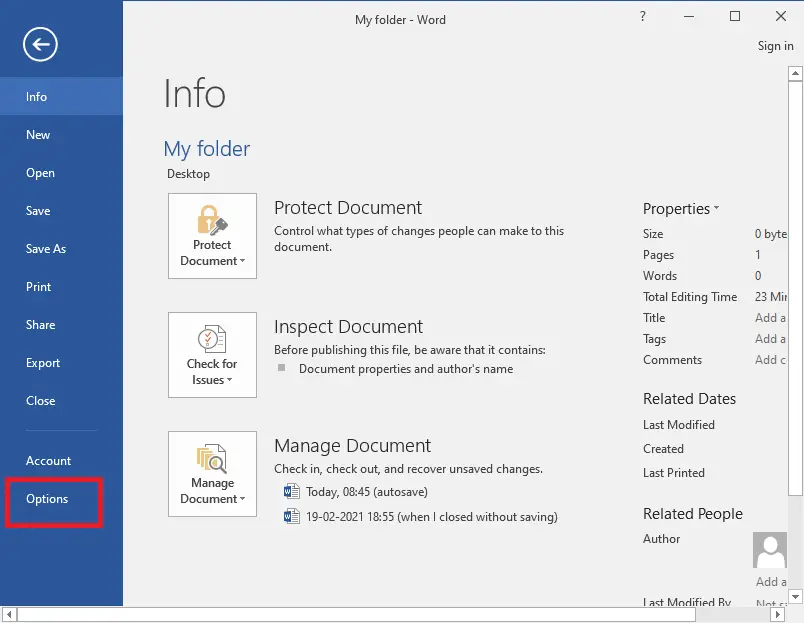
Step 3. Click the Options in the bottom left corner.
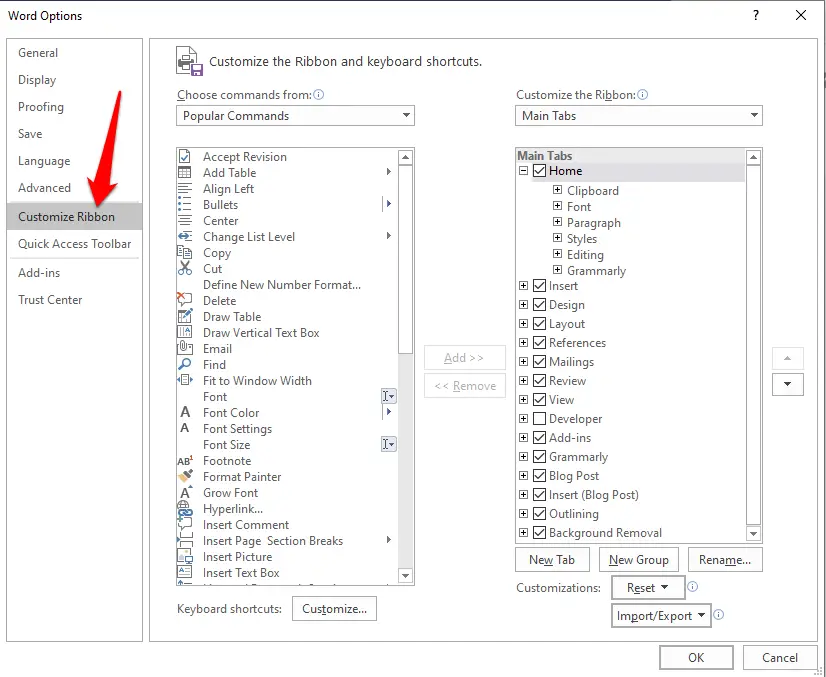
Step 4. Word Options window will open. Click on Customize Ribbon from the left side menus.
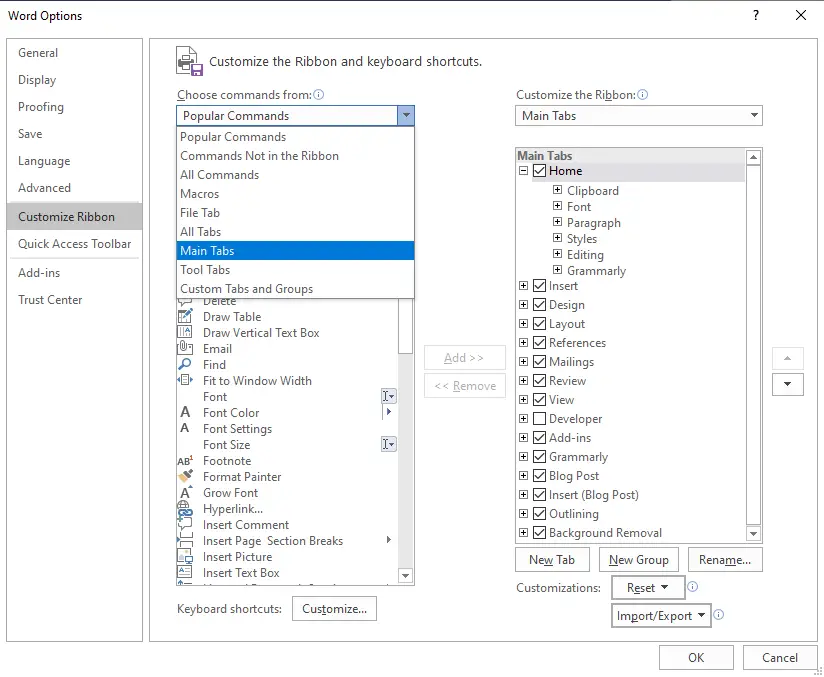
 Step 5. Click on the drop-down “Choose commands from” and select “Main Tabs.”
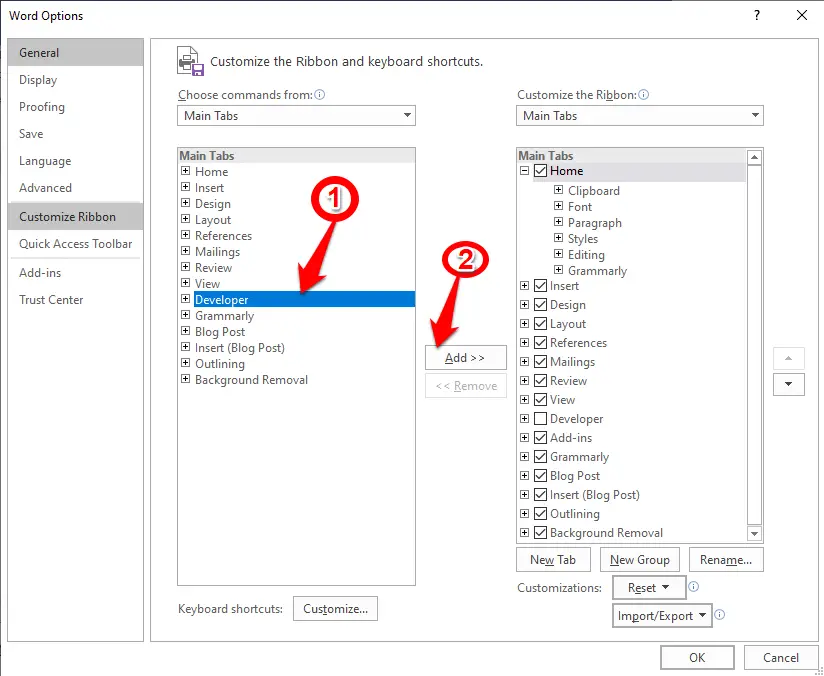
 Step 6. From the Main Tabs, select Developer and click on Add>> button.
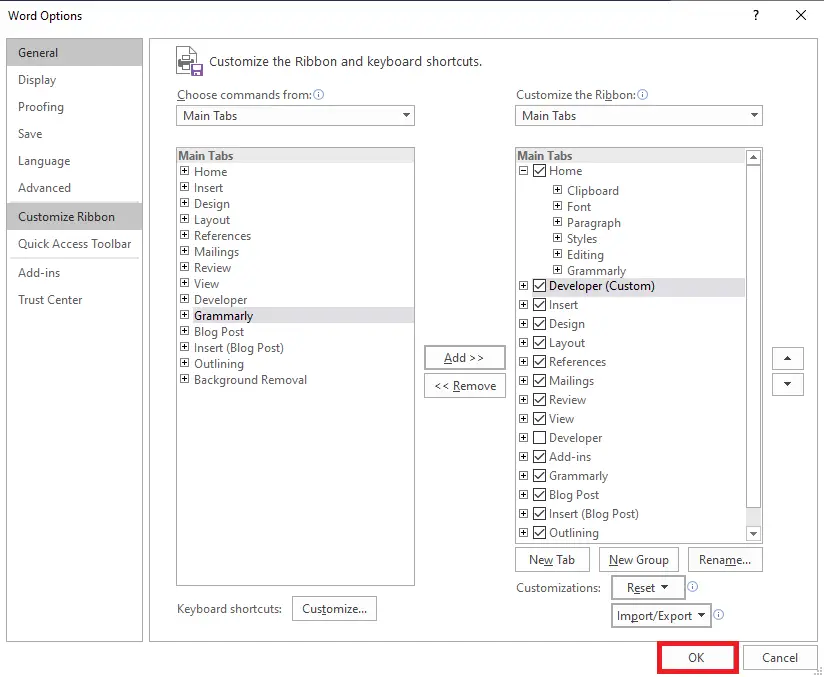
Step 7. Click the OK button on the Word Options page.
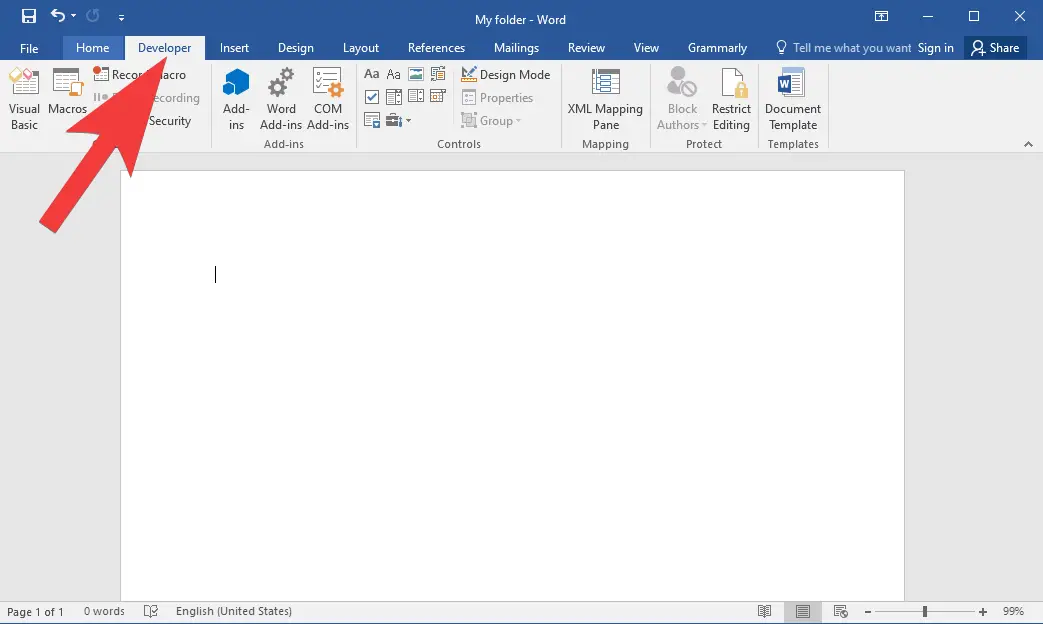
 Step 8. Now, you will notice the Developer tab is added on Ribbon. Click on the Developer tab.
Step 9. From the Controls group, click on the “Check box” icon to add “Checkbox” to the Office Word document.
Step 10. Once you have drawn checkboxes, click on any check box to check it. Again clicking on the same check box will uncheck it.
That’s all!
Checkboxes help us to make a checklist which resembles whether we have completed the task or it is still remaining. MS Word allows you to make a checklist with the checkboxes that are clickable. Checkbox once clicked is checked and on second click it gets unchecked. So let us see How to Insert Clickable Checkbox in MS Word 2016?
Step to Insert Clickable Checkbox in MS Word 2016:
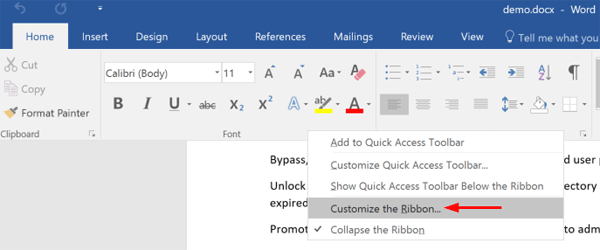
Step 1: Open an MS Word document on your screen. To insert a checkbox in the document you have to add a Developer tab in the Ribbon. You can add Developer Tab in two ways either right click on any tab present on the Ribbon and among the popped options select Customize the Ribbon option, which will allow you to add Developer tab. For demonstration, I have chosen the second way. For that go the File Tab.
 Step 2: Under File tab, click on the Options tab.
 Step 3: A Word Options dialog box will pop out. In Word Options dialog box click on the Customize Ribbon tab present on the left-hand side of the window.
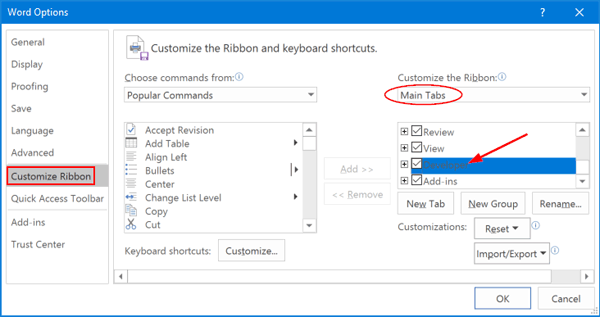
 Step 4: At the right-hand side of the window you have Customize the Ribbon drop down box, select Main Tabs from there. Just below it, you can view a scroll box showing the main tabs that appear in the Ribbon. You have your Developer tab there, mark the checkbox in front of that and click OK.
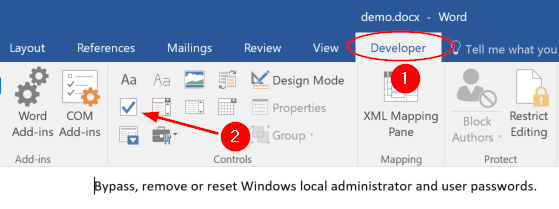
 Step 5: You can see that Developer tab (1) is added in Ribbon. Now, click where you want to add the checkbox (2). Then click on Check Box Content Control (3) button under Controls group of Developer tab. It will add a checkbox at the location of your cursor.
 Step 6: To change the checked and unchecked symbol of your checkbox, turn ON the Design Mode. For that just click once the Design Mode button in Controls group under Developer tab.
 Step 7: Now click on the checkbox of which you want to change the check and uncheck symbol and then click on Properties. You have to do this for each checkbox of which you want to change the check and uncheck symbol.
 Step 8: A Content Control Properties dialog box will get opened. Under CheckBox Properties there is a Change button in front of Checked Symbol and Unchecked symbol. Click on that Change button.
 Step 9: A Symbol dialog box will get opened. Choose a symbol and click OK. Now, click on Design Mode button to turn it OFF this is because the checkboxes won’t work until the Design Mode is ON.
Step 10: Now when you click checkbox it will turn into the symbol you had chosen.
 Thank You. Keep reading.
![]()
Download Article
![]()
Download Article
Want to add a check box or tick box to a list or form in Microsoft Word? It’s easy to do, and you can even make it checkable so you can click the box with your mouse. We’ll show you an easy way to add a clickable checkbox using Developer Mode in Microsoft Word.
Steps
-

1
Open a new file in Microsoft Word. Do so by opening the app shaped like a blue W. Then click on File in the menu bar at the top of the screen, and click on New Blank Document.
-
2
Click on File in the menu bar and then Options in the menu.
- On Mac, click on Word in the menu bar and then Preferences… in the menu.
Advertisement
-
3
Click on Customize Ribbon and then Main Tabs in the «Customize the Ribbon:» drop-down menu.»[1]
- On Mac, click on Ribbon & Toolbar in the «Authoring and Proofing Tools» section of the dialog box, then click on the Ribbon tab at the top of the dialog box.
-
4
Check «Developer» in the «Main Tabs» pane.
-
5
Click on Ok.
-
6
Click on Developer. It’s a tab in the upper-right part of the window.
-
7
Position the cursor where you’d like to insert the check box.
-
8
Click on Check Box. It’s in the menu bar at the top of the window.
-
9
Add additional check boxes and text as needed.
-
10
Lock the form. To do so, select the entire list, to be found in the Controls section on the Developer tab, then click on Group and Group.
- On Mac, click Protect Form in the Developer tab toolbar.


Advertisement
Add New Question
-
Question
What should I do if the check box is grayed out in my ribbon?

It is grayed out for me too. However, if you click on the one icon that isn’t — Legacy Tools — then you will find the exact same checkbox, which you should be able to select.
-
Question
How can I enlarge the size of a text box without enlarging the text?
In Word, just dragging the corner of the text box should be sufficient. If the text changes size accidentally, you can always highlight it and change it back to the desired size.
-
Question
How do you make a drop box in word?
Download LibreOffice. Follow the manual on how to add a list or list/add or list/multiselect box (or just look under «insert» in the menu). You can add a data source for the dropdown menu items from a database, a spreadsheet or within the file structure itself.
See more answers
Ask a Question
200 characters left
Include your email address to get a message when this question is answered.
Submit
Advertisement
Thanks for submitting a tip for review!
About This Article
Article SummaryX
1. Open a document.
2. Click File.
3. Select Customize Ribbon and then click Main Tabs.
4. Check the «Developer» box.
5. Click Save.
6. Click Developer.
7. Click where you want to insert the check box.
8. Click Check Box.
9. Add additional boxes and text.
10. Lock the form.
Did this summary help you?
Thanks to all authors for creating a page that has been read 1,240,190 times.
Is this article up to date?
Posts Tagged ‘insert clickable checkbox in word’
Steps to Insert Clickable Checkbox in Office Word 2007
February 16th, 2021 by
In order to create a fillable form, you may need to add clickable check boxes. In this tutorial we’ll walk you through the steps to insert a clickable checkbox in Office Word 2007.
How to Insert Clickable Checkbox in Office Word 2007?
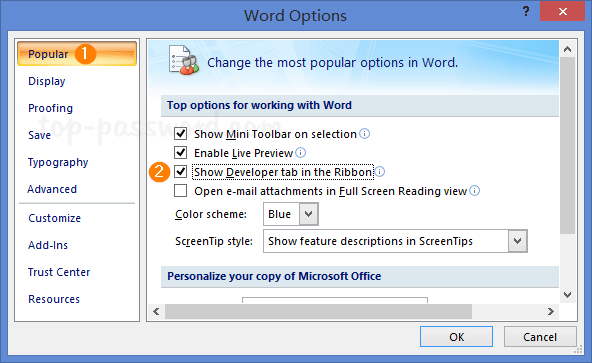
- Open up Office Word 2007. Click the Microsoft Office button in the upper left corner, and then click Word Options.

- Select the Popular tab. On the right side, check the “Show Developer tab in the Ribbon” and click OK.

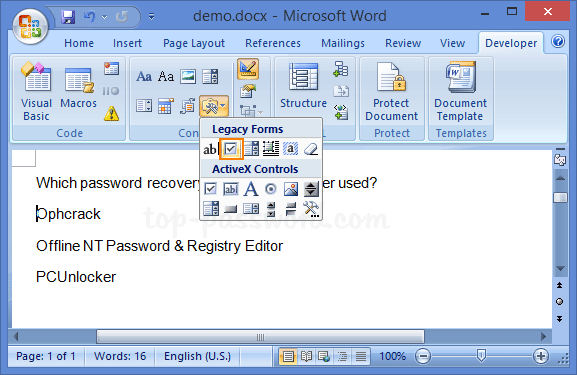
- The Developer tab will now appear on the Ribbon. Under the Developer tab, click Legacy Tools button in Controls group and select the “Check Box Form Field” control.

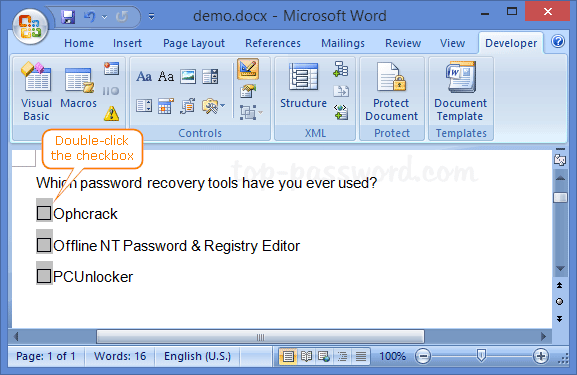
- It will insert a clickable checkbox at your cursor’s location. By default, the checkbox is unchecked. To check or tick the checkbox, just double-click it.
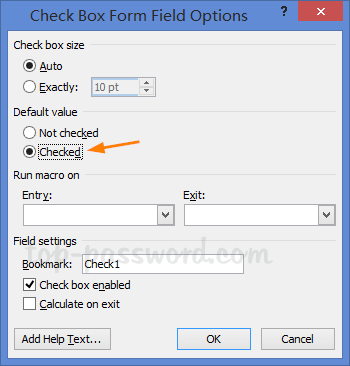
- In the pop-up window, select the “Checked” option under Default value. Click OK to save your changes.


That’s it!
2 Options to Insert a Check Box in Word 2016
February 22nd, 2017 by Admin
How can I add a clickable checkbox in Microsoft Word? Inserting a checkbox into a Word document is a common task when you create surveys or forms using Office Word. In this tutorial we’ll show you 2 simple ways to insert a check box in Word 2016.
Method 1: Insert a Check Box in Word 2016 for Printing Only
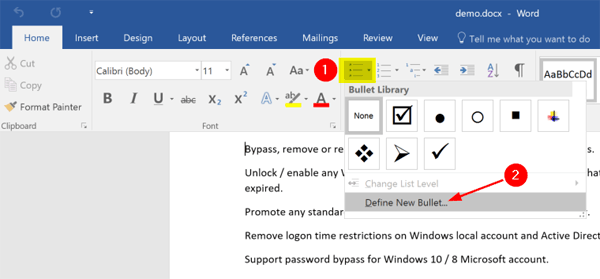
- Select the list in your Word document. In the Home tab of Microsoft Word, under the Paragraph section, click the small down-arrow next to the Bullets button.

Then choose Define New Bullet from the drop-down list.
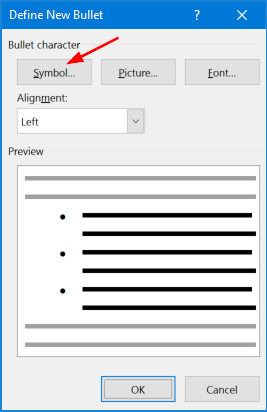
- In the resulting dialog box, click Symbol.

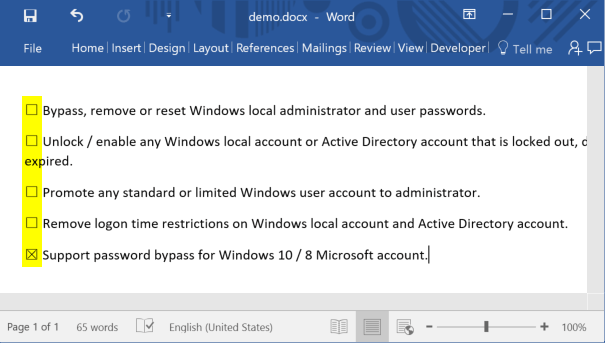
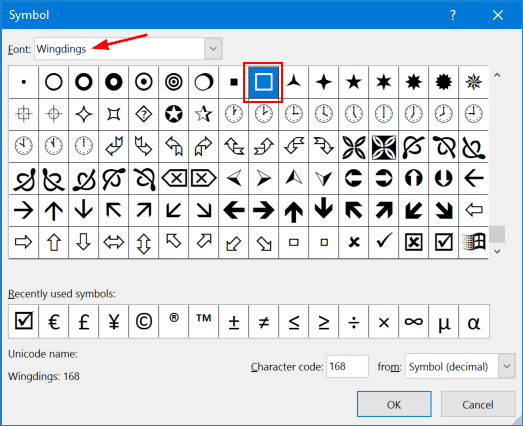
- When you open the Symbol window, select Wingdings from the Font drop-down menu. Next you can select the check box that is either checked or unchecked, and insert it into your Word document.

Method 2: Insert Clickable Check Box in Word 2016
Microsoft Word also allows you to insert check boxes that are clickable. Checkbox once clicked is checked and on second click it gets unchecked. Here’s how to insert clickable check box into your Word document:
- In the Home tab of Microsoft Word, right-click on an empty spot on the ribbon and then choose Customize the Ribbon.

- When the Word Options dialog opens, select the Customize Ribbon tab. Select Main Tabs from the Customize the Ribbon drop-down box. Check the Developer option in the list. Click OK.

- Now you can see that Developer tab is added in Ribbon. In the Controls group of the Developer tab, you will see a small check box icon. Click it to insert a check box at your cursor’s location.

- Now that the check box has been inserted, you can click it once to toggle whether or not it’s checked.