
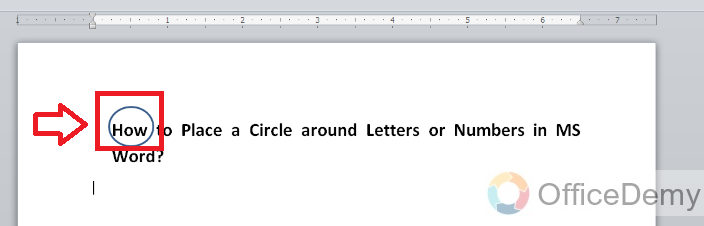
In this article, you will learn how to circle something in MS Word document. So let’s start with an introduction.
Sometimes we all need to place a circle around a specific number, word, or letter in our MS word document. Its purpose may be to decorate the document or highlight an important point in the document. So we should know how to place a circle around letters or numbers in MS word.
Benefits of adding a circle in Word
There are a lot of benefits of placing a circle around the letters or numbers in the MS word document. Here we will highlight some of the most common and significant roles of putting these circles in the document:
- A circle around a letter or word highlights the focal point of the document.
- It can make your document look professional, informative, and easy to understand.
Sometimes you may need to add a circle around a certain letter or number in your MS Word document. This may be to emphasize an important point in the document. It may also be to simply decorate the text.
How to Circle Something in Word
Circle Something in Word: Using the Oval Tool
Step 1: First of all open the Word document in which you want to add circles.
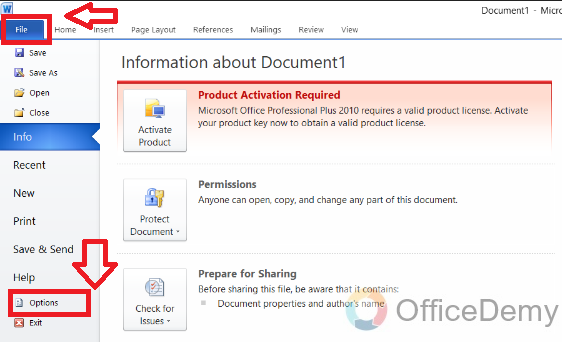
Step 2: Click on the “File” option available in the left top corner of the screen. A-Files menu will open. Now click on the “Options” available at the bottom of the menu.
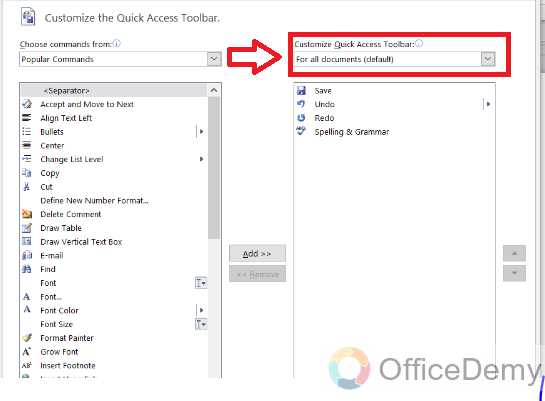
Step 3: A list of word options will open. Select “Quick Access Toolbar” from the list.

Step 4: Now you can see a dialog box on the right-hand side. This is for the customization of the Quick Access Toolbar.
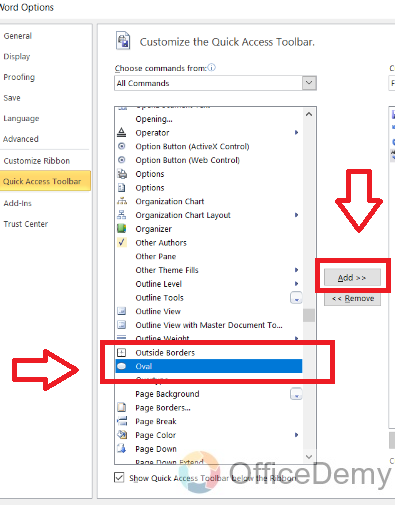
Step 5: Now, Click on the down arrow below the “Choose commands from” option and choose the “All commands” option.
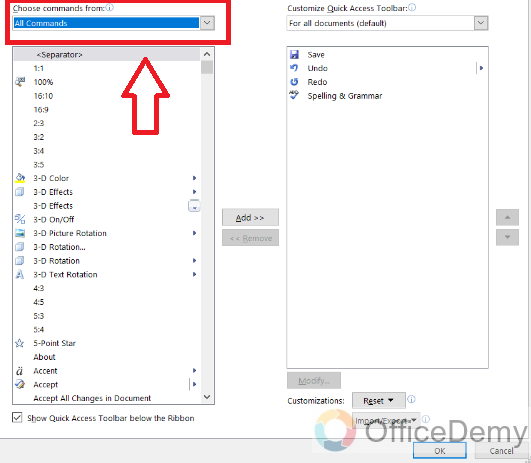
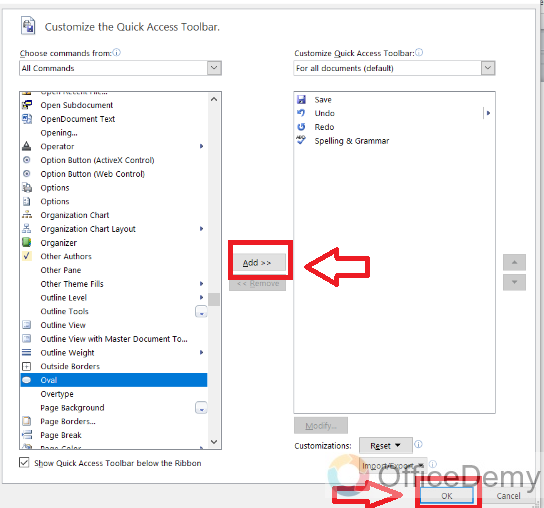
Step 6: Search the “Oval” from the command list and click on the “Add” button available on the right side of the command list. Now the Oval tool will be added to the Quick Action Toolbar list on the right side of the command list.
Step 7: Now click on the “OK” button available at the bottom, to exit.
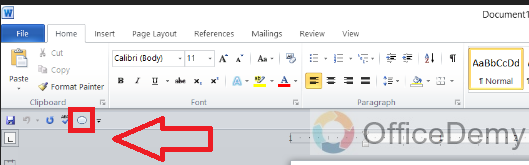
Step 8: Now you will see a circle-type sign below the clipboard.
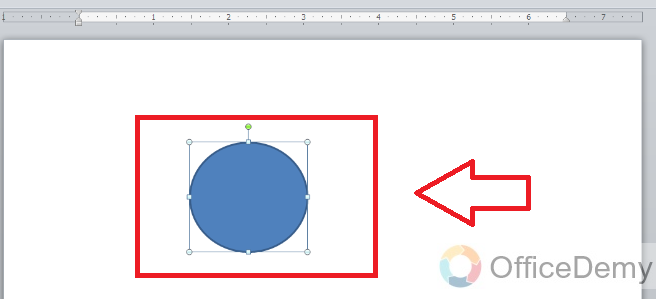
Step 9: Click on this Oval sign and position the cursor at the page where you want to add the circle. A circle will appear with the fill color.

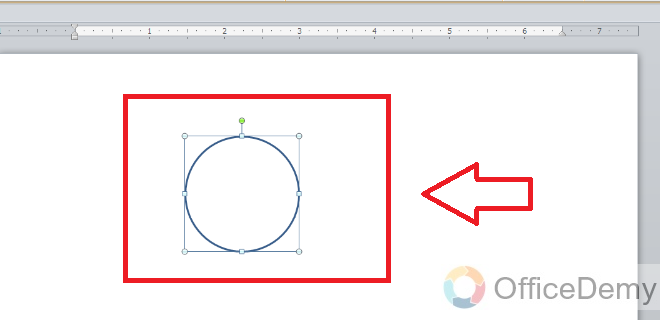
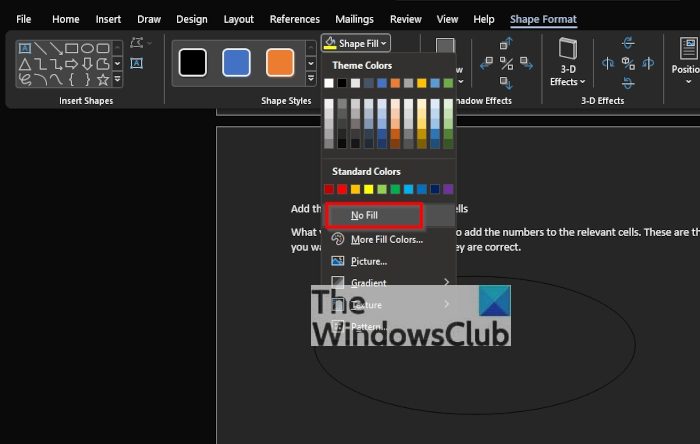
Step 10: Click on the “Shape Fill” option and select the “No fill” option available below the standard colors.
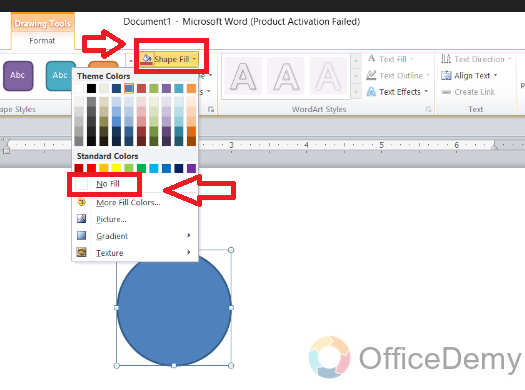
Step 11: The circle will appear as transparent, with no fill color inside the circle.

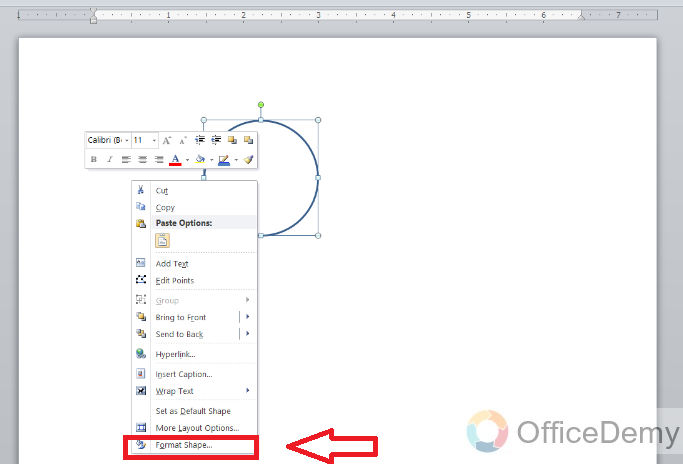
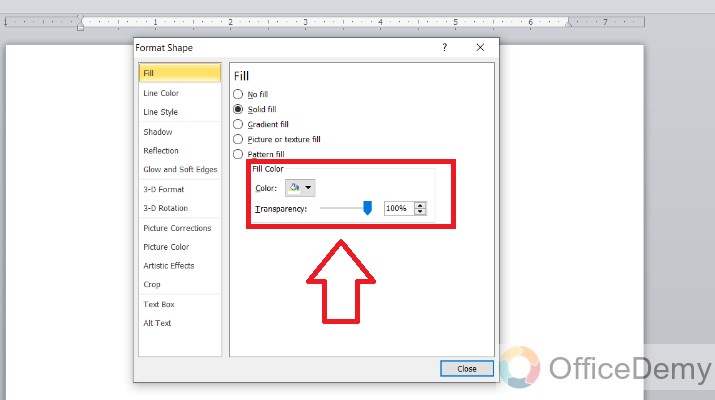
Step 12: Click right on the circle and select the “format shape” option.
Step 13: Click on the blue pointer and move it, to make transparency 100%.

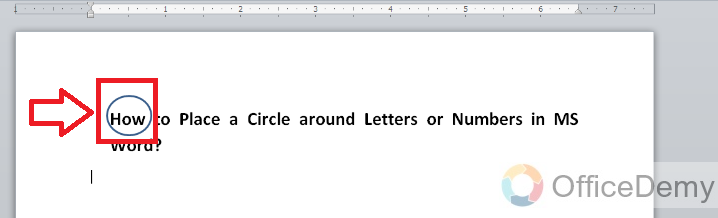
Step 14: Now move the circle and add it around the word or letter, you want to circle, in the MS word document.
Circle Something in Word: Inserting a Circle Shape
Step 1: First of all open the Word document in which you want to add circles.
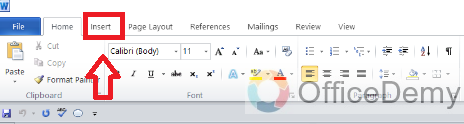
Step 2: Click on the “insert” option.
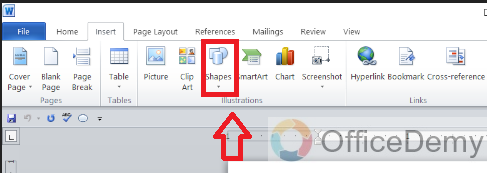
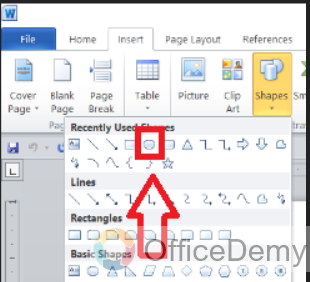
Step 3: Click on the “Shapes” icon, above the “illustrations” option.
Step 4: Choose the oval shape from the table of shapes.
Step 5: Click on this Oval sign and position the cursor at the page where you want to add the circle. A circle will appear with the fill color.
Step 6: Click on the “Shape Fill” option and select the “No fill” option available below the standard colors.

Step 7: The circle will appear as transparent, with no fill color inside the circle.
Step 8: Click right on the circle and select the “format shape” option.

Step 9: Click on the blue pointer and move it, to make transparency 100%.
Step 10: Now move the circle and add it around the word or letter, you want to circle, in the MS word document.
Important Notes
- When you drag a circle around a letter or number, it is filled inside with color. So, you have to choose the” fill tool” to select “no fill”. It will appear immediately after drawing the circle, on the format tab.
- You can also save this setting permanently by clicking on the circle and selecting the “Set as default” option. This will make sure that when you will use the Oval tool again, the circle will not be filled inside with color.
- In MS word the “Oval tool” is not enabled by default so you have to enable it and place it in the Quick Access Toolbar.
Conclusion
In this article, we have learned, “how to place a circle something in MS word”. So if you follow these simple and easy steps you can easily add a circle around letters or numbers in your document. It will help you draw the attention of readers toward the important point in the document.
Excel for Microsoft 365 Word for Microsoft 365 Outlook for Microsoft 365 PowerPoint for Microsoft 365 Project Online Desktop Client Excel for Microsoft 365 for Mac Word for Microsoft 365 for Mac PowerPoint for Microsoft 365 for Mac Excel for the web PowerPoint for the web Excel 2021 Word 2021 Outlook 2021 PowerPoint 2021 Project Professional 2021 Excel 2021 for Mac Word 2021 for Mac PowerPoint 2021 for Mac Excel 2019 Word 2019 Outlook 2019 PowerPoint 2019 Project Professional 2019 Excel 2019 for Mac Word 2019 for Mac PowerPoint 2019 for Mac Excel 2016 Word 2016 Outlook 2016 PowerPoint 2016 Project Professional 2016 Excel 2016 for Mac Word 2016 for Mac PowerPoint 2016 for Mac Excel 2013 Word 2013 Outlook 2013 PowerPoint 2013 Project Professional 2013 Project Standard 2013 Excel 2010 Word 2010 Outlook 2010 PowerPoint 2010 More…Less
You can add shapes, such as boxes, circles, and arrows, to your documents, email messages, slide shows, and spreadsheets. To add a shape, click Insert, click Shapes, select a shape, and then click and drag to draw the shape.
After you add one or more shapes, you can add text, bullets, and numbering to them, and you can change their fill, outline, and other effects on the Format tab.
Tip: You can add individual shapes to a chart, or add shapes on top of a SmartArt graphic to customize the chart or the graphic.
Add a shape in Excel, Outlook, Word, or PowerPoint
-
On the Insert tab, click Shapes.

-
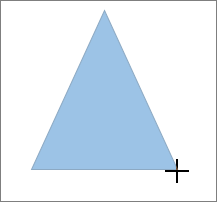
Click the shape you want, click anywhere in the workspace, and then drag to place the shape.
To create a perfect square or circle (or constrain the dimensions of other shapes), press and hold Shift while you drag.


To follow these steps, you need to open or create a report. To do that, on the Report tab, click Recent to open an existing report, or click More Reports to select a report from the list in the Reports dialog box or create a new report.
-
In the open report, on the Design tab, click Shapes.
-
Click the shape you want, click anywhere in the workspace, and then drag to place the shape.
To create a perfect square or circle (or constrain the dimensions of other shapes), press and hold Shift while you drag.
Insert a shape, or click an existing shape, and then enter text.
-
Right-click the shape and click Add Text or Edit Text, or just start typing.
Note: The text that you add becomes part of the shape — if you rotate or flip the shape, the text rotates or flips also.
-
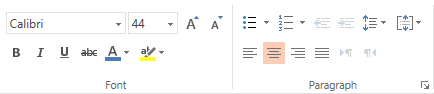
To format and align your text, click the Home tab, and then choose options from the Font, Paragraph, or Alignment groups, depending on the program you’re using and what kind of formatting you want to apply. (Text formatting options are limited in Project.)
Note: These commands aren’t available in Project.
-
Click the shape you want to change.
To change multiple shapes, press Ctrl while you click the shapes that you want to change.
-
On the Format tab, in the Insert Shapes group, click Edit Shape
, point to Change Shape, and then click the new shape that you want.
 , point to Change Shape, and then click the new shape that you want.
If you need to add the same shape repeatedly, you can do so quickly by using Lock Drawing Mode.
Note: Instead of adding individual shapes to create a drawing, you might want to Choose a SmartArt graphic. In a SmartArt graphic, the arrangement of the shapes and the font size in those shapes is updated automatically as you add or remove shapes and edit your text.
-
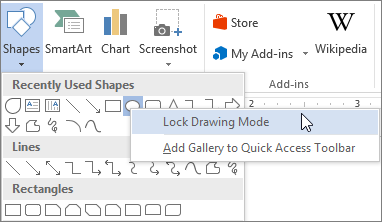
On the Insert tab, click Shapes.
-
Right-click the shape you want to add, and then click Lock Drawing Mode.
-
Click anywhere in the workspace, and then drag to place the shape.
-
Repeat step 3 to add the shape as many times as you like.
Tip: To create a perfect square or circle (or constrain the dimensions of other shapes), press and hold Shift while you drag.
-
After you add all the shapes you want, press Esc to turn off Lock Drawing Mode.
Note: This feature isn’t available in Project.
-
Select the text in the shape that you want to add bullets or numbering to.
-
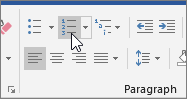
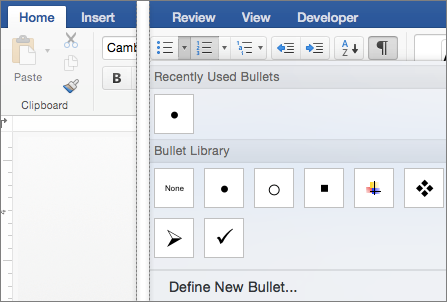
Select the Home tab on the ribbon, and in the Paragraph group, select Bullets or Numbering.
You can find different bullet styles and numbering formats by clicking the down arrow next to Bullets or Numbering.
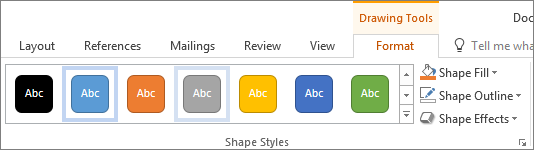
Quick Styles let you apply a style to your shape with one click. You’ll find the styles in the Quick Style gallery. When you rest your pointer over a Quick Style thumbnail, you can see how the style affects your shape.
-
Click the shape you want to change.
-
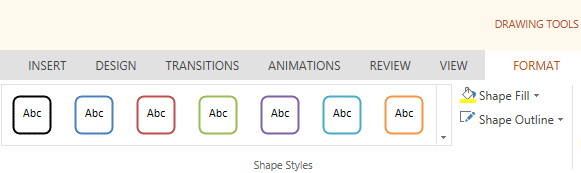
Select the Format tab, and in the Shape Styles group, select the Quick Style you want to use.
To see more Quick Styles, click the More button
.
 .
.Click the shape that you want to delete, and then press Delete. To delete multiple shapes, press Ctrl while you click the shapes that you want to delete, and then press Delete.
See Also
Draw or delete a line, connector, or freeform shape
Rotate a text box, shape, WordArt, or picture
Change the colors in a text box or shape
Draw a decorative line in Word or Outlook
Choose a SmartArt graphic
Create a chart from start to finish
Add clip art to a file
Draw and sketch notes on a page
After adding a shape to a document, you can modify it by adding connector lines, changing the style, adding a mirror image, changing the color, and applying a variety of other effects, such as shadows, glow, and 3-D.
Add a shape
-
On the Insert tab, click Shapes.
-
Click the shape you want, click anywhere in the workspace, and then drag to place the shape.

-
Right-click the shape and click Add Text or Edit Text, or just click inside the shape and start typing .
Note: The text that you add becomes part of the shape — if you rotate or flip the shape, the text rotates or flips also.
-
To format and align your text, click the Home tab, and then choose the available formatting options. For example, you can change font color, styles, sizes, change alignment or indentation, change the text orientation, to name a few.
-
Click the shape you want to change.
To change multiple shapes, press
while you click the shapes you want to change. -
On the Shape Format tab, click
, point to Change Shape, and click the new that you want.
 while you click the shapes you want to change.
 , point to Change Shape, and click the new that you want.
-
Select the shape you want to copy.
-
Press the option key and drag the shape anywhere you want. Release the mouse, and a copy of the shape is created. You can drag and release the shape as many times as necessary.
Note: Adding lists is not available in Excel 2016 for Mac.
-
Select the text in the shape that you want to add bullets or numbering to.
-
On the Home tab, click the arrow next to Bullets or Numbering.
-
Press Enter every time you want a new bullet or number, or press Enter twice to end the list.
-
Click the shape you want to change.
-
Click the Shape Format tab, and in the style gallery, click the style you want.
To see more styles, click
below the style gallery.
 below the style gallery.
-
Click the shape you want to change.
-
Click the Shape Format tab, and click
(Shape Fill icon). -
Do one of the following:
-
To use a different fill color, under Theme Colors or Standard Colors, click the color that you want to use.
-
To remove the color from the selected chart element, click No Fill.
-
To use a fill color that is not available under Theme Colors or Standard Colors, click More Fill Colors. In the Colors dialog box, use the available options to pick a color, and then click OK.
-
To fill the shape with a picture, click Picture. In the Insert Picture dialog box, click the picture that you want to use, and then click Insert.
-
To use a gradient effect for the selected fill color, click Gradient, and then click the gradient style that you want to use.
For additional gradient styles, click More Gradients, and then in the Format Chart Area pane, under Fill, click the gradient options that you want to use.
-
To use a texture fill, click Texture, and then click the texture that you want to use.
-
 (Shape Fill icon).
-
Click your shape, and then click the Shape Format tab.
-
In the Shape Styles group, click Shape Effects, point to an effect category, and then click the effect that you want.
-
On the Shape Format tab, click Format Pane.
-
In the Format Shape pane, click the Fill & Line tab, and then click either Fill or Line.
-
Drag the Transparency slider to achieve the effect you want.


Click the shape that you want to delete, and then press Delete. To delete multiple shapes, press Command while you click the shapes that you want to delete, and then press Delete.
See also
Change the size of an object
Crop a picture
Move, rotate, or group a picture, text box, or other object
Align objects in Word for Mac
Group or ungroup objects
You can add shapes, such as boxes, circles, and arrows, to your workbooks and presentations. (Word for the web doesn’t support shapes.) To add a shape, select Insert on the ribbon, select Shapes, and then choose a shape.
After you add a shape, you can move it and resize it; add text, bullets, or numbering; and you can change the fill color or outline.
-
On the Insert tab, select Shapes.
-
Select the shape you want from the drop-down gallery.
A default-sized shape is immediately inserted in the middle of the visible page.
-
Select a sizing handle on the perimeter of the shape and drag inward or outward to change the size of the shape.
To create a perfect square or circle (or constrain the dimensions of other shapes), press and hold Shift while you drag.
-
To move the shape, point the mouse at it until the pointer turns into a four-headed arrow. Then click and drag to move the shape where you want it.
When a shape is selected in your document, a Shape tab appears on the toolbar ribbon. It has buttons for things you can do with the shape such as adding a fill color or outline, or choosing a predefined shape style.
Note: If you have the Simplified Ribbon turned off, the tab name in step #4 is Format. For more information on the Simplified Ribbon see The new look of Microsoft 365.

Insert a shape, or click an existing shape, and then enter text, as follows:
-
Right-click the shape and select Edit Text.
A blinking cursor appears in the center of the shape.
-
Type the text you want to add to the shape.
-
To format and align your text, select the Home tab, and then choose options from the Font, Paragraph, or Alignment groups.
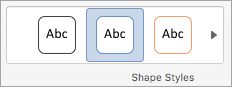
Quick Styles let you apply a style to your shape with one click. You’ll find the styles in the Shape gallery.
-
Select the shape you want to change.
-
On the Shape tab (or the Format tab if you have the Simplified Ribbon turned off), open the Shape Style gallery and select the Quick Style you want to use.
Select the down arrow on the end of the gallery to open it and see the complete list of options:
You can pause the mouse pointer over an option in the gallery to see a short description of it.

-
Select the shape you want to change.
-
On the Shape tab (or the Format tab if you have the Simplified Ribbon turned off), select the down arrow next to Fill to open the gallery of fill colors.
-
Select a color.
-
To make the shape transparent, select No Fill at the bottom of the color gallery.
-
Select the shape you want to change.
-
On the Shape tab, (or the Format if you’re still using the classic ribbon) select the down arrow next to Outline to open the gallery of outline colors.
-
Select a color.
-
At the bottom of the gallery there are also options for the thickness (Weight) of the outline, and whether the outline is solid, dotted, or a dashed line. Point at Weight or Dashes to see a pop-out list of options.
Click the shape that you want to delete, and then press the Delete key. To delete multiple shapes, press Ctrl while you select the shapes that you want to delete, and then press Delete.
Need more help?
Want more options?
Explore subscription benefits, browse training courses, learn how to secure your device, and more.
Communities help you ask and answer questions, give feedback, and hear from experts with rich knowledge.
Microsoft 365, Microsoft Office, Microsoft Office for Mac, Microsoft Word, Office 2013, Office 2016, Office 2019, Office 2021 / Office LTSC, Office 365 /
30 April 2022
In Microsoft Word, circling around text can place emphasis or enhance the text appearance. There are a few methods you can choose in Word documents and you’re not limited to circles.
We’ll show how to add a simple circle like this, plus a lot more.
Add shape to document
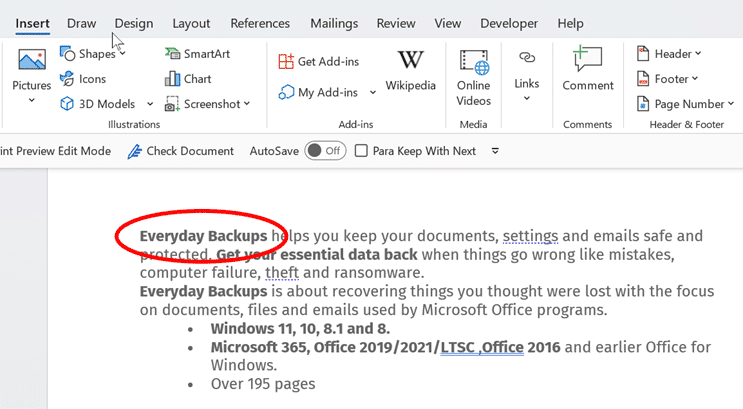
Go to Insert | Illustrations | Shapes
For our example we’ve chosen the Oval shape under Basic Shapes.

Now, hold down your cursor and drag the circle over the text.

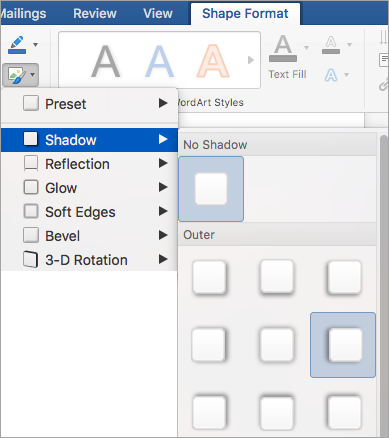
Now, make sure the shape has been selected. We change the formatting under Shape Format | Shape Styles to make it into a transparent circle.
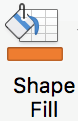
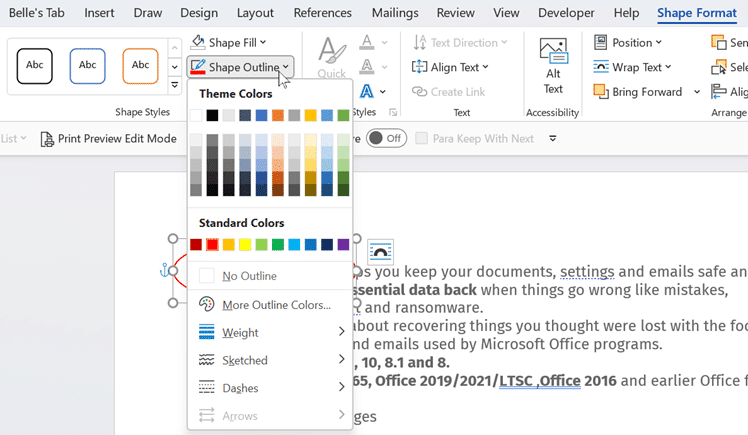
- Shape Fill – choose No Fill, so that it doesn’t cover your text.
- Shape Outline – choose a color of your choice that will really stick out on the page.
- Weight – choose the thickness of the line.
- Sketched – add more of a sketched look to your line.
- Dashes – choose between different dashed lines.

Sketchy or hand-drawn effect
For a rough, hand-drawn line effect go to Shape Outline | Sketchy .

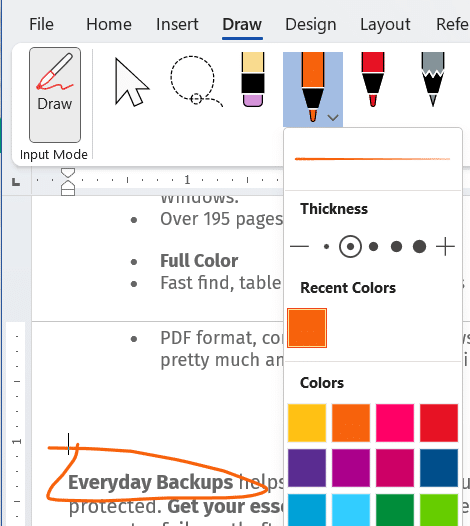
Really hand drawn shape
Yet another option is to really draw a line or shape around the words using the Draw tab. You don’t need a digital pen, just a mouse is enough. Go to the Draw tab, choose a pen, pencil etc and a color.
Add text within a shape
Another way around it is adding text within a shape. This means the text will move with the shape.
Go to Insert | Illustrations | Shapes.
Select your preferred shape.
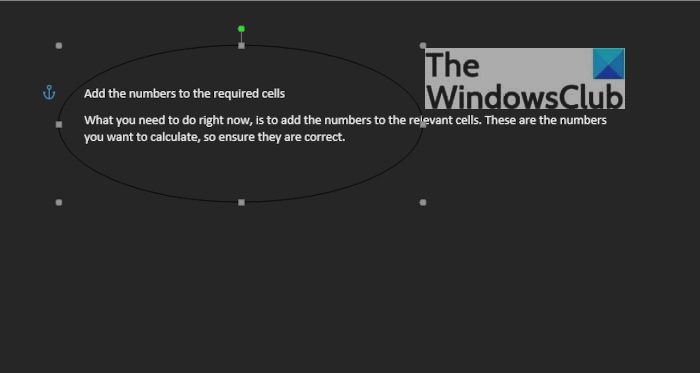
Right click on the shape and select ‘Add Text’.
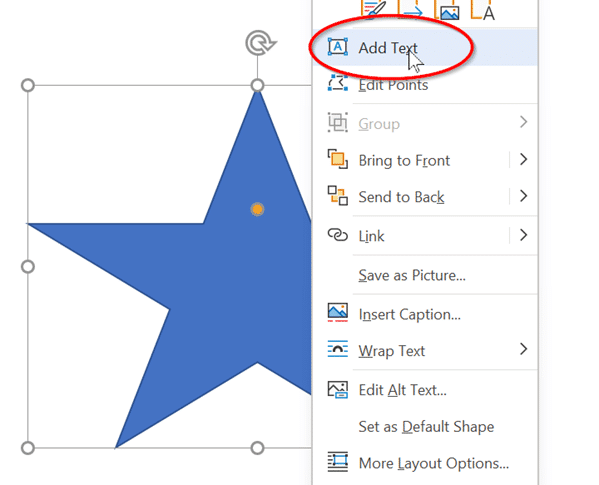
Type your text within the shape. If you need more room for text, drag the yellow dot up to ‘fatten’ the star shape

Double-click inside the shape to bring up options to change the Font style from the mini-toolbar. Of course all the formatting options are also on the Home tab.

Starting Word Page numbers from a specific page number
Make lines and arrows straight – a Word bug fix
Solved! How to connect shapes in Word
![]()
Download Article
![]()
Download Article
While you can’t outright draw free-form in Word, you can use the shapes menu to make shapes like circles. This wikiHow will teach you how to draw a circle in the computer desktop and mobile versions of Word.
-
1
Open a blank project in Word. When you tap to open Word, the program will launch and ask if you want to open a previous document or start a new one. You’ll want to open a new document to practice creating circles before you use them in any other documents.
- This app icon looks like two white pieces of paper on a blue background that you can find on your home screens, in the app drawer, or by searching.
-
2
Tap ••• (iOS) or
(Android) at the top of your keyboard. If you don’t see this menu, you’ll need to tap anywhere in the document to pull this menu up.
- The menu options will change and your keyboard should disappear.
- If you’re opening up a previous document, enable editing mode by tapping the pencil icon.
Advertisement
-
3
Tap the arrows next to Home. You’ll see this on the left side of your screen.
-
4
Tap Insert. The menu options in the right panel of the window will change.
-
5
Tap Shapes. Tapping this will bring you to a menu of shapes you can insert into the document.
-
6
Tap a circle you want to add. You can scroll through to find the «Basic Shapes» header; you’ll find a circle in that section if there isn’t one under «Recent Shapes.»
-
7
Edit the circle in your document. When you tap a circle shape from the menu at the bottom of the screen, it is copied into your document. You can pull, pinch, and drag the dots around the shape to edit its appearance.
- When you’re satisfied with the circle, tap the document around the circle and that editing menu will close. If you need to edit that shape again, you can tap on it.


Advertisement
-
1
Open Word. You’ll find this program in your Start Menu or Applications folder.
- You can either start a new document or resume a previously created document.
-
2
Click the Insert tab. You’ll see this in the editing ribbon above the document with «Home.»
-
3
Click Shapes. A menu of shapes you can add to the document will drop-down.
-
4
Click a circle you want to add. You’ll find circle shapes in «Basic Shapes.»
-
5
Click and drag while pressing ⇧ Shift on your keyboard to draw the circle on your document. After you select a circle theme and click and drag your mouse over the document to draw your circle, you can edit it.
- If you don’t hold down the Shift key, your shape may not result in a circle.
- You can change the overall look of your circle by changing the settings in Format > Shape Fill.[1]


Advertisement
Ask a Question
200 characters left
Include your email address to get a message when this question is answered.
Submit
Advertisement
Thanks for submitting a tip for review!
References
About This Article
Article SummaryX
1. Open a blank project in Word.
2. Tap the three-dots menu icon (iOS) or the up-pointing arrow icon (Android) .
3. Tap the arrows next to Home.
4. Tap Insert.
5. Tap Shapes.
6. Tap the circle icon.
7. Edit the circle in your document.
Did this summary help you?
Thanks to all authors for creating a page that has been read 14,265 times.
Is this article up to date?
Last Update: Jan 03, 2023
This is a question our experts keep getting from time to time. Now, we have got the complete detailed explanation and answer for everyone, who is interested!
Asked by: Kurtis Casper
Score: 4.7/5
(24 votes)
Create curved or circular WordArt
- Go to Insert > WordArt.
- Pick the WordArt style you want.
- Type your text.
- Select the WordArt.
- Go to Shape Format > Text Effects > Transform and pick the effect you want.
Is there a way to circle text in Word?
Just hold down the Shift key as you click and drag, and you are guaranteed of a perfect circle.
How do I put words in a shape?
Right-click anywhere in your shape and click the “Add Text” command. This places an insertion point in the shape where you can type your text. Once you’ve added whatever you want to write, the “Format” tab has tools you can use to give your text a little pop with things like text styles and shading.
What app can i use to curve text?
PicMonkey is one of the only design platforms out there with a super easy-to-use curved text tool. That means if you want to put your words into circles and arcs, you’ve got to check out PicMonkey.
How do you bend text in Word 2010?
Click and hold the pink dot on the left side of the text box, and then move the mouse around to expand and contract the curve. Release the mouse button when you’re satisfied with the appearance of the curve.
23 related questions found
How do I add text effects in Word?
Add or remove text effects
- Select the text that you want to add an effect to.
- On the Home tab, in the Font group, click Text Effect.
- Click the effect that you want. For more choices, point to Outline, Shadow, Reflection, or Glow, and then click the effect that you want to add.
How do I make a transparent circle in Word?
Select the shape or shapes that you want to make transparent. Right-click, and on the context menu, select Format > Fill. Set the Transparency slider to the percentage of transparency that you want.
How do you make a shape transparent?
Make a shape transparent
- Select Insert > Shapes.
- Select a shape from the drop-down gallery and then draw it the size that you want.
- Right-click the shape and choose Format Shape. …
- In the dialog box, in the Fill section, select the Transparency slider and drag rightward to set the degree of transparency you want.
What is circle shape?
A circle is a shape consisting of all points in a plane that are at a given distance from a given point, the centre; equivalently it is the curve traced out by a point that moves in a plane so that its distance from a given point is constant.
How do I change the transparency of a shape in Word?
Select the shape, and go to Shape Format to open the Format Pane. Select Fill > Picture or gradient fill and then drag the Transparency slider to set the exact percentage of transparency you want.
How do I add text effects in Word 2010?
To add or modify text effects:
- Select the text box, or select some text inside of the text box. The Format tab will appear.
- Click the Format tab.
- Click the Text Effects command in the WordArt Styles group. …
- Hover over an effect category. …
- Select the desired effect preset.
Where is the text wrapping in Word?
To wrap text around an image:
- Select the image you want to wrap text around. The Format tab will appear on the right side of the Ribbon.
- On the Format tab, click the Wrap Text command in the Arrange group. Then select the desired text wrapping option. …
- The text will wrap around the image.
What is text effects in Word?
Text Effects and Typography in MS Word & Office 360
In The Text Effects and Typography Settings, Applying the special formats to the content such as an Outline, Shadow, Reflection or Glow is known as the Text Effects. Similarly, changing the Number Styles, Ligatures, and Stylistics Sets is called Typography settings.
How do I fill a textbox with color in Word 2010?
Change the inside (fill) color
- Select the shape or text box.
- On the Drawing Tools Format tab, click Shape Fill > More Fill Colors.
- In the Colors box, either click the color you want on the Standard tab, or mix your own color on the Custom tab.
How do I make a text box transparent in Word 2010?
In Word 2010 the steps are a bit different:
- Place your text box, as normal.
- Right-click on the text box. …
- Choose Format Shape from the Context menu. …
- At the left side of the dialog box click Fill. …
- Use the Transparency slider to adjust how transparent you want the Text Box to be.
How do I make text more attractive in HTML?
HTML text effects are usually very simple to use, and you can change the text with just a small change in the code. To change size, just change the 24 (but leave the ” “) to any size you want. To change colors, replace #FF0000 with the new color you want.
How do I make a JPEG transparent?
You can create a transparent area in most pictures. Select the picture that you want to create transparent areas in. Click Picture Tools > Recolor > Set Transparent Color. In the picture, click the color you want to make transparent.
How do you clear the formatting in Word?
Clear formatting from text
- Select the text that you want to return to its default formatting.
- In Word: On the Edit menu, click Clear and then select Clear Formatting. In PowerPoint: On the Home tab, in the Font group, click Clear All Formatting .
Is there a perfect circle?
Perfect circles do not exist in nature, but you can see some close approximations around CMU’s main campus in Pittsburgh.
Is round and circle the same?
Circle can be a noun or a verb. … (Verb) Circle as a noun is 2-D. Round is usually an adjective.
Sometimes you may need to insert numbers or letters with circles in Word document, but you can’t type them directly or copy them from Internet every time. So how to insert circled numbers and letters in Word exactly?
To answer this question, I’ll share the detailed steps in the post. You can have a try following this guide.
Insert Circled Numbers from Symbol
1. One of the most commonly used way to insert circled numbers or letters is using Symbol.
2. Go to Insert tab, click Symbol and choose More Symbols… in the drop-down list.

3. Choose Windings, Windings 2 or Wingdings 3 as the font in Symbols tab, then scroll down to find the circled numbers. Click Insert to add the specified number to your document.

4. Note: you can only insert numbers from 1-10 with circles in this way. So if you want to insert larger numbers or letters with circles, please try the second method.
Insert Circled Number or Letter Using Enclose Characters
There’s a feature called Enclose Characters in Word, you can make use of it to insert circled numbers as well as letters.
1. Switch to Home tab, click the icon of Enclose Characters in Font section.

2. Enter the number or text you want to add circle in the textbox, then make the choice of Style and Enclosure. Click OK to implement it.

3. You can also select the existing letter in advance and click Enclose Characters to circle it. But don’t forget the maximum number of characters you can circle is 2.
4. As for circling 2 characters, like 2 letters or numbers larger than 9, you’ll find the result isn’t very well even if you choose Enlarge symbol in Style.

5. To make it looks better, you can press [Alt+F9] to switch to field mode. The circled number I just entered will be displayed as below:

6. The circle and the number are both in the parentheses, you can select the number to shrink its size.

7. It’s not enough cause the number will still be on the lower part of the circle. To raise its position, you can select the number and click the small arrow at the lower right corner of Font section in Home tab.

8. Switch to Advanced in the popping out Font window, choose Raised in the drop-down list of Position and click OK.

9. Then you can press [Alt+F9] to check the result. If it can still not satisfy you, just keep switching the mode to make adjustments till it finally looks good.

Insert a Circle Shape and Add Text to It
This method is not that frequently used, but it still works under certain circumstance. For example, if you want to circle more than 2 characters, the normal means may not help at all while this one does.
1. Switch to Insert tab, click Shapes and choose the oval shape in the list.

2. Hold your [Shift] key while dragging mouse to draw the shape. It will help you to draw a perfect circle instead of oval.

3. You can drag the vertices of it to move or resize it, but don’t forget holding [Shift] while resizing it, otherwise it will become oval again.
4. And if the color isn’t right, just double click the circle to enable Drawing Tools, you can change the setting in Shape Fill and Shape Outline.

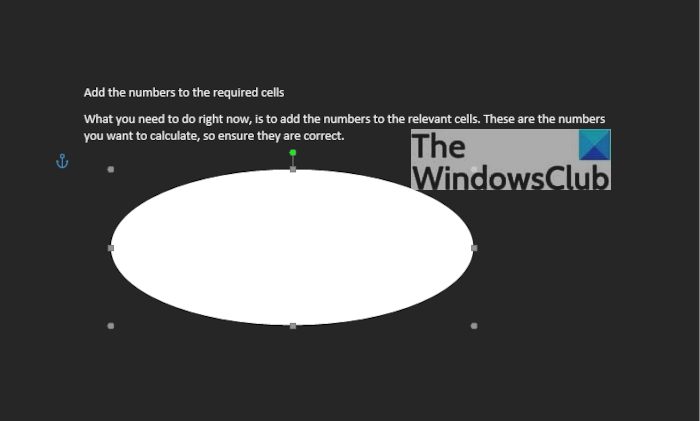
5. Then right click the circle and choose Add Text in the menu.

6. A textbox will be created inside the circle, you can type any text in it and adjust its font and size.

But you can do very little to adjust the text added in this way – you can’t even move it freely.
Instead, you can try changing the text into WordArt in advance.
7. Click WordArt in Insert tab to choose a style and type the text in the textbox.

8. Then you can freely resize and move the new created WordArt to adapt the circle.

9. Circled numbers and letters created in this way allow you to adjust them freely, but you must make corresponding changes to both the circle and the WordArt inside it, since they won’t match with each other automatically.

Copyright Statement: Regarding all of the posts by this website, any copy or use shall get the written permission or authorization from Myofficetricks.
Microsoft Word is more than just a tool for typing text. It can be used for other types of editing as well, and that includes spicing up your text to look more professional. For example, if you want to circle your text, or add a text around a circle, these are things you can do, and we are going to explain how to get them done. One of the reasons one might want to add a circle around a text is to emphasize it, but there are other reasons as well, so do what makes you feel comfortable. In this post, we show you how to insert text in a Circle. We also show you how to circle Text in Microsoft Word using built-in functions.
How to add a Circle around Text in Word
Drawing a circle around a text is easier than you might imagine. We promise that this article will not be difficult to understand, so read carefully and things should turn out just fine.
- Open Microsoft Word
- Launch a new document
- Navigate to Shapes
- Select the circle shape
- Draw the shape in your document
- Edit Shape Format
- Drag circle over text
1] Open Microsoft Word
To begin this task, you must first launch Microsoft Word. You can find the icon on the Desktop, Taskbar, or from within the Start Menu.
2] Launch a new document
After you’ve fired up Word, you must now click on Black Document to open a new document, or launch one you’ve been working on before; the choice is yours.
3] Navigate to Shapes

The next step, then, is to locate the Shapes area. To do this, click on Insert > Shapes. You will see a dropdown menu showcasing several different types of shapes. The options to choose from are as follows:
- Lines
- Basic Shapes
- Block Arrows
- Flowchart
- Callouts
- Start and Banners
4] Select the circle shape
From under the Basic Shapes category, please click on the circle icon, or to be more correct, the oval icon.
5] Draw the shape in your document
After selecting the circle, you must press and hold the left-click button, then drag to create the circle in the preferred size and position.
6] Edit Shape Format
By default, the circle will be added to your document with a color-filled center. This means, the text won’t show on the inside, so we need to change this.
To get it done, click on the shape, then select Shape Format > Shape Fill > No Fill. Doing this will remove the color from within the center of the circle.
From there, you can click on Shape Outline to determine the color of the circle’s outline.
7] Drag circle over text
The final thing you will want to do, then, is to drag the circle over the preferred line of text. Adjust the circle to allow the text to fit perfectly in the center, or in whichever form you wish.
Read: How to insert a blank page anywhere in your Word document
Apart from just creating a circle around text, folks can also create the text. Let’s look at how to do this.
- Navigate to WordArt
- Select the WordArt style you want
- Click on Shape Format or Drawing Tools Format
- Go to Transform
- Choose the circular shape
- For the newer version of Microsoft Word
- Set the circular word around a picture or shape
1] Navigate to WordArt
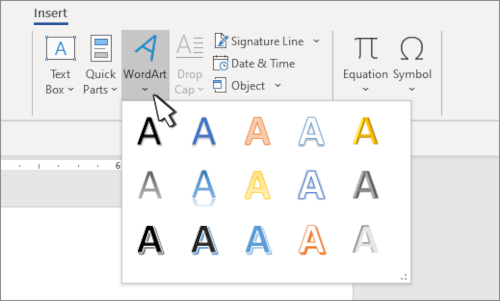
We assume you already have a Microsoft Word document opened, so from your current position, click on Insert, then select the WordArt icon from the Text menu.
2] Select the WordArt style you want
From here, you must choose the WordArt style that makes sense for your needs. Once selected, you must then type the preferred name or words for your art and hit the OK button. The art will appear in your document.
3] Click on Shape Format or Drawing Tools Format
After your WordArt has made its way to your document, you must then move to choose either Shape Format, or the Drawing Tools tab. Doing this will highlight new features to play around with.
4] Go to Transform
![]()
Next, you are required to click on Text Effects, and after that, select Transform to reveal an additional dropdown menu.
5] Choose the circular shape
From under the Follow Path category, please click on the circular shape and add it to the document.
6] For the newer version of Microsoft Word

After you’ve added the WordArt to the document, please click on the WordArt tab > Change Shape, then select the circle under Follow Path.
7] Set the circular word around a picture or shape

To top it off, drag the newly created WordArt and place it around a circular picture. Simply drag the edge of the WordArt to ensure it fits perfectly around, and that’s it, you’re done.
Read: How to mirror an Image in Microsoft Word
What are the text basics in MS word?
Folks who are new to Microsoft Word are required to learn the basics of typing, editing, and organizing text in many ways. These tasks are along the lines of the ability to add, delete, and move text in a document with ease. Additionally, users must learn how to cut, copy, and paste as well.
How do you insert text in Microsoft Word?
If you want to insert text in a Microsoft Word document, we suggest selecting Insert > Text Box, and from there, choose Draw Text Box. You must now click in the document, then drag right away to draw the text box to the size you prefer. Finally, select within the text box and then type your text.
Read: How to download Microsoft Word, Excel, PowerPoint on Mac.