
Contents
- 1 How do I circle something in a Word document?
- 2 How do I circle something in a PDF?
- 3 How do you make circles around letters?
- 4 Which tool is used to draw a circle?
- 5 How can I draw in Word?
- 6 How do I draw on a PDF in Windows?
- 7 Can I draw on a PDF?
- 8 What is the i in a circle symbol?
- 9 How do I turn a text into a shape?
- 10 How do you make a circle with a pencil code?
- 11 What is circle shape?
- 12 How do I draw a pen in Word?
- 13 Is there a draw tool in Word?
- 14 How do you draw freehand in Word?
How do I circle something in a Word document?
Draw an oval or circle
- On the Insert tab, click Shapes.
- Under Basic Shapes, click Oval.
- Click where you want the oval to start, and drag to draw the shape.
- To draw a circle, press Shift while you drag. Notes: You can change the look of your circle or curve by adding a shape fill or effect or changing the border.
How do I circle something in a PDF?
Choose Insert Menu > Drawing > Select Rectangle , Circle or Basic Shape.
How do you make circles around letters?
You can use one of the alt keys and type the decimal numbers using number pad. For example, alt + 9411 will produce circled capital N like Ⓝ. If you do not have a keyboard with number pad then try the alt + x method. Type the hexadecimal codes and then press alt + x to convert it into a circled letter.
Which tool is used to draw a circle?
compass
compass is traditional tool for drawing circles
A compass is the traditional tool for drawing precise circles, and its sharp point acts as a pivot. A pencil is attached to the other end.
How can I draw in Word?
How to draw in Word
- Click the ‘Shapes’ button and select ‘Scribble’ Open up your Microsoft Word document.
- Hold down your mouse to draw. Click and hold down your mouse to draw.
- Release the mouse. As soon as you release your mouse, the drawing will be finished.
- Edit your drawing. Double-click your drawing.
How do I draw on a PDF in Windows?
Add a line, arrow, or shape
- Choose Tools > Comment.
- Draw in the PDF:
- To edit or resize the markup, select it and drag one of the handles to make your adjustments.
- To add a pop-up note to the markup, select the Hand tool, and double-click the markup.
- (Optional) Click the close button in the pop-up note.
Can I draw on a PDF?
With Adobe Acrobat online services, you can draw directly on a PDF to visually mark your edits. Freehand drawing on a PDF is the perfect way to clearly show what content you want moved or removed altogether.
What is the i in a circle symbol?
The grey ‘circle with an i’ symbol indicates your connection is not secure.The lowercase i with a circle around it is formally known as the Information Symbol. It tells you when your connection to a website is not secure. When you connect to a website your browser uses the HTTP protocol or the HTTPS protocol.
How do I turn a text into a shape?
To convert text into a shape, right-click on the text layer, and choose “Convert To Shape”. Then select the Direct Selection tool (the white arrow tool) by pressing Shift A and click-and-drag the points in the path to give the characters a new shape.
How do you make a circle with a pencil code?
curves using a turning radius
Curves can be drawn by giving a second argument to rt and lt . The optional second argument for rt and lt is a turning radius. The turn is made while tracing out part of a circle of that radius. If you provide a radius of 0, the turtle will just pivot in place as with a normal turn.
What is circle shape?
A circle is a shape consisting of all points in a plane that are at a given distance from a given point, the centre; equivalently it is the curve traced out by a point that moves in a plane so that its distance from a given point is constant.
How do I draw a pen in Word?
On the Draw tab of the Ribbon, tap a pen to select it. In Word, you must be in Print layout to draw with ink. If the Draw tab is grayed out so that you can’t select a pen, go the View tab and select Print Layout. ; then you can select a pen to draw with.
Is there a draw tool in Word?
You can draw freely in Microsoft Word using the “Draw” feature whether you have Word for Mac or Windows. You can also insert customizable shapes into your document, or draw using the “Scribble” feature. The process of drawing in Word varies based on which version of Word and device you’re using.
How do you draw freehand in Word?
Draw a freeform shape
Click anywhere in the document, and then drag to draw. To draw a straight segment with the Freeform tool, click one location, move your pointer to a different location, and then click again; to draw a curved segment, keep your mouse button pressed as you drag to draw.
Excel for Microsoft 365 Word for Microsoft 365 Outlook for Microsoft 365 PowerPoint for Microsoft 365 Project Online Desktop Client Excel 2021 Word 2021 Outlook 2021 PowerPoint 2021 Project Professional 2021 Project Standard 2021 Excel 2019 Word 2019 Outlook 2019 PowerPoint 2019 Project Professional 2019 Project Standard 2019 Excel 2016 Word 2016 Outlook 2016 PowerPoint 2016 Project Professional 2016 Project Standard 2016 Excel 2013 Word 2013 Outlook 2013 PowerPoint 2013 Project Professional 2013 Project Standard 2013 Excel 2010 Word 2010 Outlook 2010 PowerPoint 2010 More…Less
This article discusses drawing curves, circles, and ovals. For information about drawing lines, see Draw or delete a line or connector. For information about freeform shapes and editing points in shapes, see Draw or edit a freeform shape.
Draw a curve
-
On the Insert tab, click Shapes.
-
Under Lines, click Curve.
-
Click where you want the curve to start, drag to draw, and then click wherever you want to add a curve.
-
To end a shape, do one of the following:
-
To leave the shape open, double-click at any time.
-
To close the shape, click near its starting point.
-
Draw an oval or circle
-
On the Insert tab, click Shapes.
-
Under Basic Shapes, click Oval.
-
Click where you want the oval to start, and drag to draw the shape.
-
To draw a circle, press Shift while you drag.
Notes:
-
You can change the look of your circle or curve by adding a shape fill or effect or changing the border.
-
If you want to create a more advanced diagram like overlapping circles, an organizational chart, or a flowchart, you can create a SmartArt graphic instead of drawing each shape manually.
-
Circles and ovals are filled automatically. If you don’t want the shape to obscure anything underneath it, such as text or cells, select the shape, and on the Format tab, click Shape Fill, and then click No Fill.
-
Draw a curve
-
On the Insert tab, in the Illustrations group, click Shapes.

-
Under Lines, click Curve
. -
Click where you want the curve to start, drag to draw, and then click wherever you want to add a curve.
-
To end a shape, do one of the following:
-
To leave the shape open, double-click at any time.
-
To close the shape, click near its starting point.
Note: By default, a closed shape is filled. To make sure that the shape doesn’t obscure the cells underneath, select the shape, and then under Drawing Tools, on the Format tab, in the Shape Styles group, click Shape Fill, and then click No Fill
-
 .
.Top of Page
Draw an oval or circle
-
On the Insert tab, in the Illustrations group, click Shapes.
-
Under Basic Shapes, click Oval
. -
Click where you want the circle to start. To make the shape a circle, press and hold SHIFT while you drag to draw.
Notes:
-
You can change the look of your circle or curve by adding a shape fill or shape effect or changing the shape border.
-
If you want to create a more advanced diagram like overlapping circles, an organizational chart, or a flowchart, you can create a SmartArt graphic instead of drawing each shape manually.
-
By default, a circle or oval is filled. To make sure that the shape doesn’t obscure the cells underneath, select the shape, and then under Drawing Tools, on the Format tab, in the Shape Styles group, click Shape Fill, and then click No Fill.
-
 .
.Top of Page
Need more help?
Draw an oval or circle On the Insert tab, click Shapes. Under Basic Shapes, click Oval. Click where you want the oval to start, and drag to draw the shape. To draw a circle, press Shift while you drag. Notes: You can change the look of your circle or curve by adding a shape fill or effect or changing the border.
How do you draw a circle in text?
You can create a circle in your document by going to the INSERT/Shapes… menu option and select the oval shape from that palette. You can then draw the oval with your mouse while holding down the Shift key as you draw the shape, which will “force” the oval to have a uniform diameter, otherwise known as a “circle”.
Is there a way to circle text in Word?
Create curved or circular WordArt Go to Insert > WordArt. Pick the WordArt style you want. Type your text. Select the WordArt. Go to Shape Format > Text Effects > Transform and pick the effect you want.
Is there a drawing function in Word?
You can draw freely in Microsoft Word using the “Draw” feature whether you have Word for Mac or Windows. You can also insert customizable shapes into your document, or draw using the “Scribble” feature. The process of drawing in Word varies based on which version of Word and device you’re using.
How do I circle something in a picture?
After you’ve taken a photo, tap on Edit, then Draw. Then select the shape you want to use. If you’re going to circle something on a picture, select either the square or the circle shape and drag it around your focus area.
How do I make a transparent circle in Word?
Apply transparency to a shape Select the shape or shapes that you want to make transparent. Right-click, and on the context menu, select Format Shape. In the Format Shape pane, set the Transparency slider to the percentage of transparency that you want.
How do you draw something on word?
How to draw in Word Click the ‘Shapes’ button and select ‘Scribble’ Open up your Microsoft Word document. Hold down your mouse to draw. Click and hold down your mouse to draw. Release the mouse. As soon as you release your mouse, the drawing will be finished. Edit your drawing. Double-click your drawing.
How do you add an outside border in Word?
How to highlight or select text. Once the text is highlighted, click the Home tab. On the Home tab, click the down arrow on the border to get border options, like those shown in the picture. Select the type of border you want to use. If you want a single border around the text, click Outside Borders.
How do you turn on draw in Word?
If your device is touch-enabled, the Draw tab is turned on automatically. Otherwise, turn it on by selecting File > Options > Customize Ribbon > Draw.
How do you highlight something in Word?
Highlight multiple parts of a document Go to Home and select the arrow next to Text Highlight Color. Select the color that you want. Select the text or graphic that you want to highlight. To stop highlighting, select the arrow next to Text Highlight Color.
How do you use pen in Word?
How to Use a Pen With MS Word Connect your writing tablet to your computer. Open the document you wish to write pen marks on. Click on the “Review” tab. Click “Start Inking” on the far right of the screen to begin using the tablet with Microsoft Word. Touch on the tablet to write using the pen tool.
Which tool will you use to draw a circle?
compass is traditional tool for drawing circles A compass is the traditional tool for drawing precise circles, and its sharp point acts as a pivot.
Is it possible to draw a perfect circle?
Drawing a perfect circle by hand is impossible. The human brain doesn’t have the precision or resources to draw an ever curving circle by hand. Until someone discovers the exact value of π, perfect circles will remain a mathematical concept only possible as an idea.
What app allows you to draw on pictures?
Recap. Skitch. Scribble Lite. Annotate. You Doodle. Draw on Pictures. Inkboard. Atom Draw.
Where do I find drawing tools in Word?
It looks like this, and usually appears at the bottom of your window. If your Draw Tools are not showing, you can make them appear by pulling down the View menu, clicking on Toolbars and clicking on Drawing. Take a moment to look at the functions of the Draw Tools.
Does scribble work in Word?
Turn handwriting into text with Scribble In a document, tap Apple Pencil in the body of a word-processing document where you want to write. Or tap in a text box, shape, or in a table cell in a word-processing or page layout document. Tap the Scribble tool in the toolbar at the bottom of the screen, then start writing.
How do you draw free in Word?
Draw a freeform shape Click anywhere in the document, and then drag to draw. To draw a straight segment with the Freeform tool, click one location, move your pointer to a different location, and then click again; to draw a curved segment, keep your mouse button pressed as you drag to draw.
How do I put a border around text in Word?
Add a border to selected text Select a word, line, or paragraph. On the Home tab, click the arrow next to the Borders button. In the Borders gallery, click the border style that you want to apply.
How do you put an outside border on?
Click the “Home” tab, select the “Borders” drop-down menu from the Font group and select “More Borders.” Alternatively, to apply a simple outside border, click “Outside Borders” or “Thick Box Borders.”.
How do I put a border around a paragraph in Word?
How to Put Borders Around a Paragraph in Word 2016 Place the insertion pointer in a paragraph. Click the Home tab. In the Paragraphs group, click the triangle next to the Borders command button. The Borders menu appears. Choose a border style from the menu.
How do I turn off drawing tools in Word?
To turn off the drawing canvas, do the following: From the Tools menu, choose Options. Click the General tab. Uncheck Automatically Create Drawing Canvas When Inserting AutoShapes in the General Options section. Click OK.
What is the drawing toolbar in Word?
The Drawing toolbar contains a collection of icon buttons that allows the user to draw shapes and images in the document. Provides a number of features for drawing. Enables you to select objects in the document. Inserts various shapes into the document.
On the Insert tab, in the Illustrations group, click Shapes, and then click New Drawing Canvas. Under Drawing Tools, on the Format tab, in the Insert Shapes group, click the More button . Click where you want the circle to start. To make the shape a circle, press and hold SHIFT while you drag to draw.
Subsequently, one may also ask, how do I put a circle around a number in Word?
Follow these steps:
- Position the insertion point where you want the circled text.
- Display the Insert tab of the ribbon.
- In the Symbols group, click the Symbol tool and then choose More Symbols.
- Using the Font drop-down list, choose Arial Unicode MS.
- Make sure that the From drop-down list is set to Unicode (Hex).
How do I write in a circle in Word?
Curve text around a circle or other shape
- Click Insert > WordArt, and pick the WordArt style you want.
- With the WordArt placeholder text highlighted, enter your own text.
- Select your WordArt text.
- On the Drawing Tools Format tab, in the WordArt Styles group, click Text Effects >Transform and pick the look you want.
Write Your Answer

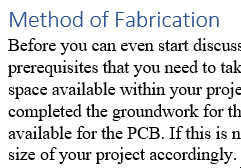
There are many ways to make text stand out in your document. You can format the font in bold or italic or highlight the text using color. For another option, we’ll show you how to circle text in Microsoft Word.
You may want to place a circle around text to emphasize it. But you might also want to use that circled text to enhance the appearance. Whatever your reason, circling text in Word takes only a couple of steps.
Add a Shape to the Document
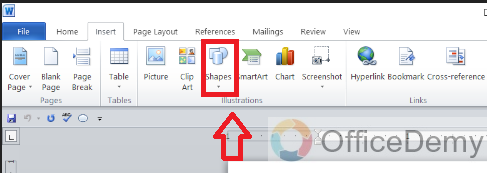
Open your Word document and go to the Insert tab. Click “Shapes” to view the available options.

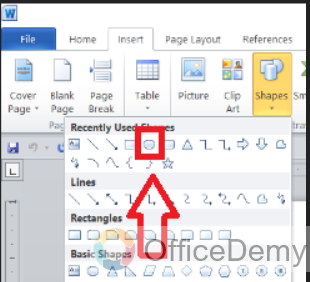
The closest shape to a circle is the oval, which works well for circling text. Choose that option in the Basic Shapes section.
Your cursor changes to a plus sign. Click and then drag to draw the oval on your document. You can make it as large or small as you like to accommodate the text you want to circle. But remember, you can resize the shape later as well.
Now that you have your shape, you may need to adjust it so that you can see the text you circle. You can also make optional changes to the line size or color.
Format the Circle Around the Text
You can use the Shape Format tab to customize your shape.
RELATED: How to Add and Format Text in a Shape in Microsoft Word
If your shape has a fill color that you need to remove, select the shape and pick “No Fill” in the Shape Fill drop-down box on the Shape Format tab.
This allows you to place the circle over the text and see only the outline of the shape.
To adjust the line of the circle, select the Shape Outline drop-down arrow. You can then change the line color, weight, and style.
As you make your changes, you’ll see your circle update immediately. So, you can get just the right look.
Move and Resize the Circle
You can move the shape so it’s on top of the text you want to circle by simply dragging it.
If you need to make the circle larger or smaller, drag a corner or edge in or out.
You can make these adjustments to your shape until you see the ideal circle.
If your preferred method of making text pop in your document is by circling it, you can do this in just minutes. And by using the Shapes feature in Microsoft Word, you’ll have a nicely drawn circle.
READ NEXT
- › How to Use the Ink Features in Microsoft Office
- › Expand Your Tech Career Skills With Courses From Udemy
- › BLUETTI Slashed Hundreds off Its Best Power Stations for Easter Sale
- › This New Google TV Streaming Device Costs Just $20
- › Google Chrome Is Getting Faster
- › The New NVIDIA GeForce RTX 4070 Is Like an RTX 3080 for $599
- › How to Adjust and Change Discord Fonts
How-To Geek is where you turn when you want experts to explain technology. Since we launched in 2006, our articles have been read billions of times. Want to know more?
In this article, you will learn how to circle something in MS Word document. So let’s start with an introduction.
Sometimes we all need to place a circle around a specific number, word, or letter in our MS word document. Its purpose may be to decorate the document or highlight an important point in the document. So we should know how to place a circle around letters or numbers in MS word.
Benefits of adding a circle in Word
There are a lot of benefits of placing a circle around the letters or numbers in the MS word document. Here we will highlight some of the most common and significant roles of putting these circles in the document:
- A circle around a letter or word highlights the focal point of the document.
- It can make your document look professional, informative, and easy to understand.
Sometimes you may need to add a circle around a certain letter or number in your MS Word document. This may be to emphasize an important point in the document. It may also be to simply decorate the text.
How to Circle Something in Word
Circle Something in Word: Using the Oval Tool
Step 1: First of all open the Word document in which you want to add circles.
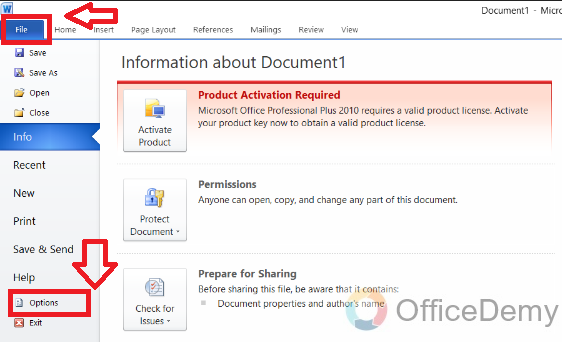
Step 2: Click on the “File” option available in the left top corner of the screen. A-Files menu will open. Now click on the “Options” available at the bottom of the menu.
Step 3: A list of word options will open. Select “Quick Access Toolbar” from the list.

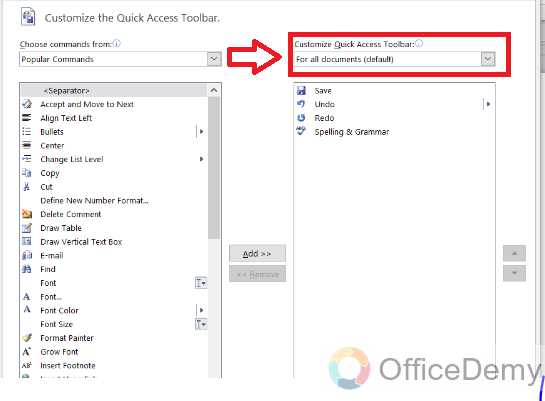
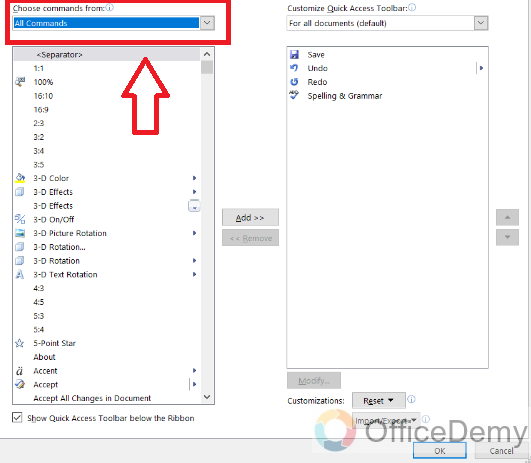
Step 4: Now you can see a dialog box on the right-hand side. This is for the customization of the Quick Access Toolbar.
Step 5: Now, Click on the down arrow below the “Choose commands from” option and choose the “All commands” option.
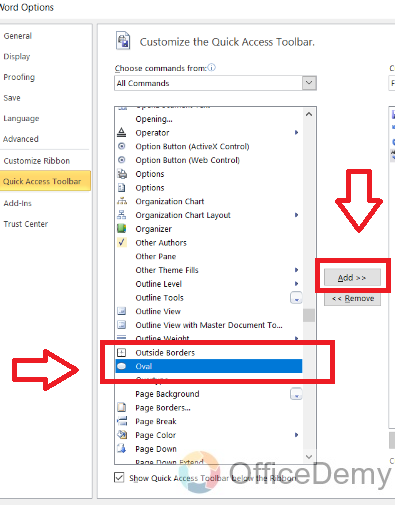
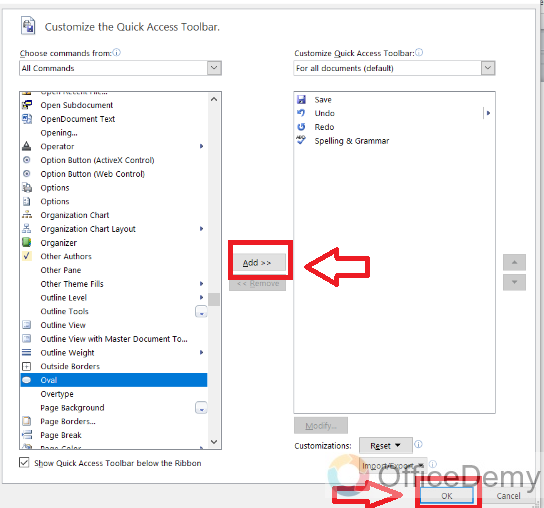
Step 6: Search the “Oval” from the command list and click on the “Add” button available on the right side of the command list. Now the Oval tool will be added to the Quick Action Toolbar list on the right side of the command list.
Step 7: Now click on the “OK” button available at the bottom, to exit.
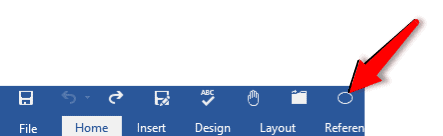
Step 8: Now you will see a circle-type sign below the clipboard.
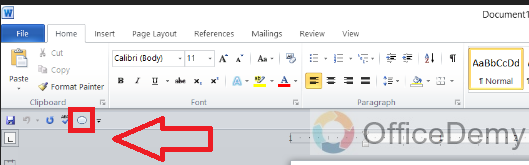
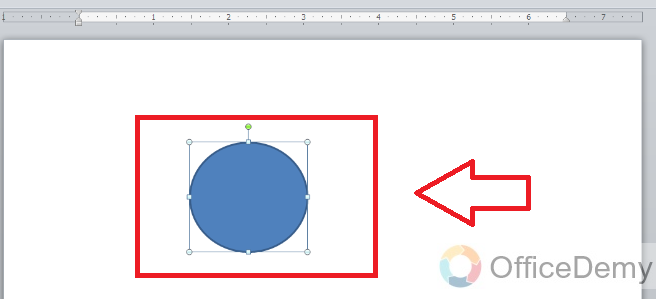
Step 9: Click on this Oval sign and position the cursor at the page where you want to add the circle. A circle will appear with the fill color.

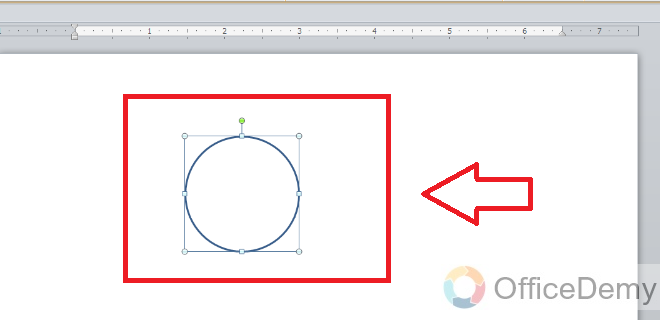
Step 10: Click on the “Shape Fill” option and select the “No fill” option available below the standard colors.
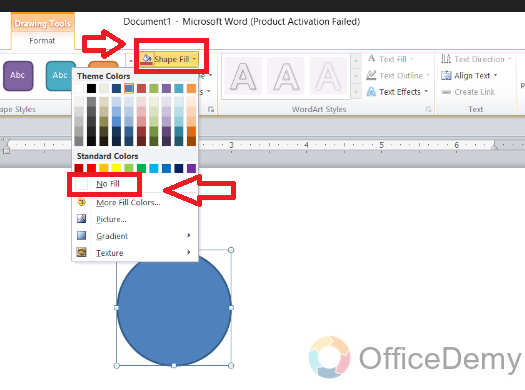
Step 11: The circle will appear as transparent, with no fill color inside the circle.

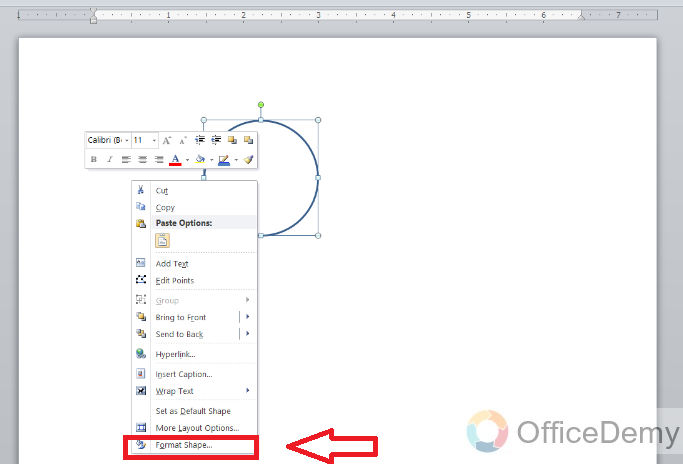
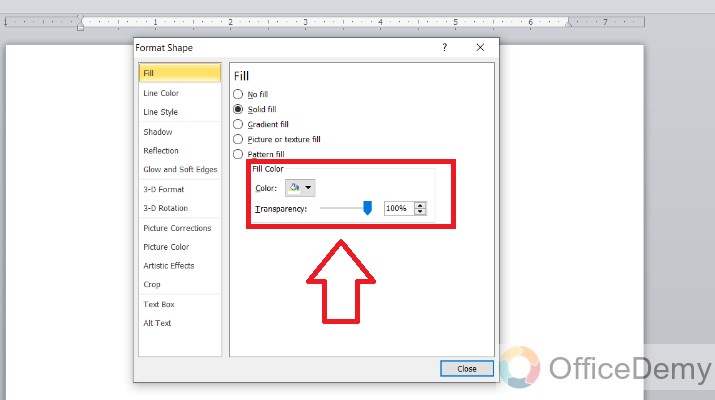
Step 12: Click right on the circle and select the “format shape” option.
Step 13: Click on the blue pointer and move it, to make transparency 100%.

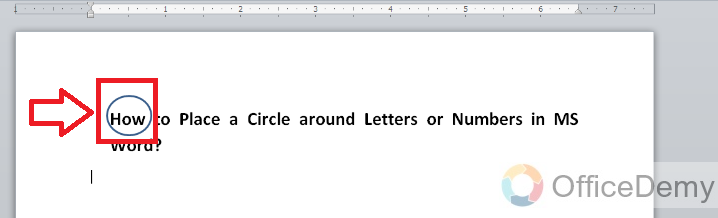
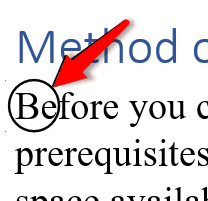
Step 14: Now move the circle and add it around the word or letter, you want to circle, in the MS word document.
Circle Something in Word: Inserting a Circle Shape
Step 1: First of all open the Word document in which you want to add circles.
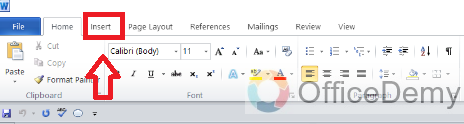
Step 2: Click on the “insert” option.
Step 3: Click on the “Shapes” icon, above the “illustrations” option.
Step 4: Choose the oval shape from the table of shapes.
Step 5: Click on this Oval sign and position the cursor at the page where you want to add the circle. A circle will appear with the fill color.
Step 6: Click on the “Shape Fill” option and select the “No fill” option available below the standard colors.

Step 7: The circle will appear as transparent, with no fill color inside the circle.
Step 8: Click right on the circle and select the “format shape” option.

Step 9: Click on the blue pointer and move it, to make transparency 100%.
Step 10: Now move the circle and add it around the word or letter, you want to circle, in the MS word document.
Important Notes
- When you drag a circle around a letter or number, it is filled inside with color. So, you have to choose the” fill tool” to select “no fill”. It will appear immediately after drawing the circle, on the format tab.
- You can also save this setting permanently by clicking on the circle and selecting the “Set as default” option. This will make sure that when you will use the Oval tool again, the circle will not be filled inside with color.
- In MS word the “Oval tool” is not enabled by default so you have to enable it and place it in the Quick Access Toolbar.
Conclusion
In this article, we have learned, “how to place a circle something in MS word”. So if you follow these simple and easy steps you can easily add a circle around letters or numbers in your document. It will help you draw the attention of readers toward the important point in the document.
You may want to place a circle around a certain letter or number in your MS Word document. This may be to emphasize an important point in the document. It may also be to simply decorate the text.
- Use the Oval Tool
- Use the Enclose Characters Tool
- Insert a Circle Shape
- Insert Enclosed Alphanumeric Symbols
We will show you step-by-step instructions for all the tools above.
Let us begin.
Method #1: Use the Oval Tool
Note: Word does not enable the Oval Tool by default. The best place to enable and place the Oval Tool is in the Quick Access Toolbar.
Step #1: Open the Word Document
Open the Word document where you want to place circles.

Step #2: Open the Word Options menu.
Click on the File tab in the top menu toolbar.

This opens the Files menu.
Click Options at the bottom of the Files menu.
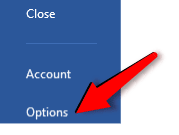
Word Options menu will open.
Click on Quick Access Toolbar.
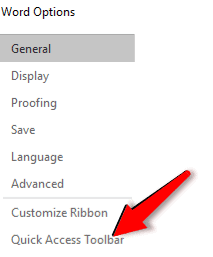
A dialog box for Customize the Quick Access Toolbar will open on the right-hand side.
Step #3: Customize the Quick Action Toolbar
Click on the down arrow below Choose commands from:
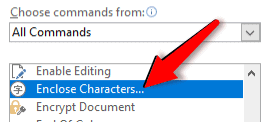
From the drop-down menu, select All Commands to change the command list below.

Search in the command list below All Commads and click on Oval.

Click on the Add button on the right-hand side of the command list.
Word will add the Oval tool in the Quick Action Toolbar list on the right.

Click on OK at the bottom of the dialog box to exit.
The Oval tool appears in the Quick Action Toolbar above the main toolbar.
Step #4: Use the Oval Tool
Position the cursor where you want the circle to appear.
Click on the Oval Tool in the Quick Action Toolbar.
The cursor will change to a cross.
Click on one corner and drag the cross cursor to the opposite corner to form a non-transparent circle.
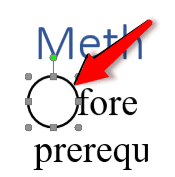
Right-Click on the circle to open a menu.
Click on Format AutoShape/Picture.
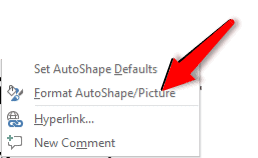
This opens the Format AutoShape dialog box.
Click on the tab Colors and Lines.
Under Fill, drag the Transparency bar to the extreme right to 100%.

Click on OK at the bottom of the dialog box to exit.
Word makes the circle transparent.
Open the Format AutoShape/Picture dialog box again. Use it to change the weight, color, and style of the circle.
Method #2: Use the Enclose Characters Tool
Note: Word does not enable the Enclose Characters Tool by default. The best place to enable and place the Enclose Characters Tool is in the Quick Access Toolbar.
Step #1: Open the Word Document
Open the Word document where you want to place circles.

Step #2: Open the Word Options menu.
Click on the File tab in the top menu bar.
This opens the Files menu.
Click Options at the bottom of the Files menu.

Word Options menu will open.
Click on Quick Access Toolbar.

A dialog box to Customize the Quick Access Toolbar will open on the right-hand side.
Step #3: Customize the Quick Action Toolbar
Click on the down arrow below Choose commands from:
From the drop-down menu, select All Commands to change the command list below.

Search in the command list and click on Enclose Characters.
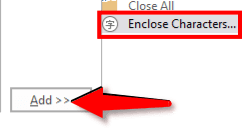
Click on the Add button on the right-hand side of the command list.
Word will add the Enclose Characters tool in the Quick Action Toolbar list on the right.
Click on OK at the bottom of the dialog box to exit.
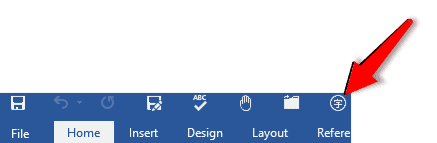
The Enclose Characters tool appears in the Quick Action Toolbar above the main toolbar.
Step #4: Use the Enclose Characters tool
Select the letter or number around which you want the circle to appear.
Click on the Enclose Characters tool in the Quick Action Toolbar.
The Enclose Characters dialog box will open.
Under Style, click on the Enlarge symbol icon in the dialog box.
Under Enclosure, select the shape of the enclosure you want.
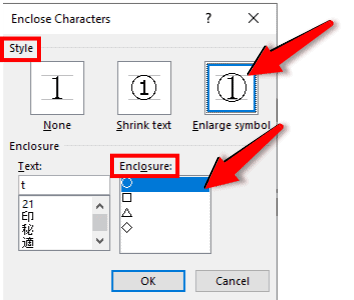
Click on OK to exit.
Word places the selected shape to enclose the letter/number.

Method #3: Insert a Circle Shape
Step #1: Open the Word Document
Open the Word document where you want to place circles.

Step #2: Insert a Circle Shape
Click on the Insert tab on the top menu toolbar to change the ribbon.

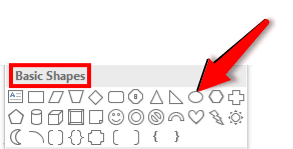
In the section Illustrations, click on the Shapes icon.

This opens a drop-down dialog box for various shapes.
Click on the Oval icon in Basic Shapes.
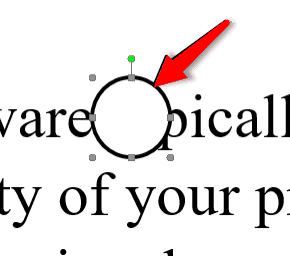
The cursor will change to a cross.
Position the cross cursor at the top left-hand corner. Drag it to the bottom right-hand corner to form a non-transparent circle.
Under Shape Styles, click on Shape Fill.

This opens the Shape Styles dialog.
Click on No Fill.

The circle changes to a transparent one.
You can select the circle and use the handles to move it. You can also change its shape and size.
Method #4: Insert Enclosed Alphanumeric Symbols
Step #1: Open the Word Document
Open the Word document where you want to place circles.
Place the cursor where you want the circle to appear.
Step #2: Insert Enclosed Alphanumeric Symbols.
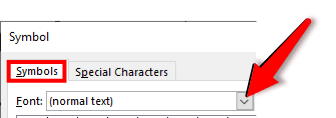
Click on the Insert tab in the top menu toolbar to change the ribbon.

In the section Symbols, click on the Symbol icon.

In the drop-down menu, click on the More Symbols icon.

This will open the Symbol dialog.
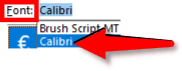
Under the Symbols tab, click on the downward arrow on the right of Font.
Under Font, select the Calibri font.
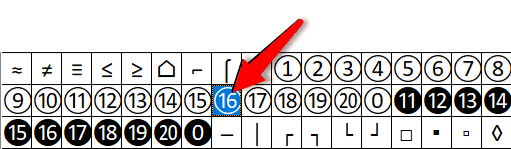
Under Subset, select Mathematical Operators.
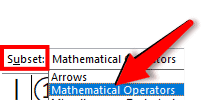
A number of encircled symbols will appear.
Select the symbol you want.
Click on Insert and then on Close at the bottom of the dialog to exit.
Word places the selected symbol in the document.

Note: Word offers only numbers as enclosed alphanumeric symbols.
Conclusion
Follow our simple instructions to place a circle around a number or letter in your document. We have shown you four methods. Select the one that suits you best.
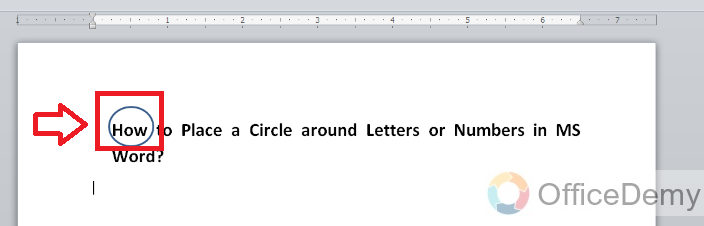
1. Open the Word document and select the text that needs to be circled. Here, we take “and” as an example.
2. Click the Change Case drop-down button → the Enclose Characters option. Then, the Enclose Characters dialog will pop up.
3. We can set the Style of the circled text. According to our actual needs, we can choose Shrink text or Enlarge symbol.
4. Click the OK button. Then, we can circle the text in Word.
(Note: We can add circles to up to 3 letters at a time. )

To be office word advanced, you could learn how to use WPS Office Writer online in WPS Academy.
Microsoft Word is more than just a tool for typing text. It can be used for other types of editing as well, and that includes spicing up your text to look more professional. For example, if you want to circle your text, or add a text around a circle, these are things you can do, and we are going to explain how to get them done. One of the reasons one might want to add a circle around a text is to emphasize it, but there are other reasons as well, so do what makes you feel comfortable. In this post, we show you how to insert text in a Circle. We also show you how to circle Text in Microsoft Word using built-in functions.
How to add a Circle around Text in Word
Drawing a circle around a text is easier than you might imagine. We promise that this article will not be difficult to understand, so read carefully and things should turn out just fine.
- Open Microsoft Word
- Launch a new document
- Navigate to Shapes
- Select the circle shape
- Draw the shape in your document
- Edit Shape Format
- Drag circle over text
1] Open Microsoft Word
To begin this task, you must first launch Microsoft Word. You can find the icon on the Desktop, Taskbar, or from within the Start Menu.
2] Launch a new document
After you’ve fired up Word, you must now click on Black Document to open a new document, or launch one you’ve been working on before; the choice is yours.
3] Navigate to Shapes

The next step, then, is to locate the Shapes area. To do this, click on Insert > Shapes. You will see a dropdown menu showcasing several different types of shapes. The options to choose from are as follows:
- Lines
- Basic Shapes
- Block Arrows
- Flowchart
- Callouts
- Start and Banners
4] Select the circle shape
From under the Basic Shapes category, please click on the circle icon, or to be more correct, the oval icon.
5] Draw the shape in your document
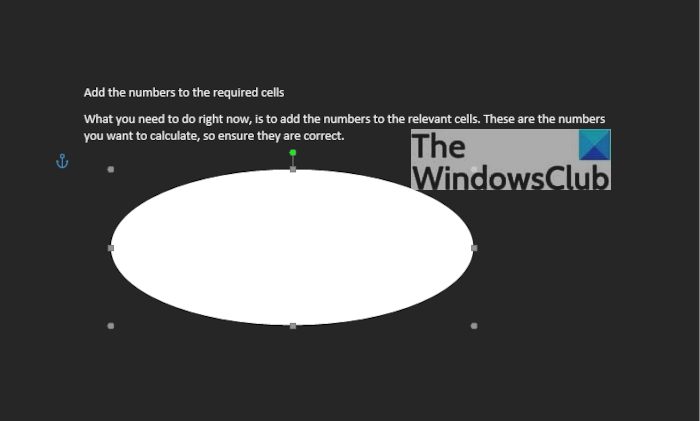
After selecting the circle, you must press and hold the left-click button, then drag to create the circle in the preferred size and position.
6] Edit Shape Format
By default, the circle will be added to your document with a color-filled center. This means, the text won’t show on the inside, so we need to change this.
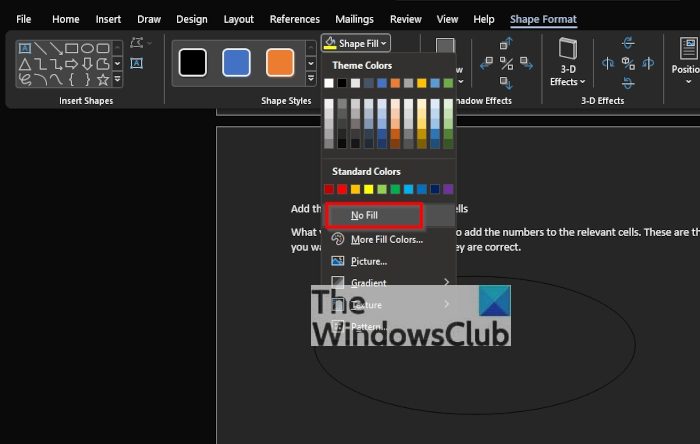
To get it done, click on the shape, then select Shape Format > Shape Fill > No Fill. Doing this will remove the color from within the center of the circle.
From there, you can click on Shape Outline to determine the color of the circle’s outline.
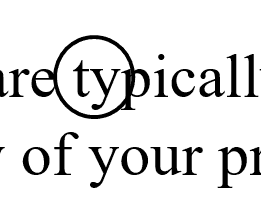
7] Drag circle over text
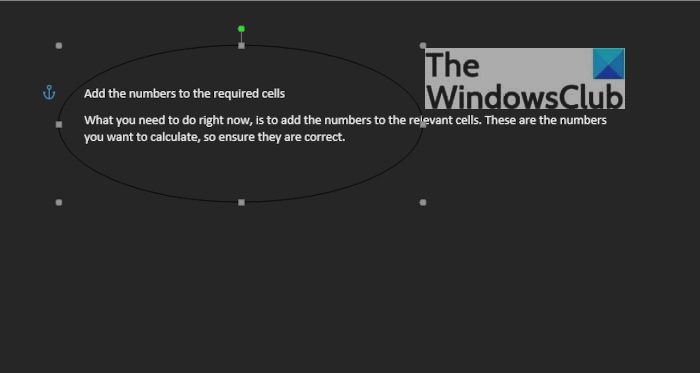
The final thing you will want to do, then, is to drag the circle over the preferred line of text. Adjust the circle to allow the text to fit perfectly in the center, or in whichever form you wish.
Read: How to insert a blank page anywhere in your Word document
Apart from just creating a circle around text, folks can also create the text. Let’s look at how to do this.
- Navigate to WordArt
- Select the WordArt style you want
- Click on Shape Format or Drawing Tools Format
- Go to Transform
- Choose the circular shape
- For the newer version of Microsoft Word
- Set the circular word around a picture or shape
1] Navigate to WordArt
We assume you already have a Microsoft Word document opened, so from your current position, click on Insert, then select the WordArt icon from the Text menu.
2] Select the WordArt style you want
From here, you must choose the WordArt style that makes sense for your needs. Once selected, you must then type the preferred name or words for your art and hit the OK button. The art will appear in your document.
3] Click on Shape Format or Drawing Tools Format
After your WordArt has made its way to your document, you must then move to choose either Shape Format, or the Drawing Tools tab. Doing this will highlight new features to play around with.
4] Go to Transform
![]()
Next, you are required to click on Text Effects, and after that, select Transform to reveal an additional dropdown menu.
5] Choose the circular shape
From under the Follow Path category, please click on the circular shape and add it to the document.
6] For the newer version of Microsoft Word

After you’ve added the WordArt to the document, please click on the WordArt tab > Change Shape, then select the circle under Follow Path.
7] Set the circular word around a picture or shape

To top it off, drag the newly created WordArt and place it around a circular picture. Simply drag the edge of the WordArt to ensure it fits perfectly around, and that’s it, you’re done.
Read: How to mirror an Image in Microsoft Word
What are the text basics in MS word?
Folks who are new to Microsoft Word are required to learn the basics of typing, editing, and organizing text in many ways. These tasks are along the lines of the ability to add, delete, and move text in a document with ease. Additionally, users must learn how to cut, copy, and paste as well.
How do you insert text in Microsoft Word?
If you want to insert text in a Microsoft Word document, we suggest selecting Insert > Text Box, and from there, choose Draw Text Box. You must now click in the document, then drag right away to draw the text box to the size you prefer. Finally, select within the text box and then type your text.
Read: How to download Microsoft Word, Excel, PowerPoint on Mac.