
There are plenty of reasons that you might need to print round stickers in Word. Maybe you’re sending thank-you notes for gifts, or maybe you just want some round stickers to use as labels for branding. Whatever the reason for printing round stickers in Word, it’s important not only that they look good but also that the printer does its job well so that your sticker comes out perfectly sized and shaped every time. It’s easy to do this with our guide!
What you’ll need
To get started, you’ll need Microsoft Word and a thermal printer. You can use any size or shape of round sticker label, but we recommend using 2-inch diameter labels for best results.


Making a Circle Sticker in Word- Step-by-Step Guide
Step 1: Start by choosing your sticker shape
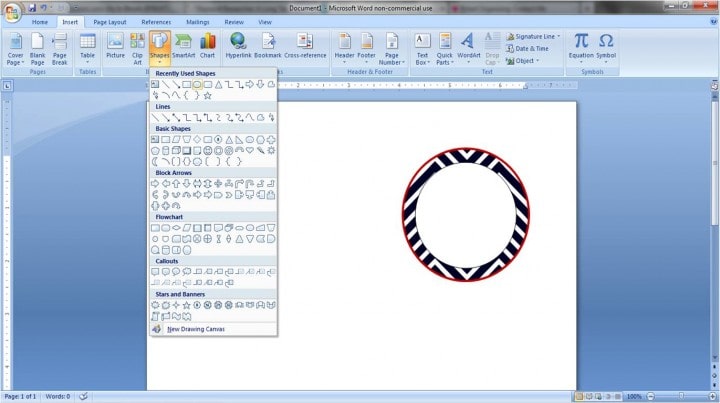
In a blank word document, click on the Insert Tab, select shapes, and pick the shape you’d love for your sticker. Since we want a round sticker, we will go with the circle.

Step 2: Adjust the shape outline and shape fill settings
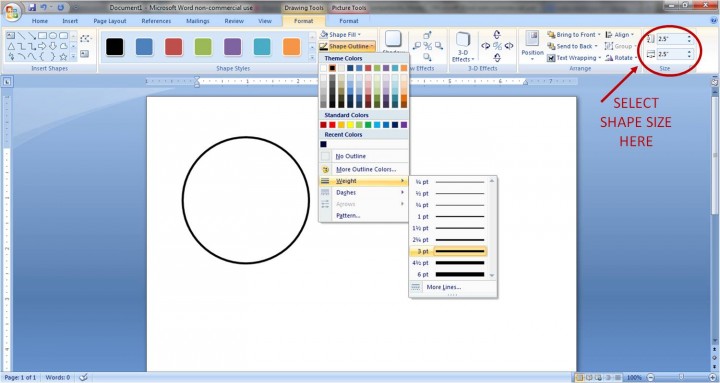
After drawing your circle to your desired size, you now have to make a few adjustments to make it pretty. I went with the dimensions (2.5” by 2.5”) for this round sticker.

Step 3: Adjust the sticker outline
Make sure the outline of your sticker is a little thicker so that it’s well-defined when you print it out.
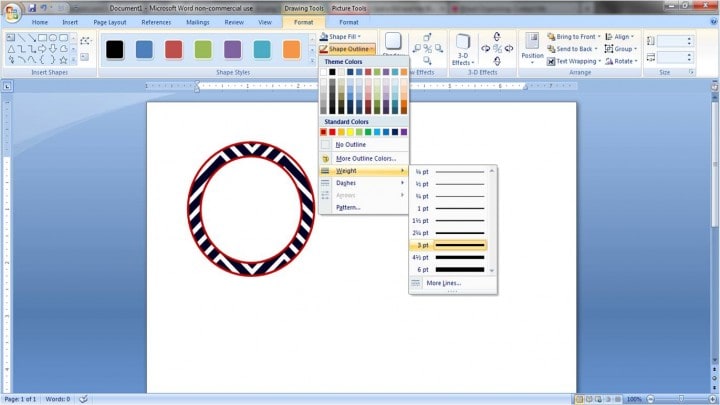
Proceed to the ‘Format’ tab, and under the dropdown on ‘Shape Outline,’ you will see ‘Weight.’ Here, you can make the sticker outline thicker or thinner, depending on your preference. We will go with 3pt.

Step 4: Change the color of the outline in the shape outline dropdown
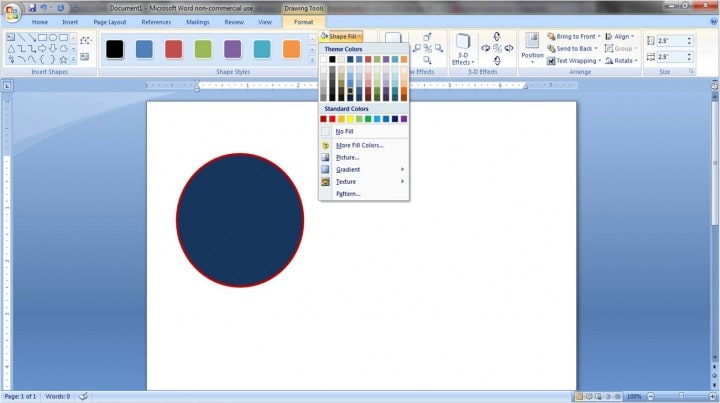
You can also change the fill colors in the ‘Shape Outline’ option. You can fill your shape with any solid color of your choice. We’ll change that from solid white to black.

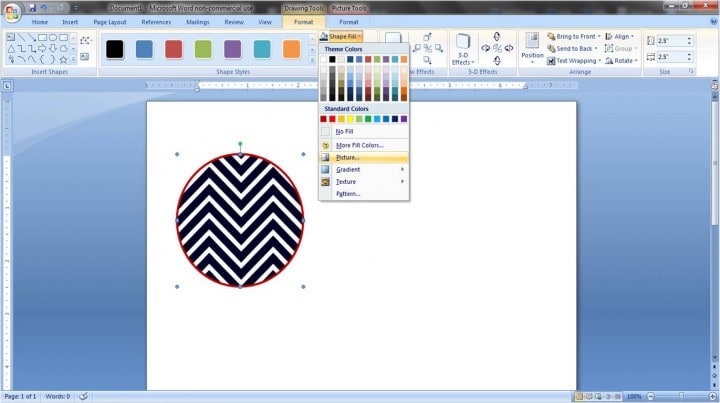
If you want to put a design inside your shape, choose the ‘Picture’ option from the ‘Shape Fill’ option. Choose any picture from your computer and use it as the shape’s background.

You can also play with the ‘Texture’ and ‘Gradient’ options until you get the ideal background.

Step 5: Layer your design if desired
Your design will always look better if it’s layered. This will allow you to have a fun color in the background and a clean white surface where you can add your wording.
To add this layer, you will follow the steps; go to the ‘Insert Tab> Shapes> Size.

Adjust the outline width and fill colors just as you did with the first layer. For the fill color, I will go with white.

Step 6: Add your text
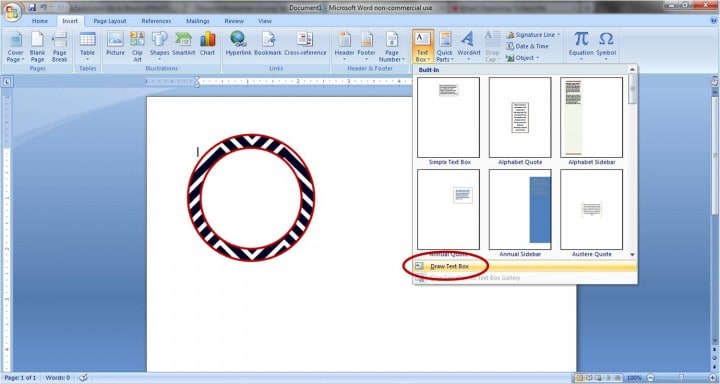
Go to the insert tab and select Text Box, then choose the ‘Draw Text Box’ option at the bottom of the dropdown menu.

Draw your text box above your existing shape. And since you down want the text to block the beautiful label design, make sure you make it transparent.
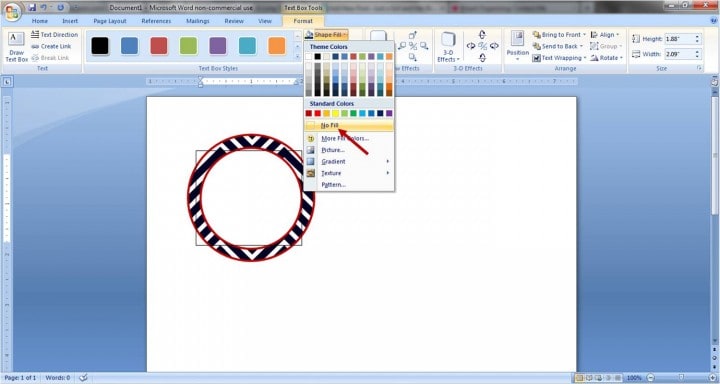
Select the ‘Text Box.’ Click on the ‘Shape Fill’ tab and choose ‘No Fill’ for the shape outline.

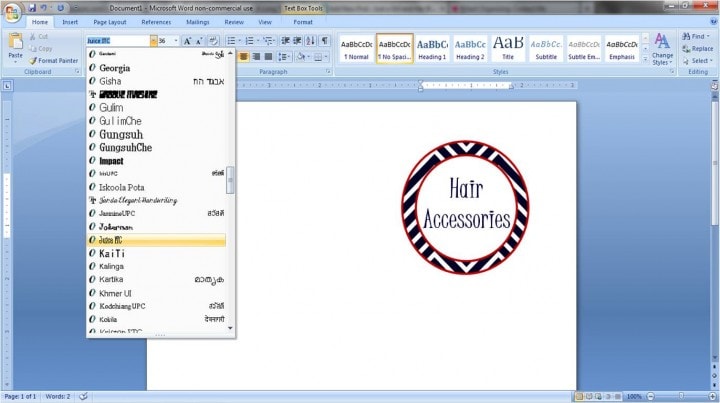
Once the text box is transparent, you are ready to type. Add your text and change the font, size, and alignment as desired. Play around with the colors as well. I will use font ‘JUICE ICT’ for this sticker in size 28 in black since we will be printing it on a thermal label printer.

Step 7: Group your label
Now the last step is to group your label. That will allow you to move it around the page as one unit rather than one piece at a time.
To access the group feature, hold the ‘CTRL’ key and click on every element of your label so that everything is selected.
Right-click on the selection, and under the ‘Grouping’ tab, choose ‘Group.’ Your label is now one unit; you can move it around and copy and paste it.

You can print it out with your thermal label printer when everything looks good!
There you have it! A quick and easy way to print round stickers in Word. We hope this article has helped you learn something new and that next time you need to create a circle label or sticker, this will be your first choice.
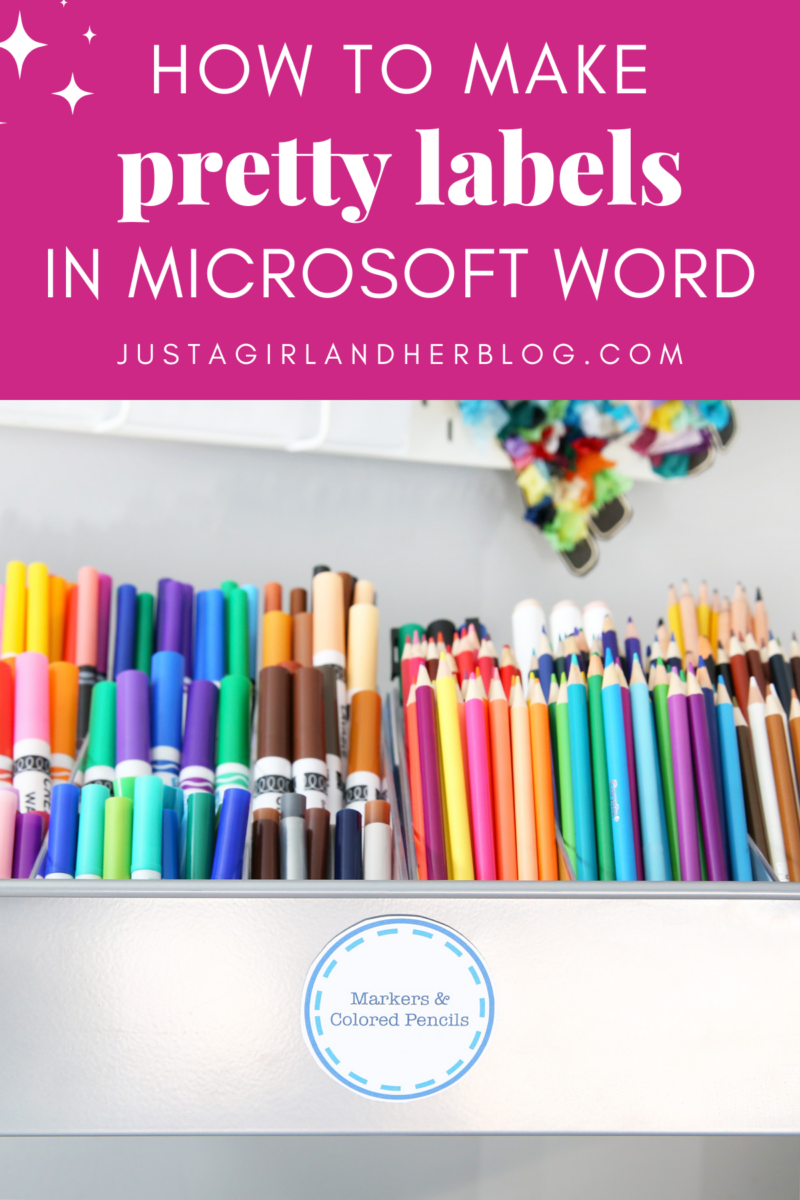
Learn how to create pretty, custom labels in Microsoft Word that can be printed in just about any shape, size, or color scheme!
This post contains affiliate links. For more information, see my disclosures here.
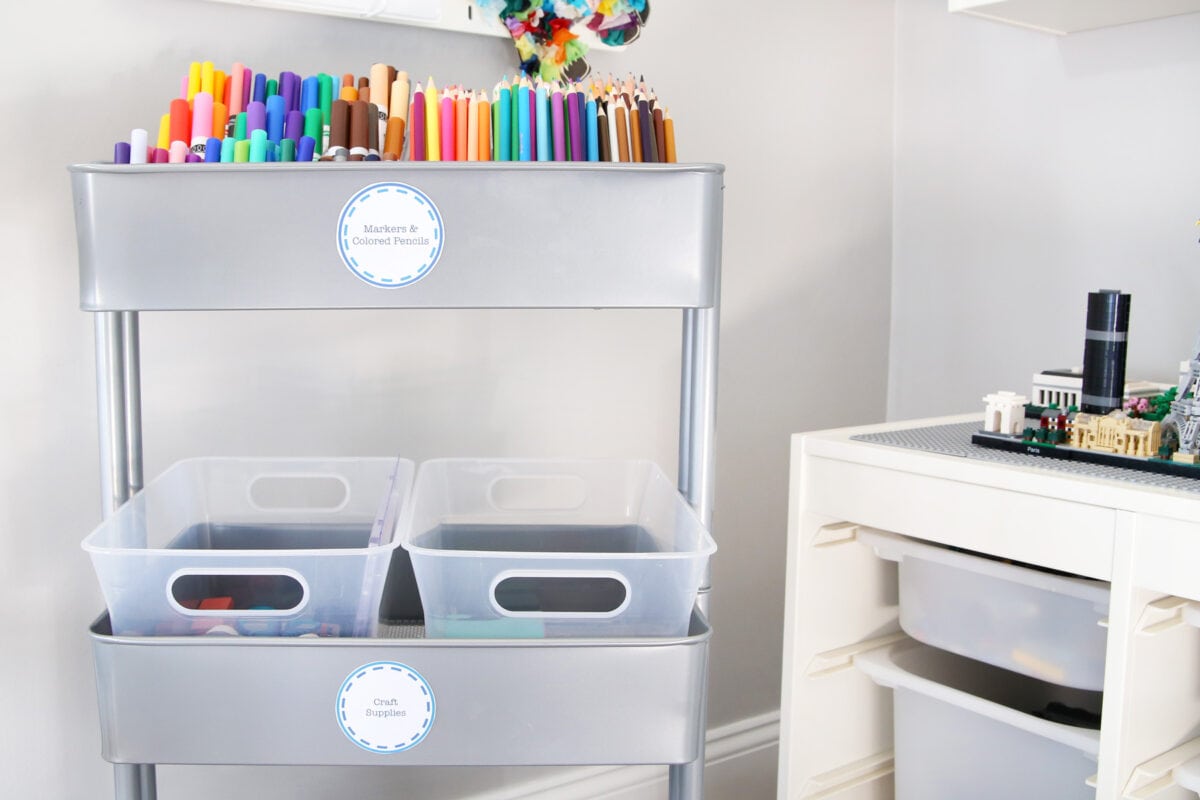
I must admit, I am just a teensy bit obsessed with labels. I put them on just about everything in our house. They’re perfect for getting organized, helping the boys find what they need, and adding a pretty touch to a basket or gift.
If I’m making labels with adhesive vinyl, I typically use my Cricut cutting machine. When it comes to creating pretty paper labels, though, I can’t help but head back to my old stand by, Microsoft Word, for all of my label-making needs.
Word is great because it’s super-simple to use. And almost everybody has it, so it’s really easy to email and share projects. I’m sure there are about a million ways to create pretty labels in Microsoft Word, but here is my tried-and-true method.

Get 300+ pages of free printables!
Become one of our VIP newsletter subscribers and gain access to our exclusive free printables vault!
How to Make a Label in Word Step-by-Step
1. Choose your shape.
Beginning with a blank document, click on the “Insert” tab, select “Shapes,” and choose the desired shape for your label. I picked the circle.

2. Adjust your outline and fill settings.
Once you’ve drawn your shape to your desired size (I chose 2.5″ x 2.5″.), you’ll want to make it look pretty! I usually like to make the outline of my shape a little thicker so that it is well defined when I print it out.
To do that, go to the “Format” tab, and under the “Shape Outline” drop down, you will see “Weight.” I chose 3 pt; you can make yours thinner or thicker depending on your preference.
You can also change the color of your outline in the “Shape Outline” drop down. I picked dark red.
While we’re changing colors, let’s go ahead and change our fill color as well. Right above “Shape Outline,” you’ll see the “Shape Fill” option. You have a few choices here. You can fill your shape with a solid color.
Or you may want to put a design inside your shape. By choosing the “Picture” option from the “Shape Fill” drop down, you can use any picture file on your computer as your shape’s background.
You can also play with the “Gradient” and “Texture” options until you find the background of your choice.
3. Add a layer, if desired.
I think it always looks nice to add a second layer to your label. You get to have a fun color or pattern in the background, but you also get a clean white surface for your wording. To add a layer, you’ll go through a similar process: choose your shape (“Insert” tab, “Shapes” button), and size it correctly. I did 2″ x 2″.
Then adjust your outline width and outline and fill colors. I went with the 3 pt dark red outline again, and I chose to keep the fill color white, but you could always pick a color.
4. Add your text.
To do this, you’ll want to go to the “Insert” tab and select “Text Box.” Choose the “Draw Text Box” option at the bottom of the drop down menu.
Draw your text box over your existing shape. Then, so the text box doesn’t block the beautiful label you’ve made, you’ll want to make it transparent. With the text box selected, go to the “Text Box” tab, and under “Shape Fill” choose “No Fill.” You will also want to choose “No Fill” for the “Shape Outline.”
Once your text box is transparent, you’re ready to type. Add your words, and change the size, font, and alignment like you would in a regular Word document. You can also play with color! I used a 36 pt font called “Juice ITC” in dark blue.
5. “Group” your label.
The last thing I like to do when I get the label the way I want it is to group it together. This allows me to move it around the page as one unit rather than trying to move each piece individually.
To use the group feature, hold down the “Ctrl” key on a Windows computer or “Command” on Mac and click on each element of your label so they are all selected.

Next you’ll want to right click on your selection and under “Grouping” choose “Group.”
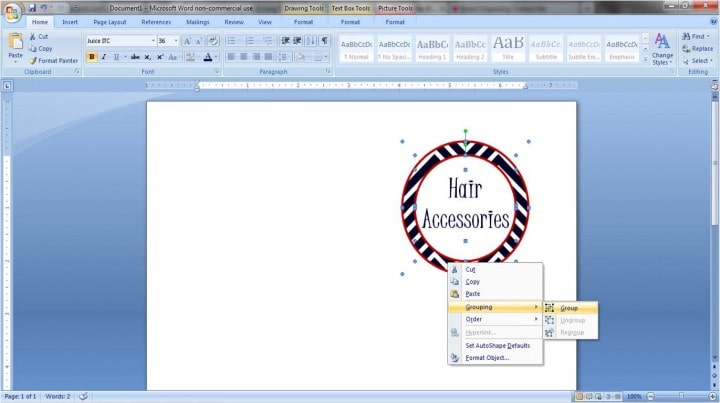
TA-DA! Your label is now one cohesive unit! You can move it around the page, copy and paste it, change the text, go crazy with it!
Now for all you overachievers out there…
Making Labels in Microsoft Word: The Bonus Round
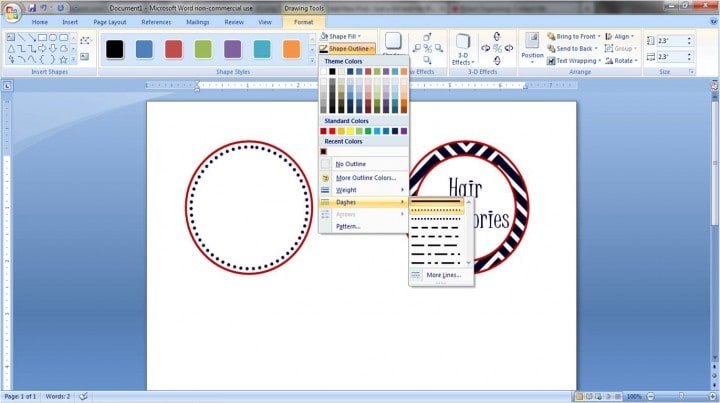
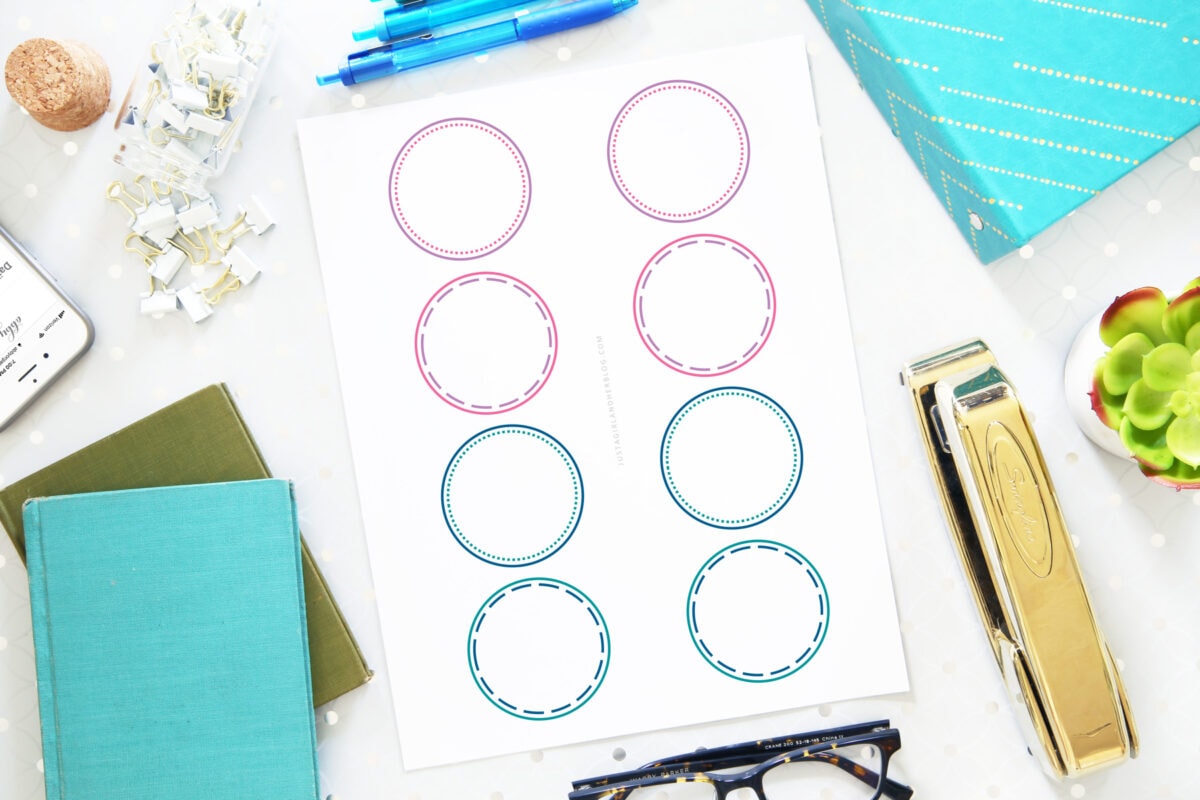
Another fun thing to play with is the outline style. I’ll start out with the same white circle with a dark red outline, but instead of using a colored background, I’ll add interest with the second layer.
For the “Shape Outline” of the inner circle, go down to “Dashes.” You will be able to choose dots (as I did), squares, dashed lines, etc. Just another cute dimension to add to your labels!
Though fancy programs and machines can be really great, it is possible to make pretty labels just using Microsoft Word. In my opinion, it is the simplest program to navigate, and it still gives beautiful, fully-custom results.
How to Print Labels From Word
After you’ve created your cute labels, what’s next? I typically print mine out (with my home ink jet printer) on white card stock so that they’re sturdy, and then cut them out by hand.
If my labels are going to be in a higher traffic area, I’ll laminate them to protect them a little bit more. Laminated or not, I typically just attach my labels with tape or velcro dots.
My Favorite Laminator
I have used this laminator for years, and it is always my go-to when I want to make my labels or other printables a little sturdier.

![]()
If you want to use a label that is more like a sticker, Avery has many templates for their stickers. You would simply head to their website, find the template that matches the stickers that you purchased (you can search by the number on the pack), download the template, and create your design within the guides they provide.
My Favorite Labeling Supplies
- Printer
- White Card Stock
- Laminator + Laminating Pouches
- Velcro Dots
- Sticker Sheets
And just for fun, I’ve included a page of simple printable labels to get you started. Happy labeling!
Making Labels in Microsoft Word: Frequently Asked Questions
Want to save this post to revisit later? Be sure to pin the image below so you can find it easily!
- How to Make DIY Iron On Labels
- How to Make Your Own Party Invitations
- How to Make Vinyl Labels with a Cricut Cutting Machine
- 16 Creative Projects for Label Lovers {The Thinking Closet}
- How to Create a Monogram in Word
- How to Make Pretty Labels with a Silhouette Machine
- How to Use Labels to Organize Your Whole House
What is your favorite way to make labels?
This post contains affiliate links. For more information, see my disclosures here.
By Francine Richards
Updated September 28, 2017
i computer image by blaine stiger from Fotolia.com
Printed labels in the shape of a circle can be easily printed using a software program such as Microsoft Word or Avery Design Pro. Most people think of labels in the shape of a square or rectangle but many blank labels in a variety of sizes are also available in a circular shape. Using either Word or Avery Design Pro, you can create and print your own circle labels.
Using Microsoft Word
Open Microsoft Word 2010 by selecting “File” and “New.”
Select “Blank Document” and then the “Mailings” tab. From the “Create” group, select “Labels.”
Select “Options” from the “Envelopes and Labels” selections box. Select the brand of your labels and the product number. For instance, to use the round Avery Labels #5294, select the “Avery Letter” from the “Label Vendor” drop down menu and “5294” from the Product Number drop down menu. Click “Ok” upon completion.
Click “New Document” from the “Envelopes and Labels” box and a new blank labels document will open. Begin typing as you would with any Word document.
Place blank labels into your printer. Print your circle labels by selecting “File” and then “Print”. Save your document for future printing.
Using Avery DesignPro
Download Avery’s Design Pro software for free from Avery’s website.
Open Design Pro and click “Design from Scratch.”
Select the label template from the drop down list. For instance, select 5294 and click “Ok.” There is a search feature to input the number if you can’t find it on the list. If you prefer to use a pre-installed template for your round label, select “Pre-Designed Template” and find your label number in the folders on the left and select your label number.
Add text, photos, clip art and graphics to your circle label by typing it into the document and using the toolbar icons to insert and edit your text and images.
Place blank labels into your printer and select “Print” from “File” menu or click the toolbar icon for printing. Save your labels as needed by selecting “Save” from the “File” menu or click the toolbar icon for saving.
How do I create a circle template in Word?
How do I print round stickers in Word?
How do I create a label template in Word?
To create a template:
- Step 1: Click on Options; this opens a dialogue box called Label Options.
- Step 2: Click on New Label; this opens a dialogue box called Label Details.
- Step 3: Enter your required measurements.
- Step 4: Give your template a name, and click OK.
How do I print Maco labels in Word?
How to Print Labels in Word
- Click the Mailings tab.
- Click the Labels button.
- Enter an address.
- Click Options.
- Select your label options.
- Click OK.
- Click Print to print the labels, or New Document if you want to do any formatting or editing of individual labels.
Содержание
- Круговая надпись на объекте
- Создание объекта
- Добавление надписи
- Написание текста по кругу
- Вопросы и ответы
MS Word — это профессиональный текстовый редактор, который в первую очередь предназначен для офисной работы с документами. Однако, далеко не всегда и далеко не все документы должны быть оформлены в строгом, классическом стиле. Более того, в некоторых случаях творческий подход даже приветствуется.
Все мы видели медали, эмблемы для спортивных команд и прочие «вещицы», где текст написан по кругу, а в центре располагается какой-нибудь рисунок или знак. Написать текст по кругу можно и в Ворде, и в данной статье мы расскажем о том, как это сделать.
Урок: Как в Word написать текст вертикально
Сделать надпись по кругу можно двумя способами, точнее, двух видов. Это может быть обычный текст, расположенный по кругу, а может быть текст по кругу и на круге, то есть, именно то, что делают на всевозможных эмблемах. Оба эти метода мы рассмотрим ниже.
Круговая надпись на объекте
Если ваша задача — не просто сделать надпись по кругу, а создать полноценный графический объект, состоящий из круга и надписи, расположенной на нем тоже по кругу, действовать придется в два этапа.
Создание объекта
Прежде, чем сделать надпись по кругу, необходимо создать этот самый круг, а для этого нужно нарисовать на странице соответствующую фигуру. Если вы еще не знаете, как можно рисовать в Ворде, обязательно прочтите нашу статью.
Урок: Как рисовать в Word
1. В документе Ворд перейдите во вкладку «Вставка» в группе «Иллюстрации» нажмите кнопку «Фигуры».
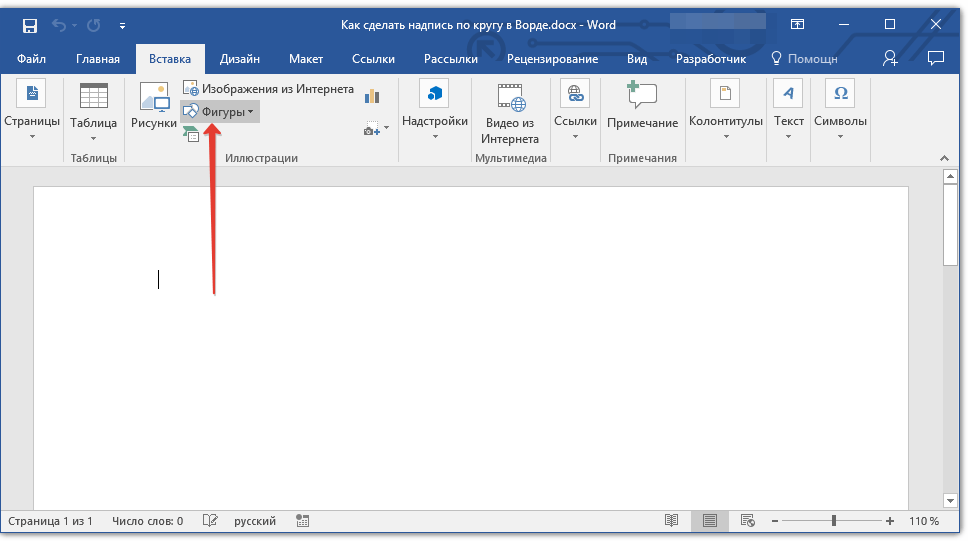
2. Из выпадающего меню кнопки выберите объект «Овал» в разделе «Основные фигуры» и нарисуйте фигуру нужных размеров.
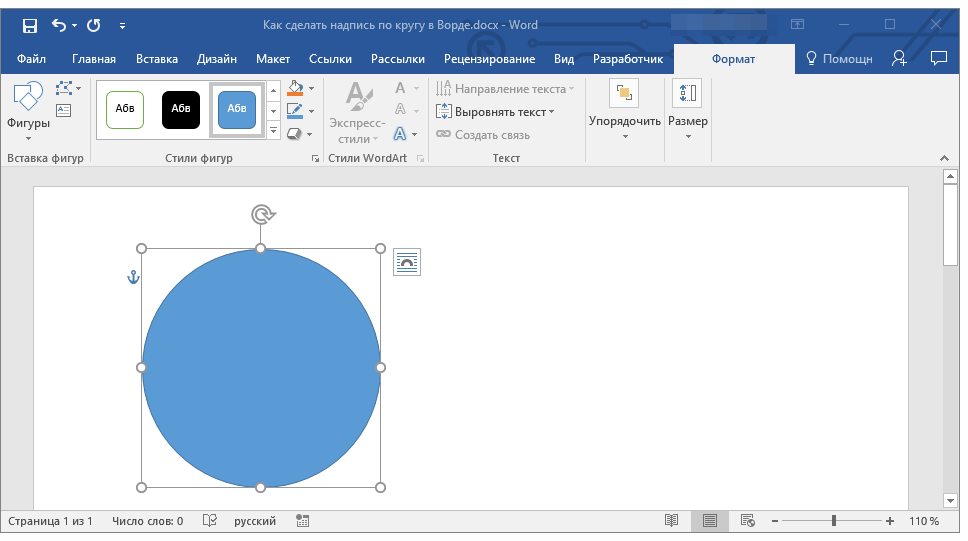
- Совет: Чтобы нарисовать круг, а не овал, перед растягиванием выбранного объекта на странице, необходимо нажать и удерживать клавишу «SHIFT» до тех пор, пока не нарисуете круг нужных размеров.
3. Если это необходимо, измените внешний вид нарисованного круга, воспользовавшись инструментами вкладки «Формат». Наша статья, представленная по ссылке выше, вам в этом поможет.
Добавление надписи
После того, как мы с вами нарисовали круг, можно смело переходить к добавлению надписи, которая и будет в нем располагаться.

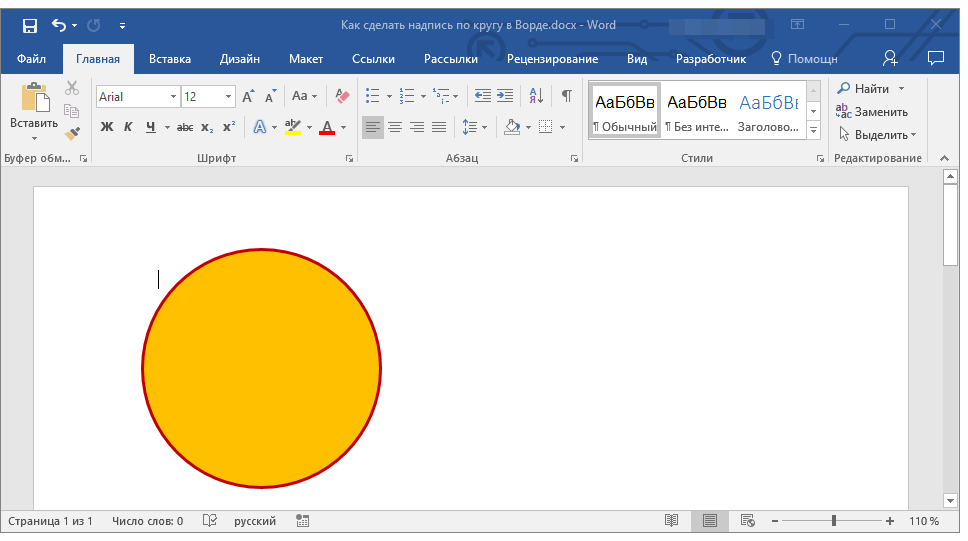
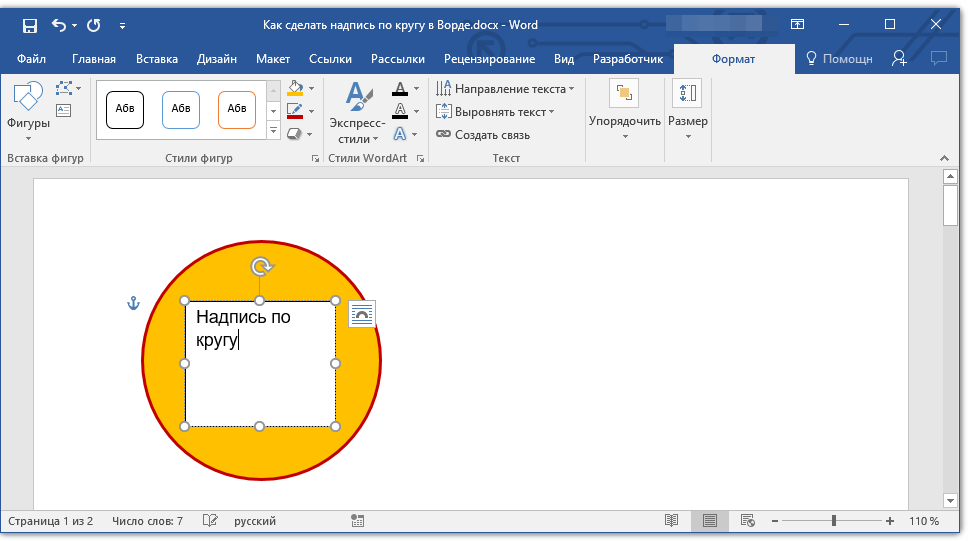
1. Кликните дважды по фигуре, чтобы перейти во вкладку «Формат».

2. В группе «Вставка фигур» нажмите кнопку «Надпись» и кликните по фигуре.
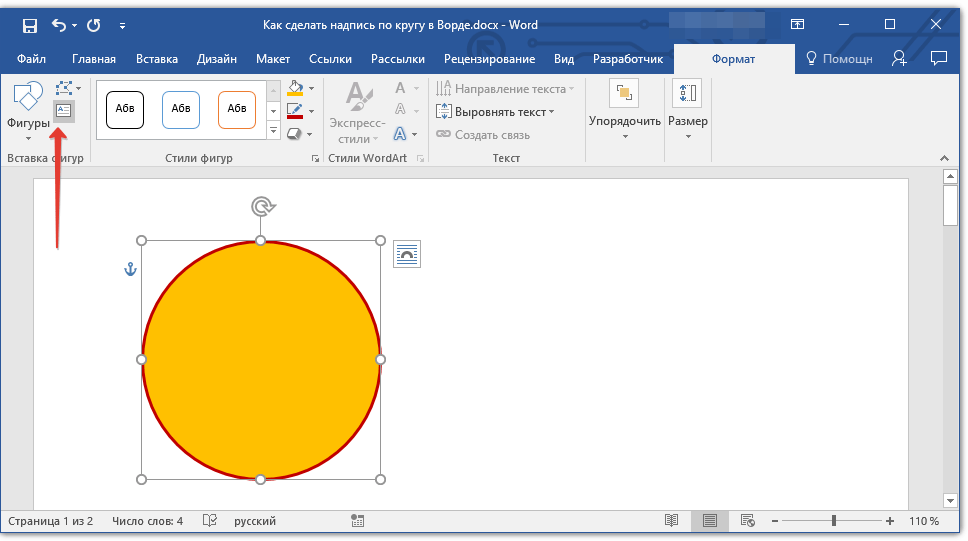
3. В появившемся текстовом поле введите текст, который должен располагаться по кругу.
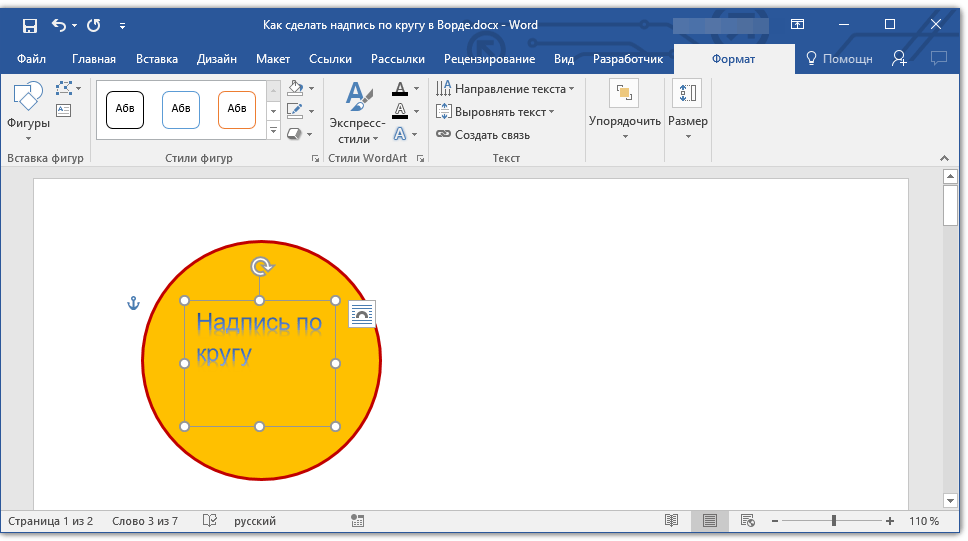
4. Измените стиль надписи, если это необходимо.

Урок: Изменение шрифта в Ворде
5. Сделайте невидимым поле, в котором располагается текст. Для этого выполните следующее:
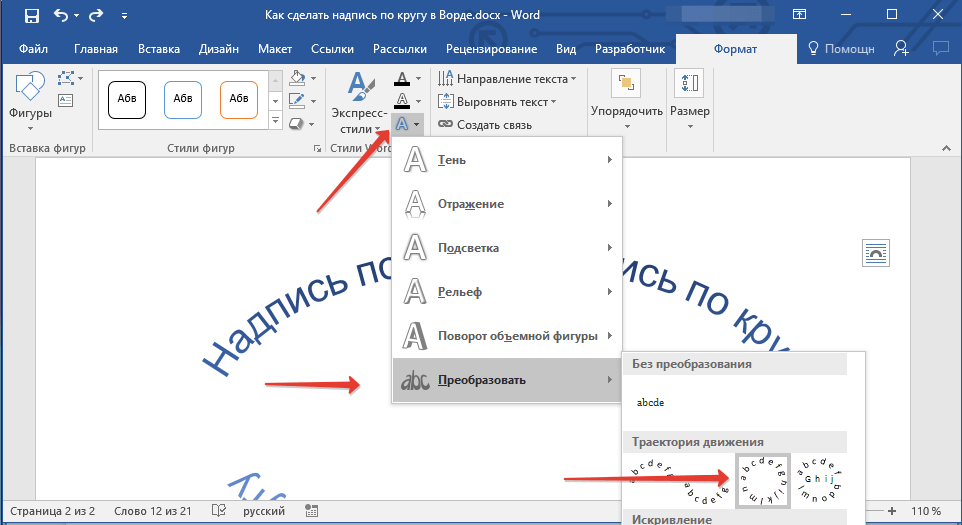
6. В группе «Стили WordArt» нажмите на кнопку «Текстовые эффекты» и выберите в ее меню пункт «Преобразовать».
7. В разделе «Траектория движения» выберите тот параметр, где надпись расположена по кругу. Он так и называется «Круг».
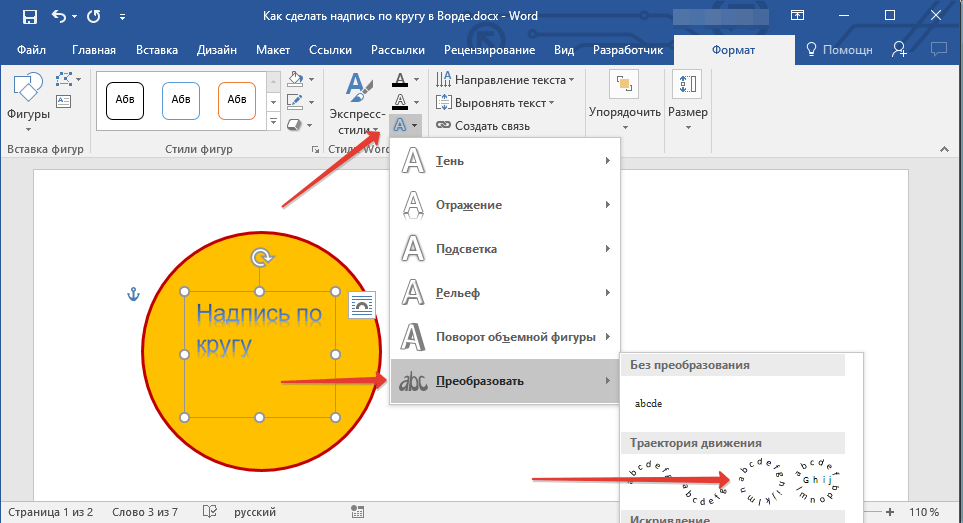
Примечание: Слишком короткая надпись может не «растянутся» по всему кругу, поэтому придется выполнить с ней некоторые манипуляции. Попробуйте увеличить шрифт, добавить пробелы между буквами, поэкспериментируйте.
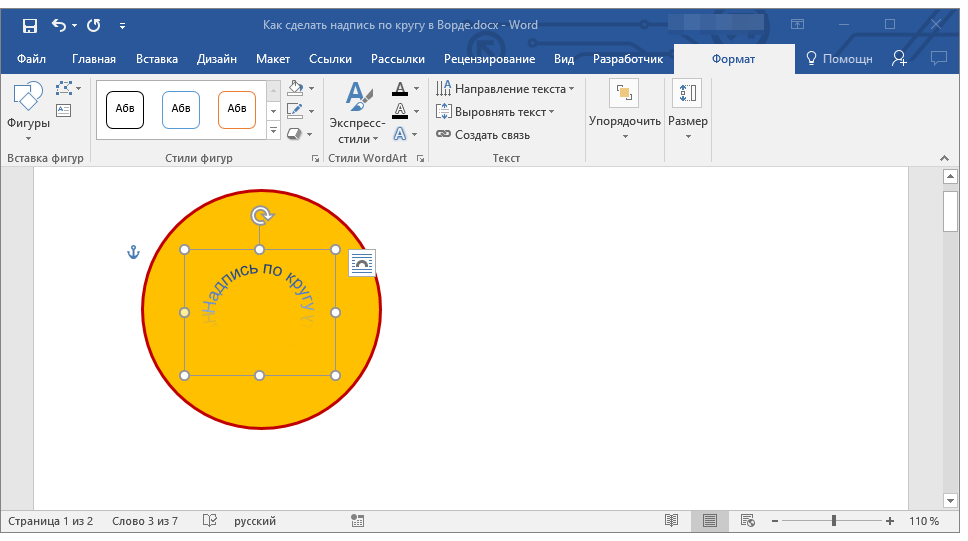
8. Растяните текстовое поле с надписью до размеров круга, на котором она должна располагаться.

Немного поэкспериментировав с перемещением надписи, размером поля и шрифта, вы сможете гармонично вписать надпись в круг.
Урок: Как повернуть текст в Word
Написание текста по кругу
Если вам не нужно делать круговую надпись на фигуре, а ваша задача — просто написать текст по кругу, сделать это можно куда проще, да и просто быстрее.
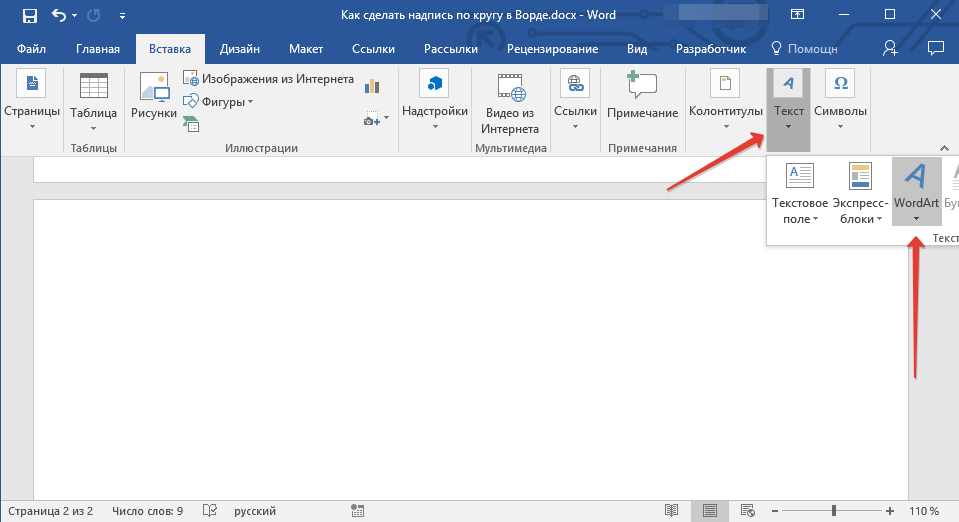
1. Откройте вкладку «Вставка» и нажмите на кнопку «WordArt», расположенную в группе «Текст».
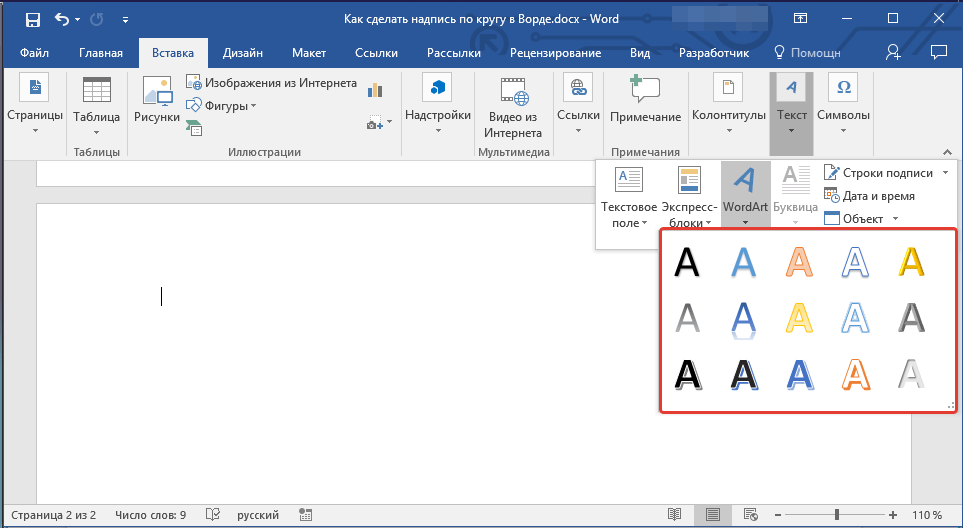
2. В выпадающем меню выберите понравившийся стиль.
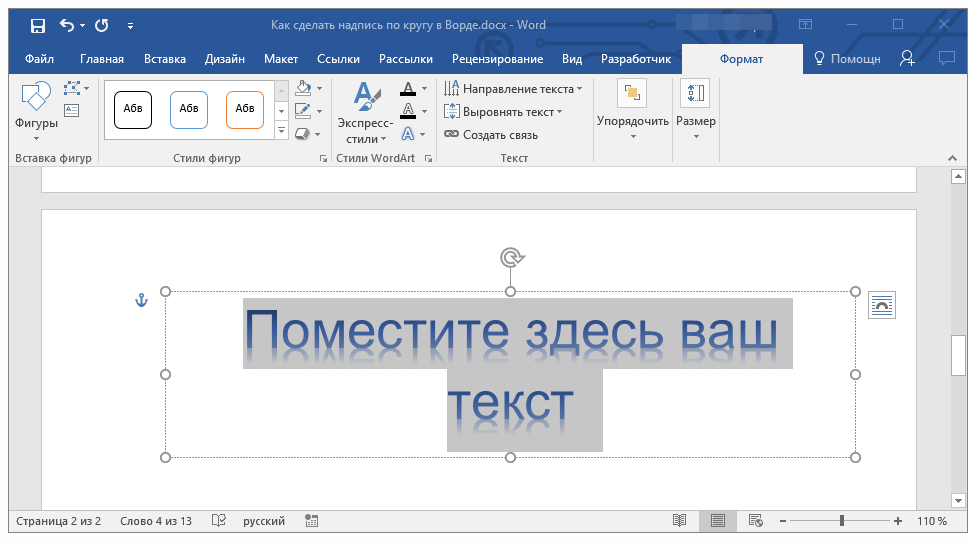
3. В появившееся текстовое поле введите необходимый текст. Если нужно, измените стиль надписи, ее шрифт, размер. Сделать все это можно в появившейся вкладке «Формат».
4. В этой же вкладке «Формат», в группе «Стили WordArt» нажмите на кнопку «Текстовые эффекты».
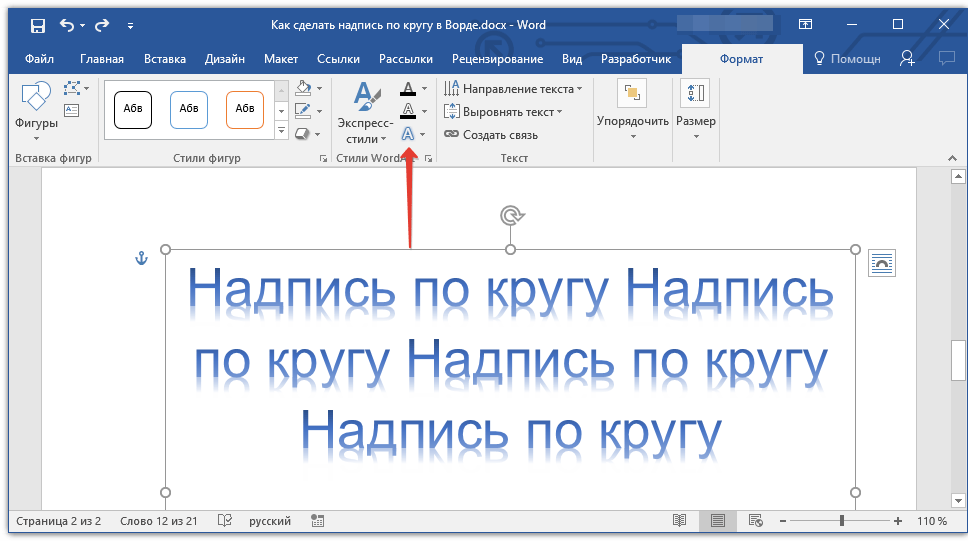
5. Выберите в ее меню пункт «Преобразовать», а затем выберите «Круг».
6. Надпись будет расположена по кругу. Если это требуется, подкорректируйте размер поля, в котором находится надпись, чтобы сделать круг идеальным. По желанию или необходимости измените размер, стиль шрифта.
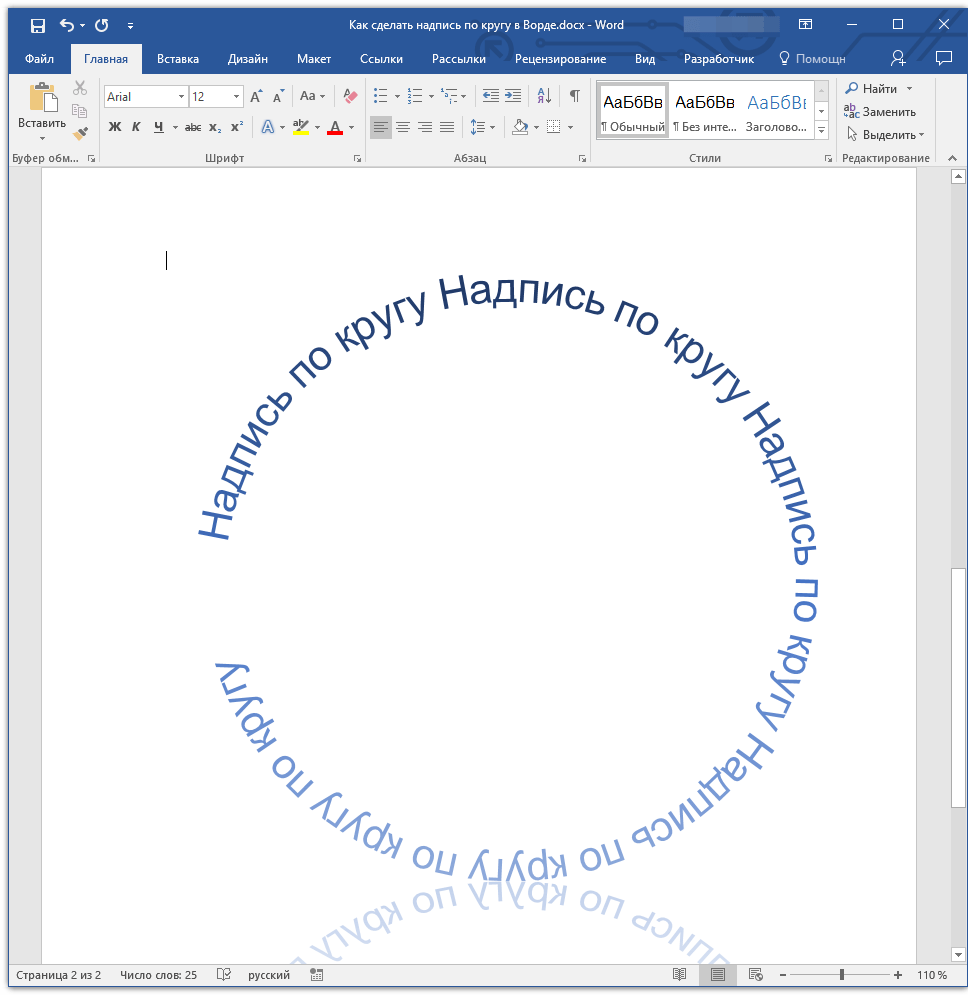
Урок: Как в Ворд сделать зеркальную надпись
Вот вы и узнали, как в Word сделать надпись по кругу, как и о том, как сделать круговую надпись на фигуре.