
The spellchecker in Microsoft Word cannot replace expert proofreading, but it can be a useful tool for proofreaders. We look at this in our Becoming A Proofreader course. However, to make the most of this tool, you need to understand the proofing options in Microsoft Word.
How to Access the Proofing Options in Microsoft Word
Even if you have used the spellchecker in Microsoft Word, you may not have realised how much you can customise what it looks for and how it highlights errors.
To access these proofing options, you need to:
- Open a Microsoft Word document.
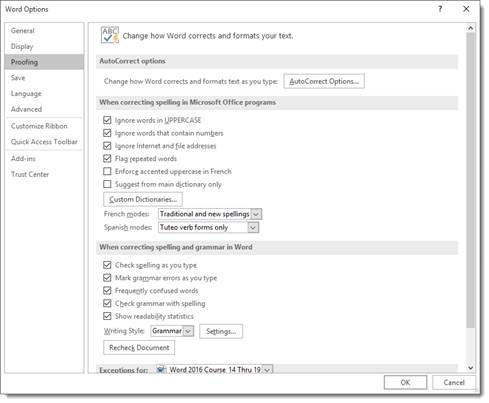
- Go to File > Options.
- Select Proofing from the list on the left of the dialogue box.
In Word for Mac, meanwhile you can access similar options by:
- Going to Word > Preferences.
- Clicking Authoring and Proofing Tools and selecting Spelling and Grammar.
Here, you will see options for customising the spellchecker, including some that apply to all Microsoft Office programs and some for Word in particular. Let’s take a quick look at both.
Proofing Settings for Microsoft Office
You can control the proofing options across all Microsoft Office programs in the section titled ‘When correcting spelling in Microsoft Office programs’. These include:
- The ability to ignore certain terms, including UPPERCASE TERMS and URLs.
- Flagging instances where the same word is used twice in a row.
- Options to select and customise the dictionary used for spellchecking.
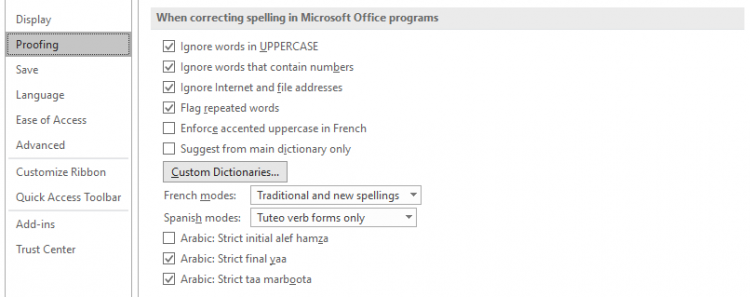
Depending on the languages you have installed in your version of Microsoft Office, you may also see other language-specific options here. We’ll focus on English for now, though!
Proofing Settings for Word
The most important options for using the spellchecker effectively in Word are in the ‘When correcting spelling and grammar in Word’ section. These include:
- Check spelling as you type – Controls whether Word will highlight errors as you type (if you deselect this, you will need to run the spellchecker manually).
- Mark grammar errors as you type – As above, but for grammar errors.
- Frequently confused words – Highlights words that it thinks may have been confused for another term (e.g. mix ups of ‘effect’ and ‘affect’).
- Check grammar with spelling – When checked, Word will check both grammar and spelling when you run a spellcheck (when unchecked, it will only check spelling).
- Show readability statistics – Provides readability stats at the end of a spellcheck.
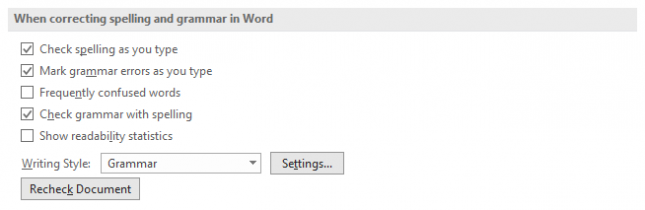
Beneath these options, you’ll also see a ‘Writing Style’ menu. The options here are:
- Grammar – Focuses on errors related to grammar and punctuation, such as comma splices, incorrect verb forms, or mixing up adverbs and adjectives.
- Grammar & Refinements – Also looks for potential stylistic issues, such as gendered language, excessive wordiness, or informal language.
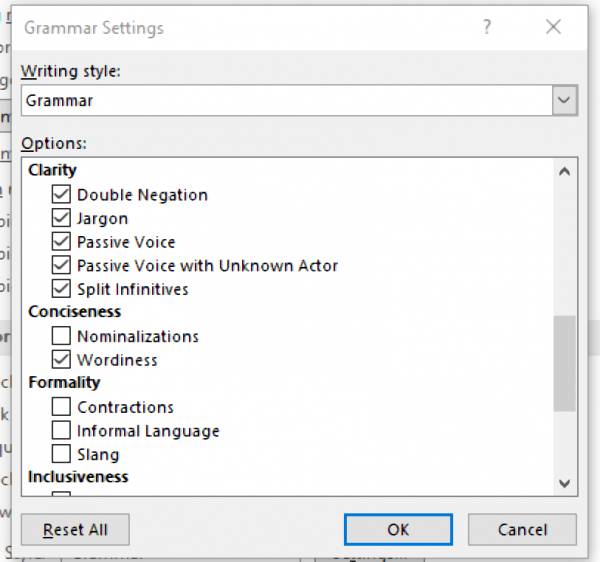
Both options can be fully customised by clicking the ‘Settings’ button next to the menu. This will open a new dialogue box where you can select or deselect specific issues to check.
Becoming A Proofreader
Do you want to start a career as a freelance proofreader? Our Becoming A Proofreader course contains everything you need to know to proofread professionally! Sign up for a free trial today.
Spell Check. If you have never used Spell Check before, then you are in for a treat. Spell check goes through your document from beginning to end (or just in selected parts) and selects misspelled words, grammatical errors, punctuation errors, and any number of other errors you want it to find.
To locate Spell Check in Microsoft Word 2016, click on the Review tab, then click the Spelling & Grammar button on the left. You will see it on the far left. It is distinguishable by the large blue checkmark with ABC written above it, as in the picture below.

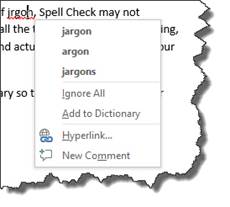
As it reads through your document, Word will display any errors it finds, as well as offer any suggestions, in the pane on the right. See the snapshot below:
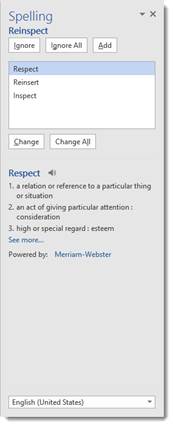
The example above shows a spelling error. You can choose to ignore this instance of the correction suggestion, ignore all instances in the document, or add the word to the user dictionary so it will not be marked as a misspelled word again. If you add it to the dictionary, it will apply to all documents.
You can also click on the File tab> Options>Proofing to establish the types of errors you want Spell Check to find and correct. Go to the «When Correcting Spelling in Microsoft Office programs» section.
If you want to spot check a word that you have typed because you are not sure if you spelled it correctly, you can also use Spell Check for just that word. Simply right click the word and a list of possible substitutions will appear. Select the substitution you want by highlighting it and left clicking your mouse.
Set Proofing Language
Spell Check operates more efficiently, of course, if it knows what language to use when proofing your document.
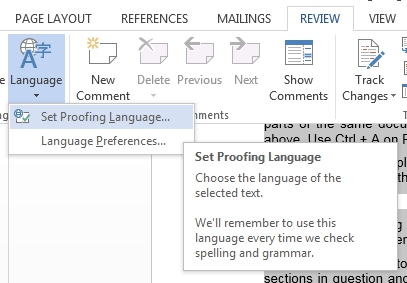
Set the proofing language by going to the Language tools on the Review tab. Click the language button and select Set Proofing Language from the dropdown menu.
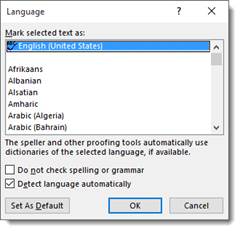
Choose your language and click OK.
Thesaurus
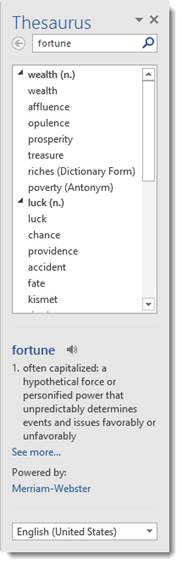
Microsoft Word also helps you find synonyms for words that you have used by providing a thesaurus that is automatically integrated into Word. To use the thesaurus, click on the Review tab (this is your editing tab) in the Ribbon, then select Thesaurus.

The thesaurus will appear on the right side of the screen.
Create Your Own Default Dictionary in Microsoft Word
If you use Microsoft Word for business and find that you use a lot of jargon, Spell Check may not recognize the spelling of those words and highlight them as wrong all the time. This can be frustrating, and it can also mean that you start to ignore those flagged errors and actually overlook a typo on your part.
Well, there is good news! You can edit the Microsoft Word dictionary so that it recognizes words or spellings that you use. You can even customize spellings.
To customize your Microsoft Word dictionary:
- Go to File
- Click Options on the left side of the screen.
- Click the Proofing tab
- Click the When Correcting Spelling section
- Click Custom Dictionaries
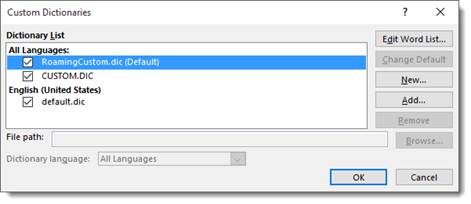
Click on Edit Word List. You should see this window in front of you:
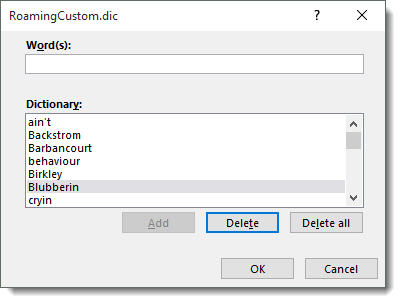
Type in any words that you may use that are not recognized by the Microsoft Word dictionary.
Alternatively, you can right click on any word that Microsoft Word marks as misspelled, and click Add to Dictionary.
Check Word Count
To check the word count of a document, simply look at the bottom left-hand corner of the screen. The first column you will see tells you the page count, and the second one tells you how many words are currently in your document. You can select a passage of text to find out how many words are in the selected portion also.

Track Changes
Microsoft Word allows you to track any changes that you make to a document. This is helpful if more than one person is working on the same file, if you have an editor, or if you simply want to be able to see changes you have made and be able to refer to the «old» version.
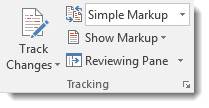
As with most of the editing features on Microsoft Word, Track Changes is located under the Review tab. You will see it right below Mailings in the Tracking Group.
By clicking on Track Changes, Microsoft Word will mark everything that you change.

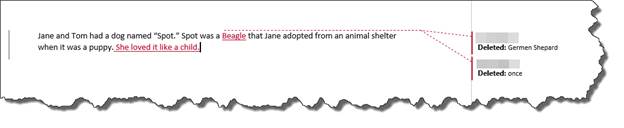
In the picture above, Track Changes was used. The words that were replaced were struck through and in red. The new words were also in red, but underlined. These are proofreading marks that Microsoft Word uses. You can also click on the Reviewing Pane button in the Tracking group to see the changes that have been made. This appears in a pane at the left side of the document window.
You can also have all changes noted in balloons on right side of the document. Simply click on the Show Markup button, then select Balloons (by Track Changes) and select the option you want. Below is a picture of revisions shown in balloons.
When you are done editing and proofreading your document, as well as making changes, you can do one of two things. You can read through the document with the changes you have made, but without the proofreading marks, to see if you have caught every error and made all the changes that need to be made. In other words, you can see if you are happy with the final draft.
To turn off the proofreading marks and view your revised document, click on the Show Markup button.
You can then uncheck the proofreading marks or comments that you want to hide, so that the document above now looks like this:

To see the proofreading marks and comments again, simply go back to Show Markup and recheck your selections.
When you click the Simple Markup button that is above the Show Markup button, you can do several things.
- You can view the final copy of your document showing proofreading marks and comments.
- You can view a final copy of the document without any proofreading marks.
- Original Markup allows you to view the original document with the original changes.
Accepting and Rejecting Changes
Whenever you make a change using the Track Changes feature, you or whoever owns the document can then go through and either accept or reject the suggested changes. All changes made to a document are only proposed changes until they are accepted or rejected.
There are two ways to accept and reject changes. The first and most commonly used way is within the body of the document. You can select, then right click on any word, sentence, or paragraph for which a change has been suggested. When you right click, you will see a drop down menu. Accept or reject change will be one of your choices. Select one or the other. When changes have been noted in a balloon, you can right click on the balloon and either accept or reject the change.
The other way is using the toolbar located in under the Review tab and in the Changes group.
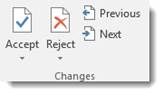
You can click on accept, then choose accept and move to the next suggested change or accept all changes within the document. Clicking reject will give you the same options. Previous and next will take you from suggested change to suggested change until all changes within the document have been accepted or rejected.
Inserting Comments
Sometimes when you are working on a document, you will want to make notes to yourself or someone else. For example, you might want to leave yourself a note that says «revise this paragraph.» If someone else is reviewing or editing your document (or you are reviewing someone else’s), it is also handy to be able to leave notes for them.
As with previous versions of Microsoft Word, you can leave comments in a document.

To insert a comment into a document, first click on the place in the document that you want to comment on. Next, go to the Insert tab and click Comment in the Comments group.
Type your comment in the box that appears to the right of the document. Press the ESC key when you are finished typing the comment.
Leave a Comment within a Comment
In previous versions of Word, if more than one person left a comment in a document, comments from different people would be left in different color balloons.
For example, Joe’s comments might be in a red balloon.
Sarah’s comments may be in a green balloon.
Jane’s comments might be in a blue balloon.
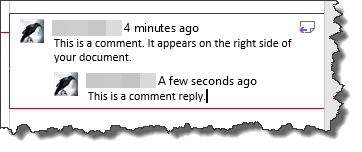
In Word 2016, you can respond to comments within the same balloon.
To leave a comment within a comment, click the page icon on the right hand side of the screen.
As you can see below, Word will then give you a place to reply to the comment.
Delete a Comment
To delete a comment, click within the comment, then right click and choose Delete Comment.
Viewing Pages
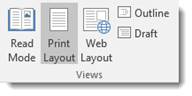
When editing or reading a document, you may want to change the way you view the page to do a better job at editing it. In Microsoft Word, you can select from four different views:
- Print layout. Shows how your document will look when it is printed.
- Read view. You view the document in full screen so that the space is maximized for reading or commenting.
- Web layout. See your document as it would appear as a web page.
- Outline. Your document as an outline with outlining tools.
- Draft. Elements such as headers and footers will not be visible in this view, enabling you to read or edit the document quicker.
Changing the page view may be done by selecting the View tab, then clicking on the appropriate icon in the Views group.
Read View
The Read view is an updated and much improved version of Full Screen view that was used in previous versions of Word. In previous versions, your document was just shown on full screen instead of in a window. In Read mode, however, your document appears more like a book or eBook. Look at the snapshot below:
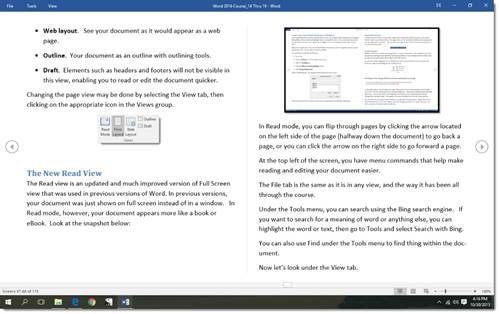
In Read mode, you can flip through pages by clicking the arrow located on the left side of the page (halfway down the document) to go back a page, or you can click the arrow on the right side to go forward a page.
At the top left of the screen, you have menu commands that help make reading and editing your document easier.
The File tab is the same as it is in any view.
Under the Tools menu, you can search using the Bing search engine. If you want to search for a meaning of word or anything else, you can highlight the word or text, then go to Tools and select Smart Lookup.
You can also use Find under the Tools menu to find the thing within the document.
Now let’s look under the View tab.
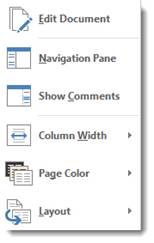
You can select Edit Document to go back to editing your document in the regular screen.
You can click Navigation Pane to display the Navigation Pane.
Click Show Comments to see all comments.
Click Column Width to adjust column width. You can also adjust the page color and the layout.
To return to your «normal» document and exit Reading view, select Edit Document.
Edit a PDF File
Out of all of the great features in Word 2016, arguably one of the greatest is the ability to edit PDF files in Word. PDF stands for Portable Document Format. Before now, the only way you could edit a PDF was by using Acrobat Reader or similar program.
To edit a PDF in Word, go to File>Open and locate the PDF. Click Open when you find the file.
Word opens the document in a new file. Just keep in mind that it might not look the same as it did in PDF form. The page breaks may be in different spots. Text boxes and graphics might be misplaced too. This feature works best with documents that are mostly text, so just be warned.
Now, once you have the file open, you can make any changes you want. When you are finished, go to File>Save As, and save it as a PDF file again.
Using Smart Lookup as a Dictionary
Smart Lookup allows you to do online research or define words with the click of a button. To use it, select a word or phrase in the text and click the Smart Lookup button located on the Review tab.
The Insights pane opens on the right side of the Word application window. There are two tabs: Explore and Define. Word uses the selected term to search the web and displays the results in the Explore tab. You may see results from websites like Wikipedia.
The Define tab will give you a dictionary entry, as seen in the sample below.

Using Smart Lookup as a Research Tool
In addition to using Smart Lookup as a dictionary, you can also use it as a research tool. Simply select a word or phrase in your document and quickly find information about it.
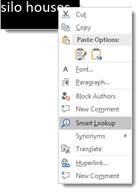
Let’s say we were creating a document about alternative housing. In one part of our document, we mention silo houses. In Word 2016, we could select the phrase «silo houses,» then right click and choose Smart Lookup from the menu.
The Insights pane opens on the right side of the document with Bing search results related to «silo houses».
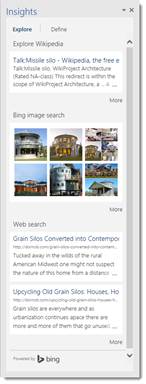
Research results are always listed under the Explore tab, whereas definitions are under the Define tab.
Click on any of the links shown in the Insights pane. The link will open in your web browser.
Installing and Inserting Add-Ins
Word 2016 gives you the ability to download apps (called «Add-Ins») from the Office store that you can use in Word. These apps can include thesauruses, dictionaries, encyclopedias, and other tools to automate tasks or simplify them.
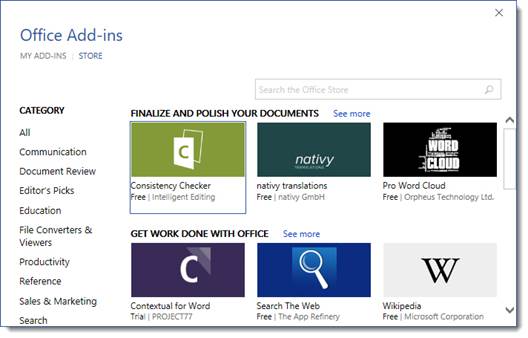
To search for and install add-ins, go to the Insert tab, then click the Store button.
You can search for Add-ins using the search bar, or you can browse by category. Some are free. Some you will have to buy.
You can manage the add-ins you have already inserted into Word by clicking the My Add-Ins button.
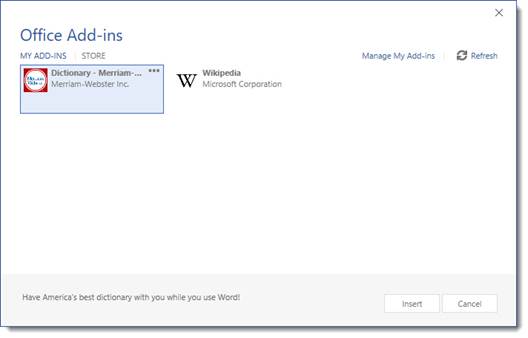
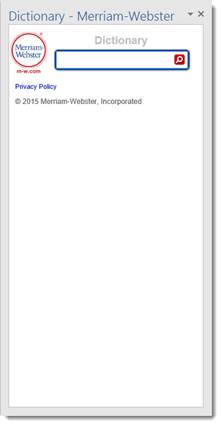
To use an add-in, or to install it, simply select the add-in, then click the insert button.
It opens up in the right pane:
Translate
Translate is located under the Review tab. Using translate, you can translate a document from or to numerous languages.

Just click Translate. You can then choose to have Word translate the entire document, selected text, or to point to a word or phrase for quick translation. You can also select Choose Translation Language to select a language, as shown below.
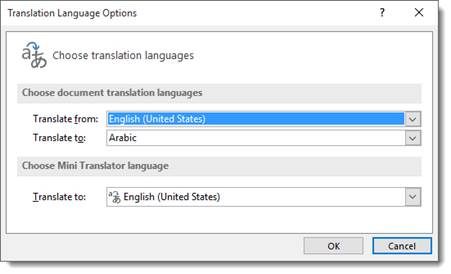
Your document is then machine translated. You must give Microsoft Word permission to send your document to the machine for translation.
Print a Document
To print a document, click File>Print.
You will then see this window with a snapshot of the page that is currently active in your document (where your mouse cursor is located):
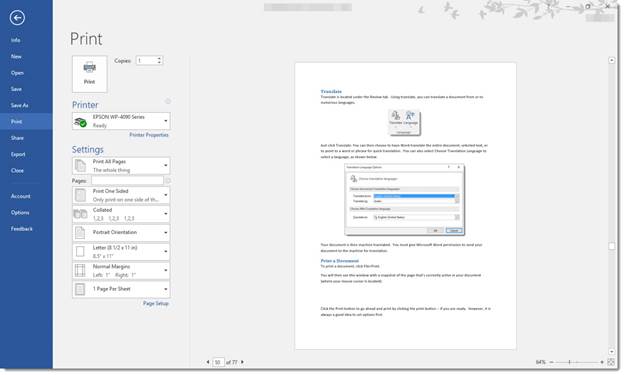
Click the Print button to go ahead and print — if you are ready. However, it is always a good idea to set options first.
First, select your printer. (By clicking Printer Properties, you can adjust the type of print to get a better quality print or to save ink.)
Under the Settings category (shown above), you can tell Microsoft Word if you want it to print the entire document, or specify pages to print by listing the page numbers separated by commas.
You can also tell Word if you want it to print the document on one or both sides of the paper, if it is collated, and choose an orientation (Portrait or Landscape. Portrait is the short side going across the top. Landscape is the long side going across the top.)
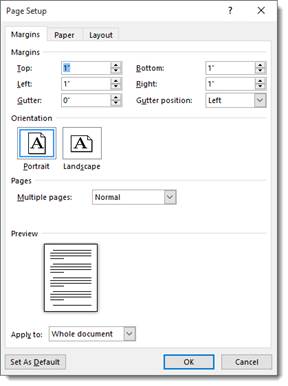
You can also set your paper size, margins, and how many pages of your document you want to print on one sheet of paper.
If you click Page Setup, you can change margins, layout, and paper size from this window also.
When you are finished, click Print at the top of the window, as we showed you before.
Sharing and Publishing to the Web
You can easily share documents without having to send them via email as large attachments. To be able to share your documents with others for review or editing, click the File tab, then click Share.
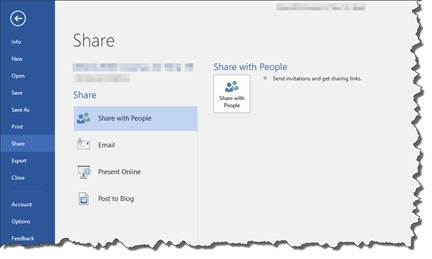
Now, choose how you would like to share the document.
Invite people is cloud-based sharing. First, save your document to your Microsoft OneDrive, then invite the people who you want to be able to view it.
Email allows you to send the file by email using your default email program. The document is sent as an attachment.
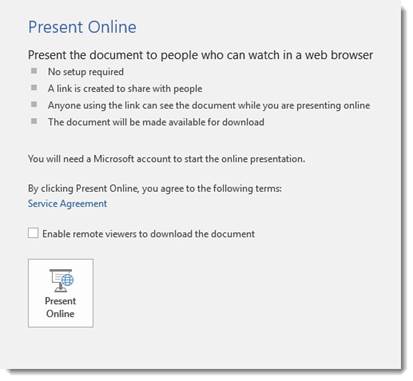
Present Online allows you to present the document online. Microsoft gives you a link to your document that you can share with other people, as explained below.
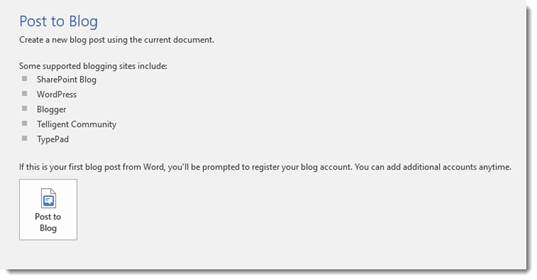
You can also post your document to your blog:
The Share Button and Co-Authoring
Word 2016 makes collaborating on documents easier than it was it previous versions with the introduction of the Share button. The Share button allows you to share documents as you work on them in Microsoft Word. In other words, you can share an open document so that you and the people you are sharing the document with can work on it at the same time. In previous versions of Word, you were required to save the document to OneDrive, and only one person could edit the document at a time.
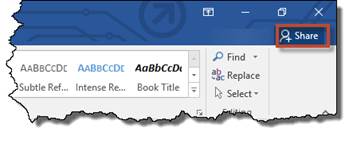
The Share button in Word 2016 is located on the upper right hand side of the screen above the ribbon.
To share the document that you currently have open, click the Share button. You will then see the Share pane on the right hand side of your screen.
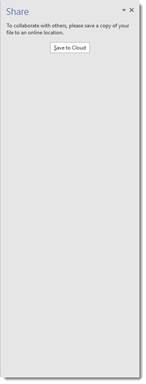
Click the Save to Cloud to save your document to OneDrive.
Once you’ve saved the document, go back to the Share pane.
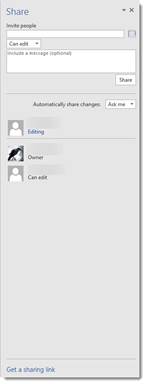
In the Invite People field, enter the email addresses of the people with whom you want to share the document.
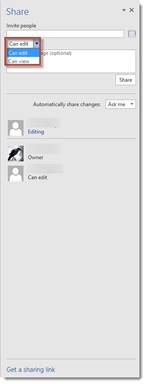
In the dropdown field below the Invite People field, specify what these people are allowed to do to the document.
Next, go to the «Automatically Share Changes» dropdown menu.

Decide if you want Word to automatically share changes with you. If you do, select Always. Otherwise, select Ask Me or Never.
When you’re finished, click the Share button.
An email will be sent to the people with whom you’ve shared the document. It will contain a link for them to view the document in OneDrive.
You can also share the document by sending people the link to the document in OneDrive. To do this, go to the bottom of the Share pane, and click the «Get a Sharing Link» link.

You can then choose to create an editing link, which means anyone who receives this link will be able to edit the document – or a view-only link. If you send someone a view-only link, the recipient will be able to view the document, but won’t be able to make changes to it.
Whenever someone is editing your open document, you will see a message below the Share button that lets you know who is making changes.

You will also see a flag in the Word document. The flag represents the cursor of the person who is also viewing and editing the document. Each person with whom you share the document will have a different color flag.

The changes and additions they make to your document will appear in real-time. You do not have to wait until they save and close the document to see the changes. This is the new real-time typing feature in Word 2016.

Word 2013 now includes a new proofing panel. When you have a document open that contains spelling or grammatical errors, the Proofing icon on the status bar displays the “Proofing errors were found. Click to correct.” message when you move your mouse over it.
On the left side of the Status Bar at the bottom of the Word window, a book icon displays. If there is an “x” on the icon, there are proofing errors (spelling and/or grammatical errors) in your document. Click the icon to open the Proofing Panel.

Spelling errors are indicated with red, squiggly underlines.
The Proofing Panel displays to the right of the document showing the first error that occurs after the location of the cursor. If it’s a spelling error, the title of the panel is “Spelling”. Three buttons display at the top of the panel. Click “Ignore” to ignore the current error and move to the next one. If you want to ignore all occurrences of the current error in the document, click “Ignore All”. To accept the flagged word as spelled correctly and add it to the Office user dictionary, click “Add”. The word will not be flagged as an error again.
To accept a suggested correction, select it in the list and click “Change”. To accept a suggested correction and apply the change to all occurrences of this error in the document, select the correction in the list and click “Change All”.
NOTE: When you click “Change”, Word automatically jumps to the next error in your document.
If you move the cursor to a different part of the document while the Proofing Panel is open, the “Resume” button displays. Click this button to continue looking for errors from the current cursor location.
When you have corrected all the errors in the document, the following dialog box displays. Click “OK” to dismiss it.
When there are no spelling or grammatical errors in your document, a check mark displays on the book icon in the Status Bar and “No proofing errors” displays when you hover the mouse over the icon.
Grammatical errors are indicated with blue, squiggly underlines. The Proofing Panel also allows you to correct grammatical errors. When a grammatical error is found, the Proofing Panel is titled “Grammar”. Suggested corrections displays in the list with some helpful information (courtesy of Merriam-Webster). In our example, the definitions of “pear” and “pair” are provided.
There may be times you want to leave the incorrect grammar alone, such as when you’re writing a story or book and your characters are talking using incorrect grammar. If you don’t want to correct the grammatical error, click “Ignore”. To accept a suggested correction, select the correction from the list and click “Change”. Again, Word jumps to the next error in the document.
NOTE: Word offers limited grammar checking. There may be some grammatical errors it will not recognize. It’s a good idea to read through your document before distributing it.
To close the Proofing Panel, click the “X” button in the upper-right corner of the panel.
If you’ve ignored incorrect words or phrases that you now want to correct, you can easily find these errors again by telling Word to recheck the document. To do this, click the “File” tab.
On the backstage screen, click “Options” in the list of items on the left.
On the “Word Options” dialog box, click “Proofing” in the list of items on the left.
In the “When correcting spelling and grammar in Word” section, click the “Recheck Document” button.
A dialog box displays with the following warning:
“This operation resets the spelling checker and the grammar checker so that Word will recheck words and grammar you previously checked and chose to ignore. Do you want to continue?”
Click “Yes” to reset the spell checker so you can recheck errors you previously ignored.
The “Recheck Document” button is grayed out. Click “OK” to close the “Word Options” dialog box.
To recheck your document for spelling and grammatical errors, click the “Review” tab.
In the “Proofing” section, click “Spelling & Grammar”.
The “Spelling & Grammar” check starts and errors you previously ignored are found again, allowing you to correct them.
NOTE: You can also press F7 to open the Proofing pane and begin the spelling and grammar check.
READ NEXT
- › How to Test the “Readability” of Your Writing in Microsoft Word or Outlook
- › How to Get ChatGPT to Write Better Fiction
- › Save $300 on Growatt’s Newest Solar Portable Generator, the INFINITY 1300
- › 10 Weird Subreddits You Need to See
- › How to Remove Watermarks From PDFs
- › How to Fix an Urban VPN Connection Error
- › How to Live Stream Every Formula 1 Race for Free in 2023
Taking advantage of Microsoft Word’s proofing and editing options can help you maintain a scholarly level of writing and complete the dissertation process more quickly. For many writers, it is hard to focus on the minute details, including spacing between sentences and whether the use of affect or effect is correct. With so much emphasis on the content and making sure one’s ideas and findings come across clearly, the meticulous details often fall by the wayside. However, Microsoft Word has various built-in features to help combat formatting and grammatical errors. Through this blog, I specifically reference features in Word 2016, but many of these features are available and similarly labelled in earlier versions.

Discover How We Assist to Edit Your Dissertation Chapters
Aligning theoretical framework, gathering articles, synthesizing gaps, articulating a clear methodology and data plan, and writing about the theoretical and practical implications of your research are part of our comprehensive dissertation editing services.
- Bring dissertation editing expertise to chapters 1-5 in timely manner.
- Track all changes, then work with you to bring about scholarly writing.
- Ongoing support to address committee feedback, reducing revisions.
The first step to turning on the proofing and editing features is knowing how to access these options. The quickest way to access this is to go File à Options (should be at the bottom of the File drop-down). After selecting Options, a more in-depth panel should appear that includes a new list of options to choose from (see Figure 1). The Proofing option should appear on the left; in Word 2016, this option is the third down from the top.
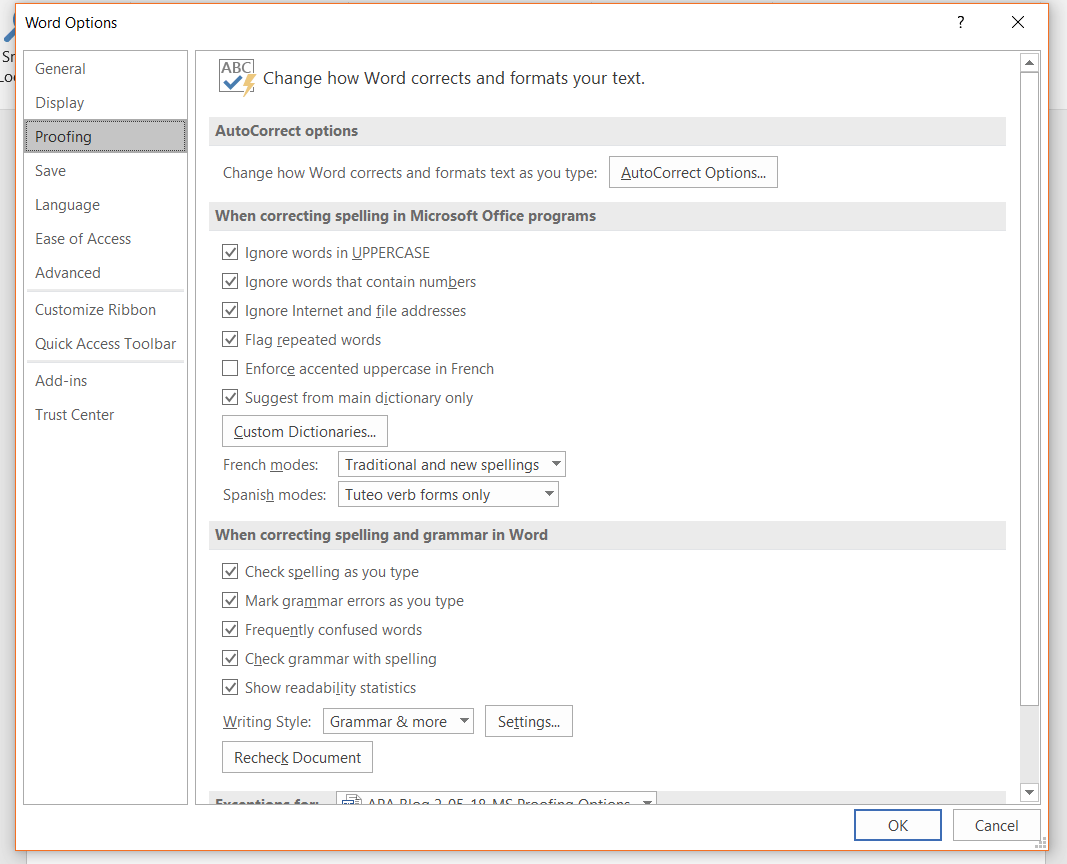
Figure 1. Word Options panel.
Within the Proofing tab, there are various formatting choices that one can make, depending on school and formatting guideline requirements. If following APA style, make sure that the Dictionary is set to English (United States). To check this, click on the Custom Dictionaries… button and under the Dictionary language drop-down and select English (United States). This will ensure that Microsoft Word is checking the proper spelling of words throughout the entire document.
As shown in Figure 1, it is best to select all of the options in the section titled When correcting spelling and grammar in Word, such as Check spelling as you type. This will help limit spelling errors while writing, instead of conducting one long spell-check at the end of the document—which can be daunting when the document contains more than 100 pages of text! At the bottom of this same section, there is a drop-down menu to the right of Writing Style. At this drop-down menu, make sure Grammar & Style is selected (you want to check both, not just grammar). To the right of this drop-down, there is a button titled Settings… This option is very important to choosing the basic style or formatting elements required by APA or the university style guide.
Under Settings. . . it is generally best to select all options and then decide whether you agree or not when Microsoft Word flags them throughout the document (see Figure 2). For example, you may not care about Date Formatting, but do want to check for the use of Comma Missing after Introductory Phrase (which is an APA requirement, e.g., According to Author,).

Figure 2. Grammar settings in Microsoft Word 2016.
Make sure to scroll through and read the options, as you may be surprised to learn the lengthy list of grammar and style elements that Microsoft Word will automatically change or highlight as errors. At the bottom of the Options, there is a section titled Punctuations Conventions. Per APA, make sure the Oxford Comma box is selected, the Punctuation Required With Quotes is set at inside, and the Space Between Sentences is set at one space OR two spaces (see Figure 3). APA prefers two spaces between sentences; however, most university guidelines require one space between sentences. Either way, it is best to keep this formatting consistent throughout and selecting this feature will ensure that Microsoft Word underlines any spacing between sentences that do not meet this requirement. Select OK when you have finished reviewing and choosing the options.
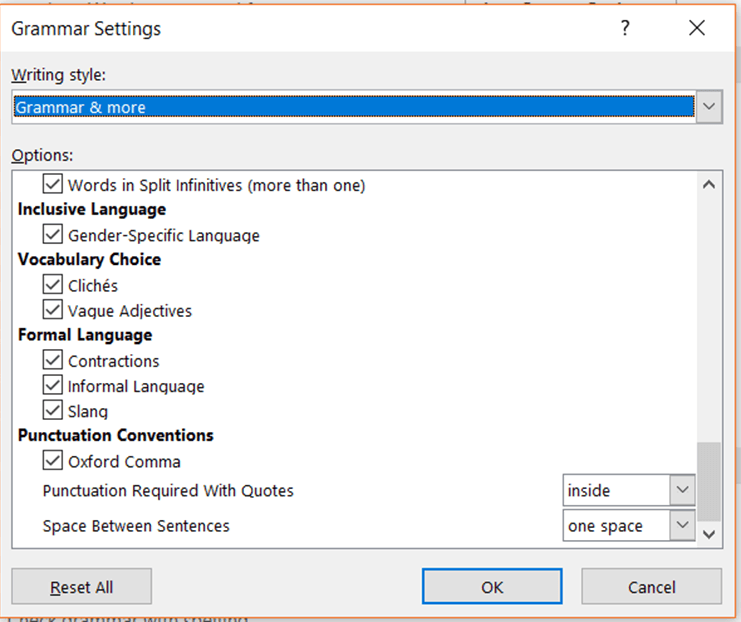
Figure 3. Grammar settings continued.
As a final step, and to verify that you have applied these settings to the document you are working in, select the Recheck Document button (see bottom of Figure 1) and then choose Yes when presented with a prompt. Before closing out of the Word Options box, Proofing settings, verify that the Hide spelling errors in this document only and Hide grammar errors in this document only options are NOT selected. Having either of the boxes checked will essentially turn off Microsoft Word’s spelling and grammar check features.
I hope this blog has been helpful and informative! Knowing how to turn on and navigate these basic grammar and formatting features will help speed up the editing process and decrease the number of errors that may hold back your dissertation from advancing toward publication.
Although Microsoft Word’s spellchecker can never compare to a human proofreader, it is a useful tool for spotting mistakes in your written work. Assuming you know how to use it, that is.
The problem is that there are many varieties of English in the world, as well as a few other languages. As such, you need to make sure your document is using the correct proofing language before running a spellcheck, otherwise it will miss words spelled differently in different regions.
Thus, to make sure you don’t end up with unintentional ‘colors’ or ‘honors’ in your work, you’d better learn how to set the proofing language in Microsoft Word!
Setting the Proofing Language
There are two main ways to set the proofing language of a new document in Microsoft Word. The first is via the ‘Review’ tab on the main ribbon:
- In the ‘Review’ tab, find the ‘Language’ section
- Click on ‘Language’ and select ‘Set Proofing Language…’ from the menu

- In the new window, pick a proofing language (e.g. Australian English) and click ‘OK’

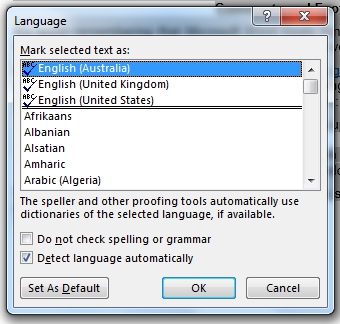
This will set the document to the language chosen. If you click on ‘Set As Default’ in the language window, you can make this the language used for all new documents.
The second approach is largely the same, but involves clicking on the language section of the bar at the bottom of your document.
![]()
This will open up the ‘Languages’ window and allow you to choose a proofing language as described above.
Find this useful?
Subscribe to our newsletter and get writing tips from our editors straight to your inbox.
Applying a New Language to Existing Text
You can specify the proofing language for existing text, or use different languages for different parts of a document, by simply selecting the text in question and repeating the steps above. Use Ctrl + A on PCs, or Cmd + A on Mac computers, to select all text quickly.
Alternatively, you can place the cursor where you want the new language settings to begin and do the same. You can then start typing a new section with new language settings.
Comments and Footnotes
It’s worth remembering that Microsoft Word treats things like headers, footers, comments and footnotes as independent from the main body of your work.
As such, you’ll have to change the proofing language for these separately by selecting the sections in question and changing the language settings as described above.
You can also do this by updating the text ‘Styles’ used in these sections:
- In the ‘Styles’ list, select the style you want to update (e.g. ‘Footnote Text’)
- Right click and select ‘Modify’
- In the new window, click ‘Format’ in the bottom left corner and select ‘Language’

- Pick a new language from the ‘Language’ window, as described above

This is especially important for footnotes and headers, since these need to be consistent with the rest of your document.

-
#1
Hello everyone.
Can you please tell me what’s the ultimate truth about the word? What I mean is I’ve heard a lot of different versions of how to use it, if it can be plural or not etc
Some claim: You definitely can say — I have a lot of proofs about this or that; while others say: If you use proofs in a sentence, people will think you’re illiterate because it can only be used in the singular. I just can’t seem to wrap my head around that. Who’s right? Any help would be much appreciated. Thanks in advance.

-
#2
Proofs of what? One single piece of evidence may be proof of a criminal’s guilt. You could fill a small book with proofs of Pythagoras’s Theorem.
-
#3
I see you used both proofs and proof, entangledbank
Does it make any difference what kind of proof it may be? Like if it’s not a single piece of evidence in a criminal case but two pieces. Would that make it proof or proofs?

-
#4
Can you please tell me what’s the ultimate truth about the word?
There is no «ultimate truth» about anything.
Proof = incontrovertible evidence, is a concept: «These photographs and your fingerprints are proof that you were in the house.» In this meaning, «proof» is uncountable — never plural.
A proof — a formal, written, demonstration of the truth of a mathematical theory — is countable.
As a general piece of advice:
Some claim: You definitely can say — I have a lot of proofs about this or that
while others say: If you use proofs in a sentence, people will think you’re illiterate because it can only be used in the singular.
-
#5
PaulQ, thank you very much! So proofs can actually only be used if we talk about proven mathematical formulas, is that correct?

-
#7
I agree with the above.
You can also use proofs to refer to draft copies of a publication or document (this word is often used in the printing industry).
-
#8
You can also use proofs to refer to draft copies of a publication or document (this word is often used in the printing industry).
Also of photographs; a coin struck as a pattern or test piece; the degree of alcoholic content of liquids.
Proofreading is a skill that most writers and editors need. It is a process of reading through your work to ensure that it meets good writing standards.
If you are looking for ways to improve your proofreading skills, several tools can help you. One such tool is Microsoft Word’s grammar checker, which automatically identifies grammar errors in your document without having to identify them manually.
Proofing in MS Word also helps if you are stuck on what word or phrase to use for a particular sentence. With the grammar checker, you can find the best option for your sentence and avoid getting stuck in a rut when writing.
This video tutorial will describe the proofing option in MS Word, show some of these features and how they can help you proofread your work quickly and efficiently.
The «Review» ribbon bar contains tools for proofreading. These buttons can be located on the left in the «Proofing» section of the ribbon tab.

Spelling & Grammar
Spelling and grammar check is a helpful tool in Microsoft Word that helps us avoid mistakes like typos, misspelt words, and grammatical errors. It is especially helpful when you are writing something that needs to be perfect such as a paper or an essay.
Grammar check is a feature of Microsoft Word that checks for spelling, grammatical, and other types of mistakes in your document.
Define
In this section, you will learn how to use the function in Microsoft Word, which enables a dictionary where you can see the meaning of the selected words.
This is a great tool that helps users to improve their vocabulary. It can be used as a quick reference when you are writing an essay or article. You can also use it to find synonyms and antonyms of words to make your writing more creative and unique.
Thesaurus
Thesaurus is a good tool for word-writers. It helps them find synonyms or related words when they are stuck in the process of writing.
The most common use cases of the thesaurus are:
— finding synonyms for difficult words
— searching for new words by browsing through its categories
— looking up definitions of words used in a document
Word Count
The Word Count function in MS Word is a simple tool that lets you know how many words are in a document.
The word count function in MS Word can be used to measure how much content you have written. It can help you track your progress and ensure you are meeting your goals for the day.
In this video tutorial, you will learn what is Proofing in MS Word in Hindi and how to use it.