
Show the Developer tab
If the developer tab isn’t already visible, see Show the Developer tab.
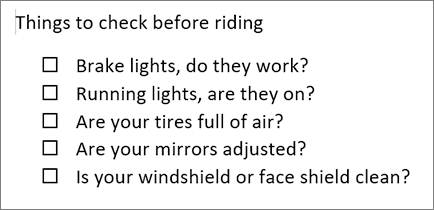
Make your list
-
Type the list.
-
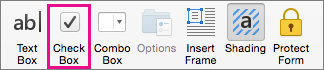
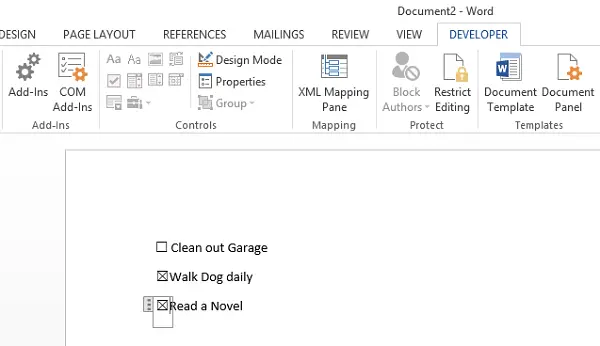
Go to Developer and select the Check Box Content Control at the beginning of the first line.

-
To change the default X to something else, see Make changes to checkboxes.
-
Copy and paste the check box control at the beginning of each line.
-
Select a checkbox to put an X (or other character) in the check box.
Add hanging indentation
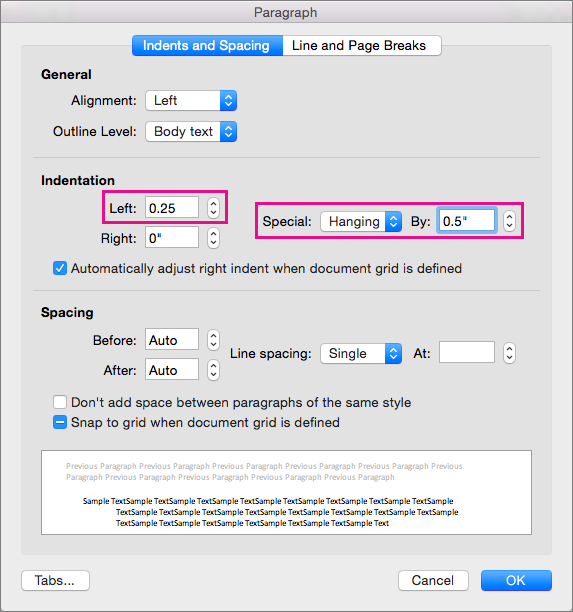
If some list items are more than one line long, use hanging indents to align them.
-
Select the list. Bullets or numbers won’t look selected.
-
Go to Home and select the Paragraph dialog box launcher
. -
Under Indentation, in the Left box, type 0.25.
-
Under Special, choose Hanging.
-
For By, Word sets a default value of 0.5 inches. Change this if you want your additional lines indented differently.
-
Select OK when finished.
 .
.Lock the text and controls to prevent changes
-
Select the list and checkboxes.
-
Go to Developer >Group > Group.
To unlock the list, select the list and choose Group > Ungroup.
Create a print only list
-
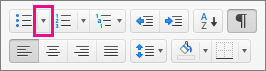
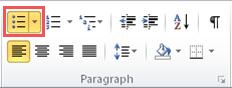
Go to Home and select the down arrow next to the Bullets button.
-
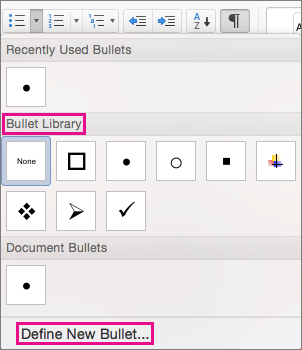
In the drop down menu, select Define New Bullet.
-
Select Symbol and find a box character. If you don’t initially see one, change Font to Wingdings or Segoe UI Symbol.
-
Select OK twice, and create your list.

Make a checklist you can check off in Word
To create a list that you can check off in Word, add content controls for checkboxes to your document.
Show the Developer tab
For more info if the developer tab isn’t already visible in Word, see Show the Developer tab.
Make your list
-
Create your list.
-
Place you cursor at the start of the first line.
-
Go to the Developer tab, and then click Check Box.
-
If you want a space after the check box, press Tab or Spacebar.
Use a Tab character if you want to format the list item with hanging indentation, like Word applies to bulleted lists.
-
Select and copy (⌘ + C) the check box and any tabs or spaces.
-
Place the cursor at the start of the each list item, and paste (⌘ + V ) the copied check box and characters.
-
Paste the checkbox at the start of each line in your list.
Add hanging indentation
If some of the list items are longer than one line, use hanging indentation to align them.
-
Select the list.
-
Go to Format and select Paragraph.
-
Under Indentation, type 0.25 in the Left box.
-
In the Special list, choose Hanging.
For By, Word sets a default value of 0.5 inches. Change this if you want your additional lines indented differently.
Make a print only check list
You can replace the bullets or numbers in a list with another symbol, such as a box can be checked on a printed version of your document.
-
Select the entire list.
-
Select Home and select the arrow next to Bullets.
-
Select Define New Bullet.
-
Select Bullet, and choose a symbol from the table of symbols.
For more choices, in the Font box choose a symbol font, such as Wingdings.
-
Select a symbol to use, such as an open box (
) or a three-dimensional box (). -
Select OK, and then select OK again.
 ) or a three-dimensional box (
 ).
).Word for the web supports only the on-paper form of checklist.
-
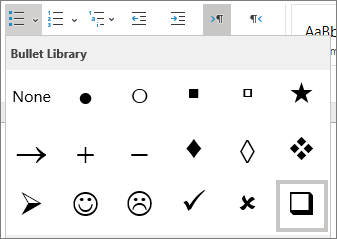
Write your list, and then select it.
-
On the Home tab, choose the down-arrow next to the Bullets list to open the bullet library, and then choose the checkbox symbol.
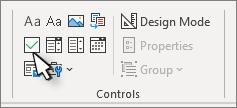
Click in the document where you want the check box. Activate the Developer tab, then click on the check box in the Controls group. This will insert a check box that the user can tick and clear.
Contents
- 1 How do I check a box in a Word document?
- 2 How do I insert a tick box in Word 2010?
- 3 How do I check a box on my Macbook?
- 4 How do you check a box in Preview Mac?
- 5 How do you check a box in Pages?
- 6 How do you type a box on a Mac?
- 7 How do I make a checklist in Word for Mac?
- 8 How do you write a check box?
- 9 How do you check a box in a PDF on a Mac?
- 10 How do I add a check in preview?
- 11 How do I tick a box in PDF Mac?
- 12 How do you check a box in Word for IPAD?
- 13 How do I insert a checkbox in numbers?
- 14 How do I make a check box in Google Docs?
- 15 Do Alt codes work on Mac?
- 16 Where is Alt on a Mac?
- 17 What’s the Alt button on a Mac?
- 18 How do you do a checklist?
- 19 How check if checkbox is checked?
- 20 What is check box in computer?
How do I check a box in a Word document?
Just position your cursor in the document where you want a check box, switch to the “Developer” tab, and then click the “Check Box Content Control” button. You should see a check box appear wherever you placed your cursor.
How do I insert a tick box in Word 2010?
After accessing the “Insert” menu, find the “Symbol” tab. From this section, choose the “Font” option and select “Wingdings”. The tick mark will be found at the bottom of the list.
How do I check a box on my Macbook?
Click the Developer tab at the top and select the Check Box Content Control icon from the Controls section. Word will add an interactive checkbox to your document. You can click on this box and it will be ticked.
How do you check a box in Preview Mac?
Select the file you wish to open, and click the Open button. With the selected PDF file now open, you can access the Markup tools by ensuring that Preview’s toolbar is displayed. Select Show Toolbar from Preview’s View menu.
How do you check a box in Pages?
Here’s how you do it:
Select Symbol from the options on your screen. You should see different symbols. Scroll down this list, find a checkbox icon, click on it, and hit OK at the bottom. Click OK again and you should see a checkbox in your document.
How do you type a box on a Mac?
This @ key is a point of confusion for PC users coming to Mac keyboards because the “ key and @ key switch places. On a UK or US keyboard you’ll find the @ key on the 2 key and the “ key will be down on the right where the ‘ key is located.
How do I make a checklist in Word for Mac?
How to Create a Checklist in Word on Mac?
- Open your Word Document and click on ‘Word’ in the upper right-hand corner of your Mac.
- Next, choose ‘Ribbon & Toolbar.
- Click on ‘Developer’ and click ‘Save.
- Type your list in a document.
- Move your cursor to the beginning of any line.
How do you write a check box?
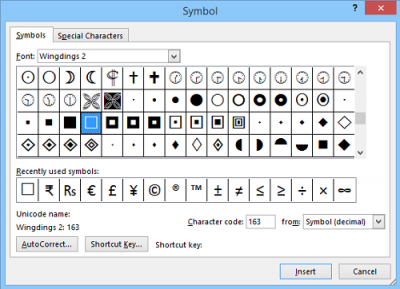
Click “Symbol.” 5. In the Symbol dialog box, find a symbol that looks like a checkbox. There are a number of options to choose from, but here’s a good choice: In the “Font” drop-down, choose “Wingdings 2” and then in the “Character code” field, enter “163.” If you like this option, click “OK.”
How do you check a box in a PDF on a Mac?
Creating a Check Box
- Open the PDF file that you will use for the form.
- From the Forms menu, select Add or Edit Fields…
- From the Add New Field pull-down menu, select Show Tools on Toolbar.
- Click Checkbox Tool.
- Position the cursor where you want the form field to begin.
How do I add a check in preview?
Open your document and go to “Insert > Symbol” menu.
5. Using Symbol Menu in Office Windows and Mac
- Change the font to Wingdings and scroll down to the bottom of the symbols.
- You can find check mark and check mark inside a square box symbols.
- Double click on the symbol or select the symbol and click insert button.
How do I tick a box in PDF Mac?
How to tick (checkmark) a box in a PDF
- Click on the Text box (the T in a square).
- Move the text box onto the place where you need to add the tick.
- Type Option/Alt + V.
- If you don’t like the appearance of that tick (checkmark), try changing the font until you find one you like.
How do you check a box in Word for IPAD?
1Double-tap a cell to start editing it; tap 42 and then tap the Checkbox button when the keyboard opens. You see a check box in the selected cell; in the area above the keyboard, you see the word false, as shown in the figure.
How do I insert a checkbox in numbers?
Add Checkboxes in Numbers
- Open your spreadsheet in Numbers and then select the cells where you want the checkboxes to appear.
- Click the Format button on the top right to open the formatting sidebar.
- Choose the Cell.
- In the Data Format dropdown box, pick Checkbox.
How do I make a check box in Google Docs?
Add custom checkbox values
- On your computer, open a spreadsheet in Google Sheets.
- Select the cells you want to have checkboxes.
- In the menu at the top, click Data.
- Next to “Criteria,” choose Checkbox.
- Click Use custom cell values.
- Next to “Checked,” enter a value.
- Optional: Next to “Unchecked,” enter a value.
- Click Save.
Do Alt codes work on Mac?
To use alt codes on Mac computers, use the Option key instead of the Alt key. Option codes for accented letters, symbols, and special characters work differently on Mac computers, as you press Option, the accent, then the letter. For example, to create an n with a tilde, the alt code is Option+n.
Where is Alt on a Mac?
Where is the Alt key on a Mac keyboard? The PC-keyboard equivalent of Alt on a Mac is called the Option key, and you’ll find the Option Key on your Mac if you go two keys to the left of the spacebar.
What’s the Alt button on a Mac?
Option key
On a Macintosh, the Alt key is called the Option key. It is not used to enter numeric character codes. Instead, keyboard letters and numbers are used. The diagram below shows the special characters a US Mac keyboard will produce when the Option key is pressed.
How do you do a checklist?
How to create your checklist
- Step 1: Do a “brain dump”
- Step 2: Organize and prioritize tasks.
- Step 3: Put them on your to-do list.
- Step 4: Check off each item as you complete it.
- Step 5: Continue adding items as they come up.
How check if checkbox is checked?
Checking if a checkbox is checked
- First, select the checkbox using the selecting DOM methods such as getElementById() or querySelector() .
- Then, access the checked property of the checkbox element. If its checked property is true , then the checkbox is checked; otherwise, it is not.
What is check box in computer?
A check box, selection box, or tick box is a small interactive box that can be toggled by the user to indicate an affirmative or negative choice.Check boxes are used when more than one option may need to be checked or as an easy way to enable or disable a setting in a software program.
Replace bullets or numbers with check marks or check boxes
-
Select the entire list; the bullets or numbers won’t look selected.
-
Choose Home, and then choose the Bullets list.
-
Do one of the following:
-
If you see the check mark or check box you want in the Bullet Library, select it.
-
If you don’t see the check mark or check box you want, go to the next step.
-
-
Choose Define New Bullet, and the Define New Bullet dialog box opens.
-
Choose Symbol, and then choose a symbol from the table of symbols.
Tip: For more choices, in the Font box, choose a symbol font, such as Wingdings.
-
Scroll through the list of symbols and choose the symbol—such as an open box (
) or a three-dimensional box ( )—you want to use. -
Choose OK, and then choose OK again in the Define New Bullet dialog box.
 ) or a three-dimensional box (
  )—you want to use.
The symbol you chose will be added to the Bullet Library so it’ll be handy if you want to use it again.
Make a checklist you can check off in Word
There are four steps involved in creating a list with check boxes that you can check off in Word. This type of list requires a Check Box Content Control, found in the Developer tab.
Step 1: Show the Developer tab
-
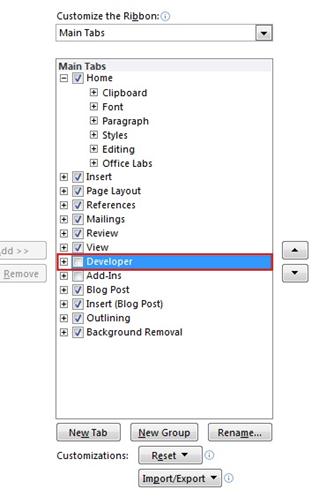
On the File tab, choose Options > Customize Ribbon.
-
In the Customize the Ribbon list, choose Main Tabs.
-
In the Main Tabs list, select the Developer check box, and then choose OK.
Step 2: Make your list
-
On the Developer tab, in the Controls group,. choose the Check Box Content Control button to insert a check box (
) in front of an item in an existing list or to create a new list. -
Press the Right Arrow key twice, type the first item in your list, and then press Enter.
-
Select the check box control that you just created, and press Ctrl+C to make a copy of the control.
-
On the new line, press Ctrl+V to paste the item, and then rename the item.
-
Repeat steps 6 and 7 as needed until your list is complete.
-
If you want to put an X in the check box, click inside the box.
More about the Check Box Content Control
You can use something other than the default check box and X.
-
Select a Check Box Content Control, and in the Controls group, choose Properties.
-
In the Content Control Properties dialog box, under Check Box Properties, choose Change next to Checked symbol and/or Unchecked symbol.
-
In the Symbol dialog box, choose a new symbol, and then choose OK to save your choice.
Step 3: Refine the layout
If some items in your list are more than one line long, you can use hanging indents to align them.
-
Select the list.
Note: Bullets or numbers won’t look selected.
-
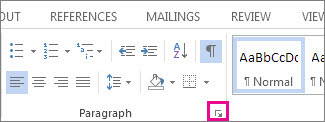
On the Home tab, in the Paragraph group, click the Paragraph dialog box launcher.
-
Under Indentation, in the Left box, type 0.25.
-
Under Special, choose Hanging.
-
Click OK when finished.
Step 4: Lock the text and controls
When you’re satisfied with the list, group it to lock the controls and listed items in place. That way, people can check off items on the list without changing the items themselves.
-
Select the list (the check box controls and the listed items).
-
On the Developer tab, in the Controls group, choose Group > Group.
Note: If you need to change something later, select the list again and choose Group > Ungroup.
See Also
Make changes to check boxes
Create a fillable form
Keyboard shortcuts for Microsoft Word 2016 for Windows
Make a checklist to print
If you just need a checklist that you can print, you can make a list where each item has a check box that you can check off on paper. You can also create a list of check boxes and check off items electronically by opening the document in Word.
Note: If you can’t check off an item electronically, it might be formatted for printing only or the document might be locked.
The way that you create the list depends on whether your document already contains bulleted lists with different kinds of bullets.
-
If your document does not already contain several different kinds of bullets, you can make a bulleted list by using a custom bullet format.
-
If your document already contains several bullet formats, you can prevent altering the existing bullets by placing the new list in a table.
Create a bulleted list with custom bullets
-
Type your list of items.
-
Select the list.
-
On the Home tab, in the Paragraph group, click the arrow next to Bullets.
-
Click Define New Bullet.
-
Click Symbol.
-
In the Font box, click a symbol font that is installed on your computer, such as Wingdings.
-
Scroll through the list of available symbols, and then double-click the box symbol that you want to use, such as an open box (
) or a three-dimensional box ( ).

Create a table to prevent altering the existing bullets
Step 1: Create a table
-
On the Insert tab, in the Tables group, click Table.
-
Click Insert Table.
-
In the Number of columns box, enter 2.
-
In the Number of rows box, enter the number of rows that you want. You need one row for each item in your list.
-
Click OK.

Step 2: Insert the check boxes and text
-
Click the top left cell.
-
On the Insert tab, in the Symbols group, click Symbol, and then click More Symbols.
-
Click the Symbols tab.
-
In the Font box, click a symbol font that is installed on your computer, such as Wingdings.
-
Scroll through the list of available symbols, and then double-click the box symbol that you want to use, such as an open box (
) or a three-dimensional box ( ). -
Click Close.
-
Click the next cell where you want to insert a box, and then press CTRL+Y to insert another box.
-
After you insert a box for each item that you want, click the top-right cell and type the text for the first item. Repeat this step for each item in the list.

Step 3: Refine the layout
Although you are using the table to lay out the list, you probably want to adjust the spacing so that the column that contains the check boxes isn’t too wide, and the text is lined up close to the check boxes. You probably don’t want the border lines that Word usually includes with the table. To make these adjustments, do the following:
-
Right-click the table, point to AutoFit, and then click AutoFit to Contents.
-
Right-click the table, click Table Properties, and then click the Table tab.
-
Click Options, and in the Left and Right boxes, enter a number that will provide a little bit of space between the check box and the text, such as .02 inches, and then click OK.
-
On the Table tab, click Borders and Shading, and then click the Borders tab.
-
Under Setting, click None, and then click OK.
Note: After you remove the border lines, you may still see gray border lines. These are the table gridlines, and they do not show when the document is printed. If you don’t want to see them at all, you can hide them by clicking View Gridlines in the Table group on the Layout tab under Table Tools.
Make a checklist that you can check off in Word
To use check boxes that you can check off in Word, you insert the check box form field into your document. This looks best if you use a table to align the check boxes with the text, so your first step is to create a table. After you create the table, you can insert the check boxes in one column and the text in the other column, and then you can refine the layout. To check off the items, you lock the form.
The result looks like the following illustration.
Step 1: Create a table
-
On the Insert tab, in the Tables group, click Table.
-
In the Number of columns box, enter 2.
-
In the Number of rows box, enter the number of rows that you want. You need one row for each item in your list.
Don’t worry about the size of the columns or the border lines in the table. You will fix those later.
Step 2: Insert the check boxes and text
To add the boxes that you will be able to check, you need to use the Developer tab.
Show Developer tab
-
Click the Microsoft Office Button
, and then click Word Options. -
Click Popular.
-
Select the Show Developer tab in the Ribbon check box.
Note: The Ribbon is a component of the Microsoft Office Fluent user interface.
 , and then click Word Options.
Add check boxes
-
Click the top left cell in the table that you inserted.
-
On the Developer tab, in the Controls group, click Legacy Tools.
-
Under Legacy Forms, click Check Box Form Field
.Note: If the check box has a gray background, click Legacy Tools in the Controls group, and then click Form Field Shading
to remove the gray shading. -
Click the next cell where you want to insert a check box, and then press Ctrl+Y to insert another check box.
-
After you insert a check box for each item that you want, click the top right cell and type the text for the first item. Repeat this step for each item in the list.

 .
. to remove the gray shading.
Step 3: Refine the layout
Although you’re using the table to lay out the list, you probably want to adjust the spacing so that the column that contains the check boxes isn’t too wide, and the text is lined up close to the check boxes. You probably don’t want the border lines that Word usually includes with the table. To make these adjustments, do the following:
-
Right-click the table, point to AutoFit, and then click AutoFit to Contents.
-
Right-click the table, click Table Properties, and then click the Table tab.
-
Click Options, and in the Left and Right boxes, enter a number that will provide a little bit of space between the check box and the text, such as .02 inches, and then click OK.
-
On the Table tab, click Borders and Shading, and then click the Borders tab.
-
Under Setting, click None, and then click OK.
Note: After you remove the border lines, you may still see gray lines. These are the table gridlines, and they do not show when the document is printed. To hide the table gridlines on the screen, click the Layout tab under Table Tools, and in the Table group, click View Gridlines.
Step 4: Lock the form
To check off the items by clicking in the check boxes, you need to lock the form. However, when the form is locked, you will not be able to make changes to the text or layout, so be sure to do this step last.
Note: If you want to check the spelling in your list, you must run spell check on the document before you lock the form.
When you want to edit the document, you can easily unlock the form. Just remember to lock it again so that you will be able to click the check boxes.
Lock the form
-
Make sure that you are not in design mode by clicking Design Mode in the Controls group on the Developer tab.
-
On the Developer tab, in the Protect group, click Protect Document, and then click Restrict Formatting and Editing.
-
In the Protect Document task pane, under Editing restrictions, select the Allow only this type of editing in the document check box.
-
In the list of editing restrictions, select Filling in forms.
-
Under Start enforcement, click Yes, Start Enforcing Protection.
-
To assign a password to the document so that only reviewers who know the password can remove the protection, type a password in the Enter new password (optional) box, and then confirm the password.
Important: If you choose not to use a password, all reviewers can change your editing restrictions.
Unlock the form
-
On the Developer tab, in the Protect group, click Protect Document, and then click Restrict Formatting and Editing.
-
In the Protect Document task pane, click Stop Protection.
Note: If you used a password to add protection to the document, you need to type the password before you can stop the protection.
Download PC Repair Tool to quickly find & fix Windows errors automatically
With Microsoft Office applications, you can create a simple To Do list or make a checklist in Microsoft Word and check off items electronically. The underlying trick for doing so is very simple and takes not more than few minutes. The result looks something like the illustration below.
Having said that, if you just need a checklist that you print, you can make a list where each item has a box that you check off on paper.
You can use boxes that you can check off in Word. For doing so, you first have to insert the check box form field into your document. Here’s how you do it!
Open a Word document, go to the “Insert” tab and choose “Symbol”
Next, from the symbol drop down list choose “More symbols”.

Then, the “Symbol” window shows up. Here you can select the check box and click on the “Insert” button. This ends part 1. I am saying so because in this part you cannot check the box. You need to do a bit of more manual work. That completes the second part.
Activate the Developer tab
Developer tab in the ‘Ribbon menu’ of Word supplies the option for checking the box in Word. Use the following procedure for it.
Assuming you have the Word file opened, right-click anywhere on the Ribbon and choose the “Customize Ribbon” option.
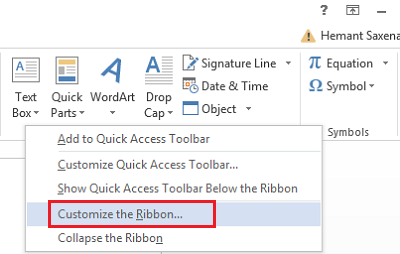
Next, select the “Developer” option within the “Customize the Ribbon” drop-down list and hit “OK”.
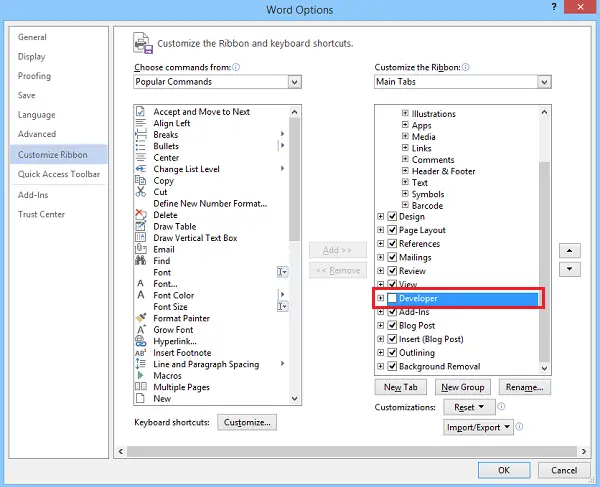
You should find the Developer tab added to the ribbon. Click on the “Developer” tab and use a customized bulleted list or a content control to insert checkboxes into a Word document.

Double click against any to-do/don’t-dos, followed by a single left-click to check the box.
That’s it!
Please note, that if you cannot check off an item electronically, it might be formatted for printing only or the document might be locked.
How do you create a checklist in Word?
To create a checklist in Microsoft Word, you can go through the aforementioned steps. Although there is no direct option, you need to create the checkboxes by adding regular boxes. For that, you can take the help of the Symbol option. Here you can find several symbols, including the checkbox.
How do you make a checklist column in Word?
To make a checklist column in Word, you need to insert the checkboxes first. To do that, follow the above-mentioned steps. Then, you can place all the checkboxes in order and use the bullet point option. Alternatively, you can insert a table and place one checkbox in one column.
See this post if you would like to know how to create a Checklist in Excel.

A post-graduate in Biotechnology, Hemant switched gears to writing about Microsoft technologies and has been a contributor to TheWindowsClub since then. When he is not working, you can usually find him out traveling to different places or indulging himself in binge-watching.
How to check a box in Word? First of all, if you are beginning to learn to use the tools that Word offers you and does not know how to check a boxDon’t worry, it’s normal when you’re a beginner, because checking a Word box is very easy and simple.
Table of Contents
- 1 There are several ways to check a box in Word which are:
- 2 How to make boxes in Word with Special Characters?
- 3 How to check a box in Word from your Mobile device?
- 4 What if you want to use the cell phone check box?
There are several ways to check a box in Word which are:
Create a checkbox in Word
- If you don’t know how to do box in Word with efficient formatting, click on the boxIn this case, it should appear in box X indicating that the selected option has been deleted, if this has not worked for you, delete it with the mouse and press the icon that says delete.
- Similarly, you can do it with the PC keyboard, replace it with a real checkbox, you can check it by clicking inside it and that’s it. It is easy and simple. Later, enter the necessary panel to insert the check box in the document, credit option in Word bar, click the file icon.
- Also, you can locate it at the top on the left side, choose the options tool from the tab that will open. Choose customize ribbon, in the menu that will be located on the left, then, put the check mark set to the tool and click on the accept icon and save the changes made.
How to make boxes in Word with Special Characters?
- Making a table in a Word document with a special character is just as easy, insert character that simulates the box marked in the document, position the text cursor in the place where you want to add the cell.
- después click on insert from Word, which is located on the upper left side, click on the symbols icon, it places it on the right side and choose the tool that says symbol from the menu that will open.
- You will notice that in the tab that was opened, it says font settings Wingding 2, in the character dropdown window, double click on the box which you have marked so that you can insert into the document, in place of the deleted cell.
- if you want to change the picture, choose as normal text that will automatically change the size of the text.
How to check a box in Word from your Mobile device?
- As the application is also available for different portable devices, it is just as simple, as doing it from your computer marks the word in Word on your phone or on the Tablet, give him copy a special character and then paste it into the document, you can do it from your website.
- But if you prefer to install the keyboard as GO Keyboard for Android or Symbols for iPhone / ipad, have to use the last to insert special characters and that’s all the procedure you need to do.
What if you want to use the cell phone check box?
Unfortunately the check box you will not be able to do it from a phone mobile, at the time of transcribing, although Word is feasible with Adroid, iOS and Windows Plome.