
Show the Developer tab
If the developer tab isn’t already visible, see Show the Developer tab.
Make your list
-
Type the list.
-
Go to Developer and select the Check Box Content Control at the beginning of the first line.

-
To change the default X to something else, see Make changes to checkboxes.
-
Copy and paste the check box control at the beginning of each line.
-
Select a checkbox to put an X (or other character) in the check box.
Add hanging indentation
If some list items are more than one line long, use hanging indents to align them.
-
Select the list. Bullets or numbers won’t look selected.
-
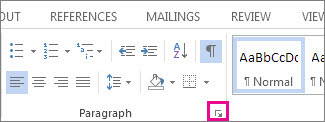
Go to Home and select the Paragraph dialog box launcher
. -
Under Indentation, in the Left box, type 0.25.
-
Under Special, choose Hanging.
-
For By, Word sets a default value of 0.5 inches. Change this if you want your additional lines indented differently.
-
Select OK when finished.
 .
.Lock the text and controls to prevent changes
-
Select the list and checkboxes.
-
Go to Developer >Group > Group.
To unlock the list, select the list and choose Group > Ungroup.
Create a print only list
-
Go to Home and select the down arrow next to the Bullets button.
-
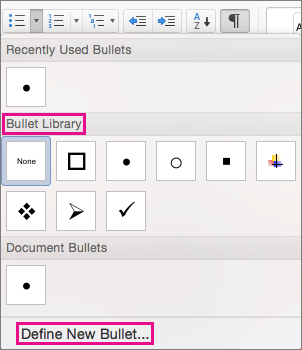
In the drop down menu, select Define New Bullet.
-
Select Symbol and find a box character. If you don’t initially see one, change Font to Wingdings or Segoe UI Symbol.
-
Select OK twice, and create your list.

Make a checklist you can check off in Word
To create a list that you can check off in Word, add content controls for checkboxes to your document.
Show the Developer tab
For more info if the developer tab isn’t already visible in Word, see Show the Developer tab.
Make your list
-
Create your list.
-
Place you cursor at the start of the first line.
-
Go to the Developer tab, and then click Check Box.
-
If you want a space after the check box, press Tab or Spacebar.
Use a Tab character if you want to format the list item with hanging indentation, like Word applies to bulleted lists.
-
Select and copy (⌘ + C) the check box and any tabs or spaces.
-
Place the cursor at the start of the each list item, and paste (⌘ + V ) the copied check box and characters.
-
Paste the checkbox at the start of each line in your list.
Add hanging indentation
If some of the list items are longer than one line, use hanging indentation to align them.
-
Select the list.
-
Go to Format and select Paragraph.
-
Under Indentation, type 0.25 in the Left box.
-
In the Special list, choose Hanging.
For By, Word sets a default value of 0.5 inches. Change this if you want your additional lines indented differently.
Make a print only check list
You can replace the bullets or numbers in a list with another symbol, such as a box can be checked on a printed version of your document.
-
Select the entire list.
-
Select Home and select the arrow next to Bullets.
-
Select Define New Bullet.
-
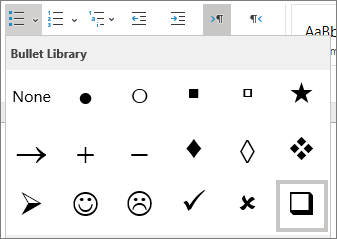
Select Bullet, and choose a symbol from the table of symbols.
For more choices, in the Font box choose a symbol font, such as Wingdings.
-
Select a symbol to use, such as an open box (
) or a three-dimensional box (). -
Select OK, and then select OK again.
 ) or a three-dimensional box (
 ).
).Word for the web supports only the on-paper form of checklist.
-
Write your list, and then select it.
-
On the Home tab, choose the down-arrow next to the Bullets list to open the bullet library, and then choose the checkbox symbol.

First, you need to customize Word’s ribbon and enable the “Developer” tab to show the option to add check boxes. Then, select “Developer” and click the “Check Box Content Control” button to insert a check box into your document. You can also transform Word’s bullets into checkboxes.
When you create surveys or forms with Microsoft Word, check boxes make the options easier to read and answer. We’re covering two good options for doing just that. The first is ideal for documents that you want people to fill out digitally within the Word document itself. The second option is easier if you’re planning to print documents like to-do lists.
Option 1: Use Word’s Developer Tools to Add the Check Box Option for Forms
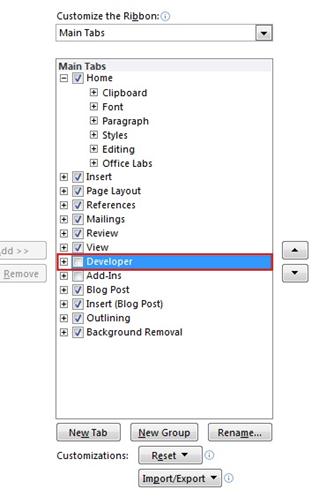
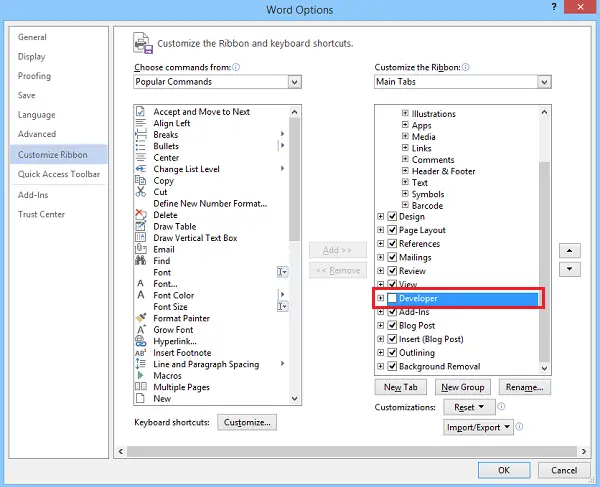
In order to create fillable forms that include checkboxes, you first need to enable the “Developer” tab on the Ribbon. With a Word document open, click the “File” drop-down menu and then choose the “Options” command. In the “Word Options” window, switch to the “Customize Ribbon” tab. On the right-hand “Customize the Ribbon” list, select “Main Tabs” on the dropdown menu.

On the list of available main tabs, select the “Developer” check box, and then click the “OK” button
Notice that the “Developer” tab is added to your Ribbon. Just position your cursor in the document where you want a check box, switch to the “Developer” tab, and then click the “Check Box Content Control” button.
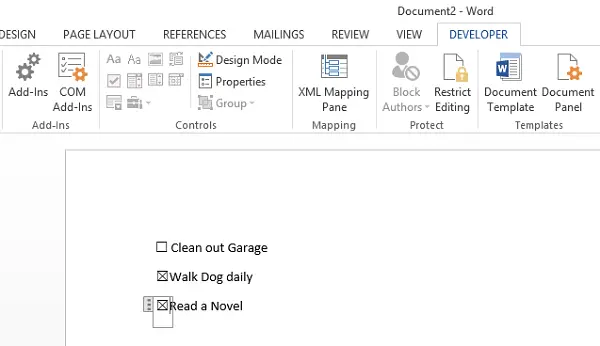
You should see a check box appear wherever you placed your cursor. Here, we’ve gone ahead and placed a check box next to each answer and, as you can see, those check boxes are interactive. Click a box to mark it with an “X” (as we’ve done for answers 2, 3, and 4) or select the whole form box (as we’ve done for answer 4) to move the check box around, format it, and so on.
RELATED: How to Create a Fillable Form With Microsoft Word
Option 2: Change Bullets to Check Boxes for Printed Documents
If you’re creating a document to print out—like a to-do list or printed survey—and just want check boxes on it, you don’t have to mess around with adding Ribbon tabs and using forms. Instead, you can create a simple bullet list and then change the bullets from the default symbol to check boxes.
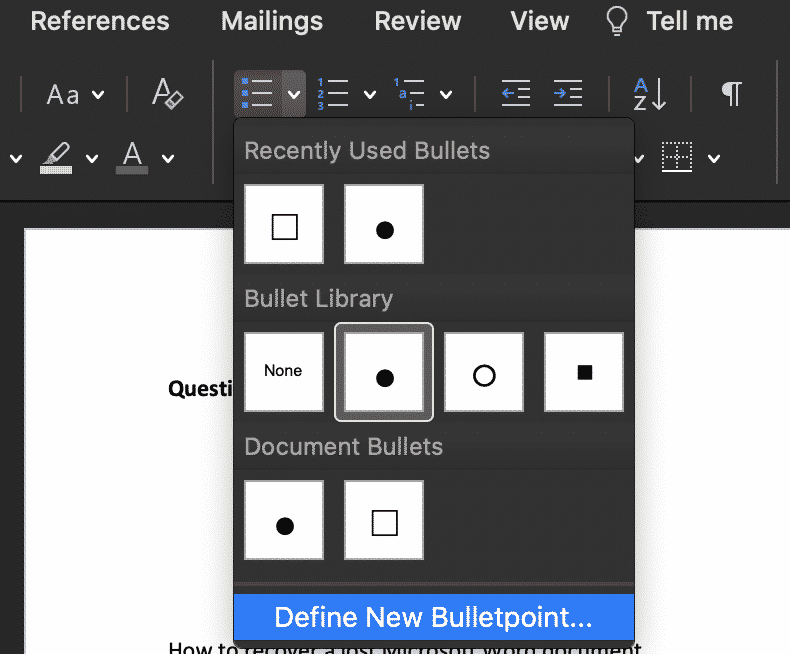
In your Word document, on the “Home” tab, click the small arrow to the right of the “Bullet List” button. On the dropdown menu, select the “Define new bullet” command.
In the “Define New Bullet” window, click the “Symbol” button.
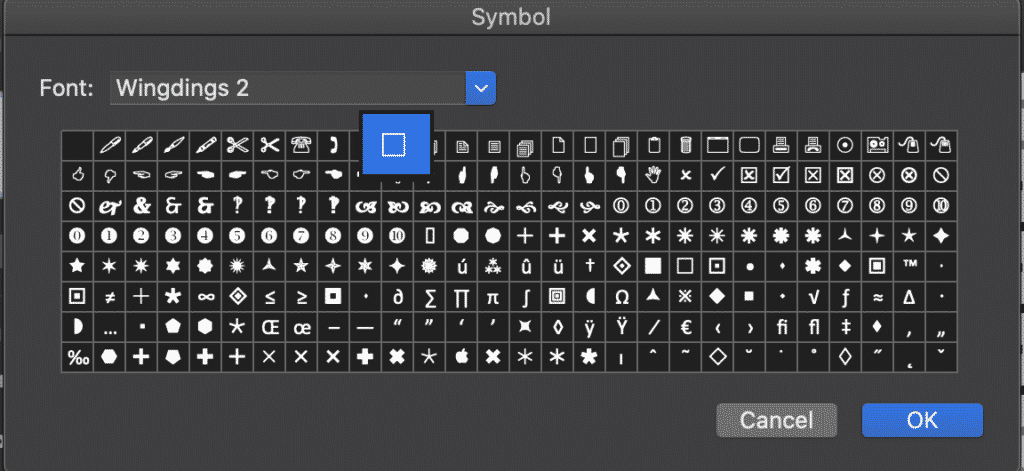
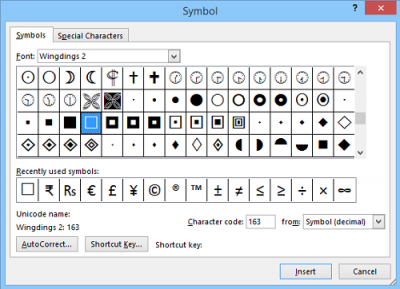
In the “Symbol” window, click the “Font” dropdown and choose the “Wingdings 2” option.
You can scroll through the symbols to find the empty square symbol that looks like a check box, or you just type the number “163” into the “Character Code” box to automatically select it. Of course, if you see a symbol you like better—like the open circle (symbol 153)—feel free to choose that instead.
When you’ve selected your symbol, click the “OK” button to close the “Symbol” window, and then click the “OK” button to close the “Define New Bullet” window, too.
Back in your Word document, you can now type your bullet list. The check boxes appear instead of the regular bullet symbol.
And the next time you need the check box symbol, you don’t have to navigate through that whole set of windows. Just click that small arrow to the right of the “Bullet List” button again, and you’ll see the checkbox listed under the “Recently Used Bullets” section.
Again, this method is really only useful for documents you want to print out. The check box symbols are not interactive, so you can’t check them off inside a Word document.
If you’re also creating spreadsheets and presentations, you may want to learn how to insert checkboxes in Excel and add checkboxes to PowerPoint too.
RELATED: How to Add a Check Mark or Tick Mark in Word
READ NEXT
- › How to Add a Check Mark or Tick Mark in Word
- › How to Count Checkboxes in Microsoft Excel
- › How to Add a Drop-Down List to a Word Document
- › How to Create a Fillable Form With Microsoft Word
- › How to Create a Basic Survey in Microsoft Word
- › Why the Right-Click Menu in Windows 11 Is Actually Good
- › Universal Audio Volt 2 Review: A Workhorse Audio Interface With Vintage Charm
- › Google+ Will Come to a Final End on July 5, 2023
Adding checkboxes to your Microsoft Word document gives you the functionality of a check list. Ticking off line items as they are complete, actioned or done.
Inserting a check list into your Word document is incredibly handy, most commonly used when creating surveys in word.

There are two ways to insert check boxes into Word, the first being more suitable for digital marking within Word itself and the second more suited to documents being printed and then checked off, such as a to do list.
In this post, we will show you how to insert both types of check boxes into your document with ease.
Inserting a tick-box in Microsoft Word
Option 1: Best for Digital Marking in Word itself

- Open Word
- Check that ‘Developer’ is turned on
- How to Turn Developer on
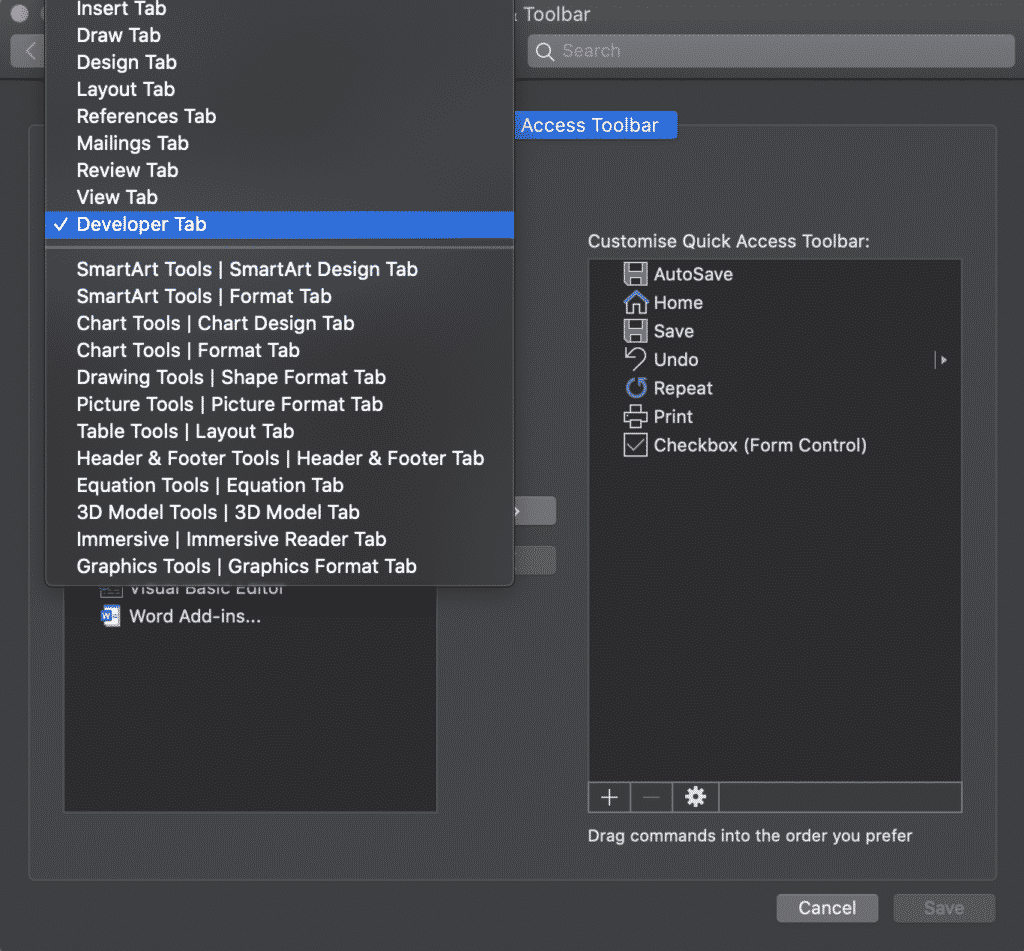
- Select the Customize Quick Access Toolbar dropdown
- Select More Commands
- Select Developer Tab
- Select Tick Box
- Press Insert
- How to Turn Developer on
- Once the Developer Tab has been activated:
- Place your cursor where you would like to insert the tick box

- Select the Tick Box in your Quick Access Short Cuts
- Repeat for each line that you would like a tick box added in front of

Option 2: Best for Printing

- Open Word
- Highlight your list
- Click the Bullet Point button
- Click Define New Bulletpoint…
- Click Bulletpoint…
- Change Font to Wingdings 2
- Select the Square Symbol
- Press OK
You have now successfully inserted check boxes in front of all highlighted lines.
Is Version Control causing issues for you? We have a solution!
If you are collaborating on a Microsoft Word Document with others and are required to keep each version saved away for future reference, it is likely you are facing the same version control pain points that every other company is.
A very cluttered shared drive or cloud, one where each new version is saved every time one of your colleagues makes an edit. Leaving you with a shared drive full of documents looking something like ReportV4_updated_final_FINAL1 and no idea if that is actually the final version or not.
Then you face the challenge of naming your new document, do you add another _FINAL2 or is _JDsedits enough for everyone else to understand what’s going on?

If it wasn’t for the ability to sort your files in date order, I’m sure most of us would have given up on the search for the most recent file a decade ago and just rolled the dice on what looked like it was most recent. It must be _final_FINAL2_FINALFINAL right?
Or those days you don’t have shared drive access and do the drag and drop to your desktop and hope you remember to take that file back over into the shared drive next time you are in the office.
Its risky business. There must be an easier way!
Lucky for us all there is, companies such as Simul Docs offer purpose built tools to help us collaborate better and manage our version control for us.
Yep thats right, Simul docs will manage the version control for you. When you open your file, from the moment you start making edits Simul will save the document as the newest version giving it a version number such as 0.0.2 or 0.0.3.
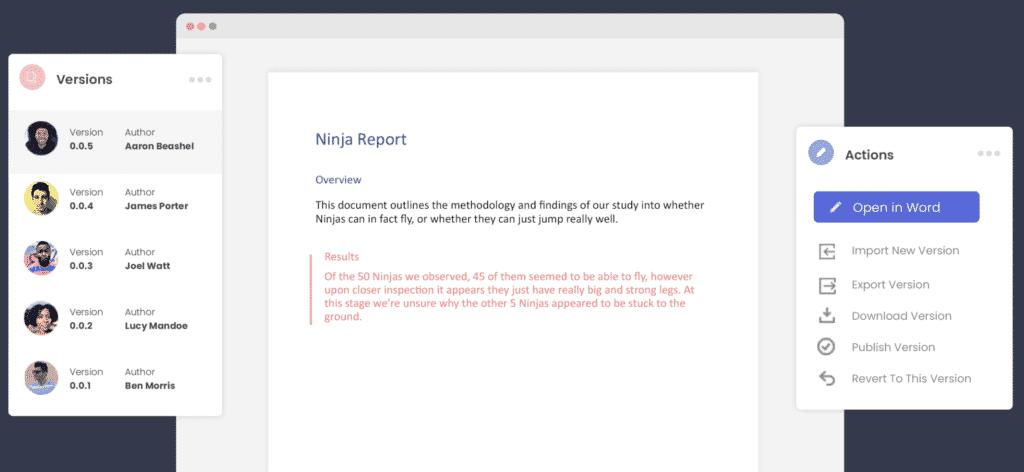
You can then refer back to any version with ease, knowing at a glance which version is the most recent (goodbye _FINAL2_Updated) and hello simple numbered versions and clearly marked authors next to each.
Its version control bliss!
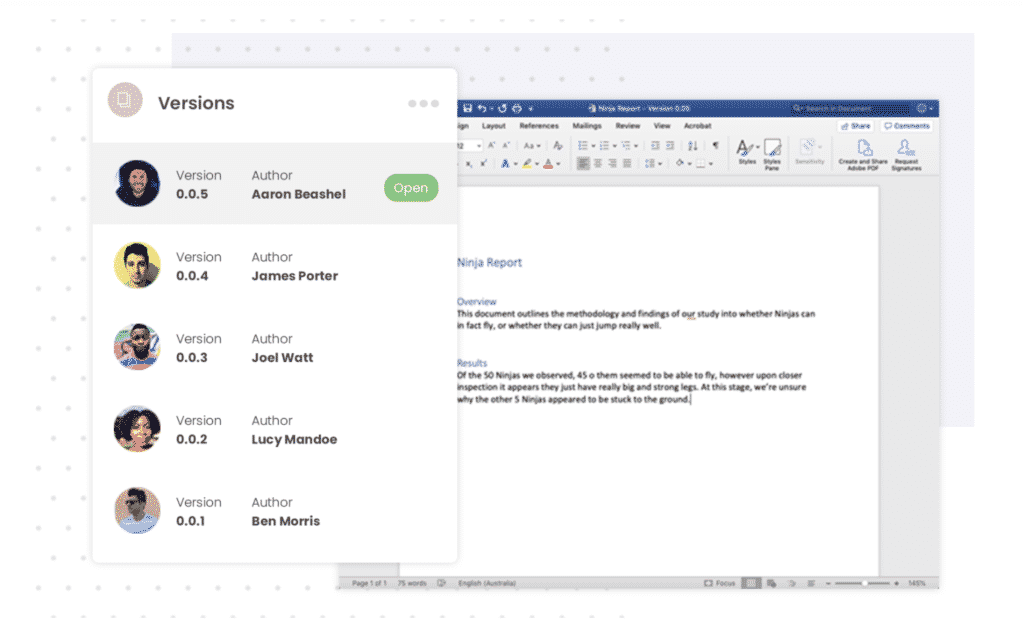
Not only that, but Simul Docs allows you to access your Word Document from anywhere, anytime. There is no need for remote shared drive access or the old clunky desktop saving. Simul gives you access to every version, anywhere, all you need is an internet connection.
Now that you have accessed your document from the comfort of the airport or your own home, you can add your tracked changes and comments, press save and let Simul notify the other collaborators that you have made some changes and they should probably jump in and check them out.
That means, no more emailing Word Documents back and forth with every edit.
Did your shared drive and inbox get a little lighter just thinking about these possibilities?

There really isn’t a downside to collaborating better with Simul Docs.
With free entry level packages on offer, its worth checking out.

There are times when you’ll want to check items off a list or mark them as complete on a form. Fortunately, it’s not too difficult to add checkboxes to your Microsoft Word documents.
There are two main types of checkboxes: interactive (that let a user check the box while in the Word document on their computers), and not interactive (that you’d use if you were printing something for people to fill out). We’ll look at both options here.
With just a few adjustments and clicks, you can insert checkboxes right into Word – so let’s see how you can do it.
Just a quick note: this is a tutorial for Mac using Office 2019. If you use a Windows machine or have a different version of Word, some of this might differ a bit.
How to Add Checkboxes to a Word Document – the Interactive Way
In order to add interactive checkboxes directly into your Word document (like, that users can check off on their computers/electronically), you’ll need to enable some special tools.
Step 1: Enable the «Developer» ribbon
Go to the Word tab in your main Word menu (up at the top of your screen) and select «Preferences» from the dropdown.

This will bring up the following menu, where you’ll see an option for «Ribbon & Toolbar», like this:
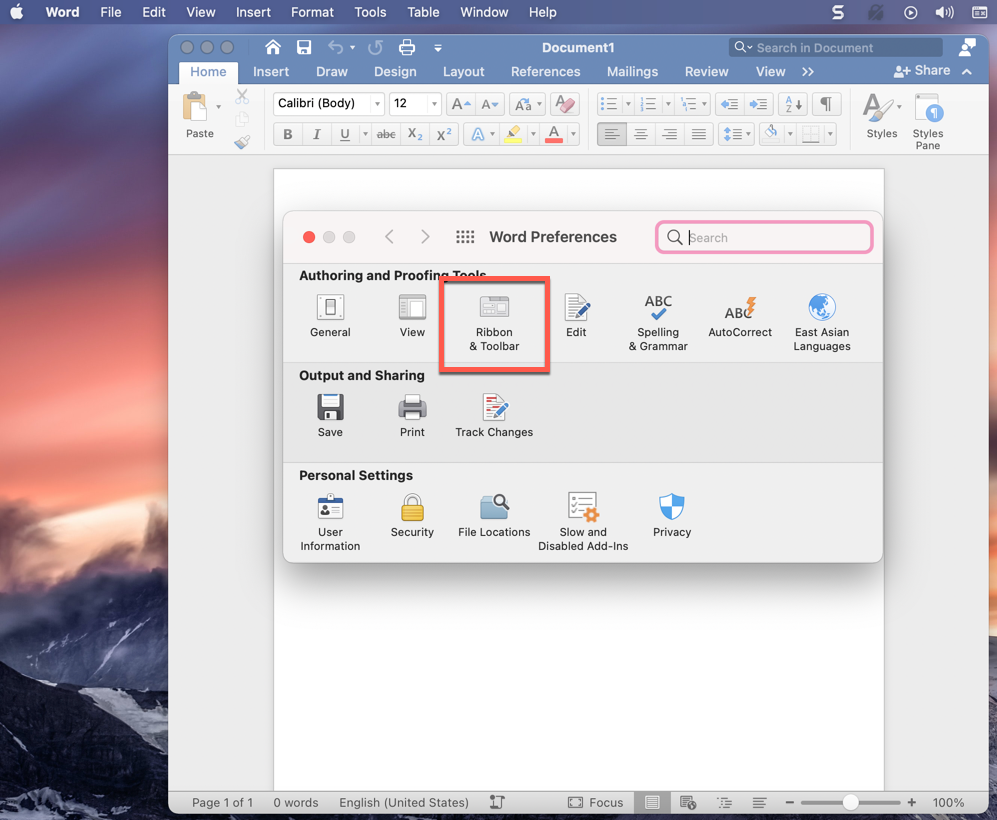
Just click on the Ribbon & Toolbar button and you’ll see the Ribbon & Toolbar menu. There are a lot of choices there, but just look on the right side under the «Main Tabs» drop down and scroll to the bottom of that long list (many things will likely already be checked).
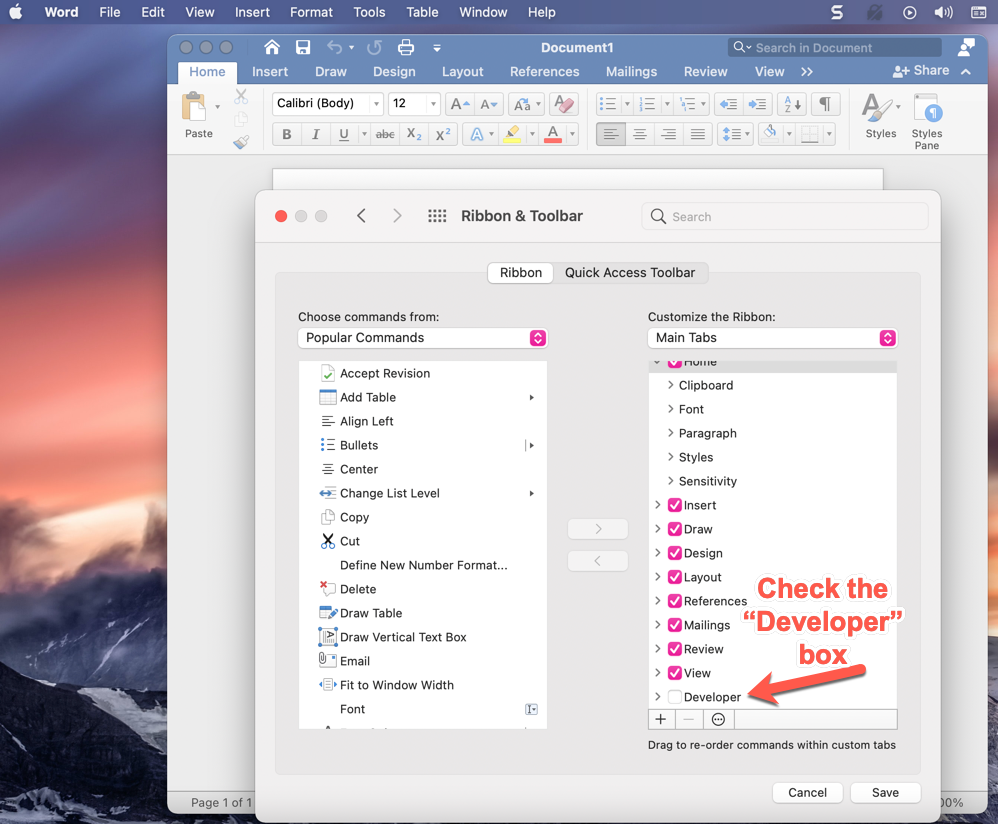
When you get to the bottom, you’ll see the «Developer» checkbox (like in the image below), and it will likely be unchecked. Just check that box and hit «Save» and then go back to your word document.
Now, when you go back to your word document, you’ll see that more options have been added to your ribbon (that’s the menu at the top of your document, with the options «Home», «Insert», «Draw», «Design», Layout», and so on).
Step 2: Go to the Developer Tab
You’ll see two little arrows at the end of that menu, and if you click on them you’ll see a «Developer» option – click the «Developer» button.
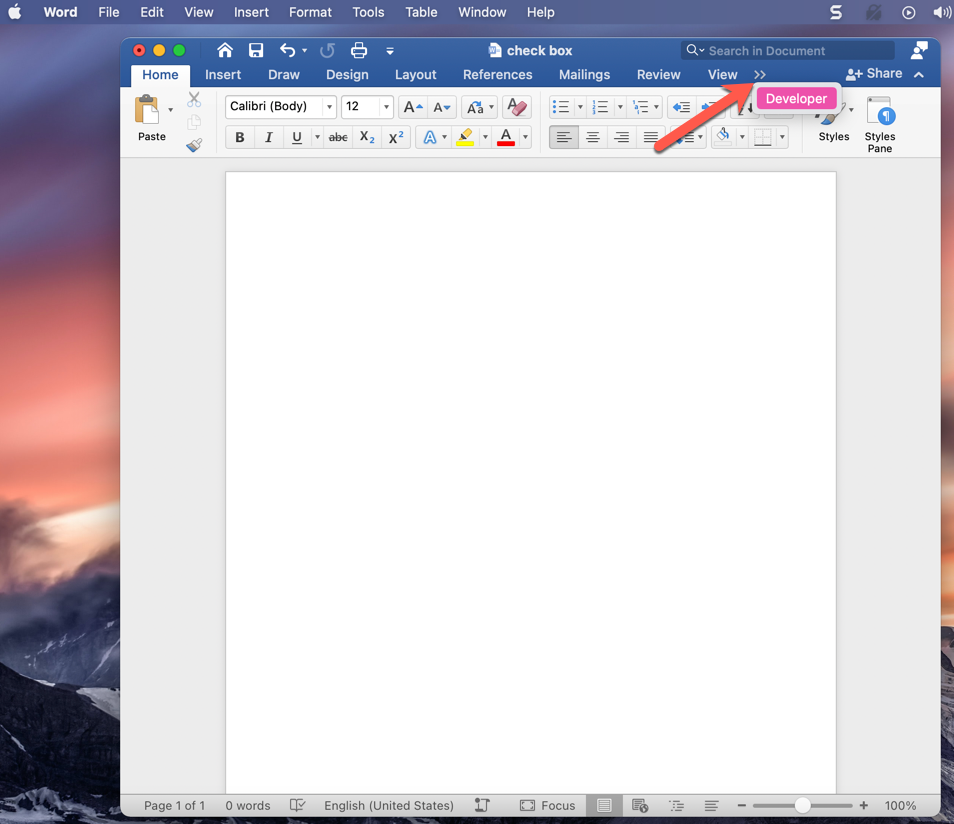
This will bring up a whole new Ribbon that looks like this:

Step 3: Add your Checkboxes
You’ll see the «Check box» option on that Developer ribbon, around the middle. If you click on it, a checkbox will be added to your Word document wherever your cursor is. So just make sure your cursor is located where you want the checkbox to be.

Once you’ve added all the checkboxes you want, and you’re ready to make your form interactive, there’s one step that remains.
Step 4: Protect your form
Word is smart, and it won’t let you actually check the checkboxes if you’re still editing and working on the form. If it did, anyone could come in when they went to fill it out and change the text, make edits, and so on.
So, you need to protect your form. This makes it so the only thing people can do is check those boxes (or uncheck them).
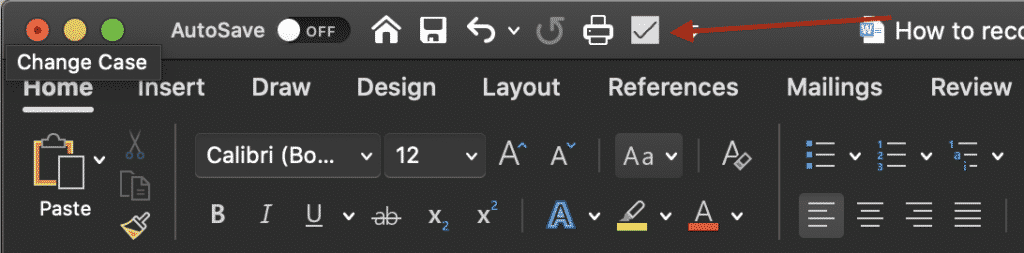
Simply click the lock symbol that says «Protect form» next to it at the right side of your Developer ribbon:
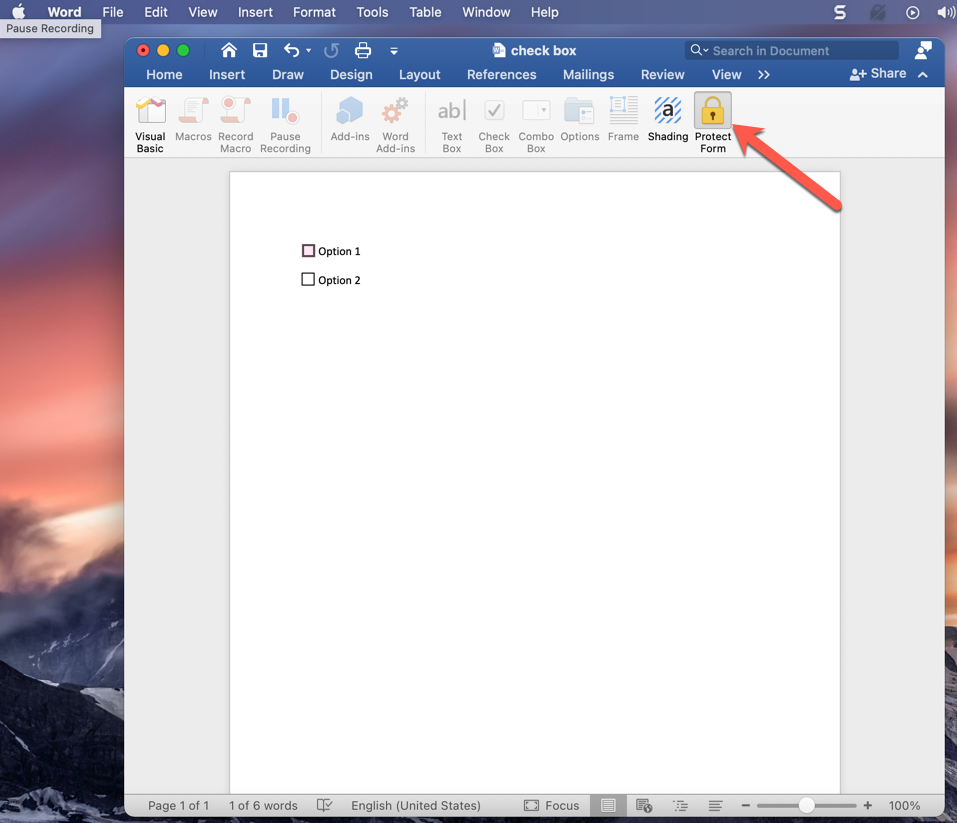
Once you’ve done that, you can now test out your fancy new checkboxes. If you click in the box, an X will appear, showing that it’s been checked. If you made a mistake and don’t want that check, just click the box again and the X will go away.
Do keep in mind that once you click «Protect form» you won’t be able to make any formatting or other changes (all your Ribbons will be «greyed out» and inaccessible). If you need to make edits, just click the Protect form button again and you’ll be able to make those changes.
Now you can add checkboxes to your forms and share them electronically.
But what if you just want to print out a list with checkboxes that people will fill out manually, on paper? Let’s look at how to do that next.
How to Add Checkboxes in Word for a Printed Document
If you just want to add boxes to a document that you’re going to print and have people check off by hand, it’s a bit easier to do. You’ll just use bullet points to create your checklist.
Before you can do that, though, you’ll need to make some updates to your bullet options.
Step 1: Customize your bullet point options
If you want bullets that look like empty checkboxes, you’ll just have to make a few updates to your bullet point options.
First, make sure your cursor is where you want the checkbox to be in your Word document. After following the below steps, that’s where Word will insert the box.
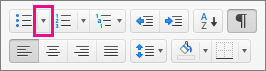
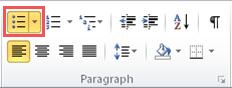
In Word, in the Home menu (on your document), you’ll find the bullet tab – it looks like three vertical dots, with a small arrow button next to it:
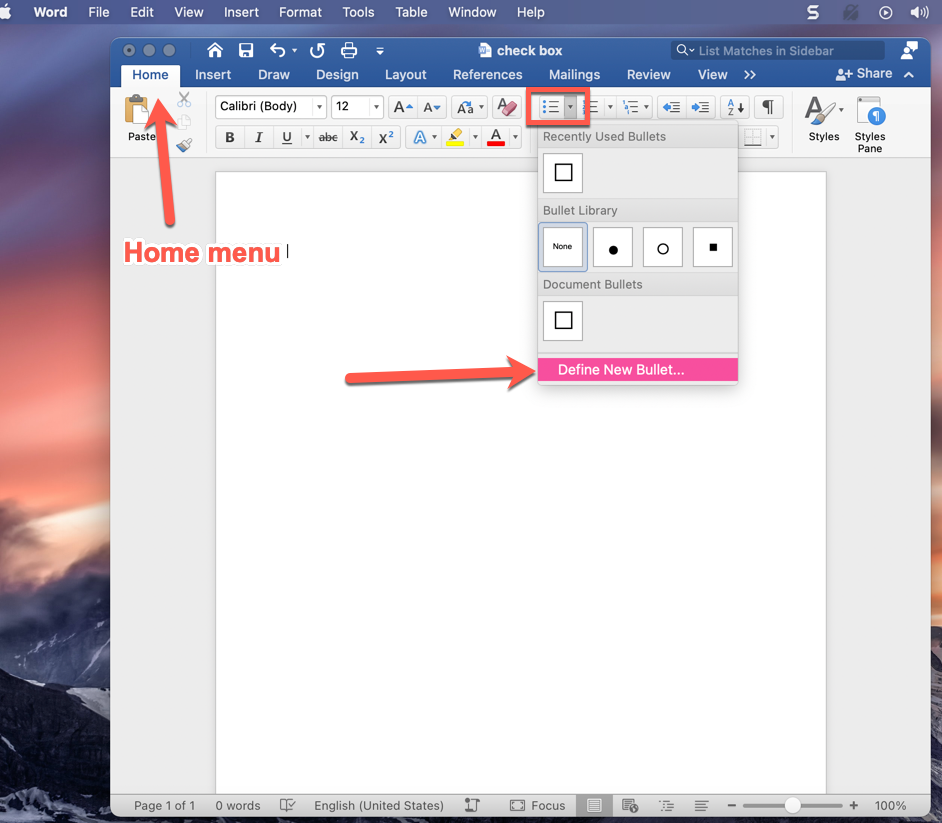
Click that small button with the arrow, and you’ll see the above dropdown with the option to «Define New Bullet» at the bottom.
Just click that option, and you’ll be taken to a new screen that looks like this:
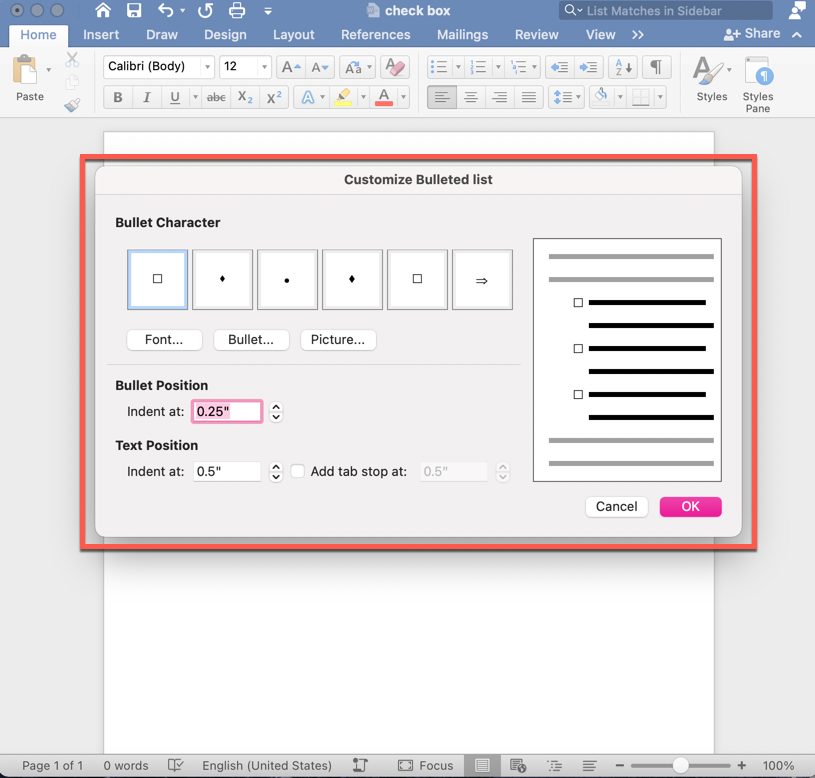
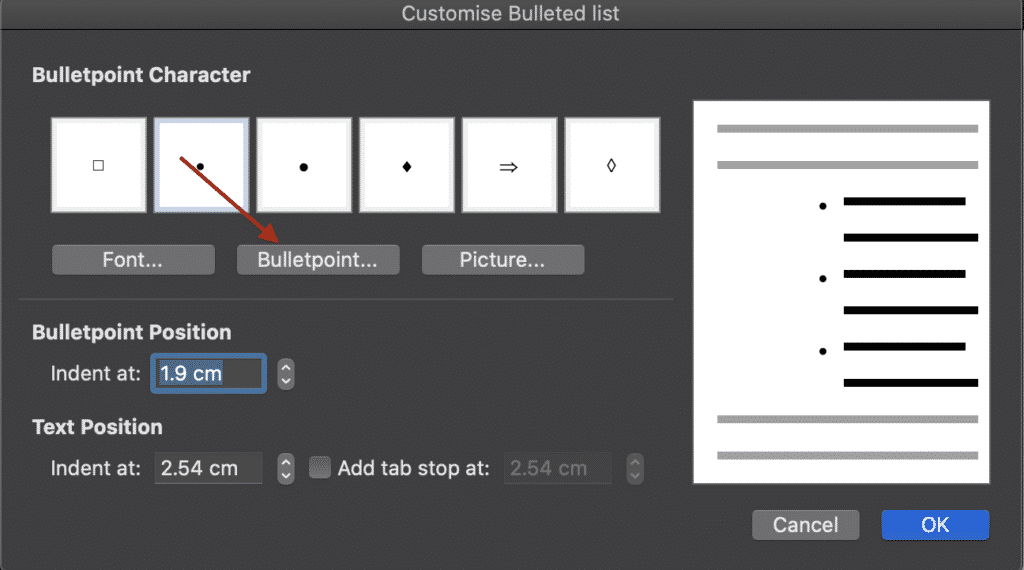
First, you’ll need to select the font that has a checkbox-like symbol in it. So click on the «Font» button (below the examples of bullet characters) and select «Windings 2» (you’ll likely need to scroll down just a bit).
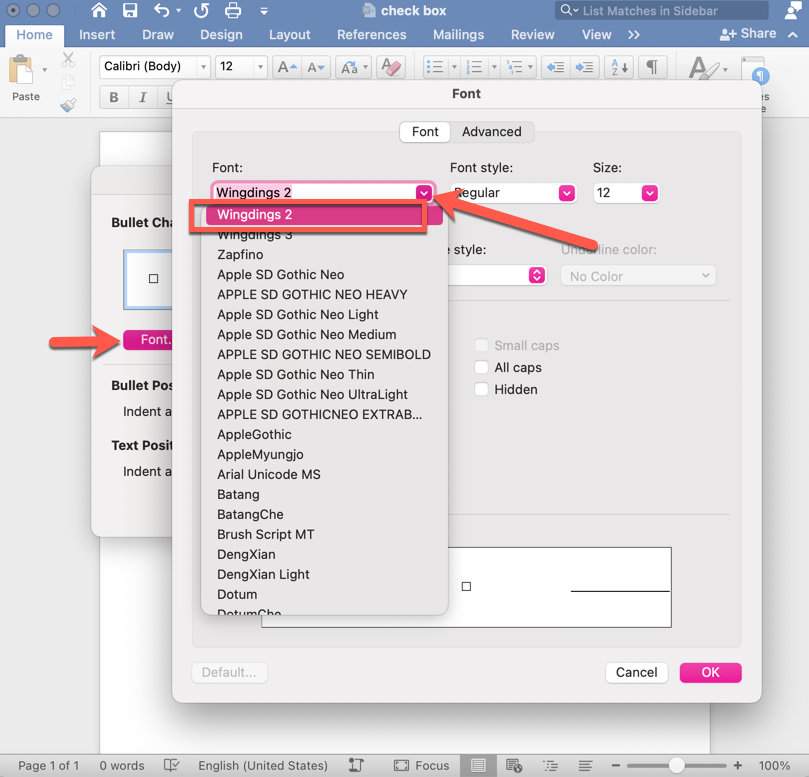
Then click «Ok» and you’ll be taken back to the customized bullet list screen. Now that your font is «Wingdings 2», you can customize your bullets.
Step 2: Choose the symbols for your customized bullets
To choose the checkbox symbol, simply click on one of the bullets that appears in the «Bullet Character» examples list (that selects it, so you’ll be changing that bullet). Then click on the «Bullets» button, and a list of symbols will appear:
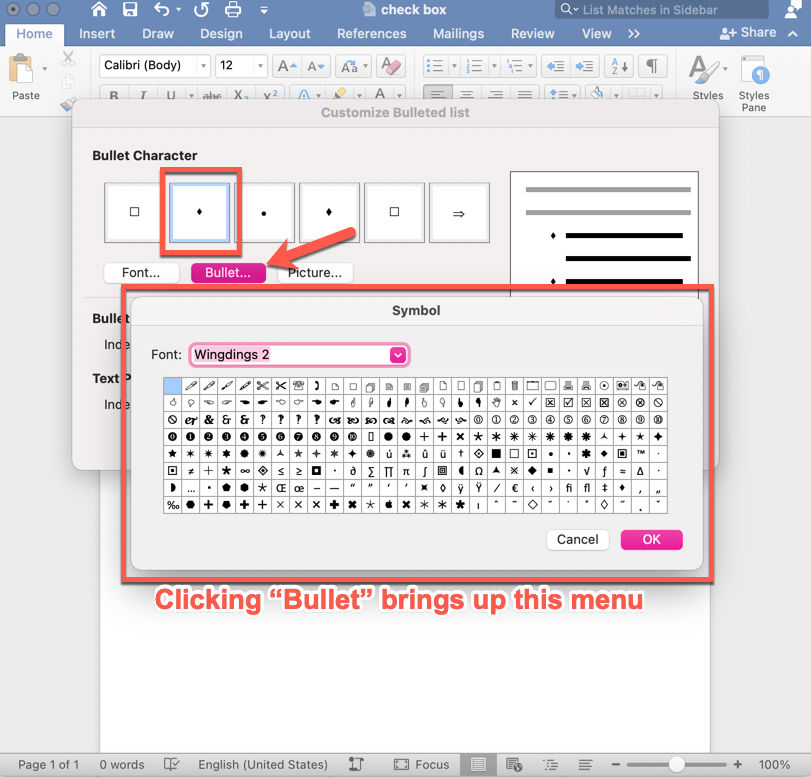
You can see that there are a lot of options, but towards the middle/right there’s an empty checkbox. Just click on that and click «Ok» and you’ll see that whatever bullet was there before has been replaced by the checkbox option.
Step 3: Enter your checkbox in your Word document
Now hit «Ok» again, and you’ll be taken back to your word document – where you’ll now see a checkbox!
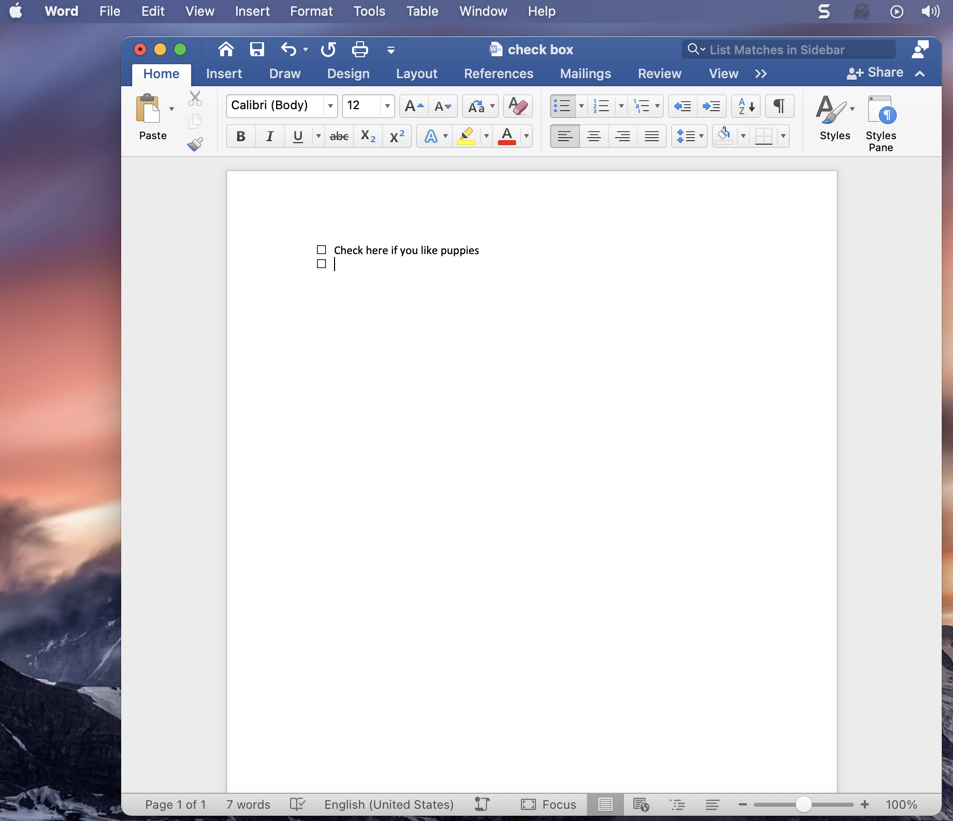
Fun tip: if you add some text (like «Check here if you like puppies» above) and then hit the Enter key, a new checkbox will appear below. So your checkboxes will automatically continue in list form until you’re done with your list.
When you’re finished with your list, just hit enter again and the cursor will go back to the beginning of a new line without a checkbox.
Do keep in mind that if you insert a checkbox, don’t type anything next to it, and then hit enter, the checkbox will just disappear and your cursor will go to a new line.
Here’s another fun tip: if you want to change the alignment of your checkbox list, you can just click and hold on one of the boxes and then drag it back and forth to indent it more or less.
That’s it!
Now you know how to insert both interactive and non-interactive checkboxes in Word documents. Enjoy!
Learn to code for free. freeCodeCamp’s open source curriculum has helped more than 40,000 people get jobs as developers. Get started
You can insert a checkbox in a Word document in 2 ways, depending on how you want it to be used.

We live in a world of checklists and checkboxes, so it stands to reason you might sometimes want to include checkboxes in documents you create.
There are two different kinds of checkboxes you can create in Microsoft Word : decorative ones for printed documents (that can be checked off in real life with a pen or pencil), and functional checkboxes that users can check with a mouse click if they’re viewing the document on a computer.
How to insert a checkbox in Word for printed documents
1. Position the cursor where you want to place the checkbox in your Word document.
2. In the ribbon at the top of the screen, make sure you’re on the «Home» tab and then click the down-arrow beside the Bullets button.
3. In the drop-down menu, click «Define New Bullet.»
4. Click «Symbol.»
5. In the Symbol dialog box, find a symbol that looks like a checkbox. There are a number of options to choose from, but here’s a good choice: In the «Font» drop-down, choose «Wingdings 2» and then in the «Character code» field, enter «163.» If you like this option, click «OK.»
6. Click «OK» again to close the other open window.
7. The checkbox will now be added to your document.
To add more checkboxes, just use the Bullet button and it’ll be inserted automatically (to get your usual bullet back, click the down-arrow next to the Bullet button and choose the symbol you prefer). In the future, you can choose either the usual bullet or the checkbox from the menu without needing to select it from the «Define New Bullet» dialog box.
How to insert a checkbox in Word for electronic documents
If you want a «clickable» checkbox in electronic documents, you’ll need to enable the Developer ribbon in Options. You’ll only need to do that once, and then you can add a functional checkbox anytime you need it.
1. In the ribbon at the top of Word, click the «File» tab and then click «Options.»
2. In the Word «Options» dialog box, click «Customize Ribbon» in the navigation pane on the left.
3. In the «Customize the Ribbon» section on the right, choose «Main Tabs» from the drop-down menu and then click the checkbox for «Developer» in the list.
4. Click «OK» to close Word Options.
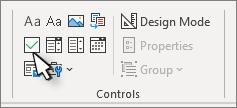
5. In the ribbon, click the new «Developer» tab.
6. In the «Controls» section, click the checkbox icon. You should see it appear in the document. It’s clickable — you can make it appear checked or unchecked by clicking.
FOLLOW BUSINESS INSIDER AFRICA
Our newsletter gives you access to a curated selection of the most important stories daily.
Thanks for signing up for our daily insight on the African economy. We bring you daily editor picks from the best Business Insider news content so you can stay updated on the latest topics and conversations on the African market, leaders, careers and lifestyle. Also join us across all of our other channels — we love to be connected!
Unblock notifications in browser settings.
Replace bullets or numbers with check marks or check boxes
-
Select the entire list; the bullets or numbers won’t look selected.
-
Choose Home, and then choose the Bullets list.
-
Do one of the following:
-
If you see the check mark or check box you want in the Bullet Library, select it.
-
If you don’t see the check mark or check box you want, go to the next step.
-
-
Choose Define New Bullet, and the Define New Bullet dialog box opens.
-
Choose Symbol, and then choose a symbol from the table of symbols.
Tip: For more choices, in the Font box, choose a symbol font, such as Wingdings.
-
Scroll through the list of symbols and choose the symbol—such as an open box (
) or a three-dimensional box ( )—you want to use. -
Choose OK, and then choose OK again in the Define New Bullet dialog box.
 ) or a three-dimensional box (
  )—you want to use.
The symbol you chose will be added to the Bullet Library so it’ll be handy if you want to use it again.
Make a checklist you can check off in Word
There are four steps involved in creating a list with check boxes that you can check off in Word. This type of list requires a Check Box Content Control, found in the Developer tab.
Step 1: Show the Developer tab
-
On the File tab, choose Options > Customize Ribbon.
-
In the Customize the Ribbon list, choose Main Tabs.
-
In the Main Tabs list, select the Developer check box, and then choose OK.
Step 2: Make your list
-
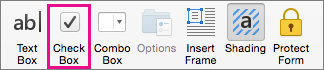
On the Developer tab, in the Controls group,. choose the Check Box Content Control button to insert a check box (
) in front of an item in an existing list or to create a new list. -
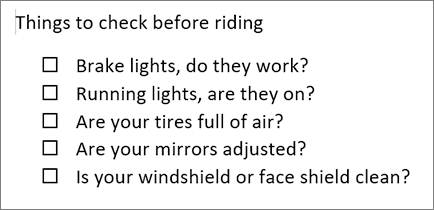
Press the Right Arrow key twice, type the first item in your list, and then press Enter.
-
Select the check box control that you just created, and press Ctrl+C to make a copy of the control.
-
On the new line, press Ctrl+V to paste the item, and then rename the item.
-
Repeat steps 6 and 7 as needed until your list is complete.
-
If you want to put an X in the check box, click inside the box.
More about the Check Box Content Control
You can use something other than the default check box and X.
-
Select a Check Box Content Control, and in the Controls group, choose Properties.
-
In the Content Control Properties dialog box, under Check Box Properties, choose Change next to Checked symbol and/or Unchecked symbol.
-
In the Symbol dialog box, choose a new symbol, and then choose OK to save your choice.
Step 3: Refine the layout
If some items in your list are more than one line long, you can use hanging indents to align them.
-
Select the list.
Note: Bullets or numbers won’t look selected.
-
On the Home tab, in the Paragraph group, click the Paragraph dialog box launcher.
-
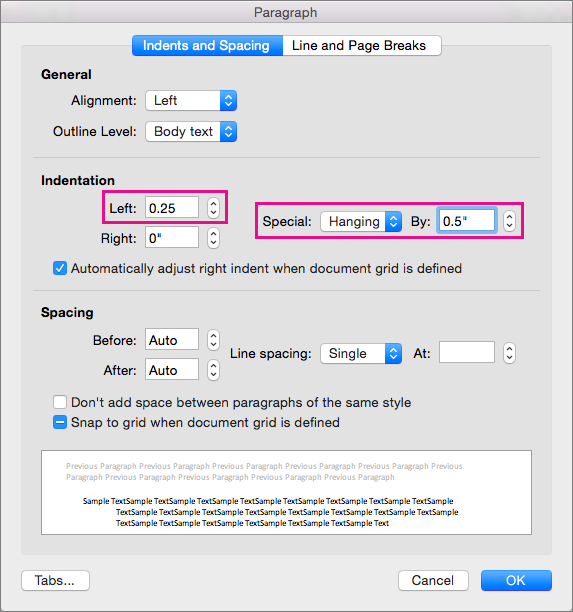
Under Indentation, in the Left box, type 0.25.
-
Under Special, choose Hanging.
-
Click OK when finished.
Step 4: Lock the text and controls
When you’re satisfied with the list, group it to lock the controls and listed items in place. That way, people can check off items on the list without changing the items themselves.
-
Select the list (the check box controls and the listed items).
-
On the Developer tab, in the Controls group, choose Group > Group.
Note: If you need to change something later, select the list again and choose Group > Ungroup.
See Also
Make changes to check boxes
Create a fillable form
Keyboard shortcuts for Microsoft Word 2016 for Windows
Make a checklist to print
If you just need a checklist that you can print, you can make a list where each item has a check box that you can check off on paper. You can also create a list of check boxes and check off items electronically by opening the document in Word.
Note: If you can’t check off an item electronically, it might be formatted for printing only or the document might be locked.
The way that you create the list depends on whether your document already contains bulleted lists with different kinds of bullets.
-
If your document does not already contain several different kinds of bullets, you can make a bulleted list by using a custom bullet format.
-
If your document already contains several bullet formats, you can prevent altering the existing bullets by placing the new list in a table.
Create a bulleted list with custom bullets
-
Type your list of items.
-
Select the list.
-
On the Home tab, in the Paragraph group, click the arrow next to Bullets.
-
Click Define New Bullet.
-
Click Symbol.
-
In the Font box, click a symbol font that is installed on your computer, such as Wingdings.
-
Scroll through the list of available symbols, and then double-click the box symbol that you want to use, such as an open box (
) or a three-dimensional box ( ).

Create a table to prevent altering the existing bullets
Step 1: Create a table
-
On the Insert tab, in the Tables group, click Table.
-
Click Insert Table.
-
In the Number of columns box, enter 2.
-
In the Number of rows box, enter the number of rows that you want. You need one row for each item in your list.
-
Click OK.

Step 2: Insert the check boxes and text
-
Click the top left cell.
-
On the Insert tab, in the Symbols group, click Symbol, and then click More Symbols.
-
Click the Symbols tab.
-
In the Font box, click a symbol font that is installed on your computer, such as Wingdings.
-
Scroll through the list of available symbols, and then double-click the box symbol that you want to use, such as an open box (
) or a three-dimensional box ( ). -
Click Close.
-
Click the next cell where you want to insert a box, and then press CTRL+Y to insert another box.
-
After you insert a box for each item that you want, click the top-right cell and type the text for the first item. Repeat this step for each item in the list.

Step 3: Refine the layout
Although you are using the table to lay out the list, you probably want to adjust the spacing so that the column that contains the check boxes isn’t too wide, and the text is lined up close to the check boxes. You probably don’t want the border lines that Word usually includes with the table. To make these adjustments, do the following:
-
Right-click the table, point to AutoFit, and then click AutoFit to Contents.
-
Right-click the table, click Table Properties, and then click the Table tab.
-
Click Options, and in the Left and Right boxes, enter a number that will provide a little bit of space between the check box and the text, such as .02 inches, and then click OK.
-
On the Table tab, click Borders and Shading, and then click the Borders tab.
-
Under Setting, click None, and then click OK.
Note: After you remove the border lines, you may still see gray border lines. These are the table gridlines, and they do not show when the document is printed. If you don’t want to see them at all, you can hide them by clicking View Gridlines in the Table group on the Layout tab under Table Tools.
Make a checklist that you can check off in Word
To use check boxes that you can check off in Word, you insert the check box form field into your document. This looks best if you use a table to align the check boxes with the text, so your first step is to create a table. After you create the table, you can insert the check boxes in one column and the text in the other column, and then you can refine the layout. To check off the items, you lock the form.
The result looks like the following illustration.
Step 1: Create a table
-
On the Insert tab, in the Tables group, click Table.
-
In the Number of columns box, enter 2.
-
In the Number of rows box, enter the number of rows that you want. You need one row for each item in your list.
Don’t worry about the size of the columns or the border lines in the table. You will fix those later.
Step 2: Insert the check boxes and text
To add the boxes that you will be able to check, you need to use the Developer tab.
Show Developer tab
-
Click the Microsoft Office Button
, and then click Word Options. -
Click Popular.
-
Select the Show Developer tab in the Ribbon check box.
Note: The Ribbon is a component of the Microsoft Office Fluent user interface.
 , and then click Word Options.
Add check boxes
-
Click the top left cell in the table that you inserted.
-
On the Developer tab, in the Controls group, click Legacy Tools.
-
Under Legacy Forms, click Check Box Form Field
.Note: If the check box has a gray background, click Legacy Tools in the Controls group, and then click Form Field Shading
to remove the gray shading. -
Click the next cell where you want to insert a check box, and then press Ctrl+Y to insert another check box.
-
After you insert a check box for each item that you want, click the top right cell and type the text for the first item. Repeat this step for each item in the list.

 .
. to remove the gray shading.
Step 3: Refine the layout
Although you’re using the table to lay out the list, you probably want to adjust the spacing so that the column that contains the check boxes isn’t too wide, and the text is lined up close to the check boxes. You probably don’t want the border lines that Word usually includes with the table. To make these adjustments, do the following:
-
Right-click the table, point to AutoFit, and then click AutoFit to Contents.
-
Right-click the table, click Table Properties, and then click the Table tab.
-
Click Options, and in the Left and Right boxes, enter a number that will provide a little bit of space between the check box and the text, such as .02 inches, and then click OK.
-
On the Table tab, click Borders and Shading, and then click the Borders tab.
-
Under Setting, click None, and then click OK.
Note: After you remove the border lines, you may still see gray lines. These are the table gridlines, and they do not show when the document is printed. To hide the table gridlines on the screen, click the Layout tab under Table Tools, and in the Table group, click View Gridlines.
Step 4: Lock the form
To check off the items by clicking in the check boxes, you need to lock the form. However, when the form is locked, you will not be able to make changes to the text or layout, so be sure to do this step last.
Note: If you want to check the spelling in your list, you must run spell check on the document before you lock the form.
When you want to edit the document, you can easily unlock the form. Just remember to lock it again so that you will be able to click the check boxes.
Lock the form
-
Make sure that you are not in design mode by clicking Design Mode in the Controls group on the Developer tab.
-
On the Developer tab, in the Protect group, click Protect Document, and then click Restrict Formatting and Editing.
-
In the Protect Document task pane, under Editing restrictions, select the Allow only this type of editing in the document check box.
-
In the list of editing restrictions, select Filling in forms.
-
Under Start enforcement, click Yes, Start Enforcing Protection.
-
To assign a password to the document so that only reviewers who know the password can remove the protection, type a password in the Enter new password (optional) box, and then confirm the password.
Important: If you choose not to use a password, all reviewers can change your editing restrictions.
Unlock the form
-
On the Developer tab, in the Protect group, click Protect Document, and then click Restrict Formatting and Editing.
-
In the Protect Document task pane, click Stop Protection.
Note: If you used a password to add protection to the document, you need to type the password before you can stop the protection.
Download PC Repair Tool to quickly find & fix Windows errors automatically
With Microsoft Office applications, you can create a simple To Do list or make a checklist in Microsoft Word and check off items electronically. The underlying trick for doing so is very simple and takes not more than few minutes. The result looks something like the illustration below.
Having said that, if you just need a checklist that you print, you can make a list where each item has a box that you check off on paper.
You can use boxes that you can check off in Word. For doing so, you first have to insert the check box form field into your document. Here’s how you do it!
Open a Word document, go to the “Insert” tab and choose “Symbol”
Next, from the symbol drop down list choose “More symbols”.

Then, the “Symbol” window shows up. Here you can select the check box and click on the “Insert” button. This ends part 1. I am saying so because in this part you cannot check the box. You need to do a bit of more manual work. That completes the second part.
Activate the Developer tab
Developer tab in the ‘Ribbon menu’ of Word supplies the option for checking the box in Word. Use the following procedure for it.
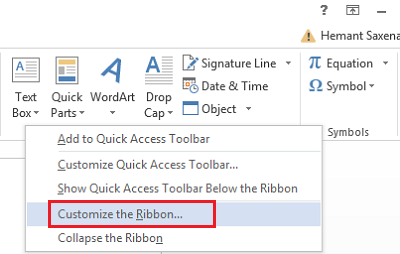
Assuming you have the Word file opened, right-click anywhere on the Ribbon and choose the “Customize Ribbon” option.
Next, select the “Developer” option within the “Customize the Ribbon” drop-down list and hit “OK”.
You should find the Developer tab added to the ribbon. Click on the “Developer” tab and use a customized bulleted list or a content control to insert checkboxes into a Word document.

Double click against any to-do/don’t-dos, followed by a single left-click to check the box.
That’s it!
Please note, that if you cannot check off an item electronically, it might be formatted for printing only or the document might be locked.
How do you create a checklist in Word?
To create a checklist in Microsoft Word, you can go through the aforementioned steps. Although there is no direct option, you need to create the checkboxes by adding regular boxes. For that, you can take the help of the Symbol option. Here you can find several symbols, including the checkbox.
How do you make a checklist column in Word?
To make a checklist column in Word, you need to insert the checkboxes first. To do that, follow the above-mentioned steps. Then, you can place all the checkboxes in order and use the bullet point option. Alternatively, you can insert a table and place one checkbox in one column.
See this post if you would like to know how to create a Checklist in Excel.
A post-graduate in Biotechnology, Hemant switched gears to writing about Microsoft technologies and has been a contributor to TheWindowsClub since then. When he is not working, you can usually find him out traveling to different places or indulging himself in binge-watching.

on
May 18, 2019, 8:16 AM PDT
Two ways to add checkbox controls to a Word document
Learn how to use a customized bulleted list or a content control to insert checkboxes into a Microsoft Word document, depending on how you are going to use it.
We may be compensated by vendors who appear on this page through methods such as affiliate links or sponsored partnerships. This may influence how and where their products appear on our site, but vendors cannot pay to influence the content of our reviews. For more info, visit our Terms of Use page.
Everyone’s familiar with the checkbox–it’s a small square that displays a checkmark, an X, or remains blank, depending on its state. These controls are great for automating all sorts of lists and choices. You can print a form and manually check off each item or update them electronically with a single click. In this article, I’ll show you two ways to add checkboxes to a simple To-Do list–how you’ll use them determines which method you’ll use. First, we’ll add a checkbox symbol that you can print. Then, we’ll add a checkbox control that you can update onscreen by clicking.
I’m using Office 365 Word (desktop) on a Windows 10 64-bit system, but you can use earlier versions of Word. You can create your own To-Do list or download the demonstration .docx or .doc files. The browser edition will display both types of checkboxes, but you can’t add either in the browser. Nor can you click the content control in the browser to change its state.
LEARN MORE: Office 365 Consumer pricing and features
How to add a checkbox symbol that you can print
If you plan to print your list and use a writing utensil to mark each item as you complete it, you can add checkbox controls via a bullet list, as follows:
- Select the list–the textual list of items.
- Click the Home tab if necessary.
- Click the Bullets dropdown in the Paragraph group. (Don’t just click the option–doing so will automatically insert the default bullet.)
- Choose Define New Bullet from the dropdown list (Figure A).
- In the resulting dialog box, click Symbol.
- Choose Wingdings from the Font dropdown.
- Select the checkbox in the first row (Figure B). The symbol might be in a different spot in your list.
- Click OK twice.
Word will replace the default bullet character with the selected checkbox (Figure C). This particular symbol won’t let you check anything in the actual document, but it’s great for printing.
Figure A
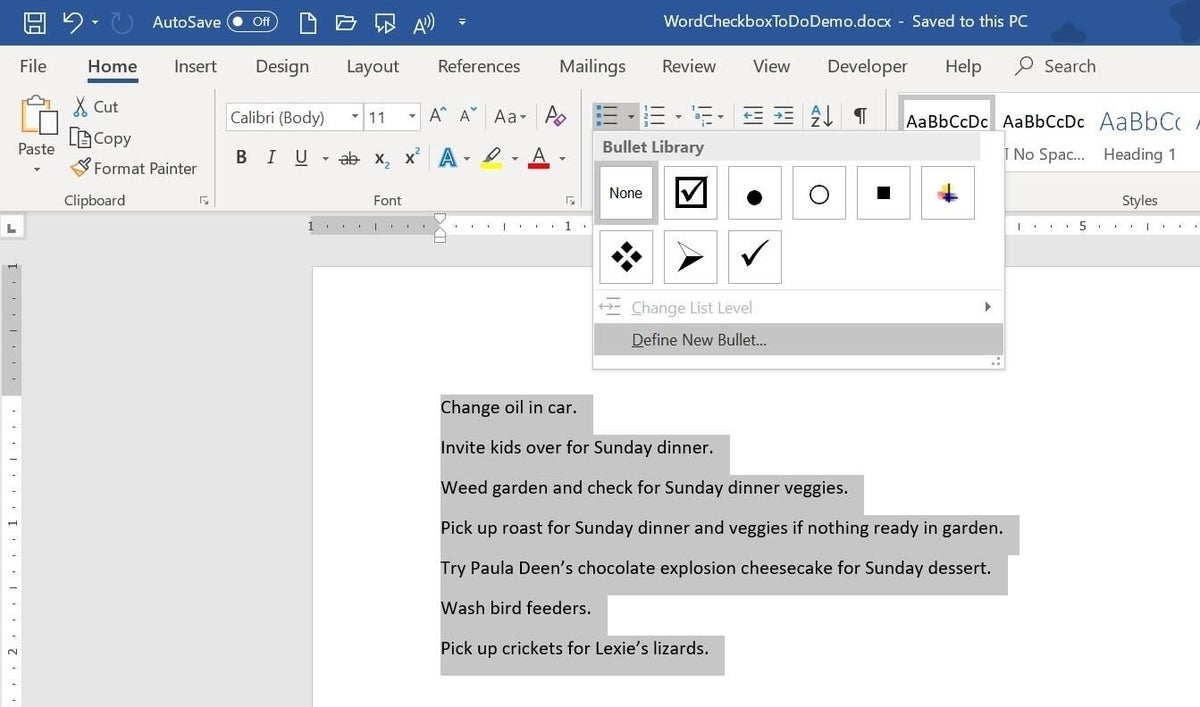
Figure B
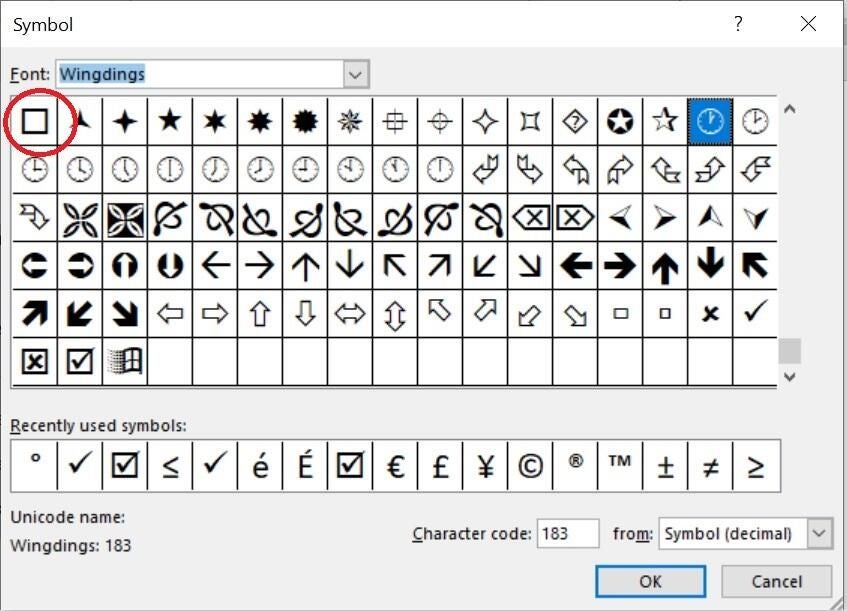
Figure C

SEE: Cost comparison calculator: G Suite vs. Office 365 (Tech Pro Research)
How to add a checkbox control that you can update onscreen
If you want to check or uncheck the checkbox with a simple click within the Word document, use a content control. These controls are available on the Developer tab, which isn’t visible by default. To display the Developer tab, if necessary, do the following:
- Right-click anywhere on the ribbon’s background and choose Customize the Ribbon.
- Check the Developer item in the list to the right.
- Click OK.
Once the Developer tab is available, you can add a checkbox content control, as follows:
- Position the cursor where you want the first control. (You can’t enter multiple controls.)
- Click the Developer tab.
- Click the Checkbox content control in the Controls group.
Figure D shows a completed list. Unfortunately, you can’t insert content controls to the entire group of items, as a group, similar to the way you’d add bullets. You must insert each control individually. Selecting the checkbox content control toggles between checked and unchecked. Don’t limit checkboxes to just To-Do lists–anytime you have a two-state choice, consider using a checkbox.
Figure D

Send me your question about Office
I answer readers’ questions when I can, but there’s no guarantee. Don’t send files unless requested; initial requests for help that arrive with attached files will be deleted unread. You can send screenshots of your data to help clarify your question. When contacting me, be as specific as possible. For example, “Please troubleshoot my workbook and fix what’s wrong” probably won’t get a response, but “Can you tell me why this formula isn’t returning the expected results?” might. Please mention the app and version that you’re using. I’m not reimbursed by TechRepublic for my time or expertise when helping readers, nor do I ask for a fee from readers I help. You can contact me at susansalesharkins@gmail.com.
Editor’s note: This article has been updated, and we added a video tutorial.
Also See
-
How to add a drop-down list to an Excel cell
(TechRepublic) -
DevOps: A cheat sheet
(TechRepublic) -
20 pro tips to make Windows 10 work the way you want
(TechRepublic download) -
https://www.zdnet.com/article/microsoft-office-365-for-business-everything-you-need-to-know/System update policy template download
(Tech Pro Research) -
Microsoft Office 365 for business: Everything you need to know
(ZDNet) -
The 10 most important iPhone apps of all time
(Download.com) -
It takes work to keep your data private online. These apps can help
(CNET) -
Programming languages and developer career resources coverage
(TechRepublic on Flipboard)
-
Microsoft
-
Software
You may need to add check boxes in your Word document mainly for two reasons:
1) To create an electronic Form containing clickable checkboxes, which can be used to capture user feedback (like a survey); see the following example:

2) To create a printable checklist, containing a checkbox against each item in the document. See the following example:

Adding checkbox controls to create a electronic Form (Word 2007)
You can find the checkbox control on the Developer tab of the Ribbon menu.
Note: If you could not see the Developer tab on the Ribbon, you may need to enable it from Word Options. Read the following article to know how to enable it.
https://wordknowhow.wordpress.com/2013/12/04/how-to-enable-the-developer-tab-in-word/
- On the Ribbon, under the tab Developer, within the group Controls, click the icon Legacy Tools. A drop-down list appears, which contains two sections: Legacy Forms and ActiveX Controls. See below.
![]()

ActiveX Control checkbox
- Both the sections have check box controls. If you choose to use the checkbox control available under ActiveX Controls section, click the Checkbox (ActiveX Control) icon. Word creates something like the following. Notice that the control is in Design Mode. Design Mode option is activated within the group Controls.

If you deactivate the design mode, the checkbox becomes clickable and you can use it to create a Form.
i. Right-click the checkbox control and select option Properties from the right-click menu.
ii. On the Properties sheet, under the tab Alphabetic, against the row Caption, enter a caption for the checkbox. Alternatively, you can delete the default caption to retain only the checkbox. You can even insert a picture instead by clicking the row named Picture from the Properties sheet.
Note: The ActiveX Control checkbox provides extended features as compared to the Legacy checkbox.
iii. You may find it difficult to format ActiveX checkbox controls if you are not in Design Mode. Switch to design mode by clicking the control. Now, place mouse cursor in front of the control and then use the TAB key to move it horizontally, SHIFT+TAB to move it in the opposite direction, press ENTER key to move it a step down, and press the Backspace key to bring it a level up.
Note: You can easily delete, resize, etc. in Design Mode.
Legacy check box
- If you choose to use a legacy checkbox, click the check box icon under the section Legacy Forms from the Legacy Tools drop-down list. Word creates a shaded square box, which is unchecked by default. Double-click the box to open the Check Box Form Field Options window. Here, you can control the checkbox size, default value, etc.
Note: Interestingly, the legacy check boxes cannot be used readily until you apply protection to your document. By default, Word adds a shaded checkbox. If you wish you can remove the shading by simply clicking the Form Field Shading icon available under the Legacy Tools list. See below image.
Apply protection to your document
i. To apply protection to your document, under the tab Developer, within the group Protect, click Protect Document. From the drop-down menu, click option Restrict Formatting and Editing.
ii. On the Restrict Formatting and Editing pane, under the section Editing Restriction, enable option “Allow only this type of editing in the document” and then select the option “Filling in forms” from the list box.
iii. Now, under the section Start Enforcement, click the button Yes, Start Enforcing Protection. The Start Enforcing Protection dialog box appears, where you need to set a password to protect your document.
Once protection is enforced, you can select/deselect the check box. Remember that you cannot edit a protected document. Therefore, apply protection only after you are done with formatting the document. You can unprotect a document by clicking the Stop Protection button available at the bottom of the Restrict Formatting and Editing pane.
Creating a printable check list
It is easy to add checkboxes to a document to create a printable checklist document. There are many ways you can create check boxes in a word document.
Method 1: On the Word Ribbon menu, under the tab Developer, within the group Controls, click the Legacy Tools icon. From drop-down list, under the section Legacy Forms, click the Check Box Form Field icon. Word inserts a shaded check box. Click the Form Field Shading icon to remove shading around the checkbox. Now, you can copy and paste the same to create multiple checkboxes in your document.
Method 2: On the Word Ribbon menu, under the tab Insert, within the group Illustrations, click icon Shapes. From the drop-down list, click the shape Rectangle. Change its dimensions to make it a perfect square. Copy and paste the same to create multiple checkboxes.
Method 3: On the Word Ribbon menu, under the tab Insert, within the group Symbols, click icon Symbol. From bottom of the drop-down list, select option More Symbols. From the Symbols window, select a square shape and then click Insert. Word inserts a square at the cursor position.