
Word for Microsoft 365 Word 2021 Word 2019 Word 2016 Word 2013 Word 2010 Word Starter 2010 More…Less
You can make a chart in Word. If you have lots of data to chart, create your chart in Excel, and then copy from Excel to another Office program. This is also the best way if your data changes regularly and you want your chart to always reflect the latest numbers. In that case, when you copy the chart, keep it linked to the original Excel file.
To create a simple chart from scratch in Word, click Insert > Chart, and pick the chart you want.
-
Click Insert > Chart.

-
Click the chart type and then double-click the chart you want.
-
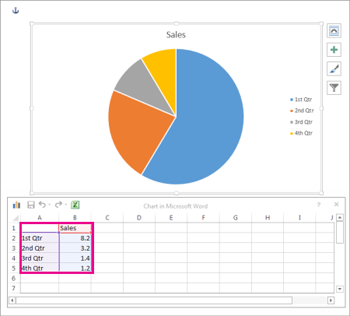
In the spreadsheet that appears, replace the default data with your own information.
-
When you’ve finished, close the spreadsheet.
-
If you want, use the Layout Options button
to arrange the chart and text in your document.
 to arrange the chart and text in your document.
You can make a chart in Word or Excel. If you have lots of data to chart, create your chart in Excel, and then copy from Excel to another Office program. This is also the best way if your data changes regularly and you want your chart to always reflect the latest numbers. In that case, when you copy the chart, keep it linked to the original Excel file.
To create a simple chart from scratch in Word, click Insert > Chart and pick the chart you want.
-
Click Insert > Chart.
-
Click the chart type and then double-click the chart you want.
-
In the spreadsheet that appears, replace the default data with your own information.
-
When you’ve finished, close the spreadsheet.
-
If you want, use the Layout Options button
to arrange the chart and text in your document.
Important:
Office 2010 is no longer supported. Upgrade to Microsoft 365 to work anywhere from any device and continue to receive support.
Upgrade now
In Microsoft Word 2010, you can insert many kinds of data charts and graphs, such as column charts, line graphs, pie charts, bar charts, area graphs, scatter graphs, stock charts, surface charts, doughnut charts, bubble graphs, and radar graphs.
Notes:
-
Don’t see the chart that you want in this article? For more information about the variety of graphs and charts you can use, see Available chart types.
-
Want to create an organization chart? For more information about how to create organization charts, see Create an organization chart.
-
If Microsoft Excel 2010 isn’t installed on your computer, you will not be able to take advantage of the advanced data charting capabilities in the Microsoft Office 2010. Instead, when you create a new data chart in Word 2010, Microsoft Graph opens.
How?
|
|
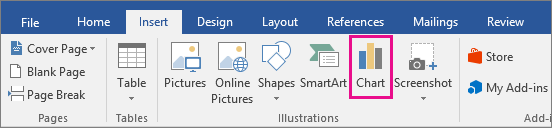
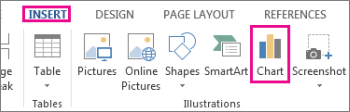
On the Insert tab, in the Illustrations group, click Chart.
|

|
|
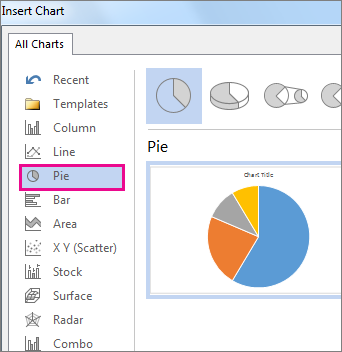
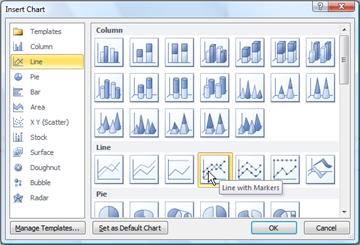
In the Insert Chart dialog box, click the arrows to scroll through the chart types. Select the type of chart that you want and then click OK.
When you rest the mouse pointer over any chart type, a ScreenTip displays its name. |

|
|
Edit the data in Excel 2010. When you are finished editing your data, you can close Excel.
Sample data in an Excel worksheet |

Tips
-
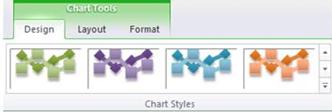
To get a good idea of what you can add to or change in your chart, under Chart Tools, click the Design, Layout, and Format tabs, and then explore the groups and options that are provided on each tab.
Note: If you don’t see the Chart Tools, make sure that you click anywhere inside the chart to activate it.
-
You can also access design, layout, and formatting features that are available for specific chart elements (such as chart axes or the legend) by right-clicking those chart elements.
More information
-
To learn about the available chart types, see Available chart types.
-
To edit data in your chart, see Change the data in an existing chart.
Top of Page
See also
Present data in a chart
Need more help?
Want more options?
Explore subscription benefits, browse training courses, learn how to secure your device, and more.
Communities help you ask and answer questions, give feedback, and hear from experts with rich knowledge.
Plot a course for interesting and inventive new ways to share your data—find customizable chart design templates that’ll take your visuals up a level. Whether you use charts in research, in presentations, or to keep track of personal projects, there’s a chart template that’ll help you get started.

Document your data easily with customizable chart designs
Charts serve a lot of purposes: To display data, to keep track of plans and goals, to impart and organize information. Charts can also be kind of a snooze. But they don’t have to be. Start all your chart plotting with a designer-created customizable template. Charts aren’t strangers to presentations; businesses of all sizes often find themselves in need of audience-ready charts. Starting with a template is a great way to get clear, quality charts every time. Charts can be a great way to share data quickly and visually at a glance. Try them out in resumes, sales materials, and anywhere else high-level data needs to be organized.

Charts offer a concise and visually appealing way to present numeric information. This tutorial explains the basics of creating and customizing charts in Microsoft Word. We’ll cover five topics:
- How to insert a chart
- How to update existing data in a chart
- How to resize a chart
- How to reposition a chart
- How to change chart colors
These steps apply to all seventeen of Word’s prebuilt chart types:
| Column | Area | Surface | Histogram | Combo |
| Line | X Y (Scatter) | Radar | Box & Whisker | |
| Pie | Map | Treemap | Waterfall | |
| Bar | Stock | Sunburst | Funnel |
Important Note: Word provides many ways to customize charts—many more than can reasonably be covered in one tutorial. So, this tutorial presents the basic methods I believe will be most useful for the majority of users.
Before we begin…
What about Figures and Graphs?
In the writing world, charts and graphs fall under the umbrella term figures, which also includes photos, drawings, maps, and musical scores.
Graphs are generally considered a type of chart. Therefore, the term chart is used throughout this tutorial. However, all the steps shown here also apply to visuals typically considered to be graphs, such as line graphs.
This tutorial is also available as a YouTube video showing all the steps in real time.
Watch more than 150 other writing-related software tutorials on my YouTube channel.
The images below are from Word for Microsoft 365. The steps are the same in Word 2021, Word 2019, Word 2016, and Word 2013. However, your interface may look slightly different in those older versions of the software.
How to Insert a Chart
- Place your cursor where you want to insert the chart.
- Select the Insert tab in the ribbon.

- Select the Chart button in the Illustrations group.

- Select a chart type from the left side of the Insert Chart dialog box.

Pro Tip: Hover your pointer over the example image in the center of the Insert Chart dialog box to see a larger example of the chosen chart type.
- Select a subtype of the selected chart.
The available subtypes will depend on the selected chart. Common charts such as pie charts and bar charts offer attractive 3-D options.

- Select the OK button to close the Insert Chart dialog box and insert the chart.

- Enter labels and numbers into the spreadsheet by typing over the example data. Add additional labels and numbers or delete the example data as necessary.

- Select the X to close the spreadsheet.

- (Optional Step) Select the Chart Elements button to the right of the chart if you want to add or remove the title, data labels, or the legend. (Click inside the border to select the chart if the right-side buttons are not visible.)

How to Update Existing Data in a Chart
- Right-click the chart.
- Select Edit Data from the shortcut menu.

Pro Tip: Select the arrow next to Edit Data and select Edit Data in Excel if you want to update your chart in Excel rather than Word’s spreadsheet.
- Edit your data in the spreadsheet (see figure 6).
- Select the X to close the spreadsheet and apply your changes (see figure 7).
How to Resize a Chart
Charts can be resized by dragging the border or by using exact dimensions (e.g., 3” x 4”).
Basic Method: Resize a Chart by Dragging the Border
- Click inside the border to reveal the resizing handles.

- Click and hold one of the handles as you drag the chart to the appropriate size.
-
- The corner handles provide movement in all directions.
- The side handles provide horizontal movement.
- The top and bottom handles provide vertical movement.
Advanced Method: Resize a Chart to Exact Dimensions
- Click inside the border to select the chart.
- Select the Layout Options button to the right of the chart.

- Select See more from the Layout Options menu.

- Select the Size tab in the Layout dialog box.

- (Optional Step) Select Lock aspect ratio if you want to maintain the current shape.

- Enter the dimensions in the Height and Width boxes. If you selected Lock aspect ratio, you only have to enter one of these numbers.

- Select the OK button to close the Layout dialog box and apply your new dimensions.

How to Reposition a Chart
You can customize your chart’s placement on the page by changing its alignment and text wrapping. Text wrapping determines how charts and other figures are positioned in relation to the surrounding text.
- Select the Home tab in the ribbon.

- Click inside the border to select the chart.
- Select the Align Left, Center, or Align Right button in the Paragraph group.

- (Optional Step) Select the Layout Options button to the right of the chart for text wrapping options.

Your position changes will be applied immediately.
How to Change Chart Colors
You can choose a prebuilt color palette for your whole chart or select custom colors for individual elements.
See the bonus section below for information about using RGB, HSL, and Hex color codes.
Basic Method: Choose a Prebuilt Color Palette
- Click inside the border to select the chart.
- Select the Chart Styles button to the right of the chart.

- Select the Color tab in the shortcut menu.

- Select a color palette.

Your new color palette will be applied immediately.
Advanced Method: Choose Custom Colors
- Select and then right-click the individual chart element you want to change.
- Select the Fill button in the shortcut menu.

- Select a color from the drop-down menu or choose More Fill Colors for additional options.

Your new color will be applied immediately.
Bonus Section: How to Use RGB, HSL, and Hex Color Codes in a Chart
Word lets you use RGB (Red, Green, Blue) and HSL (Hue, Saturation, Lightness) color codes in your charts. In addition, you can use Hex color codes if you are using an updated version of Word for Microsoft 365 (formerly Office 365).
- Select and then right-click the individual chart element you want to change.
- Select the Fill button in the shortcut menu (see figure 23).
- Select More Fill Colors from the drop-down menu.

- Select the Custom tab in the Colors dialog box.

- Select RGB or HSL from the Color model menu or enter a code in the Hex box.

- Enter your RGB or HSL code into the appropriate boxes. (Skip this step if you are using a Hex code.)

- Select the OK button to close the Colors dialog box and apply your color change.

Related Resources
Three Ways to Insert Tables in Microsoft Word
How to Save Tables and Figures as Images in Microsoft Word (PC & Mac)
How to Update Table and Figure Numbers in Microsoft Word
How to Change the Style of Table Titles and Figure Captions in Microsoft Word
How to Create and Update a List of Tables or Figures in Microsoft Word
How to Write Figure Captions for Graphs, Charts, Photos, Drawings, and Maps
How to Write Table Titles
How to Reference Tables and Figures in Text
Updated November 27, 2022
Blog
Charts are used by various sectors to represent their data using diagrams, shapes, and other visual representations. They help simplify each piece of data making it much easier for readers to understand and break down each piece of information.

Table of Content
- Build a Chart Template for Microsoft Word – Step-by-Step Instructions
- Chart Templates & Examples in Microsoft Word
- Bridal Shower Seating Chart Template in Microsoft Word
- Blank Wedding Seating Chart Template in Microsoft Word
- Gadget Comparison Chart Template in Microsoft Word
- Daily Chore Chart Template in Microsoft Word
- Hierarchy Chart Template in Microsoft Word
- Modern Family Tree Chart Template
- Sample Organizational Chart Template
- Printable Wedding Seating Chart Template
- Project Management Gantt Chart Template
- Fintech Startup Organizational Chart Template
- Day to Day Product Growth Chart Template
- Funnel Sales Bar Chart Template
- Editable Math Multiplication Chart
- Printable Multiplication Chart Template
- Sample Flow Chart Template
- School Organizational Chart Template
- Business Organizational Chart Template
- Comparison Chart Template
- Food Chart Creative Template
- Modern Conversion Chart Template
- Data Warehouse Organizational Chart Template
- Simple Weekly Gantt Chart Template
- Circular Seating Arrangement Classroom Chart Template
- FAQs
Build a Chart Template for Microsoft Word – Step-by-Step Instructions
Microsoft Word (MS WORD, Word) is a word processing program that allows its users to create documents such as charts. Learn how to prepare one by following the step-by-step procedure below.
Step 1: Open Microsoft Word

First, make sure you have installed Microsoft Word software on your computer as you will be editing the template in this application.
Step 2: Look for Chart Templates (Option 1)

The next step is to look for chart templates on Template.net. You can find lots of templates to choose from.
Step 3: Use the Search Text Box (Option 2)

You can also simply use the search text box by typing the keywords. This is particularly useful when you have a specific chart template in mind.
Step 4: Select a Chart Template

Pick out a chart template you can edit on Word. Just click on the image to gain better access.
Step 5: MS Word File Format

Make sure to select MS Word as the File Format before downloading the template.
Step 6: Open the File to Start Editing

After you have downloaded the template, open the file to start editing.
Step 7: Add a Header or a Title

To start, first, you need to think of the title or header. This is normally printed on the uppermost section of the document with a slightly bigger font size than the rest. You can as well add a little logo or whichever design you like.
Step 8: Add the Rows and Columns

Charts consist of various design elements so you will need to add this before the data. So in this example, determine how many rows and columns you will need for the figures, notes, or other relevant information.
Step 9: Write Down the Data

The next step is to write down the data on the chart template. In this case, data is written inside each row and column.
Step 10: Save the Template

Once you have finished your work, you have the option to save the file on your computer or print out the document. Click on the File Tab for these options.
Chart Templates & Examples in Microsoft Word
Charts are presented in many different ways and are used by various industries as a means to represent or organize data. That said, here are several chart templates that you can use as inspiration.
Bridal Shower Seating Chart Template in Microsoft Word

This bridal shower seating chart will help you organize seating arrangements during events like bridal showers. You can definitely make sure that everyone will have a place to seat during the party.
Blank Wedding Seating Chart Template in Microsoft Word

It is important that everyone has a place to seat during a wedding ceremony or reception. Therefore this blank wedding seating chart will help event planners organize this particular seating arrangement.
Gadget Comparison Chart Template in Microsoft Word

This gadget comparison chart works for those who are in the mobile-selling business or for those mobile phone enthusiasts who love collecting different types of phones.
Daily Chore Chart Template in Microsoft Word

Organize your chores with this daily chore chart. You will be able to manage each task more efficiently with this document.
Hierarchy Chart Template in Microsoft Word

Uses this hierarchy chart template to explain the rank and position of each individual who plays a role in an organization. This material can be used in schools or business organizations.
Modern Family Tree Chart Template

Download
Sample Organizational Chart Template

Download
Printable Wedding Seating Chart Template

Download
Project Management Gantt Chart Template

Download
Fintech Startup Organizational Chart Template

Download
Day to Day Product Growth Chart Template

Download
Funnel Sales Bar Chart Template

Download
Editable Math Multiplication Chart

Download
Printable Multiplication Chart Template

Download
Sample Flow Chart Template

Download
School Organizational Chart Template

Download
Business Organizational Chart Template

Download
Comparison Chart Template

Download
Food Chart Creative Template

Download
Modern Conversion Chart Template

Download
Data Warehouse Organizational Chart Template

Download
Simple Weekly Gantt Chart Template

Download
Circular Seating Arrangement Classroom Chart Template

Download
FAQs
Is there a chart template in Word?
Yes, there is a chart template in Word, however, you have more design options in Template.net.
What is a chart template?
This a pre-designed template that you can further customize to meet your requirements.
How do you create a chart?
You can create a chart by using the templates from Template.net and following the steps in the article.
More in Blog
| Organizational Chart Template — 17+ Free Sample, Example, Format Download! | 50+ Flow Chart Templates |
| 42+ Excel Chart Templates | FREE 40+ Flow Chart Templates in MS Word | PDF | Excel | PSD | AI | EPS |
| Gantt Chart Template — 9+ Free Sample,Example, Format Download! | 24+ Seating Chart Templates — DOC, PDF |
| 38+ Wedding Seating Chart Templates — PDF, DOC, PSD | Blank Chart Template — 17+ Free PSD, Vector EPS, Word, PDF Format Download |
| 7+ Kids Chore Chart Templates | Blood Pressure Chart Template — 36+ Free Word, Excel, PDF Format Download! |
| 6 Sample Bubble Chart Templates to Representing Your Data | Chore Chart Template — 15+ Free Word, Excel, PDF Format Download! |

Sometimes documents you’re authoring can benefit from an illustrative chart. Rather than taking the time to set up a chart in another application and embedding it or copying and pasting it into Microsoft Word, you can use the built-in chart feature.
RELATED: How to Link or Embed an Excel Worksheet in a Word Document
Create a Chart in Word
You might be creating a company report, business proposal, or college essay where a data-filled visual is an ideal addition.
Place your cursor where you want the chart in your Word document. Then, go to the Insert tab and click “Chart” in the Illustrations section of the ribbon.

Pick the type of chart you want to add on the left and the style on the right. If you’re familiar with the chart options in Excel, you can choose from the same types in Word like bar, column, pie, line, and many others. Click “OK” to insert the chart.
Once you insert the chart, an Excel spreadsheet will open. The sheet contains sample data to get you started and is a stripped-down version of Excel without tabs or a ribbon.
You can edit the data in the spreadsheet to include your own or copy and paste the data from another spot into the attached sheet. You’ll then see the chart in Word immediately update with your changes.
RELATED: How to Choose a Chart to Fit Your Data in Microsoft Excel
Update the Chart Data
Anytime you want to update the data for the chart, you can do so by heading to the Chart Design tab.
Click the drop-down arrow for Edit Data. Select “Edit Data” to display the small spreadsheet you had when you created the chart, or select “Edit Data in Excel” to open the sheet in a standard Excel window with tabs and a ribbon.
Customize a Chart in Word
Once you insert the chart into Word with the data you want, you can make some customizations. You can add a title, adjust the colors, pick a theme, include a legend, and more. Again, if you’re familiar with customizing charts in Excel, you’ll recognize the below options.
RELATED: How to Create and Customize a Funnel Chart in Microsoft Excel
Use the Chart Design Tab
Select the chart and go to the Chart Design tab. Starting on the left side of the ribbon you can add, remove, and position chart elements, change the layout, pick new colors, and select a style.
On the right side of the Chart Design ribbon, you have an option for Change Chart Type. If you believe a different type of graph would work better with your data, you can select it here.
Open the Format Chart Sidebar
If you’d like to change the font, border, or specifics of the chart like a series or axis, you can use the Format Chart sidebar.
Right-click the chart and pick “Format Chart Area” or double-click the chart.
When the sidebar opens, click the arrow next to Chart Options to select a part of the chart to adjust.
Use the tabs at the top of the sidebar for fill and line colors, effects, and properties. These tabs change depending on the chart area you select in the drop-down list.
Use the Floating Buttons on Windows
If you’re using Word on Windows, you also have floating buttons for quick changes to your chart. Select the graph, and these will display on the right side.
You can then change the Layout Options for the chart’s placement within the text. You can also use the Chart Elements, Chart Styles, and Chart Filters buttons to adjust items on the chart, choose a color scheme, and apply filters.
By creating a chart directly in Microsoft Word, you can save yourself a bit of time. This is especially handy if you’re using a small amount of data that’s beneficial to your Word document.
If you’re interested in other ways to use charts in your documents, take a look at how to create a flowchart in Word.
READ NEXT
- › How to Remove Borders in Microsoft Word
- › Google Chrome Is Getting Faster
- › The New NVIDIA GeForce RTX 4070 Is Like an RTX 3080 for $599
- › Expand Your Tech Career Skills With Courses From Udemy
- › BLUETTI Slashed Hundreds off Its Best Power Stations for Easter Sale
- › How to Adjust and Change Discord Fonts
- › Mozilla Wants Your Feature Suggestions for Thunderbird
MS Word
How to Make Letterhead in Microsoft Word
![]()
Published
1 year ago
on
November 18, 2021

How to make a letterhead in Word correctly and neatly is actually easy, but surely there are still many of you who don’t know how to make it.
In an official letter, of course, there is a letterhead and there is always a line at the bottom right. Well, it turned out to be quite easy to make you know.
Apart from being the introduction to a letter, letterhead is also commonly used as a place to write the identity of the letter, such as the identity of the sender and recipient.
For those of you who want to know how to make it, here we explain in full the steps to make a letterhead in Word for you.
HOW TO MAKE LETTERHEAD IN WORD
You should know how to make a letterhead in Word this time, guys, especially when you want to send letters between agencies.
Although not all agencies use it, it doesn’t hurt you to try and find out how to make this letterhead, here are the steps!
- First, open your Word.
- Place the cursor at the back of the last word of the letterhead
- Then select the menu Borders – Borders and Shading.
- After the border menu appears, all you have to do is select the line you want on the menu with a sign like this.
Don’t rush to click Ok, because there’s one more thing you have to do to make it, guys. In the section below, remove it or set it like this to make the line only exist at the bottom, and then Ok.
Yeah, you have successfully drawn the line, Guys, it’s easy and fast, right, how to make a letterhead in Word?
You don’t need to be confused anymore about how to make it. For beginners, making letterhead or letterhead does sound quite difficult.
In fact, how to make a letterhead in Word is fairly easy as long as you already know the procedure. After all, the letterhead cannot be made casually because it is an official identity.
The letterhead contains the official identity of an institution, agency, or company. Well, you can create an official identity on the letterhead in Microsoft Word.
MS Word
How to Create a Background in Microsoft Word
![]()
Published
1 year ago
on
November 18, 2021

This way of making a background in Word aims to beautify the appearance of the document and make it more attractive Guys.
Usually, this is often found in the use of proposals, certificates, covers, and not infrequently in job applications.
With this function, how do you make it? It’s so easy. Yes, although there are several ways you can do this, you can follow this tutorial in full.
HOW TO MAKE A BACKGROUND IN WORD
This background function is very useful if you want to create a document that upholds the originality of Guys, for example, a thesis.
In addition to having to know how to create a table of contents in Microsoft Word, you may also need to know how to create a background in your thesis document, especially in showing the results of the tests you did.
How to make this background is also needed if you want to make an official letter from the agency. Besides needing to know how to make letterhead lines in Word, you also need to know how to add a background to the letter. Here’s how:
- The first thing you can do is change the color.
- Go to Design – Page Color – and immediately choose a color like this.
That is the easiest way and you can change the color according to your needs or tastes, guys. In addition to this method, you can also replace it with an image that you have.
The method is almost the same, guys, pay attention to the following rare:
- Go to the Design menu.
- Click Page Color.
- Select Fill Effects.
- Next, select the tab Picture – Select Picture – From a File.
- Then find the image you have and press Ok
- Finished! The background will change.
But, you also need to remember that both methods will not appear when you print either color or image.
To make it appear when printing, then you need to go to the File menu – Options – Display – and check the Print background colors and Image.
Well, after you go through these few steps, the background will change and also enter when you print, GRATZ!!! It’s easy to make a background in Word.
MS Word
How to Create a Signature in Word
![]()
Published
1 year ago
on
November 11, 2021

There are several ways to make a signature in Microsoft Word. And the method is really easy, just follow the steps below, guys!
Making a signature is really needed, especially in the digital era like now, right? Of course, you need a signature in your Word file, so from that our Team will provide this tutorial in detail.
Actually, you can also use a third application or additional devices such as pens that support your PC or laptop. But this is the easiest way without using other devices and applications Guys.
HOW TO CREATE A SIGNATURE IN WORD
You need to sign first, Guys on a piece of white paper. Make sure the paper is really white and the pen has colour ink that you can really see clearly.
This function is for later photos or files the resolution will be smaller Guys. Not only that, but the customized color saturation will also reduce the thickness of the pen color, you know.
So make sure you give a signature with a clear enough emphasis. Here’s how to create a signature in Word:
- Prepare a white paper with a signature on it. Photos using a smartphone or you can directly scan the signature through a scanner.

- You can reduce the resolution and crop it so that the photo focuses on the signature. For convenience, click the image file > Edit.
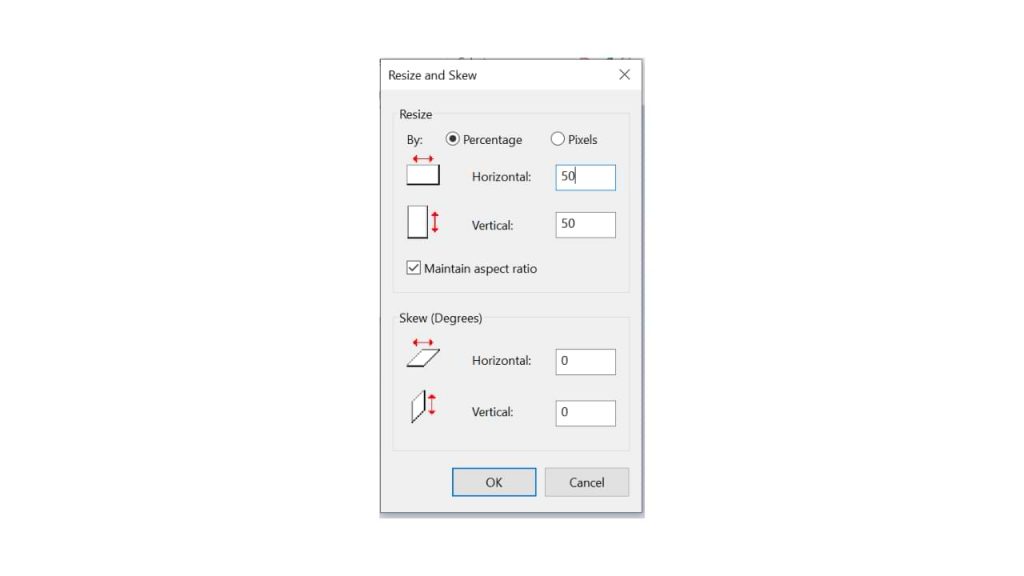
- On the Paint menu, you can resize to reduce the resolution. Choose 50 per cent resolution, fill Horizontal 50 and Vertical 50
- Hover over the exact position of the word you want to add a signature to. Click Insert > Picture > insert the previous signature image file.
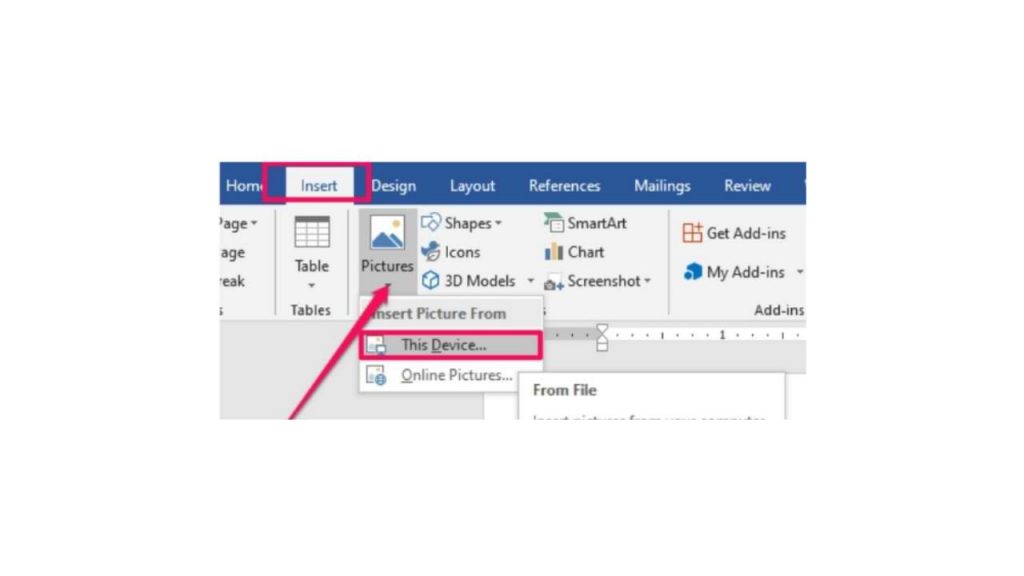
- After you insert the image, reduce the size again using the cursor for more precision.
- Double click on the image.
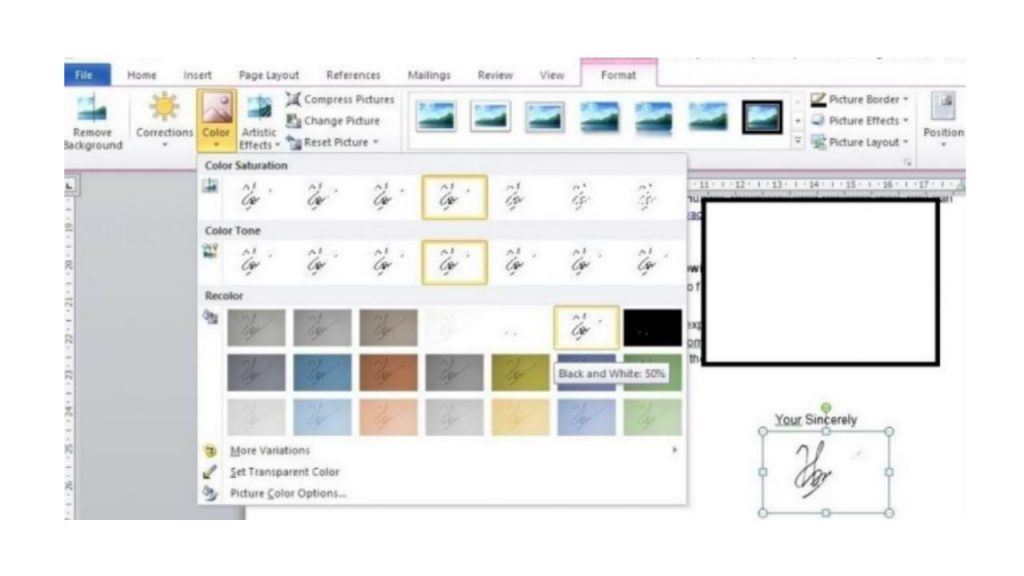
- On the Format menu, select the Color > Recolor > Black and White 50 per cent submenu.
- if your signature is not clear, double click on the image, select menu Correction > Brightness 0 per cent (Normal) Contrast 40 per cent.
You can change the last two steps depending on the contrast and color saturation you want, guys. So you can at the same time adjust the thickness of your signature that has entered the word, so guys.
I also said what Guys, how easy it is to make a signature in Microsoft Word! The most important thing is to make sure your signature is clear enough, and the photos are of high enough quality. Obviously, so that later your signature looks good, it doesn’t break.
Free Organizational Chart Templates for Microsoft Word
Smartsheet Contributor
Kate Eby
April 25, 2018
An organizational chart (also known as an organization chart, and often shortened to org chart) represents the roles and reporting structure in a team, department, division, or an entire company. Beyond corporate use, non-profits, schools, clubs, sports teams, or any other group that has a multi-level structure can also reap the benefits of an org chart. Download a free Microsoft Word organizational chart template and customize to fit your needs.
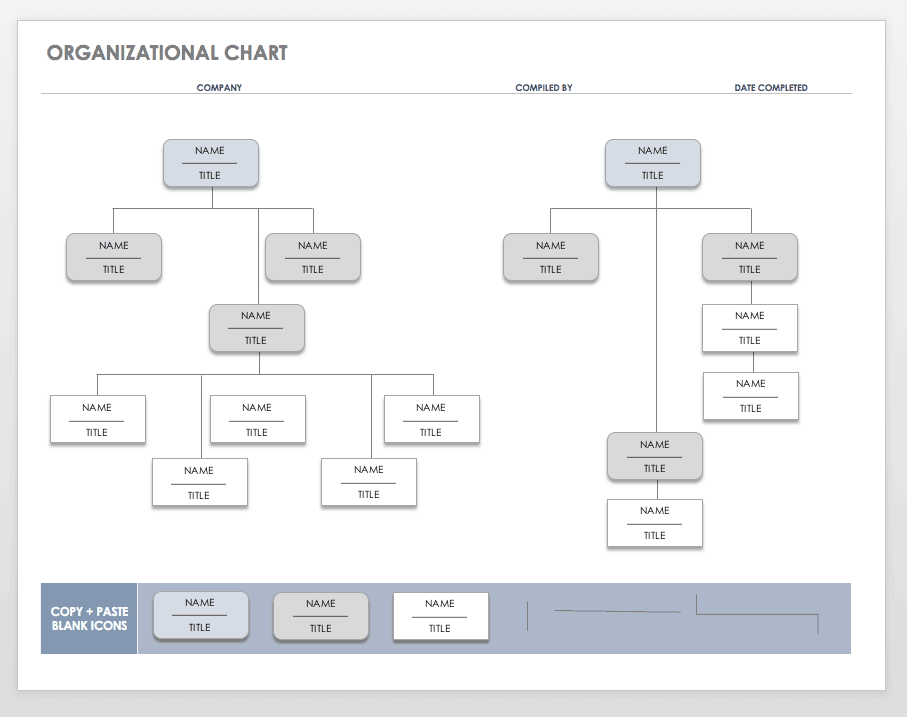
Hierarchical Organization Chart Template — Word
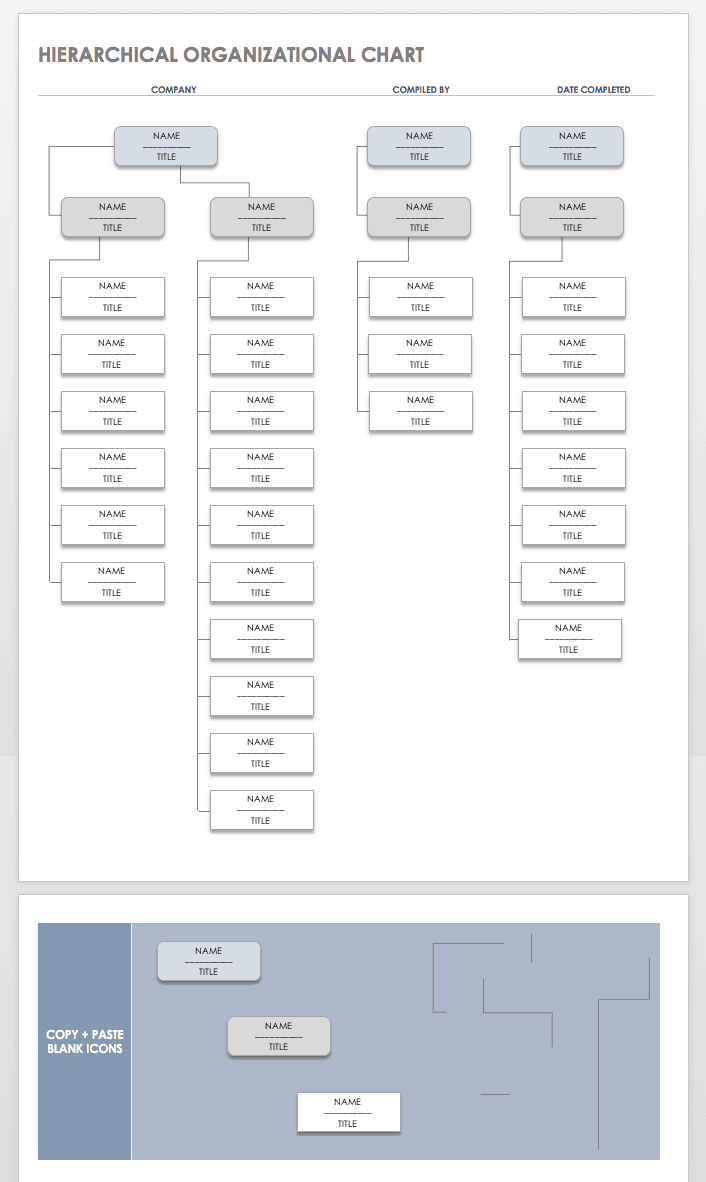
Most organizations are hierarchical, and therefore often require an org chart that displays reporting relationships up the chain. Use this template to map the structure of a company, division, team, or other group. There is space to fill in names and titles of all your team members so you create a view of who reports to whom.
Download Hierarchical Organization Chart Template — Word
Hierarchical Org Chart with Pictures Template — Word
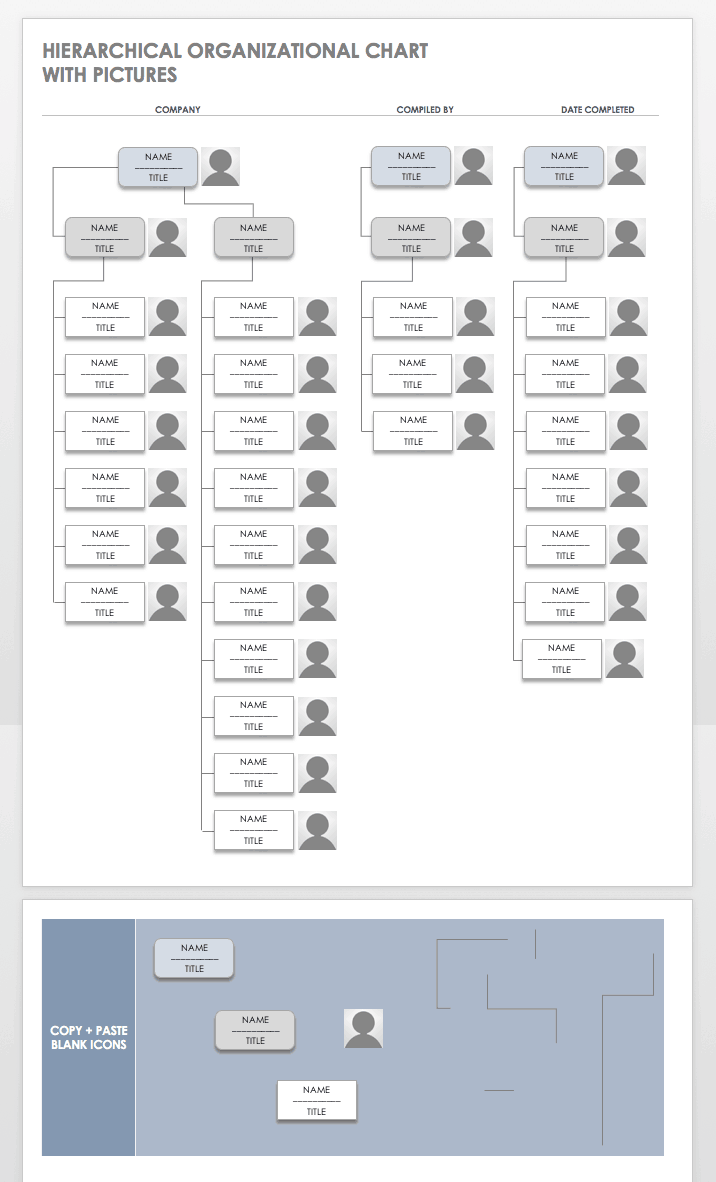
New employees can use an org chart to familiarize themselves with the structure of their team, department, or other parts of the company. As such, creating a chart that includes employee images can be a useful tool. This template is just like the hierarchical organization chart template above, but you can also add an image for each person listed.
Download Hierarchical Org Chart with Pictures Template — Word
Matrix Org Chart Template — Word
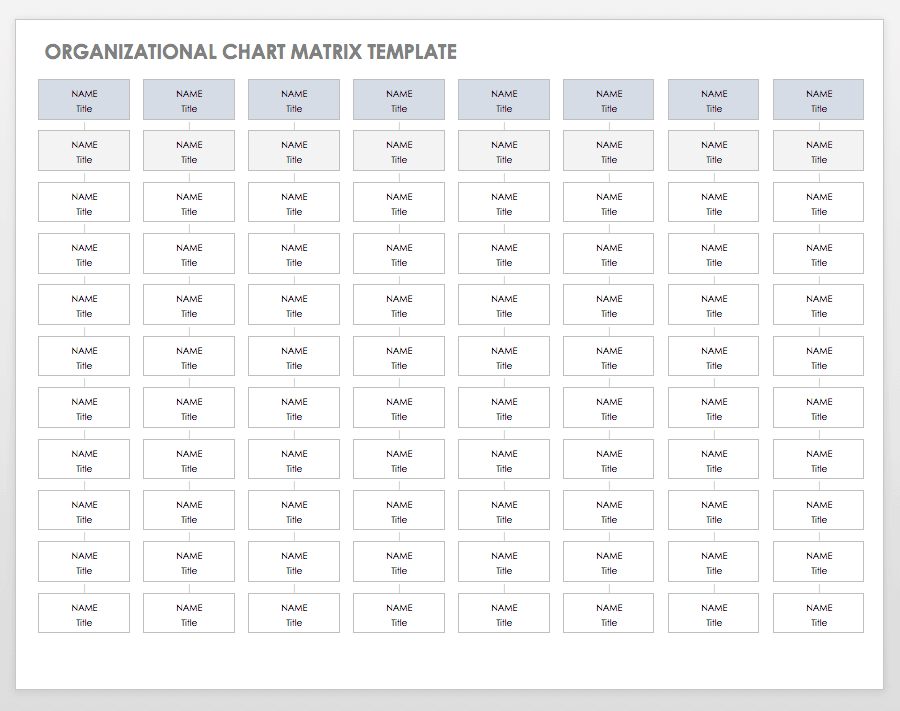
In a matrix organization, an employee can report to more than one boss. These organizations are often more fluid than hierarchical organizations because of the changing reporting relationships. Generally, a team member reports to a resource manager and a functional manager. As a contributor moves from project to project, their functional manager will change throughout their time at an organization. Use this template to easily track assignments and the reporting structure in a matrix structure.
Download Matrix Org Chart Template — Word
Horizontal Org Chart Template- Word
Process-focused organizations typically use a horizontal org chart to show the flow of work on a product or service as it moves through the process from one person to the next. Use this template to identify areas for improvement by following your company’s linear process. Simply fill in the space provided to track how products or services are created and who occupies each role.
Download Horizontal Org Chart Template — Word
Horizontal Org Chart with Pictures Template- Word

A horizontal org chart is a useful tool for illustrating the flow of work in process-focused organizations, and can also help managers identify room for improvement. This template is similar to the horizontal org chart template for Word listed above, and provides a space to add pictures of the team member working on the product or service at any given time in the process.
Download Horizontal Org Chart with Pictures Template — Word
Utility and Benefits of Creating an Org Chart in Microsoft Word
An engineer named Daniel McCallum and an artist named George Holt Henshaw created one of the first org charts to illustrate the hierarchy of the New York and Erie railroad. The chart showed not only the positions but also the locations where each person worked. The name “organization chart” started to be used in the first part of the 20th century, and it gained in popularity, eventually leading to the peak use of the term in the 1960s. According to the Google ngram viewer, the term remains a staple for describing reporting structures.
Today, company staff can use org charts to determine who reports to whom, positions within a company, or who is responsible for a particular task or project. However, you can also use org charts to help with the following:
- Planning Projects: Show the people available for deployment.
- Estimating Workload for Teams: Gauge your resource availability and appropriately assign work.
- Roadmapping Growth: Identify where you can create new positions.
- Finding and Mapping Inefficiencies in a Workplace: Illustrate areas of redundancy.
How To Create an Org Chart
Organizational charts can vary in size, so not every chart fits well into every format. For example, if you’re creating a chart with fewer elements, Microsoft Word is a good choice. On the other hand, large corporations with multiple layers who rely on a matrix org chart might find it easier to build using Microsoft Excel. If one of the above templates doesn’t suit your needs, you can also use one of the basic org chart formats in the SmartArt feature found in Microsoft Word. There are other tools available that you can use to create org charts, including Excel (which also supports Microsoft’s SmartArt feature), Visio, LucidChart, and other programs. To learn how to create an org chart and what should be included, read this article.
Make Better Decisions, Faster by Creating Org Charts in Smartsheet
Empower your people to go above and beyond with a flexible platform designed to match the needs of your team — and adapt as those needs change.
The Smartsheet platform makes it easy to plan, capture, manage, and report on work from anywhere, helping your team be more effective and get more done. Report on key metrics and get real-time visibility into work as it happens with roll-up reports, dashboards, and automated workflows built to keep your team connected and informed.
When teams have clarity into the work getting done, there’s no telling how much more they can accomplish in the same amount of time. Try Smartsheet for free, today.
How to Build Organizational Charts in Word
Microsoft Word makes the initial build of an organizational chart simple with SmartArt. The line between boxes is automatically aligned, and you can quickly create subordinates and assistants for any position.
Instructions
-
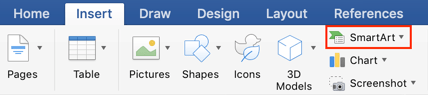
Insert SmartArt
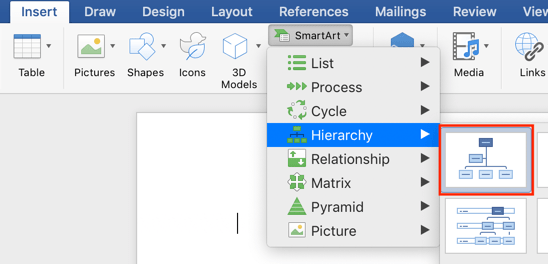
In the Insert tab, click on the SmartArt dropdown.
-
Choose a SmartArt style
Scroll down through the SmartArt options, and hover over the Hierarchy flyout.
-
Choose organizational structure
Choose a layout that works for you. Our favorite is the first one, Organizational Chart.
-
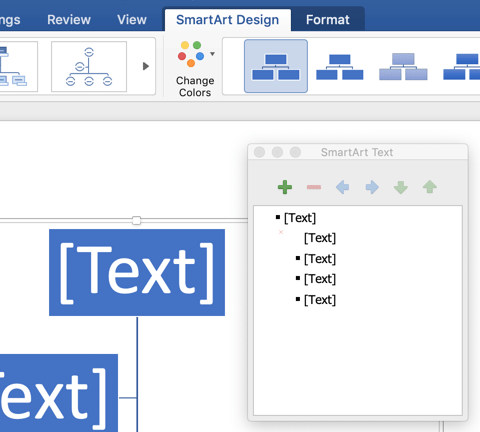
Add employee descriptions
Once you click the Organizational Chart image, Word will automatically generate the org chart template pictured below. The SmartArt Text dialog will also open up. You can edit the content in each of the boxes in the SmartArt Text box or directly in the boxes. To add another line of text within the box, hit enter.
-
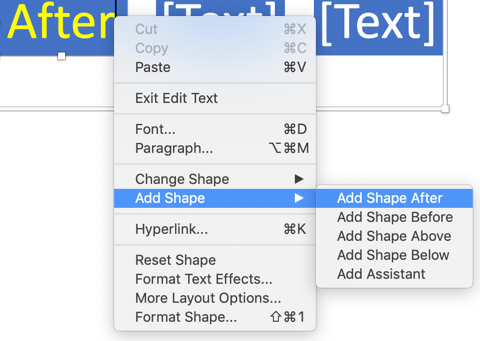
Add a new shape
Once you click the Organizational Chart image, Word will automatically generate the org chart template pictured below. The SmartArt Text dialog will also open up. You can edit the content in each of the boxes in the SmartArt Text box or directly in the boxes. To add another line of text within the box, hit enter.
-
Update organizational chart format
To update the format of your org chart right click (control + click on Macs) into the editing plane and click on the dropdown option Format Object.
-
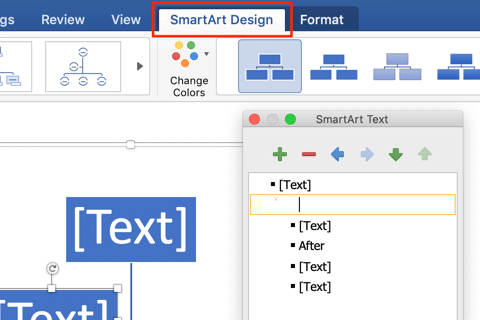
Additional organizational chart formatting options
Another way of editing the color and format of the org chart boxes is by clicking into the editing plane and choosing SmartArt Design in the top ribbon. You can edit the text within the org chart boxes by clicking into the org chart editing plane and choosing Format.
-
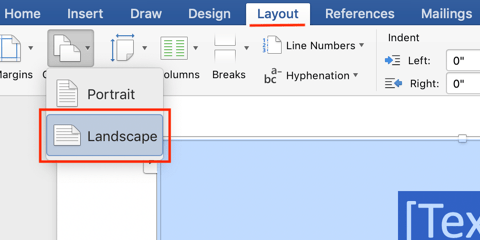
Change organizational chart layout
If you have more of a horizontal organizational structure, switch the orientation of your document to the landscape layout. To do this, first click the Layout tab. You can then click the Orientation button and select the Landscape option.
-
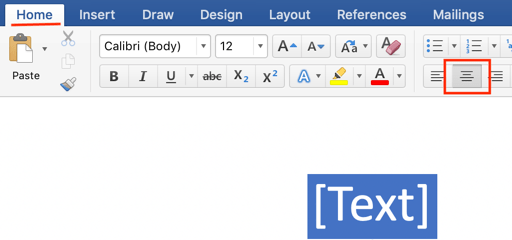
Center organizational chart
You can center your org chart with these steps. Click outside the SmartArt section to exit the editing function. Then click to the left of the org chart so your curser will be right before the org chart. Choose the Home tab, and then click the Center Text button.


Create an org chart that updates automatically
Build Org Chart in Pingboard
Creating an Org Chart in Word with Templated Information
-
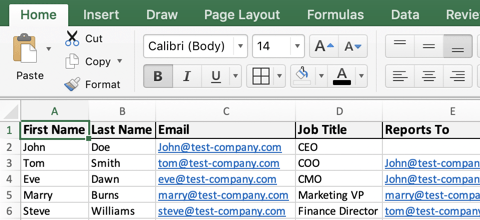
Download the organizational chart template for Excel
This file will contain all of the common data points found in org charts. You will be able to quickly add your staff info to this template and edit the information displayed in your org chart.
-
Add employees to the org chart template
Add data points for employees like first name, last name, and title. This org chart template can serve as the master document for your employee database.
-
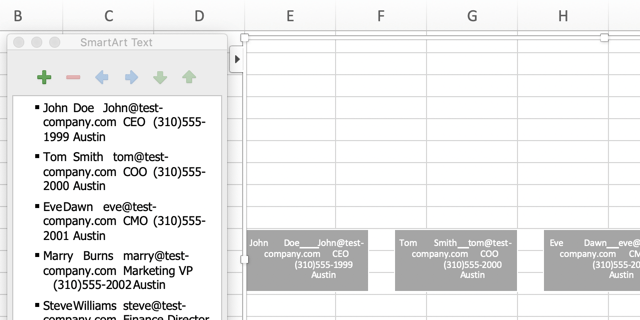
Copy/paste employee data into the org chart
Copy all of the data you’d like to display in your org chart, then clear the information in the SmartArt text box and paste in your employee data.
If there’s data in the employee database that you don’t want, you can hide columns before copying the data; this will exclude any unwanted employee data points.
-
Style employee data in the org chart
The information copied over from the org chart template will be in one long line. Click into each shape where the employee data was pasted and organize the information into separate lines.
To get your organizational structure to line up like the example below, start with the employee on the far right—or the most junior employee—and demote people until they’re under their manager

Free org chart templates for Word
Need some examples for different organizational structures in Word? Download templates for hierarchical, functional, matrix, and geographic org charts.
A flowchart or flow chart usually shows steps of the task, process, or workflow.
Word for Microsoft 365 provides many predefined SmartArt templates that you can use to make a flowchart,
including visually appealing basic flowchart templates with pictures. However, if you have a
process with a tangled flow or you need a custom layout, you can build a complex flowchart
in Word using rectangular, diamond, round, and other box types.

Managers, system analysts, programmers, and engineers adopted flowcharts as a mean of
communication for describing:
- Document workflows
- Data flows
- System operation flows
- Algorithms
No wonder that building blocks and rules of flow charts were standardized by the American
National Standards Institute (ANSI) and International Organization for Standards (ISO)
more than 50 years ago. The current standard defines the drawing direction from top to
bottom and left to right and specific symbols for different types of entities, actions,
etc. E.g.:
You can find all these shapes and other useful visual elements in the Shapes
dropdown list on the Insert tab of Microsoft Word.
The flowchart above is «cross-functional» and defines the responsibility zones of
different business units.
To create a diagram like the one above, follow the next steps (we recommend to check the
tip how to easily organize shapes in
Word,
which demonstrates easy tricks to simplify the drawing routine):
Add the drawing canvas
The drawing canvas is an essential element for the flow chart that you need to add before
adding the flow shapes because of flowchart connectors. You can add flowcharts connectors
only between the shapes within the drawing canvas:
1. On the Insert tab, in the Illustrations group, click
Shapes:

2. On the Shapes list, in the bottom, choose New Drawing
Canvas:

Word adds the new drawing canvas to your flow chart:

Draw the flowchart blocks
3. On the Shapes list, in the Flowchart group,
select the block you want to add:

4. To add text to the selected shape, just double-click in it and enter
the text.
Connect the flowchart blocks by connectors
5. To connect shapes, do the following:
- On the Insert tab, in the Illustrations group, click in the Shapes list and
then select one of the connectors in the Lines group:
- Select the beginning point on the border of the first shape (source) and the ending
point on the edge of the second shape (target):


For more customizations of shapes and connectors, see
how to change format of
diagram shapes in Word
and
how to change flowchart shapes
or
how to change connector
type for flowchart.
Top-to-down flowcharts are perfect for the Portrait page orientation in Microsoft word. For
the Landscape page orientation or the PowerPoint presentation, the preferred layout is
left-to-right. Sometimes left-to-right flow diagrams with delimited borders of organization unit
activities are called Swimlane diagrams or Swimlane flowcharts.
See also this tip in French:
Comment créer un organigramme des opérations dans Word.