
Document themes make it easy to coordinate colors, fonts, and graphic formatting effects across your Word, Excel, and PowerPoint documents and update them quickly. This video show you how-to change the entire theme, read below to just customize theme fonts, colors, or effects.

I want to
-
Choose a standard color theme
-
Create my own color theme
-
Change theme fonts
-
Change theme effects
-
Switch or remove a theme
-
Save a custom theme for reuse
-
Make my changes the new default theme
-
Learn more about themes
Choose a standard color theme
-
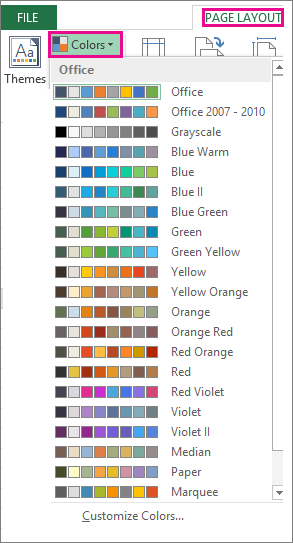
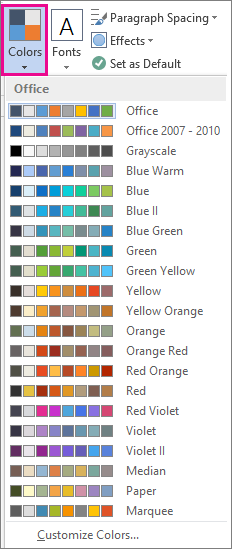
On the Page Layout tab in Excel or the Design tab in Word, click Colors, and pick the color set you want.
Excel

Word
Tip: The first group of colors are the colors in the current theme.
Create my own color theme
-
On the Page Layout tab in Excel or the Design tab in Word, click Colors, and then click Customize Colors.
-
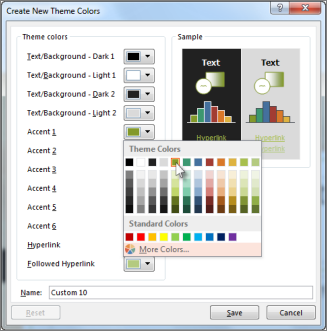
Click the button next to the theme color you want to change (for example, Accent 1 or Hyperlink), and then pick a color under Theme Colors.
To create your own color, click More Colors, and then pick a color on the Standard tab, or enter numbers or select a color on the Custom tab.
-
In the Sample pane, preview the changes that you made.
-
Repeat this for all the colors you want to change.
-
In the Name box, type a name for the new theme colors, and click Save.
Tip: To return to the original theme colors, click Reset before you click Save.
Change theme fonts
-
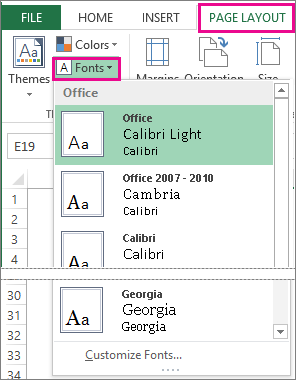
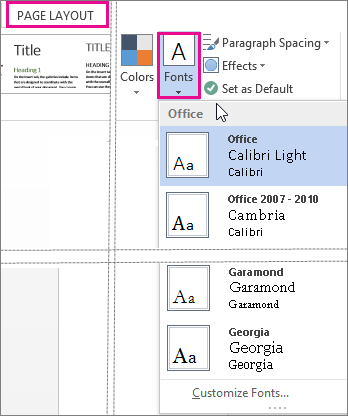
On the Page Layout tab in Excel or the Design tab in Word, click Fonts, and pick the font set you want.
Excel
Word
Tip: The top fonts are the fonts in the current theme.
-
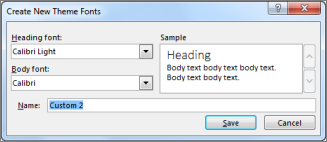
To create your own set of fonts, click Customize Fonts.
-
In the Create New Theme Fonts box, under the Heading font and Body font boxes, pick the fonts you want.
-
In the Name box, enter a name, and click Save.
Change theme effects
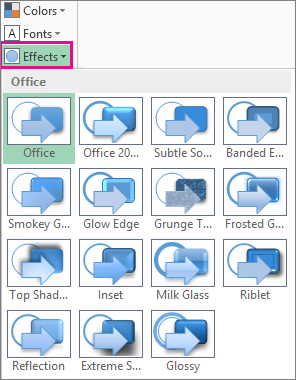
Theme effects include shadows, reflections, lines, fills, and more. While you cannot create your own set of theme effects, you can choose a set of effects that work for your document.
-
On the Page Layout tab in Excel or the Design tab in Word, click Effects.
. -
Select the set of effects that you want to use.
 .
.
Switch or remove a theme
-
To change themes, simply pick a different theme from the Themes menu. To return to the default theme, choose the Office theme.
-
To remove theme formatting from just a portion of your document, select the portion you want to change and change any formatting you like, such as font style, font size, color, etc.
Save a custom theme for reuse
Once you’ve made changes to your theme, you can save it to use again. Or you can make it the default for new documents.
-
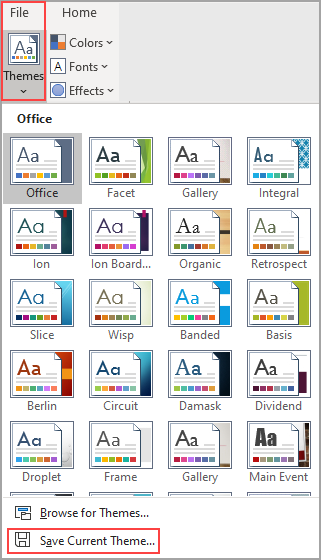
On the Page Layout tab in Excel or the Design tab in Word, click Themes > Save Current Theme.
-
In the File name box, enter a name for the theme, and click Save.
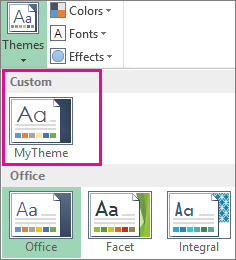
Note: The theme is saved as a .thmx file in the Document Themes folder on your local drive and is automatically added to the list of custom themes that appear when you click Themes.
Make my changes the new default theme
After saving your theme, you can set it so it’s used for all new documents.
Excel
Apply your custom theme to a blank workbook and then save it as a template named Book.xltx.
Word
-
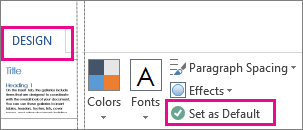
On the Design tab, click Set as Default.
More about themes
A document theme is a unique set of colors, fonts, and effects. Themes are shared across Office programs so that all your Office documents can have the same, uniform look.
You can also change the Office theme. The Office theme is the color scheme for your entire Office program, while document themes are more specific (they show up in individual Word documents or Excel spreadsheets).

In addition, you can add a pattern to your Office program, by changing the Office Background.
See Also
-
Change the font size in Word, Excel or PowerPoint
-
Change the line spacing in Word
-
Insert subscript or superscript text in Word
-
Add or remove a sheet background in Excel
-
Create your own theme in PowerPoint
-
Customize and save a theme in Word 2016 for Mac
Users with normal vision may like to use their computer in light mode, whereas some users, especially people with contract problems may prefer dark mode. Also, it is better to work with the light mode in bright light conditions and dark mode at the night or in dark environments.
Now, Microsoft Office allows you to easily switch between dark, light, colorful, dark grey, and system themes. This feature is mostly available to Microsoft Office 365, Office 2019, and Office 2016. However, Office’s dark grey, colorful, and system themes are only available to Microsoft 365 version. Also, if you have Microsoft 365, you can use the new dark mode feature for your Office apps.
When you use the new black theme (dark mode) for the Word, it will not only change the theme of the toolbar and Ribbon but also the writing canvas of the Word document. The background and theme you apply in one Office app (e.g. Word) will change the theme and background of all the apps in the Office suite to provide a unified experience.
In this tutorial, we will show you how to personalize the theme and background of MS Word (Office apps), and change the Word to ‘light’ or ‘dark’ mode.
Change Word to Light Mode (applies to All Office Apps)
Most of the computer interfaces and software uses light theme/mode for displaying content because this mode resembles the look of ink on paper, making texts more readable than other themes.
Light Mode, also known as Positive contrast polarity, is the classic black text on white background. If you have normal vision or are in a bright environment, this mode helps you digest information much easier. In the light background, there’ll be more light, hence pupils don’t need to dilate more to let in more light, which makes it easy for your eyes to comprehend the information.
By default, the Office apps (including Word) are set to ‘use system settings’ (Windows theme) or ‘Colorful’, but you can change the look and feel of all your Office programs by changing the Office Theme or background. As we mentioned before, when you change the theme of one of the Office apps, it automatically carries your Office themes across the suite to all apps. To change the Microsoft Word theme to the ‘White’ theme (light mode), follow these steps:
Switch to Light Mode from Account Settings
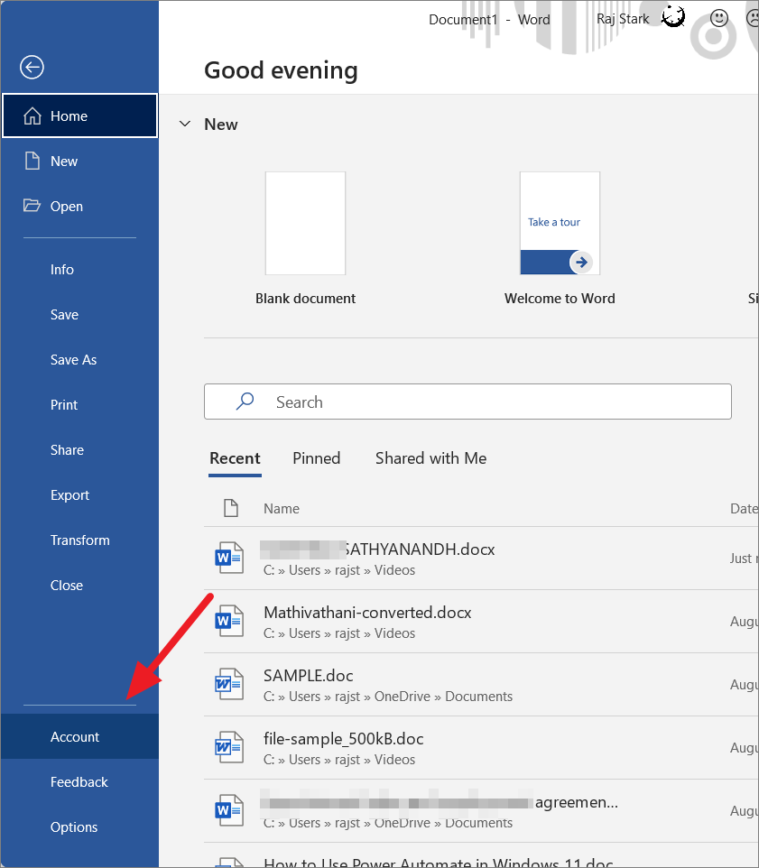
First, open the Microsoft Word application (or Excel, PowerPoint, OneNote, and Outlook), then click the ‘File’ menu at the top left corner of the program.

In the Word Backstage view, select ‘Account’ on the left panel.
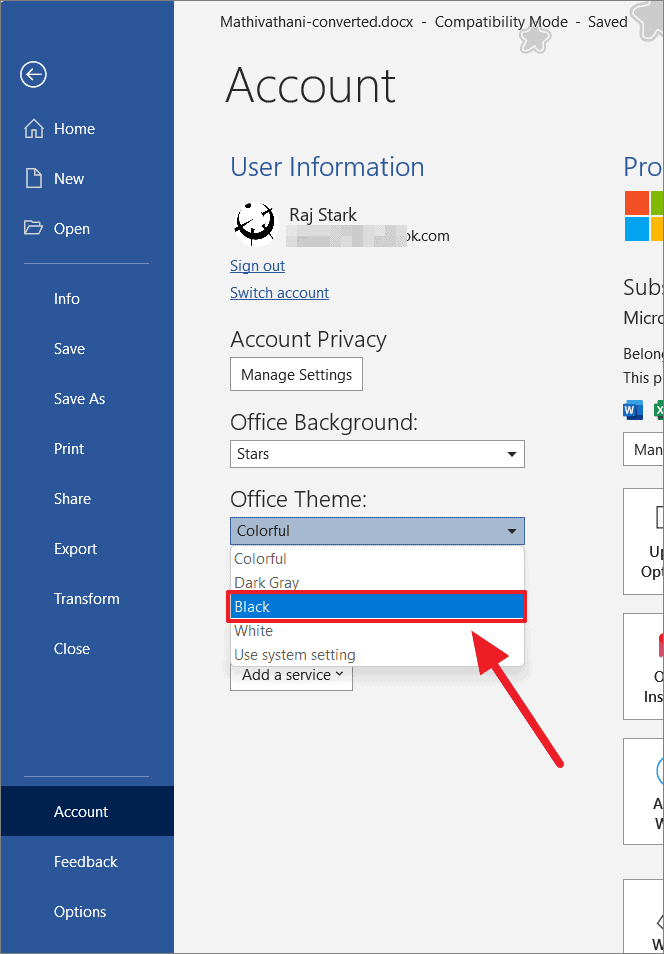
On the Account page, click or tap the ‘Office Theme’ drop-down list and choose the theme you want: Black, Dark Gray, Colorful, or White. Since we want light mode, we’re selecting the ‘White’ theme here.

As you can see, the title bar, ribbon, canvas, borders, everything is in white now (light mode).
To be honest, the difference between the white theme and the default ‘Colorful’ theme is subtle. In the ‘Colorful’ theme, the title bar would be in blue and the ribbon and the window would be in light-grey (nearly white) color. On the ‘White’ theme everything would be in White color.
The real difference in the appearance of the app is when you change the theme to ‘Dark Grey’ and ‘Black’ (Dark Mode).
Switch to Light Mode from Word Options Screen
Open Microsoft Word, then click the ‘File’ menu in the Ribbon. Then, select ‘Options’ at the bottom of the left panel in the backstage view.
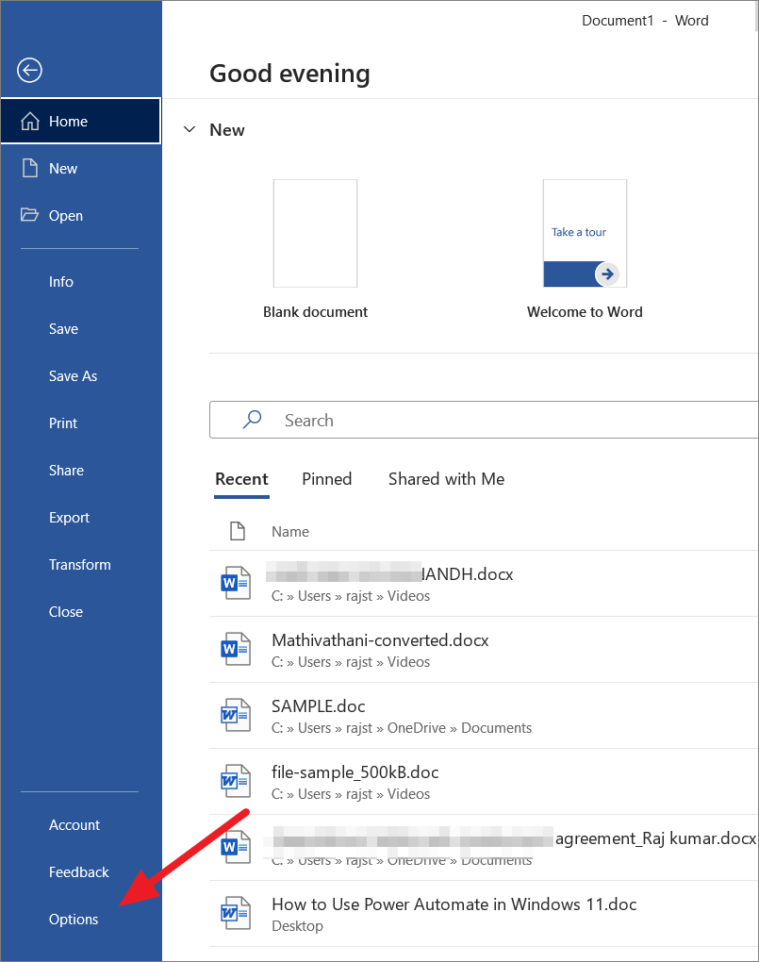
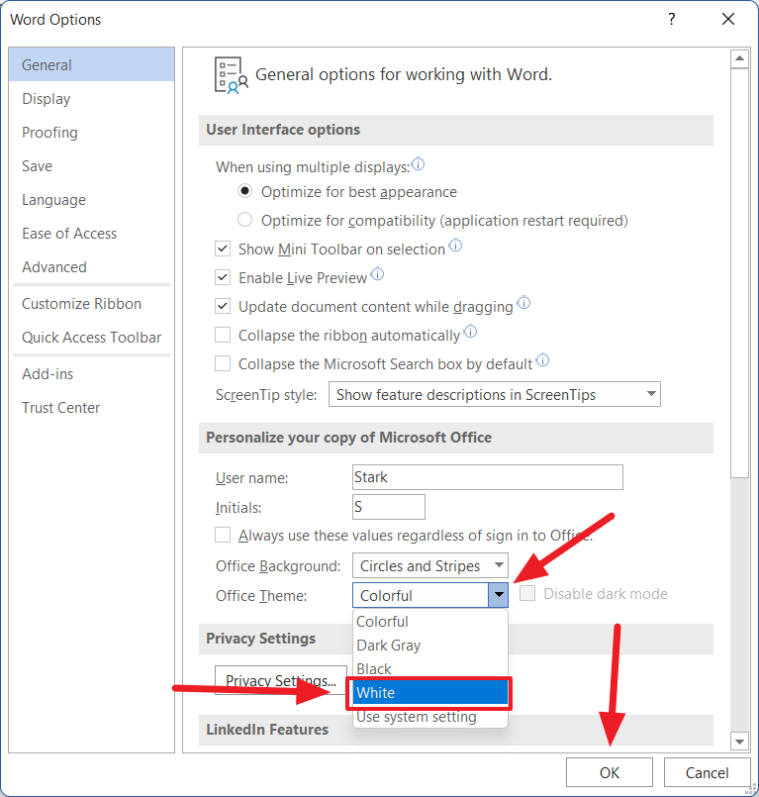
The Word Options window will appear. There, make sure the ‘General’ tab is selected in the left pane and look for the ‘Personalize your copy of Microsoft Office’ section on the right.

Under the ‘Personalize your copy of Microsoft Office’ section, click the drop-down menu next to the ‘Office Theme’ and choose ‘White’ for light mode. Then, click ‘OK’ to apply.
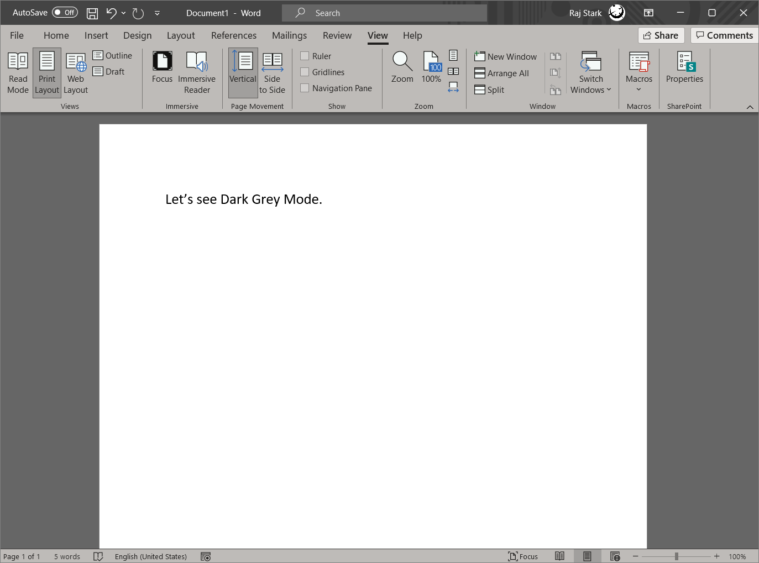
Try the Dark Grey Theme too
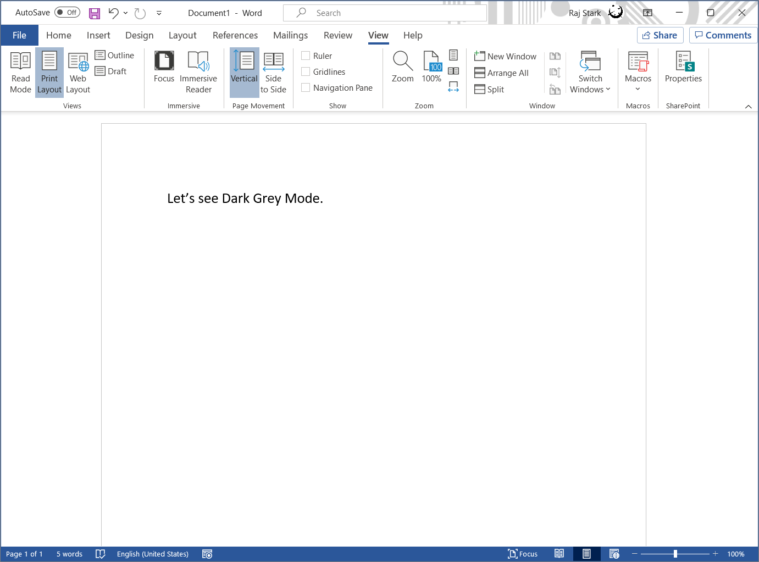
Let’s see how the ‘Dark Grey’ theme looks on Word. To do that, follow the same above instructions and choose the ‘Dark Grey’ theme from the ‘Office Theme’ drop-down.

This is how the Word looks in the Dark Grey theme.
How to Change Microsoft Word Background (applies to all Office apps)
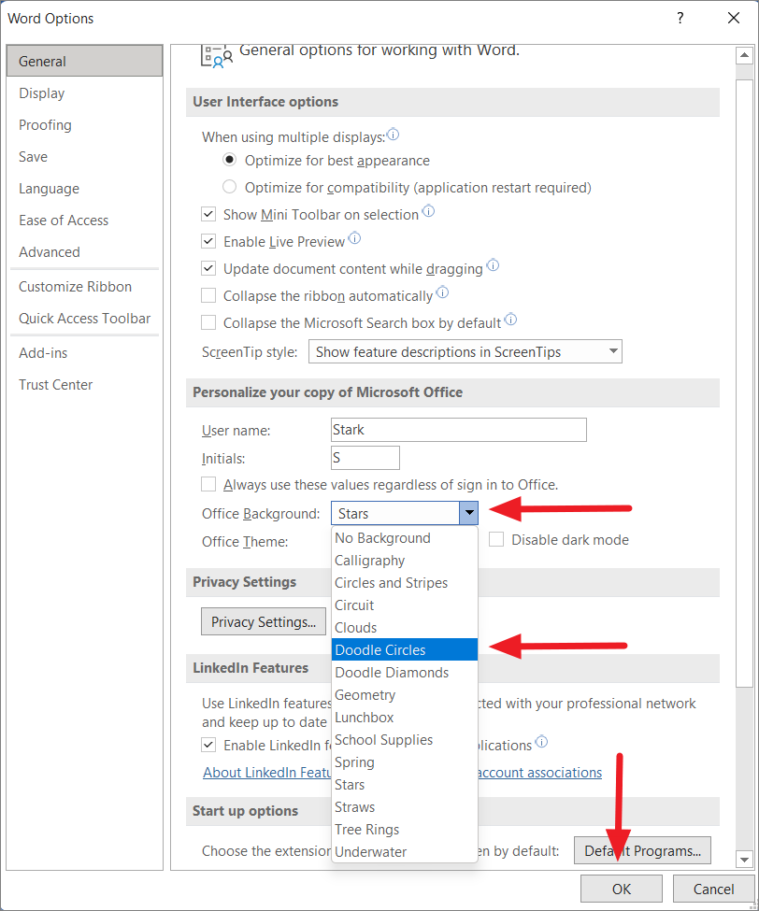
Microsoft Office apps also allow you to change the background of your apps. There are several backgrounds pattern you can choose from like clouds, spring, underwater, and more.
To change the background, open Microsoft Word and click the ‘File’ menu. Next, click ‘Options’ from the left sidebar and select the ‘General’ tab. Then, choose a background pattern from the ‘Office Background’ drop-down list under the ‘Personalize your copy of Microsoft Office’ section.
How to Enable Dark Mode in Word
If you’re a night owl who tends to stay up until late at night, working on your Word documents, MS Word can strain your eyes and damage your retinas with its bright white coloring. To address this issue, Microsoft Office introduced a new black theme (dark mode).
For people with cataracts and related disorders or people who work in low light environments, the dark mode can reduce eye strain and accommodate light sensitivity. In the dark mode, you will read and write white texts on a dark background which makes it more stylish and appealing than the light mode. Also, Dark mode helps you reduces battery usage especially if you’re using an OLED screen.
The dark mode was also available in the previous version but it only changes the theme of the ribbon and toolbars, while the writing canvas stays bright white. But with the new Dark Mode, the dark theme includes the document canvas as well. Unfortunately, this full black theme is only available in Microsoft 365.
To turn on Dark Mode in the Word, Open Microsoft Word (or any other Office app) and click the ‘File’ menu in the ribbon. Then, click ‘Account’ in the sidebar.
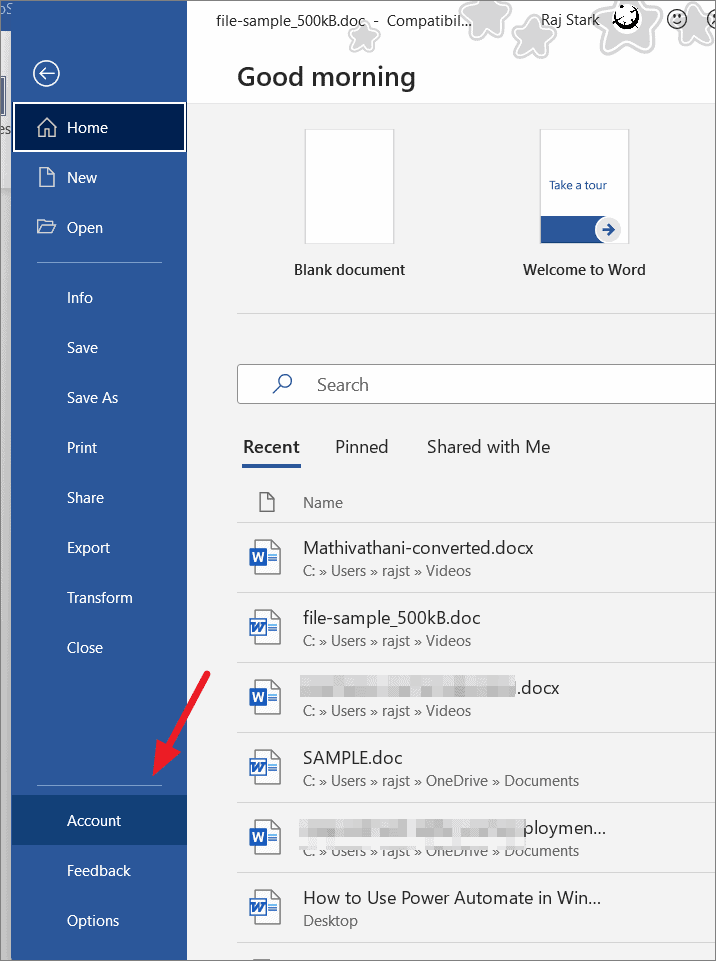
On the right, change the dropdown below Office Theme to ‘Black’.
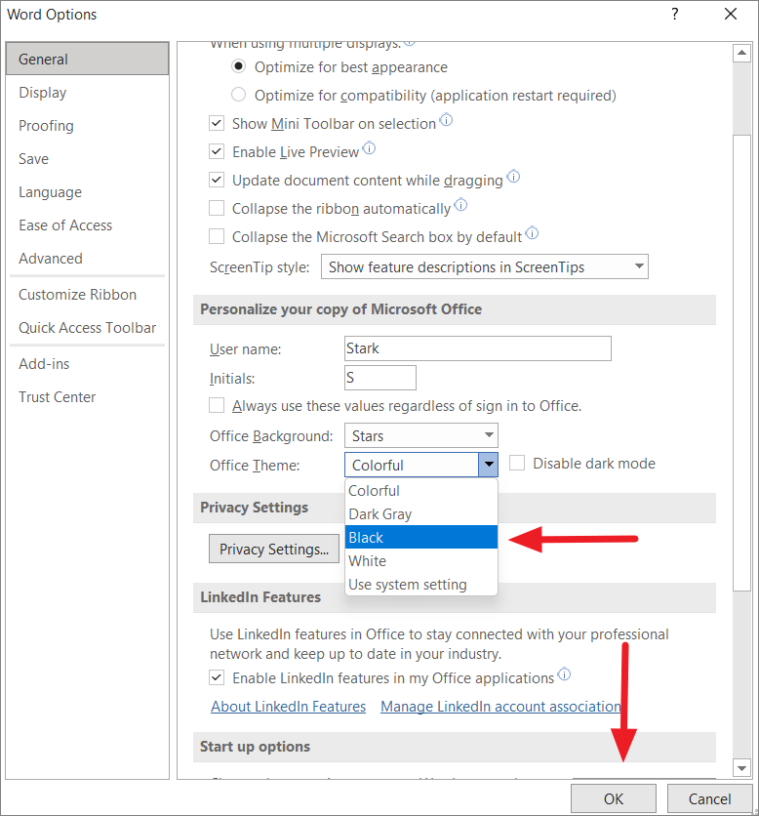
Alternatively, you can click the ‘Options’ in the backstage view. Then, choose the ‘Black’ theme from the drop-down menu next to the ‘Office Theme’ under the ‘Personalize your copy of Microsoft Office’ section in the Word options. Then, click ‘OK’ to apply
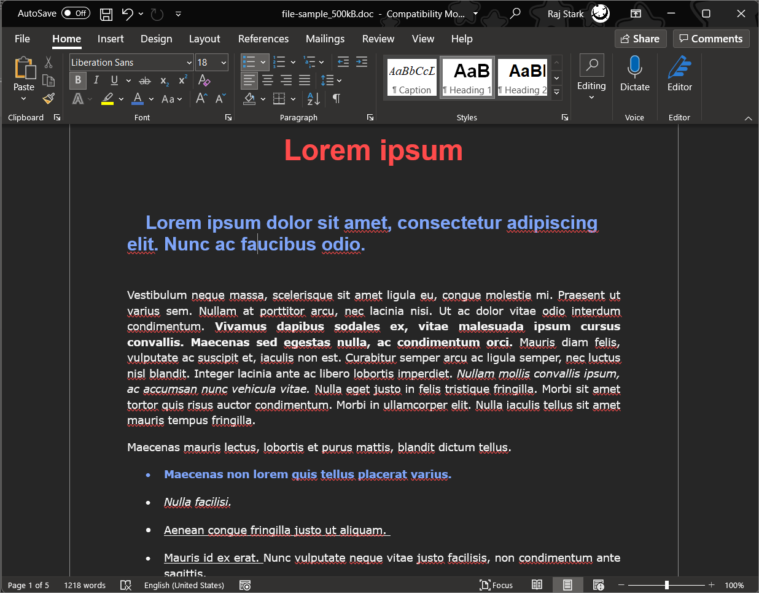
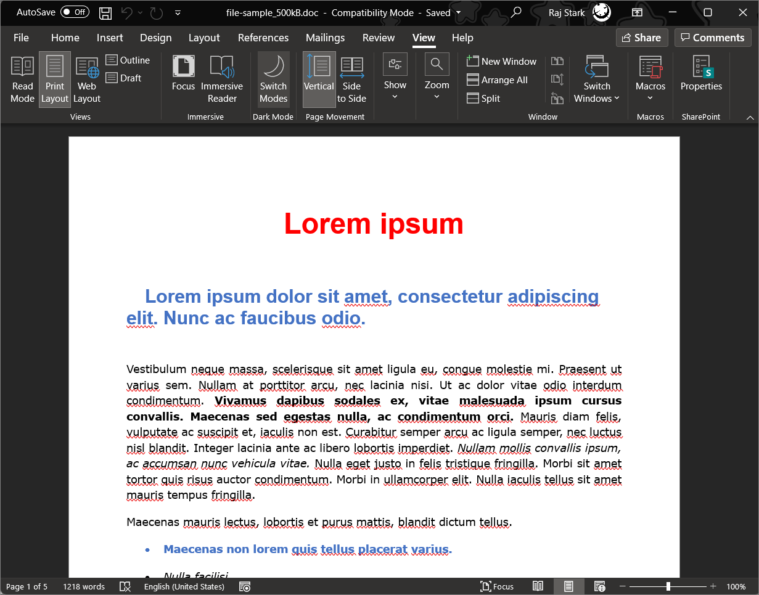
Now, Microsoft Word (and other Office apps) will automatically run in a dark mode as shown below. As you can see, the toolbar, ribbon as well as canvas are in full black color, and colors (texts) within your document will automatically adjust to accommodate the new color contrast.
Quickly Switch Between Dark and Light Modes
Once you applied the Black theme, you can easily switch between the black and white page background colors without having to switch the theme. This is helpful if some of the contents of documents are not displayed correctly in the Black theme. Here’s how you do that:
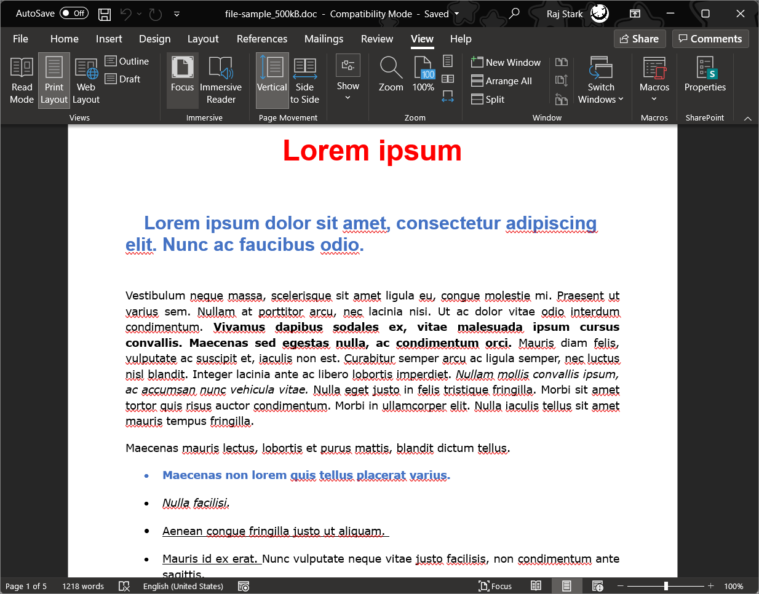
After the black theme is selected, go to the ‘View’ tab in Word Ribbon, you’ll see a new button – ‘Switch Modes’ in the ‘Dark mode’ section. Click/Toggle the ‘Switch Modes’ (sun icon) to change the background page color to white.
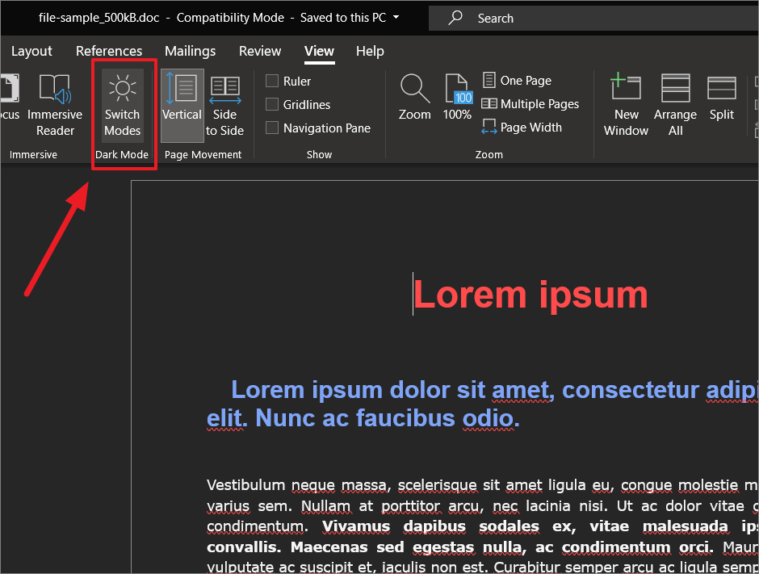
Doing this will change the editor back to a light mode (temporarily) while leaving the ribbon, background, title bar, and status bars black (as shown below).
To turn the editor back to black (dark mode), click the ‘Switch Modes’ button again (this time, it will be a moon icon).

How to Disable Dark Mode (But Keep the Black Theme)
You can also change the editor back to white canvas (permanently) while keeping the black theme of ribbon, background, and status bars. Here’s how:
Go to File > Options > General, then check the ‘Disable dark mode’ box (next to Office Theme drop-down) under the Personalize your copy of Microsoft Office section.
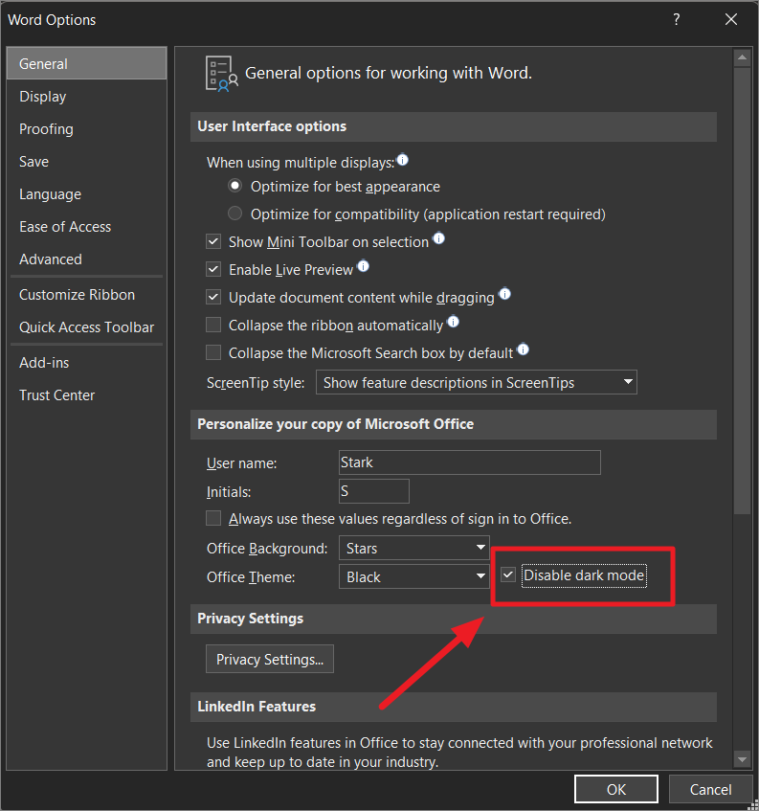
This will always keep the editor page color white while maintaining the black theme.
That’s it.
Microsoft Word uses the default template whenever you open a new blank document. It is called normal.dotm and has predefined settings for font size, font family, themes, paragraph spacing, etc. The documents generally use Office theme with predefined set of styles. If you are not happy with these default settings in Word, you can customize the theme in Microsoft Word to make things as per your convenience.
Default Theme Settings in Word
A theme in Word document has three components:
- Fonts – size and family
- Styles – colors, spacing, etc., for each element like list, heading, paragraph, etc.
- Effects – bold, italic and other effects for elements
A theme can have custom values for all these components or use only few of them. For example, you will always see the document opens with white background in most of the Word themes though it is possible to have a different page color. In addition, you may also always see the font size of paragraph as 11 pixels and paragraph spacing as single. This may be annoying and you want to customize these settings as per your need.
Customizing Theme in Microsoft Word
The blank document in Word for Windows uses the font size as 11 pixels and family as Calibri. On Mac, you can see the default font size as 12 pixels. As mentioned, the blank Word document uses the Office theme as a default theme. There are two ways to change your default theme settings in Word:
- One is to choose from one of the predefined themes that come with your Word installation package. You can also create your own theme and use for future documents.
- Other is to customize each component of the default normal.dotm template so that you can use on all your documents. For example, you can manually change the default font size in the template to 14 px or 16 px instead of 11 px.
In both cases, the objective is to have a uniform setup for all your documents and keep things convenient for your working.
Choose Default Themes
This is an easy and recommended way without changing any other settings in Word.
- Go to “Design” tab in the ribbon and click on “Themes” option.
- You will see a list of pre-defined themes and select the one you want to apply on your current document.
- You can hover over the theme to see the live preview before selecting a specific theme.
- You will notice the style in your document like heading color, font size, font family are changed as per the theme you have selected.

- Word will apply the selected theme only on the current document. If you want to use the theme for all your future documents as a base template, then click on “Set as Default” option.

- You will see a prompt informing you that Word will apply font, colors, effects and paragraph spacing of the current theme on all new blank documents. Click “OK” to confirm the prompt and apply the changes.

Customize Blank Template
If you do not like to use any of the existing themes, then it is possible to customize the appearance of the blank template and set as your default.
- Choose the style set for heading and text elements under “Design” tab’s “Document Formatting” group.
- Select base theme colors, fonts, effects and paragraph spacing by clicking on the respective dropdowns.
- It is also possible to apply page background color and borders for your document.
- If the existing colors and fonts are not enough, you can always upload third-party items.
- Additionally, you can go to “Home” tab and apply new “Styles” for your heading and body text. If required, you can change the font family and size from here and define new styles for each element using styles editor.
- When you are done, go back to “Design” tab and click on “Themes” dropdown.
- Select “Save Current Theme…” option.
- Provide a name for your theme and save it for future use. In this case, you need to manually select the theme every time when you want to use it in your document.
- If you want to use the customized theme as your template, then click on “Set as Default” and confirm the prompt to apply your changes.
Next time onwards, your blank document will always open with the customized theme. You do not need to increase the font size or change the font family every time when you open Word.
Change Office Theme
Themes are available across all Office apps like Excel and PowerPoint. It means, you can save a theme in Word and open in Excel or PowerPoint. However, styles are only applicable for Word or in your current document. For example, the custom theme we have saved in Word with the name as “WebNots” can be seen in PowerPoint as shown below.

It is also possible to change theme of your entire Office applications like Word, PowerPoint, Outlook and Excel in Windows version.
- Open any Office apps like Word or Excel.
- Go to “File > Options” menu and go to “General” tab.
- Select your preferred theme from “Office Theme” dropdown.

The selected theme will be applied to all Office applications like Word, Outlook, Excel, PowerPoint, etc. You can choose the black theme to apply dark mode in Office apps or force to use system settings. However, these Office themes will not have impact on font size, family and other paramters. It will only affect the appearnce of the app by using the selected color.
Download PC Repair Tool to quickly find & fix Windows errors automatically
Colors make things look beautiful. Do you know that you can add colors to your boring white and blue documents too? By adding the colors, theme, and fonts, you can customize your document and make it look modern and more personalized. Windows comes with some pre-defined themes for Microsoft Word, Excel, and PowerPoint, but you can always create your own customized themes and save it on your PC.
Change document theme colors in Word or Excel
You can select or create a uniform theme for all your documents like a Word document, Excel sheet, and PowerPoint presentation. In this post, we will learn how to-
- Change the look of your document
- Customize a document theme
- Customize the document fonts
- Save a document theme
1] Change the look of your document
Apply a theme

MS Word has its default theme set, but you can change it anytime. There is a set of pre-defined themes where you can select your preferred theme and apply the changes.
The templates are shown on the menu ribbon.
If you don’t like any of the pre-defined themes, you can customize the given themes and save it as your own theme on your PC.
2] Customize the theme
Select any predefined theme, and change the colors, fonts, and effects from the main Toolbar.
Select the colors, fonts, and effects of your choice, and save the theme as your own theme. You can name it anything at your convenience.
To change the colors, click on Colors from the Ribbon and Customize Colors. A new pop-up will open, and here you can change the font color, accent, hyperlink, followed hyperlink, and text background.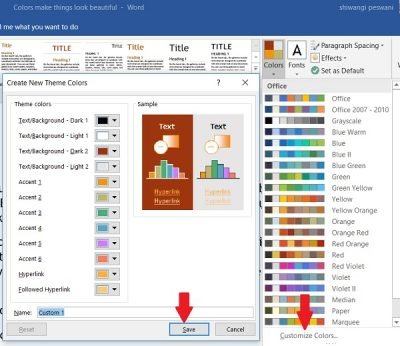
To change the fonts, click on Fonts on the Ribbon and click on Customize Fonts. Here you can change the Heading fonts and the body fonts. Select as per your choice and click on Save.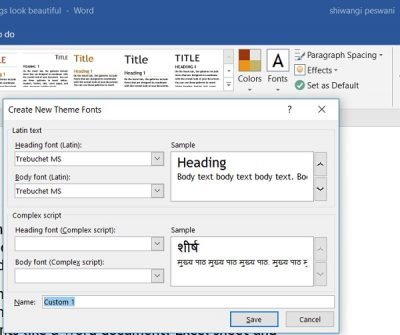
To change the effects, click on Effects on the Ribbon and click on Customize Effects. Select the preferred one and you are done.
Furthermore, you can also change the Page Color, Page Border and Watermark from the Ribbon itself.
Create as many themes with different color choices as you want and you can then try them on your documents.
All your custom document themes are saved in the Document Themes folder and are automatically added to the list of custom themes. You can use those themes whenever you want.

Shiwangi loves to dabble with and write about computers. Creating a System Restore Point first before installing new software, and being careful about any third-party offers while installing freeware is recommended.
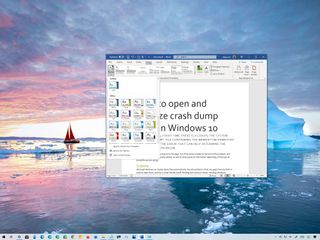
(Image credit: Windows Central )
Although you can style every part of a Microsoft Word document individually with unique fonts and colors, it is not a convenient approach since you have to repeat the steps many times, consuming more time and increasing the chances of mistakes, and this is when styles and themes can come in handy.
In the Office apps, styles are collections of fonts, text sizes, and colors that you can apply to different parts of the document (titles, subheadings, quotation, etc.). On the other hand, themes are collections of styles that you can use to format the entire document quickly.
When you use styles and themes, you will still be using a few steps, but it is a more organized way to format a document on Windows 10, and you will really see the benefit when you need to make changes since updating the format can be as easy as selecting a new theme or style.
In this Windows 10 guide, we will walk you through the steps to change the look and feel of Word documents using the style and themes settings whether you use Office from Microsoft 365 or Office 2019.
- How to use styles in Word
- How to use themes in Word
How to use styles in Word
To change the overall look of a Word document, use these steps:
- Open the Word app.
- Under the «New» section, click the Blank document option (or open an existing document).
- Create the document’s content.
- Select with the mouse the text you want to apply a different format – for example, the title.
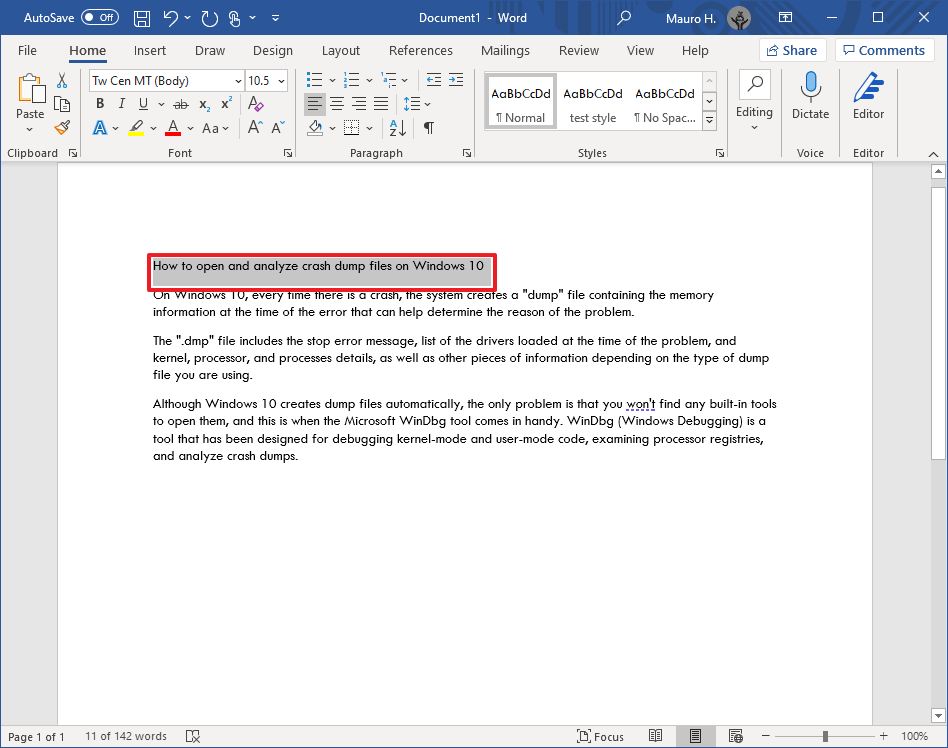
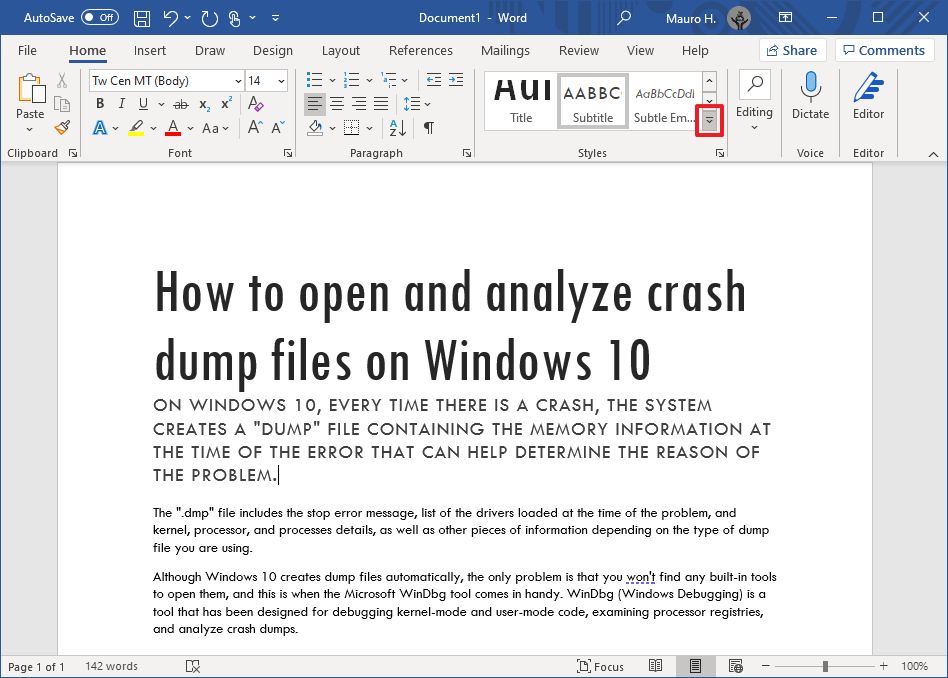
- In the «Home» tab, under the «Styles» section, select the content type to style.Quick note: When selecting a style, make sure to apply it to the correct formating. For example, if you choose the title, then the style should be «Title.» For the subtitle, select the «Subtitle» style and the rest of the headings using «Heading» 1 through 9 accordingly. And don’t worry about the colors. You will customize these when applying a theme. Also, to view all the available elements, click the More button in Styles’s bottom-right corner.

- Continue applying the styling for subtitles, headings, quotes, and anything else you want to format.Quick tip: You can always click and hold the Ctrl key and use the mouse pointer to select the same parts of the document, including the same stying, for instance, all the subtitles (headings).
Once you complete the steps, the document will be formatted with the styling you selected, and when you make changes to the style, the formatting will change automatically for all the same parts of the document.
In addition to selecting from the predefined settings, you can also create new or modify existing elements to style documents with custom settings.
Create new style element
To create a custom style element in Microsoft Word, use these steps:
- Open the Word app.
- Click the Open option.
- In the «Home» tab, under the «Styles» section, click the More (down-arrow button) menu.
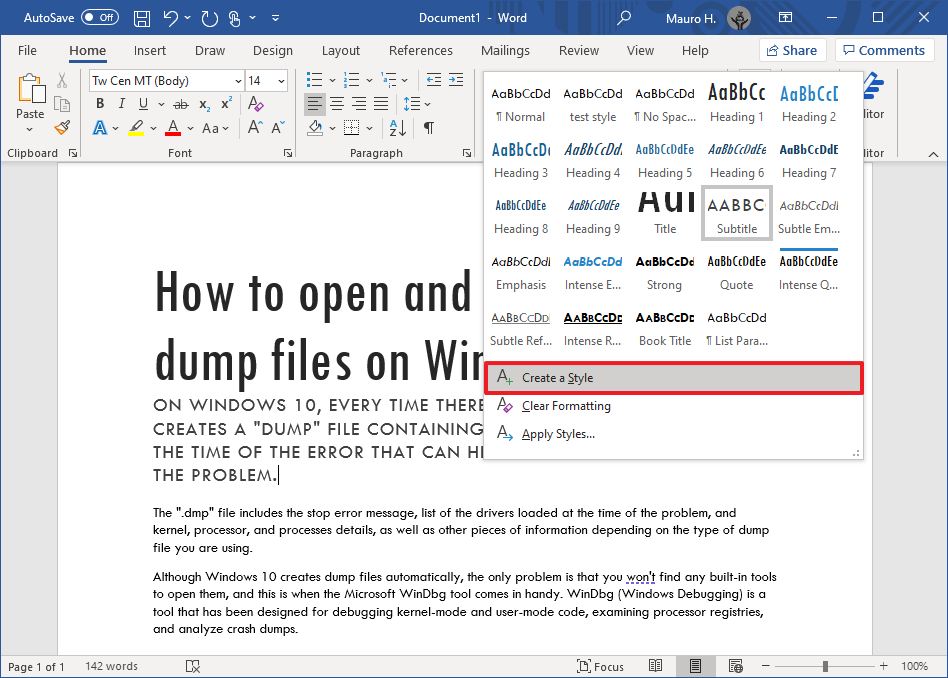
- Click the Create a style option.
- Specify a name for the style.
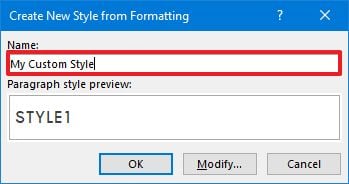
- Click OK button.
After you complete the steps, the new element will appear in the Styles menu.
Modify style elements
To modify a new or existing style element, use these steps:
- Open the Word app.
- Click the Open option.
- In the «Home» tab, under the «Styles» section, right-click the style and select the Modify Option.
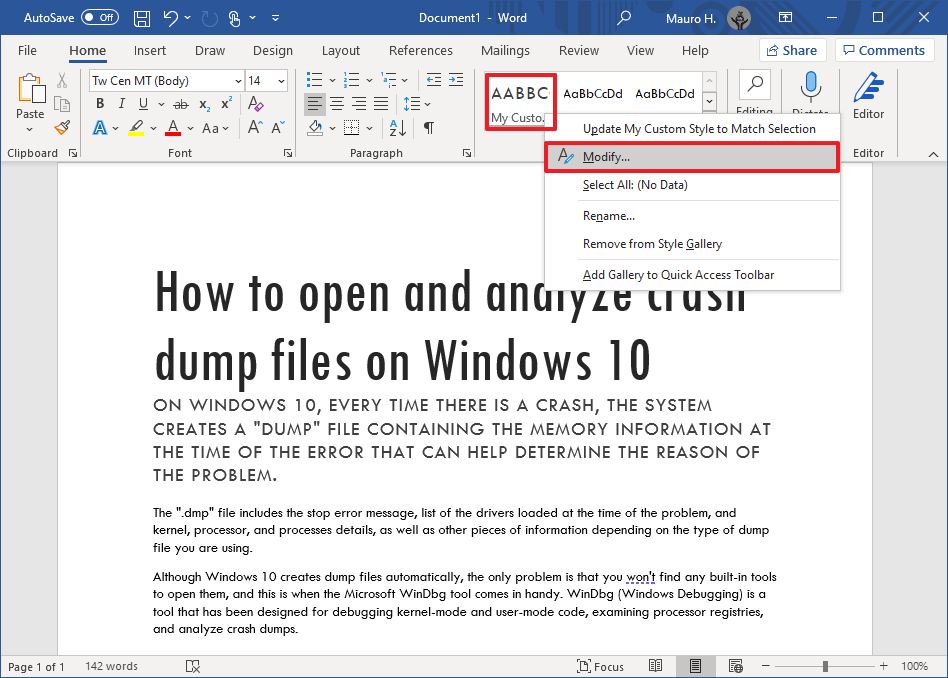
- Customize the style name and formatting settings (for example, font, size, color, aligment, etc.) as necessary.
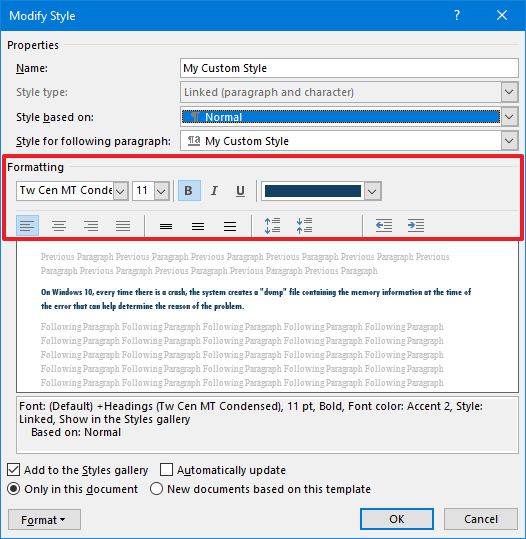
- Click the OK button.
Once you complete the steps, the new styling changes will apply to the element.
 Get subscribed
Microsoft 365 gives you full access to all the Office apps and perks, such as 1TB OneDrive storage and Skype minutes. You can also install Word, Excel, PowerPoint, Outlook, and other apps on up to five devices, and depending on the subscription, you can share the account with up to five people.
How to use themes in Word
After applying the style, you can use themes to give the document a different look and feel with colors and a combination of fonts.
To apply a theme to a Microsoft Word document, use these steps:
- Open the Word app.
- Click the Open option.
- Select the document you already styled to open it.
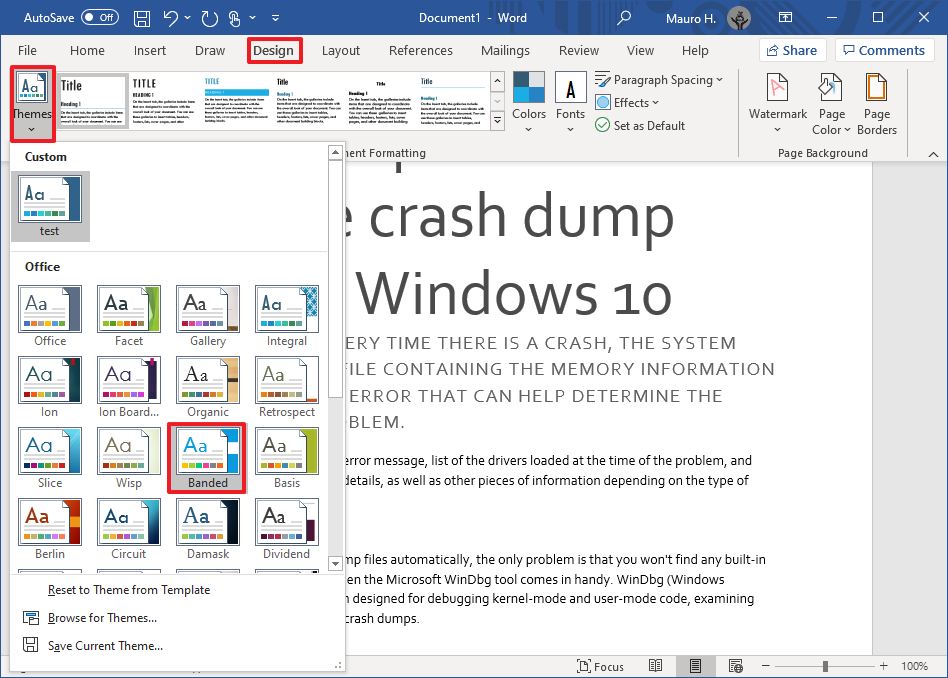
- Click the Design tab.
- Click the Themes button.
- Roll the mouse pointer over the themes to see a live preview of each available theme.
- Click the theme you want for the document.
- (Optional) Use the «Document Formatting» section to select another version of the theme with different combinations of fonts and colors.
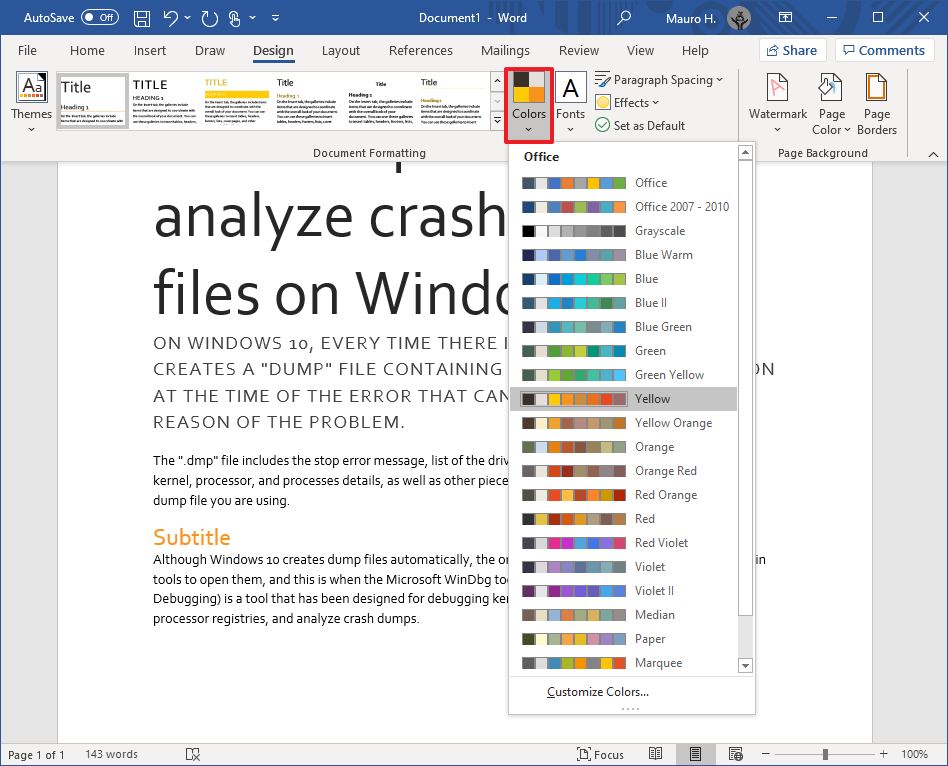
- (Optional) Click the «Colors» menu to select a different color scheme.
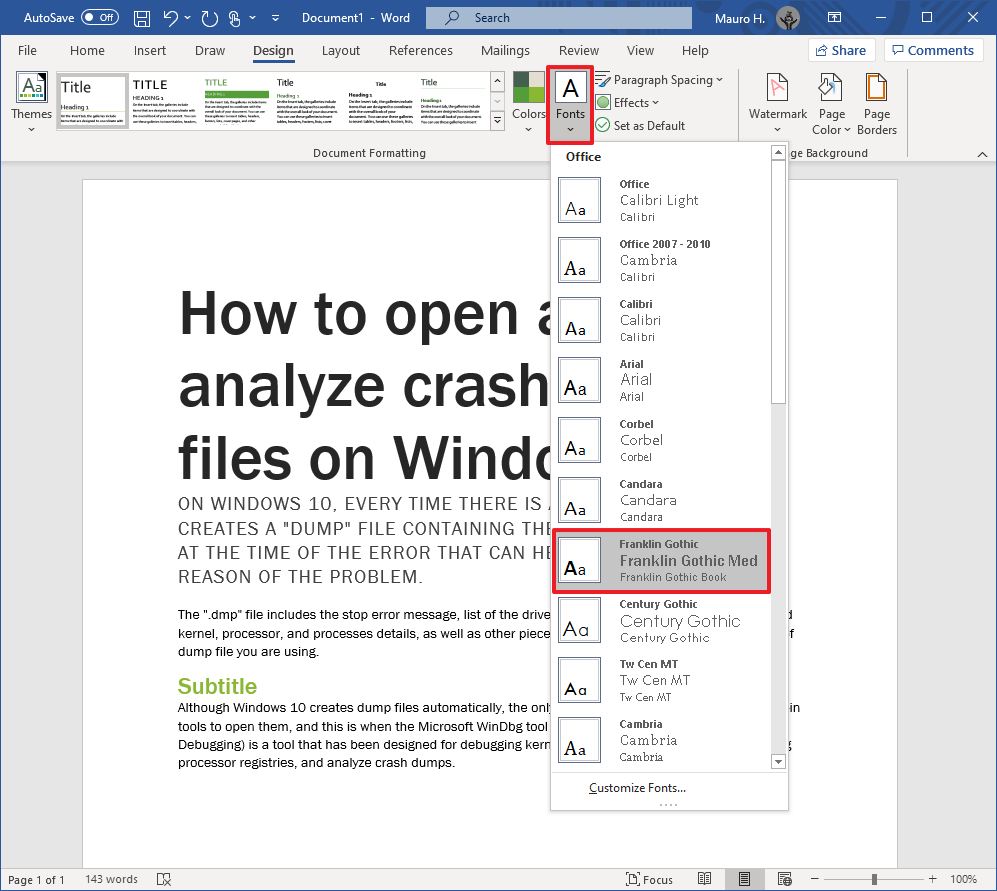
- (Optional) Click the «Fonts» menu to select a different combination of fonts.Quick note: As you open the menu, the top font is one for the title, the one in the middle is for the subheadings, and the one at the bottom is for the content.
After you complete the steps, the content will incorporate the new colors and fonts available through the theme you selected.
Set theme as the default
To set a theme as the default for Word, use these steps:
- Open the Word app.
- Click the Open option.
- Select the document you already styled to open it.
- Click the Design tab.
- Customize the formatting of the document with colors, fonts, spacing, and effects.
- Click the Set as Default button.
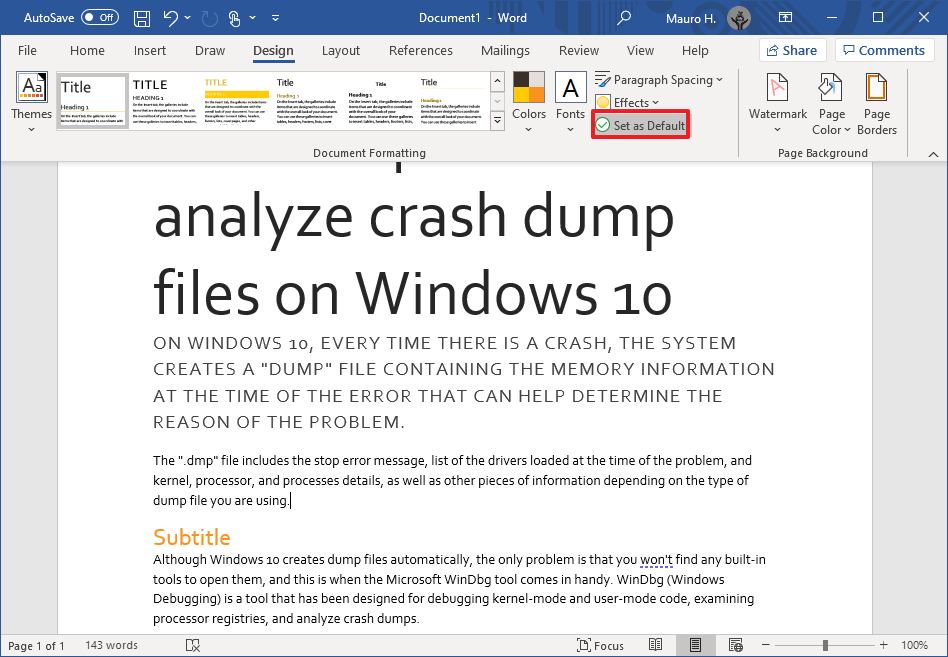
- Click the OK button.
Once you complete the steps, the theme will be available as the default for every new document. However, it won’t apply to the document automatically. Instead, it will be the default theme in the «Style» section, in the «Home» tab.
Create a new theme template
To create a new theme for Microsoft Word documents, use these steps:
- Open the Word app.
- Click the Open option.
- Select the document you already styled to open it.
- Click the Design tab.
- Use the «Document Formatting» section to select a format.
- Click the «Colors» menu to select a color scheme.
- Click the «Fonts» menu to select a combination of fonts.
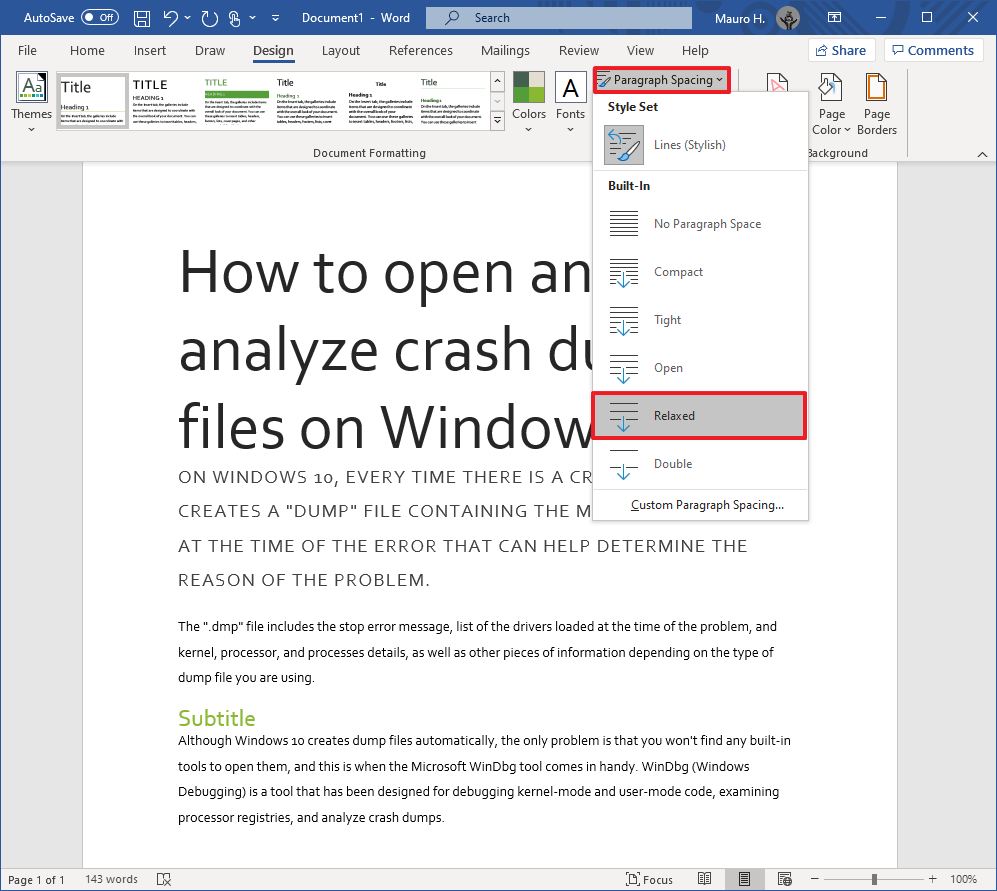
- Click the «Paragraph Spacing» menu and select one of the predefined options.Quick tip: You can also click the Custom Paragraph Spacing option to create a new style.
- (Optional) Click the «Effects» menu and select the effect you want to use when inserting objects.
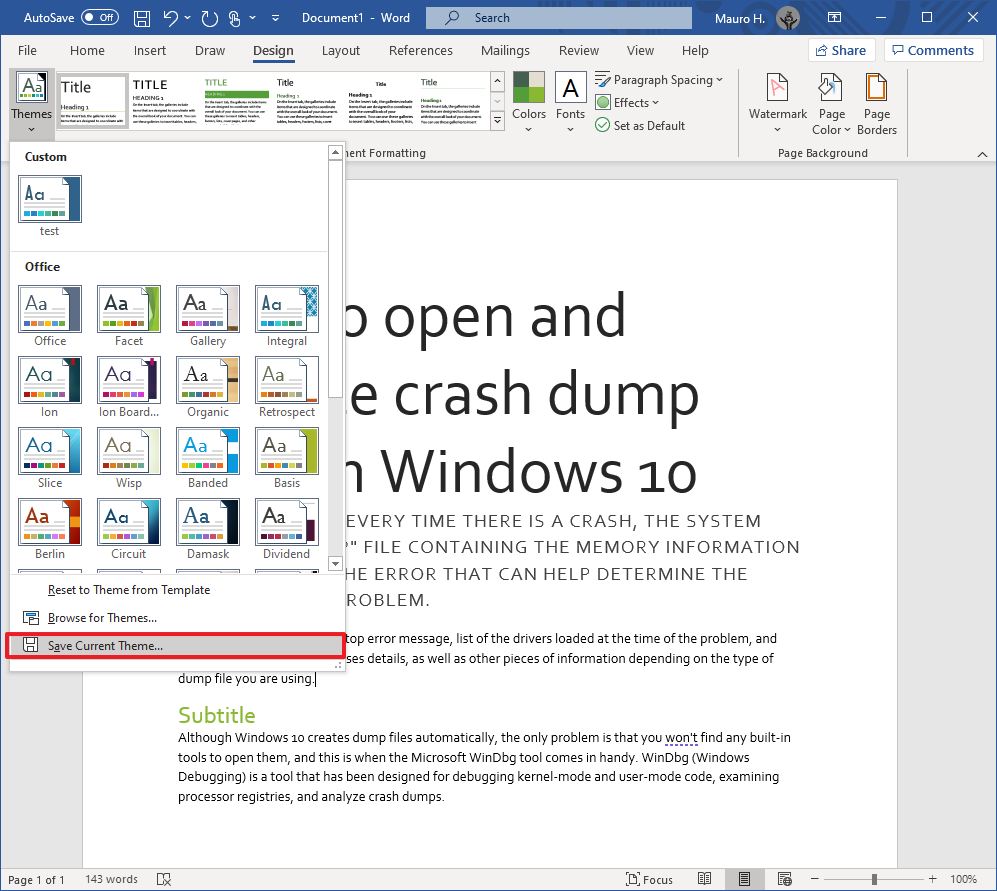
- Click the «Themes» menu and choose the Save Current Theme option.
- Confirm a name for the theme.
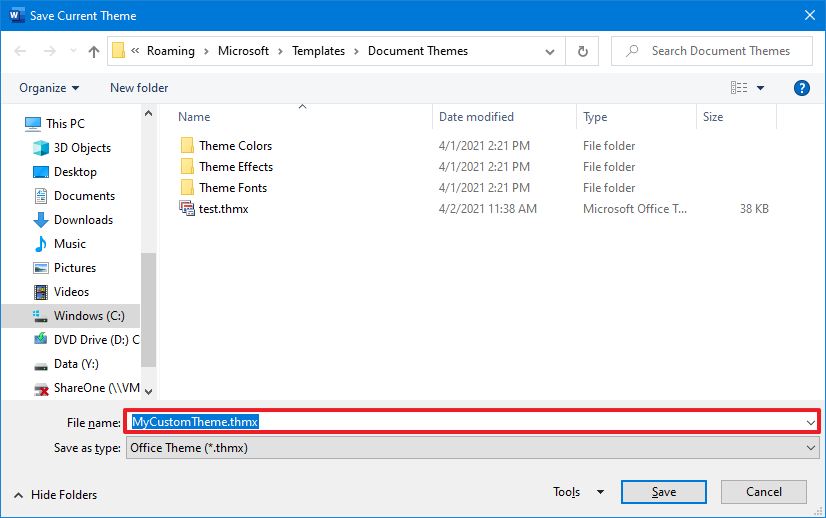
- Click the Save button.
After you complete the steps, the new theme will be available from the «Themes» menu in the «Custom» section.
More Windows 10 resources
For more helpful articles, coverage, and answers to common questions about Windows 10, visit the following resources:
- Windows 10 on Windows Central – All you need to know
- Windows 10 help, tips, and tricks
- Windows 10 forums on Windows Central
All the latest news, reviews, and guides for Windows and Xbox diehards.
Mauro Huculak is technical writer for WindowsCentral.com. His primary focus is to write comprehensive how-tos to help users get the most out of Windows 10 and its many related technologies. He has an IT background with professional certifications from Microsoft, Cisco, and CompTIA, and he’s a recognized member of the Microsoft MVP community.