
To use your favorite font in Word all the time, set it as the default.
-
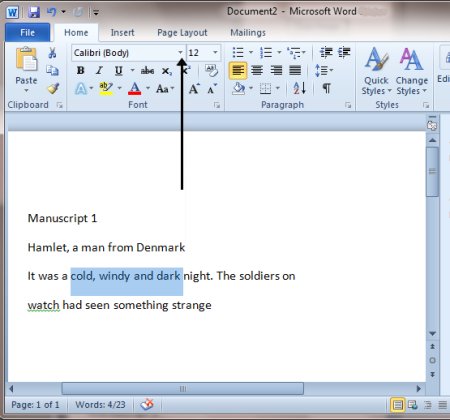
Go to Home, and then select the Font Dialog Box Launcher
 .
. -
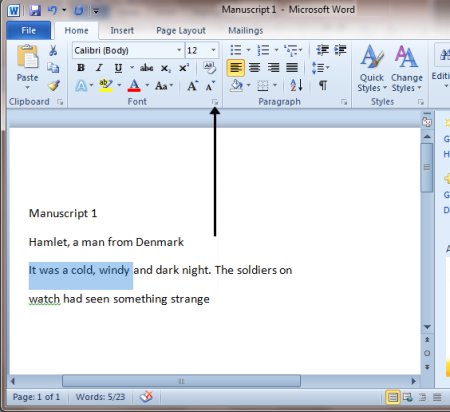
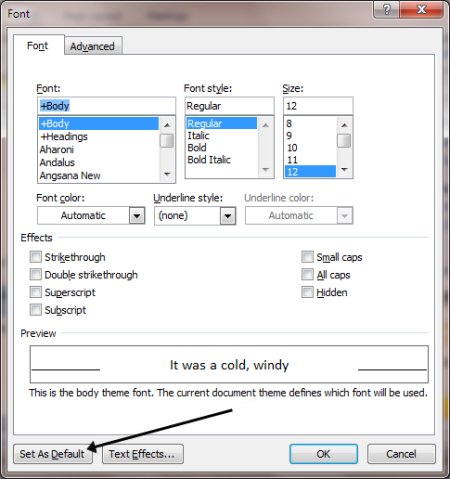
Select the font and size you want to use.
-
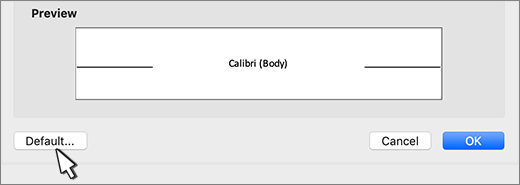
Select Set As Default.
-
Select one of the following:
-
This document only
-
All documents based on the Normal template.
-
-
Select OK twice.
 .
.
If the default font setting doesn’t persist
Sometimes, a company’s permission settings or some add-ins change the default font back to the original font. If that’s happening, here are some things to try.
-
Select Start.
-
In the Search box, type Normal.dotm and select Search.
-
Right-click Normal.dotm, and select Properties.
-
On the General tab, make sure Read-only isn’t checked. If it’s checked, uncheck it.
-
Select the Security tab. Under Group or user names, select your name, and then make sure you have Write permission in the Permissions box.
-
Select OK.
If you aren’t able to uncheck the Read-only box or if you don’t have Write permission, contact the person who’s in charge of your company’s computer systems.
If you have Write permissions and the default font setting still doesn’t stick, you might have to turn off Word add-ins and change the default font setting. Here’s how:
-
Select File > Options > Add-Ins.
-
In the Add-ins box, find one of the add-ins you want to turn off and note the add-in type listed in the Type column.
-
Select that add-in type in the Manage list, and select Go.
-
Uncheck the boxes for the add-ins you want to turn off, and select OK.
-
Repeat steps 1-4 for other types of add-ins.
After you change the default font, turn on the add-ins.
-
Select File > Options > Add-Ins.
-
Select an Add-in type in the Manage list, and select Go.
-
Check the boxes for the add-ins you want to turn on, and select OK.
-
Repeat steps 1-3 for the other types of add-ins you want to turn on.
Note: You don’t have to turn off the Document Inspector type add-ins.
To use your favorite font in Word all the time, set it as the default.
-
Go to Format > Font > Font.
You can also press and hold
+ D to open the Font dialog box. -
Select the font and size you want to use.
-
Select Default, and then select Yes.
-
Select OK.
 + D to open the Font dialog box.
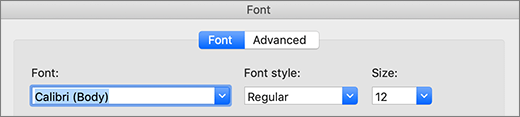
When it comes to creating a compelling and effective document, one of the most important tools at your disposal is the font (also known as «typeface»).
Fonts do much more than improve—or hamper—the legibility of your piece. They set a tone. They’ve got personalities. They evoke feelings. As such, fonts can either reinforce or undermine your brand.


Because fonts are so important, you may want to change the default fonts in Microsoft Word. In this article, you’ll see, step-by-step how to add fonts to Microsoft Word so you can change the default fonts in your document.
You’ll also learn tips on where to find the best Microsoft Word fonts and how to choose the best ones for your document.
(Note: In the tutorials below, I use Microsoft Word for macOS. If you’re on Windows or a different version of Word, then your interface will look different.)
Why Use Premium Fonts in Your Microsoft Word Document?
When it comes to creating documents that get and keep your readers’ attention, fonts are some of your most powerful tools. The right fonts:
- reinforce your branding
- express the right tone
- direct the reader’s attention
- improve readability
You might be tempted to use free fonts for Microsoft Word in your next document. But remember, those built-in MS Word fonts are exactly the same fonts that everyone else is using. Or, you might find a free Microsoft Word fonts download. But free fonts are often not as well-designed as premium fonts.
You can easily add fonts to Microsoft Word from outstanding sources like Envato Elements or GraphicRiver. To be able to download unlimited fonts, then look to Envato Elements. You get access to thousands of fonts. Download as many as you need for one small subscription price.


For one-off projects, GraphicRiver is a great source of the best Microsoft Word fonts on a pay-per-use basis.
And lastly, use the tips above to choose and use fonts effectively in your document. The misuse and overuse of fonts are sure signs of an amateur.
How to Change Microsoft Word Default Font
Word comes with default fonts, but you can change the font to match your branding or to change the tone and personality of the document.
You’ll find that dozens of fonts are already built into Word, and you can replace the default fonts with those. And you can also add new fonts. We’ll talk about how to add fonts to Microsoft Word later in this post.
To change the Microsoft Word default font, you’ve got three options:
1. How to Change the Microsoft Word Default Font for a Block of Text
This is a quick method that’s good to use if you want to change the default font only for one or a few bits of text. Here are the steps:
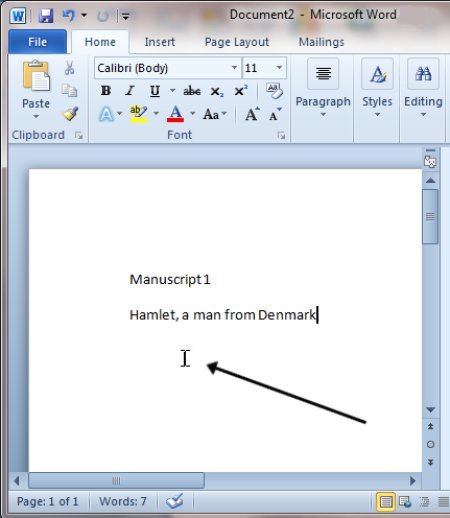
Step 1. Select the Text


Step 2. Open the Font Selection Tool


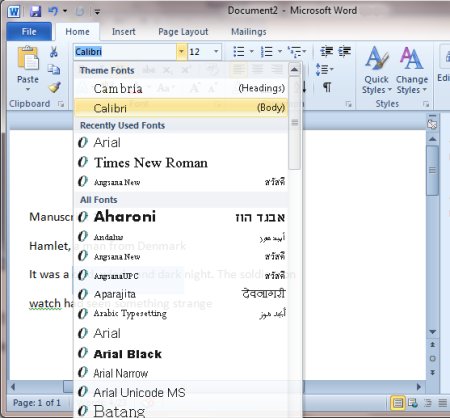
Click on the Font selection tool on the ribbon. You must be on the Home tab to see the buttons for formatting text. The Microsoft Word fonts list opens.
Step 3. Find the font you wish to use.
The Microsoft Word fonts list shows the Theme Fonts, Recent Fonts, and All Fonts. Scroll down farther to see all the fonts available on your computer. This includes fonts that are built-in as well as fonts you’ve added, listed in alphabetical order. The fonts list also gives you a preview of what each font looks like.
Click on the font you wish to use. A triangle next to the font means there are further selections you can make.


Step 4. Change the Font Size
Go to the font-size button to change the font size.


Or, click the Increase Font Size or Decrease Font Size buttons to change the font size by increments.
Step 5. Change Other Text and Paragraph Settings
Use the other buttons on the ribbon to add emphasis (bold, italics, underline), change the font color, and apply other effects.


We’ve now changed the default font in Microsoft Word.


2. How to Replace the Default Font Based on Paragraph Style
By changing the font used for a paragraph style, the change is applied globally in your document for all text with that paragraph style. Use this if you want to change the default font for large sections of text.
Follow the steps on how to change the Microsoft Word default font for a paragraph style:
Step 1. Select the Text
Highlight text that’s representative of the paragraph style you want to re-format. Make sure it’s got the paragraph style you want to change.


In this example, I’ll replace the default font for the Normal paragraph style.
Step 2. Apply the Font Settings You Wish to Use
Follow the steps in Method 1 to change the font, font size, font color, and apply other settings. You may also want to change the paragraph settings, such as alignment, line spacing, etc.


Step 3. Apply the New Formatting to the Paragraph Style
With the cursor in the paragraph you’ve formatted, click on the Styles button on the ribbon. This opens the paragraph Styles selection.


The current paragraph style will be highlighted. In this case, it’s the Normal style. Right-click on the Normal style, then click on Update Normal to Match Selection.


All other paragraphs with the Normal style are updated with the new font and settings you made.


3. How to Change the Font Based on Paragraph Styles Button
This method has the same end-result as Method 2. It changes the default font for a specific paragraph style. The steps are slightly different, as you’ll see:
Step 1. Open the Styles Settings
Click on the Styles button on the ribbon. This displays the paragraph styles.


Step 2. Modify the Paragraph Style
Right-click on the style you wish to change. Click Modify…


The Modify Style dialog opens.


Change the font, font size, and other settings. The box shows a preview of what the paragraph will look like when the settings you chose are applied. If you’re happy with the way it looks, click OK.


The new font (and other settings) will be applied to all paragraphs with that paragraph style.
How to Add Fonts to Microsoft Word
Right out of the box, Microsoft Word comes with dozens of fonts built in. But what if you want to use a font and you don’t see it on the Microsoft Word fonts list?
In that case, you add the font to Microsoft Word. I’ll walk you through how to do that in this section:
Step 1. Find New Fonts
The first step is to find the font you want to use. There are many sources of custom fonts. One to consider is Envato Elements, where you can download an unlimited number of fonts for one small subscription price.
To find a font you like, log into your Envato Elements account.


On the search bar, click on the downward arrow, then select Fonts.


Type a keyword into the search bar, depending on what kind of font you’re looking for. Click the search icon. The most relevant results appear.


Refine the results by Categories, Spacing, Optimum Size, and Properties. You can also sort the results by popularity (Popular) and newness (New).
Click on a font image or name to see its details.


When you find a font you like, click on any of the Download buttons on the page.


The Add this file to a project dialog box pops up.


Select a project to add the font file to. Or, click Create new project to add it to a new project. For this example, I’ll add the font to my existing tutorial project. Click the Add & Download button.
The file manager opens (Finder, if you’re on macOS; File Explorer, if you’re on Windows). Specify where you want to save the font file on your computer. Click Save.


The font files are now saved on your computer as a zip file.


Double-click on the zip file to unzip it.


Double-click on the font file itself to open it. It’ll usually have an extension like OTF or TTF. Click Install Font.


This adds the font to your computer’s fonts library.


The new font should now appear in the All Fonts list in Microsoft Word. To confirm, click on the Fonts button on the ribbon and scroll down the list until you see the new font. If you don’t see it, you may have to restart your computer.


Now, follow any of the methods above to change the default font with the new one.
2 Types of Fonts
Now that you know how to add fonts to Microsoft Word and replace the default fonts in your document, it would help for you to know more about fonts. This will help you choose the best fonts for your Word document.
There are two basic types of fonts you can use in your documents:
1. Serif Fonts
Serif fonts have little lines at the end of each stroke, like this:


Common examples of serif fonts include:


Various research studies have shown that, when it comes to printed matter, serif fonts are the easiest to read and result in the best comprehension.
2. Sans Serif Fonts
As the name implies, sans serif fonts don’t have little lines at the end of each stroke (“sans” means “without” in French):


These are some of the most common sans serif fonts:


Citing research by the Software Usability Research Laboratory, Drew E. Whitman in his book Ca$vertising, noted that sans serif fonts are the most legible fonts to use on a computer screen. Specifically, Arial, Courier, and Verdana were considered the best for online reading.
But these studies were conducted when the resolution of online screens was still very low (below 100 dpi) compared to printed materials (300 dpi). As computer screen resolutions get closer to 300 dpi, serif fonts may prove to be legible both online and offline.
In the meantime, you can use both serif and sans serif fonts in one document—if you know how. Read on for tips on how to use combine fonts.
5 Tips on Using Typography Effectively in Your Word Documents
It’s easy to get carried away with fonts! You may find that having so many kinds of fonts available at your fingertips unleashes your creativity. Yet, as with most things, fonts can either enhance or sabotage your document.
Follow these tips to harness the power of typography:
1. Keep It Simple
When it comes to choosing fonts, legibility is of utmost importance. Sure, it’s easier than ever now for you to find the most creative and outrageous fonts. But if nobody can read your text, then they defeat their purpose. If you must use an ornate font, restrict it to one letter or word.
2. Stick to Two Fonts
A document that’s dripping with many different fonts makes it look amateurish, confusing, and incoherent. For best results, stick to a maximum of two fonts: one serif and one sans serif. (More on this in tip #4).
Remember, use formatting like bold, italics, underlines, different font sizes and colors to add emphasis and variety.
3. Match the Tone and Goals for the Document
Fonts have personality, so pick the ones that match the tone and goals of the document. For example, the fonts for a 16th birthday party invitation will be different from the ones in a financial business report.
When in doubt, pre-test the document. Show it to other people, especially those who are like the intended audience. Make sure they can comprehend the document, first, and that they respond favorably.
4. Choose Fonts Appropriate for the Document’s Intended Use
Whether the document will be printed out or consumed on a computer screen will also affect your choice of fonts.
If you’re making a printed document, use the sans serif font for headings and the serif font for body text. For a web-based document, switch it: Use a serif font for headings and sans serif for body text.
5. Use Handwritten, Cursive, and Decorative Fonts Sparingly


There are other font types that may not fit easily in either serif or sans serif categories. These include handwritten, cursive, and decorative fonts. Handwritten fonts, as the name says, look like they were written by hand. These are extremely popular and useful for adding a warm, personal touch on materials. They can range from casual to glamorous.
Cursive fonts are a kind of handwritten font that look like they’re written in longhand. Beware of using cursive and handwritten fonts because they can be difficult to read. Use them for short bits of text you want to emphasize.
You can easily find handwritten fonts in marketplaces like Envato Elements or GraphicRiver.
Decorative fonts have special effects or treatments. They may be serif or sans serif. And some handwritten fonts can be considered decorative as well.
Here’s a sampling of the decorative fonts available in Envato Elements:
5 Best Font Styles for 2020
Designers come up with new fonts every day. Below are five of the best and freshest Microsoft Word font styles we’re seeing for 2020, along with two fresh examples of each style:
1. Vintage Fonts
Vintage fonts evoke the aesthetic of times past. If you’re working on a document that’s about a specific time, you’re bound to find a font to match.
Anthique — Vintage Typeface


Anthique is reminiscent of handmade Victorian hand lettering but with a modern flavor. It works best for materials that relate to the early 1800s. The font includes three variations in TTF and OTF formats. It also supports multilingual characters.
Middle Class Script


Middle Class is a script font that’s evocative of the bold style of the ’60s and ’70s. It’s got a hand-drawn and layered style, and includes punctuation, common ligatures, and extra swashes (lines).
2. Brush Script Fonts
Brush script fonts are handwritten fonts that look like they were written with a brush, such as a calligraphy or a paintbrush. These are increasingly popular as brands want to add a personal touch to their materials.
Eberthany Brush Script


Eberthany is a modern brush script signature font that works for:
- social media posts
- logos
- wedding invitations
- labels
- quotes
- and more
It works best with software that supports OpenType fonts like Adobe Illustrator CS, Adobe Photoshop CC, Adobe InDesign, and Corel Draw.
Mistrully Brush Script


Mistrully is a stylish brush script that looks like natural handwriting. It comes with special swashes or handwritten lines that you can use to add emphasis. Mistrully works well for logos, social media posts, advertisements, product designs and labels, stationery, among others.
3. Font Duos
Font Duos take the guesswork out of choosing fonts that work well together. These two-for-one font packages are designed to complement each other. You only need to pick the font duo that aligns with your branding and the tone of the material you’re designing. Examples of font duos include:
Chiladepia — Font Duo


The Chiladepia Font Duo is made up of two handwritten fonts. One’s a cursive font and the other’s a sans serif font. This font duo would work well on a computer screen. Use the cursive font for titles or headers and the sans serif font for the rest of the document.
Perkin | Duo Font Pack


The Perkin Duo Font combines a bold sans serif and a serif font. The sans serif font is best for titles and headings, while the serif font works great for body text. This duo is ideal for printed materials.
4. 3D Decorative Fonts
3D decorative fonts look like they’re popping off the pages. These fonts are incredibly eye-catching. For that reason, they’re great for titles. But, they’re not the most legible fonts, so use them sparingly for short bits of text.
Ultra — Modern Font


If you’re creating a futuristic document, then consider the Ultra — Modern Font. It’s got a modern and futuristic style. This pack is actually made up of four font styles: regular, bold, 3D, and bold 3D. It also comes in both OTF and TTF formats.
Under Construction 3D Color Font


Under Construction is a stunning 3D decorative font to use on materials related to industry, construction, technology, and the like. Each letter looks like it floats on top of the page. It’s a color or SVG OpenType font, which works only in Photoshop CC 2017+, Illustrator CC 2018, and some Mac apps.
5. Tech Sans Serif Fonts
Tech sans serif fonts have gone a long way since the pixelized arcade fonts of the ‘80s. Many are also much more legible and modern. Below are two examples:
Azuria — Technology Science Font


The Azuria — Technology Science Font evokes technology, science, and outer space. Its metallic, 3D look would work well in video games, movie titles, and tech-related branding. The font includes all Latin letters from A-Z, numbers, and punctuation marks.
Cyborg — Futuristic Technology Typeface


Cyborg is another futuristic tech font. Inspired by science fiction, it’s perfect for titles related to space, technology, and science. It comes in OTF, TTF, and WOFF formats.
Put Fonts to Work in Your Microsoft Word Document Today
As you’ve learned in this article, you don’t need to stick to the default fonts in Microsoft Word. Follow the steps outlined above to replace the default fonts with ones that are more appropriate to your document.
Now that you understand how to add fonts to Microsoft Word, you’re ready to start taking advantage of the unique look a professionally designed font can give your documents.
At Envato Elements and GraphicRiver we’ve got some of the best Microsoft Word fonts available. Take a look at our Microsoft Word fonts list today. Download your favorites for your next MS Word document.
The basic steps to change the font of a text in your document are:
- First, Select the text you want to modify
- Then Select the Home tab and locate the Font group in this tab
- Now, Click the drop-down arrow next to font style box
- Font style menu now descends
- With just a left click select your desired font style
- If you want to change the font style in your document to bold or italic, click the ‘B’ or ‘I’ icons on the format bar.
See the image:

Please Share
How to Change Text Style in Word
MS Word allow you to change default font style. You can change font style according to your requirement. Steps to change the font style are given below;
Steps to Change Font Size in Word
- Select Your text.
- Visit Home Tab
- Click on Drop Down Arrow.
- Font style menu appears
- Select Desired Style according to your requirement

Buy This Ad Space @$20 per Month, Ad Size 600X200 Contact on: hitesh.xc@gmail.com or 9999595223
Magenet is best Adsense Alternative here we earn $2 for single link, Here we get links ads. Magenet
Changing the text in your documents can help to make your creations more interesting and eye-catching.
Text can be changed to many different sizes and styles.
This guide explains how to change text size and font style in Microsoft Word. It will feature Word 2010, but the process is similar for both earlier and later versions of Word. For other version please visit the Microsoft Word support site.
You’ll need:
- A computer with Microsoft Word installed.
Follow these step-by-step instructions to change text size and font
Step 1: Open an existing Word document or start a new document and type your text.
Step 2: If you’d like to change a portion of the text to a different font, it will need to be selected or highlighted first. When the mouse pointer is moved over a text area, it will change from an arrow to a ‘text select’ or ‘I-beam’ icon.
Step 3: Select your text so that it’s highlighted.
Step 4: To change the font style, click the arrow next to the font style in the ribbon at the top of your document.
Step 5: Choose your font style from the drop-down list given.

Step 6: Next to the font style box is a box containing a number and an arrow. This changes the size of the font. Click on the arrow.
Step 7: Choose the size of font from the drop-down list of options.
Step 8: If you’d like the same size and style of font set up every time you start a new document, you can set a ‘default font’. Click on the ‘Font’ arrow just above the main screen.
Step 9: A dialogue box will pop up. In this, choose your font size and style from the options.

Step 10: Click Set As Default in the bottom left-hand corner of the dialogue box.
Step 11: Another dialogue box will pop up asking if you’re sure you want to change the font for all Word documents. Click Yes. Now, whenever you open a new document in Word, the default font will be used.
Step 12: If you want to change the default font in an earlier version of Word, click Format at the top of your document to open the ‘Format’ menu. Choose Font from the menu list. Then follow steps 9 to 11.
Last updated 3rd July 2019.
How can a Digital Champion approach help your organisation?
Take our online assessment to find out.
It takes 10 minutes. There are no strings attached. At the end, you get a tailored report with recommendations and a free, practical guide to running a Digital Champions project.
Get started with our interactive planner.