
Word for Microsoft 365 Word 2021 Word 2019 Word 2016 Word 2013 More…Less
Sometimes you need to manually trigger an update of the information in fields like those used in a table of contents, headers and footers, cross-references, bookmarks, and formulas in tables. You can update fields one by one, or you can update all the fields in your document at once.
In this article
-
Update a field
-
Update all fields in a document
Update a field
-
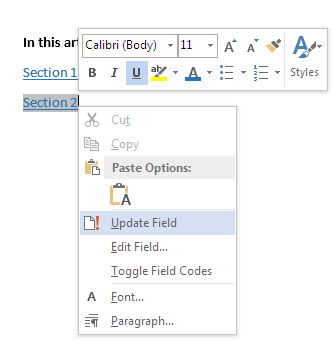
In a document you have open, right-click a field, such as a table of contents, a page number, or a cross-reference, and click Update Field.

Notes:
-
If you’re updating a table of contents, in the Update Table of Contents dialog box, select whether you want to update page numbers only or the entire table. Updating page numbers only simply updates the page numbers for the existing sections. It doesn’t add new sections to your table of contents. To update your table of contents with new sections from your document, select Update entire table.
-
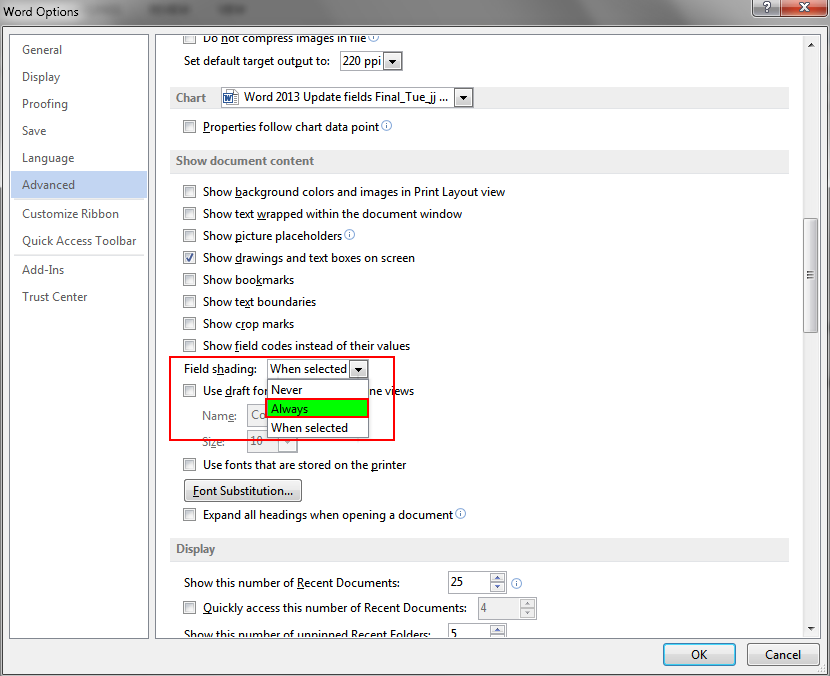
If you’re having trouble distinguishing which parts of your text are fields, you can set all fields to show up with grey background. To do this, click FILE > Options > Advanced, and under Show document content, from the Field shading drop-down menu, select Always.
-

Top of Page
Update all fields in a document
-
Press Ctrl + A.
-
Press F9.
-
If your document has tables with fields or formulas, you might need to select each table separately and press F9.
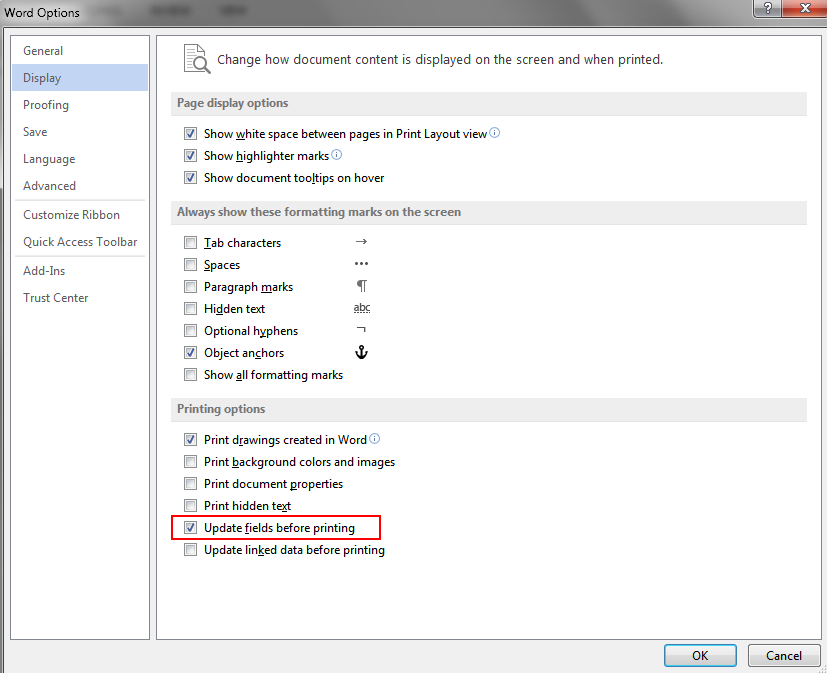
Tip: To make sure that you don’t forget to update your table of contents before you print the document, set Word to update fields automatically before printing. Click FILE > Options > Display, and under Printing options, select the check box for Update fields before printing.
Note: Sometimes a field is not updated because the item the field refers to no longer exists. The link or bookmark might also be broken. For more information, see Troubleshoot bookmarks.
Top of Page
See Also
Insert fields
Field codes in Word
Create or update a cross-reference
Update a table of contents
Use a formula in a Word or Outlook table
Create a table of contents
Need more help?
Update Fields in Your Microsoft Word Documents Manually or Automatically
by Avantix Learning Team | Updated April 6, 2021
Applies to: Microsoft® Word® 2010, 2013, 2016, 2019 or 365 (Windows)
If you have inserted fields in your Microsoft Word document, you can choose to update them manually or have them update automatically. For fields you update manually, you can update just one field or update all the fields in your Word document at once. Some fields, such as page numbers, will automatically update when you preview your document. Many fields are set by default to update when you open a document but you can also set an option in Microsoft Word to update fields when you preview your file.
You can insert fields in several ways in Word. Some fields are created when you use Word’s built-in features (such as inserting a table of contents, a cross-reference, a bookmark or a page number). Other fields can be inserted using the Field dialog box or can be entered using keyboard shortcuts.
Recommended article: How to Insert Built-in and Custom Fields in Microsoft Word
Updating a single field
You can update a single field manually in two ways:
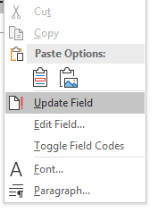
- Right-click the field and select Update Field. Depending on the type of field, another dialog box may appear where you can select other options (this occurs for example, with a tables of contents).
- Click the field and press F9.
Update field appears in the drop-down menu when you right-click a field:
Updating all fields in the body of a Word document
To manually update all fields in the body of a Word document:
- Click in the body of the Word document.
- Press Ctrl + A.
- Press F9.
Updating fields in headers, footers or text boxes
Some fields in headers, footers or text boxes must be updated separately.
To update fields in headers, footers or text boxes:
- Click in the header, footer or text box.
- Pess Ctrl + A to select all.
- Press F9.
Page fields do not need to be updated manually.
Updating a table of contents field
If you update a table of contents, another dialog box appears. In the Update Table of Contents dialog box, select Update page numbers only if no content has changed. Select Update entire table to update page numbers and content.
Updating fields before printing or previewing
You can set an option in Microsoft Word to ensure that all fields are updated automatically before previewing (to preview, click the File tab in the Ribbon and then click Print):
- Click the File tab in the Ribbon and click Options at the bottom. A dialog box appears.
- Click Display in the categories on the left.
- Scroll down to the Printing options area in the panel on the right.
- Ensure the check box for Update fields before printing is checked.
- Click OK.
The Word Options dialog box where Update field before printing has been checked appears as follows:

Preventing field updating
You can prevent fields from updating by locking them.
To lock a field so that it is not updated, click the field, and then press Ctrl + F11. To unlock a field so that it can be updated, click the field, and then press Ctrl + Shift + F11.
Displaying fields with grey shading
You can change your options in Microsoft Word so that all fields are displayed with grey shading (the shading does not print). This can be helpful to determine where you have fields in your document.
To display fields with grey shading:
- Click the File tab in the Ribbon and click Options at the bottom. A dialog box appears.
- Click Advanced in the categories on the left.
- Scroll down to Show document content area in the panel on the right.
- Select Always from the drop-down menu for Field shading.
- Click OK.
The Word Options dialog box with Field shading set to Always appears as follows:

You may not want to display field shading permanently. The default setting is Field shading when selected.
Fields are a very powerful way of using variable content in Microsoft Word documents. However, if fields do not update, your document can display errors or inaccurate content.
Subscribe to get more articles like this one
Did you find this article helpful? If you would like to receive new articles, join our email list.
More resources
How to Insert a Watermark in Word (like DRAFT)
14+ Word Selection Shortcuts to Quickly Select Text
How to Find and Replace in Word (and use Wildcards)
How to Superscipt or Subscript in Word (with Shortcuts)
How to Keep Text Together in Microsoft Word (Words, Lines or Paragraphs)
Related courses
Microsoft Word: Intermediate / Advanced
Microsoft Word: Designing Dynamic Word Documents Using Fields
Microsoft Word: Long Documents Master Class
Microsoft PowerPoint: Intermediate / Advanced
VIEW MORE COURSES >
Our instructor-led courses are delivered in virtual classroom format or at our downtown Toronto location at 18 King Street East, Suite 1400, Toronto, Ontario, Canada (some in-person classroom courses may also be delivered at an alternate downtown Toronto location). Contact us at info@avantixlearning.ca if you’d like to arrange custom instructor-led virtual classroom or onsite training on a date that’s convenient for you.
Copyright 2023 Avantix® Learning
Microsoft, the Microsoft logo, Microsoft Office and related Microsoft applications and logos are registered trademarks of Microsoft Corporation in Canada, US and other countries. All other trademarks are the property of the registered owners.
Avantix Learning |18 King Street East, Suite 1400, Toronto, Ontario, Canada M5C 1C4 | Contact us at info@avantixlearning.ca
I want a way of updating all fields in a Word 2013 document. (If it works in other versions, all the better; I originally had this problem with Word 2007, and nothing seems to have changed since then.) This includes cross-references, page numbers, tables of contents, indexes, headers, etc. If it can be updated by pressing F9, I want it updated.
(In theory updating fields can cause other fields to need updating, e.g. a longer table of contents changes some page numbers in the main text. Taking care of the common cases is good enough for me. In fact, it’s ok if I have to run the macro two or three times before it stabilizes. I just want to have a single macro that finds everything.)
My attempt so far doesn’t update fields in text boxes inside figures. How do I update them, and what else have I missed?
EDIT: Combining the answer given with what I already had gives a macro that seems to update everything (with a known defect).
'' Update all the fields, indexes, etc. in the specified document.
Sub UpdateAllFieldsIn(doc As Document)
    '' Update tables. We do this first so that they contain all necessary
    '' entries and so extend to their final number of pages.
    Dim toc As TableOfContents
    For Each toc In doc.TablesOfContents
        toc.Update
    Next toc
    Dim tof As TableOfFigures
    For Each tof In doc.TablesOfFigures
        tof.Update
    Next tof
    '' Update fields everywhere. This includes updates of page numbers in
    '' tables (but would not add or remove entries). This also takes care of
    '' all index updates.
    Dim sr As range
    For Each sr In doc.StoryRanges
        sr.Fields.Update
        While Not (sr.NextStoryRange Is Nothing)
            Set sr = sr.NextStoryRange
            '' FIXME: for footnotes, endnotes and comments, I get a pop-up
            '' "Word cannot undo this action. Do you want to continue?"
            sr.Fields.Update
        Wend
    Next sr
End Sub
'' Update all the fields, indexes, etc. in the active document.
'' This is a parameterless subroutine so that it can be used interactively.
Sub UpdateAllFields()
    UpdateAllFieldsIn ActiveDocument
End Sub
Download PC Repair Tool to quickly find & fix Windows errors automatically
In Microsoft Word, you can insert built-in or custom fields into your Word document that may change within your document. In Word, the field feature inserts fields into your document; some fields will be inserted automatically, such as NumPages, NumWords, and Date.
What are Fields in Microsoft Word?
In Microsoft Word, a field is a placeholder for document information that can be changed. Microsoft Word displays the field result instead of the field codes.
How to add Fields to my Document?
There are various types of fields that you can add to your document; some field text will be inserted automatically, and some you have to modify in the dialog box before you add it to the document. In this tutorial, we will discuss how to add fields to your word documents.
To add text fields to your Word document, follow the steps below.
- Launch Microsoft Word
- Click anywhere on the document
- Click the Insert tab
- Click the Quick Parts button
- Click Field from the drop-down menu
- Choose a field name from the field name list.
- then, choose an option from the list on the right.
- Click OK
Launch Microsoft Word
Click anywhere on the Word document.
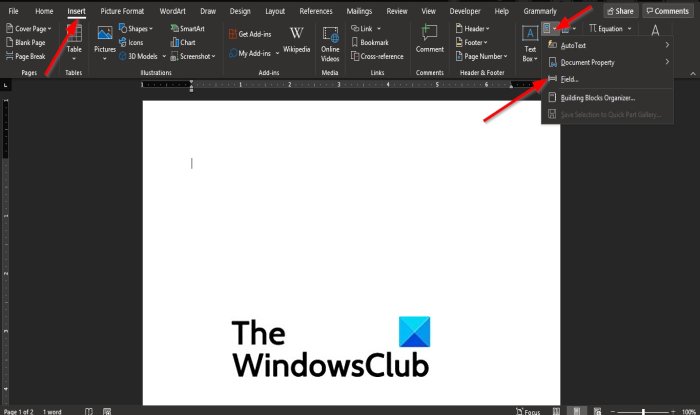
On the menu bar, click the Insert tab.
In the Text group, click the Quick Parts button.
Then select Field from the drop-down menu.
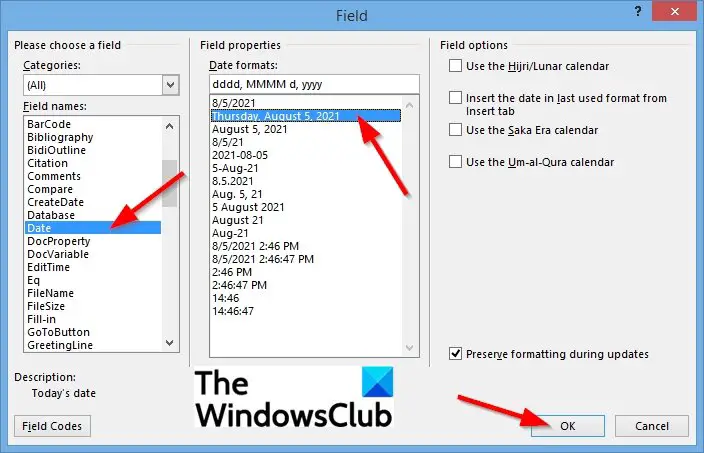
A Field dialog box will appear.
Inside the dialog box, there are various fields to choose from in the Field Name list.
Select a field from the Field Name list on the left.
In this tutorial, we chose to select the Date field.
Then, choose a field option from the list on the right.
Depending on the field name selected, the options on the right will change.
Then click OK.
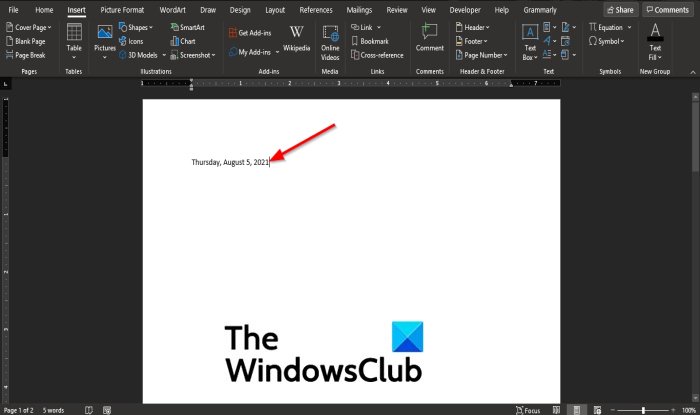
The field is added to the Word document.
If you want to change the format of the field, you cannot change it directly on the Word document; you have to change it within the Field dialog box.

To change the format of the field, right-click the field and select Edit Field.
It will return to the Field dialog box, where you can change the format of the field and then click OK to see the field change.
We hope this tutorial helps you understand; how to insert a text field in Microsoft Word; if you have questions about the tutorial, let us know.

Shantel has studied Data Operations, Records Management, and Computer Information Systems. She is quite proficient in using Office software. Her goal is to become a Database Administrator or a System Administrator.