
Word for Microsoft 365 Word for Microsoft 365 for Mac Word 2021 Word 2021 for Mac Word 2019 Word 2019 for Mac Word 2016 Word 2016 for Mac Word 2013 Word 2010 Word for Mac 2011 More…Less
You can have Word align objects—such as pictures, shapes, SmartArt, and charts—in relation to the edges of the page, the margins, or other objects.
Align a picture, shape, text box, SmartArt graphic, or WordArt
-
Select the objects to align.
To select multiple objects, select the first object, and then press and hold CTRL while you select the other objects.
-
Do one of the following:
-
To align a picture, select Picture Format or Picture Tools > Format.
-
To align a shape, text box, or WordArt, select Shape Format or Drawing Tools > Format.
-
-
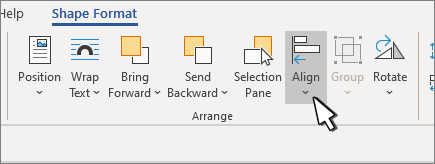
In the Arrange group, select Align.

-
Choose of the following:
Important: If Align options are unavailable, you may only have a single item selected.
-
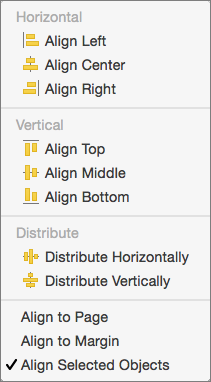
Align Left
To align the edges of the objects to the left. -
Align Center
To align the objects vertically through their centers. -
Align Right
To align the edges of the objects to the right. -
Align Top
To align the top edges of the objects. -
Align Middle
To align the objects horizontally through their middles. -
Align Bottom
To align the bottom edges of the objects.Notes:
-
When you align objects relative to each other by their edges, one of the objects remains stationary.
-
Align Middle aligns objects horizontally through the middles of the objects and Align Center aligns objects vertically through the centers of the objects. When you align objects relative to each other by their middles or centers, the objects are aligned along a horizontal or vertical line that represents the average of their original positions. No object necessarily remains stationary, and all of the objects might move.
-
Depending on the alignment option, objects might cover another object. If this happens, undo the alignment and move the objects to new positions before aligning again.
-
-
Arrange objects equal distances from each other
-
Select at least three objects to arrange. To select multiple objects, select the first object, and then press and hold CTRL while you select the other objects.
To select objects that are hidden, stacked, or behind text, go to Home > Find and Select > Select Objects, and then draw a box over the objects.
-
Do one of the following:
-
To arrange pictures equally, select Picture Format or Picture Tools > Format.
-
To arrange a group with shapes, text boxes, or WordArt equally, select Shape Format or Drawing Tools > Format.
-
-
In the Arrange group, select Align.
-
Choose one of the following:
-
Distribute Horizontally To center the objects horizontally.
-
Distribute Vertically To center the objects vertically.
-
Word can align objects to the left, center, right, top, middle, and bottom. You select whether you want those positions to be relative to the page, the margins, or other objects.
Note: If text wrapping for an object is set to In Line with Text, Word can only align it in relation to the page or the margins. To change it, Control + Click the object, point to Wrap Text, and then pick something other than In Line with Text. To learn more about text wrapping, see Control text wrapping around objects.
Tip: If you have several objects to position on a page, you might want to use a grid to help you.
Align an object with other objects, the margins, or the page
-
Hold down Shift and use the mouse or touchpad to select the objects that you want to align.
-
Select Shape Format or Picture Format.
-
Select Align. If you don’t see Align on the Shape Format tab, select Arrange, and then choose Align.
-
Choose one of the following:
-
Align to Page
-
Align to Margin
-
Align Selected Objects
-
-
To choose whether the selected objects are aligned to the margins, the page, or relative to each other, select Align, and choose one of the following:
-
Align to Page
-
Align to Margin
-
Align Selected Objects
-
-
Select Align again, and then choose the type of alignment from one of the three categories: Horizontal, Vertical, or Distribute.

Tip: After you have objects aligned as you want, you can move them while preserving their relative positions by defining them as a group. For help with using groups, see Group or ungroup shapes, pictures, or other objects.
You can align objects in relation to an anchor, such as the margin, page, and paragraph. You can also enter a precise numeric position for the object in relation to the anchor.
Align an object with other objects, the margins, or the page
-
Select the object.
-
Select Format or Format Picture.
-
To choose whether the selected objects are aligned to the margins, the page, or relative to each other, select Align, and then select one of the following options:
-
Align to Page
-
Align to Margin
-
Align Selected Objects
-
-
Select Align again, and then choose the type of alignment that you want.
Align an object in relation to text
-
Select the object to select it.
-
Select Format or Format Picture.
-
Under Arrange, select Wrap Text, and then choose a style other than In Line with Text (for example, Tight
).
-
In the document, drag the object where you want it.
-
To fine-tune the picture’s position, under Arrange, select Position, and then choose More Layout Options.
-
On the Position tab, select the options that you want for your horizontal and vertical anchors.
Note: To make sure that the selected object moves up or down with the paragraph that it’s anchored to, select Move object with text.
 ).
).
Need more help?
Want more options?
Explore subscription benefits, browse training courses, learn how to secure your device, and more.
Communities help you ask and answer questions, give feedback, and hear from experts with rich knowledge.
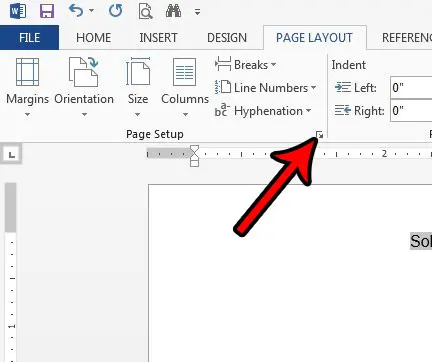
To center something in the middle of the page in Word, select the text or object that you want to center, go to the “Page Layout” tab and click the “Page Setup” group. Select the “Align Center” option from the dropdown menu.
This will center the text or object in the page. You can also use the toolbar to center the text. Just highlight the text you want to center and click “Center” in the toolbar. Another route you can take is to click the “Paragraph” group in the “Home” tab, select “Alignment” and choose “Center” from the dropdown menu.
Whichever route you take, the result will be the same: the text or object in the center of the page.
To fix the center alignment in Microsoft Word, you’ll need to take the following steps:
1. Select the text you want to center by highlighting it with your mouse.
2. Go to the Home tab at the top of the page, and locate the Paragraph group. This group contains the alignment options for your text.
3. Click the “Center” button in this group, which looks like a vertical line with three dots in the middle. This will align your text in the middle of the page.
4. Alternatively, you can press “Ctrl + E” on your keyboard to center align your text instantly.
5. If you’re having trouble aligning the text correctly to the center, you can also use the ruler at the top of the page. Drag the blue square located in the middle to adjust the margins of your text until it’s centered in the document.
Where is the exact center of a Word document?
The exact center of a Word document is determined by taking the full width of the page and dividing it by two. For example, if the page width is 8.5″ then the exact center of the page would be 4.25″.
The same concept applies to the height of the page as well. The vertical center of the page can be determined by taking the height of the page and dividing it by two. The exact center point of the page would then be the intersection of the two dimensions, which is 4.
25″ from the left margin and 4.25″ from the top margin.
What is the keyboard shortcut for centering text?
The keyboard shortcut for centering text will depend on what type of computer you are using.
On a Mac:
The keyboard shortcut for centering text on a Mac is Command + E.
On a Windows PC:
The keyboard shortcut for centering text on a Windows PC is Ctrl + E.
Additionally, you can also use the center align option in your word processor’s formatting toolbar. This will be the icon of two lines of text with a centered line between them. If you click on this icon, it will center the text in the current selection or the entire document, depending on your setup.
What is center alignment in Word?
Center alignment in Microsoft Word is a feature that allows a user to align text in the vertical center of the page, similar to text being in the middle of a line. To achieve center alignment in Microsoft Word, select the desired text, then click the “Home” ribbon.
In the “Paragraph” section, select the center-aligned icon or click “Center” in the “Alignment” menu dropdown. The selected text will now be centered on the page.
Once the desired text is center-aligned, Word offers additional formatting options. Through the “Home” ribbon, users can add spacing before or after a paragraph or line, reduce or increase the line or paragraph spacing, or set the text in a different font.
Additionally, users can add additional styles to the text, such as bold, italicize, or create a list of items. Center alignment in Word is a great way to easily change the look and feel of a document, and making the center alignment process easy and simple for any user.
Why is Microsoft Word off center?
There could be several reasons why Microsoft Word is off center. It could be due to issues with your computer’s resolution settings, window and/or display settings, display adapters, as well as issues with the program itself.
First, check your computer’s resolution and window settings. Make sure they are set to the recommended values or at least the ones that you prefer. You can also check the display settings of your computer.
In some cases, the text size, font, and other properties can be changed to make the document look differently when printed or displayed on the screen.
If these settings aren’t the issue, then check if the display adapter of your computer is working properly. Most display adapters are designed to adjust the resolution and size of your screen automatically depending on the output of the device being used.
If the computer is unable to adjust the display properly, then it might not display the document correctly.
Finally, check if there are any issues with the program itself. It could be that the document layout is off, or the page margins are too wide or too narrow. You can try resetting the default settings of Microsoft Word and see if this fixes the issue.
However, if the problem still persists, you should contact Microsoft Support for further assistance.
Why is my page not centered in Word?
The page not being centered in Word could be caused by several factors. First, you should check to make sure you have the page margin set correctly for your document. To do this, go to the Page Layout tab, click the Margins button, and choose the margin size from the drop-down menu.
It’s important to note that the default margin size in Word is 1 inch on each side. Therefore, if your document is larger than 1 inch on either side, it won’t be centered.
If the margins seem to be set correctly, the issue could be with the paragraph alignment. To check this, highlight the text you want to be centered, go to the Home tab, click the Paragraph grouping button, and select the Center alignment option.
The highlighted text should now be centered on the page.
If the page is still not centered after checking the margins and paragraph alignment, you can try resetting the page on the document. To do this, go to the Layout tab, click the Page Setup button, and choose the Reset All Page Breaks option.
This will make sure your entire document is centered on the page.
Finally, you can also try manually centering the page. To do this, select a text box, set the height and width to the desired size, choose a location for the text box, and align it to the center of the page.
You can use the View option in the Ribbon or right-click the text box to make sure it’s perfectly centered.
Why is my word document on the left?
It is possible that your word document is appearing on the left side of the screen due to the position of the window on the display. If it is the active window, the document should be centered on the screen or positioned at the top of the screen.
Check the windows that are open, and if your word document is in the background, resize it so that it is the active window. Your word document may also be appearing on the left side of the screen because of the Zoom or View settings on the document.
You can check this by going to the View tab on the ribbon or in the lower-right corner, and adjust the Zoom or View settings to change the view of the document. Additionally, if you have multiple displays connected to your computer, your word document may have been inadvertently moved to a secondary display, which could cause it to appear on the left side.
You can check the position of displays in the display settings on your computer.
How do I adjust the Margins in Word?
Adjusting margins in Word is easy. Depending on your version of Word and operating system, the process may vary slightly. Generally, the following steps can be used to adjust the margins:
1. Open your document in Microsoft Word and select the “Page Layout” tab.
2. Select the “Margins” option from the drop-down menu.
3. Select one of the predefined margin settings from the drop-down menu.
4. Alternatively, select the “Custom Margins” option from the drop-down menu and use the “Margins” tab to enter the custom margin settings you would like.
5. Select the “OK” button, and your margin settings will be applied.
You can also quickly adjust the left margin for an individual paragraph or a group of paragraphs by selecting the text, right-clicking and selecting “Paragraph” from the pop-up menu. Then, adjust the value of the “Left” field in the “Indentation” section of the “Paragraph” window.
How do I change a Word document from left to right?
In order to change a Word document from left to right, you will need to work with the alignment options of the program. First, select the text you would like to change the alignment of – or the entire document.
Next, locate the Paragraph group in the main ribbon of the Home tab: here you will find options to align your text to the left, center, right, or justified. Choose the right alignment option to change your document from left to right.
Additionally, if you also want to change the direction of the text from left to right, you will need to navigate to the Layout tab of the ribbon, select Text Direction, and choose Right-to-Left. This will apply to the entire document, so you may want to be sure that you have made the appropriate selections for any specific documents before applying a text direction.
How do you align text using the keyboard?
Using your keyboard, you can align text by using the Tab key or the arrow keys. To align text using the Tab key, press the Tab key to move the cursor to the right by one tab stop, with each press of the Tab key.
You can also press the arrow keys to move your cursor to the left or right to align the text accordingly. To align multiple lines precisely, double-click the left mouse button where you want the text to be positioned, then press the right arrow key until it reaches the desired position.
This will move the cursor to the desired position and all text after it will stay aligned.
What does Alt F9 do in Word?
Alt F9 is a key combination used in Microsoft Word that helps to quickly access certain field coding. Specifically, Alt F9 will toggle the display of field codes, which are programming code used to store data such as text, graphics, tables and other fields.
Pressing Alt F9 will cause the field codes to switch between showing the code and visible text. This can be useful when you are trying to troubleshoot or want to modify or delete a field code.
What is Ctrl U used for?
Ctrl U (also known as Control U or C-u) is a keyboard shortcut most commonly used to view a full source code of a webpage on many web browsers. When Ctrl U is pressed, the source code of the page that is currently open in the active window is displayed.
This allows web developers and other tech-savvy people to inspect and modify the code of their own webpages, as well as analyze the code of webpages created by others. Additionally, some web browsers have keyboard shortcut combinations with Control U to open the current webpage view in an external code editor, allowing for more detailed code inspection and modification.
What is the use of shortcut key F8?
The F8 key is a shortcut key that is most commonly used to enter the Windows startup menu, also known as the advanced boot options menu. This menu provides several options that users can use to troubleshoot and fix various issues when Windows fails to start.
It can also be used to access the Windows Recovery Environment (WinRE) where users can attempt to perform system repairs. The F8 key can also be used to access the Safe Mode in Windows, which allows users to run a limited version of Windows with basic drivers and services to help diagnose potential issues.
Finally, the F8 key can also be used to select boot device options when booting from a USB drive or other bootable device.
What is the meaning of Ctrl E?
Ctrl E is the shortcut for the “End” command which sends the cursor to the end of a line or document. In other words, pressing Ctrl E allows you to quickly navigate to the end of a line or document without having to use your mouse or manually move cursor using the arrow keys or page down key.
This key combination can be used in almost any program or document, from a word processor to a web browser. Additionally, some keyboards may have an “End” key in place of the Ctrl key. Holding down the Ctrl key and pressing E with it is the same as pressing this “End” key.
Select the text that you want to center. in the Page Setup group, and then click the Layout tab. In the Vertical alignment box, click Center. In the Apply to box, click Selected text, and then click OK.
Should poems be centered or left aligned?
Poetry Format: Centering Lines. As with spacing, if there is a reason other than “it looks nice” that your poem must be centered, then by all means, stick to your guns.
How do you center something in the middle of the page in Word?
To change the alignment of text and objects on a page so that they appear in the center: Select what you want to center, and from the Page Layout tab, expand the Page Setup section. In the Layout tab, you’ll find a Vertical alignment drop-down menu in the Page section. Select Center from the drop-down menu.
How can you move a poem in a document to the center of the page?
The Ctrl+Home key combination moves you there instantly.
- 2Type and format your document’s title.
- 3To center the title right to left, select it and press Ctrl+E.
- 4Position the insertion pointer after the title’s last line, and then, on the Page Layout tab, choose Breaks→Next Page from the Page Setup area.
How do you express love in writing?
How to write a love letter to your partner:
- Be ready to get vulnerable.
- Start out the letter with a personal greeting.
- Say why you’re writing the letter.
- Tell them why you love them and/or being with them.
- Use storytelling.
- Close the letter warmly.
- Consider whether it’s the right gesture.
What are words to describe someone you love?
What are some good words to describe a person you love? Here are some words to describe someone you love: affectionate, affable, attentive, amicable, brave, caring, considerate, cheerful, easygoing, faithful, forgiving, gentle, good listener, honest, heartfelt, kind and humorous.
How do you describe falling in love?
People Explain What It Feels Like To Fall In Love
- “You think about the person all the time.
- “Terrifying and amazing.”
- “You feel safe when you’re with them.
- “It’s so good and so horrible at the same time.
- “You simply make time for them, and make sacrifices.
- “You feel giddy and happy when you see them.
What is a love interest character?
A love interest is a character whose role in a story is that of a lover — or potential lover — to another character, especially the protagonist. But not all love interests and romantic relationships are created equal.
How do you make two characters fall in love?
Shipping: 14 Ways To Develop Romance In Your Story
- I can get emotionally involved in the romance of characters without actually getting emotionally involved!
- Put them together.
- Go slowly.
- Show that they like being together.
- Make them need each other for practical things.
- Demonstrate how confused they are.
- Give them a chorus to argue with.
- Create a pursuit.
How do you write an epic romance?
Making Romance Epic – 5 Tips for Writers
- Develop Both Characters Equally. To write a compelling romance, we need two complete characters.
- Show Both Characters Changing. When we are young, we dream of finding the “right person”.
- Plot a Commitment Arc. Relationships are dynamic and change over time.
- Change the Characters, Again.
- Take Advantage of the Fantasy.
How do you write a realistic romance?
Here are my 4 tips for writing realistic romance:
- Know your character’s individual personalities.
- Understand your character’s internal and external goals.
- Make your characters work for their relationship.
- Make your readers crave the relationship.
What makes a great romance novel?
Two basic elements comprise every romance novel: a central love story and an emotionally satisfying and optimistic ending. An Emotionally Satisfying and Optimistic Ending: In a romance, the lovers who risk and struggle for each other and their relationship are rewarded with emotional justice and unconditional love.
Who reads romance novels?
The Audience 84% of romance novel readers are women. Romance fiction buyers span all age ranges but the largest segment (41%) is between 30 and 54 years old.
Select what you want to center, and from the Page Layout tab, expand the Page Setup section. In the Layout tab, you’ll find a Vertical alignment drop-down menu in the Page section. Select Center from the drop-down menu. Make sure the Apply to drop-down menu has Selected text selected, and click OK.
Contents
- 1 How do you center a picture?
- 2 How do you center something in Word?
- 3 How do you center art?
- 4 How do you center a poster?
- 5 How do you center a picture in Word on a Mac?
- 6 What is the shortcut for center align in Word?
- 7 How do I center a heading in Word?
- 8 Should a picture be centered to the table or wall?
- 9 How do I center an image in CSS?
- 10 How do you center a picture on a door with a wall?
- 11 How do you matte a poster?
- 12 Why can’t I align picture in Word?
- 13 Why can’t I Align Center in Word?
- 14 How do you align pictures in Word 2016?
- 15 How do I center align right in Word?
- 16 Which key is used for Centre alignment?
- 17 How do I turn on alignment guides in Word?
- 18 How do I align an image in a header in Word?
- 19 How do you center a heading?
- 20 How do you arrange art on the wall when the couch is not centered?
How do you center a picture?
To center an image using text-align: center; you must place the inside of a block-level element such as a div . Since the text-align property only applies to block-level elements, you place text-align: center; on the wrapping block-level element to achieve a horizontally centered .
How do you center something in Word?
Use your mouse to select the text you wish to center. Click the Page Layout tab. Click the small Page Setup button at the bottom-right corner of the Page Setup section of the ribbon. Click the dropdown menu to the right of Vertical alignment and choose the Center option.
How do you center art?
Hang your Art by its Center
The artwork’s center should be 57 inches from the ground to match average eye level. People shouldn’t strain themselves to view the artwork. By placing the center of the artwork at eye level, it ensures the art can be admired comfortably.
How do you center a poster?
Space the posters evenly, no less than 1 inch apart and no more than 6 inches apart. The center of the grouping should be about 60 to 66 inches from the floor. If you have an odd number, use a horizontal row; vertical rows look best on narrow walls.
How do you center a picture in Word on a Mac?
Select what you want to center, and from the Page Layout tab, expand the Page Setup section. In the Layout tab, you’ll find a Vertical alignment drop-down menu in the Page section. Select Center from the drop-down menu. Make sure the Apply to drop-down menu has Selected text selected, and click OK.
What is the shortcut for center align in Word?
You can also center-align your text with the shortcut Ctrl+J (Cmnd+J). You can also change the alignment and justification settings in the paragraph dialog box.
How do I center a heading in Word?
Center Text Horizontally
- Triple-click the document’s title to select it.
- Click the “Home” tab in the Word ribbon.
- Click the icon of centered lines in the ribbon’s Paragraph group to center the title without affecting the rest of your text.
- Triple-click the document’s title to select it.
Should a picture be centered to the table or wall?
When hanging your pictures, always hang them in relation to the furniture sitting below. With your couch off-centered on the wall, focus on hanging your painting centered above the couch to create a great focal point for your living room.
How do I center an image in CSS?
This is also the way to center an image: make it into block of its own and apply the margin properties to it. For example: IMG. displayed { display: block; margin-left: auto; margin-right: auto }
How do you center a picture on a door with a wall?
When a wall, doorway, or window separates multiple pieces of artwork, level the centre of the artworks rather than the top or bottom of the frames. If hanging art next to a door, level the frames to be parallel to the side of the door.
How do you matte a poster?
Wear rubber gloves or wash your hands thoroughly to avoid leaving fingerprints on the poster and mat.
- Place the mat (face down) next to cardboard (face up).
- Then put your poster on the cardboard so that it was under a mat.
- Place any heavy objects on your piece, that it does not accidentally shifted.
Why can’t I align picture in Word?
Hold down Shift and use the mouse or touchpad to select the objects that you want to align. Select Shape Format or Picture Format.If you don’t see Align on the Shape Format tab, select Arrange, and then choose Align.
Why can’t I Align Center in Word?
Select the text that you want to center, and then click Paragraph on the Format menu. On the Indents and Spacing tab, change the setting in the Alignment box to Centered, and then click OK.On the Indents and Spacing tab, change the setting in the Alignment box to Centered, and then click OK.
How do you align pictures in Word 2016?
To align two or more objects:
- Hold the Shift (or Ctrl) key and click the objects you want to align. In our example, we’ll select the four shapes on the right.
- From the Format tab, click the Align command, then select one of the alignment options.
- The objects will be aligned based on the selected option.
How do I center align right in Word?
Click anywhere in a paragraph you want to align, or select multiple paragraphs. Click an alignment option in the Paragraph group.
Align a Paragraph
- To align left, press Ctrl + L.
- To align right, press Ctrl + R.
- To align center, press Ctrl + C.
- To justify, Ctrl + J.
Which key is used for Centre alignment?
Ctrl + E
Ctrl + E — Align selected text or line to the centre.
How do I turn on alignment guides in Word?
Turn on the snap-to options
- Select a chart, picture, or object in the document.
- On the right end of the ribbon, select Format > Align > Grid Settings. The Grid and Guides dialog box appears.
- Turn on one or both of these options: Option. Description. Snap objects to grid when the gridlines are not displayed.
Go back to page one and double-click in the header area to open the header/footer area. On the Header & Footer Tools > Design tab, click Insert Alignment Tab. On the Alignment Tab window, select Left then click OK. Leave all other settings as they are.
How do you center a heading?
To set the heading alignment in HTML, use the style attribute. The style attribute specifies an inline style for an element. The attribute is used with the HTML
tag, with the CSS property text-align.
How do you arrange art on the wall when the couch is not centered?
A good technique to use is to add art to each side of the couch, over other items or furnishings. Try to use pieces of artwork that are about the same size and are about the same distance away from the central artwork. While asymmetry can be very appealing, a symmetrical arrangement is often easier to use successfully.
![]()
Download Article
An easy-to-follow guide on aligning text in the center of Word documents
![]()
Download Article
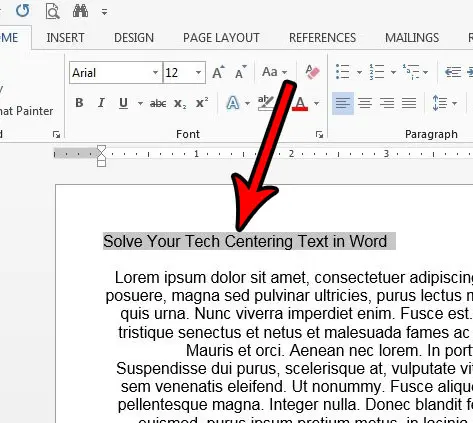
Microsoft Word offers a huge array of options for customizing your documents — so huge, in fact, that it can be hard to figure out how to do simple things like center your text. Luckily, the method is easy to remember once you know it. Simply click the «Center» option under the «Paragraph» label at the top of the page (or hit Ctrl+E as a shortcut to switch between centered and left-aligned text).
-
1
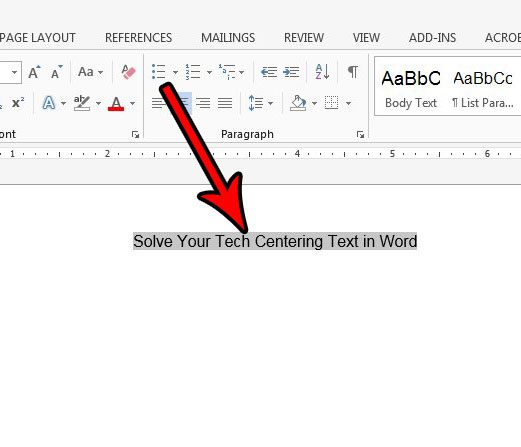
Highlight the text you want to center. If you already have text in the document, the first thing you must do is highlight it. Put the mouse cursor at the start of the text you want to center. Click and hold the left mouse button. Move the cursor to the end of the text you want to highlight. The text should now be bordered by a transparent blue box.
-
2
Click the «Center» button in the upper toolbar. Follow these directions:[1]
- Look at the toolbar at the top of the Word window (the space with all the options). The word «Home» in the top left should be selected (it will be by default). If it isn’t (or you’re not sure), click on «Home.»
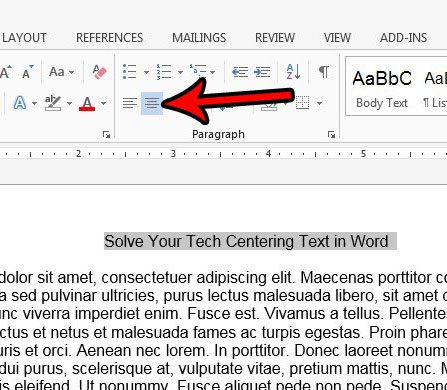
- Next, look under the «Paragraph» header, which is below «Home» and to the right. You should see three small buttons that look like pages with the text aligned to the left, center, and right.
- Click the button with the text aligned in the center.
Advertisement
-
3
Deselect your text. The text you selected should now be aligned evenly between the left and right margins. Now, click where you would like to continue typing and proceed with the rest of your document.
- If your text didn’t center, you may have accidentally deselected it before hitting the center button. You need to center your text while it’s selected without clicking anywhere else on the page.
-
4
If you haven’t typed anything yet, just click the «Center» button. If your document is completely blank, click the «Center» button from the directions above and any text you type will be center-aligned.
- If you want to add centered text at the end of your document, click at the end of your document, hit the enter/return key to start a new line, and click the «Center» button.
-
5
Alternatively, hit Ctrl+E. This keyboard combination will switch you back and forth between left-aligned text and centered text.[2]
If you use it while text is highlighted, the text will change to centered (and back if you hit the keys again). If you use it on a blank line, it will change the alignment of the cursor so that the next words you type are centered. -
6
Use the other buttons to change your alignment. The buttons next to the «Center» button in the toolbar allow you to get different text alignments. They all work the same way as the center button does. From left to right, the alignment buttons are:
- Align left
- Align center
- Align right
- Justify (similar to center except that words will automatically be stretched so that all the lines are the same width).


Advertisement
-
1
Highlight the text you want to center. This method will align the text midway between the top and bottom margins on the page. To start, highlight the text the same way as you would if you were aligning it horizontally (see method above).
- If you haven’t typed anything yet, skip this step. When you’re done, the text that you type will be centered vertically.
-
2
Open the Layout menu. Follow these directions:[3]
- Click «Page Layout» in the upper toolbar (to the right of the «Home» tab that’s selected by default).
- Click the «Page Setup» button.
- In the window that pops up, click the «Layout» tab.
-
3
Select a centered vertical alignment. In the tab you just selected, look for the «Vertical Alignment» box. Select «Center.»
-
4
Apply the changes. Clicking «OK» will change the alignment and return you to your document. If you like, you can use the options under «Apply to» to change which parts of your document are centered vertically.
- For example, if you have highlighted text that you want to center vertically, be sure to choose the «Selected text» option from the «Apply to» menu.


Advertisement
Add New Question
-
Question
How do I vertically align text in a table with rows?

Ankit Bhatt
Community Answer
Select the text within the table, then go to Layout in the ribbon area. You’ll see an alignment tab there; select any option from the Center line (Align Center Left, Align Center or Align Center Right). All of these will align your text vertically, along with the horizontal alignment you specify.
-
Question
How can I save a document in a folder on the desktop?
In the top left hand corner of the program, select ‘File’ and then select the ‘Save As…’ option. You can then save it to any directory you want. If the folder you want to put it into isn’t already on the desktop, you’ll need to move it there using windows explorer, or if you want to create a new folder on your desktop, right-click the desktop, and mouse over the ‘New’ option, and select ‘Folder’.
-
Question
If I have 3 lines, should 2 be above the center or below?
If the text is centered, the second line should be directly in the center, not above or below it.
Ask a Question
200 characters left
Include your email address to get a message when this question is answered.
Submit
Advertisement
-
If you want to emphasize important information, you may want to bold, italicize, or underline your information in addition to—or instead of—centering it. By default, these options are to the left of the alignment options under the «Font» header.
Thanks for submitting a tip for review!
Advertisement
About This Article
Thanks to all authors for creating a page that has been read 289,783 times.
Is this article up to date?
Text in a Microsoft Word document occasionally needs to be put in the center of the page between the left and right margins.
You might also need to know how to center text in Word vertically in Word documents, which means that it needs to be in the middle of the top and bottom margins.
You can vertically center text in Microsoft Word by selecting the text, choosing the Layout tab, clicking the Page Setup button, choosing the Layout tab, clicking the Vertical Alignment tab, choosing Center, then clicking Apply.
How to Horizontally Center Text in Microsoft Word
- Open the document in Word that contains the text you want to center.
- Use your mouse to select the text.
- Click the Home tab at the top of the window.
- Click the Center button in the Paragraph section of the ribbon.
How to Vertically Center Text in Microsoft Word
- Open the document containing the text to center vertically.
- Use your mouse to select the text you wish to center.
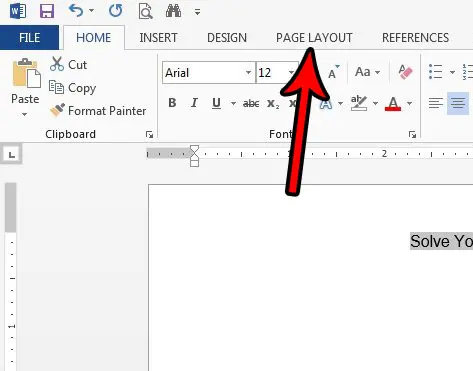
- Click the Page Layout tab.
- Click the small Page Setup button at the bottom-right corner of the Page Setup section of the ribbon.
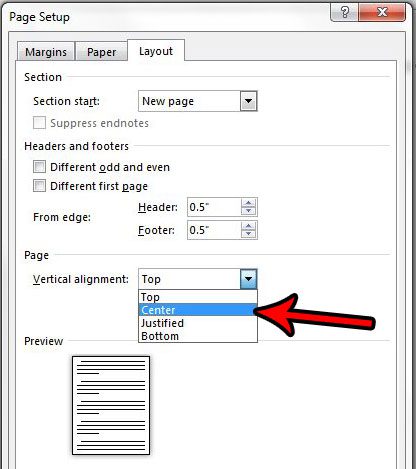
- Click the dropdown menu to the right of Vertical alignment and choose the Center option.
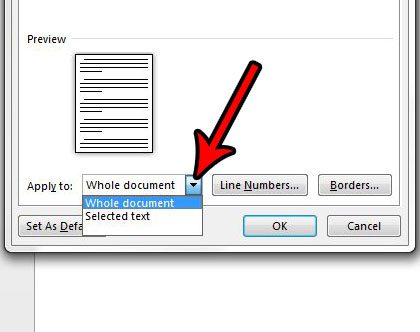
- Click the dropdown menu to the right of Apply to and choose the appropriate option, then click the OK button.
Our article continues below with additional information on how to center align text in Microsoft Word, including expanded sections with pictures for the steps above.
Last update on 2023-04-13 / Affiliate links / Images from Amazon Product Advertising API
| As an Amazon Associate, I earn from qualifying purchases.
Adding content to a document in Microsoft Word can include a variety of options. You can format that text using a number of different tools and dialog box menus in the application, and many of those changes can be applied by simply selecting the text you want to change.
But if you need to align text to the center of the page, whether it is vertical alignment or horizontal alignment, then you may be wondering where that setting is found.
When you start typing in a Word document that is using the Normal template, all of the text that you enter will be left aligned by default.
This means that the first letter on each line will be against the left margin of the page. This is the standard for most corporations and institutions and is the most common alignment format used in documents.
But sometimes, a part of your document will need to be centered on the page, either horizontally or vertically.
Our tutorial below will show you how to center text in Microsoft Word using either the horizontal or vertical alignment option so that you can achieve the desired display result for your document.
You may also want to know how to get rid of space after paragraphs in Google Docs if you use that application for document editing, too.
Expanded – How to Center Text in Microsoft Word Horizontally
The summary section above gives a brief overview of how to horizontally center text in Word, but this section provides pictures as well if you would like a little more information. Note that I am using Microsoft Word 2013 in the images below, but the process is the same in most other versions of Word as well.
Find out how to use all small caps in Word if you have been struggling to manually apply that formatting in your document.
Step 1: Open your document in Microsoft Word.
Step 2: Use your mouse to highlight the text that you want to center horizontally.
Step 3: Click the Home tab at the top of the window.
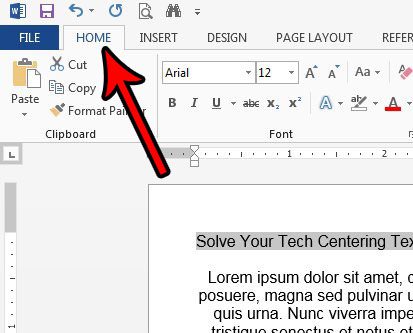
Step 4: Select the Center button in the Paragraph section of the ribbon.
The next section includes information on how to center text vertically if the text you want to modify in your document needs to be in the middle of the page.
Expanded – How to Center Text in Microsoft Word Vertically
We outlined how to vertically center text in the summary section above, but this section will provide images as well. This section was performed using Microsoft Word 2013.
Step 1: Open your document in Microsoft Word.
Step 2: Use your mouse to select the text that you want to center vertically.
If you wish to center the entire document you can skip this step.
Step 3: Click the Page Layout tab at the top of the window.
Step 4: Click the Page Setup button in the Page Setup section of the ribbon.
It’s the tiny button at the bottom-right corner of the section.
Step 5: Click the dropdown menu to the right of Vertical alignment, then choose the Center option.
Note that the vertical alignment drop down menu also has options for Top, Justified, and Bottom.
Step 6: Select the dropdown menu to the right of Apply to, then choose the option that fits your needs.
If you selected text earlier, then the Selected sections option will only vertically center that selected text. The Whole document option will vertically center the entire document, and the This point forward will vertically center all of the document text after the point at which your mouse cursor is currently located. Some of the vertical alignment options may not appear depending on the selected text’s locations, whether or not any text is selected, or the composition of the document.
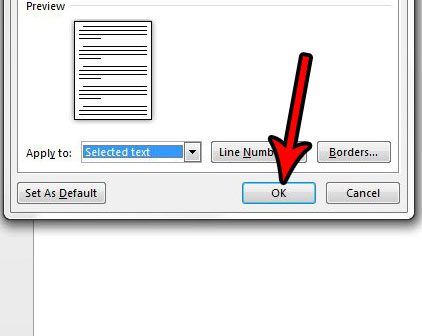
Step 7: Click the OK button to apply the vertical centering.
How to Center Text in a Table in Microsoft Word
If you have a table in your document and need to center the text in one of the table cells, then you get to use some table-specific centering options. By default the data in your table will be horizontally centered at the top of the table cell, but there are options that let you customize the alignment within a cell.
Step 1: Open the document containing the table text that you want to center.
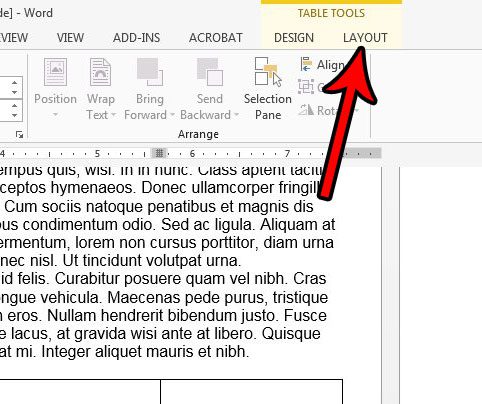
Step 2: Click inside the cell containing the data you wish to center.
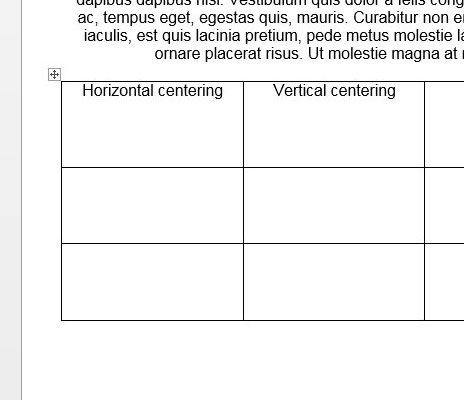
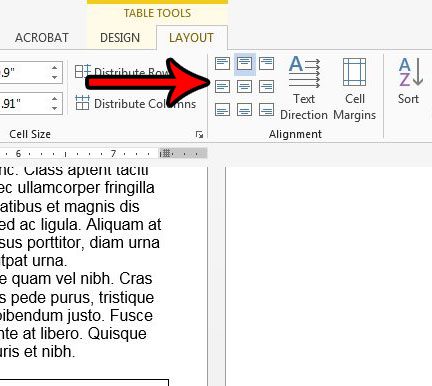
Step 3: Click the Layout tab at the top of the window under Table Tools.
Step 4: Click the desired alignment option in the Alignment section of the ribbon.
Additional Notes on How to Center Text in Word
- You can also center text horizontally by selecting it and then pressing Ctrl + E on your keyboard.
- One of the most common reasons to align text either horizontally or vertically is to add a title. If you are adding a title, be sure to check your work or school’s guidelines on titles, as they often include additional requirements like font sizes. You can adjust font styles in the Font section of the ribbon on the Home tab.
- If you center some text in your document, the center align text setting will typically persist. You will likely need to select the Left Align option after centering your text if you want to return to normal text alignment after centering some of your text.
- If you vertically center text in Word, you will have several options concerning what parts of your document should be centered. These options include the selected text, the whole document, or “this point forward.”
If you have left aligned text on a page and you need it to be center aligned, then the keyboard shortcut option might be a little easier than using the option on the Home tab.
However, when you need to create vertical centered text on a cover page or title pages, then you will need to use the Page Setup button in the Page Setup group and make the adjustment from the Vertical alignment drop down menu on the Layout tab.
Does your document have a title page, but you need to number your pages and skip that title page? Find out how to start page numbering on the second page in Word so that a page number doesn’t display on the title page.
Additional Sources

Matthew Burleigh has been writing tech tutorials since 2008. His writing has appeared on dozens of different websites and been read over 50 million times.
After receiving his Bachelor’s and Master’s degrees in Computer Science he spent several years working in IT management for small businesses. However, he now works full time writing content online and creating websites.
His main writing topics include iPhones, Microsoft Office, Google Apps, Android, and Photoshop, but he has also written about many other tech topics as well.
Read his full bio here.
Open the document in Word that contains the text you want to center. Use your mouse to select the text. Click the Home tab at the top of the window. Click the Center button in the Paragraph section of the ribbon.
How do I center in the middle of the page in Word?
Use Word’s Vertical Alignment settings to center a page From anywhere on the page, choose Page Setup from the File menu. Click the Layout tab. In the Page section, click the Vertical Alignment dropdown and choose Center. Click OK. No guesswork, just a centered page!.
What is the command for centering text?
Centered text is text that is centered between two edges. You can also center-align your text with the shortcut Ctrl+E (Cmnd+E).
How do you center text on a keyboard?
Ctrl+E Center – centers text between margins. Ctrl+R Align Right – aligns text to the right margin, and the left margin is ragged.
How do I center text horizontally in Word?
To align text horizontally on a page, highlight the text you want to center. Next, click the “Center Alignment” icon in the “Paragraph” group of the “Home” tab. Alternatively, you can use the Ctrl+E keyboard shortcut. Your text will now be horizontally aligned.
How do I right align text?
For example, in a paragraph that is left-aligned (the most common alignment), text is aligned with the left margin. In a paragraph that is justified, text is aligned with both margins.Align text left, center, or right. To Click Align text right Align Text Right.
How do I center align text to the left?
First, create a parent div that centers its child content with text-align: center . Next, create a child div that uses display: inline-block to adapt to the width of its children and text-align: left to make the content it holds align to the left as desired. Clear and effective. Thank you!Aug 13, 2009.
What is center alignment shortcut?
In MS Word Ctrl + C is the shortcut key to copy selected text. In MS Word Ctrl + E is the shortcut key to “Centre Align” the selected text.
How do I align text horizontally?
For vertical alignment, set the parent element’s width / height to 100% and add display: table . Then for the child element, change the display to table-cell and add vertical-align: middle . For horizontal centering, you could either add text-align: center to center the text and any other inline children elements.
How many ways can you align your text in?
There are four main alignments: left, right, center, and justified. Left-aligned text is text that is aligned with a left edge. Right-aligned text is text that is aligned with a right edge. Centered text is text that is centered between two edges.
How do you center a button?
How to center a button in CSS? text-align: center – By setting the value of text-align property of parent div tag to the center. margin: auto – By setting the value of margin property to auto. display: flex – By setting the value of display property to flex and the value of justify-content property to center.
How do I align left and right in Word?
Figure B On the Home tab, click the Paragraph group’s dialog launcher and then click Tabs in the bottom-left corner. Enter 6.5 in the Tab stop position. Click Right in the Alignment section (Figure C). Click Set. Click OK.
What is the shortcut key for Align Left?
Ctrl + L — Align selected text or line to the left.
How do you center something on the computer?
When editing a rich text file in Microsoft Word or another rich text editor, you can usually center text using the keyboard shortcut Ctrl + E . You may also click the center alignment icon, as shown in the picture.
How do you apply Centre alignment to a paragraph we can press?
To apply centre alignment to a paragraph we can press Ctrl + E.
What does the F5 function key do?
F5 is also commonly used as a reload key in many web browsers and other applications, while F11 activates the full screen/kiosk mode on most browsers. Under the Windows environment, Alt + F4 is commonly used to quit an application; Ctrl + F4 will often close a portion of the application, such as a document or tab.
How do you center a form?
Wrap your form in a div. Set the div’s display to block and text-align to center (this will center the contained form). Set the form’s display to inline-block (auto-sizes to content), left and right margins to auto (centers it horizontally), and text-align to left (or else its children will be center-aligned too).
What is center alignment?
Centre Alignment means that the text in the page is exactly in the centre.. also the distance from the left and right margin is equal to the text of the paragraph.
How do you align text in a resume?
Once you have the Tabs window open, you’ll need to make three selections: Tab stop position. The tab stop position tells Word where you want text aligned on the page. Alignment. Select Right to make sure the text is aligned right, as shown in the blue circle. Leader.
What is the default text alignment?
By default, the text in word processing applications such as Microsoft Word is aligned to the left. This means that the left edge of each paragraph is flush with the left margin.
What are the four types of alignment?
There are four main alignments: left, right, center, and justified.
What are two categories of text alignment?
(i) There are two categories of Text alignment: Horizontal Text Alignment: Text aligned with respect to left and right margins, Vertical Text Alignment: Text aligned with respect to top and bottom margins.
How do I center text vertically in a button?
Use line-height to center it vertically. I usually use the same value as its height. No need to use padding-top or margin-top for vertical align. Just use display: table-cell; and vertical-align: middle; .
How do you center text in CSS?
To center text in CSS, use the text-align property and define it with the value “center.” Let’s start with an easy example. Say you have a text-only web page and want to center all the text. Then you could use the CSS universal selector (*) or the type selector body to target every element on the page.
How do you center align text in HTML?
To center text using HTML, you can use the <center> tag or use a CSS property. To proceed, select the option you prefer and follow the instructions. Using the <center></center> tags. Using a style sheet property.
Which alignment is used to apply center?
Center the text vertically between the top and bottom margins. Select the text that you want to center. in the Page Setup group, and then click the Layout tab. In the Vertical alignment box, click Center.
Click the “Page Setup” button in the lower-right corner of the “Page Setup” section of the “Page Layout” tab. On the “Page Setup” dialog box, click the “Layout” tab. In the “Page” section, select “Center” from the “Vertical alignment” drop-down list. Your cover page text is now centered vertically on the page.
How do I center the contents horizontally?
How to Center Horizontally & Vertically in Excel
- Click the cell where you want to center the contents.
- Click “Home,” then click the small arrow in the bottom corner of the “Alignment” area of the ribbon.
- Click the drop-down box next to “Horizontal” and choose “Center.” Do the same thing in the box next to “Vertical.”
How do you center a table vertically in Word?
Centering Information in Table Cells
- Right-click on the cell containing the information you want to vertically center. This displays a Context menu for the cell.
- Choose the Alignment (Word 97) or Cell Alignment (Word 2000 or later) option from the Context menu.
- Choose the Center Vertically option.
How do you center a table vertically and horizontally in Word?
Right-click anywhere inside the table and then choose the “Table Properties” command from the context menu that appears. In the Table Properties window that opens, you can choose left, center, or right alignment by clicking those options in the “Alignment” section.
How do I write horizontally in Word?
Position text horizontally in a paragraph, shape, or text box
- Click or tap in the paragraph, line of text, shape, or text box that you want to modify.
- On the Home tab, select the horizontal alignment option that you want.
Why is my Word document off center?
Common causes for this include: The text has been set to right, centered, left, or justified alignment. Use the alignment tools under the Paragraph section of the Home menu to set the alignment you want. A special indentation, such as a first line or hanging indentation, may have been selected.
How do you center text vertically and horizontally?
For vertical alignment, set the parent element’s width / height to 100% and add display: table . Then for the child element, change the display to table-cell and add vertical-align: middle . For horizontal centering, you could either add text-align: center to center the text and any other inline children elements.
How do you align text horizontally or vertically in Microsoft Word?
First, highlight the text you want to align vertically. Once selected, head back to the “Layout” tab of the “Page Setup” dialog box. Next, choose the desired vertical alignment type, open the drop-down menu next to “Apply To,” select “Selected text,” and then click the “OK” button.
How do you adjust the margin on a Word document?
Click the outer edge of the text box to select it. On the Format menu, click Shape. In the left pane of the Format Shape dialog box, click Text Box. Under Internal Margin, adjust the measurements to increase or decrease the distance between the text and the outer border of the text box.
How to center a table horizontally in word?
Menu Toolbar. 1 Step 1: Select the Table. The first thing you need to do when it comes to how to center a table horizontally in Word is to select that table that 2 Step 2: Find the Center Button. 3 Step 3: Click the Center Button.
How do you center a page in word?
Follow these directions: Click “Page Layout” in the upper toolbar (to the right of the “Home” tab that’s selected by default). Click the “Page Setup” button. In the window that pops up, click the “Layout” tab. Select a centered vertical alignment. In the tab you just selected, look for the “Vertical Alignment” box. Select “Center.”
Apply Left, Center, Right or Justify Alignment to Text in Microsoft Word
by Avantix Learning Team | Updated April 13, 2022
Applies to: Microsoft® Word® 2010, 2013, 2016, 2019, 2021 and 365 (Windows)
You can align or justify text or other content in Word in several ways including using keyboard shortcuts, selecting commands in the Ribbon, using the Paragraph dialog box or modifying a style. It’s important to note that alignment or justification is paragraph formatting so applies to entire paragraphs. You can align text or inline graphics in paragraphs that are followed by a hard return (you pressed Enter or Return).
To see where paragraphs have been created in a Word document, it’s helpful to turn on Show/Hide ¶ on the Home tab in the Ribbon.
In this article, we’ll review 4 different ways to change horizontal alignment or justification in Word documents.
Recommended article: How to Insert a Line in Word (3+ Ways)
Do you want to learn more about Microsoft Word? Check out our virtual classroom or in-person Word courses >
There are 4 types of alignment that can be applied to paragraphs:
- Align left – aligns text or inline graphics with the left margin or indent
- Center – centers text or inline graphics between the left and right margins or indents
- Align right – aligns text or inline graphics with the right margin or indent
- Justify – distributes text evenly between the left and right margins or indents
A paragraph aligns within the indents (indent markers appear on the Ruler). The indents may be different from the margins. Paragraphs are also entered in cells in tables and each paragraph in a cell may have different indents and alignment settings.
1. Align or justify using keyboard shortcuts
To align or justify paragraphs using keyboard shortcuts:
- Align left – select the paragraph(s) and press Ctrl + L to align to the left.
- Align right – select the paragraph(s) and press Ctrl + R to align to the right.
- Align center – select the paragraph(s) and press Ctrl + E to align center.
- Justify – select the paragraph(s) and press Ctrl + J to justify.
2. Align or justify using the Ribbon
To align or justify paragraphs using the Word Ribbon
- Select the paragraph(s) to which you want to apply alignment or justification. If you would like to select all paragraphs, press Ctrl + A.
- Click the Home tab in the Ribbon and then click Align Left, Center, Align Right or Justify in the Paragraph group.
Align and Justify commands appear on the Home tab in the Ribbon in the Paragraph group:
![]()
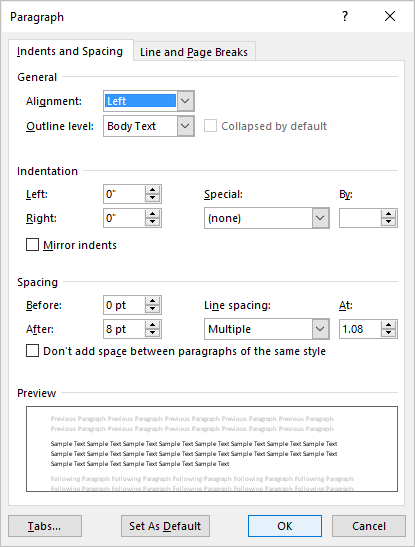
3. Align or justify using the Paragraph dialog box
To align or justify paragraphs using the Paragraph dialog box:
- Select the paragraph(s) to which you want to apply alignment or justification. If you would like to select all paragraphs, press Ctrl + A.
- Right-click and select Paragraph. The Paragraph dialog box appears.
- From the Alignment drop-down menu, select Left, Center, Right or Justify.
- Click OK.
You can also display the Paragraph dialog box by clicking the Home tab in the Ribbon and then clicking the dialog box launcher on the bottom right of the Paragraph group.
The Paragraph dialog box includes a drop-down menu to select Alignment:
4. Align or justify by modifying a style
When you create a new blank document, it starts out using the Normal style which contains default paragraph and character formatting.
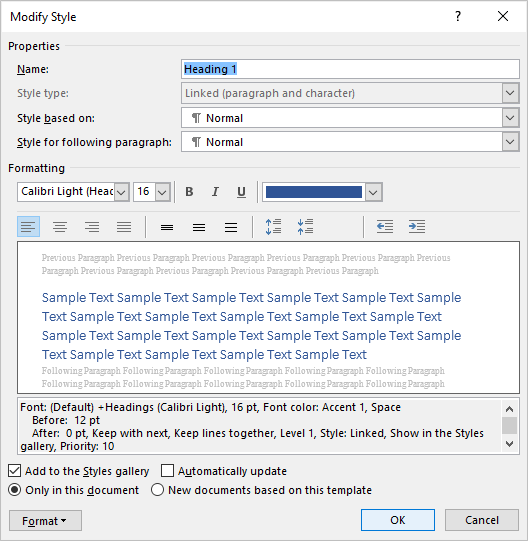
If you want to apply alignment or justification to multiple paragraphs throughout a document (such as a heading), you can modify a style (such as Heading 1).
To change the alignment for a heading style (such as Heading 1):
- Click in a paragraph using the heading style (typically applied through the Home tab in the Ribbon).
- Click the Home tab in the Ribbon.
- In the Styles group, right-click the heading style. A dialog box appears.
- Click Format. A drop-down menu appears.
- Click Paragraph. The Paragraph dialog box appears.
- From the Alignment drop-down menu, select Center or your preferred alignment.
- Click OK twice.
Below is the Modify Style dialog box with align and justify commands:
There may be issues if you modify alignment or justification in the Normal style since other styles are based on this style by default. Cells in tables would likely be affected and so would other styles that are based on the Normal style (such as Header, Footer and Heading styles). Paragraphs using these styles would then inherit the alignment or justification (unless alignment or justification has been specifically modified in these styles). If you are comfortable using styles, you could create your own style or modify a different Word style to avoid this issue.
Subscribe to get more articles like this one
Did you find this article helpful? If you would like to receive new articles, join our email list.
More resources
How to Double Space in Word (4 Ways + Shortcut)
How to Hide Comments in Word (or Display Them)
How to Find and Replace in Word (and Use Wildcards)
How to Create a Hanging or First Line Indent in Word (3 Ways)
How to Superscript or Subscript in Microsoft Word (with Shortcuts)
Related courses
Microsoft Word: Intermediate / Advanced
Microsoft Excel: Intermediate / Advanced
Microsoft PowerPoint: Intermediate / Advanced
Microsoft Word: Long Documents Master Class
Microsoft Word: Styles, Templates and Tables of Contents
Microsoft Word: Designing Dynamic Word Documents Using Fields
VIEW MORE COURSES >
Our instructor-led courses are delivered in virtual classroom format or at our downtown Toronto location at 18 King Street East, Suite 1400, Toronto, Ontario, Canada (some in-person classroom courses may also be delivered at an alternate downtown Toronto location). Contact us at info@avantixlearning.ca if you’d like to arrange custom instructor-led virtual classroom or onsite training on a date that’s convenient for you.
Copyright 2023 Avantix® Learning
Microsoft, the Microsoft logo, Microsoft Office and related Microsoft applications and logos are registered trademarks of Microsoft Corporation in Canada, US and other countries. All other trademarks are the property of the registered owners.
Avantix Learning |18 King Street East, Suite 1400, Toronto, Ontario, Canada M5C 1C4 | Contact us at info@avantixlearning.ca