
Word for Microsoft 365 Word 2021 Word 2019 Word 2016 Word 2013 Word 2010 Word 2007 More…Less
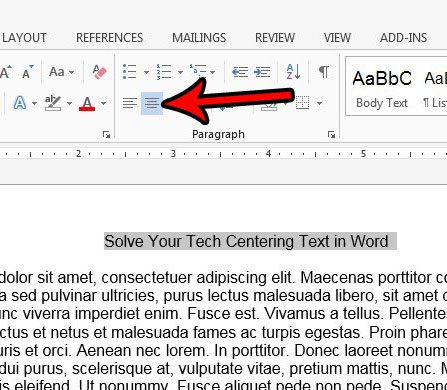
Alignment determines the appearance and orientation of the edges of the paragraph: left-aligned text, right-aligned text, centered text, or justified text, which is aligned evenly along the left and right margins. For example, in a paragraph that is left-aligned (the most common alignment), the left edge of the paragraph is flush with the left margin.
Vertical alignment determines the position of the text within a section of a document relative to the top and bottom margins, and is often used to create a cover page.
-
Select the text that you want to align.
-
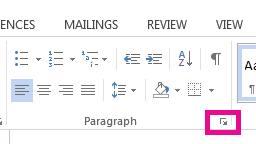
On the Home tab, in the Paragraph group, click Align Left
 or Align Right .
 or Align Right
  .
.-
Select the text that you want to center.
-
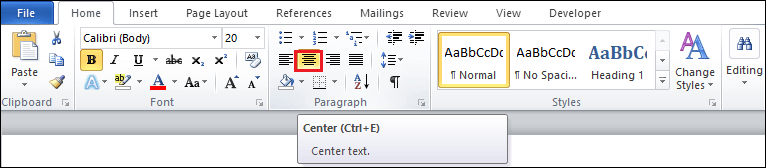
On the Home tab, in the Paragraph group, click Center
.
 .
.-
Select the text that you want to center.
-
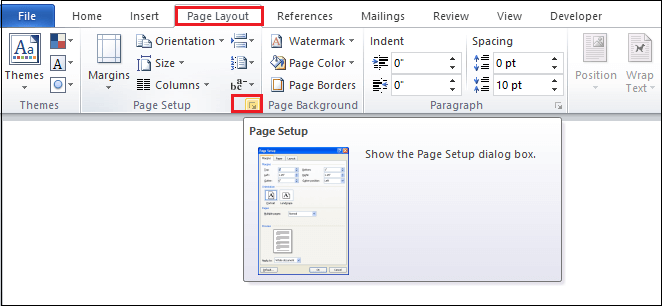
On the Layout or Page Layout tab, click the Dialog Box Launcher
in the Page Setup group, and then click the Layout tab. -
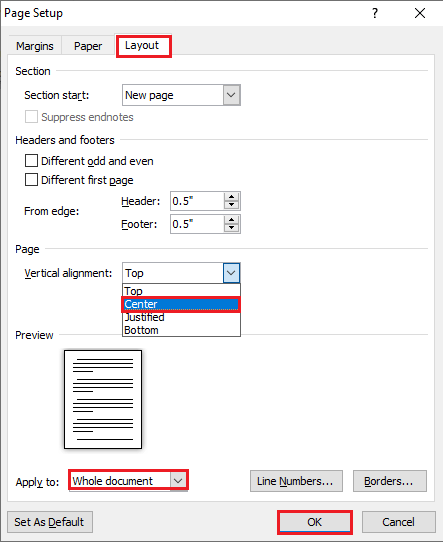
In the Vertical alignment box, click Center.
-
In the Apply to box, click Selected text, and then click OK.
 in the Page Setup group, and then click the Layout tab.
When you justify text in Word, you give your text straight edges on both sides of the paragraph. Justifying extends each line of your text to the left and right margins. Justifying text might make the last line of text in a paragraph considerably shorter than the other lines.
-
Select the text you want to justify.
-
On the Home tab, in the Paragraph group, click Justify
.
 .
.Tips:
-
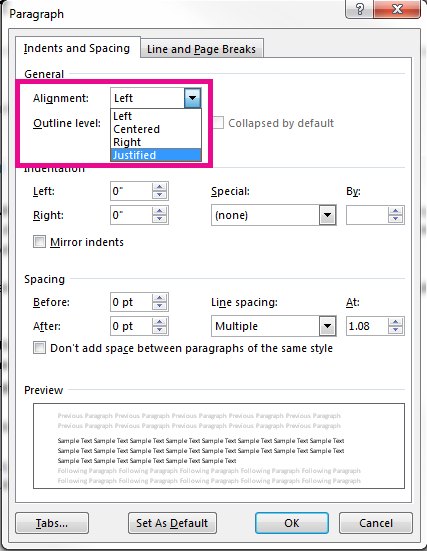
In the Paragraph group, click the Dialog Box Launcher
, and select the Alignment drop-down menu to set your justified text. -
You can also use the keyboard shortcut, Ctrl + J to justify your text.
In Office Word 2007, you can choose from a selection of predesigned cover pages to create a professional-looking document quickly and easily.
-
On the Insert tab, in the Pages group, click Cover Page.
-
Click the cover page that you want.
A cover page is always added to the beginning of the open document.

See also
Adjust indents and spacing
Need more help?
Want more options?
Explore subscription benefits, browse training courses, learn how to secure your device, and more.
Communities help you ask and answer questions, give feedback, and hear from experts with rich knowledge.
Text in a Microsoft Word document occasionally needs to be put in the center of the page between the left and right margins.
You might also need to know how to center text in Word vertically in Word documents, which means that it needs to be in the middle of the top and bottom margins.
You can vertically center text in Microsoft Word by selecting the text, choosing the Layout tab, clicking the Page Setup button, choosing the Layout tab, clicking the Vertical Alignment tab, choosing Center, then clicking Apply.
How to Horizontally Center Text in Microsoft Word
- Open the document in Word that contains the text you want to center.
- Use your mouse to select the text.
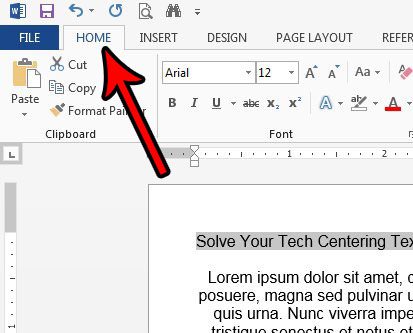
- Click the Home tab at the top of the window.
- Click the Center button in the Paragraph section of the ribbon.
How to Vertically Center Text in Microsoft Word
- Open the document containing the text to center vertically.
- Use your mouse to select the text you wish to center.
- Click the Page Layout tab.
- Click the small Page Setup button at the bottom-right corner of the Page Setup section of the ribbon.
- Click the dropdown menu to the right of Vertical alignment and choose the Center option.
- Click the dropdown menu to the right of Apply to and choose the appropriate option, then click the OK button.
Our article continues below with additional information on how to center align text in Microsoft Word, including expanded sections with pictures for the steps above.
Last update on 2023-04-13 / Affiliate links / Images from Amazon Product Advertising API
| As an Amazon Associate, I earn from qualifying purchases.
Adding content to a document in Microsoft Word can include a variety of options. You can format that text using a number of different tools and dialog box menus in the application, and many of those changes can be applied by simply selecting the text you want to change.
But if you need to align text to the center of the page, whether it is vertical alignment or horizontal alignment, then you may be wondering where that setting is found.
When you start typing in a Word document that is using the Normal template, all of the text that you enter will be left aligned by default.
This means that the first letter on each line will be against the left margin of the page. This is the standard for most corporations and institutions and is the most common alignment format used in documents.
But sometimes, a part of your document will need to be centered on the page, either horizontally or vertically.
Our tutorial below will show you how to center text in Microsoft Word using either the horizontal or vertical alignment option so that you can achieve the desired display result for your document.
You may also want to know how to get rid of space after paragraphs in Google Docs if you use that application for document editing, too.
Expanded – How to Center Text in Microsoft Word Horizontally
The summary section above gives a brief overview of how to horizontally center text in Word, but this section provides pictures as well if you would like a little more information. Note that I am using Microsoft Word 2013 in the images below, but the process is the same in most other versions of Word as well.
Find out how to use all small caps in Word if you have been struggling to manually apply that formatting in your document.
Step 1: Open your document in Microsoft Word.
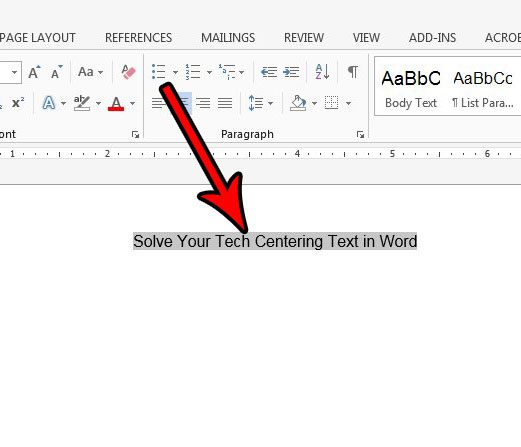
Step 2: Use your mouse to highlight the text that you want to center horizontally.
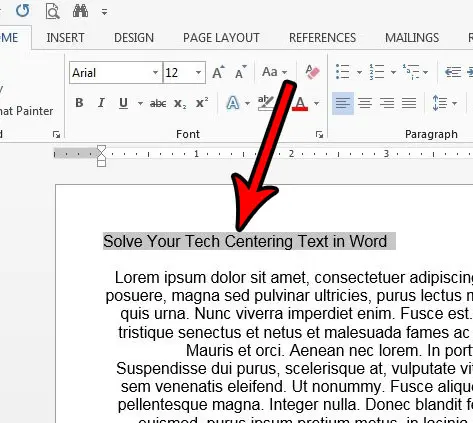
Step 3: Click the Home tab at the top of the window.
Step 4: Select the Center button in the Paragraph section of the ribbon.
The next section includes information on how to center text vertically if the text you want to modify in your document needs to be in the middle of the page.
Expanded – How to Center Text in Microsoft Word Vertically
We outlined how to vertically center text in the summary section above, but this section will provide images as well. This section was performed using Microsoft Word 2013.
Step 1: Open your document in Microsoft Word.
Step 2: Use your mouse to select the text that you want to center vertically.
If you wish to center the entire document you can skip this step.
Step 3: Click the Page Layout tab at the top of the window.
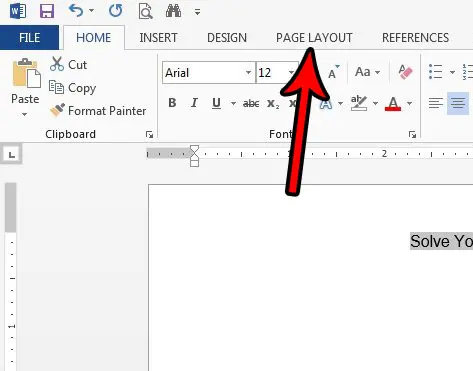
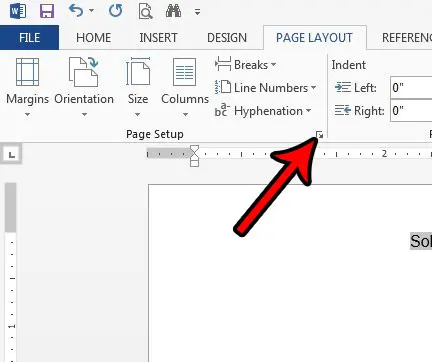
Step 4: Click the Page Setup button in the Page Setup section of the ribbon.
It’s the tiny button at the bottom-right corner of the section.
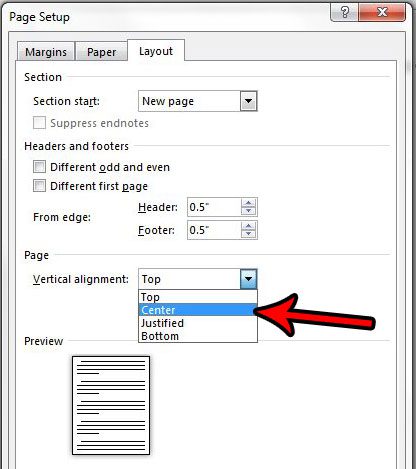
Step 5: Click the dropdown menu to the right of Vertical alignment, then choose the Center option.
Note that the vertical alignment drop down menu also has options for Top, Justified, and Bottom.
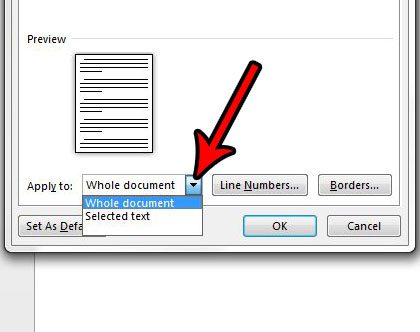
Step 6: Select the dropdown menu to the right of Apply to, then choose the option that fits your needs.
If you selected text earlier, then the Selected sections option will only vertically center that selected text. The Whole document option will vertically center the entire document, and the This point forward will vertically center all of the document text after the point at which your mouse cursor is currently located. Some of the vertical alignment options may not appear depending on the selected text’s locations, whether or not any text is selected, or the composition of the document.
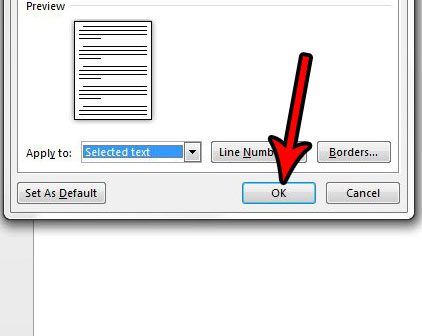
Step 7: Click the OK button to apply the vertical centering.
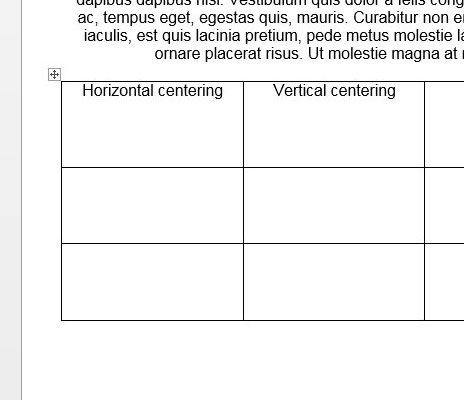
How to Center Text in a Table in Microsoft Word
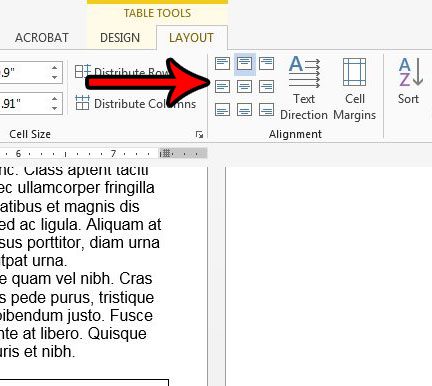
If you have a table in your document and need to center the text in one of the table cells, then you get to use some table-specific centering options. By default the data in your table will be horizontally centered at the top of the table cell, but there are options that let you customize the alignment within a cell.
Step 1: Open the document containing the table text that you want to center.
Step 2: Click inside the cell containing the data you wish to center.
Step 3: Click the Layout tab at the top of the window under Table Tools.
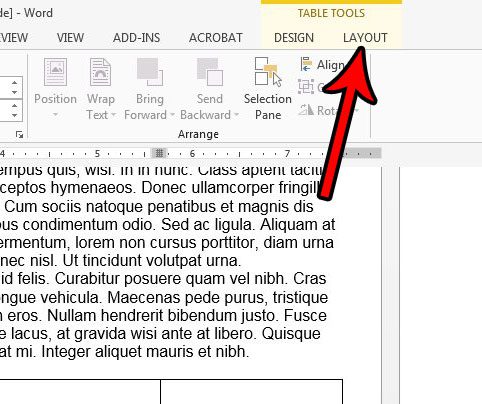
Step 4: Click the desired alignment option in the Alignment section of the ribbon.
Additional Notes on How to Center Text in Word
- You can also center text horizontally by selecting it and then pressing Ctrl + E on your keyboard.
- One of the most common reasons to align text either horizontally or vertically is to add a title. If you are adding a title, be sure to check your work or school’s guidelines on titles, as they often include additional requirements like font sizes. You can adjust font styles in the Font section of the ribbon on the Home tab.
- If you center some text in your document, the center align text setting will typically persist. You will likely need to select the Left Align option after centering your text if you want to return to normal text alignment after centering some of your text.
- If you vertically center text in Word, you will have several options concerning what parts of your document should be centered. These options include the selected text, the whole document, or “this point forward.”
If you have left aligned text on a page and you need it to be center aligned, then the keyboard shortcut option might be a little easier than using the option on the Home tab.
However, when you need to create vertical centered text on a cover page or title pages, then you will need to use the Page Setup button in the Page Setup group and make the adjustment from the Vertical alignment drop down menu on the Layout tab.
Does your document have a title page, but you need to number your pages and skip that title page? Find out how to start page numbering on the second page in Word so that a page number doesn’t display on the title page.
Additional Sources

Matthew Burleigh has been writing tech tutorials since 2008. His writing has appeared on dozens of different websites and been read over 50 million times.
After receiving his Bachelor’s and Master’s degrees in Computer Science he spent several years working in IT management for small businesses. However, he now works full time writing content online and creating websites.
His main writing topics include iPhones, Microsoft Office, Google Apps, Android, and Photoshop, but he has also written about many other tech topics as well.
Read his full bio here.
![]()
Download Article
An easy-to-follow guide on aligning text in the center of Word documents
![]()
Download Article
Microsoft Word offers a huge array of options for customizing your documents — so huge, in fact, that it can be hard to figure out how to do simple things like center your text. Luckily, the method is easy to remember once you know it. Simply click the «Center» option under the «Paragraph» label at the top of the page (or hit Ctrl+E as a shortcut to switch between centered and left-aligned text).
-
1
Highlight the text you want to center. If you already have text in the document, the first thing you must do is highlight it. Put the mouse cursor at the start of the text you want to center. Click and hold the left mouse button. Move the cursor to the end of the text you want to highlight. The text should now be bordered by a transparent blue box.
-
2
Click the «Center» button in the upper toolbar. Follow these directions:[1]
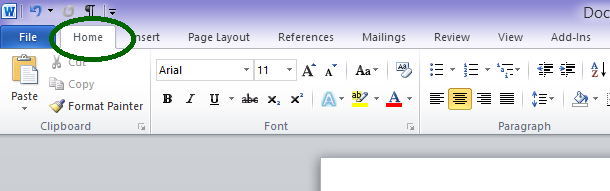
- Look at the toolbar at the top of the Word window (the space with all the options). The word «Home» in the top left should be selected (it will be by default). If it isn’t (or you’re not sure), click on «Home.»
- Next, look under the «Paragraph» header, which is below «Home» and to the right. You should see three small buttons that look like pages with the text aligned to the left, center, and right.
- Click the button with the text aligned in the center.
Advertisement
-
3
Deselect your text. The text you selected should now be aligned evenly between the left and right margins. Now, click where you would like to continue typing and proceed with the rest of your document.
- If your text didn’t center, you may have accidentally deselected it before hitting the center button. You need to center your text while it’s selected without clicking anywhere else on the page.
-
4
If you haven’t typed anything yet, just click the «Center» button. If your document is completely blank, click the «Center» button from the directions above and any text you type will be center-aligned.
- If you want to add centered text at the end of your document, click at the end of your document, hit the enter/return key to start a new line, and click the «Center» button.
-
5
Alternatively, hit Ctrl+E. This keyboard combination will switch you back and forth between left-aligned text and centered text.[2]
If you use it while text is highlighted, the text will change to centered (and back if you hit the keys again). If you use it on a blank line, it will change the alignment of the cursor so that the next words you type are centered. -
6
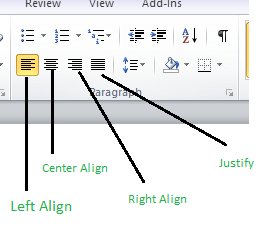
Use the other buttons to change your alignment. The buttons next to the «Center» button in the toolbar allow you to get different text alignments. They all work the same way as the center button does. From left to right, the alignment buttons are:
- Align left
- Align center
- Align right
- Justify (similar to center except that words will automatically be stretched so that all the lines are the same width).


Advertisement
-
1
Highlight the text you want to center. This method will align the text midway between the top and bottom margins on the page. To start, highlight the text the same way as you would if you were aligning it horizontally (see method above).
- If you haven’t typed anything yet, skip this step. When you’re done, the text that you type will be centered vertically.
-
2
Open the Layout menu. Follow these directions:[3]
- Click «Page Layout» in the upper toolbar (to the right of the «Home» tab that’s selected by default).
- Click the «Page Setup» button.
- In the window that pops up, click the «Layout» tab.
-
3
Select a centered vertical alignment. In the tab you just selected, look for the «Vertical Alignment» box. Select «Center.»
-
4
Apply the changes. Clicking «OK» will change the alignment and return you to your document. If you like, you can use the options under «Apply to» to change which parts of your document are centered vertically.
- For example, if you have highlighted text that you want to center vertically, be sure to choose the «Selected text» option from the «Apply to» menu.


Advertisement
Add New Question
-
Question
How do I vertically align text in a table with rows?

Ankit Bhatt
Community Answer
Select the text within the table, then go to Layout in the ribbon area. You’ll see an alignment tab there; select any option from the Center line (Align Center Left, Align Center or Align Center Right). All of these will align your text vertically, along with the horizontal alignment you specify.
-
Question
How can I save a document in a folder on the desktop?
In the top left hand corner of the program, select ‘File’ and then select the ‘Save As…’ option. You can then save it to any directory you want. If the folder you want to put it into isn’t already on the desktop, you’ll need to move it there using windows explorer, or if you want to create a new folder on your desktop, right-click the desktop, and mouse over the ‘New’ option, and select ‘Folder’.
-
Question
If I have 3 lines, should 2 be above the center or below?
If the text is centered, the second line should be directly in the center, not above or below it.
Ask a Question
200 characters left
Include your email address to get a message when this question is answered.
Submit
Advertisement
-
If you want to emphasize important information, you may want to bold, italicize, or underline your information in addition to—or instead of—centering it. By default, these options are to the left of the alignment options under the «Font» header.
Thanks for submitting a tip for review!
Advertisement
About This Article
Thanks to all authors for creating a page that has been read 289,783 times.
Is this article up to date?
MS-Word is a word processing application that provides many powerful tools, these tools provide a great advantage to the user. It is used to create documents like letters, articles, etc. MS-Word is an interactive and very user-friendly application. It has been developed by Microsoft Corporation Ltd.
Text Alignments
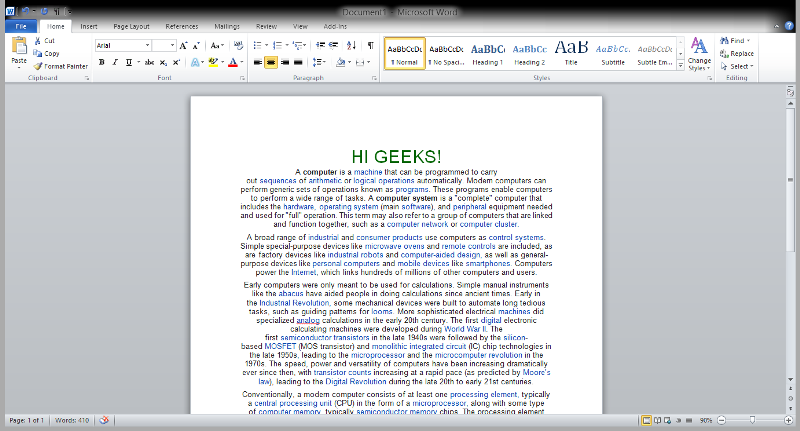
This is one of the features provided by MS-Word to its user. This feature is used by the user to align text or paragraphs so that it gives a good look or a kind of systematic look. There are 4 types of text alignments which are left-aligned, center-aligned, right-aligned, and justified. (All 4 are shown in the below image.
Left-Aligned Text
A paragraph or a text is left-aligned when that paragraph or text is aligned evenly along the left margin of the page in MS-Word. Now, we will learn step by step with the help of a diagram to make a paragraph text left-aligned.
Step 1: First open MS-Word on your PC.
Step 2: Now, Open the document or create a new one in which you want to perform this operation.

Step 3: Now, select the paragraph text which you want to make Left-aligned.
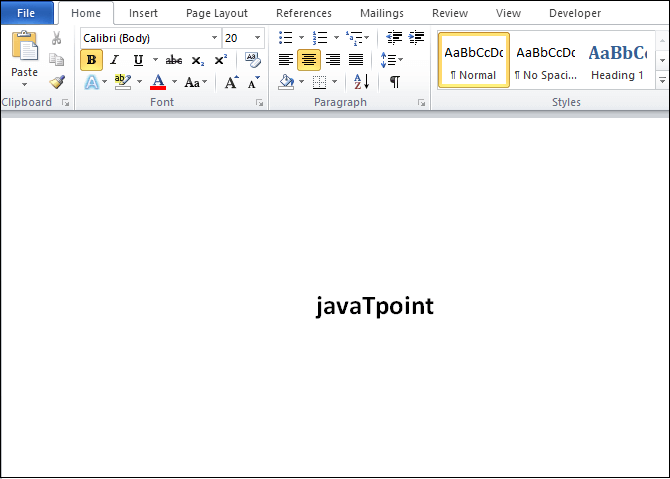
Step 4: Now, go to the “Home” tab and click on that. (As shown in the below image)
Step 5: Now, go to the “Paragraph” section in the “Home” tab and click on the Left-Align text button.

Step 6: The paragraph text is aligned to left successfully.

Alternate way or using shortcut key:
The shortcut key for Left-Aligned Text is “Ctrl + L”.
Now, we can use a shortcut key for the same. Let us see this also step by step:
Step 1: First open MS-Word on your PC.
Step 2: Now, Open the document or create a new one in which you want to perform this operation.
Step 3: Now, select the paragraph text which you want to make Left-aligned.
Step 4: Now, use the Shortcut key which is “Ctrl +L “.
Step 5: The paragraph text is aligned to left successfully.
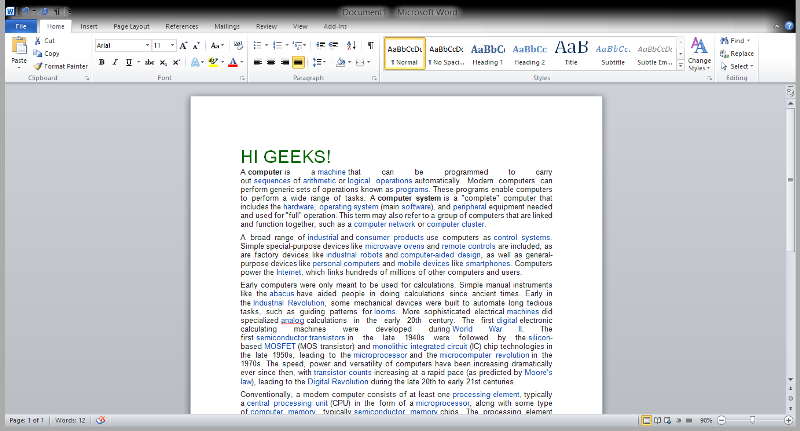
Center Aligned Text
A paragraph’s text or a text will be center-aligned if the paragraph or text is in the center of the left and right margins of the page in MS-Word. Now, we will learn step by step with the help of a diagram to make a paragraph text center-aligned.
Step 1: First open MS-Word on your PC.
Step 2: Now, Open the document or create a new one in which you want to perform this operation.
Step 3: Now, select the paragraph text which you want to make Center-aligned.
Step 4: Now, go to “Home” tab and click on that. (As shown in the below image)
Step 5: Now, go to the “Paragraph” section in the “Home” tab and click on the Center-Align text button.

Step 6: The paragraph text is aligned to the center successfully.
Alternate way or using shortcut key:
The shortcut key for Center-Aligned Text is “Ctrl + E”.
Now, we can use a shortcut key for the same. Let us see this also step by step:
Step 1: First open MS-Word on your PC.
Step 2: Now, Open the document or create a new one in which you want to perform this operation.
Step 3: Now, select the paragraph text which you want to make Center-aligned.
Step 4: Now, use the Shortcut key which is “Ctrl +E“.
Step 5: The paragraph text is aligned to the Center successfully.
Right-Aligned Text
A paragraph’s text is said to be right-aligned when it is aligned evenly along the right margin of the page in MS-Word. Now, we will learn step by step with the help of a diagram to make a paragraph text right-aligned.
Step 1: First open MS-Word on your PC.
Step 2: Now, Open the document or create a new one in which you want to perform this operation.
Step 3: Now, select the paragraph text which you want to make Center-aligned.
Step 4: Now, go to the “Home” tab and click on that. (As shown in the below image)
Step 5: Now, go to the “Paragraph” section in the “Home” tab and click on the Right-Align text button.

Step 6: The paragraph text is aligned to the center successfully.
Alternate way or using shortcut key:
The shortcut key for Right-Aligned Text is “Ctrl + R”.
Now, we can use a shortcut key for the same. Let us see this also step by step:
Step 1: First open MS-Word on your PC.
Step 2: Now, Open the document or create a new one in which you want to perform this operation.
Step 3: Now, select the paragraph text which you want to make Right-aligned.
Step 4: Now, use the Shortcut key which is “Ctrl +R“.
Step 5: The paragraph text is aligned to the Right successfully.
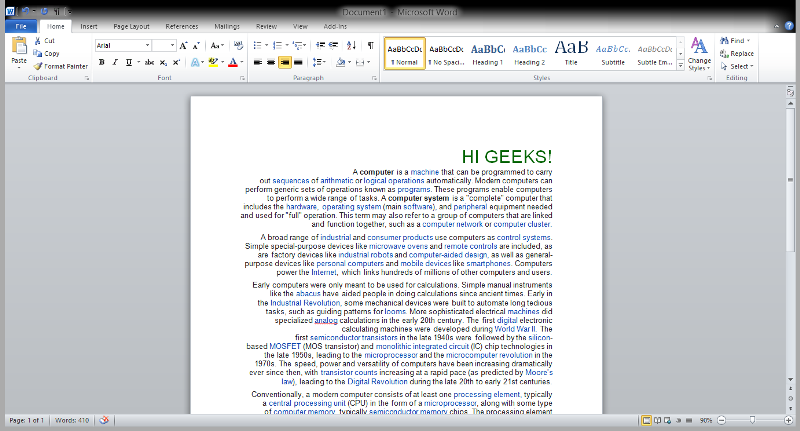
Justified Text
A paragraph’s text is said to be justified when it is aligned evenly along both the left side and the right side margins of the page in MS-Word. Now, we will learn step by step with the help of a diagram to make a paragraph text justified.
Step 1: First open MS-Word on your PC.
Step 2: Now, Open the document or create a new one in which you want to perform this operation.
Step 3: Now, select the paragraph text which you want to make justified text.
Step 4: Now, go to the “Home” tab and click on that. (As shown in the below image)
Step 5: Now, go to the “Paragraph” section in the “Home” tab and click on Justify text button.

Step 6: The paragraph text is aligned to the Justified text successfully.
Alternate way or using shortcut key:
The shortcut key for Justified Text is “Ctrl + J”.
Now, we can use a shortcut key for the same. Let us see this also step by step:
Step 1: First open MS-Word on your PC.
Step 2: Now, Open the document or create a new one in which you want to perform this operation.
Step 3: Now, select the paragraph text which you want to make Justified Text.
Step 4: Now, use the Shortcut key which is “Ctrl +j“.
Step 5: The paragraph text is aligned to the Justified text successfully.
Centering text improves the appearance of the Word document.
There are the following methods that you can use to make your text center in Word document ?
Note: Using the below methods, you can center text in Word 2010, 2013, 2016, 2019, and Office 365.
Method 1: Center the text horizontally
This method is used to center the text between the left and right margins of the page.
Step 1: Select the text that you want to center in Word document.
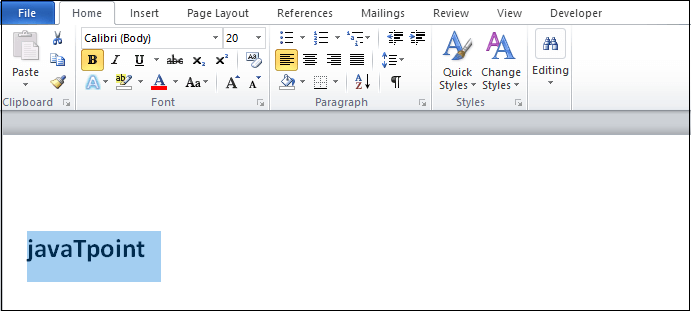
Step 2: Go to the Home tab on the ribbon and click on the Center text icon in the Paragraph section, or you can also press the Ctrl+E key from the keyboard.
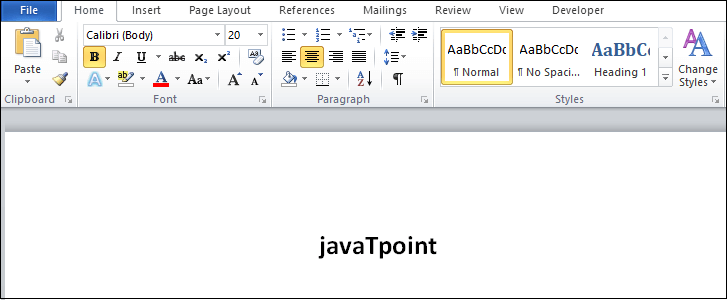
The screenshot below shows that the selected text is in the center of the page.
Method 2: Center the text vertically
This method id used to center the text between top to bottom margins of the page.
There are the following steps to center the text vertically ?
Step 1: Select the text that you want to center in Word document.

Step 2: Go to the Page Layout tab on the ribbon and click on the Dialog Box Launcher icon in the Page Setup section.
Step 3: A page Set up window appears on the screen in which do the following:
- Click on the Layout tab at the top of the screen.
- Select the Vertical alignment Center from the drop-down menu.
- Make sure apply to select as Whole document.
- Click on the OK button at the bottom of the screen.
The below screenshot shows that your selected text is centered vertically.
Change Word’s default vertical alignment for special design effects
Updated on October 21, 2022
What to Know
- To center text in Word, use the Vertical alignment menu.
- The Vertical Alignment menu also controls Top, Justified, and Bottom text alignment.
- To center text in Word for only part of the document, highlight what you want to center before choosing Vertical Alignment.
This article explains how to center text in Word. Instructions apply to Word for Microsoft 365, Word 2019, Word 2016, Word 2013, Word 2010, Word 2007, and Word 2003.
How to Vertically Align Text in Word
When you want to position text in a section of a document relative to the top and bottom margins, use vertical alignment.
To reflect a change in the vertical alignment, the document page or pages must be only partially full of text.
For Microsoft Word 2019, 2016, 2013, 2010, and 2007
-
Open the Word document in which you want to vertically align the text.
-
Go to the Layout tab (or Page Layout, depending on the version of Word).
-
In the Page Setup group, select the Page Setup dialog launcher (which is located in the lower-right corner of the group).
-
In the Page Setup dialog box, choose the Layout tab.
-
In the Page section, select the Vertical alignment drop-down arrow and choose either Top, Center, Justified, or Bottom.
If you choose Justified, the text is spread out evenly from top to bottom.
-
Select OK.
-
Your text will now be aligned the way you selected.
For Word 2003
To vertically align text in Microsoft Word 2003:
-
Select File.
-
Choose Page Setup.
-
In the Page Setup dialog box, select Layout.
-
Select the Vertical alignment drop-down arrow and choose either Top, Center, Justified, or Bottom.
-
Select OK.
Vertically Align Part of a Word Document
When you use the steps above, the default condition is to change the vertical alignment of the entire Microsoft Word document. If you want to change the alignment of only part of the document, select the text you want to vertically align.
Here’s how to vertically align part of a document:
-
Select the text you want to vertically align.
-
Go to the Layout tab (or Page Layout, depending on the version of Word).
-
In the Page Setup group, select the Page Setup dialog launcher (it’s located in the lower-right corner of the group).
-
In the Page Setup dialog box, choose the Layout tab.
-
In the Page section, select the Vertical alignment drop-down arrow and choose an alignment.
-
In the Preview section, select the Apply to drop-down arrow and choose Selected text.
-
Select OK to apply the alignment to the selected text.
-
Any text before or after the selection retains the existing alignment choices.
If you don’t select text prior to performing the alignment selection, the Selected text preference can only be applied from the cursor’s current location to the end of the document.
To make this work, position the cursor, then:
-
Go to the Layout tab (or Page Layout, depending on the version of Word).
-
In the Page Setup group, select the Page Setup dialog launcher (which is located in the lower-right corner of the group).
-
In the Page Setup dialog box, choose the Layout tab.
-
In the Page section, select the Vertical alignment drop-down arrow and choose an alignment.
-
In the Preview section, select the Apply to drop-down arrow and choose This point forward.
-
Select OK to apply the alignment to the text.
FAQ
-
What is the default text alignment in Microsoft Word?
The standard text alignment default in Word (and most other word processing programs) is left-justified.
-
How do I create vertical text in Microsoft Word?
Create a text box and type what you want into it, then right-click on the edge of the box and select Format Shape from the drop-down menu. Select Size/Layout & Properties > Text Box, then open the drop-down menu next to Text Direction. From there, choose the options that best suit your needs.
Thanks for letting us know!
Get the Latest Tech News Delivered Every Day
Subscribe
Updated: 12/30/2021 by
Below are the steps on how to change or move the alignment of text in a word processor and most text editing programs. View the steps for the program you are using by clicking one of the links below.
Align text in Microsoft Word
Tip
The steps below are for changing the alignment of text in Microsoft Word. They can also be used to align text in a column or row for Microsoft Excel and most other text programs.
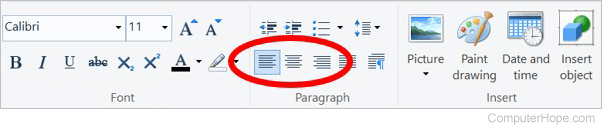
To change the horizontal alignment of text in Word, highlight the text you want to change and click the left, center, or right alignment icons, as shown in the image. In all new versions of Microsoft Word, the alignment options are found under the Home tab.
- How to highlight or select text.
or
Press one of the shortcut keys to adjust the alignment of any highlighted text. For left alignment, highlight the text and press Ctrl+L to align text to the left margin. For center alignment, highlight the text and press Ctrl+E. For right alignment, highlight the text and press Ctrl+R to align text to the right.
Adjusting the vertical alignment
If you want to change the vertical alignment of text, follow the steps listed below.
- Open Microsoft Word
- Click File and then Page Setup
- Click the Layout tab
- Under Vertical alignment, click the down arrow and select center, bottom, or the alignment you want to use. If you do not want this setting to affect the whole document, change the «Apply to» to the selected text.
Align text in WordPad
To change the horizontal alignment of text in WordPad, highlight the text and click the left, center, or right alignment icons in the Paragraph section of the menu bar.
- How to highlight or select text.
Note
If you’re working with a .txt file or save the file as a .txt file, all formatting is lost, including any alignment. If you want to align text in a .txt file, edit the file, and then use the Save As option to save it as a .rtf, .docx, or .odt.
Align text in Google Docs

In Google Docs, you can click one of the alignment options (left, center, right) in the top center of the toolbar.
or
Press one of the shortcut keys to adjust the alignment of any highlighted text.
- For left alignment, highlight the text and press Ctrl+Shift+L.
- For center alignment, highlight the text and press Ctrl+Shift+E.
- For right alignment, highlight the text and press Ctrl+Shift+R.
or
- Open Google Docs
- Highlight the text you want to align.
- Click Format, Align, and then choose an alignment.
- How to highlight or select text.
Align text in OpenOffice Writer
To change the horizontal alignment of the text in OpenOffice Writer, highlight the text you want to change and click the left, center, or right icons on the toolbar. These icons look similar to those shown in the above example picture of the Microsoft Word.
- How to highlight or select text.
How to change the vertical alignment
OpenOffice Writer does not have a feature like Microsoft Word that lets you vertically align text. However, this can still be done using frames. To do this, follow the steps listed below.
- Open OpenOffice Writer
- Click Insert
- Click Frame
- In the Frame window under type, change the horizontal and vertical position to center and both to «Entire page.»
- Because the frame has borders, unless you want to keep these borders, click the borders tab and click None under Style.
- Once done, you have a frame in the center of your page to enter any text and have it centered.
Просмотров 6.3к.
Чтобы выровнять текст в ворде достаточно воспользоваться кнопками на главной панели Microsoft Word, горячими клавишами, линейкой и табуляцией. Расскажу подробно, как это сделать правильно быстро и без ущерба для набранного текста.
Содержание
- Инструменты группы «Абзац»
- Кнопки на главной панели
- Окно «Абзац»
- Горячие клавиши
- Когда не нужно выравнивать текст по ширине
- Использование табуляции
- Линейка
- Если нужно выровнять текст по вертикали
- Используем инструменты «Параметров страницы»
- Используем линейку для вертикального выравнивания
- Особенности выравнивания текста в таблице
- Выравниваем текст в текстовом поле
- Вывод
Инструменты группы «Абзац»
Горизонтальное положение текста в Word настраивается тремя способами – с помощью горячих клавиш, через панель быстрого доступа и в меню «Абзац», которое вызывается правой кнопкой мыши. Каждый из перечисленных вариантов предполагает разный подход, но схожий результат.
Кнопки на главной панели
Блок «Абзац» располагается на панели быстрого доступа в верхней части интерфейса. Если выделить текст, а после обратиться к заранее подготовленным шаблонам выравнивания, то Word начнет перемещать текст в выбранном направлении.

Выравнивается информация по левому и правому краям, по центру и по ширине. По умолчанию выбран вариант «По левому краю», но какой из вариантов необходим – зависит от требований, выдвигаемых к документу.
Окно «Абзац»
Кроме панели быстрого доступа, расположенной над страницей в Word, раскрыть контекстное меню «Абзац» разработчики из Microsoft разрешают и с помощью правой кнопки мыши при нажатии на выделенный фрагмент текста.

Следующие действия уже знакомые – найти поле «Выравнивание», а после выбрать подходящий вариант. Указанное оформление применяется к выделенному фрагменту текста, но, если перед переходом к «Абзацу» воспользоваться комбинацией Ctrl + A, то форматирование применится ко всему документу сразу.

Горячие клавиши
Каждый раз обращаться к панели быстрого доступа при оформлении многостраничных документов долго и не слишком удобно: приходится переключаться между вкладками, искать Текст в Word выравнивается с помощью набора горячих клавиш:
- По левому краю – Ctrl + L;
- По ширине – Ctrl + J;
- По правому краю – Ctrl + R;
- По центру – Ctrl + E
Применяются горячие клавиши и к отдельным страницам, и к выбранным фрагментам текста. При повторном использовании комбинации параметры выравнивания автоматически сбрасываются. Запомнить сочетания несложно: достаточно действовать по аналогии: L – Left; J – Justify; R – Right.
Когда не нужно выравнивать текст по ширине
Равномерного распределения информации по странице (выравнивание по ширине) требуют в высших образовательных учреждениях, в государственных организациях и в бухгалтерии на производстве. И причин придерживаться стиля несколько: текст не обрывается, слова не переносятся, а страница заполняется равномерно.

Проблемы с выравниванием по ширине возникают лишь в том случае, если текст в документ копируется с веб-страниц. При попытке выставить информацию по ширине начнутся сложности – абзацы начнут склеиваться, а слова – менять положение в произвольном порядке. Проблема решается с помощью раздела «Заменить», вызываемого комбинацией Ctrl + H.
Настройка выравнивания скопированного текста работает по следующему сценарию: необходимо строку «Найти» заполнить с помощью комбинации «.^p» (без кавычек), а «Заменить» на «11».
После того, как Word поменяет значения процедуру предстоит повторить в обратном порядке: сверху вписать «11», а снизу – «.^p».
Использование табуляции
Табуляция – распространенный, но неправильный способ выравнивания текста в Word, нарушающий структуру документа и вносящий беспорядок в форматирование. Всему виной – работа с текстом «на глаз».
Каждое нажатие на Tab по умолчанию сдвигает текст на 1,25 сантиметра (классический отступ). И, если с помощью табуляции задавать абзацы, то проблем с оформлением не возникнет, но как быть, если сдвинуть необходимо заголовок? Сколько раз предстоит нажимать на Tab и как перенести подготовленное выравнивание на последующие заголовки нескольких уровней?
Кроме проблем с расчетами табуляция не в лучшем свете выглядит и при просмотре подготовленного документа на сторонних компьютерах, где доступны иные версии Word. Вероятность того, что текст, получивший выравнивание с помощью Tab, потеряет заданное положение на странице, приближается к 100%.
Линейка
Перемещать текст по странице с помощью «Линейки» рекомендуется в исключительных случаях, когда не спасают настройки категории «Абзац» и необходимо придерживаться специфического оформления. И главная причина не обращаться лишний раз к «Линейке» – нарушение параметров всего текстового поля на странице.

Понаблюдать за радикальными изменениями Word разрешает с помощью вкладки «Вид», где в разделе «Отображение» достаточно поставить галочку напротив «Линейки». После активации параметра над страницей появится специальный ползунок, разрешающий контролировать размеры видимой области текста.

Если сдвинуть специальные индикаторы, то информация поменяет местоположение по горизонтали. Но вместе с тем переместится и остальной текст на всех страницах документа.
Если нужно выровнять текст по вертикали
Кроме горизонтального выравнивания в Word предусмотрено и вертикальное, которое применяется в разы реже, а потому ни специальных горячих клавиш, ни раздел «Абзац» со сменой оформления не справятся. Действовать предстоит по иному сценарию.
Используем инструменты «Параметров страницы»
Перед применением официального способа для разметки разработчики из Microsoft рекомендуют добавить и выделить фрагмент текста (как вариант – заголовок), а после переключиться на вкладку «Макет», расположенную на панели быстрого доступа», и вызвать контекстное меню «Параметры страницы».

Когда Word отобразит тематическое меню сверху появится и блок дополнительных ссылок для перехода. Из предлагаемых вариантов понадобится «Источник бумаги».

Следующий шаг – выбор параметра «Вертикального выравнивания» (вариантов четыре – по верхнему краю, по центру, по высоте, по нижнему краю) и смена особенностей раздела «Применить к» (необходимо выбрать «к выделенному тексту»). Если подходящие параметры выбраны, значит, пора нажать на «ОК» и просмотреть итоговый результат. Word отцентрирует текст и вынесет в то место, которое выбрано в параметрах.
Используем линейку для вертикального выравнивания
Кроме горизонтальных полей «Линейка» в Word пригодится и при вертикальном выравнивании. Порядок действий тот же – выбрать категорию «Вид» на панели быстрого доступа в верхней части интерфейса, поставить галочку напротив пункта «Линейка» в разделе «Отображение», а после – с помощью курсора – менять положение верхнего поля, двигая ползунок в подходящем направлении слева от страниц документа.

Промежуточный результат настраиваемого положения текста отображается в Word пунктирной линией: редактор наглядно продемонстрирует, насколько сильно поменяют положение абзацы и какое место займет добавленная информация.

Способ с «Линейкой» полностью повторяет принцип с добавлением настроек в разделе «Поля», представленном в категории «Макет». Если задать «Верхний отступ», то результат отобразится соответствующий.

Особенности выравнивания текста в таблице
Текст, добавленный в ячейки таблицы, в Word настраивается через контекстное меню, вызываемое правой кнопкой мыши. Если из появившегося списка выбрать «Свойства», то редактор от Microsoft отобразит серию тематических разделов, скрывающих инструменты для настройки вертикального и горизонтального выравнивания.

Вкладка «Таблица» разрешает задавать отступы, настраивать оформление и задавать конкретные размеры ширины для строк и столбцов.

Если переключиться на раздел «Ячейка», то отобразится информация о конкретном выделенном блоке, а вместе с тем – параметр выравнивания по вертикали.
При взаимодействии с таблицами работают и стандартные горячие клавиши – Ctrl + E, Ctrl + L, но только после выделения ячеек.
Выравниваем текст в текстовом поле
Текстовые поля в Word добавляются через категорию «Вставка», расположенную на панели быстрого доступа в верхней части интерфейса. После вызова тематического контекстного меню на страницах документа сразу появится смысловой блок или цитата с заранее подготовленным содержимым.

Оформление для текстового поля задается текстовым редактором в зависимости от выбранного шаблона: Word добавляет фон, подбирает шрифт и центрирует информацию. Но выставленные настройки по умолчанию с легкостью редактируются с помощью категории «Абзац» и контекстных меню, вызываемых правой кнопкой мыши.

Вне зависимости от способа необходимо придерживаться трех правил: выделять блок рекомендуется стандартным нажатием левой кнопкой мыши, клавиша Tab стирает текст в выбранном поле, а при попытке перетащить информацию на соседнюю страницу вся конструкция сразу развалится.
Вывод
Форматировать и выравнивать текст в Word разработчики из Microsoft разрешают и с помощью панели быстрого доступа с настройками, и задействуя наборы горячих клавиш, и даже полагаясь на экспериментальные способы – табуляцию и настраиваемые поля.
Какой из способов выбрать – зависит от типа оформляемого документа. Если верстается дипломная работа, то доверять Tab и линейке не рекомендуется – велика вероятность столкнуться с неровно составленными абзацами и некорректно расставленными переносами слов. Официальным документам требуется оформление с помощью инструментов соответствующего порядка.
Шесть проверенных способов на выбор.

Выравнивание — один из базовых приёмов форматирования текста, который чаще всего применяется при оформлении документов. Существует масса различных способов задать нужное расположение текста или отдельных его фрагментов на страницах как по горизонтали (что требуется чаще), так и по вертикали.
Как выровнять текст в Word по горизонтали
1. Через панель инструментов
Самый простой метод выравнивания текста, о котором могут не знать только новички. И всё же его тоже необходимо упомянуть.
Переключитесь на вкладку «Главная» и поставьте курсор на нужный абзац либо выделите фрагмент текста.
Кликните по одной из кнопок, отвечающей за выравнивание.
2. С помощью горячих клавиш
Этот способ знают в основном только опытные пользователи. Он позволяет применять те же варианты выравнивания, что и предыдущий, но с помощью сочетания клавиш. Согласитесь, это удобнее и гораздо быстрее.
Нажмите на клавиатуре Ctrl + L, Ctrl + E, Ctrl + R, Ctrl + J — для выравнивания по левому краю, центру, правому краю и по ширине соответственно.
3. Из настроек абзаца
Расположение отдельных частей текста можно также задавать через меню «Абзац», где доступны все стандартные варианты выравнивания.
Поставьте курсор на нужный абзац, кликните правой кнопкой мыши и выберите в контекстном меню «Абзац».
Установите желаемый способ выравнивания и нажмите OK.
4. С помощью линейки
Для визуального выравнивания блоков текста, особенно когда их необходимо подогнать под иллюстрации или другие объекты на странице, удобно использовать линейку.
Перейдите на вкладку «Вид» и в меню «Отображение» включите «Линейку».
Двигая стрелки, выровняйте текст. Верхняя меняет отступ первой строки, а левая и правая — размер отступов с каждой стороны.
При этом, если перетащить границы линейки, можно изменить размеры полей и таким образом отодвинуть текст от краёв.
Как выровнять текст в Word по вертикали
1. Через параметры страницы
Для вертикального выравнивания текста, когда, например, он набран крупным шрифтом и его не много, проще всего воспользоваться настройками документа.
Переключитесь на вкладку «Макет» и кликните «Параметры страницы».
В открывшемся окошке перейдите в раздел «Источник бумаги» и выберите необходимый вариант для вертикального выравнивания.
2. Из макета таблицы
Когда в документе есть таблицы, иногда необходимо выровнять по высоте текст внутри ячеек. Для этого тоже существует специальная опция.
Выделите таблицу и переключитесь на вкладку «Макет».
Кликните по кнопке «Выравнивание» и установите один из вариантов на центральный столбец.
Читайте также 🖨💻📅
- 25 секретов Word, которые упростят работу
- Как поставить ударение в Word
- Как настроить интервалы в Word
- 3 способа уменьшить размер документа в MS Word
- Как вставить, редактировать или убрать колонтитулы в Word
Содержание
- 0.1 Создание заголовка с помощью встроенных стилей
- 1 Заголовок 1
- 1.1 Заголовок 2
- 1.2 Создание собственного стиля и сохранение его в качестве шаблона
- 1.3 Помогла ли вам эта статья?
- 2 Как выровнять заголовок по центру в ворде
Порой элементарные вещи на деле выглядят не такими уж безобидными и требуют гораздо больше усилий для достижения результата.
Почти
в любом тексте присутствует
заголовок документа . Для его
выделения из общего текста применяется
оформление цветом, шрифтом, размером и так далее. А также прием расположения
по центру страницы Word . Таким образом, весь
документ выглядит намного аккуратнее и акцентирует внимание в местах начала новых глав.
Расположить
заголовок по центру в документе Word можно, например, с помощью клавиши пробела, нажимая до тех пор, пока курсор не встанет примерно в центр листа по горизонтали. Но эти лишние щелчки клавишей можно исключить, и расположить
заголовок текста
по центру страницы , применив элементарное действие —
один щелчок клавиши мышки.
Для этого необходимо установить курсор в начало заголовка, который предполагается перемещать в центр. Затем на вкладке меню ленты «Главная» в разделе «Абзац» нажать значок «
Выровнять по центру ».
Все. Команда активирована. Ваш заголовок переместится в центр листа с учетом установленных параметров страницы.
Упростить эту ситуацию уж совсем до безобразия можно воспользовавшись сочетанием клавиш
Ctrl
+
E
!
В этом разделе «Абзац» к документу можно применить другие способы выравнивания текста, например «Выравнивание по ширине», а еще: уменьшитьувеличить отступ, изменить интервал между строками текста, изменить цвет фона выделенного участка текста и так далее.
——————————————————————————————-

Некоторые документы требуют особого оформления, и для этого в арсенале MS Word содержится довольно много средств и инструментов. В числе таковых различные шрифты, стили написания и форматирования, инструменты для выравнивания и многое другое.
Урок: Как выравнивать текст в Ворде
Как бы там ни было, но практически любой текстовый документ невозможно представить без заголовка, стиль которого, конечно же, должен отличаться от основного текста. Решение для ленивых — выделить заголовок жирным, увеличить шрифт на один-два размера и на этом остановится. Однако, есть ведь и более эффективное решение, позволяющее сделать заголовки в Word не просто заметными, а правильно оформленными, да и просто красивыми.
Урок: Как изменить шрифт в Ворде
Создание заголовка с помощью встроенных стилей
В арсенале программы MS Word имеется большой набор встроенных стилей, которые можно и нужно использовать для оформления документов. Кроме того, в данном текстовом редакторе можно также создать и свой собственный стиль, а затем использовать его в качестве шаблона для оформления. Итак, чтобы сделать заголовок в Ворде, выполните следующие действия.
Урок: Как в Word сделать красную строку
1. Выделите заголовок, который необходимо оформить должным образом.

2. Во вкладке “Главная” разверните меню группы “Стили”, нажав на небольшую стрелочку, расположенную в ее правом нижнем углу.

3. В окне, которое откроется перед вами, выберите необходимый тип заголовка. Закройте окно “Стили”.

это основной заголовок, идущий в самом начале статьи, текста;

Заголовок 1
заголовок меньшего уровня;

Заголовок 2
еще меньше;

Подзаголовок
собственно, это и есть подзаголовок.

Примечание: Как можно заметить со скриншотов, стиль заголовка помимо изменения шрифта и его размера также изменяет и междустрочный интервал между заголовком и основным текстом.
Урок: Как изменить междустрочный интервал в Ворде
Важно понимать, что стили заголовков и подзаголовков в MS Word являются шаблонными, в их основе лежит шрифт Calibri, а размер шрифта зависит от уровня заголовка. При этом, если у вас текст написан другим шрифтом, другого размера, вполне может быть такое, что шаблонный заголовок меньшего (первого или второго) уровня, как и подзаголовок, будут мельче, чем основной текст.
Собственно, именно так получилось в наших примерах со стилями “Заголовок 2” и “Подзаголовок”, так как основной текст у нас написан шрифтом Arial, размер — .
Создание собственного стиля и сохранение его в качестве шаблона
Как было сказано выше, помимо шаблонных стилей, вы также можете создать свой собственный стиль оформления заголовков и основного текста. Это позволяет переключаться между ними по необходимости, а также использовать любой из них в качестве стиля по умолчанию.
1. Откройте диалоговое окно группы “Стили”, расположенной во вкладке “Главная”.

2. В нижней части окна нажмите на первую кнопку слева “Создать стиль”.

3. В окне, которое перед вами появится, задайте необходимые параметры.

В разделе “Свойства” введите название стиля, выберите ту часть текста, для которой он будет использоваться, выберите стиль, на котором он основан, а также укажите стиль для следующего абзаца текста.

В разделе “Формат” выберите шрифт, который будет использоваться для стиля, укажите его размер, тип и цвет, положение на странице, тип выравнивания, задайте отступы и междустрочные интервалы.
В нижней части окна “Создание стиля” выберите необходимый пункт:
- “Только в этом документе” — стиль будет применим и сохранен только для текущего документа;
- “В новых документах, использующих этот шаблон” — созданный вами стиль будет сохранен и станет доступен для использования в дальнейшем в других документах.

Выполнив необходимые настройки стиля, сохранив его, нажмите кнопку “ОК”, чтобы закрыть окно “Создание стиля”.
Вот простой пример стиля заголовка (хотя, скорее, подзаголовка), созданного нами:

Примечание: После того, как вы создадите и сохраните свой собственный стиль, он будет находится в группе “Стили”, которая расположена во вкладе “Главная”. Если он не будет отображаться непосредственно на панели управления программы, разверните диалоговое окно “Стили” и найдите его там по названию, которое вы придумали.

Урок: Как сделать автоматическое содержание в Ворде
На этом все, теперь вы знаете, как правильно сделать заголовок в MS Word, используя шаблонный стиль, доступный в программе. Также теперь вы знаете о том, как создать свой собственный стиль оформления текста. Желаем вам успехов в дальнейшем изучении возможностей этого текстового редактора.
Мы рады, что смогли помочь Вам в решении проблемы.
Задайте свой вопрос в комментариях, подробно расписав суть проблемы. Наши специалисты постараются ответить максимально быстро.
Помогла ли вам эта статья?
Да Нет
Как выровнять заголовок по центру в ворде
В разделе Программное обеспечение на вопрос Как сделать заголовок по центру заданный автором Просветление лучший ответ это На верху смотрите, листочки нарисованы с полосочками посередине и по бокам, Вам нужна та что посредине
Ответ от
22 ответа
Привет! Вот подборка тем с ответами на Ваш вопрос: Как сделать заголовок по центру
Ответ от Imobilazer
Где, в блокноте, ан сайте, в ворде, в экселе, на пачке яблочного сока? Нажать «Выравнивание по центру»
Ответ от Невроз
Эти слова, что хочешь сделать по центру, выдели с помощью мышки. И на верху, в WORLD, там есть значки, поищи значок «сделать по центру».
Ответ от
2 ответа
Привет! Вот еще темы с нужными ответами: