
Microsoft Word is more than just a tool for typing text. It can be used for other types of editing as well, and that includes spicing up your text to look more professional. For example, if you want to circle your text, or add a text around a circle, these are things you can do, and we are going to explain how to get them done. One of the reasons one might want to add a circle around a text is to emphasize it, but there are other reasons as well, so do what makes you feel comfortable. In this post, we show you how to insert text in a Circle. We also show you how to circle Text in Microsoft Word using built-in functions.
How to add a Circle around Text in Word
Drawing a circle around a text is easier than you might imagine. We promise that this article will not be difficult to understand, so read carefully and things should turn out just fine.
- Open Microsoft Word
- Launch a new document
- Navigate to Shapes
- Select the circle shape
- Draw the shape in your document
- Edit Shape Format
- Drag circle over text
1] Open Microsoft Word
To begin this task, you must first launch Microsoft Word. You can find the icon on the Desktop, Taskbar, or from within the Start Menu.
2] Launch a new document
After you’ve fired up Word, you must now click on Black Document to open a new document, or launch one you’ve been working on before; the choice is yours.
3] Navigate to Shapes

The next step, then, is to locate the Shapes area. To do this, click on Insert > Shapes. You will see a dropdown menu showcasing several different types of shapes. The options to choose from are as follows:
- Lines
- Basic Shapes
- Block Arrows
- Flowchart
- Callouts
- Start and Banners
4] Select the circle shape
From under the Basic Shapes category, please click on the circle icon, or to be more correct, the oval icon.
5] Draw the shape in your document
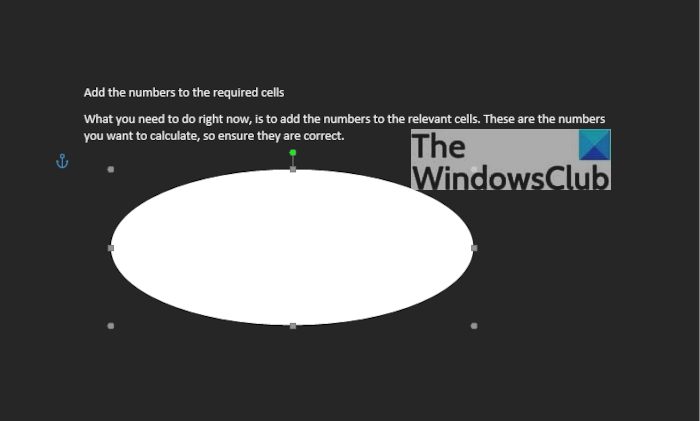
After selecting the circle, you must press and hold the left-click button, then drag to create the circle in the preferred size and position.
6] Edit Shape Format
By default, the circle will be added to your document with a color-filled center. This means, the text won’t show on the inside, so we need to change this.
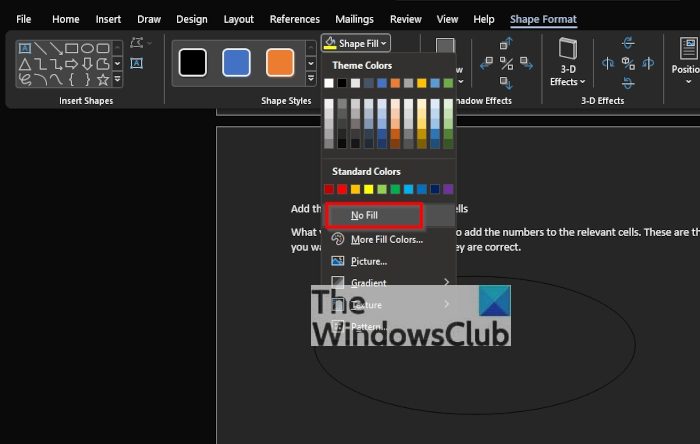
To get it done, click on the shape, then select Shape Format > Shape Fill > No Fill. Doing this will remove the color from within the center of the circle.
From there, you can click on Shape Outline to determine the color of the circle’s outline.
7] Drag circle over text
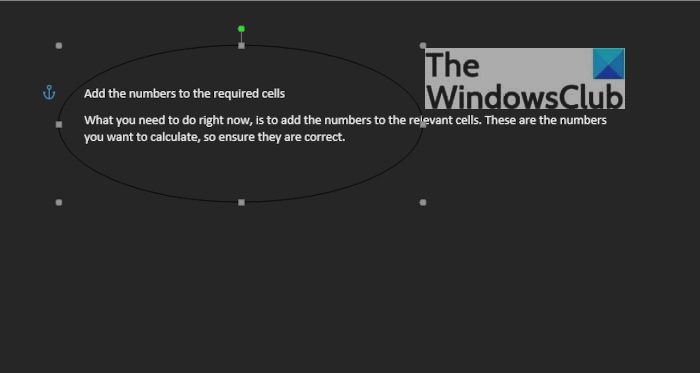
The final thing you will want to do, then, is to drag the circle over the preferred line of text. Adjust the circle to allow the text to fit perfectly in the center, or in whichever form you wish.
Read: How to insert a blank page anywhere in your Word document
Apart from just creating a circle around text, folks can also create the text. Let’s look at how to do this.
- Navigate to WordArt
- Select the WordArt style you want
- Click on Shape Format or Drawing Tools Format
- Go to Transform
- Choose the circular shape
- For the newer version of Microsoft Word
- Set the circular word around a picture or shape
1] Navigate to WordArt
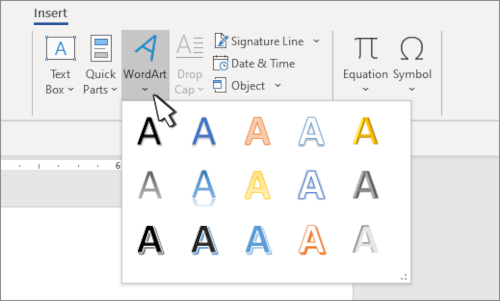
We assume you already have a Microsoft Word document opened, so from your current position, click on Insert, then select the WordArt icon from the Text menu.
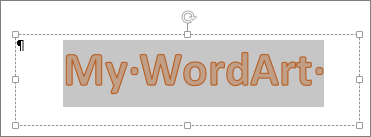
2] Select the WordArt style you want
From here, you must choose the WordArt style that makes sense for your needs. Once selected, you must then type the preferred name or words for your art and hit the OK button. The art will appear in your document.
3] Click on Shape Format or Drawing Tools Format
After your WordArt has made its way to your document, you must then move to choose either Shape Format, or the Drawing Tools tab. Doing this will highlight new features to play around with.
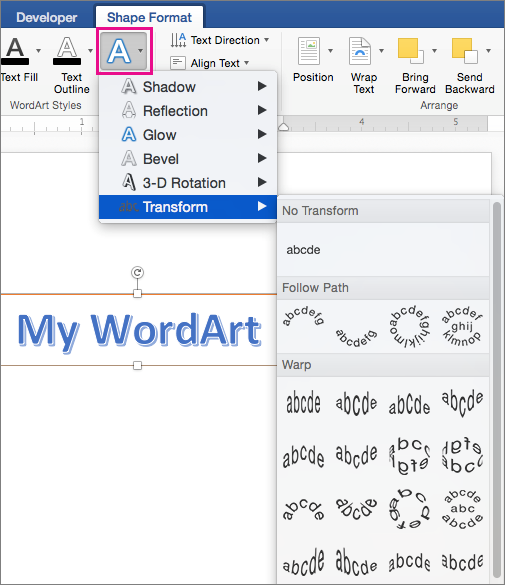
4] Go to Transform
![]()
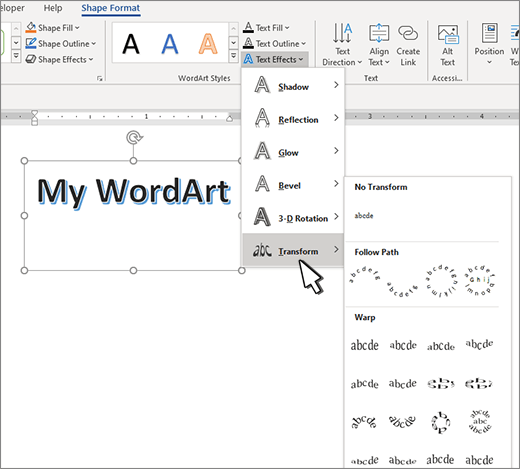
Next, you are required to click on Text Effects, and after that, select Transform to reveal an additional dropdown menu.
5] Choose the circular shape
From under the Follow Path category, please click on the circular shape and add it to the document.
6] For the newer version of Microsoft Word

After you’ve added the WordArt to the document, please click on the WordArt tab > Change Shape, then select the circle under Follow Path.
7] Set the circular word around a picture or shape

To top it off, drag the newly created WordArt and place it around a circular picture. Simply drag the edge of the WordArt to ensure it fits perfectly around, and that’s it, you’re done.
Read: How to mirror an Image in Microsoft Word
What are the text basics in MS word?
Folks who are new to Microsoft Word are required to learn the basics of typing, editing, and organizing text in many ways. These tasks are along the lines of the ability to add, delete, and move text in a document with ease. Additionally, users must learn how to cut, copy, and paste as well.
How do you insert text in Microsoft Word?
If you want to insert text in a Microsoft Word document, we suggest selecting Insert > Text Box, and from there, choose Draw Text Box. You must now click in the document, then drag right away to draw the text box to the size you prefer. Finally, select within the text box and then type your text.
Read: How to download Microsoft Word, Excel, PowerPoint on Mac.
Create curved or circular WordArt
- Go to Insert > WordArt.
- Pick the WordArt style you want.
- Type your text.
- Select the WordArt.
- Go to Shape Format > Text Effects > Transform and pick the effect you want.
Contents
- 1 Can you make a text box a circle?
- 2 How do you create curved text in Word?
- 3 How do I turn a text into a shape?
- 4 How do I make text curved on a Mac?
- 5 How do I circle something in a PDF?
- 6 How do I make a transparent circle in Word?
- 7 How do I put text in a shape in Word?
- 8 How do you curve text in design space?
- 9 How do you curve text on Iphone word?
- 10 How do you turn a smart object into a shape?
- 11 How do I convert text to shapes in PowerPoint?
- 12 How do I make text go in a circle in PowerPoint?
- 13 How do you write text in a circle in HTML?
- 14 How do you curve text in PowerPoint?
- 15 Is there a way to curve text in Keynote?
- 16 How do I insert text into Google Docs?
- 17 How do you circle text in Google Slides?
- 18 How do I create a fillable text box in PDF?
- 19 Can I draw on a PDF?
- 20 What is circle shape?
Can you make a text box a circle?
If you want to constrain text to a circular shape, you can add a text box over a circle and shape the text manually using line breaks. Alternatively, you can place Block Arc shapes (with No Line and No Fill) on either side of the text, with Tight wrapping. You can easily insert a circular shape and add text to it.
How do you create curved text in Word?
Choose the Word Art option, then click the text icon that looks the way you want your curved text to look. Click the Drawing Tools Format tab at the top of the window. Choose the Text Effects option, click Transform, then click a curve type from the options on the menu. Adjust the layout options for your curved text.
How do I turn a text into a shape?
To convert text into a shape, right-click on the text layer, and choose “Convert To Shape”. Then select the Direct Selection tool (the white arrow tool) by pressing Shift A and click-and-drag the points in the path to give the characters a new shape.
How do I make text curved on a Mac?
Click the ‘Text Effects’ button in the WordArt Styles group, point to ‘Transform’ and select one of the effects in the ‘Follow Path’ section to curve the text’s letters.
How do I circle something in a PDF?
Choose Insert Menu > Drawing > Select Rectangle , Circle or Basic Shape.
How do I make a transparent circle in Word?
Select the shape or shapes that you want to make transparent. Right-click, and on the context menu, select Format > Fill. Set the Transparency slider to the percentage of transparency that you want.
How do I put text in a shape in Word?
Add text to an AutoShape
- On the Insert tab, in the Illustrations group, click Shapes, and then click the shape that you want.
- Drag to create the shape.
- The shape is automatically selected.
- On the Drawing Tools tab, in the Insert Shapes group, click Edit Text.
- Type the text that you want.
How do you curve text in design space?
Curving Text in Design Space
- Click the Text tool in the Design panel to the left of the Canvas.
- Enter text into the text box, choose your font and font style, and use the Letter Space tool to adjust letter spacing as needed.
- Click on the Curve tool.
- Drag the slider to the right to curve the text downward.
How do you curve text on Iphone word?
Once you’ve added your text, scroll to the right on the menu and select the “Curve” option. Slide the bar left for a downward curve or right for an upward curve.
How do you turn a smart object into a shape?
You cannot convert a Smart Object to a Shape Layer. The best option is to double-click the Smart Object, which should open it up in Illustrator, then copy it. Jump back to Photoshop and paste it, choosing Shape Layer when the options pop up. Then delete the Smart Object if desired.
How do I convert text to shapes in PowerPoint?
And if you are all set about the above details, here’s how you can convert text to shape in PowerPoint. Type the text and align it on your slide. Now select the both elements (text and shape) drawing the mouse around them while holding the right-click. Go to Format > Merge Shapes > Intersect.
How do I make text go in a circle in PowerPoint?
Move to the ribbon’s Drawing Tools Format tab, and then click the “Text Effects” button. Click “Transform” followed by the “Circle” effect. PowerPoint converts your text into a circle.
How do you write text in a circle in HTML?
Add CSS
- Set the border-radius to “50%”.
- Specify the width and height of the element.
- Style the class using the background, border, and color properties.
- Center the number using the “center” value of the text-align property.
- Specify the font of the number.
How do you curve text in PowerPoint?
Select your text and go to Insert > WordArt. Select the style you want from the menu. Now go to Shape Format/Drawing Tools Format and select Text Effects >Transform. Here you will see a whole range options to change the shape of your text.
Is there a way to curve text in Keynote?
1 Answer. No, there’s no text tricks like that built into Keynote. In order to achieve effects like this, you’d have to use ArtText or TypeStyler.
How do I insert text into Google Docs?
In your document, open the “Insert” menu and then choose the “Drawing” command. In the Drawing window that opens, click the “Text Box” button on the toolbar at the top. Now, click and drag your mouse to create a text box in the space provided, and then add your desired text.
How do you circle text in Google Slides?
Step 2: Select the slide at the left side of the window where you want to draw the circle. Step 3: Click the Shape button in the toolbar, choose the Shapes option, then click the circle. Step 4: Click on the slide, hold down the mouse, then drag your mouse to draw the circle.
How do I create a fillable text box in PDF?
How to create fillable PDF files:
- Open Acrobat: Click on the “Tools” tab and select “Prepare Form.”
- Select a file or scan a document: Acrobat will automatically analyze your document and add form fields.
- Add new form fields: Use the top toolbar and adjust the layout using tools in the right pane.
- Save your fillable PDF:
Can I draw on a PDF?
With Adobe Acrobat online services, you can draw directly on a PDF to visually mark your edits. Freehand drawing on a PDF is the perfect way to clearly show what content you want moved or removed altogether.
What is circle shape?
A circle is a shape consisting of all points in a plane that are at a given distance from a given point, the centre; equivalently it is the curve traced out by a point that moves in a plane so that its distance from a given point is constant.
Beautifying our Word documents is a good idea to do bring out our work , shapes and pictures are useful for this purpose. Today we’re going to teach you how to write inside a circle, square, or shape in Word.
In most cases, writing over a shape in Word isn’t complicated, although the process is often more difficult when it comes to circles or rings . This is exactly what we are going to teach you today.
Today, looking at how it is done, you will learn to write in a circle, we also recommend that you link Excel to Word because you can mix the functions of the two applications very easily. Without further ado, read the following guide to making circles with letters or words in Word.
What is the use of writing inside a circle in Word?
The tutorial that we bring to you today is more stylistic than practical, the truth is that there won’t be many occasions where you need to write in a circle . In any case, it is useful to know it to decorate and give more style to our Word documents.
It is particularly useful in eliminating the feeling of stiffness present in written material. For this reason, we consider it to be a very Useful to create dynamic content. Learn to write inside a ring in Word with the following information.
Before you start, it is important to note that this is not the only function in terms of shapes, because Word allows many different ones, for example you can make straight, curved or tilted arrows in Word with the keyboard and join everything to do a more complete job.
The process of making a ring or a circle with words inside is not complicated, in any case we consider it some kind of trick, so this requires a lot of attention . Read the following tutorial to find out how to do it easily :
Make the form
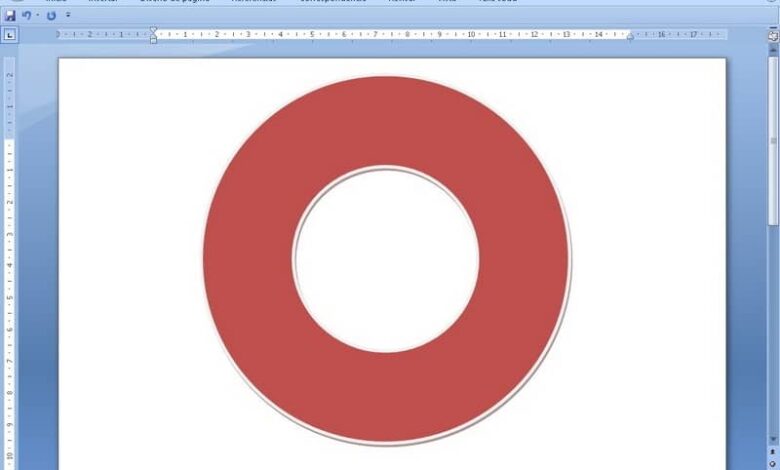
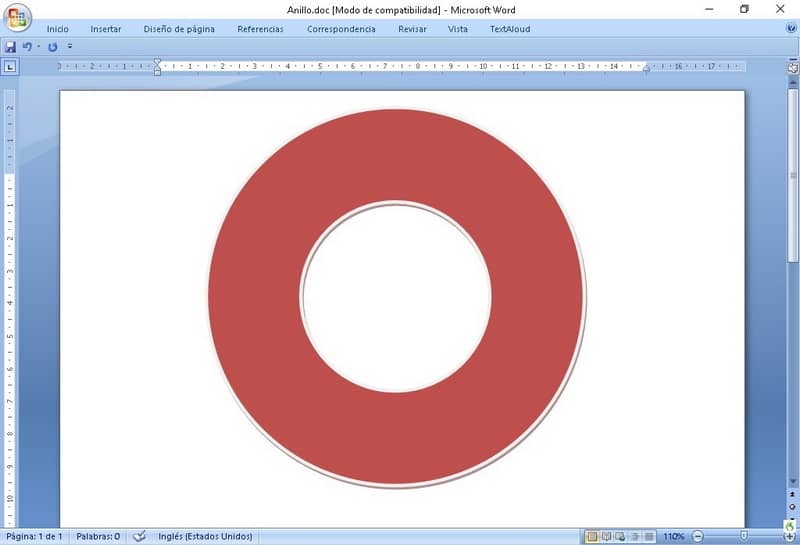
- The first step is to find the shape you need, in this case we will select a circle, more precisely a ring. You will find this form in the option Forms and Basic forms .
- To create the circle, press the small icon, so that it does not warp while you are not manipulating, use the shift key while you calculate the appropriate size.
- Adjust the size to your liking, you can also change the internal size of the ring.
- Likewise, by selecting the circle and going in Format , you can change its fill color and outline color, as well as other basic options.
- When you are done setting up the circle or geometric shape as you like, it’s time to save the document, be sure to save it as Word 97-2003 document , all you need to do is change the document type when you save it.
- The previous point is very important, because only in this way you will be able to create the internal letters of the ring.
The word or letters in the circle
- Go to the option of Insertion and look for the WordArt .
- Tap WordArt and select the font you prefer.
- Write the text that will be inside the circle, relative to that, if you wish write special signs such as musical signs with the keyboard , you can also do it, after finishing the text, press OK .
- The text will appear inside the document, click on it to switch to format. Here locate the option to wrap text and select Before the text . At the same time, you can change the format of the text to meet your needs and tastes.
- Still in the format, select the option Change shape and locate Fine Circle , it will be located at the top of the multiple options. When you tap on the option, you will notice that the letters have changed.
- The last step is to adjust the size and shape of the text until it is the right size. suitable size to hold inside the circle.
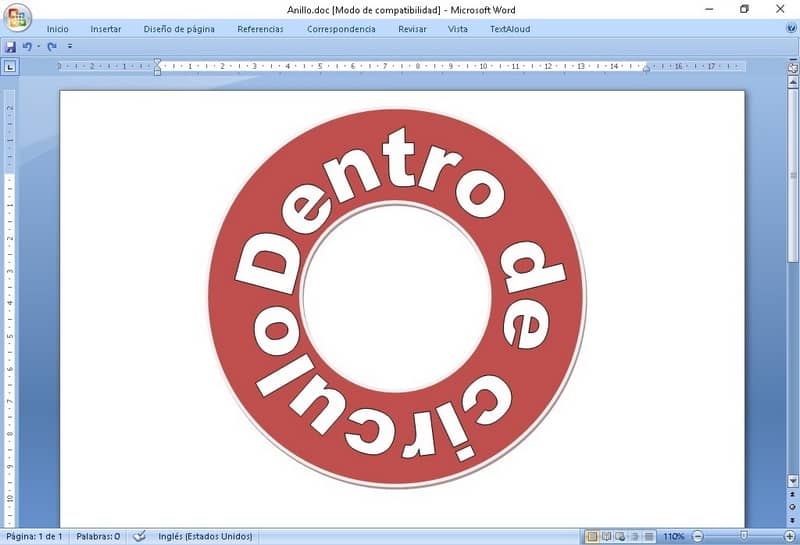
After the above process, you can create a circle with words in the shooting . As you will see, the process is not complicated, it just requires a little dedication and patience. Using this method, you will present the information in a fun way and with a very good aesthetics. In addition, it is possible to easily fold or arch text in Word , further improving the final presentation.


There are many ways to make text stand out in your document. You can format the font in bold or italic or highlight the text using color. For another option, we’ll show you how to circle text in Microsoft Word.
You may want to place a circle around text to emphasize it. But you might also want to use that circled text to enhance the appearance. Whatever your reason, circling text in Word takes only a couple of steps.
Add a Shape to the Document
Open your Word document and go to the Insert tab. Click “Shapes” to view the available options.

The closest shape to a circle is the oval, which works well for circling text. Choose that option in the Basic Shapes section.
Your cursor changes to a plus sign. Click and then drag to draw the oval on your document. You can make it as large or small as you like to accommodate the text you want to circle. But remember, you can resize the shape later as well.
Now that you have your shape, you may need to adjust it so that you can see the text you circle. You can also make optional changes to the line size or color.
Format the Circle Around the Text
You can use the Shape Format tab to customize your shape.
RELATED: How to Add and Format Text in a Shape in Microsoft Word
If your shape has a fill color that you need to remove, select the shape and pick “No Fill” in the Shape Fill drop-down box on the Shape Format tab.
This allows you to place the circle over the text and see only the outline of the shape.
To adjust the line of the circle, select the Shape Outline drop-down arrow. You can then change the line color, weight, and style.
As you make your changes, you’ll see your circle update immediately. So, you can get just the right look.
Move and Resize the Circle
You can move the shape so it’s on top of the text you want to circle by simply dragging it.
If you need to make the circle larger or smaller, drag a corner or edge in or out.
You can make these adjustments to your shape until you see the ideal circle.
If your preferred method of making text pop in your document is by circling it, you can do this in just minutes. And by using the Shapes feature in Microsoft Word, you’ll have a nicely drawn circle.
READ NEXT
- › How to Use the Ink Features in Microsoft Office
- › Expand Your Tech Career Skills With Courses From Udemy
- › BLUETTI Slashed Hundreds off Its Best Power Stations for Easter Sale
- › This New Google TV Streaming Device Costs Just $20
- › Google Chrome Is Getting Faster
- › The New NVIDIA GeForce RTX 4070 Is Like an RTX 3080 for $599
- › How to Adjust and Change Discord Fonts
How-To Geek is where you turn when you want experts to explain technology. Since we launched in 2006, our articles have been read billions of times. Want to know more?
You can use WordArt with a Transform text effect to curve or bend text around a shape. If you want the text to circle the shape, you can also do this, but it’s a little bit more work. You can also insert WordArt multiple times to wrap text around shapes with straight edges.

-
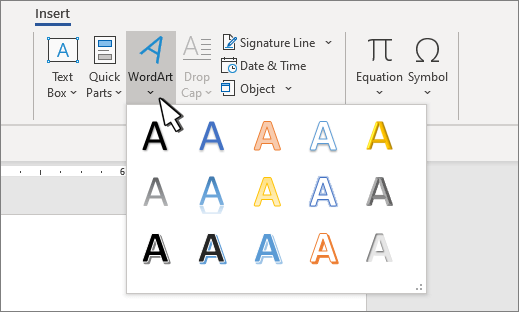
Go to Insert > WordArt, and pick the WordArt style you want.

Note: The WordArt icon is located in the Text group, and it may appear different depending on the version you’re using and the size of your screen. The icon may also look like this
or . -
Replace the WordArt placeholder text with your own text.
-
Select your WordArt text.
-
Go to Shape Format or Drawing Tools Format, select Text Effects >Transform and pick the look you want.
 or
or  .
.
Note: Depending on your screen size, you might only see the icons for WordArt Styles.

Advanced techniques
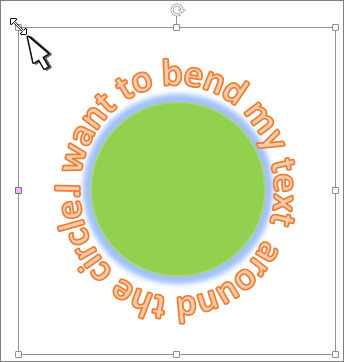
Wrap around a circle To create text that completely circles your shape, choose Circle under Follow Path, and then drag any of the sizing handles until your WordArt is the size and shape you want.
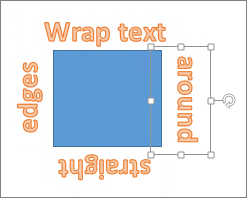
Wrap around straight edges To wrap text around a shape that has straight edges, such as a rectangle, insert WordArt objects for each edge. In this example, WordArt is inserted four times, one for each side of the shape.
Group moves and copy To move or copy multiple WordArt objects as a single shape, see Group or ungroup shapes, pictures, or other objects .
Precise angle control You can control the angle of your WordArt text in relation to your shape with precision by using the Rotate tool.
If you need very precise control or are creating a complex combination of shapes and text, you’ll want to use a third-party drawing or graphics program to create the text around your shape and then copy and paste it into your Office document.
See Also
Add shapes
Insert WordArt
Create curved or circular WordArt
-
Go to Insert > WordArt.
-
Pick the WordArt style you want.
-
Type your text.
-
Select the WordArt.
-
Go to Shape Format > Text Effects > Transform and pick the effect you want.


Advanced techniques
Wrap around a circle To create text that completely circles your shape, choose Circle under Follow Path, and then drag any of the sizing handles until your WordArt is the size and shape you want.
Wrap around straight edges To wrap text around a shape that has straight edges, such as a rectangle, insert WordArt objects for each edge. In this example, WordArt is inserted four times, one for each side of the shape.
Group moves and copy To move or copy multiple WordArt objects as a single shape, see Group or ungroup shapes, pictures, or other objects .
Precise angle control You can control the angle of your WordArt text in relation to your shape with precision by using the Rotate tool.
If you need very precise control or are creating a complex combination of shapes and text, you’ll want to use a third-party drawing or graphics program to create the text around your shape and then copy and paste it into your Office document.
In Word for the web you can see WordArt that’s already in your document, but to add more WordArt you need to open or edit the doc in the desktop version of Word.
You can use the Font features on the Home tab to change the font color and size, and apply bolding, italics, or underlines to your text.