
Share a document
When you share your document with others and give them permission to edit, everyone’s changes are made in the same document.

-
In the top right corner, above the ribbon, click Share > Share.

-
Save your document in OneDrive, if it’s not already there.
Note: The Share window displays if your document is not currently saved in OneDrive. Select the OneDrive option, then name your document and select OK.
-
Enter email addresses of the people you want to share with and make choices for permission you want to allow.
-
Type a message if you want, and select Send.
The people you’re sharing with will get mail from you, with a link to your document.
-
In the top right corner, above the ribbon, click Share.
-
Enter email addresses of the people you want to share with, and make choices for permission you want to allow.
-
Type a message if you want, and click Send.
The people you’re sharing with will get mail from you, with a link to your document.

-
In the upper right corner, select Share.
-
Select Save to save the document to the cloud to share.
-
Select Send a Copy.
Note: You can select to send the copy as a Word Document, PDF, or HTML.
-
Select Email as Attachment.
Note: You also have the option to select to share with Outlook,AirDrop, Mail, Messages, Notes, and More (any extensions you have installed on your Mac).
-
Choose a Mail account provider.
-
Complete the email with invitees, add an optional note, and send.
Note: If you aren’t signedin to a Mail provider, you will need to sign in.
Need more help?
Want more options?
Explore subscription benefits, browse training courses, learn how to secure your device, and more.
Communities help you ask and answer questions, give feedback, and hear from experts with rich knowledge.
Collaborate in Word
- Select Share. on the ribbon. Or, select File > Share. Note: If your file is not already saved to OneDrive, you’ll be prompted to upload your file to OneDrive to share it.
- Select who you want to share with from the drop-down, or enter a name or email address.
- Add a message (optional) and select Send.
Contents
- 1 Is there a way for two people to edit a Word doc?
- 2 How do I share a Word document on a shared drive?
- 3 How do I share a document that everyone can edit?
- 4 How do I share a Word document for team editing?
- 5 How do I create a link to share a document?
- 6 How do you share a Word document on a Mac?
- 7 Why can’t I share a Word document on teams?
- 8 How do I share a document on teams?
- 9 How do you get a URL for a Word document?
- 10 Why can’t I send a Word document?
- 11 How do I share a Word document without OneDrive?
- 12 Can I present a Word document in teams?
- 13 Can you attach a document to a Microsoft teams meeting invite?
- 14 How do I share files?
- 15 How do I create a link to a file?
- 16 How do I make a link to a document?
- 17 How do I send a Word document as an email?
- 18 How do I send a link to a Word document in an email?
- 19 Can a Word file can be attached to an email message?
Is there a way for two people to edit a Word doc?
With Office 2016, Microsoft introduced a new, highly useful collaboration feature in Word: Co-editing (or co-authoring), which allows multiple people to work on a document at the same time.People you share the document with can view or edit the file using either the free Word Online app or Word 2016.
You can click ‘Share’ at anytime and then select how you would like to share your document. Once you’ve selected your sharing method simply type in the names of the people you wish to share with and their editing rights and click ‘Share’.
Share an already saved document
Click File > Share > Share with People (or, in Word 2013, Invite People). Enter the names or email addresses of the people you’re sharing with. If you want to, click Can Edit or Can View. The first option lets your coworkers change the file.
Work on a file together
- In a team conversation or in the Files tab, select More options. next to the file.
- Choose if you want to edit the file in Teams, on your desktop, or online.
- Select Start conversation to add a message about the file.
- Type your message or @mention someone and select Send.
Creating a shareable link makes it simple to share a document in an email, document, or IM.
- Select Share.
- Select Copy Link.
- Paste the link wherever you want. Note: If you need to change any permissions for the link, select Link settings.
Send your document as an email attachment
- In the upper-right corner, click the Share icon and then click Send Attachment.
- Click Document or PDF.
- Word will open your default email application and attach your file to a new message. Just fill in the details, like email addresses and a short message, and click Send.
As far as I know, there isn’t the special option which can select Word/Excel to share during the Teams presentation, only Desktop, Windows, PowerPoint and Whiteboard. To share the word and excel, you need to share your desktop, then open these files in order to let the participants to view.
To share a file that’s already been uploaded to Teams
- To access all files you’ve recently opened and your OneDrive, tap More. > Files.
- Go to the file you want and tap More options. > Share.
- Search and tap a person or group name in the Chat tab, or tap a channel from the Channel tab.
How do you get a URL for a Word document?
For instance, it could be pasted into a Word document as a link to the document. It could also be saved on your Desktop so you can access the document directly from the Desktop. To view the Document URL, scroll down to the Locations section in the Document Details Panel. There you will see the URL.
Why can’t I send a Word document?
Most servers will block a Word document because it can contain a macro virus. If it shows as being sent on your end, chances are it’s being blocked on the receiving end. Try renaming the document so the extension doesn’t end with . doc (like name it to .
Share a document with no sign-in necessary
- With the document open in Word for the web, Excel for the web, PowerPoint for the web, or OneNote for the web click Share.
- Click Get a link, choose Edit (or another option if you don’t want people to edit), and then click Create link.
- Copy the link and send it out.
Can I present a Word document in teams?
1) In a Team meeting, click the Share tray icon to open the presentation menu. 2) Click Browse to find an existing presentation file. 3) If you have a file uploaded already, click Browse Teams and Channels. 4) Select the presentation file you want.
Can you attach a document to a Microsoft teams meeting invite?
Adding Files to Teams Meetings
The net result is that two ways are available to include files in Teams meetings: The meeting organizer can generate links to files and include them in the meeting invitation. They can also update meeting details afterwards to include links to other files.
Share with specific people
- Select the file you want to share.
- Click Share or Share .
- Under “Share with people and groups,” enter the email address you want to share with.
- To change what people can do to your doc, on the right, click the Down arrow.
- Choose to notify people.
- Click Share or Send.
How do I create a link to a file?
Hold down Shift on your keyboard and right-click on the file, folder, or library for which you want a link. Then, select “Copy as path” in the contextual menu. If you’re using Windows 10, you can also select the item (file, folder, library) and click or tap on the “Copy as path” button from File Explorer’s Home tab.
How do I make a link to a document?
Right-click the file that you want to link to, and select Get a link. Choose the type of link you want, and then copy the link. Return to the document library where you want to add the link, and enter that link in the Create link to dialog.
How do I send a Word document as an email?
How to Send a Document via Email in Word 2016
- Save your document one more time.
- Click the File tab.
- Choose the Share command.
- Choose the E-Mail item found under the Share heading.
- Click the Send As Attachment button. At this point, Outlook takes over, and you compose your email message.
How do I send a link to a Word document in an email?
Select the text or picture that you want to display as a hyperlink. Press Ctrl+K. You can also right-click the text or picture and click Link on the shortcut menu. In the Insert Hyperlink box, type or paste your link in the Address box.
Can a Word file can be attached to an email message?
If you have Outlook installed as part of Microsoft Office, and set as your default email app, you can send your document as an email attachment. If you are using Excel, Publisher, or Word, you can also send your file as the body of an email message.
When collaborating on a Microsoft Word Document with your collegues, sharing the document as updates are made or reviews are required is a continuous part of the collaborative process.
There are a number of ways to share a Word Document, although still commonly used, the old email back and forth is a method that has since been outdated by some easier and frankly cooler systems designed to make sharing simple.

In this post, we will talk you through 3 better ways to share your Microsoft Word document and leave you to decide which is best for your team.
1. Use a Dedicated Sharing and Collaboration Tool
With so many of us facing the same issues when trying to share and collaborate on Microsoft Word Documents, dedicated tools such as Simul Docs were built with sharing and collaboration in mind.
With Simul, you can easily share your Word document with your team while Simul manages the version control for you. Upload your document to Simul Docs, and then share it with your team either via email, a direct link, a shared cloud system or any of the other sharing options Simul offers and let them know you are ready for their edits or notes.
Once your colleague makes a change to your document, a new version will be created and saved. You will be alerted that someone in your team has made an update to the document and you can continue collaborating together while Simul manages the version control on your behalf.
When you have reached a final version and would like to share the document outside of your team, or as a PDF to a client, colleague or company simple select the method that best suits your client to receive the file (dropbox, email, direct link, cloud shared drive etc) and click send as a PDF. Within seconds you have shared your document with someone outside of your team.
The only downside in using a dedicated sharing tool built for collaboration is the additional cost. Most tools charge a fee per month or per user and while often a small fee, this may not fit within all companies budgets.
On the plus side, these tools make working together in word easy. You will never have to send documents back and forth again, leaving you with a clean inbox and peace of mind that no changes, updates or edits will be missed. Plus the version control is managed for you, it really is collaboration made easy.
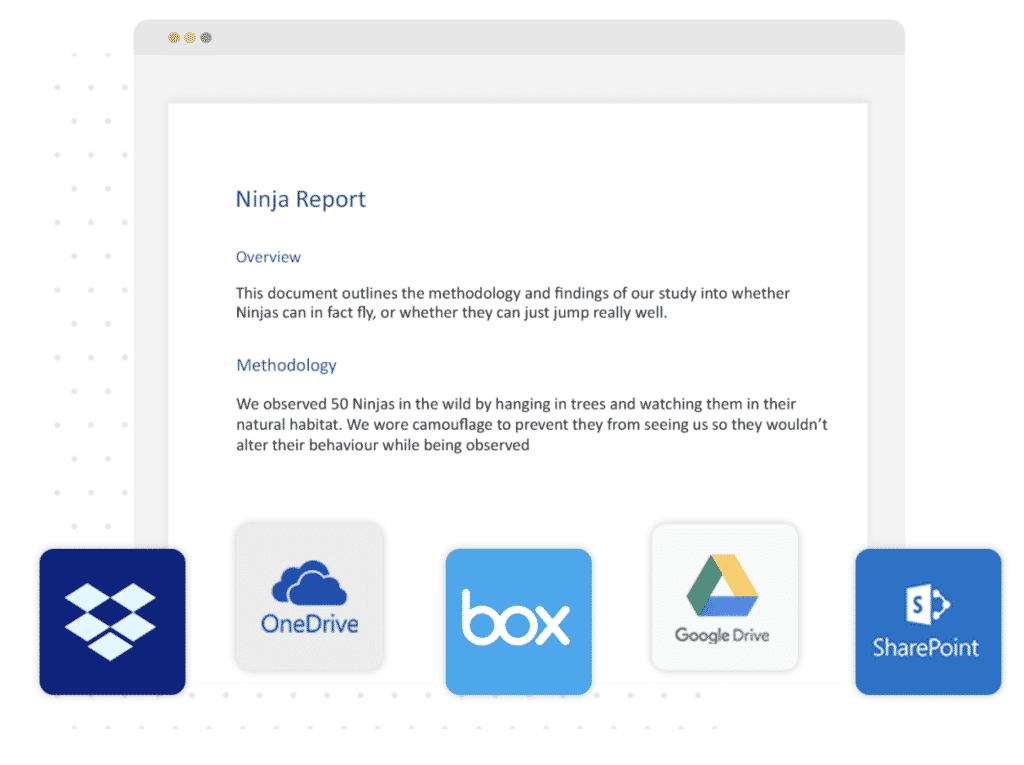
2. Use a Shared Cloud Storage Drive
If you are in a team of more than 2 people it is likely you are using some form of shared drive to save and store your files. Whether that be a Dropbox, Google Drive, OneDrive or another amazing Cloud storage system.
Shared Drives allow you to save and store all of your documents in one place. Each team member then has remote access to your files, without having to email them back and forth. You can edit a Word Document, update the version number and save it back onto the shared drive for the rest of your team to open at any time.

On the plus side, shared drives provide you with one centralised spot for all of your documents, saving you emailing them back and forth. They offer easy access to people outside of your organisation and are a cost effective way to store and share files.
The downsides to using a Shared Drive is that you still need to notify your team that there is a new version saved in the Shared Drive for them to review. This doesn’t have to mean an email message, it could be a ping on Slack or your IM System, so while it’s not as clunky it is still a two-step sharing process.
The other downside is there is no version control. Your shared drive can quickly end up looking like a mess of file names and numbers, while your team get creative adding _Final_updated_FINALFINAL to the end of your document without actually knowing if that is the final version or not.
A messy shared drive may almost be as painful as a cluttered email inbox?
3. Use an Intranet Tool
Intranet tools such as Microsoft SharePoint have sharing features built-in that make sharing your Word Document easier.
Sharepoint makes sharing your documents easy, its in its name after all!
You can click ‘Share’ at anytime and then select how you would like to share your document. Once you’ve selected your sharing method simply type in the names of the people you wish to share with and their editing rights and click ‘Share’.
Wooloa, just like that your document has been shared with whomever you selected and they will be notified that the file is ready for them.
The best part of Intranet Tools such as Sharepoint is it does exactly as it is supposed to, makes sharing your Word Document easy. You can share to a specific shared drive, or directly via email at the click of a button and the sharing feature comes included in your existing Microsoft 365 subscription.
The drawbacks to Intranet tools is that it does require that Microsoft 365 subscription. If you are not on Microsoft 365 you will need to pay the annual feel to sign up and start using Sharepoint.
To sum it up…
There are a lot of different ways to share your Microsoft Word Documents. Now that you are armed with all of the information available we suggest you look at your organisation and consider other factors that will assist you in making the right decision.
Purpose-built sharing tools are amazing but do come with a fee. Although the fee can be minor this may be outside of your financial capabilities at this time.
Your team may already be used to working on your existing Shared Drive, Dropbox or Google Drive system and it could be as simple as some re-training on how to best use the shared system or doing a deep cleanse of the files and processes you already have in place.

Do some research and chat with your team leaders.
Don’t dismiss the option of a new sharing tool too quickly, they are purpose-built to solve this very problem and most, such as Simul Docs offers a free trial or test period so you can try before you buy.

Our guide shows you the methods and options for sharing documents in Word, Excel, and PowerPoint on both a Windows computer and a Mac.
There are different ways to share a document you create in Microsoft Word, Excel, and PowerPoint. Many times we simply plop the document into an email and send it on its way. But there are other options like allowing the recipient to edit it or sharing it as a different file type like a PDF.
This guide walks you through the methods and options for sharing a document in Word, Excel, and PowerPoint on both Windows and Mac.
Share a Document on Windows
The steps for sharing a document in all three applications are basically the same on Windows. What’s different is that you can use special file types in each. To get started, follow these steps to share a document in any of these three apps.
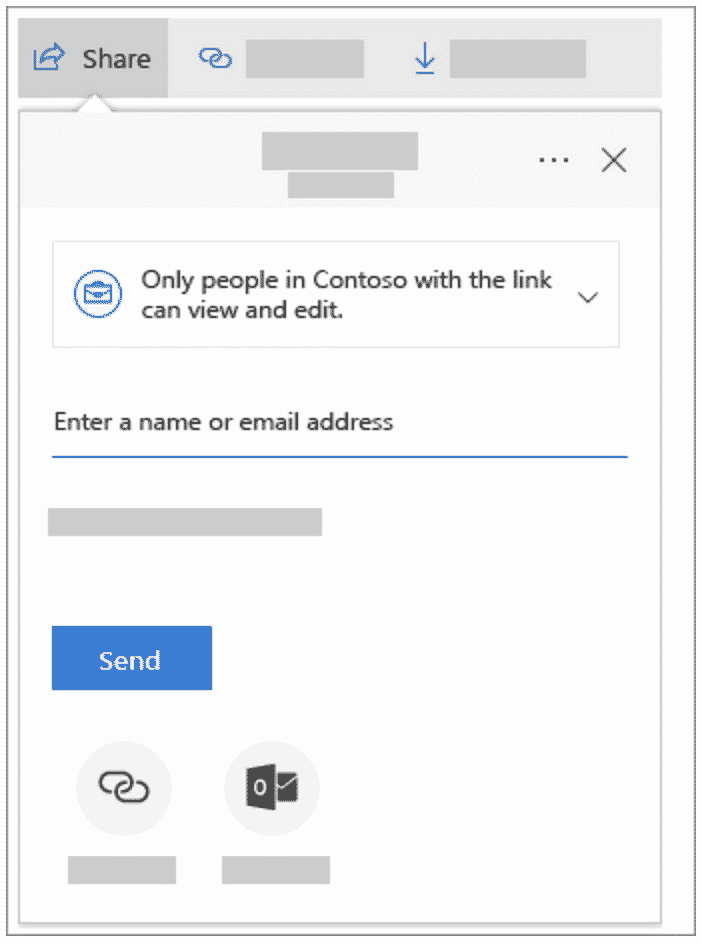
- Click the Share button on the upper right side, above the ribbon, or select File > Share from the menu.
- The first time you do this, you’ll see a pop-up window with a message asking you to upload a copy of the document to OneDrive to share it. If you would like to collaborate or allow editing, use this option, and choose an account if you have more than one.
- Select the Anyone with the link can edit Keep the box checked for Allow editing if you want to do exactly that.
- If you have a Premium OneDrive account, you can optionally set an expiration date and set a password.
- Click Apply.
- Enter a name or email address for each recipient and include a message if you like.
- Click Send to send the email with your default email app, Copy link to obtain a link to share it yourself, or Outlook to create a shareable link and pop it into an Outlook email.

Alternatively, you can attach a copy of the document to an email. And you can choose this option instead, at any point through the above sharing process. At the bottom under Share a Copy, pick Word Document, Excel Workbook, or PowerPoint Presentation depending on the application or choose to send it as a PDF. This will attach the file to an email ready for you to complete and send.

Time-Saving Tip: If you want a fast way to share a Word, Excel, or PowerPoint document on Windows, you can use the Send To menu. This lets you quickly pick a fax or mail recipient, communications app, or another spot you’ve added. Right-click the file icon and move to Send to in the shortcut menu.

Manage Document Access on Windows
If you allow editing in Step 3 above and change your mind later, you can manage the access for each recipient.
- Click the Share button on the upper right side or select File > Share from the menu.
- At the top of the pop-up window, click More Options (three dots) and then Manage Access.
- Below the recipient’s name or email address, click the Can edit drop-down box and choose a different option from the list.

You can also click the shareable link at the top. Then copy and paste it to another person from the Manage Access window if you like.
Share a Document on Mac
The steps for sharing documents in Word, Excel, or PowerPoint on Mac are also the same in all three applications and similar to Windows.
- Click the Share button on the upper right side, above the ribbon, or select File > Share > Share from the menu bar.
- The first time you share it, you’ll be prompted to select a Place. Choose one of your OneDrive accounts and click Save. You can adjust the document Name here as well.
- Click the Share button or File > Share > Share from the menu bar again and you’ll see your sharing options: Invite People, Copy Link, and Send a Copy.

Choose Invite People if you’d like to collaborate. Add the names or email addresses, an optional message, and check the Can Edit box so they can make changes. Click Share.

Choose Copy Link if you want to share the link yourself. Pick either View-Only or View and Edit as the link will vary. It will then be copied to your clipboard for you to paste where you please.

Choose Send a Copy to email it with your default email application. Click Send as to choose the type of file and click the Email as Attachment or Share button to use your Mac Share Sheet.

Similar to Windows, you can share a copy of your document via email at any time. Click File > Share from the menu bar and choose the file type you’d like to use. You can pick from the document, workbook, presentation, HTML, or PDF depending on the application you’re using. An email will open with the document attached ready for you to complete and send.
Time-Saving Tip: You can also share a document quickly on macOS just like on Windows. Right-click the file icon and move down to Share. You’ll see your Mac’s sharing options like Mail, Messages, and AirDrop.

Manage Document Access on Mac
If you allow editing for your document and change your mind, you can manage the access for each recipient on Mac too.
- Click the Share button on the upper right side of the document.
- At the bottom of the pop-up under Shared With, right-click the recipient.
- Choose a different option from the list.

Sharing is Caring!
There are all sorts of reasons to share a Word, Excel, or PowerPoint document. For letting others make changes or sharing for reference, you have flexible options on both Windows and Mac.
And if you’re interested, check out how to add a watermark to your Word document before you share it. This is handy for indicating things like confidentiality or privacy.
![]()
![]()
Download Article
![]()
Download Article
No matter your platform, there’s no shortage of ways to send a Microsoft Word document to anyone on the Internet. Most cloud services (such as Google Drive and Dropbox) feature the ability to send documents directly from their desktop and mobile apps. You can also attach a document to an email or Facebook chat. And if you have mail program set up on your computer, you can even send your document without leaving Microsoft Word.
-
1
Sign in to your Gmail or Yahoo! Mail account. You can attach your Word document to a message in Gmail or Yahoo! Mail on a computer or by using either service’s app for mobile devices.
- Most free mail sites and apps are similar. These instructions may also help you use providers other than Gmail and Yahoo.
-
2
Click or tap “Compose”. In both mobile apps, the “Compose” icon is a pencil.[1]
A new message window will appear.Advertisement
-
3
Click or tap the paperclip icon. The file selection box will appear on most platforms.[2]
- If you’re using the Yahoo! Mail app on a mobile device, tap the + sign, and then tap the second icon (a sheet of paper) in the resulting toolbar.[3]
The file selection window should now appear.
- If you’re using the Yahoo! Mail app on a mobile device, tap the + sign, and then tap the second icon (a sheet of paper) in the resulting toolbar.[3]
-
4
Tap “Attach File” or “Insert from Drive”. You can skip this step if you’re not using the Gmail app on a mobile device.
- Choose “Insert from Drive” if the document is saved to your Google Drive.
- Choose “Attach File” if the document is saved to your phone or tablet.
-
5
Navigate to the document you want to attach. Browse to the location of your Word document and double-click (or tap) to attach it.
- If you’re attaching from Google Drive, tap the file you want to attach, and then tap “Select”.
-
6
Address the email to the recipient. Enter the desired recipient’s email address into the “To:” field, then add your subject and message content.
-
7
Click or tap “Send”. When the recipient opens the email, they’ll find the option to open or download the file to their computer or mobile device.


Advertisement
-
1
Open the Mail app on your device. To use this method, make sure Mail is properly configured to send mail from your email account.[4]
- You’ll be able to attach a document that’s on your device or in your iCloud Drive.
- If you have the Dropbox, Google Drive, or OneDrive apps installed on your device, you’ll have the option to attach a document from one of those accounts.
-
2
Tap the “Compose” icon. The icon looks like a square with a pencil.
-
3
Type an email address into the “To:” field. This should be the address of the person to whom you’ll be sending the document.
-
4
Type your message. Enter a subject into the “Subject” field and type a note to the recipient in the main text area.
-
5
Touch and hold your finger in the body of the message. A black bar will appear containing several options from which to choose.[5]
-
6
Tap “Add Attachment”. The file navigator will open to your iCloud drive by default.
-
7
Tap “Locations” to switch to another location. If the document is not located in your iCloud drive, choose it from any of the folders listed (including Google Drive, Dropbox, or OneDrive, if applicable).
- If you don’t see an icon for the cloud service you use, tap “More,” and then select your service. Flip the switch to the “On” position to enable it, and then use the back button to return to the Locations screen.
-
8
Select the file and tap “Add Attachment.” You’ll be returned to the email message you previously composed. This message now has your document attached.
-
9
Tap “Send.” The file will be delivered to the appropriate email account.


Advertisement
-
1
Launch the Mail app on your Apple device. To use this method, you’ll need to have the Mail app configured to send mail through your email account. If you haven’t already done so, do it now.
-
2
Press ⌘ Cmd+N to compose a new message. You could also click the New Message icon (a square with a pencil) or click File > New Message.[6]
-
3
Click the paperclip icon. This icon appears in the upper right area of the New Message Window.
-
4
Select the document and click “Choose File”. You can hold down the ⌘ Cmd key as you click if you want to select multiple files.
-
5
Address the email to the recipient. Type the recipient’s email address into the “To:” field, a subject in the “Subject:” field, and a note in the large text area.
-
6
Send the email. Click the paper airplane icon at the top left corner of the message to send the email and its attached document.


Advertisement
-
1
Open your Google Drive. If your Word document is located in your Google Drive, it’s easy to share it with others. Accessing your Drive is different depending on your platform:[7]
- Mobile: Launch the Google Drive app on your device.
- Desktop: Log in to http://drive.google.com in your web browser.
-
2
Navigate to the document you want to share. If you don’t see it in the main folder, you may have to look in some of the subfolders.
- If you haven’t yet uploaded the document from your computer, click New > File Upload, and then double-click the Word document.[8]
- If you haven’t yet uploaded the document from your computer, click New > File Upload, and then double-click the Word document.[8]
-
3
Click the ⋮ icon and tap “Add People.” Skip this step if you’re using the web version of Drive.
-
4
Right-click the file and select “Share.” Skip this step if you’re using the mobile app.
- Another way to do this is to single-click the document and then click the Share icon (the outline of a person’s head with a plus sign.)
-
5
Type the email address of the person you want to receive your file. If this person is one of your Google contacts, you can just start typing their name and then select the correct person from the search results.
-
6
Control whether the person can edit the copy in your Google Drive. By default, Drive gives the person permission to edit the document in your Google Drive.
- Leave this alone if you’re sharing the document with someone and you both plan to make edits.
-
7
Change “Can Edit” to “Can View” if you want the person to be able to download their own copy but not edit yours.
-
8
Select “Done” or “Share” to share the document. An email will be sent to the recipient containing information on how to access the document. They’ll be able to view it online or download it to their computer.


Advertisement
-
1
Open Dropbox on your computer or mobile device. If you’re a Dropbox user, you can use the service to share documents with anyone on the web. Using this method will send a message to the recipient that includes a link to the document. The recipient will be able to download the document by accessing that link (and they won’t need a Dropbox account).
- You’ll need to have a Dropbox account to use this method.
- You should also have the application installed on your device. If you’re using a computer, you can use the web version by signing in to http://www.dropbox.com.
-
2
Add the document to your Dropbox. If you haven’t uploaded the Word document to your Dropbox, do so now.
- Mobile app: Tap the “+” icon and then select “Upload files.” Navigate to the document you want to upload, and then tap “Upload File.”
- Desktop app: If the folder where the file’s stored is not already synced with Dropbox, drag the file from its current location to the Dropbox folder.
- Dropbox.com: Navigate to the folder where you’d like to store the file, then click the “Upload” icon to select your document.
-
3
Open the “Share” window. This step is a little different depending on your platform:[9]
- Mobile: Tap the downward-pointing arrow next to your Document and select “Share.”
- Desktop: Right-click (or Ctrl+Click) the document in the Dropbox application, then click “Share…”
- Dropbox.com: Hover the mouse over the document file and select “Share” (when the menu appears).
-
4
Select “Can View” from the permissions options. If you’re using a mobile device, you’ll see this option under “These People”.[10]
-
5
Type the email address of the person to whom you’d like to send the file. Enter this into the “To:” field. To add multiple recipients, separate each email address with a comma (,).
-
6
Select the “Invite” or “Send” button. The button name depends on your application.[11]
- If you’re using the Dropbox.com site, the button will say “Share.” An email will now be sent to the email address(es) you provided.


Advertisement
-
1
Log into Facebook. If you have a Word document on your computer that you want to send to someone else, you can do so using the web version of Facebook.[12]
- For this method to work, both you and the person to whom you’d like to send the document need to have Facebook accounts.
- The Facebook Messenger app does not support attaching documents saved to your phone, other than photos or videos
-
2
Open a chat window with the recipient. You will be attaching the document to a chat message.
- Click the mail icon at the top right area of Facebook and select “New Message.”
- Start typing the person’s name into the “To:” field and then click their name when it appears in the search results.
-
3
Click the paperclip icon at the bottom of the chat window. Now you’ll be able to navigate to the Word document on your computer.
-
4
Select the document and click “Open”. If you’re using a Mac, the button will say “Choose File.”
-
5
Press ↵ Enter or ⏎ Return to send the document. The recipient will be able to download the document by double-clicking the icon that appeared in the chat window.


Advertisement
-
1
Open your document in Word Online. If you’re using the free version of Microsoft Word available online, you can share the document right from the program.
- This method is similar to sharing a document from your OneDrive account. If your document is in OneDrive, navigate to the document to open it in Word Online.
-
2
Click the “Share” button. This button is at the top right corner of the screen.
-
3
Select “Invite People.” Here you can enter the email address of the person you’re sharing with.
-
4
Enter the recipient’s email address in the “To:” field. To add multiple recipients, separate each email address with a comma (,).
-
5
Select editing permissions for the document. By default, the recipient of the document will have the ability to make changes to your document. This is noted by the “Recipients can edit” dropdown on the Invite screen.
- If you want to share ongoing access to this document and want everyone on the Invite list to be able to make edits, leave this option alone.
- To share a read-only version of the document (cannot be edited by anyone else), click “Recipients can edit” and select “Recipients can only view.”
-
6
Type a note into the “Note” field. Think of this field as the body of an email. Type something here that will alert the recipient to what the email and document are about.
-
7
Click “Share.” An email will be sent to the recipient that contains a link to the document. With that link, the recipient can make changes to the document on Word Online (if you gave them permission to do so) or download the file to their computer.


Advertisement
-
1
Open your document in Microsoft Word. If you’re using Word 2016 for Windows or Mac, you’ll be able to use the built-in “Share” feature to send your document from the app.
- If you’re using an older version of Word, just click the File menu (or Office button in 2007) and select “Send” or “Send To” to send a Document.
-
2
Save changes to your document. To avoid sending an outdated version of your document, click “File” and then “Save”.
-
3
Click the “Share” icon. You’ll see this icon in the top right corner of Word. It looks like the silhouette of a person with a + sign.[13]
-
4
Click “Save to Cloud” if prompted. If you haven’t saved the document to the cloud, you’ll be prompted to do so. Word attempts to save your document to the cloud in case you want to share the document for editing instead of sending it as an attachment (more on this soon).
-
5
Click “Send as Attachment.” You may have to click “Share” again to see this option. “Send as Attachment” will allow you to email a copy of the document to a recipient.
- If, instead of sending the file to the recipient, you’d like to be able to share online editing access of the document, choose “Invite People” instead.[14]
Type the person’s email address when prompted, then click “Send” to email them an invitation to edit the document.
- If, instead of sending the file to the recipient, you’d like to be able to share online editing access of the document, choose “Invite People” instead.[14]
-
6
Select an attachment type. You have two options from which to choose:[15]
- Send a copy: Choose this option if the person to whom you’re sending the document needs to edit or add to the document.
- Send a PDF: Choose this option if you don’t want the document to be modified.
-
7
Address the email to the recipient. Once you select an attachment option, a new email message will open in your default email program (e.g., Outlook, Apple Mail). Enter the recipient’s email address into the “To:” field, type a subject line, and a description of the file in the body.
- To send the document to multiple people, separate each email addresses with a comma (,).
-
8
Click “Send.” Your document will arrive at its destination in a few moments.


Advertisement
Ask a Question
200 characters left
Include your email address to get a message when this question is answered.
Submit
Advertisement
-
Most cloud services include the ability to send documents via email or mobile applications. The instructions for the majority of cloud services are similar.
-
If you don’t have Microsoft Word, you can use Microsoft Office Online. The service includes a free, up-to-date version of Word accessible only on the web.
Thanks for submitting a tip for review!
Advertisement
About This Article
Thanks to all authors for creating a page that has been read 93,164 times.