
Word for Microsoft 365 Word for Microsoft 365 for Mac Word 2021 Word 2021 for Mac Word 2019 Word 2019 for Mac Word 2016 Word 2016 for Mac Word 2013 Word 2010 More…Less
You can group shapes, pictures, or other objects. Grouping lets you rotate, flip, move, or resize multiple shapes or objects as though they’re a single shape or object.
Group shapes, pictures, or other objects
-
Press and hold CTRL and select shapes, pictures, or other objects to group.
The Wrap Text option for each object must be other than In line with Text. For more info, see Wrap Text.
-
Do one of the following:
-
Go to Picture Format or Picture Tools Format >
 Group > Group.
 -
Go to Shape Format or Drawing Tools Format > Group > Group.
To still work with an individual item in the group, select the group, and then select the item.
The Group button is enabled for two or more selected objects.
-
 Group > Group.
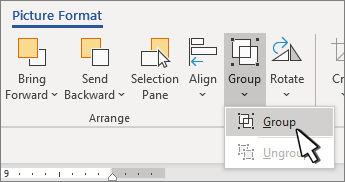
Group shapes, pictures, or objects
-
Press and hold CTRL while you select the shapes, pictures, or objects that you want to group.
The Wrap Text option for each object must be other than In line with Text. For more info, see Wrap Text.
-
Go to Drawing Tools or Picture Tools, on the Format tab, in the Arrange group, select Group
, and then select Group.
To work with an individual item in the group, select the group, and then select the item.
 , and then select Group.
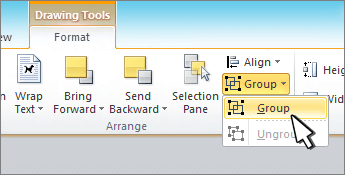
Group shapes, pictures, or other objects
-
Press and hold command while selecting the shapes, pictures, or other objects to group.
The Wrap Text option for each object must be other than In line with Text. For more info, see Wrap Text.
-
Go to Shape Format or Picture Format, and then select Group
> Group.If Group
isn’t visible on the ribbon, select Arrange to display it.
 > Group.
To work with an individual item in the group, select the group, and then select the item.
If the Group button is unavailable, verify that you have more than one object selected.
See also
For more info selecting shapes or pictures, see Select a shape or other object in Word.
SVG icons must converted to shapes before grouping. For more info, see Convert an SVG image to an Office shape.
Need more help?
Want more options?
Explore subscription benefits, browse training courses, learn how to secure your device, and more.
Communities help you ask and answer questions, give feedback, and hear from experts with rich knowledge.
To group objects:
Hold the Shift (or Ctrl) key and click the objects you want to group. Click the Group command on the Format tab, then select Group. The selected objects will now be grouped.
In respect to this, How do I select a group of shapes in Word?
Tips for selecting shapes and objects
- To select one object, click or tap the object.
- To select multiple shapes in a group, press and hold Shift or Ctrl while you click or tap the shapes.
Considering this, Why can’t I group things in Word? The Group button is unavailable
Make sure you have multiple shapes or pictures selected. If your selection includes a table, worksheet, or GIF image, the Group button will not be available.
Accordingly How do you add shapes to groups? Simply click on the group first, then select the object you’d like to duplicate. Hold down the control key, then click and drag the object to the desired position. You have now created an additional shape within the group.
How do you overlap shapes in Word? Select the shapes you want to merge: press and hold the Shift key while you select each shape in turn. (If you don’t select any shapes, then the Merge Shapes button in step 2 will be grayed out.) On the Drawing Tools Format tab, in the Insert Shapes group, select Merge Shapes, and then pick the option you want.
Why can’t I Group A picture and a shape in Word?
If your . docx Word file is in compatibility mode you can’t group pictures with shapes. Turn off compatibility mode and then grouping pictures with shapes will work so long as one changes the word wrapping to something other then in line with text.
How do you make an intersecting circle in Word?
On the Insert tab, in the Illustrations group, click SmartArt. In the Choose a SmartArt Graphic gallery, click Relationship, click a Venn diagram layout (such as Basic Venn), and then click OK.
How do you apply the subtle effect shape style in Word?
On the Format tab, in the Shape Styles group, click Shape Effects, and select an option from the list. To add or change a built-in combination of effects, point to Preset, and then click the effect that you want. To customize the built-in effect, click 3-D Options, and then choose the options that you want.
How do I group all shapes in Powerpoint?
Press and hold CTRL while you click the shapes, pictures, or other objects to group. You will need to select more than one shape, picture or object in order to enable the Group button. You can select all the objects on a slide by pressing CTRL+A. Select the Arrange button and choose Group.
How do you group objects in Word on a Mac?
Group shapes, pictures, or other objects
- Press and hold command while you use the mouse or touchpad to select the shapes, pictures, or other objects that you want to group.
- Click the Shape Format tab or the Picture Format tab, and then click Group > Group.
How do I anchor an image into a shape in Word?
From the start screen, click the Options command. This will display the Word Options dialog box. From the dialog box, navigate to the Display section and make sure to tick the Object Anchors checkbox. Apply your setting by clicking the OK button.
Why is the group option greyed out in Word?
Here are some reasons why the Group button is grayed out and the things you can do to get it back. Only one shape or picture is selected. Make sure you have multiple shapes or pictures selected. You can’t use the Group tool with SVG icons, so those don’t count.
How do you make a Venn diagram on Lucidchart?
Create a Venn diagram in Lucidchart
Start with a template to customize or begin by selecting the Venn diagram shape library and then drag circle shapes—or sets—to the canvas. You can duplicate or resize these shapes to be bigger, smaller, or even ovals.
How do I create a WPS Venn diagram in Word?
Insert Venn diagram in WPS Writer
- Open your word document and click the position where you want to insert a venn diagram.
- Click the Insert tab and click WPSArt to get a pop-up dialog.
- Select Radial Venn and click OK.
- After inserting the venn diagram, we can edit it as need.
How do you make a diagram on Microsoft Word?
To create a diagram in a document
- Position the cursor in the document where you want to insert the diagram.
- Do either of the following to open the Choose a SmartArt Graphic dialog box: …
- In the left pane, select a type of diagram. …
- Click OK to insert the selected diagram at the cursor.
How do you use shapes in Word?
To add a shape, click Insert, click Shapes, select a shape, and then click and drag to draw the shape. After you add one or more shapes, you can add text, bullets, and numbering to them, and you can change their fill, outline, and other effects on the Format tab.
How do I fill a shape with text in Word?
How to Format Text to Fit a Shape in Microsoft Word
- Click on the “Insert” tab at the top of Word and then click on “Shapes” under the Illustrations group. …
- Click on the shape you want, such as a square, circle or star.
- Click anywhere on the document to place the shape. …
- Right-click on the shape and select “Add Text.”
What is subtle effect?
What does subtle effect mean? adj. 1 not immediately obvious or comprehensible. 2 difficult to detect or analyse, often through being delicate or highly refined.
What is the shortcut for grouping in Word?
Hold the Shift (or Ctrl) key and click the objects you want to group. Click the Group command on the Format tab, then select Group. The selected objects will now be grouped.
How do I group together in PowerPoint?
To group objects in PowerPoint using a keyboard shortcut:
- In Normal View or Slide Master View, Shift-click or Ctrl-click the pictures, shapes or other objects you want to group.
- Press Ctrl + G. The selected objects will be grouped together and have a single set of selection and rotation handles.
How do you group and ungroup objects?
To group objects together, select them by clicking on them while holding down Shift, and choose Arrange > Group (Cmd-G) in the menu. To ungroup the the objects, select the group and choose Arrange > Ungroup (Cmd-Shift-G) in the menu.
How do you group objects on a Mac?
Group objects: Select multiple objects, then Control-click one of the objects and choose Group from the shortcut menu. Ungroup objects: Control-click the group, then choose Ungroup from the shortcut menu.
How do I create a group in Word 2013?
To group objects:
- Hold the Shift (or Ctrl) key and click the objects you want to group. Selecting multiple objects.
- From the Format tab, click the Group command and select Group. Grouping objects.
- The selected objects will now be grouped.
Why can’t I select multiple objects in Word?
By default, Word does not show Select Multiple Objects icon in the toolbar. We must include it in the Quick Access Toolbar. Click on the Customize Quick Access Toolbar icon.
- Reference 1
- Reference 2
- Reference 3
- Reference 4
- Reference 5
![]()
Download Article
![]()
Download Article
- Grouping Objects in Word
- Why is the Group button grayed out?
- Q&A
|
|
Do you want to move or resize multiple pictures, shapes, or other objects in your document at the same time? Grouping objects in Microsoft Word is an efficient way to manipulate them to act as a whole instead of individual pieces. You can group shapes, pictures, and other objects so that if you wish to relocate them but not change the distance between them, they will move as one. This wikiHow article teaches you step-by-step how to group and ungroup shapes, pictures, and other objects in Word on your PC or Mac.
Things You Should Know
- Group items by selecting them and then going to «Layout > Group».
- Make sure none of the objects have the «In Line with Text» wrap setting before creating a group.
- If the Group option is grayed out, make sure you have more than one object selected & that none of the objects is a SVG, table, or worksheet.
-
1
Open your document in Word. You can either double-click the file in your file manager (Finder for Mac and File Explorer for Windows) or you can click the Word app icon and go to File > Open.
-
2
Make sure none of your objects are set to «In Line with Text.» If a picture or object you want to add to the group has its text wrapping set to «In Line with Text,» you won’t be able to select it while creating your group.[1]
Here’s how to check and change the text wrap settings:- Click any object you want to add to the group.
- Click the «Layout Options» icon that appears at the top-right corner.
- If the «In Line with Text» option is selected, choose any of the other text wrapping options.
- Repeat for all objects you want to group.
Advertisement
-
3
Select the objects you want to group. If you’re using Windows, press and hold Ctrl as you click each object. If you’re on a Mac, press and hold Cmd instead.
-
4
Click the Shape Format or Picture Format tab. You’ll see one or both of these tabs at the top of Word, depending on which objects you’ve selected. The option to group objects appears on both of these tabs.
- If you don’t see either of these tabs, click the Layout tab instead. You’ll also find the option to group here.
- If you’re using Office 2010, click the Drawing Tools or Picture Tools tab, then click the Format tab.[2]
-
5
Click Group on the toolbar. You’ll see this on the Arrange panel near the top-right corner of Word. If you don’t see this option, click Arrange to make it visible. A brief menu will expand.
-
6
Click Group again to group the selected objects. The objects are now grouped together, which allows you to rotate,
- To ungroup objects, click your group to select it, click the Layout tab, then select Ungroup.
- Once you’ve grouped, then separated a group, you can regroup it. Go to Layout > Regroup.


Advertisement
-
1
You can’t include SVG icons in your groups. If there are SVG icons in your selection, you’ll first have to convert the SVG icons to shapes, which is a feature that only Windows 365 subscribers have access to. There will be a «Convert to Shape» button under Graphics Tools > Format.
-
2
You only have one shape, picture, or object selected. Since you can’t create a group with only 1 item, you’ll need to add more items. Press and hold Ctrl (Windows) or Cmd (Mac) as you click to add other objects.
-
3
Your selection includes a table or worksheet. Unfortunately, you cannot add these things to your group.


Advertisement
Add New Question
-
Question
How can I group text boxes in Word?

Click one after the other while holding Ctrl. Then do a right-click and press ‘Group’.
-
Question
Microsoft Word wouldn’t allow me to group for some reason. Do you have any idea what I’m doing wrong?
Objects with «In Line» text wrapping and GIFs cannot be grouped. Since wrapping is difficult in a text box, it is best to move any items out of a text box, change the word wrap setting, and then group. You can then copy the group and paste it back into a text box and finish by deleting the group outside the box.
Ask a Question
200 characters left
Include your email address to get a message when this question is answered.
Submit
Advertisement
Thanks for submitting a tip for review!
About This Article
Thanks to all authors for creating a page that has been read 190,876 times.
Is this article up to date?
Merge shapes
- Select the shapes to merge. Press and hold Shift to select multiple shapes. The Shape Format tab appears.
- On the Shape Format tab, click Merge Shapes, and then pick the option you want. The order in which you select the shapes to merge may affect the options shown to you.
Contents
- 1 Can you group shapes together in Word?
- 2 How do I merge text boxes and shapes in Word?
- 3 Can you merge images in Word?
- 4 How do I merge text box shapes?
- 5 How do you repeat headers in Word?
- 6 How do I make a multi level list in Word?
- 7 How do you keep a shape from moving in Word?
- 8 What is mail merge in Word?
- 9 How do I keep text and pictures together in Word?
- 10 How do I overlay two images in Word?
- 11 How do you combine pictures and shapes in Powerpoint?
- 12 How do you merge boxes in Word?
- 13 How do you merge tables in Word?
- 14 How do you put a header on every page in Word?
- 15 What is header row in Word?
- 16 How do I fix multi level numbering in Word?
- 17 How do I create a multilevel list in Word 2016?
- 18 How do you create a hierarchy in Word?
- 19 How do I lock a shape in Word 2016?
- 20 What is an anchor in Word?
Can you group shapes together in Word?
Group shapes, pictures, or objects
Press and hold CTRL while you select the shapes, pictures, or objects that you want to group. The Wrap Text option for each object must be other than In line with Text. For more info, see Wrap Text. , and then select Group.
How do I merge text boxes and shapes in Word?
Press and hold command while you use the mouse or touchpad to select the shapes, pictures, or other objects that you want to group. Click the Shape Format tab or the Picture Format tab, and then click Group > Group.
Can you merge images in Word?
Double-click the image, which opens the picture on the Word page.Click once on the first image, press and hold down the “Ctrl” key and then click once on each other image. When they’re all selected, click the “Insert” button and the to-be-merged pictures open together on the page, but not yet merged.
How do I merge text box shapes?
Press and hold Ctrl while you click the shapes, pictures, or other objects to group. 2. Then right click and select Group. By doing this, we can group shapes, pictures, or other objects at the same time as though they were a single shape or object.
Repeat table header on subsequent pages
- In the table, right-click in the row that you want to repeat, and then click Table Properties.
- In the Table Properties dialog box, on the Row tab, select the Repeat as header row at the top of each page check box.
- Select OK.
How do I make a multi level list in Word?
To create a multilevel list:
- Select the text you want to format as a multilevel list.
- Click the Multilevel List command on the Home tab. The Multilevel List command.
- Click the bullet or numbering style you want to use.
- Position your cursor at the end of a list item, then press the Enter key to add an item to the list.
How do you keep a shape from moving in Word?
Click Advanced. Word displays the Advanced Layout dialog box.
Stop Graphics and Text from Jumping Around
- Display the File tab of the ribbon, then click Options.
- Click Display at the left side of the dialog box.
- Select the Object Anchors check box.
- Click on OK.
- In Print Layout view, select the shape (the block arrow).
What is mail merge in Word?
Mail Merge is a handy feature that incorporates data from both Microsoft Word and Microsoft Excel and allows you to create multiple documents at once, such as letters, saving you the time and effort of retyping the same letter over and over.
How do I keep text and pictures together in Word?
To keep the picture and its caption together you have a couple of options. In both cases you want to use the “Keep with next” and “Keep together” paragraph attributes. Select both the caption and picture, right click, select “Paragraph”, select “Line and Page Breaks” tab, turn on both those options.
How do I overlay two images in Word?
How to overlay pictures in Word
- Go to the Insert tab.
- Select the Pictures option and choose an image source.
- Right-click on both pictures > Wrap Text > Square.
- Click on one image and drag it on top of another.
How do you combine pictures and shapes in Powerpoint?
To select the picture and then the circle and merge the shapes:
- Click the picture.
- Shift-click the edge of the circle.
- Click the Drawing Tools Format, Drawing Format or Shape Format tab in the Ribbon.
- In the Insert Shapes group, click Merge Shapes and then select Intersect from the drop-down menu.
How do you merge boxes in Word?
Merging Cells: Quick Menu Option
- Select the cells you want to merge.
- Right click within the selected cells » select Merge Cells. The selected cells are merged.
How do you merge tables in Word?
Method 2: Use “Merge Table” Option
- Firstly, click on the cross sign to select the first table.
- Then press “Ctrl+ X” to cut the table.
- Next place cursor at the start of the line right below the second table.
- And right click.
- Lastly, on the contextual menu, choose “Merge Table”.
Use headers and footers to add a title, date, or page numbers to every page in a document.
Try it!
- Select Insert > Header or Footer.
- Select one of the built in designs.
- Type the text you want in the header or footer.
- Select Close Header and Footer when you’re done.
Microsoft Office allows you to mark the first row of a table as table headers in both PowerPoint and Word. The general process is to find the table formatting options in the the ribbon and check Header Row for each table.
How do I fix multi level numbering in Word?
How to fix Multilevel list in Word
- Select the first heading level and then from the Word Main menu, under the tab Home, within the group Paragraph, click the Multilevel List icon.
- From the drop-down list, click option Define New Multilevel List.
How do I create a multilevel list in Word 2016?
On the Home tab, click the Multilevel List button and choose what kind of list you want. If none of the lists suit you, you can choose Define New Multilevel List and create a new kind of list in the Define New Multilevel List dialog box. Enter the items for the list, pressing Enter as you complete each one.
How do you create a hierarchy in Word?
Create a hierarchy
- On the Insert tab, in the Illustrations group, click SmartArt.
- In the Choose a SmartArt Graphic gallery, click Hierarchy, and then double-click a hierarchy layout (such as Horizontal Hierarchy).
- To enter your text, do one of the following: Click [Text] in the Text pane, and then type your text.
How do I lock a shape in Word 2016?
Lock or unlock shapes from selection
Select the shape or shapes that you want to protect. On the Format menu, click Protection. Select the From selection check box, and then click OK twice.
What is an anchor in Word?
The anchor is a symbol that sometimes appears when you insert an image, or a SmartArt, or a drawing into a Word document.Suppose you want to keep the picture fixed to one location or position. You can click it, and wrapping options will appear. Here, you can pick ‘Fix position on page.
In Microsoft Office documents work with autoshapes is available. You can create compositions, combine images, insert WordArt objects. But you have to change them separately. It is very inconvenient if you make a pattern from many different parts. In order not to move each circle, understand how to group the figures in Word.

For transfer or other operations with autoshapes they can be combined
If you combine images, the program will perceive them as a whole. So you can change all the elements at once, move them or apply certain attributes to them.
How to group objects in a document?
You combined a drawing from several parts and decided to move it to another place. In order not to drag autoshapes separately, connect them via WordArt.
Here’s how to group objects in Word:
- Arrange the illustrations as you need.
- Select them. To do this, hold down the Ctrl key and click on the shapes you want to join.
- The “Format” item will appear in the menu bar. Select it — VordArt will open. In Office 2003, these settings must be invoked through the View — Drawing Panel.
- Click the «Group» button. It is located on the right side of the menu. If it is not visible, expand or expand the window.

After that, Word will perceive individual objects as one. They can be changed, moved and copied at the same time.
It is much easier to combine drawing through the context menu. To do this, select all the images with the Ctrl key pressed and right-click on them. In the drop-down list, hover over «Group».

If you want to change the color of the illustration or use the attributes, you can do this with all the pictures at once. But some effects are not superimposed on the composition, but on individual figures. For example, a shadow — it appears not at the whole pattern, but along the contour of each element.
In the Word it will not be possible to combine images created in different programs. If you add an image from a file and WordArt to a document, you cannot select them at the same time. To get around this limitation, you need to change the wrap options.
- Click on the picture with the right mouse button.
- Aim at «Text Wrap».
- Click on any value other than “In Text”. Now graphic files and WordArt objects can be connected.

Word 2007 removed this feature.
How to cancel grouping?
You should not delete the entire composition and create a new one if you want to drastically change something. It is better to remove the union, make adjustments and re-create the overall picture. It’s time to learn how to ungroup the picture in Word. Separate and connect patterns can be in the same menu.
- Highlight an illustration.
- Click on it with the right mouse button.
- Aim at the grouped item. There will be a necessary option. It is also available in the WordArt panel.

How to change an object without disconnecting a group?
If you need to work with one element, do not need to disconnect anything. To again not understand how to group the picture in Word, follow the instructions.
- Click on the image.
- Click on a single Word Art item. Now the frame will be around it, and around the whole composition. Several elements can be selected if you press the Ctrl key while selecting the next shape.
- Freely change autoshapes, move them instead of ungrouping, use attributes. If you move a component beyond the limits of the whole illustration, its frame will expand. But the drawing will remain whole.
Combining figures and drawings in Microsoft Office 2007
In Word 2007, it is impossible to connect illustrations from other programs and WordArt objects directly. They cannot be distinguished at the same time. But there are workarounds. In particular, the use of tools for working with labels. Here’s how to do grouping in Word 2007.
- Click on the «Insert» tab. In the “Text” field, find the “Inscription” menu and click on the arrow below it.
- Select “Simple inscription” and click anywhere in the document.
- In the «Label Styles» panel, click «Fill Shapes» and go to the «Figure» item.
- Find your desired image.
- Adjust its size and move to the right place. To drag the area with the text (in this case with the picture), “hook” it over the frame.

WordArt objects and labels can be selected simultaneously using the Ctrl or Shift key. Combining into one composition will be available both in the text menu and in the auto shapes tab.
In Word, you can create multi-faceted and multi-layered patterns by combining different shapes. Subsequently, they are printed, copied into graphic editors, used for presentations, or simply stored as a keepsake. To facilitate the work with WordArt and not drag all components separately, use grouping.