
Excel for Microsoft 365 Word for Microsoft 365 Outlook for Microsoft 365 PowerPoint for Microsoft 365 Project Online Desktop Client Excel for Microsoft 365 for Mac Word for Microsoft 365 for Mac PowerPoint for Microsoft 365 for Mac Word for the web OneNote for the web PowerPoint for the web Excel 2021 Word 2021 Outlook 2021 PowerPoint 2021 Project Professional 2021 Project Standard 2021 Excel 2021 for Mac Word 2021 for Mac PowerPoint 2021 for Mac Excel 2019 Word 2019 Outlook 2019 PowerPoint 2019 Project Professional 2019 Project Standard 2019 Excel 2019 for Mac Word 2019 for Mac PowerPoint 2019 for Mac Excel 2016 Word 2016 Outlook 2016 PowerPoint 2016 Project Professional 2016 Project Standard 2016 Excel 2016 for Mac Excel 2013 Word 2013 Outlook 2013 PowerPoint 2013 Project Professional 2013 Project Standard 2013 Excel 2010 Word 2010 Outlook 2010 PowerPoint 2010 More…Less
Crop a picture to trim away outer edges that are unnecessary.
-
If, instead, you want to remove the background of a picture, see Remove the background of a picture.
-
If you want to make a picture bigger or smaller, see Change the size of a picture.
Important: Cropped parts of the picture are not removed from the file, and can potentially be seen by others; including search engines if the cropped image is posted online. If there is sensitive information in the area you’re cropping out make sure you delete the cropped areas (see below) then save the file.
In addition to basic margin-cropping, you can also crop pictures to specific shapes and aspect ratios, or crop picture fills inside a shape (in Microsoft 365 for Mac and in Office 2010 and later).

1:32
Office can help with you with basic image editing as illustrated in the video above, but for more advanced tasks, you may need a dedicated image-editing app. Digital Trends has recommendations for free photo-editing software.
Crop the margins of a picture
-
Use Insert > Picture to add the image to an Office file (such as a Word document, PowerPoint presentation, or Excel workbook).
-
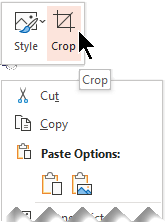
Right-click the picture. A pop-up menu appears with two buttons either immediately above or below the menu. Crop is one of the buttons.

-
Select the Crop button.
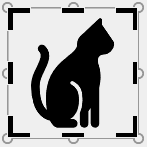
Black crop handles appear on the edges and corners of the picture.
-
Crop the image by doing one of the following:
Description
Action
Crop one side
Drag inward on the side cropping handle
Crop two adjacent sides at the same time
Drag inward on the corner cropping handle
Crop equally on two parallel sides at once
Press and hold Ctrl while dragging inward on the side cropping handle
You can also outcrop, or add a margin around a picture, by dragging the cropping handles outward rather than inward.
-
(Optional) To reposition the crop area, either change the crop area by dragging the edges or corners of the crop rectangle, or move the picture.
-
When you’re finished, press Esc or click anywhere outside the picture within the document.
Note: Cropping tools are not available for shapes, but in Office 2010 and later, you can resize a shape and use the Edit Points tool to achieve an effect similar to cropping or to customize the shape. See Use edit points to edit or crop the shape for more information.
Crop to a shape, such as a circle
See Crop a picture to fit in a shape.
Other kinds of cropping
Select a heading below to open it and see the detailed instructions.
Cropping a picture to a common photo size or aspect ratio lets it easily fit into a standard picture frame. You can also use this tool to preview how a picture will fit into a specific aspect ratio before cropping.
-
Use Insert > Picture to add the image to an Office file (such as a Word document, PowerPoint presentation, or an Excel workbook).
-
Click the picture.
-
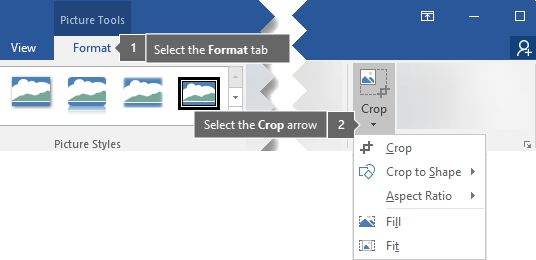
Click Picture Tools > Format, and in the Size group, click the arrow under Crop.
-
From the menu that appears, select Aspect Ratio, then click the ratio that you want.
A crop rectangle appears, showing you how the picture will appear when cropped to the selected aspect ratio.
-
If desired, adjust the crop area using the cropping handles as described under Crop a picture.
-
When you’re finished, press Esc or click anywhere outside the picture within the document.
By default, after you crop a picture, the cropped areas remain part of the file, hidden from view. However, you can reduce file size by removing the cropped areas from the picture file. This also helps prevent other people from viewing the parts of the picture that you have removed.
Important: If you delete cropped areas and later change your mind, you can click the Undo  button to restore them. Deletions can be undone until the file is saved.
To remove cropped areas from the picture file:
-
Select the picture or pictures from which you want to delete cropped areas.
-
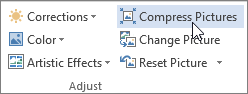
Click Picture Tools > Format, and in the Adjust group, click Compress Pictures. A dialog box appears showing compression options.
If you don’t see the Picture Tools and Format tabs, make sure that you’ve selected a picture. You might have to double-click the picture to select it and open the Format tab. Also, if your screen size is reduced, you might only see the Compress Pictures icon.
-
Under Compression Options, be sure that the Delete cropped areas of pictures check box is selected.
To remove croppings for the selected picture or pictures only and not all pictures in the file, select the Apply only to this picture check box.
Select a Resolution option, if desired.
-
Click OK.

See Also
Cut out or cover part of a picture
Insert pictures
Add a drawing to a Word document
Reduce the file size of a picture
Use Word Layout Options to move pictures
Wrap text around pictures in Word
Crop the margins of a picture
-
Use Insert > Pictures to add the image to an Office file (such as a Word document, PowerPoint presentation, or Excel workbook).
-
Click the picture, then click the Picture Format tab on the toolbar ribbon.
-
On the Picture Format tab, select Crop.
Black crop handles appear on the edges and corners of the picture.
-
Crop the image by dragging any crop handle inward. If you drag one of the corner handles, it crops two adjacent sides at the same time.
-
Click away from the picture to see the cropped image.


Note: After you crop a picture, the cropped parts are hidden but remain as part of the picture file. To permanently remove the cropped portion and reduce your picture size, see the section further down this page named Delete cropped areas of a picture.
Crop to a specific shape
See Crop a picture to fit in a shape.
Delete cropped areas of a picture
By default, even after you crop parts of a picture, the cropped parts remain as part of the picture file. However, you can reduce the file size by removing the croppings from the picture file. This also helps prevent other people from viewing the parts of the picture that you have removed.
Important: Deleting cropped areas of a picture can’t be undone. Therefore, you should only do this after you are sure that you have made all the crops and changes that you want.
To remove cropped areas of a picture file:
-
Click the picture or pictures from which you want to delete cropped areas.
-
On the Picture Format tab, click Compress Pictures
.(If you don’t see the Picture Format tab, make sure that you’ve selected a picture.)
-
Select the Delete cropped areas of pictures check box.
To remove croppings for the selected picture or pictures only and not all of the pictures in the file, select Selected pictures only.
 .
.See Also
Insert pictures in Office for Mac
Move, rotate, or group a picture, text box, or other object in Office for Mac
Change the size of a picture, shape, text box, or WordArt
Control text wrapping around objects in Word for Mac
In Word for the web and PowerPoint for the web you can do basic picture cropping—trimming away unwanted margins of a picture. Only the desktop apps can delete the cropped areas from the image, however.
Crop a picture
-
Select the picture you want to crop.
-
On the Ribbon, select the Picture tab.
-
Select the downward pointing arrow next to the Crop option
, then select Crop.Black crop handles appear on the edges of the picture.
-
With your mouse, point at a crop handle, then click and drag inward to trim the margin of the image.
-
When you are finished cropping margins, click outside the boundary of the image to save the changes.
 , then select Crop.
Important: Cropped parts of the picture are not removed from the file, and can potentially be seen by others; including search engines if the cropped image is posted online. Only the Office desktop apps have the ability to remove cropped areas from the underlying image file.
Crop a picture to fit in a shape
For details, see Fit a picture inside a shape.
Need more help?
Crop a picture
- Select the picture you want to crop.
- On the Ribbon, select the Picture tab.
- Select the downward pointing arrow next to the Crop option.
- With your mouse, point at a crop handle, then click and drag inward to trim the margin of the image.
Contents
- 1 How do you freehand crop an image in Word?
- 2 How do I cut a picture on my computer?
- 3 How do I crop a custom image?
- 4 Can you cut a picture in half on word?
- 5 How do you crop an irregular shape?
- 6 How do you crop a picture in Windows 10?
- 7 How do I crop a picture in Word 2010?
- 8 Which allows a user to edit a picture in Word?
- 9 How do you crop an object out of a picture?
- 10 Can you freehand crop in PowerPoint?
- 11 How do I split a picture into prints?
- 12 How do you split a picture in Word?
- 13 How do I split a JPEG in half?
- 14 How do I freehand crop an image in Windows?
- 15 How do I edit around a picture?
- 16 How do you crop a screenshot in Word?
- 17 How do I crop a picture in Word 2016?
- 18 How do I edit a picture in Word 2010?
- 19 Can you edit a picture on Word?
- 20 How do I edit a JPEG in Word?
How do you freehand crop an image in Word?
This is one way to do it:
- Draw the shape.
- Right-click (or Control-click) on it and select Format Shape.
- Choose Fill > Picture or Text and click on Picture.
- Insert a picture, then select Format Picture in the Ribbon.
- Choose Crop > Crop to Fit.
How do I cut a picture on my computer?
Try it!
- Select a picture.
- Select the Picture Tools > Format tab and select Crop.
- There are different ways to crop your picture: Drag a cropping handle to crop it from the side, top, or bottom. Press Shift to crop the entire photo down to the size you want.
- Press Esc to finish.
How do I crop a custom image?
If you want to change the outline of a picture and make it a shape (like a circle or a star), use the cropping tools on the PICTURE TOOLS FORMAT tab. Select the picture (or pictures) that you want to crop. On the PICTURE TOOLS FORMAT tab, click Crop > Crop to Shape, and then pick the shape you want.
Can you cut a picture in half on word?
Right click the image on the first page and select “Crop.” Watching the ruler, drag the top right corner to the halfway mark on the page so only the left half is visible.You’ll notice there’s a round handle at the top of the image’s midpoint, which you can use to crop the image by exactly half.
How do you crop an irregular shape?
How to Crop an Image to an Irregular Shape
- Open the image file in your image editor.
- Double-click on the background layer in the Layers Palette and rename the layer.
- Use the Lasso Tool to outline the irregular shape that you wish to crop.
- Open the Image menu and select the “Crop” option.
How do you crop a picture in Windows 10?
How to crop image using Photos on Windows 10
- Open Start.
- Search for Photos and click the top result to open the app.
- Click on the picture.
- Click the Crop button from the top-center toolbar.
- Use the pins in corners to select the area you want to crop.
- Click and drag the image to center it in the cropping area.
How do I crop a picture in Word 2010?
To crop an image:
- Select an image. The Format tab will appear.
- Select the Format tab.
- Click the Crop command. Black cropping handles appear. The black cropping handles.
- Click and drag a handle to crop an image.
- Click the Crop command to deselect the crop tool.
Which allows a user to edit a picture in Word?
Follow the steps as under to make corrections to the picture. Click the picture to reveal the “Format” tab. Press the “Corrections” option to reveal the dropdown. This will reveal to you how to edit image text in word.
How do you crop an object out of a picture?
Click the Select tool in the toolbar at the top of the program window.
- Select the portion of the image you want to crop using the Select tool.
- Once selected, right-click with the mouse anywhere in the image selection and select Crop.
Can you freehand crop in PowerPoint?
How to crop an image in PowerPoint 2010 or earlier: Custom shape. 1. Head to the Autoshapes menu and select Freeform. Draw a freeform shape over your image, tracing out the part of the image you want to keep.
How do I split a picture into prints?
Right click on the slice icon in the top left corner of the image. Choose Divide Slice and define into how many slices do you want to divide your image, or set the size of each sub-slice. Hit ok. File > Save for web > Save: Make sure “Save all slices” is selected in the dialog.
How do you split a picture in Word?
Follow these steps:
- First and foremost, press Ctrl+C to copy the image (we will need to paste the image again and again)
- Always select the image first.
- Next, press Ctrl and select one parallelogram.
- Go the Format tab under Drawing Tools.
- Locate the Merge Shapes command.
- Click the Intersect option from the drop-down menu.
How do I split a JPEG in half?
How to split JPG
- Open your browser in JPG free application web site and go to Splitter tool app.
- Click inside the file drop area to upload a JPG file or drag & drop a JPG file.
- Click on “SPLIT” button, file will be automatically uploaded to split.
How do I freehand crop an image in Windows?
Step 1: Right-click on the image and select Open With on the pop-up menu, followed by Paint. Step 2: Click the Select button and drag the tool to encompass the portion of the image you wish to crop. Step 3: Click the Crop button directly right of Select.
How do I edit around a picture?
- Open the photo you want to edit.
- Tap Edit. Crop. To crop the photo to different aspect ratios, like a square, tap Aspect ratio . To change the photo’s perspective, tap Transform . Drag the dots to the edges of your desired photo or tap Auto.
- To save a copy of the photo with your edits, at the bottom right, tap Save.
How do you crop a screenshot in Word?
Click the picture, then click the Picture Format tab on the toolbar ribbon. On the Picture Format tab, select Crop. Black crop handles appear on the edges and corners of the picture. Crop the image by dragging any crop handle inward.
How do I crop a picture in Word 2016?
To crop an image:
- Select the image you want to crop. The Format tab will appear.
- From the Format tab, click the Crop command.
- Cropping handles will appear on the sides and corners of the image. Click and drag any handle to crop the image.
- To confirm, click the Crop command again. The image will be cropped.
How do I edit a picture in Word 2010?
How to Edit an Image in a Word 2010 Document
- Click to select the image. The image grows handles.
- Hold down the Shift key.
- Use the mouse to drag one of the image’s four corner handles inward or outward to make the image proportionally smaller or larger.
- Release the Shift key.
Can you edit a picture on Word?
Microsoft Office Picture Manager isn’t included in the new Office but you can use Word to edit photos. Word has many built-in photo editing features, so you might not need a separate program.In Word, you can choose color variations, crop, compress at different levels, and apply some special effects.
How do I edit a JPEG in Word?
While there is no way to turn a JPEG image directly into a Word document that you can edit, you can use a free Optical Character Recognition (OCR) service to scan the JPEG into a Word document file, or you can convert the JPEG file into a PDF and then use Word to convert the PDF into an editable Word document.
Things You Should Know
- In your Word document, select your picture and click Crop.
- Choose Crop for a standard crop, Crop to Shape for an irregular crop, and Aspect Ratio to choose a predetermined size.
- Select the portion of the image you want to keep. Click the «Crop» icon and save.
-
1
Open your Microsoft Word document. Double-click the document that contains the picture you want to crop. This will open the document in Microsoft Word.
-
2
Select a picture. Scroll through your document until you find the picture you want to crop, then click once the picture to select it.
Advertisement
-
3
Click Crop. It’s in the «Size» section on the right side of the Format toolbar. A drop-down menu will appear.
- On Mac, it’s in the toolbar at the top of the «Picture Format» tab.
-
4
Click Crop. This is in the drop-down menu. Clicking it prompts a set of black bars to appear on the edges and in the corners of the selected picture.
-
5
Adjust the picture’s crop. Click and drag inward any of the black bars on the edges or in the corners of the picture to do so.
-
6
Click the «Crop» icon. It’s the box with a line through it above the Crop drop-down icon. This will remove any section of the picture that falls outside of the black bars’ limits.
-
7
Save your changes. Press Ctrl+S (Windows) or ⌘ Command+S (Mac) to do so.


Advertisement
-
1
Open your Microsoft Word document. Double-click the document that contains the picture you want to crop. This will open the document in Microsoft Word.
-
2
Select a picture. Scroll through your document until you find the picture you want to crop, then click once the picture to select it.
-
3
Click the down arrow next to the «Crop» button. It’s in the «Size» section on the right side of the Format toolbar. A drop-down menu will appear.
- On Mac, it’s in the toolbar at the top of the «Picture Format» tab.
-
4
Select Crop to Shape. This is in the drop-down menu. Doing so prompts a pop-out menu with shapes.
-
5
Select a shape. Click the shape in which you want your picture to appear. This will immediately apply the shape to the picture.
-
6
Adjust the shape’s size. Click and drag inward or outward any of the circular points around the picture’s outline to decrease or increase the picture’s size.
-
7
Save your changes. Press Ctrl+S (Windows) or ⌘ Command+S (Mac) to do so.


Advertisement
-
1
Open your Microsoft Word document. Double-click the document that contains the picture you want to crop. This will open the document in Microsoft Word.
-
2
Select a picture. Scroll through your document until you find the picture you want to crop, then click once the picture to select it.
-
3
Click the down arrow next to the «Crop» button. It’s in the «Size» section on the right side of the Format toolbar. A drop-down menu will appear.
- On Mac, it’s in the toolbar at the top of the «Picture Format» tab.
-
4
Select Aspect Ratio. This option is in the drop-down menu. Doing so prompts a pop-out menu to appear.
-
5
Select a ratio. In the pop-out menu, click one of the aspect ratios you’d like to use to crop your picture.
-
6
Adjust the crop selection. Click and drag your picture around until you’ve centered the section you want to keep in the aspect ratio’s square or rectangle.
-
7
Click the «Crop» icon. It’s the box with a line through it above the Crop drop-down icon. Doing so will crop your picture according to your selected aspect ratio.
-
8
Save your changes. Press Ctrl+S (Windows) or ⌘ Command+S (Mac) to do so.


Advertisement
Add New Question
-
Question
How do I make a cropped picture to fit it into another?

Double click or right click the image (depending on what computer/mouse you have), and click on the little icon that looks like a bold triangle. You can also go to the «help» tab and type in «crop» for more hands-on help.
-
Question
What’s the advanced way of cropping a picture in Word?
If you have a Windows configuration on your laptop, just press the Windows button and then the shift button and then the S button. Do this while on the screen you want to screenshot and then drag your cursor to screenshot the section you want. Then simply press CTRL + V (PASTE). But make sure to set the pasted picture to an image format.
Ask a Question
200 characters left
Include your email address to get a message when this question is answered.
Submit
Advertisement
-
Once you crop the photo, it is possible to recover it through various apps and programs.
Thanks for submitting a tip for review!
Advertisement
About This Article
Thanks to all authors for creating a page that has been read 208,053 times.
Is this article up to date?
Содержание
- Обрезаем изображение
- Обрезаем изображение для заполнения или размещения в фигуре
- Удаляем обрезанные области изображения
- Изменяем размер изображения без его обрезки
- Вопросы и ответы

Как вам наверняка известно, работа в программе MS Word не ограничивается одним только набором и редактированием текста. Используя встроенные средства этого офисного продукта, можно создавать таблицы, диаграммы, блок-схемы и многое другое.
Урок: Как создать схему в Ворде
Помимо этого, в Word также можно добавлять графические файлы, изменять их и редактировать, внедрять в документ, совмещать с текстом и делать многое другое. О многом мы уже рассказывали, а непосредственно в данной статье мы рассмотрим еще одну довольно актуальную тему: как обрезать рисунок в Ворде 2007 — 2016, но, забегая вперед, скажем, что и в MS Word 2003 делается практически так же, за исключением названий некоторых пунктов. Визуально же все будет понятно.
Урок: Как сгруппировать фигуры в Ворде
Обрезаем изображение
Мы уже писали о том, как добавить графический файл в текстовый редактор от Microsoft, подробную инструкцию вы можете найти по ссылке ниже. Поэтому логично будет сразу перейти к рассмотрению ключевого вопроса.
Урок: Как вставить изображение в Word
1. Выделите рисунок, который необходимо обрезать — для этого дважды кликните по нему левой кнопкой мышки, чтобы открылась основная вкладка “Работа с рисунками”.
2. В появившейся вкладке “Формат” кликните по элементу “Обрезка” (расположен он в группе “Размер”).
3. Выберите подходящее действие для обрезки:
- Совет: Для одинаковой (симметричной) обрезки двух сторон рисунка, перетаскивая центральный маркер обрезки на одной их этих сторон, удерживайте клавишу “CTRL”. Если же вы хотите симметрично обрезать четыре стороны, удерживайте “CTRL” перетаскивая один из угловых маркеров.

4. Завершив обрезку изображения, нажмите клавишу “ESC”.
Обрезаем изображение для заполнения или размещения в фигуре
Выполняя обрезку рисунка, вы, что вполне логично, уменьшаете его физический размер (не только объем), а вместе с тем и область рисунка (фигура, внутри которой находится изображение).
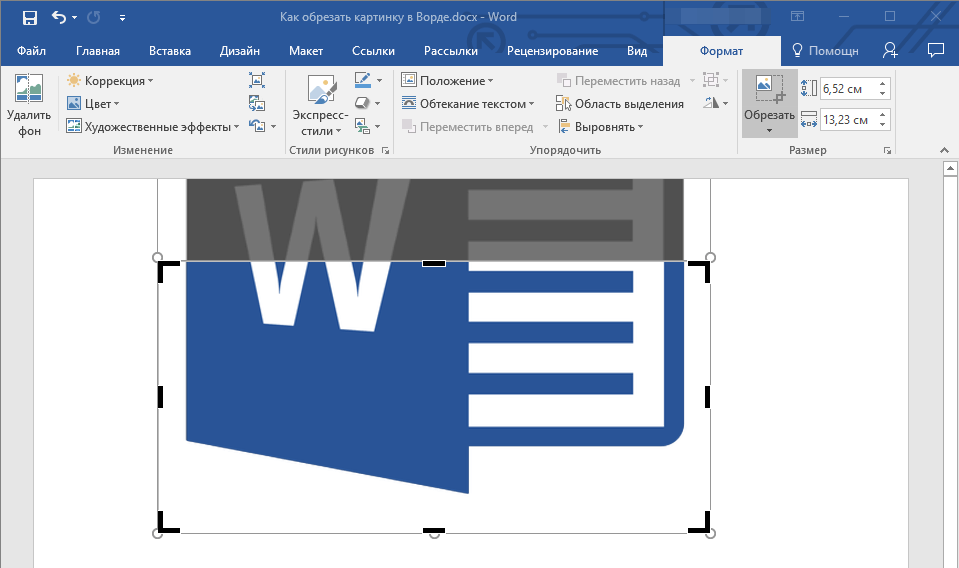
Если же вам необходимо оставить размер этой фигуры неизменным, но обрезать само изображение, используйте инструмент “Заливка”, расположенный в меню кнопки “Обрезать” (вкладка “Формат”).
1. Выделите изображение двойным кликом левой кнопки мышки.
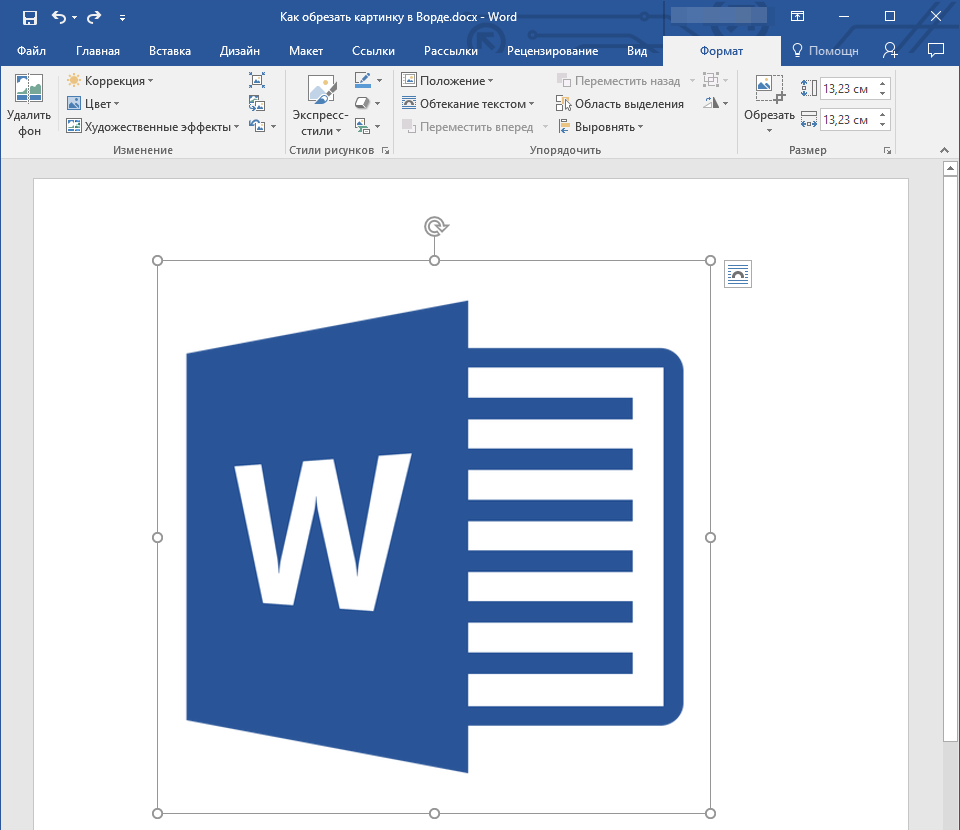
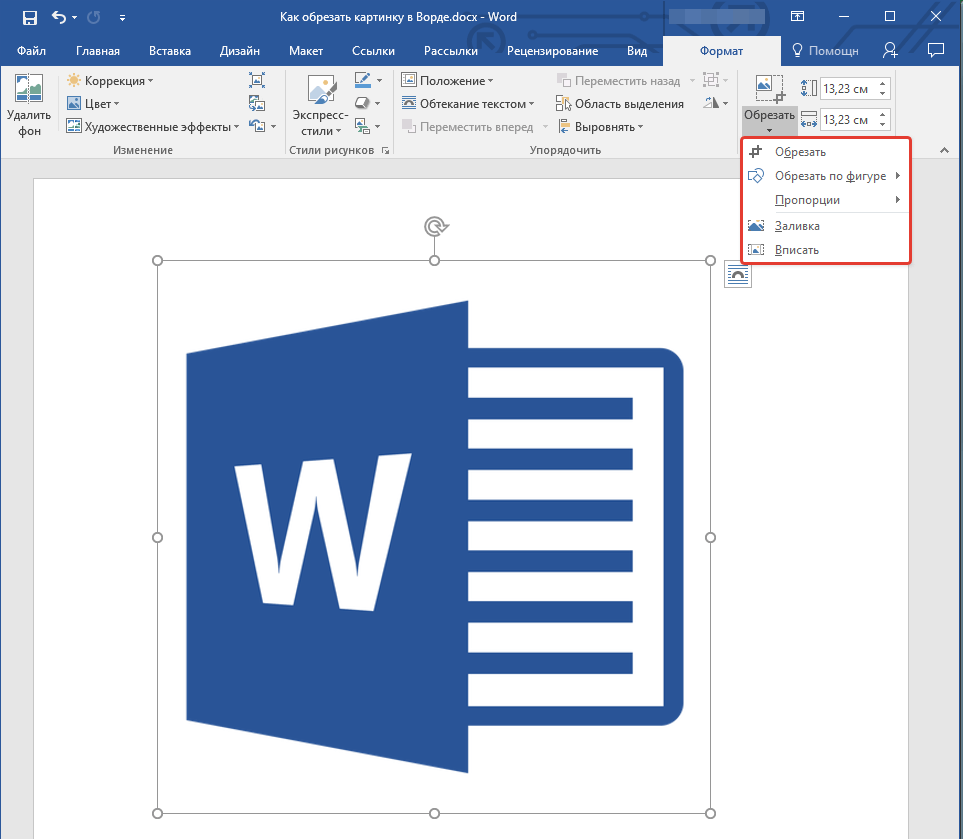
2. Во вкладке “Формат” нажмите на кнопку “Обрезка” и выберите пункт “Заливка”.
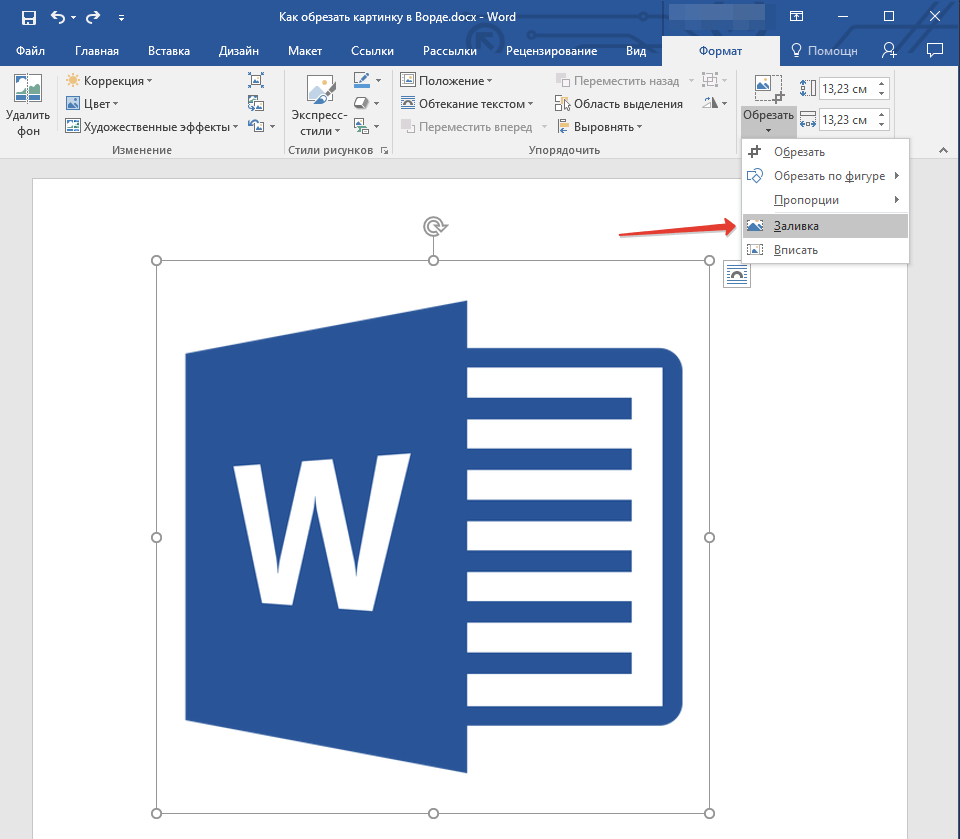
3. Перемещая маркеры, расположенные по краям фигуры, внутри которой находится изображение, измените его размер.
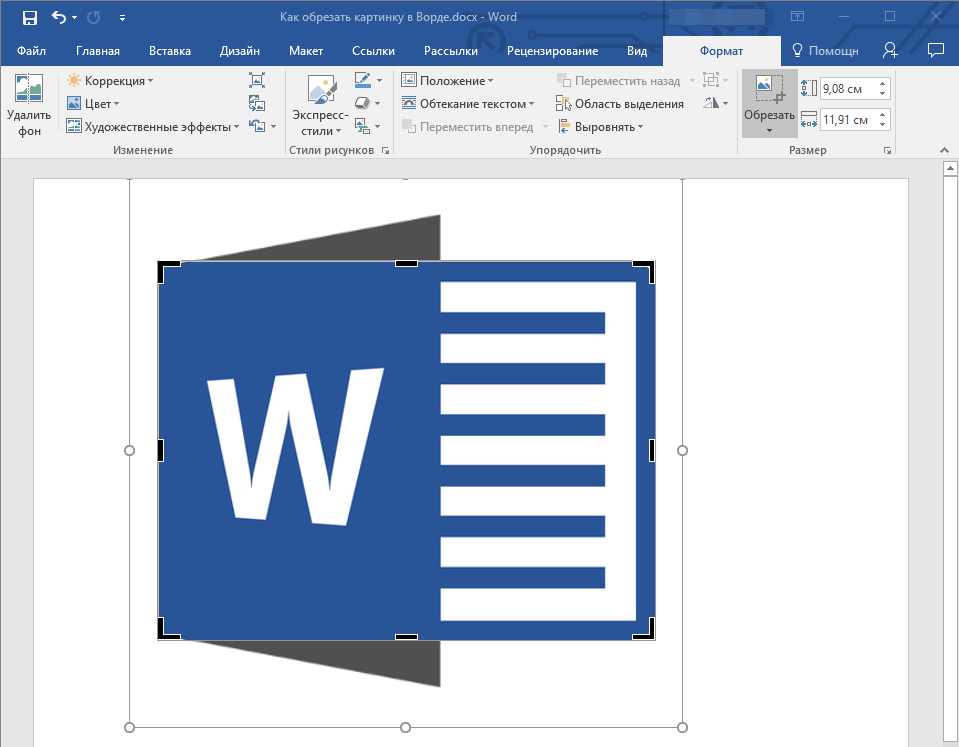
4. Область, в которой находилась фигура (рисунок) останется неизменной, теперь вы можете продолжить работать с ней, например, залить каким-нибудь цветом.
Если же вам необходимо разместить рисунок или его обрезанную часть внутри фигуры, используйте инструмент “Вписать”.
1. Выделите рисунок, дважды кликнув по нему.
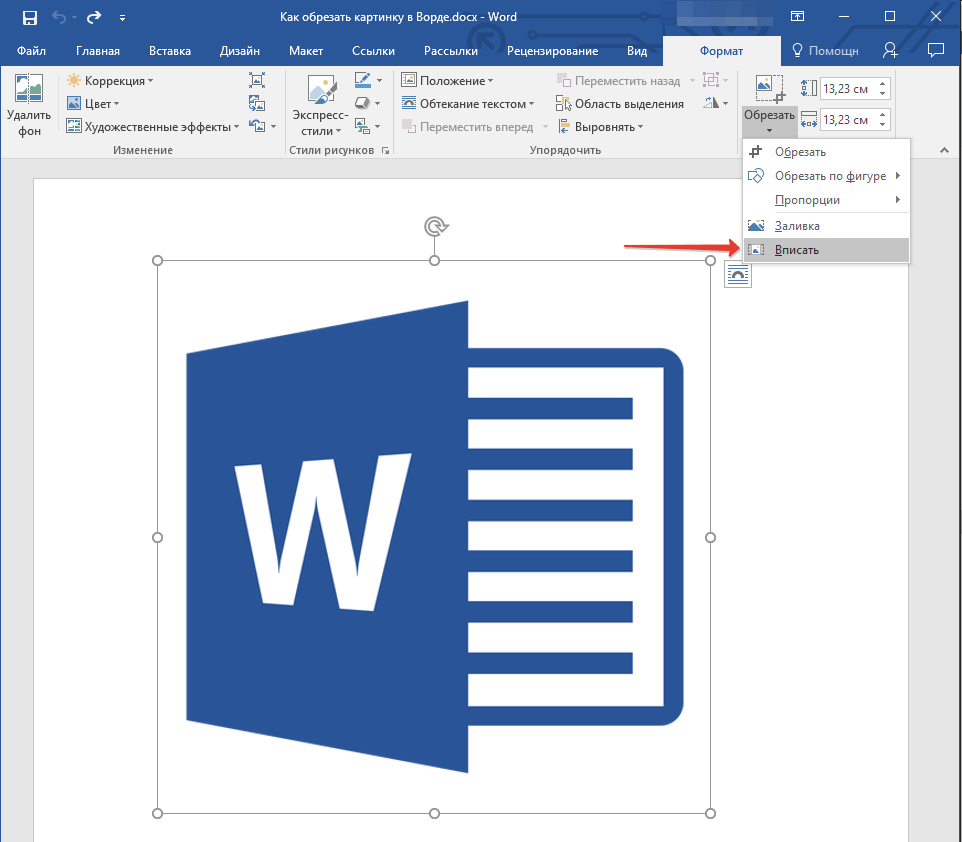
2. Во вкладке “Формат” в меню кнопки “Обрезка” выберите пункт “Вписать”.
3. Перемещая маркер, задайте необходимый размер для изображения, точнее, его части.
4. Нажмите кнопку “ESC”, чтобы выйти из режима работы с рисунками.
Удаляем обрезанные области изображения
В зависимости от того, какой из методов вы использовали для обрезки изображения, обрезанные фрагменты могут остаться пустыми. То есть, они не исчезнут, а останутся частью графического файла и по-прежнему будут находится в области фигуры.
Обрезанную область рекомендовано удалить из рисунка в случае, если вы хотите уменьшить занимаемый им объем или же сделать так, чтобы никто другой не увидел области, которые вы обрезали.
1. Дважды кликните по изображению, в которм необходимо удалить пустые фрагменты.
2. В открывшейся вкладке “Формат” нажмите на кнопку “Сжать рисунки”, расположенную в группе “Изменение”.

3. Выберите необходимые параметры в появившемся диалоговом окне:
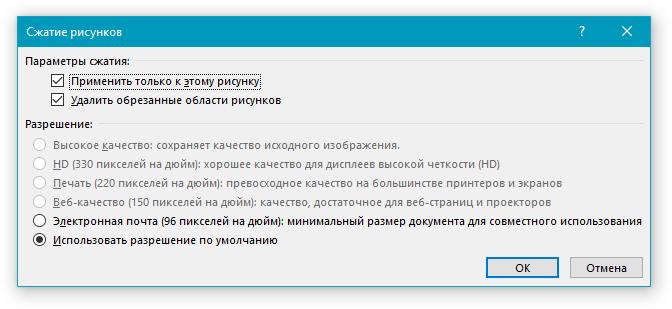
- Применить только к этому рисунку;
- Удалить обрезанные области рисунков.
4. Нажмите “ESC”. Объем графческого файла будет изменен, другие пользователи не смогут увидеть фрагменты, которые вы удалили.
Изменяем размер изображения без его обрезки
Выше мы рассказали обо всех возможных методах, с помощью которых можно обрезать рисунок в Ворде. Кроме того, возможности программы также позволяют пропорционально уменьшить размер изображения или же задать точные размеры, ничего при этом не обрезая. Для этого выполните одно из следующих действий:
Для произвольного изменения размеров рисунка с сохранением пропорциональности кликните по области, в которой он находится и потяните в нужном направлении (внутрь рисунка для уменьшения, наружу — для увеличения его размера) за один из угловых маркеров.
Если вы хотите изменить рисунок не пропорционально, тяните не за угловые маркеры, а за те, что расположены посредине граней фигуры, в которой находится рисунок.
Чтобы задать точные размеры области, в которой будет находиться рисунок, а вместе с тем и задать точные значения размера для самого графического файла, выполните следующее:
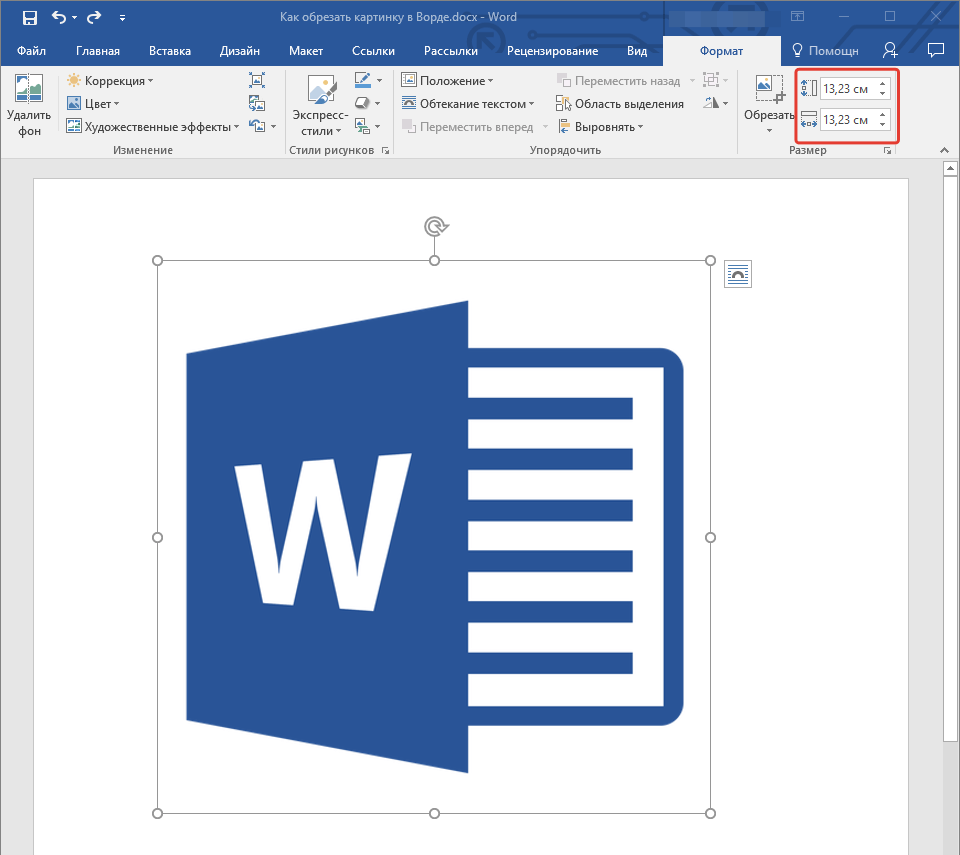
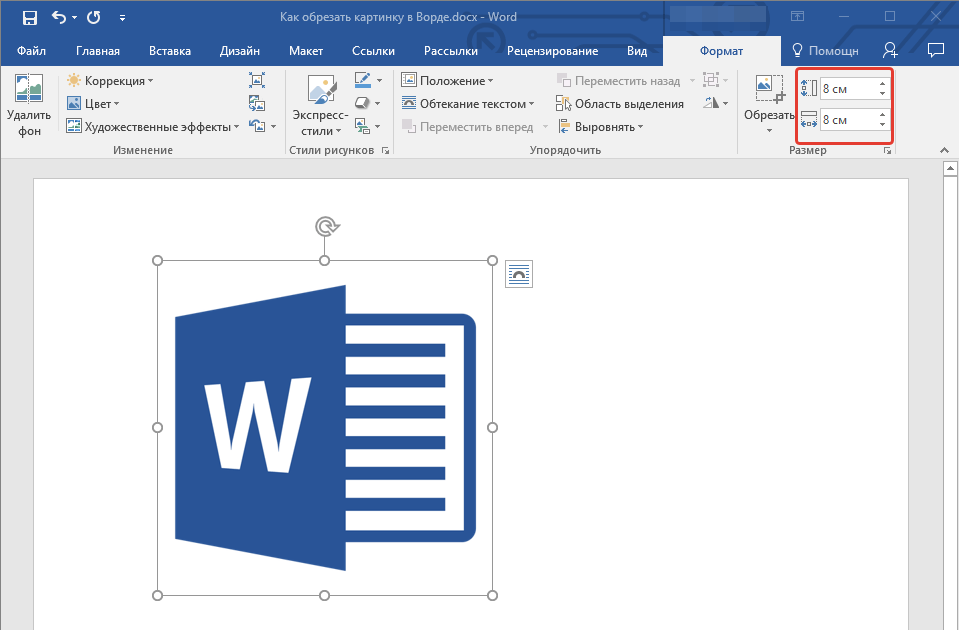
1. Выделите изображение двойным кликом.
2. Во вкладке “Формат” в группе “Размер” задайте точные параметры для горизонтального и вертикального полей. Также, вы можете изменить их постепенно, нажимая на стрелочки вниз или вверх, делая рисунок меньше или больше, соответственно.
3. Размеры рисунка будут изменены, сам же рисунок при этом обрезан не будет.
4. Нажмите клавишу “ESC”, чтобы выйти из режима работы с графическими файлами.
Урок: Как добавить текст поверх картинки в Word
На этом все, из этой статьи вы узнали о том, как обрезать рисунок или фото в Ворде, изменить его размер, объем, а также подготовить для последующей работы и изменений. Осваивайте MS Word и будьте продуктивны.
Что делать, если выбранное изображение по тем или иным причинам не подходит по размерам (например, имеет слишком большой размер, нуждается в редактировании и т.д.)? Как показывает практика, для того, чтобы обрезать картинку, вовсе не обязательно пользоваться сложными графическими редакторами – все необходимые для этого инструменты уже есть в Word.
Кадрирование изображения
Для обрезки рисунка в Ворде, после того как он будет вставлен в документ, необходимо подвести к нему курсор мыши и нажать на правую кнопку. Это позволит вызвать контекстное меню, в котором следует выбрать пункт «обрезка».
Сразу после этого по углам картинки и на разных ее сторонах отобразятся маркеры, передвигая которые можно менять размеры изображения. А именно:
- Чтобы обрезать рисунок с одной стороны, двигают маркер, расположенный с нужной стороны по направлению к центру.
- Если обрезать нужно две смежные стороны, передвинуть нужно угловой маркер.
- Для обрезки двух параллельных сторон, нужно вести к центру один из маркеров, удерживая при этом клавишу CTRL.
- Для одновременной обрезки всех сторон следует перемещать угловой маркер, параллельно удерживая клавишу CTRL.
После того, как размер рисунка будет скорректирован, маркеры можно убрать путем нажатия клавиши Esc, либо кликнув мышью по пространству за пределами картинки.
Обрезка по контуру
Также как в предыдущем случае, для обрезки рисунка или скриншота в Word 2007, 2010, 2013, вначале необходимо вызвать контекстное меню, кликнув по правой кнопке мыши. Однако после этого нужно выбрать пункт «Обрезать по фигуре».
В дальнейшем, действие откроет список шаблонов, из которых можно будет выбрать понравившийся. Причем, при желании определиться можно не только с самой фигурой, но и цветом, и типом линии-контура, а также ее толщиной.
Важной особенностью обрезки фото по контуру является то, что какой бы не была фигура (например, круг или квадрат), оригинальные размеры изображения останутся при этом неизменными.
Обрезка по пропорции
Может получиться так, что перед пользователем встанет задача обрезать картинку, сохранив при этом ее изначальные пропорции. Сделать это можно воспользовавшись разделом Формат, где следует выбрать пункт Обрезка, а затем – Пропорции. В открывшемся контекстном меню можно будет сделать выбор из готовых шаблонов в пользу того, который будет наиболее уместным.
Обрезка для заполнения или размещения в фигуре
Обрезать картинку в Ворде для размещения в фигуре можно вышеперечисленными способами в случае, если оно будет использовано в качестве заливки для уже готового шаблона. Для начала нужно поместить саму фигуру в документ, выбрав нужный шаблон из предложенных.
После того, как фигура будет выделена, необходимо обратиться к вкладке Средства рисования, а оттуда перейти к заливке и кликнуть по строке Рисунок.
Подходящее изображение можно выбрать, загрузив его из памяти компьютера, либо указав ссылку на него (если рисунок размещен в сети Интернет). Если есть необходимость изменить размер картинки, можно воспользоваться одним из маркеров.
Скорректировать фон в случае если он, например, заполнил фигуру не до конца, можно обратившись к меню «Обрезать» (выбрав команду «Заполнить», или «Вписать»). Разница между командами заключается в том, что пункт «Вписать» позволяет изображению полностью поместиться в фигуре, но при этом в ней могут остаться пустоты. «Заполнить» позволяет изображению заполнить фигуру целиком. Части, выходящие за ее пределы при этом будут отрезаны.
Удаление обрезанных частей
После того, как работа с картинкой будет завершена, ее размеры изменятся, но это вовсе не говорит о том, что его обрезанные части будут автоматически удалены. И если выделить фотографию кликнув по ней, она снова будет видна пользователю в своем первоначальном виде. Поэтому ненужные части следует удалять отдельно.
Делается это следующим образом:
- Двойной клик по картинке открывает меню «Работы с рисунками». Затем нужно выбрать раздел «Изменение» и пункт «Сжать рисунки».

- В открывшемся окне следует отметить галочками пункты «Применить только к этому рисунку» (если работа идет с несколькими картинками делать это не нужно) и «Удалить обрезанные области» рисунков, а после – сохранить внесенные изменения нажатием кнопки ОК.


You can remove unnecessary pixels from an image directly in Microsoft Word using the built-in cropping tool. You can also crop a photo to fit a specific shape. Here’s how to crop a picture in Microsoft Word.
To crop a picture in Microsoft Word, open the Word document, add an image (Insert > Pictures), and then select the photo by clicking it.

Next, go to the “Picture Format” tab, which appears after you select the image. Then, in the “Size” group, click “Crop.”
In the drop-down menu that appears, select “Crop.”
Cropping handles will now appear around the frame of the image. To crop out certain areas, click and drag the handles to capture only the content that you want to keep.
After setting the cropping frame, click the icon in the upper half of the “Crop” option in the “Size” group of the “Picture Format” tab.
The unwanted areas of your image are now removed.
How to Crop a Picture as a Shape in Word
To crop an image as a shape, open the Microsoft Word application, insert an image (Insert > Pictures), and then select the image by clicking it.
In the “Picture Format” tab, which appears after selecting the image, click the “Crop” button found in the “Size” group. In the drop-down menu that appears, select “Crop To Shape.”
A sub-menu displaying a large library of shapes will appear. Select the shape that you’d like to crop the image as by clicking it. We’ll use the teardrop shape in this example.
Your image will now be cropped as the selected shape automatically.
This is just one of many photo editing tools available in Microsoft Word. You can also do things such as removing the background from an image, annotating an image, and more.
RELATED: How to Remove the Background from a Picture in Microsoft Word
READ NEXT
- › How to Crop a Picture in Microsoft OneNote
- › 7 Awesome Microsoft Word Features You Should Be Using
- › 4 Ways to Insert a Command or Code Block in Microsoft Word
- › Expand Your Tech Career Skills With Courses From Udemy
- › How to Adjust and Change Discord Fonts
- › Google Chrome Is Getting Faster
- › The New NVIDIA GeForce RTX 4070 Is Like an RTX 3080 for $599
- › BLUETTI Slashed Hundreds off Its Best Power Stations for Easter Sale
How-To Geek is where you turn when you want experts to explain technology. Since we launched in 2006, our articles have been read billions of times. Want to know more?
In this article, you will learn the different methods on how you can crop pictures in MS Word.
3 Ways to Crop a Picture in MS Word
- Crop a picture by manually setting the crop area
- Crop a picture to a shape
- Crop a picture to an aspect ratio
Method 1: Crop a Picture Manually by Setting the Crop Area
The first on the list of methods allows you to directly manipulate the cropping handles.
Cropping handles are the lines that appear around a picture when you select a Crop option.
You will adjust them manually until you crop your picture into your preferred look.
Step 1: Open the document that you need to format.

Step 2: Access the Format tab under Picture Tools
Click on the Picture. It will make the Format tab active on the Ribbon.
Go to Crop under the Format tab.

Step 3: Display Cropping Handles
Click the Crop Button
Notice that cropping handles will appear around your picture. You can now adjust them to crop your picture.

Step 4: Adjust / Move the cropping handles
Define the area you want to keep and remove by adjusting the cropping handles. Click and drag each handle until you achieve your preferred crop area.
If you intend to keep the original ratio, hold down the Shift key while dragging the corner cropping handles.
You can also keep the cropping area centered by holding down the Ctrl key while adjusting the handles.
As you adjust the cropping handles, you will notice that areas outside the cropping handles are highlighted in dark color. This shows you a quick preview on how your picture will look like once you complete the crop command.

In some situations, you need to adjust the picture area so that you can fix the layout of other objects in your document. You can also use the cropping handles to do this. Simply adjust the cropping handles outside the picture to extend the area that it will occupy. A sample image applying this concept is shown below.

When you apply this concept, you can move the picture in this area. Any portion of the picture that will extend beyond the area will be cropped.

Step 4: Finish applying the crop command and make necessary changes if needed.
Finalize your crop area and click anywhere outside the picture to apply the crop command. Upon doing so, you will notice that the selected picture will be cropped accordingly.
Keep in mind that, MS Word stores the complete data of a photo even if you crop it.
Suppose you want to readjust the crop area, you can always do it by repeating all the steps.

Method 2: Crop a Picture to a Shape
As the title implies, MS Word also offers a feature that allows you to make a selected picture take the form of a shape. You can choose from a collection of available shapes and apply it to your picture. This method will also make use of the Crop drop-down list that is available on the Format tab.
Below are the steps on how you can do it.
Step 1: Find and open the document that contains the picture.
Step 2: Make the Format tab under Picture Tools active.
Selecting a picture in your document will display the Format tab on the ribbon. Make it active by clicking the picture you need to edit and subsequently, click the Format tab under Picture Tools. This tab contains the controls you will use for the next step.
Step 3: Select the shape that you will apply as the picture’s new form.
Focus on the Size group of the Format tab. In here, click the Crop drop-down button to display a list of additional commands. Move your mouse pointer over the Crop to Shape option. This will display a collection of shapes that you can apply. Decide on the shape that you need to apply and click it from the collection. Your picture will be cropped according to your selected shape.

Method 3: Crop a Picture to an Aspect Ratio
The last method on the list allows you to crop pictures into standard formats. You can choose among square, portrait, and landscape formats depending on your need. Use this method if you intend to crop a picture into a more formal appearance. A scenario that best exemplifies this is when you need to crop your own picture into an ID picture size.
To use this method, follow the steps below.
Step 1: Locate the document that contains the picture and open it.
Step 2: Select the picture that you need to crop and open the Format tab.
In your document, click on the picture that you intend to crop. Notice that as you click on it, the Format tab appears on the ribbon. Activate the Format tab by clicking it. From the Format tab, locate the Size group. This contains the Aspect Ratio command that you will use in the next step.
Step 3: Select the desired aspect ratio
From the Size group, click on the Crop drop-down button to view a list of extra commands. Move your mouse pointer over the Aspect Ratio option to display the formats that you can apply. The Aspect Ratio options are grouped by Square, Portrait and Landscape. Click the option that satisfies your need. Upon clicking, the selected picture will automatically adapt to your option.
Conclusion
We hope you found this article helpful!
How to Edit a Picture in Microsoft Word in 2023 – PDFgear
Summary :
Learn from this guide about how to edit a picture in Microsoft Word: change color, add border, locate picture, cut out, adjust width/height, compress the picture, artistic effects, etc. The best PDF editor that converts between and edits Word document and image files is also introduced.
Content Table
-
Part 1. How to Insert Picture in Word
-
Part 2. How to Edit Picture in Word
-
Part 3. Best Online Tool for Converting and Editing Word
-
Part 4. Edit a Picture in Word FAQs
How to Edit a Picture in Word
As familiar office software, Word is usually used to edit text documents. But, do you know that it can also be used to edit pictures? It not only allows you to insert pictures into documents to allow better interpretation of the text but also allows you to edit the inserted pictures to meet your needs. This article will explain in detail how to edit a picture through Word in three parts.
⭐ You May Also Like
To add a picture in Word, you can follow the steps below:
- Enter Word, find, and click the “Insert” option in the toolbar.
- Click “Picture”, select the picture you want to add, and done. (In general, the location of the added image is where the cursor is located)

Insert Picture to Word from Device or Online
Part 2. How to Edit Picture in Word
Word provides a variety of tools for editing the picture. Here are some common options:
Change Color
For the added picture, usually, we can adjust its color through Word to make it better conform to the context. Select the added picture, click the “Picture Format” button in the toolbar, and click the drop-down box of the “Color” options. Here, we can adjust the image color options such as Color Saturation, Color Tone, Recolor, More Variations, Transparent Color, etc.
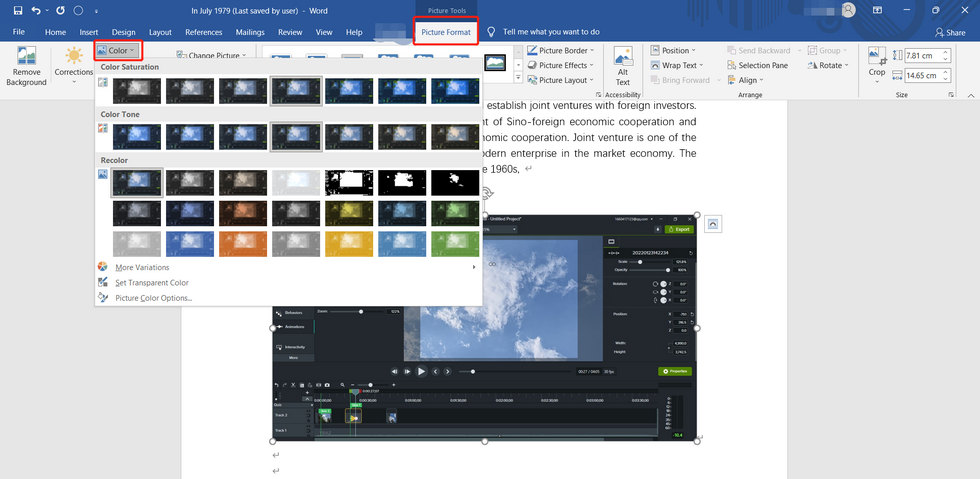
Change Color to Enhance the Expression in Word
Add Border
Setting the border can make the inserted picture more beautiful. The following steps can make it easy for a picture to get a border:
- Insert the picture to be bordered.
- Click “Picture Format ” options
- Find “Picture Border” and click the drop-down option to the right of this button. You can set the Theme Colors, Weight, and Dashes of the border.
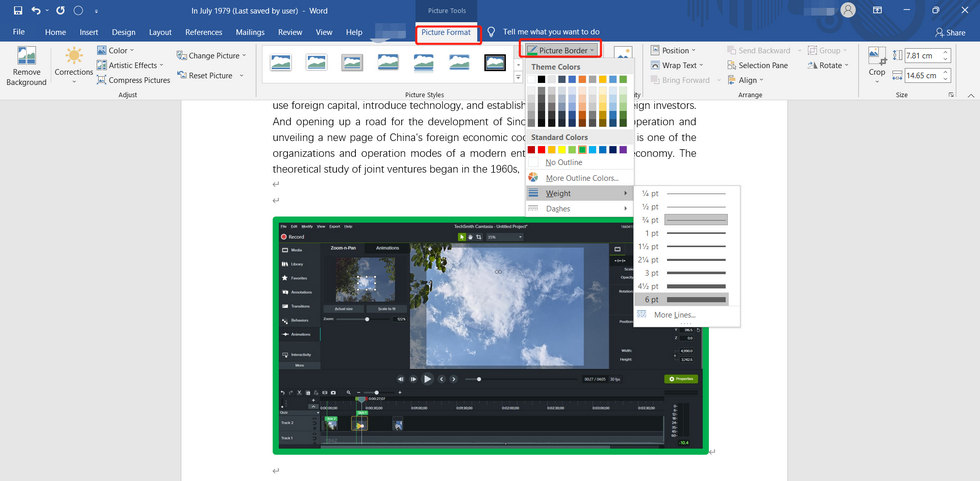
Word Border Play a Role of Emphasis
Locate the Picture
According to the following steps, you can arbitrarily adjust the position of the picture.
- Click Picture Tools > Picture Format.
- Select the Position button. The default format of Word is that the picture is embedded in the text, but we can set the format arbitrarily in the “Wrap Text ” option. Or click “More Layout Options” directly to set the picture position according to your needs.
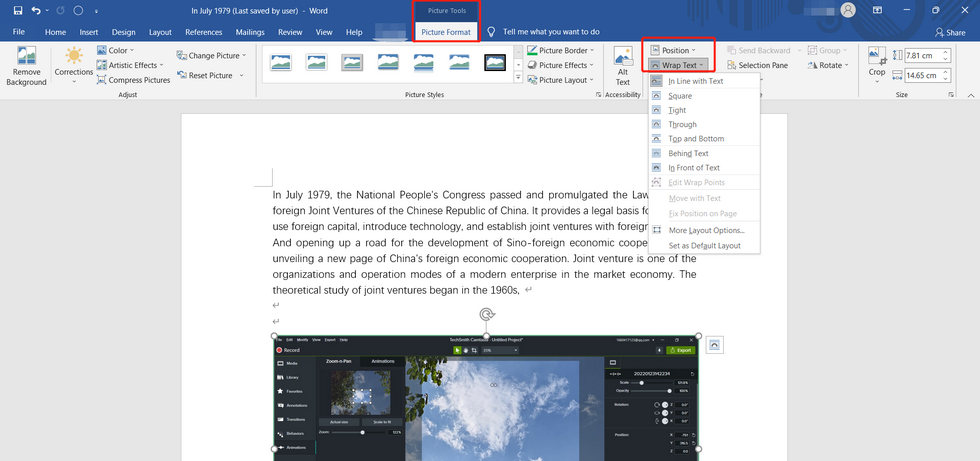
Proper Location Can Make Typesetting Neat and Comfortable
Cut Out
There are two main ways to achieve clipping in Word:
- Click on the picture, and the button for clipping the picture will appear below the function key on the right. Click the button and drag the black line at the edge with the mouse to achieve clipping.
- Select “Picture Format” in the toolbar and click the drop-down box of “Crop”. You can cut it freely or choose to Crop to Shape or Aspect Ratio, etc.

Different Scenes Require Different Picture Sizes
Adjust the Width and Height
Similarly, there are two ways to set the inserted picture. The first is to directly locate the height and width in the upper right corner of the page and directly type the value you want to change. The second is to directly select the picture, click the right mouse button, and choose “Format Picture”. Change the height and width in the toolbar that appears on the right.
You can change the size of the picture by adjusting the width and height
Compress the Picture
To compress a picture in Word, there are only a few simple steps: insert the picture > Picture Tool > Picture Format > Compress Pictures > select the Compression Options and set the Resolution.

Compressing the Picture Will Reduce the Clarity of the Picture
Artistic Effects
As we all know, Word can be added with artistic words to attract readers’ attention or increase the viewing experience. Similarly, the picture that we inserted into Word can also be added with the artistic effect that comes with Word.
Click the picture > Artistic Effects > Choose the one you prefer or click “Artistic Effects Options” > A toolbar will pop up on the right > There are seven types of special effects for you to choose from, such as Shadow, Reflection, and Glow.

Artistic Effects Increase the Beauty of Pictures
Part 3. Best Online Tool for Converting and Editing Word, PDF, JPG, etc.
PDFgear is a highly recommended online service for converting any format between Word, PDF, and JPG. For convenience, it can also convert online in real-time. PDFgear takes users’ privacy and security into consideration, and it won’t save any files you upload. And it is compatible with multiple platform devices such as Linux, Windows, Mac, Android, and iOS.
1. It provides conversion between multiple formats, such as Word to PDF, JPG to PDF, PDF to Word, and PDF to JPG.
2. A simple and friendly user interface allows you to use it easily, which is suitable for everyone.
3. High conversion efficiency, no long waiting time.
4. Completely free, no need to spend any money.
5. Lossless compression and hyper compression for PDF documents are both supported.
A Variety of Online PDF Tools Available to You
Part 4. Edit a Picture in Word FAQs
The Inserted Picture Shows only the Border but not the Content
Lacking content is a common issue when you’re using Microsoft Word, to resolve this issue, you should: File > Options > Advanced tab > Show document content > Uncheck “Show picture placeholders” option > OK.
Unable to Move the Position of the Inserted Picture
This is related to the way the picture surrounds, in general, the default picture surround in Word is “In line with Text”. So, it can not be arbitrarily moved. You can operate it by following the steps below:
Picture Format > Wrap Text > Select any wrap-around method, for example, Top and Bottom and In front of Text.
Inserted Pictures are Distorted and Blurred
To avoid distortion and blur, you can do this: File > Options > Advanced > Image Size and Quality > Uncheck Do not compress images in files > OK.
The Inserted File is Not Fully Displayed
This problem can be solved by adjusting the line spacing.
Select the image > Click “Home” > Select “Paragraph” > Choose “Indents and Spacing” > Set “Line Space” to “Single Spacing” or other options in the “Line Spacing” column > Click “OK” button.
How to Align Multiple Files
Bring up the gridlines by following these steps: View > Gridlines > Align > Grid Settings > Vertical Spacing > OK. Then assist in aligning the inserted pictures through these gridlines.
Part 5. Conclusion
The image editing function of Word is very convenient and powerful. Several common editing functions introduced in this article are very easy to learn. If you study carefully, it can effectively save your time cost and improve the quality of your work.
More Related Articles
- 16 Best Sites to Read Free Books Online without Downloading
- The 15 Best Free LaTeX Editors for Windows, Mac, Linux
- The 13 Best Free PDF Scanner Apps for iPhone and iPad
- The 11 Best EPUB Readers for iPhone and iPad
- The 11 Best Audiobook Torrent Websites
TheTechieSenior.com is reader supported. We may earn a commission if you buy through links on this site. As an Amazon Associate, we earn from qualifying purchases. Learn more here.
Can you crop images in Microsoft Word? Yes, you can. Read on to find out how.
Table of Contents
There are a hundred reasons to use photos in text documents such as books, articles, brochures, etc.. Perhaps the image is a logo. Maybe it illustrates steps in a tutorial or serves as a background.
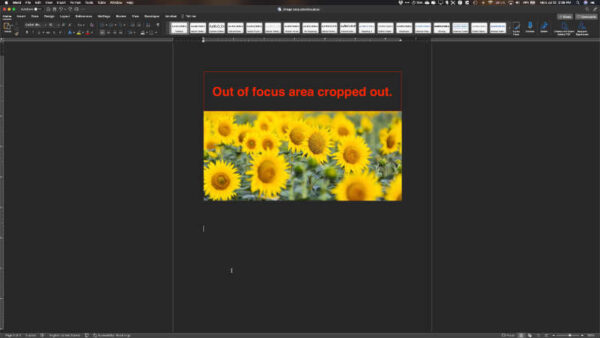
What if you find exactly the image you need, but it includes scenery or other bits that you don’t need? For example, you find a photo of a rural countryside, but you only need the portion of the image that includes a red barn in a green field. Do you look for a different image, or is there a way to trim the image so that you can keep only the part you really need?
That’s where cropping comes in.
If you know how to insert images in MS Word and the only problem your image has is that its physical dimensions are too large to fit in the document properly, you may just need to resize it. We discussed how to insert and resize images in this article.
3 Ways to Crop Images in Microsoft Word
I’ll assume you’re familiar with the procedures for inserting photos in your Word documents. Once you have inserted your image, you can use one of these three ways to crop it. I’ll start with the simplest method.
Crop images in Microsoft Word – method 1
This is simplest and most basic image cropping method in MS Word.
- Right-click on the image you inserted.
- Select Crop from the right-click menu.
- You’ll see a set of handles just inside the border of the image. There’ll be one that is shaped like a 90 degree angle inside each corner. In addition, there’ll be one shaped like a T in the center of the top, bottom, and each side border.
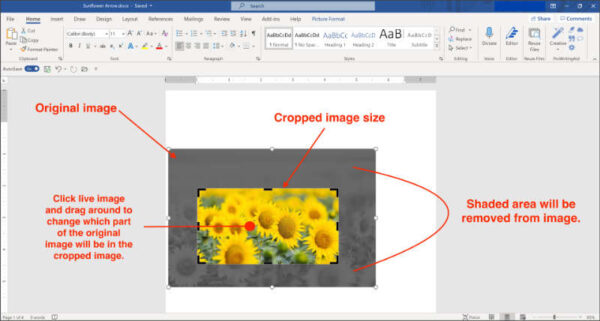
- Click on any of those handles and drag inward across the image.
As you drag the cropping handles, you’ll notice that part of the image is still colored just as it was before you started cropping it. That is the part of the image that will remain when you complete the cropping. The area that appears shaded will disappear.
You can move the live part of the image around. Just click somewhere inside the live image and drag the cropping box around until the exact portion of the image that you want to keep is inside the box.
Note that you can change the dimensions of the live image by dragging any handle further inward or outward toward the original image border.
Once you have exactly the part of the image that you want to keep, hit the enter key. That will make the part of the image that you cropped out disappear, leaving only the area of the image that you wanted to keep.
Note that once you have hit the enter key, dragging the handles around the edges of the image inward or outward will resize the image. Dragging from a corner will maintain the same aspect ratio as the original cropped area. However, dragging the center handles on the top or side will cause the cropped image to be squeezed or stretched. That may result in an image that is distorted and probably not what you wanted.
Crop images in Microsoft Word – method 2
This method involves setting image dimensions and vertical or horizontal offsets. It is my least favored of the three methods, but I’ll show you how to crop your image using measurement settings in case you find it useful.
In MS Word images can be cropped using numbers or by dragging with your mouse.
We’ll first set the dimensions of the final cropped image. Then we’ll adjust the image so that exactly the part you want will be displayed in the final image.
- After you’ve inserted an image, right-click it.
- From the right-click menu, select Format Picture.
- A panel labeled Format Picture will open, probably on the right side of the screen.
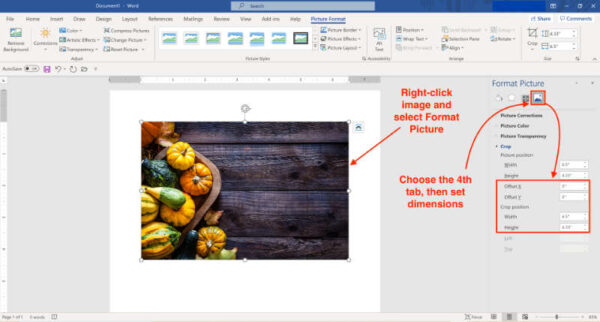
- At the top of that panel there are four tabs. Click the last one with the icon of an image.
- There will be four sections below the tab. Those tabs may be open or closed. Click the small arrow on the left of each section to open or close it. Choose the last section, labeled Crop.
- You will see two setting areas labeled Picture Position and Crop Position.
When you first open the crop panel both will show the dimensions of the image as it was inserted.
To set the dimension you’d like to have for the cropped and finished image, enter the width and height in the Crop Position section. You can either type in the dimensions or use the up/down arrows inside the dimension box.
Now to adjust the image so that you see the part of the original image that you wanted, use the Offset X and Offset Y adjustments in the Picture Position section.
Offset X moves the original image left or right within the crop area. Use positive numbers to move the image to the right. Use negative numbers to move the image to the left.
Offset Y moves the image up and down. Use positive numbers to move the image up and negative numbers to move the image down.
When the cropped image looks the way you want it, click anywhere outside the image.
Bonus tip: Instead of using the Offset X and Offset Y settings to set the visible part of the image, you can also do it by dragging the original image around until the part you want to be visible is showing inside the crop box.
To do that, set the image dimensions using the Crop Position section as instructed above.
With the image still selected, right-click the image and choose Crop from the right-click menu.
You should see the full image appear behind the crop box. The image will be shaded out except the portion that shows inside the crop box. Drag the larger shaded image around until the cropped image is how you want it.
Click anywhere outside the image to set it.
Crop images in Microsoft Word – method 3
Method 3 for cropping images in Word provides more creative possibilities.
First, insert the image into your file. When the image is selected, you will notice another tab labeled Picture Format has been added to the ribbon.
If clicking the image did not automatically open the Picture Format tab, click on the tab to display the array of tools that are available to you.
Toward the right end of the toolbar, look for a button/icon labeled Crop. If you click the down arrow on the Crop button, you’ll see three cropping-related options.
1) Crop
This option allows you to drag all sides of the image in until you have exactly the portion of the image you wanted to keep visible inside the cropping frame.
When you select Crop, in addition to the small square “handles” on each corner and halfway along each side of the image, you’ll see a second set of handles just beside those that you’ll use in cropping the image.
NOTE: You don’t want to use the smaller square handles unless you also wish to resize the image. Dragging those square handles will reduce the size of the entire image, but not necessarily in a way that leaves you with just the portion of the image left that you desired. The cropping handles allow you to select a section of the image that you wish to keep and discard the remainder.
The cropping handles inside each corner are shaped similar to a ninety degree corner bracket. Along the sides the handles are t-shaped with the longest straight edge along the outside edge of the image.
I suggest you start by carefully mousing over one of the corner bracket handles. Click on the handle and drag it toward the center of the image. You can do the same with any other cropping handle. If you find yourself reducing the entire image instead of cropping it, you’ve almost certainly clicked the very small square handle instead of the larger cropping handle.
Once your image is cropped, you can make adjustments to the crop by:
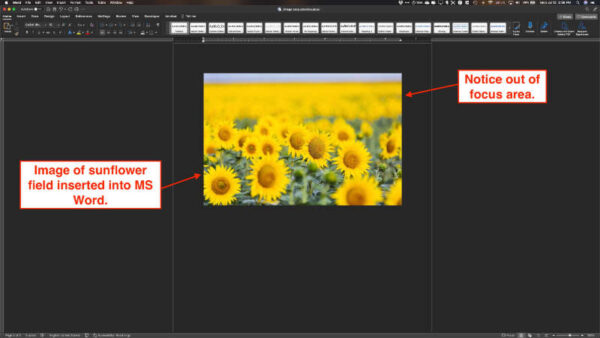
- Dragging any of the cropping handles in or out or,
- Click inside the cropped section. The remainder of the image will be shaded out. As you drag the image around, you will see it come into focus inside the crop box.
- When you see the desired part of the image inside the crop box, click outside the image. The shaded area will disappear.
The part that will be kept is inside the cropping frame. The part outside the cropping frame will be hidden.
2) Aspect Ratio
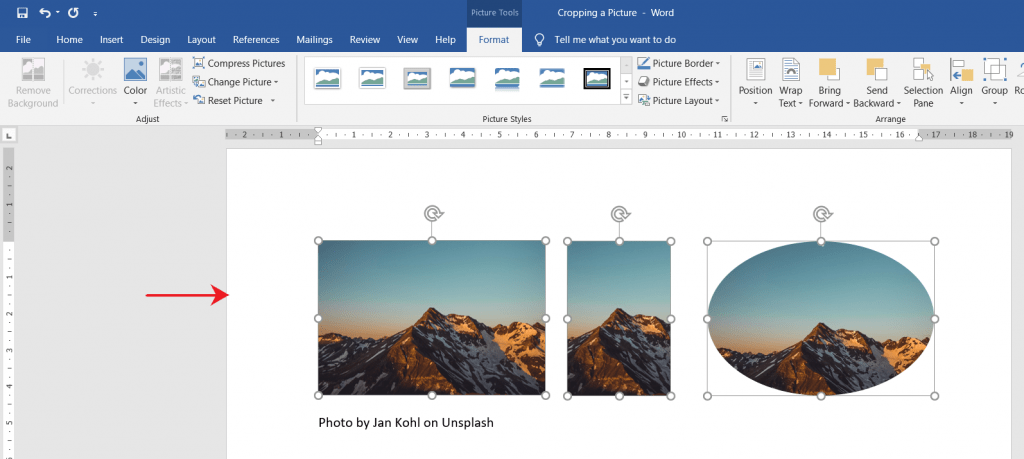
The aspect ratio pertains to the width of the image compared to the height. If you select the Aspect Ratio option, you’ll see several options of the most popular aspect ratios. The first number is the width, the second is the height.
Click on one and you’ll see a cropped section of your image in the ratio you selected.
Pick another ratio and you’ll see the shape change. For example, if you pick 16:9, you’ll see a cropped area that is approximately 56% as tall as it is wide. If you pick 4:3, you see a cropped area that is 75% as tall as it is wide.
Once you have chosen your aspect ratio, you can click anywhere inside the live area of the image and drag it around until the part of the image you wish to keep is visible.
NOTE: Just as you were able to grab the cropping handles in the corners and sides of the image using the Crop method that we discussed in number one above, you can do the same when you start with an aspect ratio. In other words, selecting an aspect ratio does not tie you to that ratio.
If you decide none of the available ratios suits your needs, you can tweak it by dragging the cropping handles. The aspect ratio option is there to give you a starting place and to help you easily crop your images to some of the more common ratios used in publishing and website production.
3. Crop to Shapes
Now for the fun part. Once you have cropped your image so that it contains only the part you wanted to keep, you can get creative with your cropping by applying shapes to your image. This is done using the Crop to Shapes feature.
First, crop the image to the area you want to keep using method 1 or 2 above. Then, apply one of the shapes to your cropped image. Whatever shape you apply, your image will fill the inside of that shape.
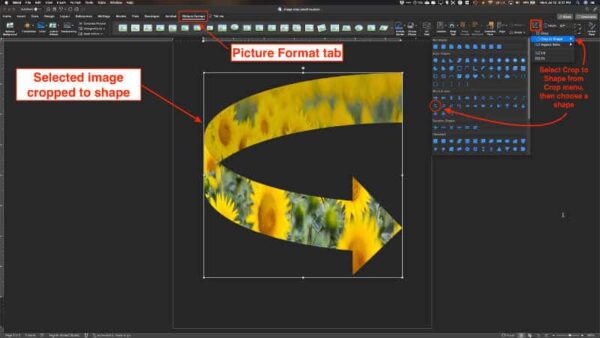
The creative uses for this feature are endless. For example, let’s say you are working on a poster and you want a curved arrow shape pointing to an item on the poster. You’d like to have the arrow to look as though it had been cut from a photo of a sunflower field in full bloom.
You can crop your image of the sunflower field, then apply a curved arrow shape to it. Instead of a solid color, your arrow will be filled with sunflowers from the image you chose.
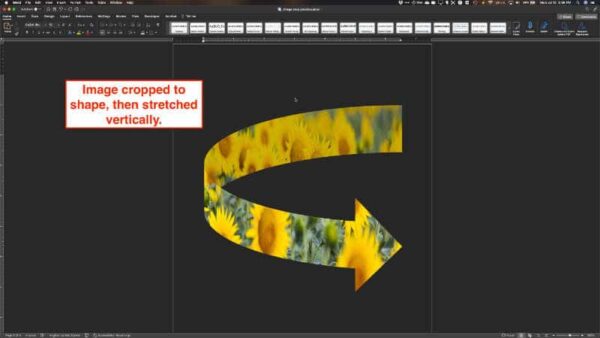
If you apply a shape to an image and you think it looks a bit squeezed, try applying a different aspect ratio to it. The shapes can be applied, whatever size and/or aspect ratio you have selected.
There are dozens of shapes available, from geometric shapes to math signs to moons and stars.
Take time to play around with them. Use different aspect ratios with different shapes. You’ll surely find something you like.
If you have no need for an image in the shape of an arrow or plus sign, just crop your image to the width and height you need and move the shape around until you have only the part of the image you wish to keep.
Saving a cropped image out of a Word document
Microsoft Word allows you to save any image from a document by right-clicking the image and choosing Save as Picture.
Please be aware that images with extensions .jpg, .gif, .png and others are rectangular or square regardless what you see on the page. The arrow with the sunflower background is still a rectangular image. You don’t see the background surrounding the arrow in the document where the image was originally cropped because Word makes the part of the image that is cropped out transparent.
![]()
On most computers Microsoft Word documents appear to have either a white or dark background, depending whether your computer is set to use light or dark mode. However, MS Word page backgrounds are actually transparent unless you assign a page background color.
In our working example, if you were to save the image from that document with a white background, then insert it into a different document with a blue background, you wouldn’t see just the sunflower-filled arrow. You would see a white rectangle with a sunflower-filled arrow inserted into a document with a blue background.
You can, however, save your sunflower-filled arrow as an image with a transparent background which you can then insert into other documents.
To save an image from a MS Word document with a transparent background, right-click the image and select Save as Picture. You will probably see a .png extension after the file name you chose. If so, that’s good because that will save the image that has been cropped to a shape with a transparent background.
If you see a .jpg extension or a different one that is not .png, your image will probably be saved with a white background. Look for the setting in the Save as Picture settings panel that allows you to change the image format and select .png. Then, if you desire to, you can insert that image into a different document and have a ready made sunflower-filled arrow.
Final notes on cropping and compressing images in Microsoft Word
After you’ve inserted your images and finished the document, you can just save it as usual. If you don’t compress the image that you resized and/or cropped, your document will have a larger size in kilobytes or megabytes because the part of the image that you cropped out is actually still in the file, just not visible.
If you decide you’d prefer a different aspect ratio, for example, just reopen the document and select the image. Then choose the Picture Format tab and make whatever changes you wish to make.
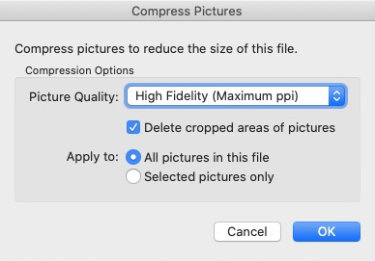
To freeze the image so that it can’t be changed you can compress the image and tell Word to delete the cropped portions of images.
To delete the cropped portions of images in Microsoft Word, select the image. Then in the Picture Format tab, click the Compress pictures button. About half-way down in the Compress pictures panel, check the box next to Delete cropped areas of pictures.
You can find more information about cropping images in Microsoft Word here.