
Import or export text (.txt or .csv) files
There are two ways to import data from a text file with Excel: you can open it in Excel, or you can import it as an external data range. To export data from Excel to a text file, use the Save As command and change the file type from the drop-down menu.
There are two commonly used text file formats:
-
Delimited text files (.txt), in which the TAB character (ASCII character code 009) typically separates each field of text.
-
Comma separated values text files (.csv), in which the comma character (,) typically separates each field of text.
You can change the separator character that is used in both delimited and .csv text files. This may be necessary to make sure that the import or export operation works the way that you want it to.
Note: You can import or export up to 1,048,576 rows and 16,384 columns.
Import a text file by opening it in Excel
You can open a text file that you created in another program as an Excel workbook by using the Open command. Opening a text file in Excel does not change the format of the file — you can see this in the Excel title bar, where the name of the file retains the text file name extension (for example, .txt or .csv).
-
Go to File > Open and browse to the location that contains the text file.
-
Select Text Files in the file type dropdown list in the Open dialog box.
-
Locate and double-click the text file that you want to open.
-
If the file is a text file (.txt), Excel starts the Import Text Wizard. When you are done with the steps, click Finish to complete the import operation. See Text Import Wizard for more information about delimiters and advanced options.
-
If the file is a .csv file, Excel automatically opens the text file and displays the data in a new workbook.
Note: When Excel opens a .csv file, it uses the current default data format settings to interpret how to import each column of data. If you want more flexibility in converting columns to different data formats, you can use the Import Text Wizard. For example, the format of a data column in the .csv file may be MDY, but Excel’s default data format is YMD, or you want to convert a column of numbers that contains leading zeros to text so you can preserve the leading zeros. To force Excel to run the Import Text Wizard, you can change the file name extension from .csv to .txt before you open it, or you can import a text file by connecting to it (for more information, see the following section).
-
Import a text file by connecting to it (Power Query)
You can import data from a text file into an existing worksheet.
-
On the Data tab, in the Get & Transform Data group, click From Text/CSV.
-
In the Import Data dialog box, locate and double-click the text file that you want to import, and click Import.
-
In the preview dialog box, you have several options:
-
Select Load if you want to load the data directly to a new worksheet.
-
Alternatively, select Load to if you want to load the data to a table, PivotTable/PivotChart, an existing/new Excel worksheet, or simply create a connection. You also have the choice of adding your data to the Data Model.
-
Select Transform Data if you want to load the data to Power Query, and edit it before bringing it to Excel.
-
If Excel doesn’t convert a particular column of data to the format that you want, then you can convert the data after you import it. For more information, see Convert numbers stored as text to numbers and Convert dates stored as text to dates.
Export data to a text file by saving it
You can convert an Excel worksheet to a text file by using the Save As command.
-
Go to File > Save As.
-
Click Browse.
-
In the Save As dialog box, under Save as type box, choose the text file format for the worksheet; for example, click Text (Tab delimited) or CSV (Comma delimited).
Note: The different formats support different feature sets. For more information about the feature sets that are supported by the different text file formats, see File formats that are supported in Excel.
-
Browse to the location where you want to save the new text file, and then click Save.
-
A dialog box appears, reminding you that only the current worksheet will be saved to the new file. If you are certain that the current worksheet is the one that you want to save as a text file, click OK. You can save other worksheets as separate text files by repeating this procedure for each worksheet.
You may also see an alert below the ribbon that some features might be lost if you save the workbook in a CSV format.
For more information about saving files in other formats, see Save a workbook in another file format.
Import a text file by connecting to it
You can import data from a text file into an existing worksheet.
-
Click the cell where you want to put the data from the text file.
-
On the Data tab, in the Get External Data group, click From Text.
-
In the Import Data dialog box, locate and double-click the text file that you want to import, and click Import.
Follow the instructions in the Text Import Wizard. Click Help
 on any page of the Text Import Wizard for more information about using the wizard. When you are done with the steps in the wizard, click Finish to complete the import operation.
 -
In the Import Data dialog box, do the following:
-
Under Where do you want to put the data?, do one of the following:
-
To return the data to the location that you selected, click Existing worksheet.
-
To return the data to the upper-left corner of a new worksheet, click New worksheet.
-
-
Optionally, click Properties to set refresh, formatting, and layout options for the imported data.
-
Click OK.
Excel puts the external data range in the location that you specify.
-
 on any page of the Text Import Wizard for more information about using the wizard. When you are done with the steps in the wizard, click Finish to complete the import operation.
If Excel does not convert a column of data to the format that you want, you can convert the data after you import it. For more information, see Convert numbers stored as text to numbers and Convert dates stored as text to dates.
Export data to a text file by saving it
You can convert an Excel worksheet to a text file by using the Save As command.
-
Go to File > Save As.
-
The Save As dialog box appears.
-
In the Save as type box, choose the text file format for the worksheet.
-
For example, click Text (Tab delimited) or CSV (Comma delimited).
-
Note: The different formats support different feature sets. For more information about the feature sets that are supported by the different text file formats, see File formats that are supported in Excel.
-
-
Browse to the location where you want to save the new text file, and then click Save.
-
A dialog box appears, reminding you that only the current worksheet will be saved to the new file. If you are certain that the current worksheet is the one that you want to save as a text file, click OK. You can save other worksheets as separate text files by repeating this procedure for each worksheet.
-
A second dialog box appears, reminding you that your worksheet may contain features that are not supported by text file formats. If you are interested only in saving the worksheet data into the new text file, click Yes. If you are unsure and would like to know more about which Excel features are not supported by text file formats, click Help for more information.
For more information about saving files in other formats, see Save a workbook in another file format.
The way you change the delimiter when importing is different depending on how you import the text.
-
If you use Get & Transform Data > From Text/CSV, after you choose the text file and click Import, choose a character to use from the list under Delimiter. You can see the effect of your new choice immediately in the data preview, so you can be sure you make the choice you want before you proceed.
-
If you use the Text Import Wizard to import a text file, you can change the delimiter that is used for the import operation in Step 2 of the Text Import Wizard. In this step, you can also change the way that consecutive delimiters, such as consecutive quotation marks, are handled.
See Text Import Wizard for more information about delimiters and advanced options.
If you want to use a semi-colon as the default list separator when you Save As .csv, but need to limit the change to Excel, consider changing the default decimal separator to a comma — this forces Excel to use a semi-colon for the list separator. Obviously, this will also change the way decimal numbers are displayed, so also consider changing the Thousands separator to limit any confusion.
-
Clear Excel Options > Advanced > Editing options > Use system separators.
-
Set Decimal separator to , (a comma).
-
Set Thousands separator to . (a period).
When you save a workbook as a .csv file, the default list separator (delimiter) is a comma. You can change this to another separator character using Windows Region settings.
Caution: Changing the Windows setting will cause a global change on your computer, affecting all applications. To only change the delimiter for Excel, see Change the default list separator for saving files as text (.csv) in Excel.
-
In Microsoft Windows 10, right-click the Start button, and then click Settings.
-
Click Time & Language, and then click Region in the left panel.
-
In the main panel, under Regional settings, click Additional date, time, and regional settings.
-
Under Region, click Change date, time, or number formats.
-
In the Region dialog, on the Format tab, click Additional settings.
-
In the Customize Format dialog, on the Numbers tab, type a character to use as the new separator in the List separator box.
-
Click OK twice.
-
In Microsoft Windows, click the Start button, and then click Control Panel.
-
Under Clock, Language, and Region, click Change date, time, or number formats.
-
In the Region dialog, on the Format tab, click Additional settings.
-
In the Customize Format dialog, on the Numbers tab, type a character to use as the new separator in the List separator box.
-
Click OK twice.
Note: After you change the list separator character for your computer, all programs use the new character as a list separator. You can change the character back to the default character by following the same procedure.
Need more help?
You can always ask an expert in the Excel Tech Community or get support in the Answers community.
See Also
Import data from external data sources (Power Query)
Need more help?
CSV to Excel
Powered by
aspose.com
and
aspose.cloud
Choose CSV files
or drop CSV files
Use password
This password will be applied to all documents
If you need to convert several CSV to one Excel use Merger
Convert CSV to Excel Online
Use CSV to Excel converter to export CSV files to Excel format online. Our free conversion service will parse the content of the original CSV file to the smallest detail and recreate the content in the target Excel format.
You can use the CSV to Excel Converter completely free, at any time, and from any device.
CSV to Excel Converter Online
Converting from CSV to Excel format is one of the most common operations. We often need both of the features that CSV and Excel formats provide. CSV and Excel formats complement each other in some cases.
Convert CSV file to Excel Online
To convert CSV to Excel format, simply drag and drop a CSV file into the data upload area, specify the conversion options, click the ‘Convert’ button, and get your output Excel file in seconds.
Free CSV to Excel Converter is based on Aspose software products, which are widely used around the world for programmatic processing of CSV and Excel files with high speed and professional quality of the result.
CSV to XLSX (EXCEL) Converter
Convert your csv files to xlsx online & free
Drop files here. 100 MB maximum file size or Sign Up
Convert to CSV
csv
Comma-Separated Values
Is a text format used for representing tabular data. Each file line is located on a separate line in the table. The values of the columns are separated by a delimiter, most often a comma. However, other symbols can be used as delimiters as well.
XLSX Converter
xlsx
Office Open XML Worksheet Sheet
XLSX is a file format created with Microsoft Excel, version from 2007 and younger. This file is a spreadsheet. All data distributed document and stored in the cells. Each cell has a unique address, which is denoted by the letters and Arabic numerals. XLSX file format is based on the Open XML. To reduce the size of the file is compressed ZIP.
How to convert CSV to XLSX
Step 1
Upload csv-file(s)
Select files from Computer, Google Drive, Dropbox, URL or by dragging it on the page.
Step 2
Choose «to xlsx»
Choose xlsx or any other format you need as a result (more than 200 formats supported)
Step 3
Download your xlsx
Let the file convert and you can download your xlsx file right afterwards
CSV to XLSX Quality Rating
4.8 (80,914 votes)
You need to convert and download at least 1 file to provide feedback!
![]()
Download Article
![]()
Download Article
This wikiHow teaches you how to save a CSV document on your computer as a separate XLS (Excel Workbook format) file. Your original CSV file will not be changed, and the converted XLS will be saved as a separate file.
-
1
Open the CSV file you want to convert in Excel. Find the CSV file you want to convert on your computer, and double-click on its name or icon to open it.
- Alternatively, you can open Microsoft Excel, and open the CSV file from your recent files list.
-
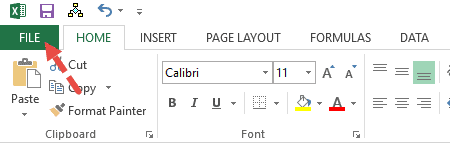
2
Click the File tab. It will open a drop-down menu of your file options.
- On Windows, you can find this button in the upper-left corner of the Excel window.
- On Mac, this button is located on your menu bar in the upper-left corner of your screen.
Advertisement
-
3
Click Save As on the File menu. This option will allow you to save your CSV file in a different file format.
- You can also use a keyboard shortcut to open the Save As window.
- The Save As shortcut is Ctrl+⇧ Shift+S on Windows, and ⌘ Command+⇧ Shift+S on Mac.
-
4
Select This PC or On My Mac. This option will allow you to save your converted XLS file to your computer’s local storage.
- On Windows, you can find the This PC button below One Drive on the Save As menu.
- On Mac, click the On My Mac button in the lower-left corner of the Save As window. If you see a different button here labeled Online Locations, you can skip this step.
-
5
Select Excel 97-2003 Workbook (.xls) as your file format. Click the drop-down file format selector at the bottom of the Save As window, and select XLS as your format.
- This drop-down menu is labeled as Save as type on Windows, and File Format on Mac.
-
6
Select a saving location for your converted XLS file. Find the folder where you want to save your XLS file, and click on its name in the Save As window.
-
7
Click the Save button. You can find this button in the lower-right corner of the Save As window. It will convert your CSV file to XLS, and save a copy to the selected location.
- Your converted XLS will be saved as a separate file. The original CSV file will not be changed.


Advertisement
Ask a Question
200 characters left
Include your email address to get a message when this question is answered.
Submit
Advertisement
Thanks for submitting a tip for review!
About This Article
Article SummaryX
1. Open your CSV file in Excel.
2. Click the File menu, and select Save As.
3. Select This PC on Windows, or On My Mac on Mac.
4. Select Excel 97-2003 Workbook (.xls) as your file format.
5. Select a saving location.
6. Click Save.
Did this summary help you?
Thanks to all authors for creating a page that has been read 21,239 times.
Is this article up to date?
Many software programs offer data output in the form of a downloadable CSV file.
Owing to their simplicity and versatility, CSV files take up less space and are easily transferable. As such, CSV is often the go-to extension for a lot of database programs.
In fact, CSV and spreadsheets go hand in hand.
That is why Excel provides multiple ways to convert a CSV file to Excel. In this tutorial we will look at three such ways:
- By opening the file from Windows Explorer
- By opening the file directly in Excel
- By importing the file
We will also look at a few issues you are likely to face when you convert a CSV file to Excel and how to address and resolve these issues.
What is a CSV File?
A CSV file is a very commonly used file extension.
It is a plaintext format file in which values are separated by commas, hence the name Comma Separated Values (CSV).
However, it is not uncommon to find CSV files where the values are separated by other symbols like semicolons or tabs.
These files can be opened using any spreadsheet program like Excel, Google Sheets, Open Office, etc.
You can also open them in a simple text editor like Notepad.
The files contain simply the data in text form, without any formatting or formulas.
Owing to their ease of storage and their compatibility, the CSV format is a popular file format.
The data in CSV files do not contain any kind of formatting.
So, if you want to use it in Excel, you will need to first get Excel to format the data into a form that can be displayed in cells.
Let us look at three ways in which we can convert a CSV file to Excel.
Method 1: Directly Opening a CSV File in Excel from Windows Explorer
You can directly open a CSV file that is in any folder from Windows Explorer or your file browser.
To open the file in Excel, simply double-click the file.
Most of the time computers are set up to open CSV, TSV and other similar files directly in Excel, if it is present on your computer.
You can tell if Excel is the default program to open the file from the familiar green Excel icon as shown below:

However, if your computer has not been set up to open CSV files directly in Excel, you can set it up as follows:
- Right-click on the CSV file.
- Select ‘Open With’ from the context menu that appears.
- You should now see a submenu with a list of applications. If you see ‘Excel’ as one of the options, go ahead and select it.
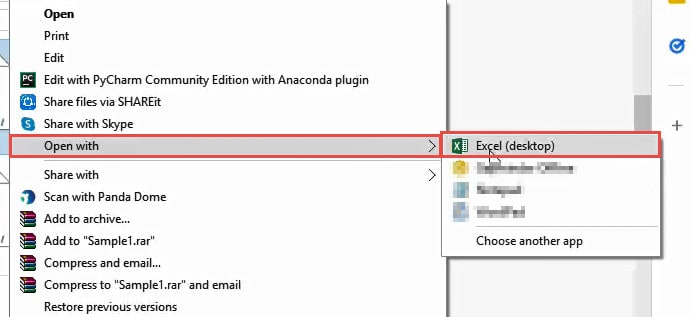
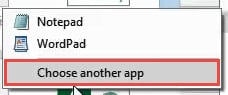
- If you don’t see Excel as one of the options, then click on ‘Choose another app’.
- Select Excel from the app options (Click ‘More Apps’ for more app options).
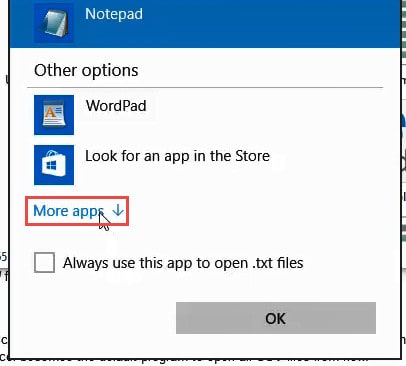
- Click on the checkmark next to ‘Always use this app to open .csv files’. This will make sure that Excel becomes the default program to open all CSV files from now.
Also read: How to Open XML Files in Excel?
Method 2: Opening a CSV File Directly in Excel
You can also open a CSV file directly in Excel as follows:
- Open Microsoft Excel.
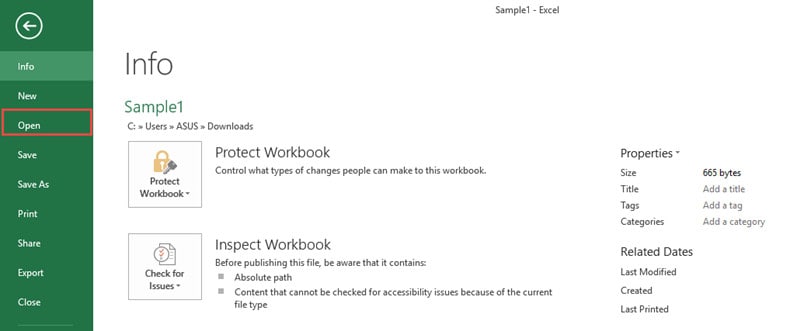
- Click on the File tab.
- Click on Open.
- Browse and select the CSV file that you want to open.
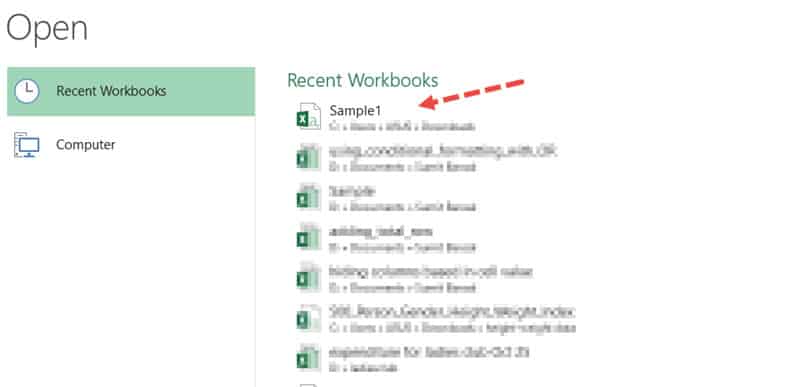
That’s it! Your CSV file should automatically open in Excel.
Once the file opens, you might find some data items looking out of place.
You might also find some of the data formatted differently from what you had expected.
This is because Excel uses your default data format settings to convert each column of the original file to Excel.
However, there is no need to worry. You can always format the data according to your requirements either in the original CSV file or within Excel.
We will discuss more on how to do that towards the end of this tutorial.
Note that the first two methods discussed so far do not change the format of the CSV file to XLS or XLSX.
If you save the file, it will still get saved as a CSV file.
Also read: How to Open an MPP file in Excel?
Method 3: Importing a CSV File to Excel
This method lets you import and converts data from a CSV file into an existing Excel worksheet.
The steps to import a CSV file to Excel is as follows:
- Select the cell from where you want to start displaying the imported data.
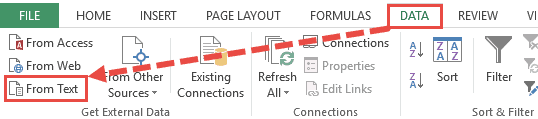
- From the Data tab, select ‘From Text’ under the ‘Get External Data’ group.
- This will open a dialog box, from where you can select the CSV file that you want to import.
- Either double click on the file name or select the file and press Open.
- This will open the ‘Text Import Wizard’.
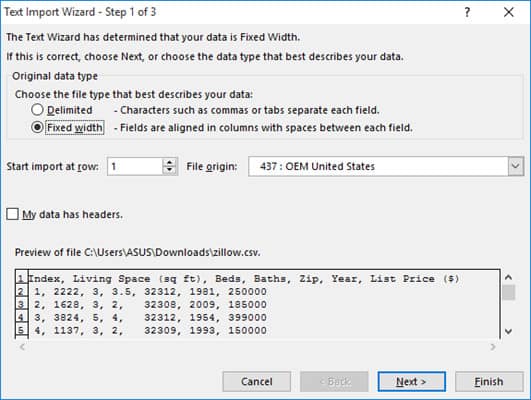
- The first step of the wizard lets you choose the file type that best describes your data. Make sure the ‘Delimited’ option is selected.
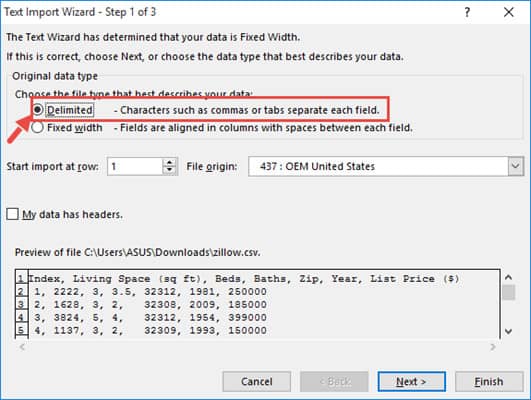
- Click Next.
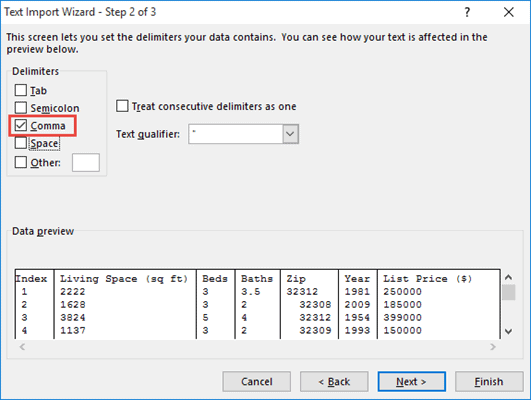
- The second step lets you set the delimiter by which you want to separate the data. Since the data items in our CSV file are separated by commas, make sure the ‘Comma’ option is checked.
- You can also make sure the checkbox next to ‘Treat consecutive delimiters as one’ is checked. This ensures you don’t get unnecessary blank cells due to the presence of repeated consecutive commas (that were probably there by mistake).
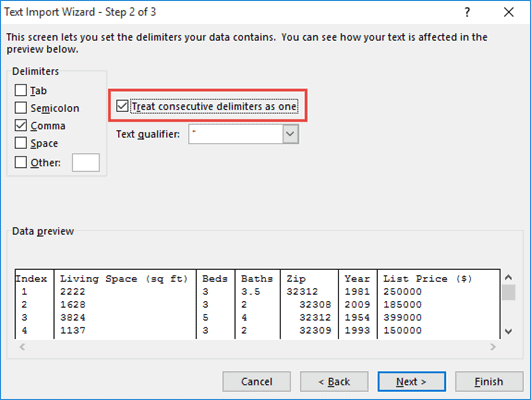
- Click Next.
- The third step lets you set the format for each column. At the bottom of the wizard window, you can see a preview of how your data is going to look after splitting the column. If you want to change the format for any of the columns, simply select the column you need to format from the preview and select the radio button corresponding to the format you want for that column. If you don’t want the column to show at all, then you can select the ‘Do not import column (skip)’ option.
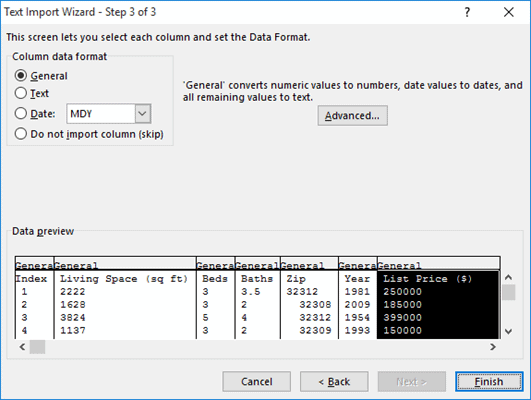
- Click Finish.
- Finally you will get asked to confirm where you want to start displaying your imported data. If importing to the same sheet, check if the starting cell is correctly mentioned in the input box below ‘Existing worksheet’. If you want to display the imported data in a new worksheet, check the radio button next to ‘New worksheet’.
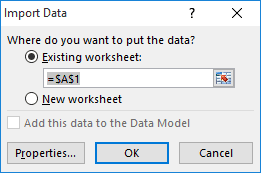
- Click OK.
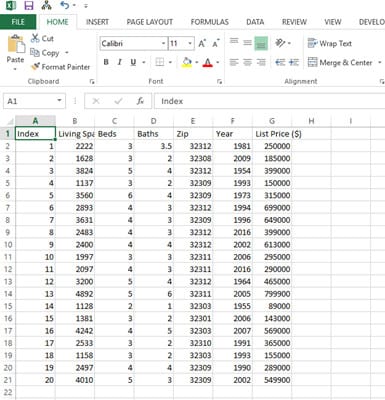
You should now see your CSV data imported into the cells starting from your selected cell.

Also read: How to Open VCF File in Excel?
Handling Problems that Arise After Converting a CSV File to Excel
Now let us take a look at some issues that are likely to arise when you convert a CSV file to Excel and how to address and handle these issues.
Some of the problems you might see after conversion include:
- Data displayed in a single column
- Values not separated as expected
- Lost leading zeros in numerical values
- Numerical or Text values converted to dates
- Dates converted to text
Let’s address each of these issues and see how to resolve them.
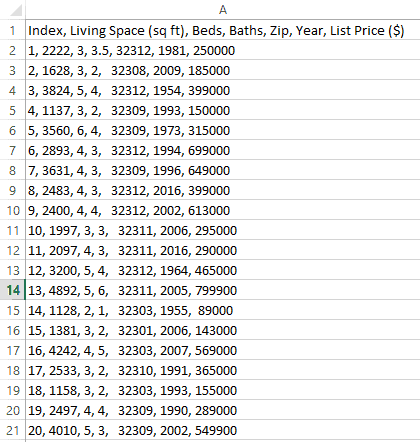
Data Displayed in a Single Column
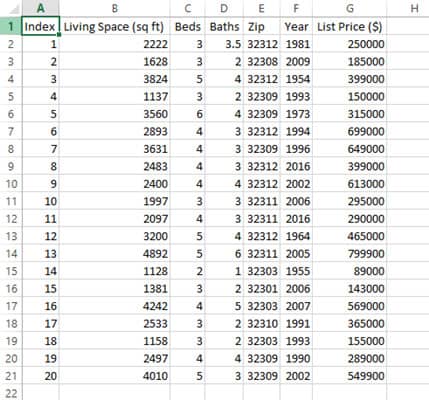
After converting your CSV file to Excel you might find each record of data displayed in a single Excel column as shown below:
To break them up into separate columns, you can use the Text to Columns feature of Excel as follows:
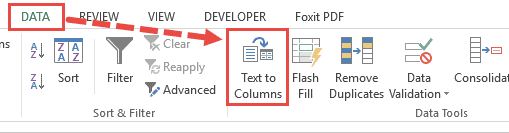
- Select the range of cells containing your copied data
- From the Data tab, select the ‘Text to Columns’ button (in the ‘Data Tools’ group).
- This will open the Convert Text to Columns wizard.

- You will notice that the steps in this wizard are exactly like the ‘Text Import Wizard’ discussed in method 3 of this tutorial (importing a CSV file to Excel). So you can follow steps 6 to 12 from method 3.
- At the end of 12, when you click the Finish button, you should see your CSV data imported into the cells starting from your selected cell.
Your data should now be split into separate columns for each field, based on the comma delimiter in the CSV file.
You can now go ahead and further clean up / format the data as required.
Values not Separated as Expected After Converting CSV to Excel
In some cases, you might find the entire structure of the table gone awry.
This could be because you have different separators set in your computer’s regional and language settings from the separators set in the CSV file.
For example, in some countries, the default separator is the comma, while in certain others, it is the semicolon.
To solve this issue, you can do one of the following:
- Change the Separator in your Computer’s Regional Settings
- Import the File instead of Opening Directly
Change the Separator in your Computer’s Regional Settings
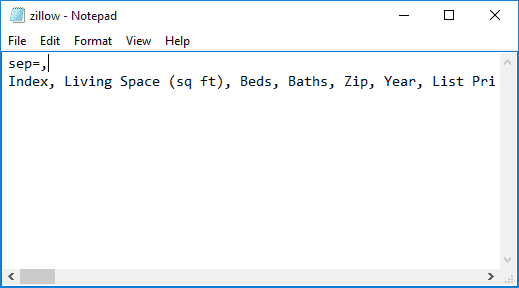
Specify the separator for your region directly in the CSV file, by typing “sep=,” or “sep=;” in the first line.
You can add this in any text editor, for example, Notepad.
Import the File instead of Opening Directly
Instead of directly opening the file, you can try importing the file (as shown in method 3 – importing a CSV file to Excel), and provide the right delimiter in Step 2 of 3 in the Text Import Wizard.
Note: Sometimes you might find more than one value put into a single cell. This might be because of the absence of a delimiter separating the two values in the original CSV file. To solve this problem, you can either open the CSV file in a text editor, add the separators in the right place, or you could split the cell using the Text to Columns feature. Make sure the cells to the right are empty before splitting the cell. You don’t want the existing values to get overwritten by the split values.
Lost Leading zeros in numerical values after Converting CSV to Excel
If your original CSV file contains numerical values with leading zeros, you might find them absent after converting the file to Excel.
This is because your Excel cells are automatically set to display numerical values in the General format.
This format removes leading zeros from numbers. If you want to retain the leading zeros, you can try changing the format of the column cells to Text.
Numerical or Text Values Converted to Dates after Importing CSV to Excel
You might find certain text values from the original CSV file mysteriously converted to dates after importing to Excel.
This could be because the original values in your CSV file happen to resemble date values. For example, you might have a user name as jan19, which Excel might interpret as a date.
The solution to this problem is simple. Simply change the format of the cell to Text.
Dates Converted to Text after Importing CSV to Excel
Finally, you might find certain dates from the original CSV file converted to text.
This might be because Excel did not recognize the date format, so it assumed it to be a Text value.
The solution to this problem is to simply convert the format of the cell to Date and set the date to your required format.
In this tutorial, we showed you three different ways to convert a CSV file to Excel.
We also pointed out certain issues you are likely to face after converting the file, and suggested solutions to overcome the issues.
We tried to make this tutorial informative enough so you know exactly what to do when using CSV files in Excel. Hope we did not miss any points.
Other Excel tutorials you may also find useful:
- How to Convert a Text File to Excel?
- How to Open Excel File [xls, xlsx] Online (for FREE)
- Why does Excel Open on Startup (and How to Stop it)
- How to Make Excel File Read Only
- How to Insert an Excel file into MS Word
- How to Save Selection in Excel as PDF (3 Easy Methods)
- How to Merge Two Excel Files?
- How to Convert PDF to Excel without Software?
- How to Open DAT Files in Excel?