
Word for Microsoft 365 Word for the web Word 2021 Word 2019 Word 2016 Word 2013 Word 2010 Word 2007 Word Starter 2010 More…Less
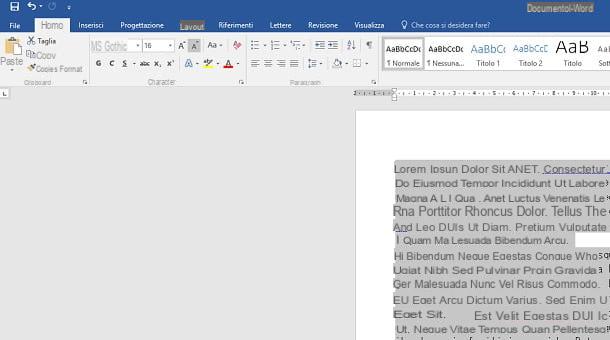
Before you print, you can preview your document and specify which pages you want to print.

Preview your document
-
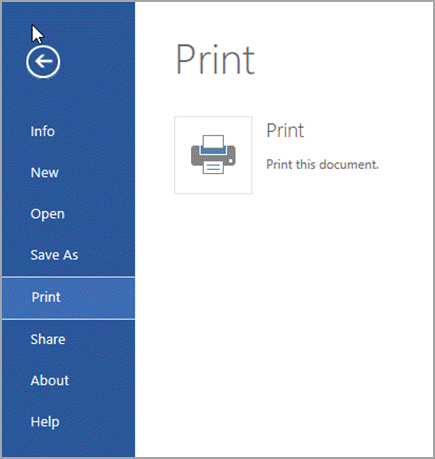
Select File > Print.
-
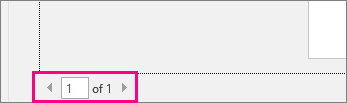
To preview each page, select the forward and backward arrows at the bottom of the page.

If the text is too small to read, use the zoom slider at the bottom of the page to enlarge it.
-
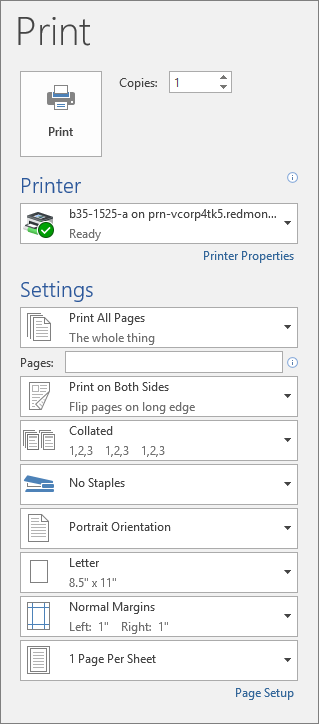
Choose the number of copies, and any other options you want, and select the Print button.

-
Select File > Print.
-
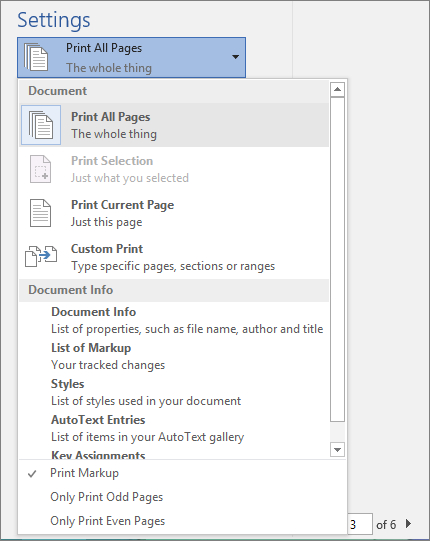
To print only certain pages, print some of the document’s properties, or print tracked changes and comments, select the arrow under Settings, next to Print All Pages (the default), to see all of your options.
-
To print only certain pages, do one of the following:
-
To print the page shown in preview, select Print Current Page.
-
To print consecutive pages like 1 -3, select Custom Print and enter the first and last page numbers in the Pages box.
-
To print individual pages and a range of pages (like page 3, and pages 4-6) at the same time, select Custom Print, and enter the page numbers and ranges separated by commas (e.g. 3, 4-6).
-
Note: If the printer you’ve chosen under Printer supports color, black and white, and grayscale printing options, the options will appear in the list under Settings.
-
Select File > Print.
-
Under Settings, choose the color printing option, and any other options you want, and select the Print button.
-
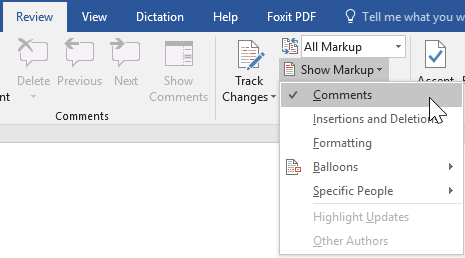
Open a document that has comments. If the comments option doesn’t show immediately, go to Review > Show Markup, and select only Comments from the list.
You can choose to print comments from one specific reviewer by selecting the reviewer under Specific people.
-
Select File > Print.
-
Under Settings, select Print Markup.
-
Select Print.
Your document will print with comments.
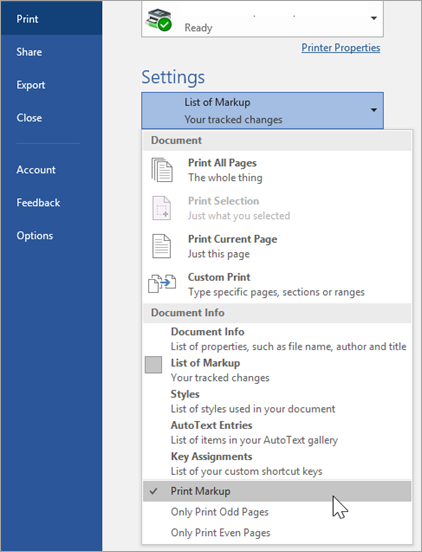
Note: If you want to print your document without any comments, go to Review > Tracking > No Markup and then print your document.
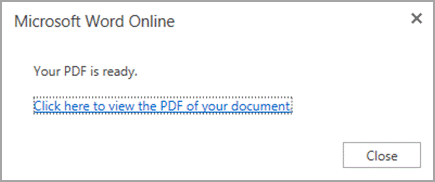
Printing from Word for the web may seem a little confusing. That’s because it first creates a PDF to preserve the layout and formatting, and then you print the PDF.
Note: If you’re using Internet Explorer on Windows 7 or an earlier operating system, you’ll need to download and install the free Adobe Reader app before you can print your document.
Print your document
-
Click File >Print > Print.
Notes:
-
If you’re in Reading view, click Print near the top of your screen.
-
-
-
Word for the web generates a PDF copy of your document.
-
Click Click here to view the PDF of your document to open the PDF preview of your document.
Tip: If your default PDF viewer is Word, cancel the Word for the web print job, open the document in Word (Edit Document > Edit in Word) and print it from Word (File > Print).
-
Print your document:
-
On Windows 7, choose a printer and change or keep any other settings you want, and then click Print.
-
On Windows 8, in the Reader app, swipe up from the bottom of the screen (or right-click anywhere) and select Print. On the Print page, choose a printer, choose the settings you want, and then click Print.
-
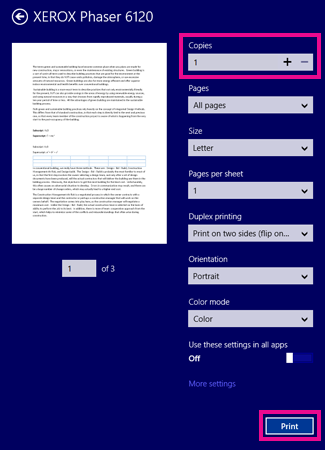
On Windows 10, in the Reader app, swipe up from the bottom of the screen (or left-click anywhere) and select Print. On the Print page, choose a printer, choose the settings you want, and then click Print.
-


If you want multiple copies of a printout, change the number of copies in the Print page:
-
On Windows 7 or earlier, at the top of the Print page is a box labeled Copies with up and down arrows for you to choose how many copies of the document you want. Make your choice (either by entering a number or using the arrows), and then click Print.
-
On Windows 8 or Windows 10, choose how many copies to print (either by entering a number or using the + and – buttons), and then click Print.

Note: If the printer you’ve chosen under Printer supports color, black and white, and grayscale printing options, the options will appear in the list under Settings.
-
Click File > Print.
-
Under Settings, choose the color printing option, and any other options you want, and click the Print button.
See also
-
Print in black and white
-
Your printer manufacturer’s website (where you can find updated printer drivers)
-
Microsoft 365 Community Forums
-
Tutorial: Printer Problems in Windows
Need more help?
Want more options?
Explore subscription benefits, browse training courses, learn how to secure your device, and more.
Communities help you ask and answer questions, give feedback, and hear from experts with rich knowledge.
В Word Online удобный набор инструментов. С помощью него можно не только быстро отредактировать документ, но и распечатать его. Этот процесс занимает несколько минут, но предварительно требуется настройка некоторых параметров. Изучите, как распечатать документ в текстовом редакторе.

Содержание
- 1 Распечатываем документ в Ворд Онлайн
- 2 Какие параметры настроить при печати документа в Word Online
- 3 Проблемы, которые могут возникнуть при распечатке текста в Ворде Онлайн
Распечатываем документ в Ворд Онлайн
После того как в текстовом редакторе оформили документ, распечатайте его, следуя алгоритму:
- Зайдите на сайт https://word-online.ru/.
- Перейдите на страницу авторизации.
- Введите данные для входа (телефон или электронную почту и пароль).
- На главной странице загрузите необходимый документ. Для этого нажмите на кнопку «Файл» в верхней части экрана.
- В появившемся меню выберите пункт «Открыть».
- Во вкладке, где осуществляется загрузка документов, откройте проводник.
- Найдите нужный документ и дважды нажмите на него.
- Ожидайте, когда файл загрузится в редактор.
- Проверьте текст документа, графические данные (параметры интервалов, полей, размер шрифта и т.п.). При необходимости внесите корректировки.
- После этого нажмите на цветной значок в левом верхнем углу рабочего поля.
- В открывшемся окошке выберите пункт «Печать».
- Укажите нужные параметры. Нажмите на строчку «Предварительный просмотр», чтобы еще раз убедиться, что в тексте нет никаких ошибок.
- Убедитесь, что принтер подключен к ПК и сети питания.
- Вставьте бумагу в специальный разъем.
- Нажмите кнопку «ОК».
- Ожидайте, когда документ распечатается.
Если не хотите настраивать дополнительные параметры, то в основном меню во вкладке «Печать» кликните по строчке «Быстрая печать».

Какие параметры настроить при печати документа в Word Online
Перед печатью документа настройте все необходимые параметры. В их числе:
- имя принтера – если у вас несколько устройств, то из выпадающего списка выберите название нужного;
- номера или диапазоны страниц (все, текущая и т.п.). Если хотите распечатать только конкретные страницы, то укажите их номера через запятую. Если хотите выбрать определенный диапазон, то введите, например, «3-7» или «2-10».
- число копий;
- тип печати документа (односторонняя, двусторонняя). Для этого поставьте галочку рядом с соответствующим пунктом;
- диапазон страниц (все, четные, нечетные);
- формат документа (А4, А5 и т.д.);
- число страниц на одном листе;
- ориентация страницы (альбомная или книжная).

Проблемы, которые могут возникнуть при распечатке текста в Ворде Онлайн
Иногда при попытке распечатать какой-то документ могут возникнуть некоторые проблемы. Среди них:
- Принтер не печатает. В этом случае, проверьте, что устройство подключено к сети, целостность его кабеля. Убедитесь, что установлены необходимые драйверы. Попробуйте их обновить;
- Принтер не взаимодействует с текстовым редактором. Для начала проверьте, что вы выбрали правильное устройство из выпадающего списка. Если все верно, то перезапустите Word Online, пройдите заново авторизацию и повторите попытку;
- Печатается не все содержимое документа. В этом случае проверьте настройки параметров. Нажмите на цветную кнопку в левом верхнем углу. В появившемся меню в конце списка выберите раздел «Параметры Word». В новом окошке нажмите на вкладку «Дополнительно». Найдите категорию «Печать». Поставьте галочки рядом с необходимыми пунктами (печать в обратном порядке, на задней стороне листа и т.п.). Сохраните изменения.
Частые вопросы:
-
Как сделать отступ в Word Online
-
Как сделать шпоры к экзамену в Word Online
-
Как вставить рамку в Word Online
-
Как конвертировать Word Online в Эксель онлайн бесплатно
Добавить комментарий
Как распечатать текстовый документ из Ворд Онлайн
В настоящее время документооборот все больше осуществляется в цифровом пространстве, однако время от времени возникает необходимость напечатать документ на принтере, то есть превращение текстового документа в распечатанный материал, поскольку работать с таким документом гораздо удобнее. Большинство людей задаются вопросом, как распечатать документ в Ворд Онлайн. Разберем подробнее несколько вариантов в данной статье.

Способы печати всего документа Ворд Онлайн
Как правило, печатают полностью весь готовый документ. Чтобы распечатать документ в Ворд Онлайн необходимо:
- Нажмите в верхнем меню «Файл» и кликните «Печать» либо воспользуйтесь комбинацией «Ctrl+P»;
- В открывшемся окне введите количество копий, которое нужно распечатать, принтер и его настройки;
- Нажмите «Разобрать по копиям», если необходимо напечатать несколько экземпляров, где много страниц, когда нужно напечатать сначала первые страницы, потом вторые и так далее;
- Укажите «альбомная» или «книжная» ориентация, чтобы расположить лист горизонтально или вертикально в зависимости от информации в документе;
- Выберите лист печати: форматы А4, А3, Letter (печать конвертов) и другие;
- Укажите поля страницы, то есть то, как у вас будет расположена информация;
- Выберите элементы масштабирования;
- Нажмите «Ок» чтобы начать печать документа.

Распечатка отдельного диапазона документа
По умолчанию будет распечатан весь рабочий лист, но бывает такое, что необходимо напечатать только отдельные диапазоны текста вместо целого листа. Это очень удобно, если вам не нужен весь текст. Для того чтобы распечатать отдельный диапазон документа нужно:
- Выделите необходимую область печати, зажав левую кнопку на первом слове и растянув по нужному тексту;
- Нажмите в панели меню «Файл» и найдите кнопку «Печать»;
- В меню настроек откройте список команды «Напечатать активные листы»;
- В открывшемся окне нажмите кнопку «Напечатать выделенный фрагмент». В предварительном просмотре теперь виден только выделенный ранее диапазон текста;
- Нажмите на кнопку «Печать», и выбранный диапазон будет распечатан согласно установленным параметрам печати.

Печать отдельных страниц документа
Если нужно напечатать не отдельный диапазон текста, а несколько страниц выполните следующие действия:
- Выделите листы, которые необходимо распечатать;
- Во вкладке «Разметка страницы» в блоке «Параметры страницы»нажмите кнопку «Область печати»;
- В появившемся меню нажмите «Задать»;
- Перейдите на вкладку «Файл» и в разделе«Печать» кликните «Напечатать выделенный фрагмент»;
- В области предпросмотра видны только те листы, которые вы выделяли;
- Кликните «Печать», и необходимые листы будут распечатаны согласно установленным параметрам печати.
Воспользуйтесь данными рекомендациями, чтобы распечатать документ из Ворд Онлайн. Сделать это довольно просто, если соблюдать описанный алгоритм действий, а работать с печатным документом значительно удобнее.
How to print from Word

If you want print from Word a text document, the procedure to follow is simple but differs depending on the solution used to open the file to be printed: the desktop client, the online version or the app for smartphones and tablets. But let’s go in order, so as not to create confusion.
If you’re using Word’s desktop client for Windows o MacOS, select the items File> Print in the menu bar at the top and use the settings you see on the screen to adjust the document printing and page range. Once this is done, select the printer, using the appropriate drop-down menu, and press the button Print, to conclude the operation.
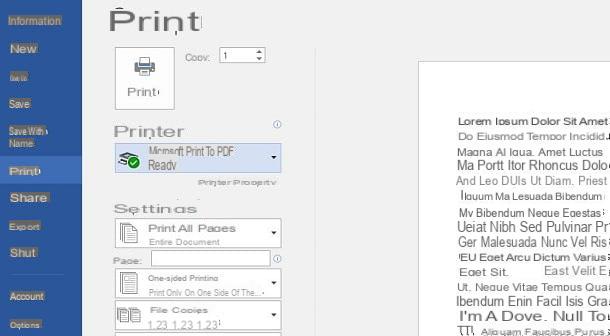
You can also proceed in a similar way through the online version of Word, by pressing on the items File> Print> Print (above) and adjusting the parameters that are shown on the screen. After selecting the printer to be used from the appropriate drop-down menu, press the key Print, to start printing the document.
As for the Word for Android and iOS, proceed as follows: after starting the application and opening the document to print, press the icon ⋮, which you find at the top, and select the item Print from the box that is shown to you. If you use the app Word to Android, select the printer from the drop-down menu at the top and then press the button Print; on iOSinstead, choose AirPrint and use your voice Print to select the printer to be used, then starting the process using the key Print.
If you don’t have a compatible printer with AirPrint and want to know more about how to set one up on iOS, I recommend you read my guide on how to print from iPhone. You can also consult my guide on how to print from Android, to learn more about this topic also in relation to the famous Google operating system.
Now that you know how to print any Word document, let’s see in detail how to carry out some printing processes, using the configuration options, which I will talk about in the next chapters.
How to print from Word in black and white
If you have a color printer and would like to print from Word only in black and white, all you have to do is follow carefully the information I am about to give you. Obviously, if you have a monochrome printer, you do not need to read the instructions I am about to give you in this chapter, because whatever the operation you perform, the printing will be performed only and only in black and white.
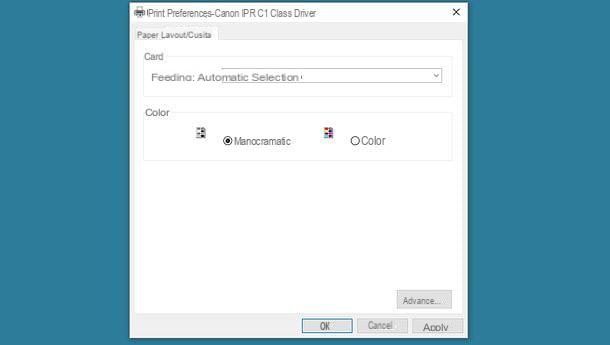
First, if you are using the desktop version of Word to Windows, in the panel of Print, click on the wording Printer properties and, based on your printer model, locate the color option by selecting Color print, Shades of gray or Bianco e nero from the menu in charge. Since your goal is to print in black and white, choose the latter option and confirm with the button OK. Then carry out the printing, as I explained to you in the previous chapter.
For Word to MacOS, instead from the panel of Print, put the check mark on the box Bianco e nero And that’s it. If you don’t find this item, click on the drop-down menu that says it Copies and pages and choose the item Color calibration. In the section that is shown to you, activate the box ColorSync and choose, come Preset, the one called Bianco e nero. If you don’t find it, choose the voice Other profiles and then click Bianco e nero, confirming the operation with the key OK. Then proceed with printing the document.
Su Word OnlineSince the print interface is that of the browser you are using, the color change option may not be available. Up Windowsfor example, in the panel of Print this option is not present and, therefore, you will have to click on the wording or on the button that refers to Advanced settings of the press. Alternatively, you can easily access this panel by pressing the key combination Ctrl + Shift + P.
By doing so, more options will be displayed, including the ability to access printer properties and choose the type of color to use in printing. Unfortunately, this panel is different depending on the model of printer in your possession, but it will be easy for you to locate the appropriate item on the screen.
Su MacOSinstead, you have to interact on the board Color calibration or activate the box Bianco e nero from the panel Print, as I showed you in the previous paragraph, regarding the desktop client of Word to MacOS.
As for the Word to Android, from the panel of Print, tap on the ▼ icon, which you find under the printer name, to access additional print setup options. Then choose Bianco e nero in the section Color And that’s it.
Su iOSinstead, in the app of Word, after selecting the printer from the panel Print, expand the options and move up ON the lever next to the option Bianco e nero.
In case you want to have more information on how to print in black and white on your PC or on your smartphone or tablet, regardless of the software or application you are using, you can refer to my guide on how to print in white. and black.
How to print from Word in color
With regard to the color printing of a Word document, I would like to clarify that this operation is possible only and only if you are in possession of one color printer. If you have a monochrome printer, you will only be able to print pages in black and white or with shades of gray.
In this regard, if you want to consult some of my guides, in which I recommend some color printers to buy, you can refer to the one relating to the best color multifunction laser printers, the one relating to the best color laser printers or the one on which printer to buy. (where I told you about various types of printers, including inkjets).
If you’ve made sure you have a color printer, it’s time to print your document. By default, printing a document to a color printer is done in color. Therefore, you will not have to do anything other than start printing as I have explained to you in this chapter.
Alternatively, you can simply follow the procedure I have indicated to you in this chapter, to make sure that the option is not activated Bianco e nero, choosing, instead, the one named Color print o Color. If, however, you want to deepen this topic, I can recommend reading my guide on how to print in color.
How to print double-sided from Word
A Word document can be printed on both sides of a sheet (front back), perhaps to save on the use of paper. This is easy to do, but requires your printer to support this feature (automatic duplexing). So let’s see how to proceed.
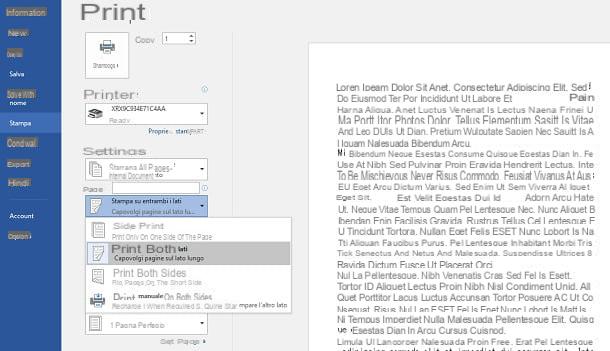
In the desktop version of Word to Windows, from the panel of Print, under the box relating to the page range, you will find a drop-down menu with the wording Print on one side: by clicking on this last item, choose the option Print on both sides from the drop-down menu, to activate the mode Front and back.
I warn you that you will find two identical words Print on both sides: on one there is a note Flip pages on the long edge, on the other Flip pages on the short edge. The first option concerns the printing of the document which has the orientation of the sheet vertically, while the second concerns the horizontal orientation. Then choose the one related to the setting of your document.
Su Word to MacOSinstead, from the panel of Print, check the box Double-sided And that’s it. Alternatively, select the item layout from the drop-down menu and use the appropriate menu next to the item Double-sided, to activate this feature (Wide-cut binding o Short-cut binding).
For Word Online, it all depends on the browser and operating system you are using on your PC. On browsers for Windows, in the panel of Print, you can find the option Double-sided, to be activated by ticking the appropriate box, or you will need to access the advanced print settings, using the combination Ctrl + Shift + P. Sui browser per MacOSinstead, since a single print panel is used, you can refer to the procedures I mentioned in the previous paragraph, relating to the desktop client of Word for macOS.
As for the Word per Android, from the panel of Print, expanding the items via the icon ▼, you can choose the item Long side o Short side, from the drop-down menu under the heading Two sides. On iOSinstead, from the panel of Print, tap on the item options and activate the function Front / back, by moving the lever up ON.
The operations that I have indicated to you in the previous paragraphs, as I have already mentioned, require that the printer be equipped with the functionality Front and back. In case it does not have one, you can decide to use a gimmick, which requires you to print all the first odd pages, put the block of paper printed upside down back into the tray, and then print all even pages. In this regard, you can learn more by reading my guide on how to print on both sides.
How to print from Word to PDF
Print a Word document to PDF it is an operation that can be carried out in a few simple steps, carefully following what I will show you shortly.
You need to know that PCs with an operating system Windows 10 e MacOS, as well as smartphones with Android e iOS, they all have one virtual PDF printer, to convert any printable document into this format. As for older Windows operating systems, you need to install a third-party virtual printer, such as doPDF, of which I told you in this guide of mine.
The procedure to follow is exactly the same as the one I have already indicated in this chapter, taking care to select, as the printer, the one virtual PDF. After pressing the key Print, you will be prompted to select the destination folder where the file should be placed: after selecting it, press the button Save, to confirm the whole operation.
If you want to know more about how to print a Word document to PDF, you can refer to my guide on how to print to PDF or the one on how to create PDF from Word, in which I also told you about the native functionality of Word for export of documents in this popular format.
How to print scaled down from Word
If, through the print preview of Word, you have realized that the font of the document you intend to print is too large and, therefore, too many sheets would be consumed to put it on paper, you can decide to act in two ways: decrease the font size or print multiple pages on one sheet.
In the first case, the formatting of the sheet and the arrangement of all elements will vary, as the text will be made smaller, taking up fewer lines. In the second case, however, the structure of the document will remain unchanged, as well as the size of the font; the printout, however, will show a smaller font, as each page will occupy a portion of the sheet.
With regard to the character reduction of the entire text document, both in the desktop version of Word in that Word Online, in the tab Home located at the top, press the button A with the ▼ symbol next to it: by doing so, you will uniformly reduce the font size, maintaining the aspect ratio if you have used different values on some portions of text.
Nell’app Word to Android e iOS Unfortunately, this feature does not exist, so you will have to act by changing the value of the font size, which you find in the tab Home. Once this is done, you can proceed to print, as I explained to you in this chapter, or create a PDF file, as I explained to you in another chapter of the guide.
If you want, instead, print multiple pages on one sheet, the operation you need to perform is simple: in Word to Windows, in the panel of Print, click on the wording 1 page per sheet, to expand the menu. Then choose one of the options that are shown to you to increase the number of pages per sheet. Up MacOSinstead, from the panel of Print di Word, select the voice layout in the drop-down menu and choose a value from 2 a 16, next to the wording Pages per sheet.
uses Word Online? In this case if you use Windows, select the number of pages from the drop-down menu, in the print panel, next to the wording Pages per sheet. If you don’t find this option, you can access the advanced print settings panel by pressing the combination Ctrl + Shift + P.
In alternativa, in browser come Chrome, Firefox, Edge o Safari, in the panel of Print, there is an option named Ladder, which allows you to enter a percentage value that increases or decreases the text of a document. Since you want to decrease the character, set a value less than 100, to achieve your goal.
Su MacOS, instead, you can act as I explained to you in the previous paragraphs, referring to the information on Word to MacOS.
How to print in A3 from Word
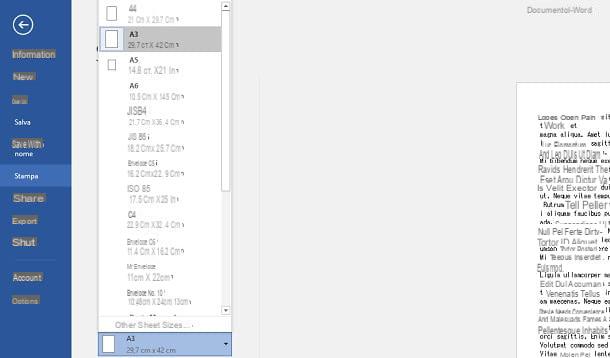
If your printer supports paper sizes other than standard A4, such as A3 o A5, you can adjust the appropriate setting before printing the document from the panel Print di Word.
Su Word to Windows, in the panel of Print, click on the item A4 and choose the format you want to apply for printing from the appropriate drop-down menu. Up MacOSinstead, from the panel of Print, select the voice Paper handling from the drop-down menu and activate the box Scale to fit sheet. At this point, choose the paper size, selecting it from the menu next to the wording Print sheet size.
It was used Word Online da Windows, choose the format you prefer the most from the panel of Print, identifying the wording Paper size. If you don’t find this option, press the key combination Ctrl + Shift + P, in order to access the advanced print settings. Up MacOSInstead, follow the instructions I indicated in the previous paragraph, relating to the classic Word for macOS.
On the app of Word to Android, you can change the paper size to be used for printing via the panel Print, choosing it from the drop-down menu that you find under the heading Paper size. On iOSinstead, from the panel of Print di Word, you can select the paper size from the appropriate item you find in the section options.
How to print in Word without margins
A Word document cannot be printed without margini, as all printers reserve the right to leave a border on all four sides of the paper, for printer safety reasons. You can, however, make sure to minimize this margin, by following the instructions that I will give you in the next lines.
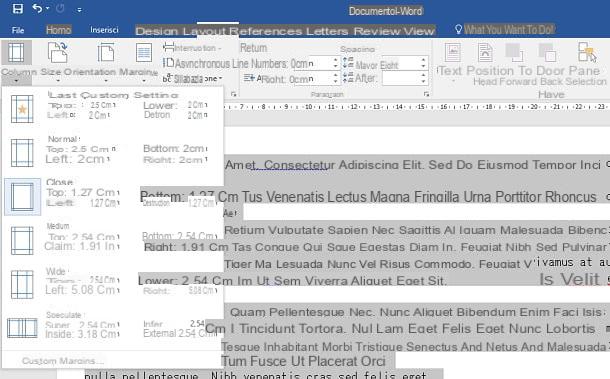
Regardless of the version of Word you are using, i.e. the desktop version, the online platform or the app for smartphones and tablets, to reduce the margins of a document, select the tab layout and premium tasto Edges. At this point, select the option Stretto, to set the default preset with reduced margin.
Alternatively, click on the wording Custom margins and enter the values in the appropriate fields for the top, bottom and side margins. When you have finished working on this option, proceed to print the document.
How to print Word without comments
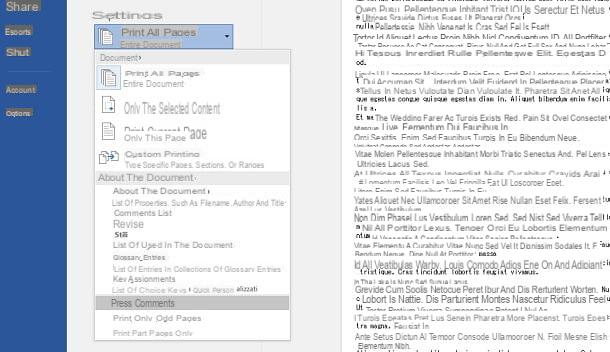
With regard to Revisioni and Comments present in a document of Word, these can be removed during printing to prevent them from being displayed. However, this operation can only be performed on the Word desktop client, As Word Online and the mobile app of Word they already send the document to print without displaying comments and revisions.
Su Word to Windows, from the panel of Print, click on the item Print all pages and from the drop-down menu you see, make sure the item is disabled Print comments. On MacOS, instead from the panel of Print di Word, select the voice Microsoft Word from the drop-down menu, and then choose the option Document, to fianco della voce Print of.
How to print from Word
When you share documents with other people, whether it’s through email or as something that you upload through a website, they often want the document to be in a specific file format. Documents that you create in Word Online will typically have the .docx file extension, which can be opened by many versions of Microsoft Word.
But sometimes the requirements for the submitted document will dictate that the file be in the PDF format, so you may be looking for a way to make this conversion. Fortunately Word Online has a utility that will let you quickly and easily convert from Word Online to a PDF.
Microsoft Excel has a ton of useful formulas, including an mm to inches formula that lets you make unit conversions easily.
How to Download a Word Online Document as a PDF
The steps in this article were performed in the desktop version of Google Chrome, but will work in other desktop Web browsers as well. The file that you save will be in the PDF format, and will be a copy of the existing document in your Word Online account. You will still have the original Word file in Word Online after you complete these steps.
Step 1: Go to Word Online at https://office.live.com/start/Word.aspx and sign into your Microsoft Account.
Step 2: Open the document that you want to save as a PDF.
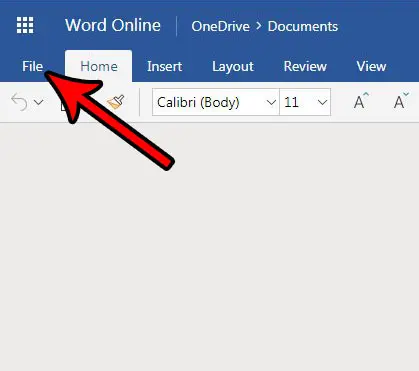
Step 3: Click the File tab at the top-left corner of the window.
Step 4: Choose the Save As option in the left column.
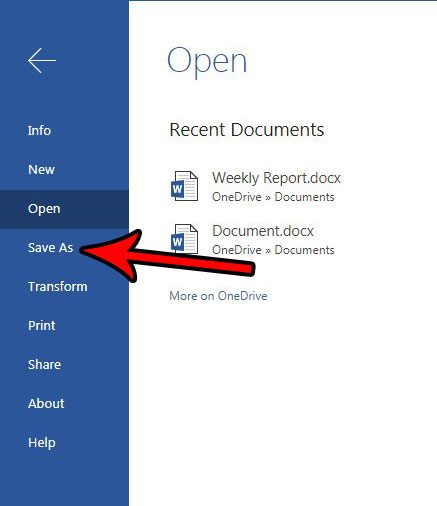
Step 5: Select the Download as PDF option.

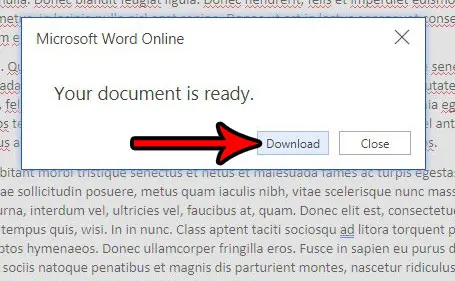
Step 6: Click the Download button to save the file to your computer.
Note that if you wish to edit the created PDF file that you will need a program that can edit those types of files. Such programs include Adobe Acrobat (not Adobe Reader) and some newer versions of the Microsoft Word desktop application. Additionally you can convert a lot of PDFs to the Word format by uploading them back to your OneDrive account, then right-clicking on the uploaded PDF and choosing the Open in Word Online option.
Do you need to print your document on a paper size other than the one that is currently selected? Find out how to change the page size in Word Online and save your document so that it prints on a different size of paper.

Matthew Burleigh has been writing tech tutorials since 2008. His writing has appeared on dozens of different websites and been read over 50 million times.
After receiving his Bachelor’s and Master’s degrees in Computer Science he spent several years working in IT management for small businesses. However, he now works full time writing content online and creating websites.
His main writing topics include iPhones, Microsoft Office, Google Apps, Android, and Photoshop, but he has also written about many other tech topics as well.
Read his full bio here.